pgAdmin is a database management tool in the PostgresDB community. It is used for easy access, creation, and maintenance of database objects with a user-friendly interface. pgAdmin 4 is an updated version of pgAdmin 3 which is an open-source application that anyone can download and use based on the operating system.
Here in the blog, we will discuss the installation and setup process of pgAdmin 4.
For the installation of pgAdmin, the user needs some technical knowledge. The following steps are the installation process of pgAdmin 4.
Installation steps for pgAdmin 4 on Ubuntu:
Step 1. Install required dependencies
For the installation process of pgAdmin 4 first, you needed to install the required dependencies as shown below.
apt-get install curl gnupg2 -y
Step 2. Install the public key
You will be required to add the mandatory GPG key before downloading and installation of pgAdmin 4.
sudo curl https://www.pgadmin.org/static/packages_pgadmin_org.pub | sudo apt-key add
Step 3. Adding the pgAdmin4 repository
The following commands can be used for adding a pgAdmin repository in the system.
sudo sh -c 'echo "deb https://ftp.postgresql.org/pub/pgadmin/pgadmin4/apt/$(lsb_release -cs) pgadmin4 main" > /etc/apt/sources.list.d/pgadmin4.list && apt update'
Step 4. Update the system and install pgAdmin 4
Run the following commands for updating the system and installation of install the latest version of pgAdmin.
apt-get update
apt-get install pgadmin4
Install for desktop mode only:
sudo apt install pgadmin4-desktop
Install for web mode only:
sudo apt install pgadmin4-web
Step 5. Run a web setup script
After installing pgAdmin4, initially, you need to run a web setup script to configure the system to run in web mode.
/usr/pgadmin4/bin/setup-web.sh
Step 6. Enter the user credentials
After the above command is executed, you will be asked to provide your Email and password to finish the configuration.
Step 7. Access pgAdmin4 Web Interface
Further, then you can access the web application interface by using the URL: http://your-server-ip/pgadmin4
Step 8. pgAdmin4 User Interface
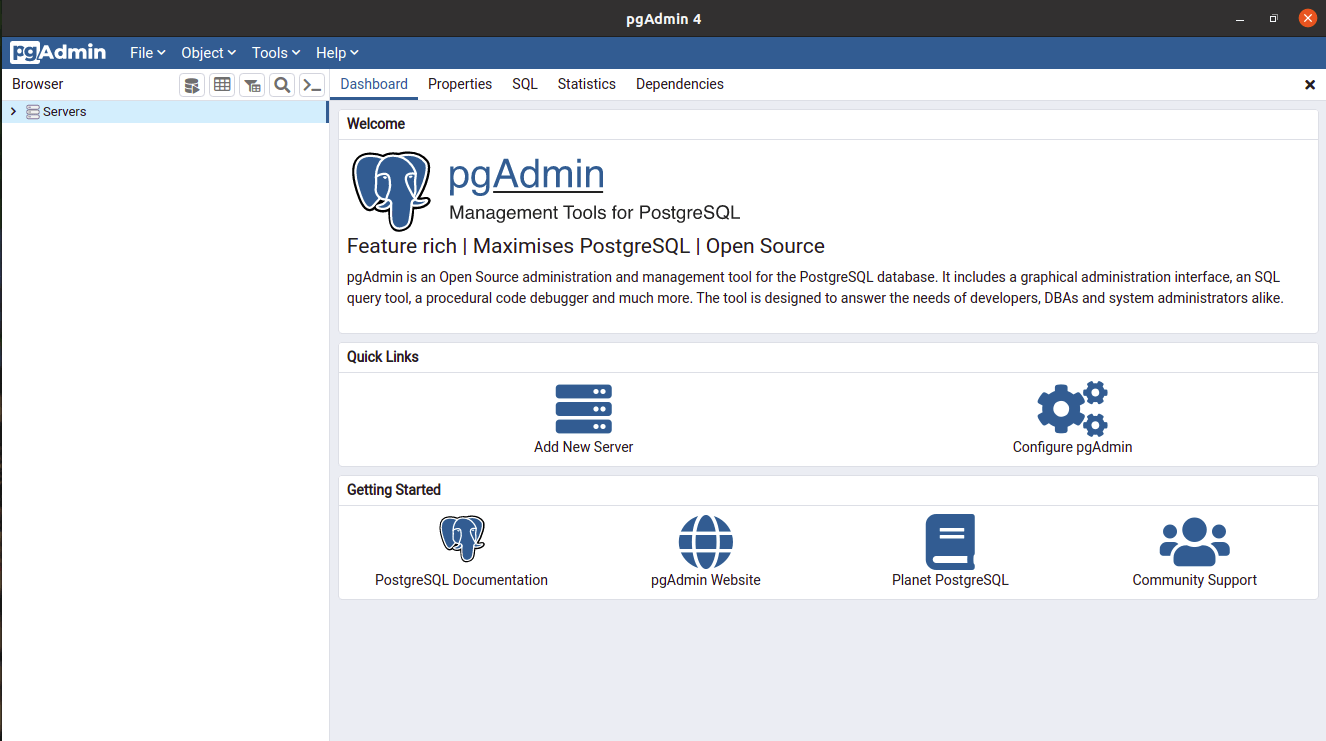
The following is the UI of the pgAdmin4 interface. There are a lot of options for database management in the pgAdmin4 user interface. The following is the User interface dashboard of pgAdmin4. For the installation firstly you need to add a server. Click the Add new server button for further actions.
Step 9. Add New Server
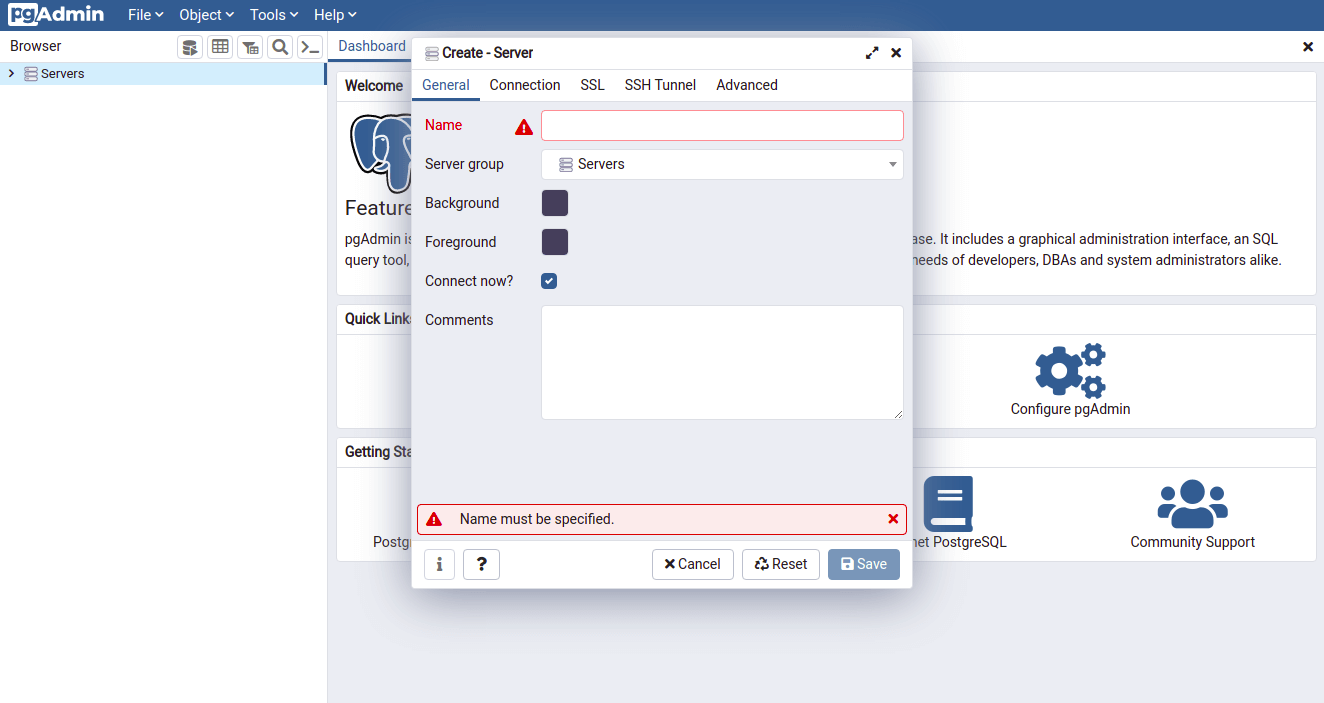
Add the name of the server to “localhost” and select the server group as servers in the General settings of the created server then click the connection tab settings as shown in the image below.
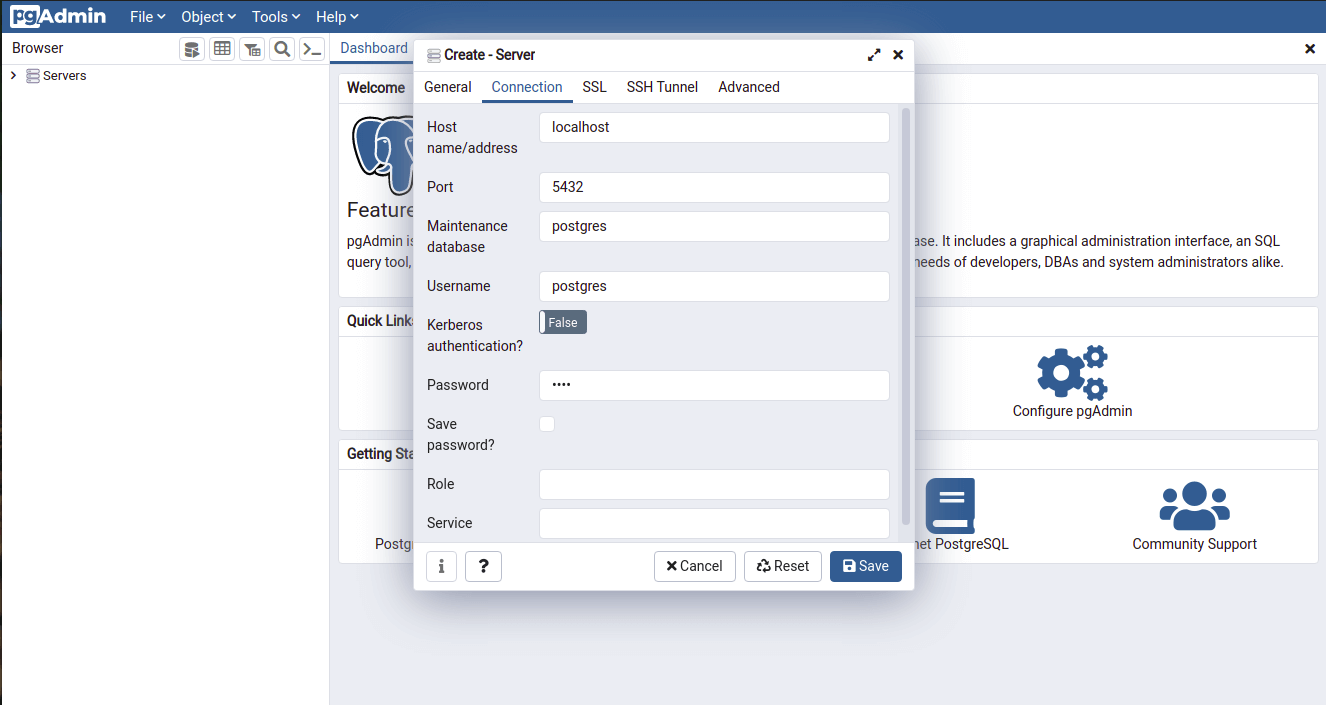
Create connection credentials for the server such as hostname, dbname, and Postgres password then save the server settings. After this, we can use the PgAdmin 4 for database management.
Step 10. Using Query Tool
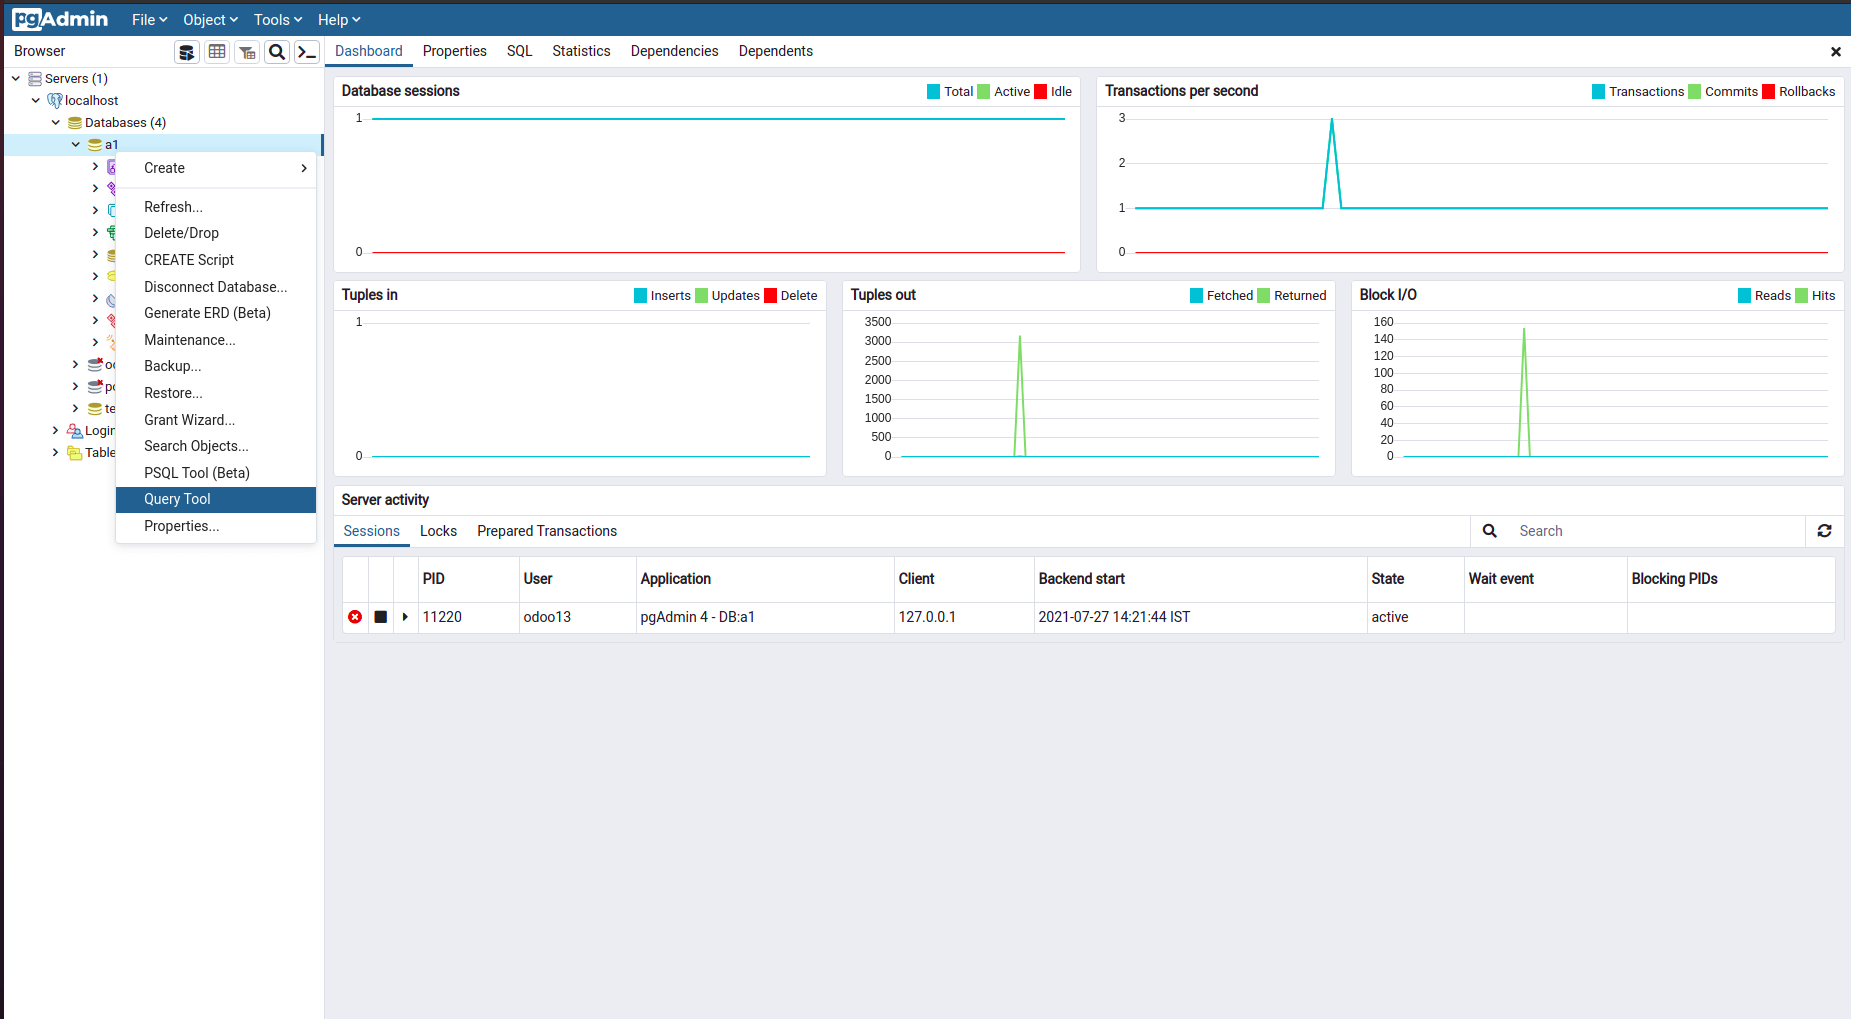
After server installation, we can use the query tool for database management as shown in the figure below.
Step 11. Using Query Editor
The query can be written as per our purpose in the Query Editor as shown in the figure below. There is a run button in the query editor. After clicking it we can see the results as per the query as depicted in the following image.
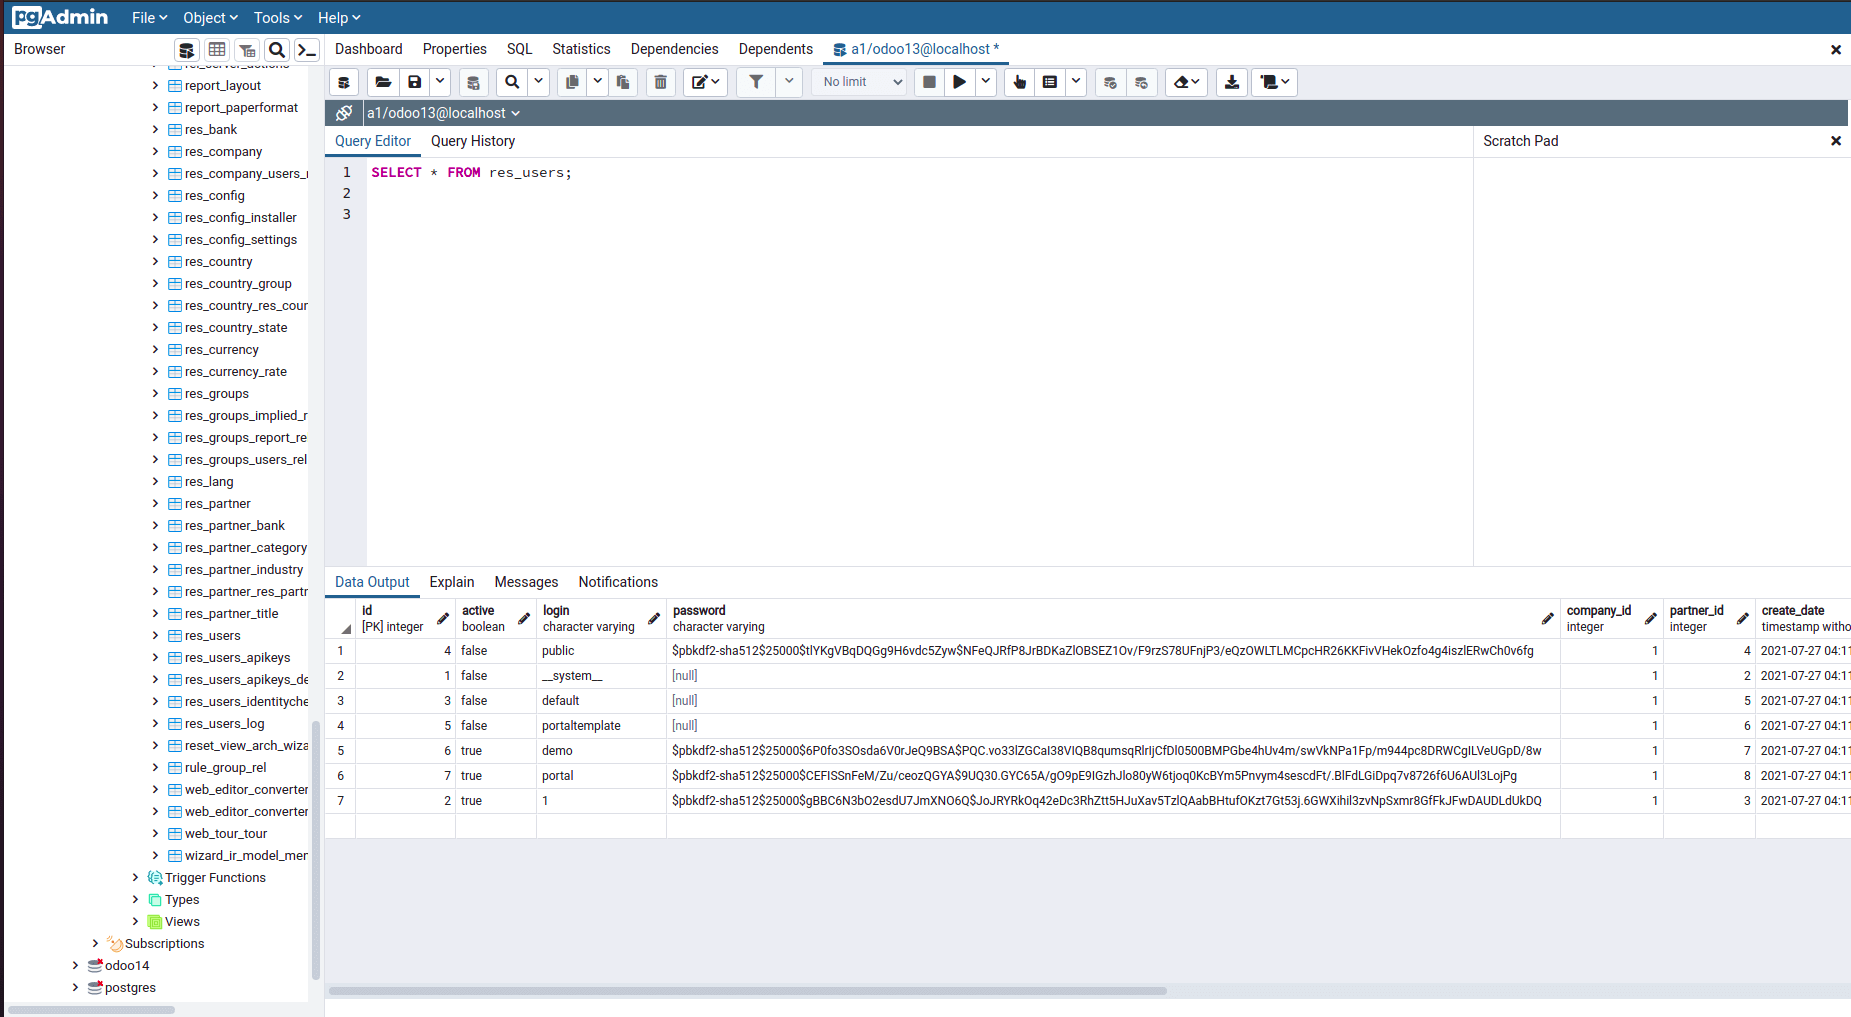
In this manner, you can easily install and run PGAdmintools in the Ubuntu-based operations of the Odoo platform.
Have a look at the following blog to explore more about Install Odoo 16 on Ubuntu 22.04. Install Odoo 16 on Ubuntu 22.04