In Odoo, ‘Controllers’ are used to configure the Front-end modules under ‘Website.’ These Front-end modules are integrated with Back-end modules. Using Controllers, you can specify the URL to link the Webpages. Controllers provide their own extension mechanism, which differs from that of models.
To work with Controllers, first of all, we need to create a folder named ‘controllers’ in our custom module. The Controllers folder contains init files and python files like models. The image shown below is the module structure after adding controllers.

And also, add this code to the init file of the module for importing controller files from the folder.
from . import controllers
Creating the Controller
Controllers are Inherited from ‘Controller.’ I’m going to create a module that explains how to get sales details and pass these details to the webpage.
So now I’m going to create a controller:
from odoo import http
from odoo.http import request
class SaleData(http.controller):
       @http.route([‘/salesdata/’], type=”http”, auth=”public”, website=”True”)
        def sale_data(self, **post):
             sales_data = request.env[‘sale.order’].sudo().search([ ])
               values = {
                            ‘records’: sales_data
                    }
              return request.render(“website_sale_details.tmp_sales_data”, values)
Let’s see what the code means.
Firstly, we have to import the libraries to load the controller. So I have imported the ‘http’ and ‘request’ library.
@http.route([‘/salesdata/’], type=”http”, auth=”public”, website=”True”)
Routes are defined through a method decorated with route(). Here we can see ‘@http.route()’ allows us to navigate to specific pages. And it also helps to link the URL with a specific webpage.
Inside decorator, we can also use some keywords like;
‘/url’: Need to specify the ‘url’ to be used to redirect a specific page
‘type’: Specify the type of request. There are two types,
a) ‘json’: This request is more suitable for executing methods on the server and obtaining results.
b) ‘http’: This is simpler and easier to use when all we what is to access some resources on the server.
‘auth’: It’ defines the access to the URL or to view the webpage related to the link.
a) ‘user’: If auth is the user, The current request will perform only for the user.
b) ‘public’: If auth is public, the current request will perform for all the users. There will be no restrictions.
c) ‘none’: If auth is none, nobody can access the request and database.
‘website’: We can mention that the controller is linking to the webpage by setting the value as ‘True’ or ‘False’.
‘methods’: There are two methods.we can specify one, If not, all methods are allowed.
a) [‘GET’]: GET is used for viewing something, without changing it,
b) [‘POST’]: POST is used for changing something.
‘sitemap’: This allows you to set sitemap links to demonstto rate website navigation. It Serves as the directory for website pages accessible to users.
‘cors’: Allows secure requests and data transfers between browsers and servers.
‘multilang’: Used to add languages to your website and translate it from the frontend.
‘csrf’: It’s used for secure user sessions by generating a token.
Now we can render the web page containing data.
return request.render(“sales_records.tmp_sales_data”, values)
This is for rendering the webpage.’request.render’ helps to render the webpage from the controller. The webpage template is defined by module_name.template_id, here ‘website_sale_details’ is the module name and ‘tmp_sales_data’ is the template id. We can also pass data into it.
If you need to redirect to any another URL instead of rendering a webpage, we use ‘request.redirect’. For example, if you need to redirect to ‘shop’.
return request.redirect(‘/shop’)
Creating the View
Now we can create the template name of the XML should be ‘tmp_sales_data’ in ‘views’ folder in our module. Because we have already called the view in the controller.
<?xml version="1.0" encoding="utf-8"?>
<odoo>
    <template id="tmp_sales_data" name="Sale Details">
        <t t-call="website.layout">
            <div class="oe_structure">
                <div class="container"><br />
                    <center>
                        <h3>Sale Order Details</h3>
                    </center><br />
                    <table class="table-striped table">
                        <thead style="font-size: 23px;">
                            <tr>
                                <h6><b>
                                        <th>Sale Order</th>
                                        <th>Customer</th>
                                        <th>Date</th>
                                        <th><b>State</b></th>
                                    </b></h6>
                            </tr>
                        </thead>
                        <tbody>
                            <t t-foreach="records" t-as="order">
                                <tr>
                                    <td><span t-esc="order.name" /></td>
                                    <td><span t-esc="order.partner_id.name" /></td>
                                    <td><span t-esc="order.date_order" /></td>
                                    <td><span t-esc="order.state" /></td>
                                </tr>
                            </t>
                        </tbody>
                    </table>
                </div>
            </div>
        </t>
    </template>
</odoo>
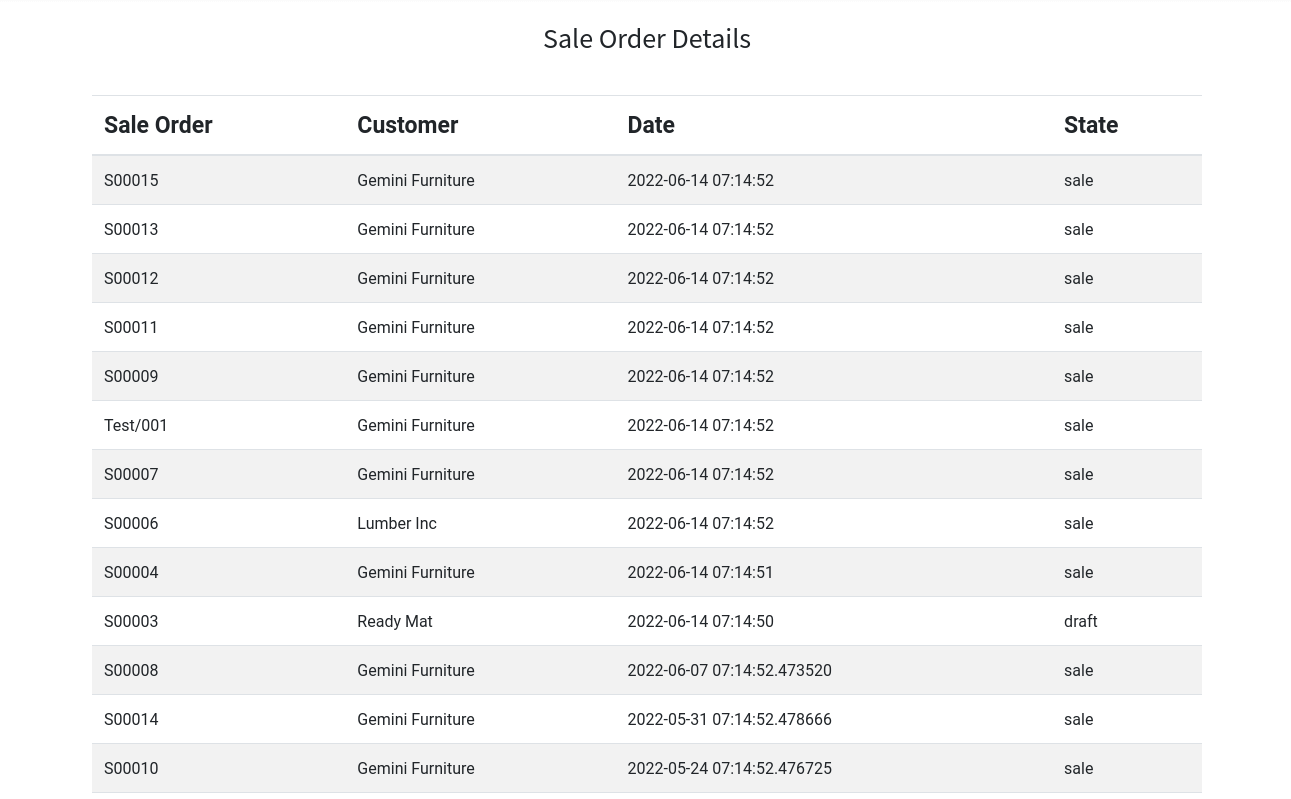
Now the page ‘salesdata’ will display the sales details that we selected.

In Odoo, we can also override the existing controller function as per our need. It’s not the same as overriding in other python files. For example, If we need to override the controller function from ‘CustomerPortal’ from module ‘Portal’.
You have to import the class from where the function is;
from odoo.addons.portal.controllers.portal import CustomerPortal
Now you have specified the path to the class where the function is located. Here ‘portal’ is the controller file and ‘CustomerPortal’ is the class of the function. After all these you can override the function like;
from odoo.addons.portal.controllers.portal import CustomerPortal
Class CustomerPortalInherit(CustomerPortal):
If you need to override the function you have taken the full code and edited or customized it. It’s like taking full control of that function.
@http.route()
    def _prepare_home_portal_values(self, counters):
        ( #exisitingcode + #yourlogic)

        return
If you want to Super the function, that means the existing function and your customized function also need to work.
@http.route()
     def _prepare_home_portal_values(self, counters):
             values = super()._prepare_home_portal_values(counters)
                       #yourlogic
            return values
This is how we create, super, and override the Web Controller in Odoo 15. The system also helps to build frontend modules.