Barcode use is one technique to improve sales and inventory management systems' efficiency. Barcodes expedite data entry, lower mistake rates, and conserve time. The procedure of incorporating barcodes is simple if you're running Odoo 17. In this blog post, we'll guide you through the steps to create barcodes in Odoo 17.
Take a look at an example of creating a barcode for the corresponding sale order.
Step 1: Create a module that contains a barcode field and a Python function to create a barcode based on the sale order date and reference number.
class SaleOrder(models.Model):
   _inherit = 'sale.order'
   barcode = fields.Char(string="Barcode")
   @api.model
   def create(self, vals):
       res = super(SaleOrder, self).create(vals)
       res.barcode = res.date_order.date().strftime("%Y%m%d") + res.name
       return res
Step 2: Inherit the sale order from view and add the barcode field in it.
<?xml version="1.0" encoding="utf-8"?>
<odoo>
   <record id="sale_order_form_inherit" model="ir.ui.view">
       <field name="name">blog.sale.order.form</field>
       <field name="model">sale.order</field>
       <field name="inherit_id" ref="sale.view_order_form"/>
       <field name="arch" type="xml">
           <xpath expr="//field[@name='payment_term_id']" position="after">
               <field name="barcode"/>
           </xpath>
       </field>
   </record>
</odoo>
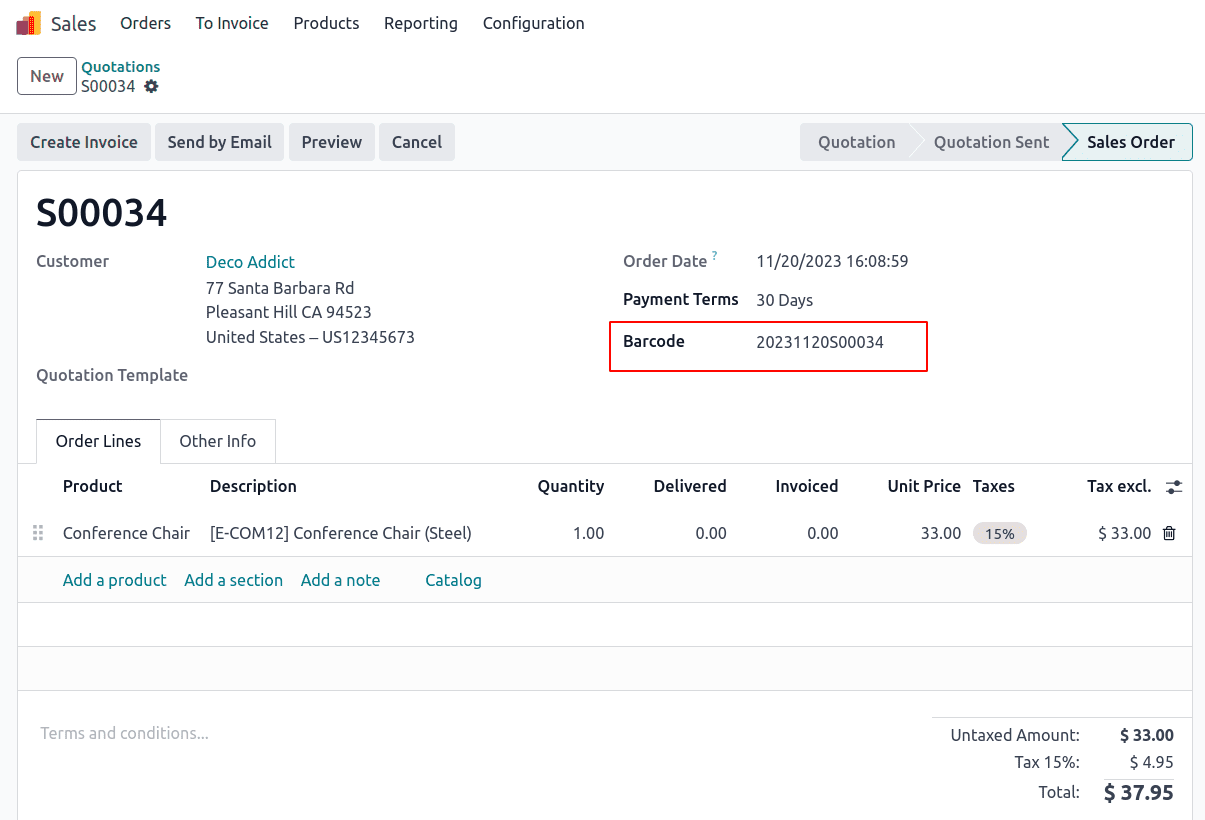
Output of the above code will be:

Here, the barcode field contains the combination of order date and the sale order reference number.
Let's print this barcode number. For this, we need to create an action for printing the barcode and a template.
Step 3: Create an XML file and add the action for printing the report
<!--    ACTION FOR PRINTING BARCODE-->
   <record id="action_report_sale_barcode" model="ir.actions.report">
       <field name="name">Sale Order Barcode</field>
       <field name="model">sale.order</field>
       <field name="report_type">qweb-pdf</field>
       <field name="report_name">blog1.barcode_template</field>
       <field name="report_file">blog1.barcode_template</field>
       <field name="print_report_name">'Sale Order Barcode (PDF)'</field>
       <field name="binding_model_id" ref="sale_management.model_sale_order"/>
       <field name="binding_type">report</field>
   </record>
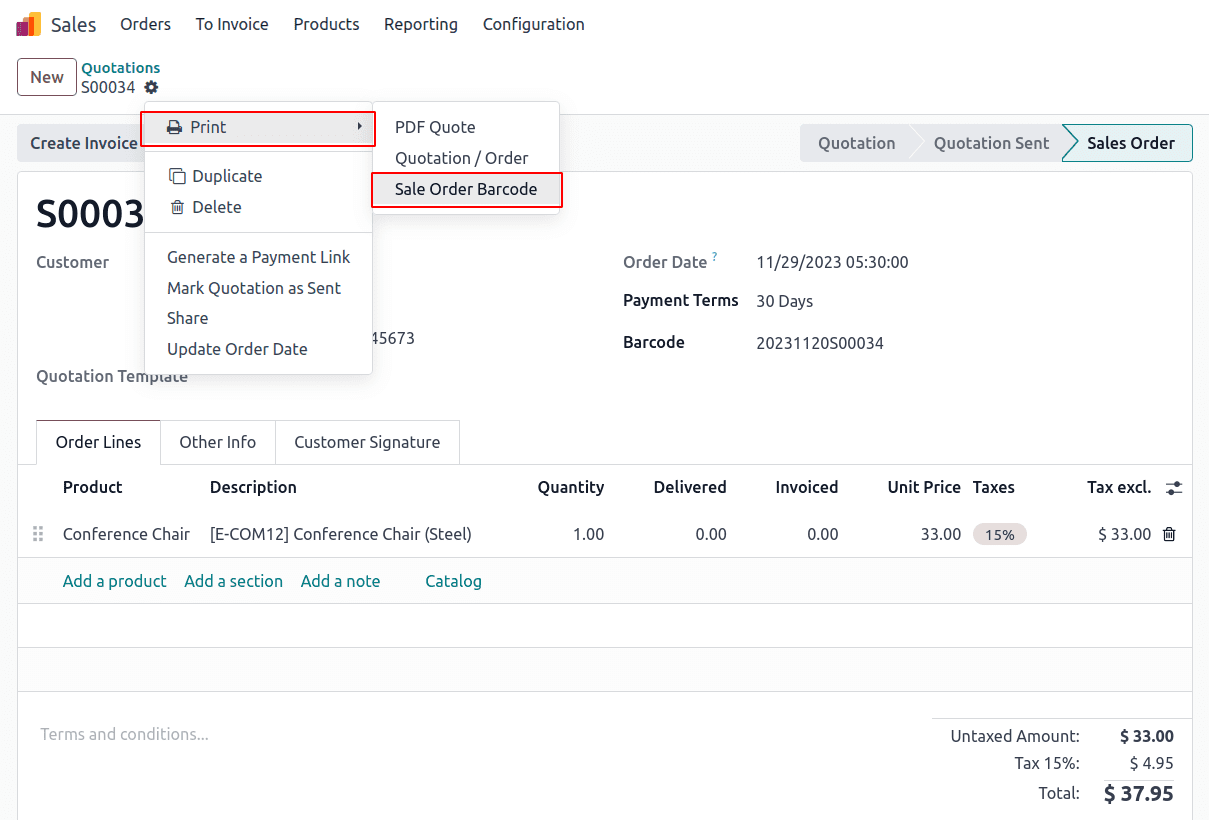
Which will create a report action as shown in the figure.

Step 4: Add a template for printing the barcode.
<!-- BARCODE TEMPLATE-->
<template id="barcode_template">
<t t-call="web.html_container">
<t t-foreach="docs" t-as="doc">
<t t-call="web.external_layout">
<div class="page">
<div class="oe_structure"/>
<div>
<div class="col-5">
<h2><span t-field="doc.name"/></h2><br/>
<span style="margin-left:-60px;">
<img t-if="doc.barcode"
style="width:400px;height:70px;"
t-att-src="'report/barcode/?barcode_type=%s&value=%s&
width=%s&height=%s'%('EAN13',doc.barcode,265,80)"/>
</span>
<div style="margin-left:100px" t-field="doc.barcode"/>
</div>
</div>
</div>
</t>
</t>
</t>
</template>
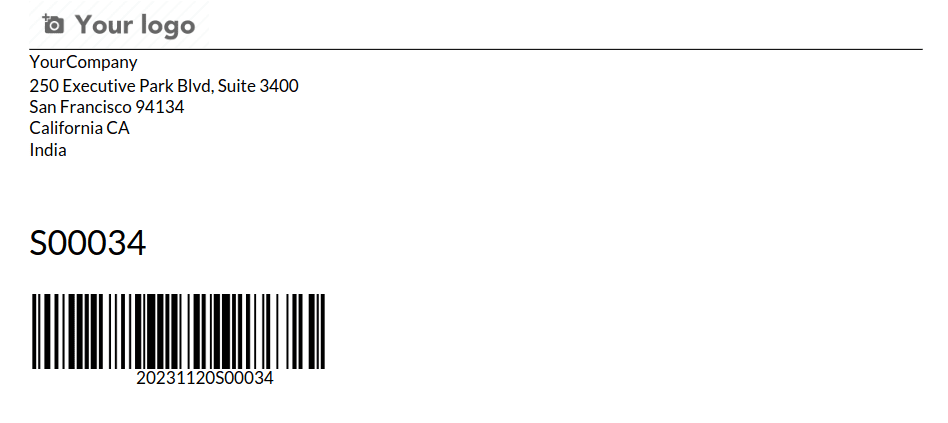
It will print the barcode as shown in the figure,

In conclusion, barcodes have the potential to greatly improve the effectiveness of your company's operations. These instructions allow Odoo 17 users to easily add barcode capabilities to their system, providing a workable way to cut down on errors, expedite procedures, and save time in the ever-changing world of corporate operations. Consequently, companies can streamline their operations, raise the correctness of their work, and eventually add to increased overall productivity.
Refer to our previous blog on how to Create a barcode in odoo 16 to read more about how to create a barcode in odoo.