Server actions in Odoo allow you to execute automated tasks on the server side, usually triggered by events such as button clicks or automated workflows. Written in Python, they enable the execution of complex business logic, enhancing the functionality of your Odoo system.
To view all available server actions in Odoo, first enable developer (debug) mode. Once activated, go to the Settings menu, navigate to the Technical section, and select Server Actions.
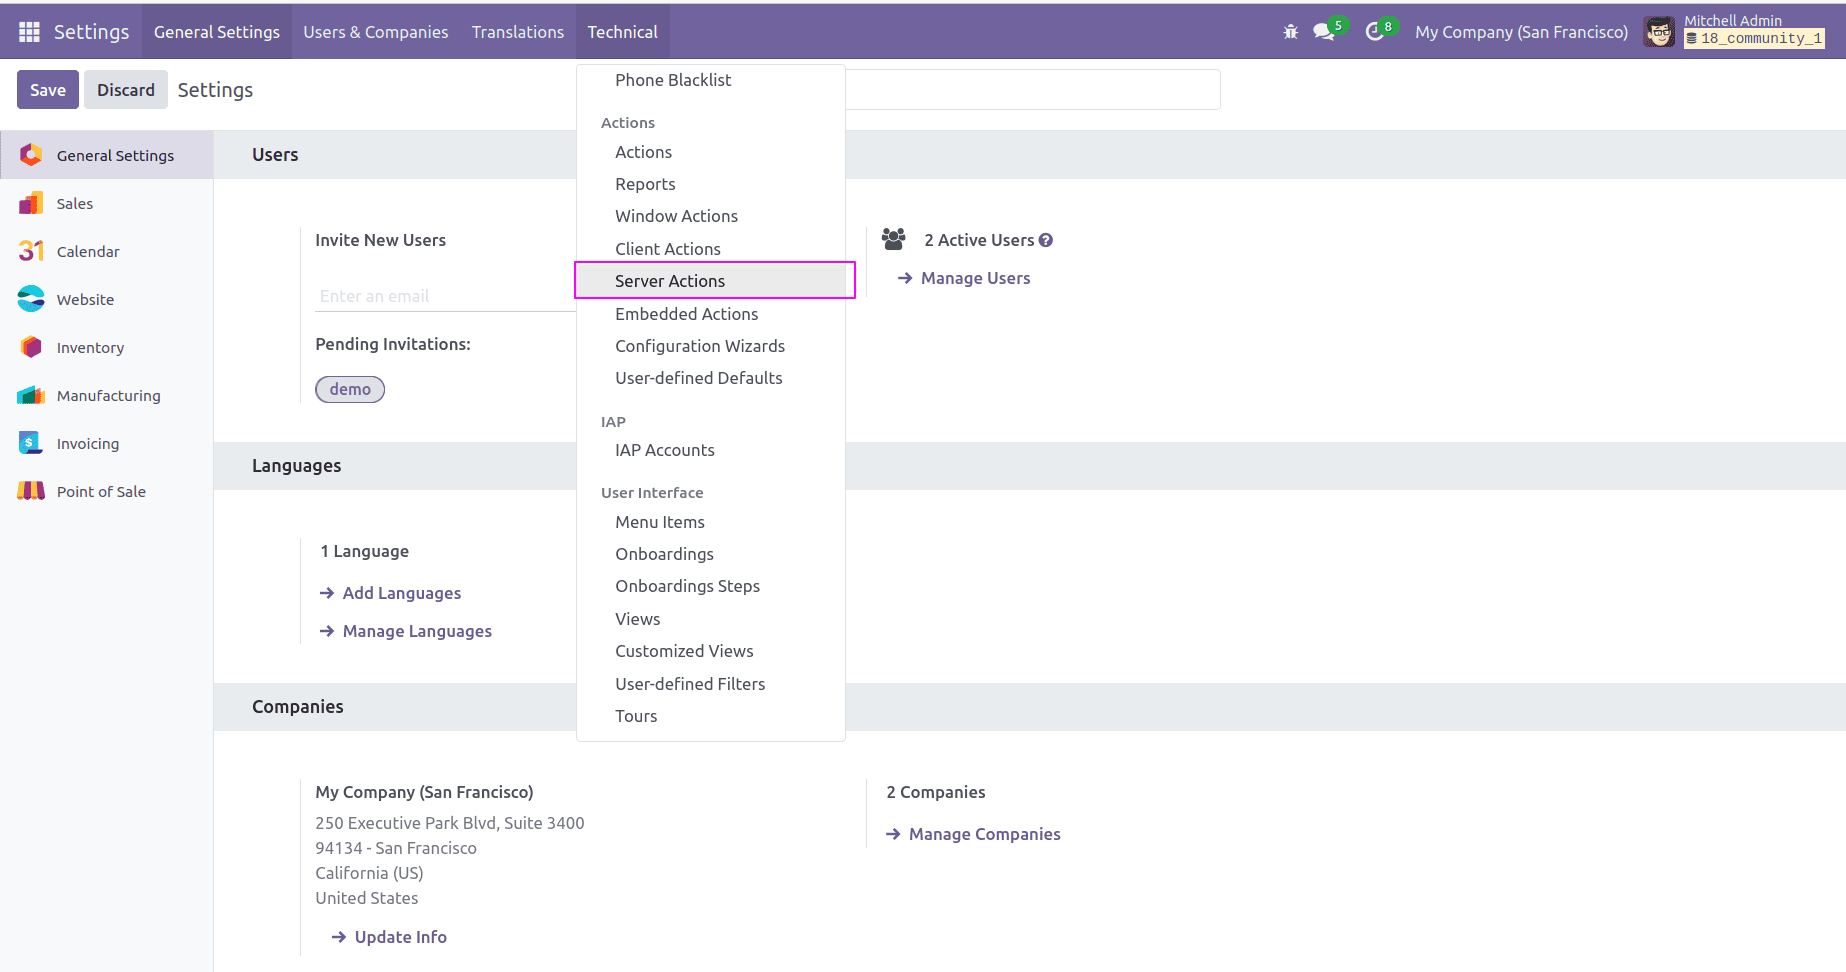
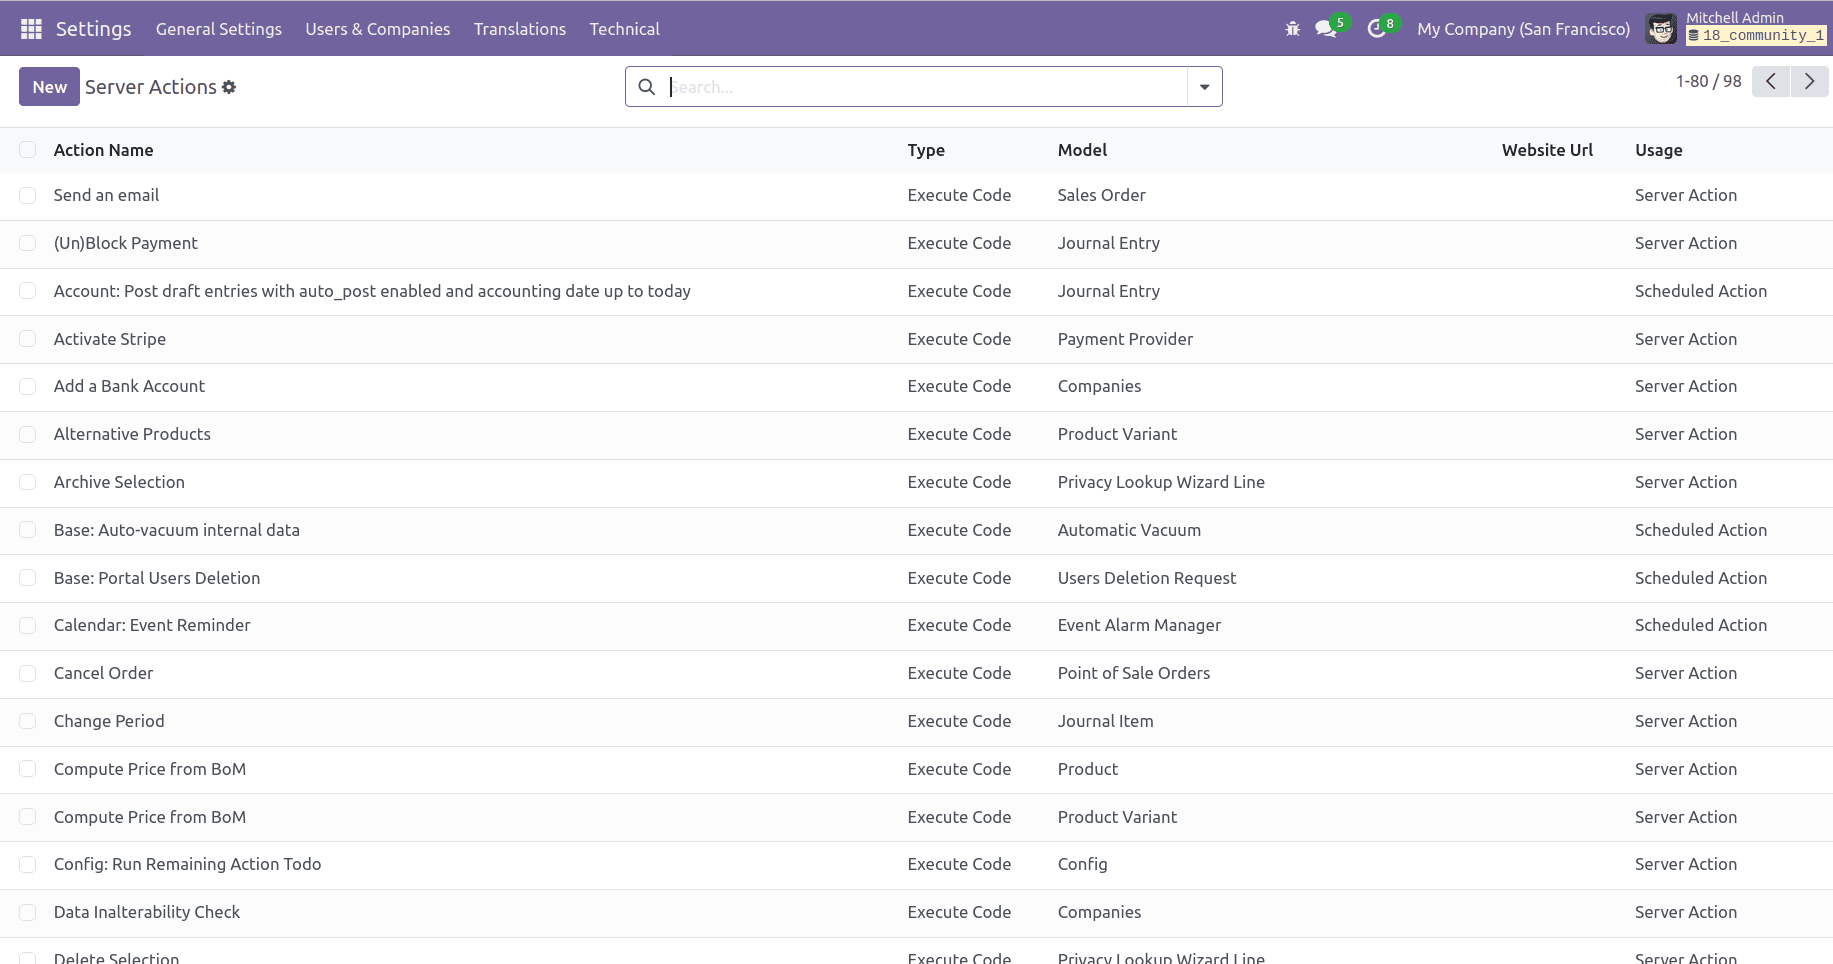
Here, you can explore a list of all the server actions configured in your environment.
What Can Server Actions Do in Odoo 18?
Server actions are highly versatile and can automate a wide range of operations. Some key capabilities include:
1. Execute Python Code: Automate custom logic using Python scripts.
2. Create New Records: Automatically generate new records in any Odoo model.
3. Update Existing Records: Modify records based on predefined conditions to maintain data accuracy.
4. Send Emails and SMS Messages: Trigger notifications to stakeholders when certain events occur.
5. Manage Followers: Automatically assign followers to important records.
6. Schedule Next Activities: Automatically create follow-up tasks to streamline workflow processes.
7. Chain Multiple Actions: Build complex workflows by chaining together multiple server actions.
Practical Example: Copy Data from "Phone" to "Mobile" in res.partner
Let’s create a server action that copies data from the "phone" field to the "mobile" field in the res.partner model.
1. Define the Server Action in XML
To create this server action, navigate to the "data" directory in your Odoo 18 custom module. Open the ir_action_data.xml file and define the action with the following XML code:
<?xml version="1.0" encoding="UTF-8" ?>
<odoo>
    <record id="copy_phone_to_mobile" model="ir.actions.server">
        <field name="name">Copy Phone to Mobile</field>
        <field name="model_id" ref="base.model_res_partner"/>
        <field name="binding_model_id" ref="base.model_res_partner"/>
        <field name="binding_view_types">list</field>
        <field name="state">code</field>
        <field name="code">
            action = records.action_copy_phone_to_mobile()
        </field>
    </record>
</odoo>
Explanation:
* name: A descriptive name for the server action, as displayed in the server actions menu.
* model_id: Specifies the model associated with the action (in this case, res.partner).
* binding_model_id: Binds the action to the model, so it is only available when working with res.partner.
* binding_view_types: Defines where the action is accessible, with "list" indicating it will be available in the list view.
* state: This specifies the type of action, where "code" means it will execute a Python script.
* code: Contains the Python script that will be executed when the action is triggered.
2. Implement the Python Function
Next, define the Python function that the server action will call. Add the following code to your res.partner model's Python file:
from odoo import models

class ResPartner(models.Model):
    _inherit = 'res.partner'
    def action_copy_phone_to_mobile(self):
        for record in self:
            if record.phone and not record.mobile:
                record.write({'mobile': record.phone})
Explanation:
* action_copy_phone_to_mobile: This function checks if a res.partner record has a phone number but no mobile number. If so, it copies the phone number to the mobile field.
Once you've reviewed the server actions, you'll see that the newly created server action is now available.
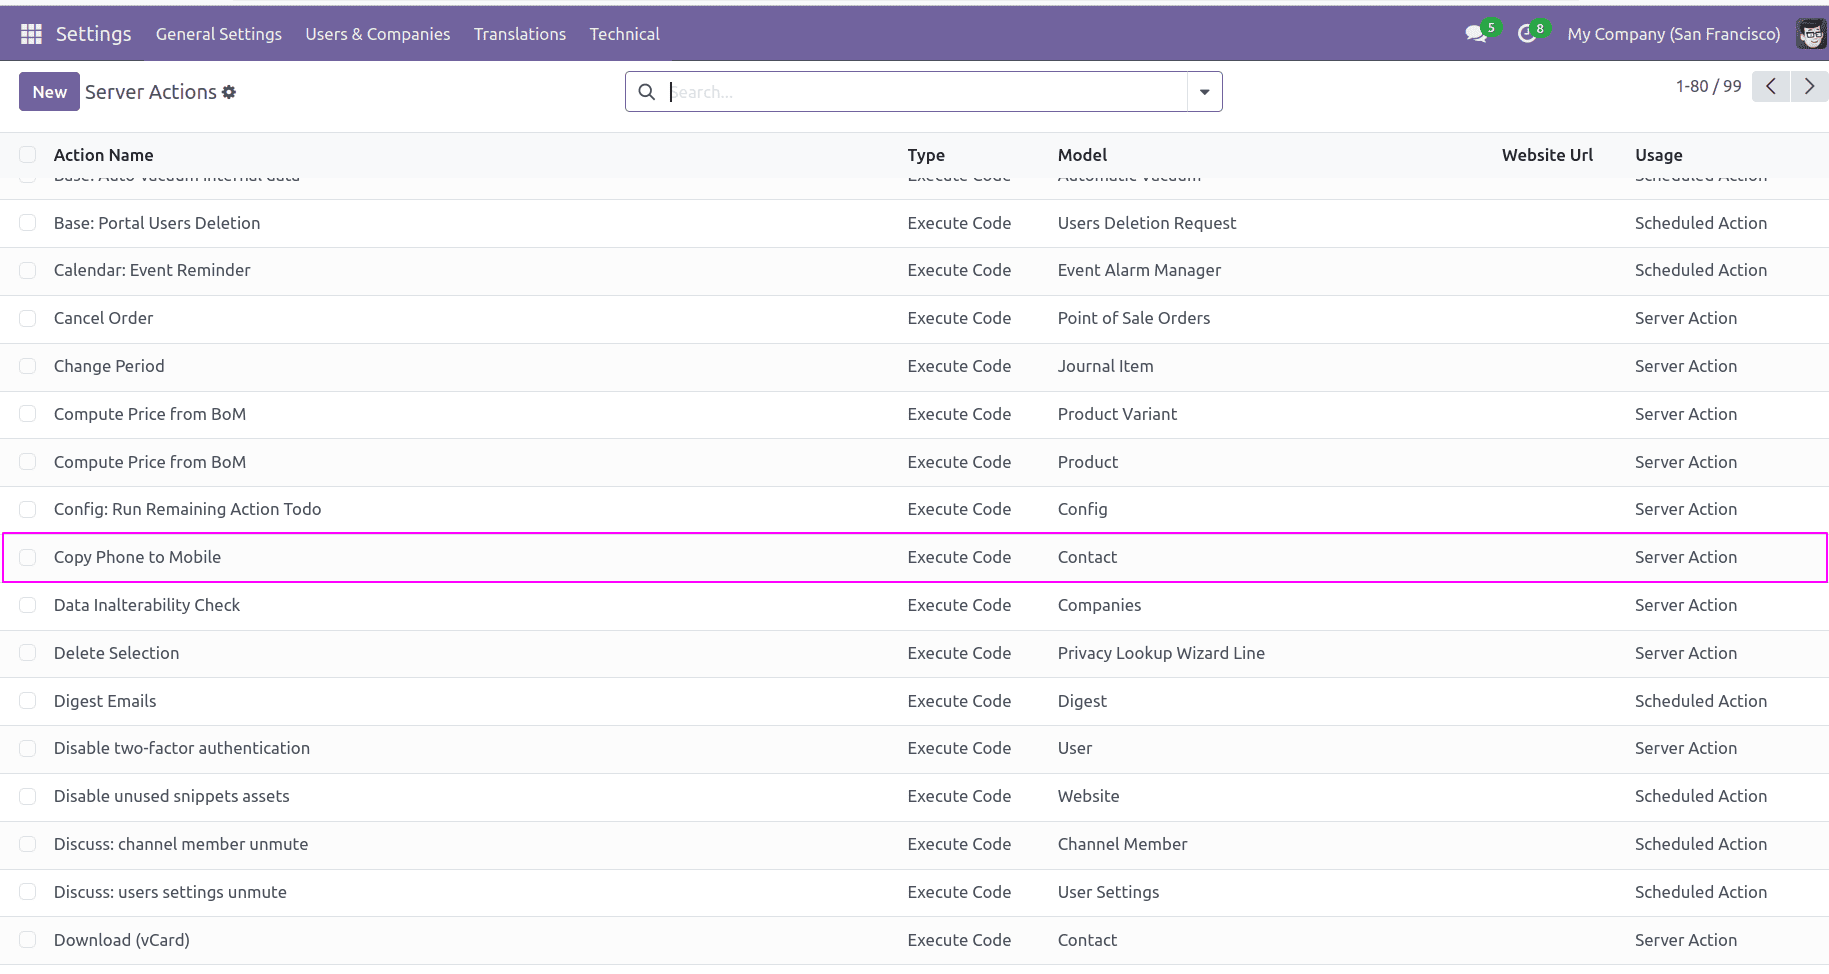
3. Execute the Server Action
Once you've created the server action, it will be available for use in the contacts list view. To test it, follow these steps:
1. Go to the Contacts module.
2. Select several contacts that have data in the "phone" field but not in the "mobile" field.
3. Under the Actions menu, you should see the newly created server action named "Copy Phone to Mobile."
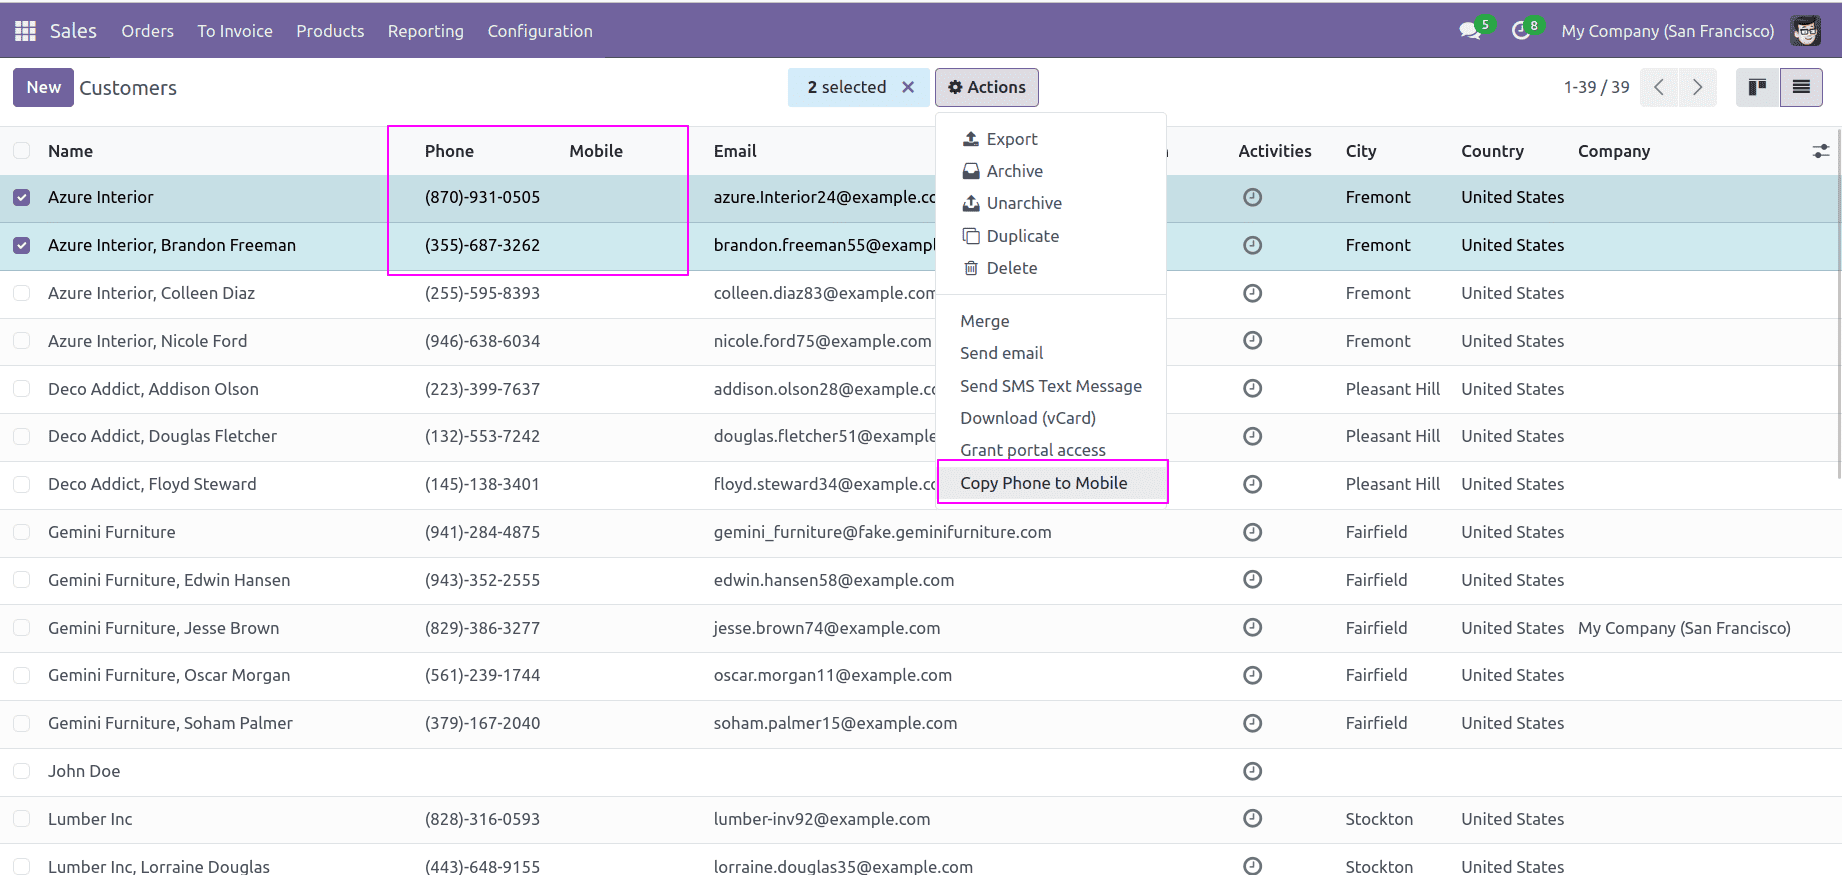
4. Click the action, and Odoo will copy the phone numbers into the corresponding mobile fields.
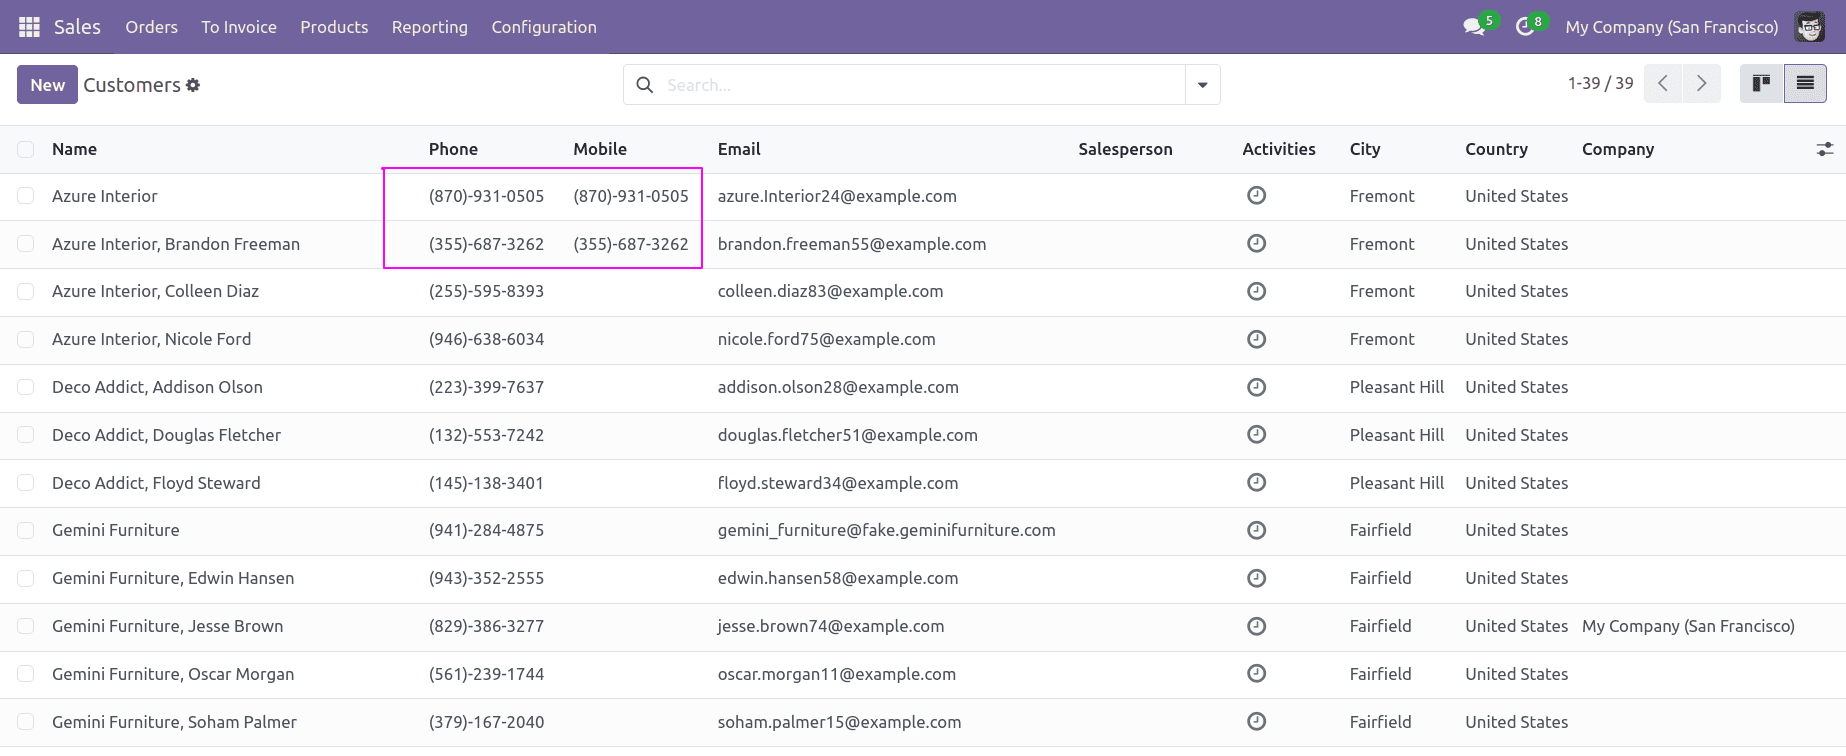
By implementing this server action, you can automate data-handling tasks within Odoo, such as synchronizing fields. This small but powerful automation helps ensure data consistency and saves time in routine tasks.
Server actions offer endless possibilities for automating processes and optimizing workflows in Odoo 18. By exploring and customizing server actions, you can significantly enhance your ERP system’s efficiency and reduce manual intervention.
To read more about How to Create & Configure Server Actions in the Odoo 17, refer to our blog How to Create & Configure Server Actions in the Odoo 17.