In the dynamic landscape of business operations, effective vendor bills and payment management are crucial for maintaining financial health. Odoo 17, the latest version of the powerful open-source ERP software, offers robust features to streamline and enhance the entire process. In this blog, we will explore how Odoo 17's accounting module empowers businesses to efficiently handle vendor bills and payments.
A vendor bill is an invoice received for products or services purchased from a vendor, recording payables such as sales taxes, freight, and delivery charges. In Odoo, a vendor bill can be created at various stages of the purchasing process, depending on the bill control policy in the Purchase app settings. Odoo 17 provides a centralized data hub for vendor bills and payments within its accounting module. This allows businesses to have a unified view of all financial transactions related to vendors, promoting transparency and ease of access.
Vendor Bill Creation
Creating vendor bills in Odoo 17 is a seamless process. Users can navigate to the Accounting module and access the ‘Bills’ option from the ‘Vendors’ menu section. This window will provide the list of every bill that is created inside your Odoo Accounting Module with their Number, Vendor, Bill Date, Due Date, Reference, Activities, Tax Excluded, Total, Currency, Payment, and other details as shown below.

Click on the ‘New’ button and input necessary details such as vendor information, invoice date, and itemized expenses inside the new displayed window. The intuitive interface ensures quick and accurate data entry.
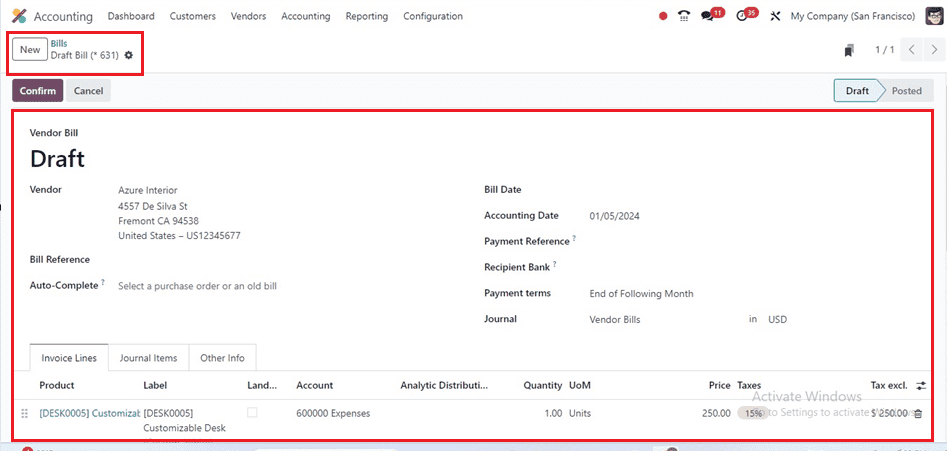
To create a bill, enter the vendor's name and a bill reference in the ‘Vendor’ and ‘Bill Reference’ field. Auto-complete the remaining fields by entering a previous bill or purchase order. The Bill Date field specifies the bill's generation date, while the Accounting Date displays the system's updated accounting data. Enter the Payment Reference, Recipient Bank, Bill Due Date, and Journal information in the corresponding fields. The invoice's Invoice Line, Journal Items, and Other Info tabs are identical. Click the Confirm button to approve the bill, and its status will change from Draft to Posted.
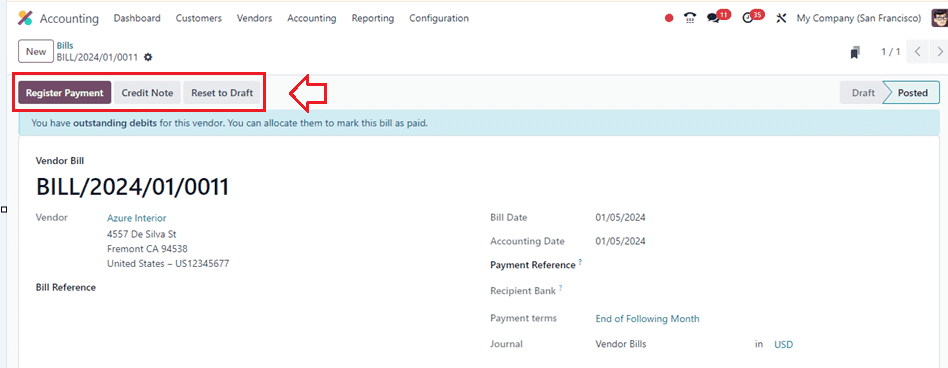
After conforming to the vendor bill, we can proceed with the payment procedure using the ‘Register Payment’ button. Odoo 17 allows users to attach relevant documents, such as invoices or receipts, directly to vendor bills. This feature streamlines document management, making it easy to retrieve supporting materials when needed, and provides a comprehensive audit trail.
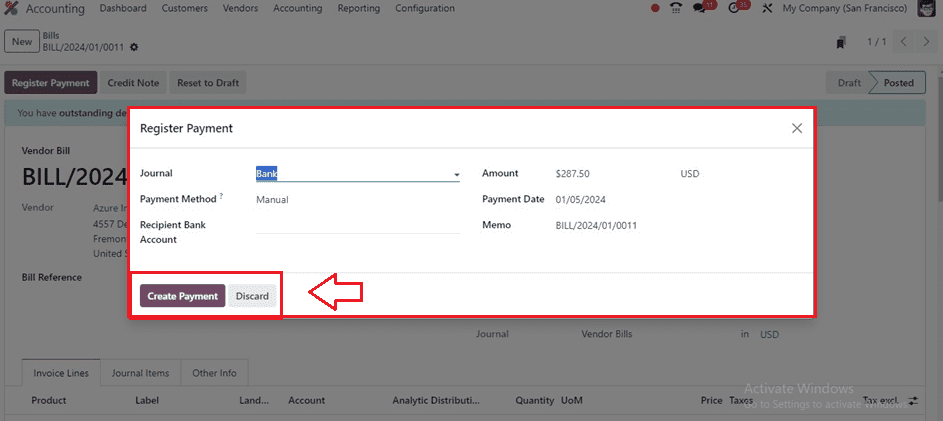
Choose the payment Journal, Payment Method, Recipient Bank Account, and other details from the displayed pop-up window and proceed with the payment using the ‘Create Payment’ button.
Payment Management
Managing vendor payments is simplified with Odoo 17. Users can track due dates, view outstanding payments, and initiate payments directly from the platform. Integration with various payment gateways facilitates a smooth and secure payment process. Odoo supports integration with bank feeds, allowing real-time synchronization of financial data. This ensures that vendor payment records are always up-to-date and discrepancies can be identified and addressed promptly.
We can access the dashboard of all the payment records from the ‘Payments’ window of the ‘Vendors’ menu. This dashboard will show the list of Dates, Numbers, Journals, Payment Methods, Vendors, Batch Payments, Amounts in Currency, etc, as shown below.

Click the ‘New’ button to create a new vendor payment and fill in the details of the form fields, including Internal Transfer, Payment Type, Amount, Date, Journal, Payment Method, Destination Journal, and Memo.
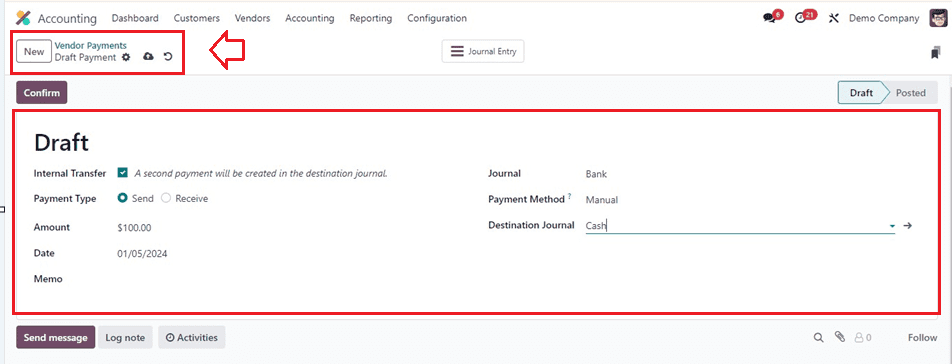
Proceed to the ‘Confirm’ button after entering the necessary data below. The Payment option allows tracking of liquidity changes and can be processed manually or using built-in facilities, as illustrated in the screenshot.
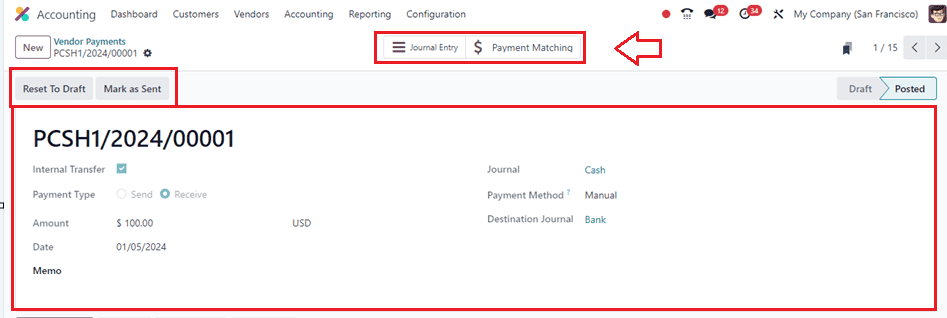
You can check the details of the journal details using the ‘Journal Entry’ smart button, and the payments matching to this vendor payments will be shown inside the ‘Payment Matching’ smart button.
Vendor Batch Payments
You can access the details of batch payment for every vendor using the ‘Batch Payments’ option in the ‘Vendors’ menu with their Reference, Bank, Date, Amount, State, and Activities.
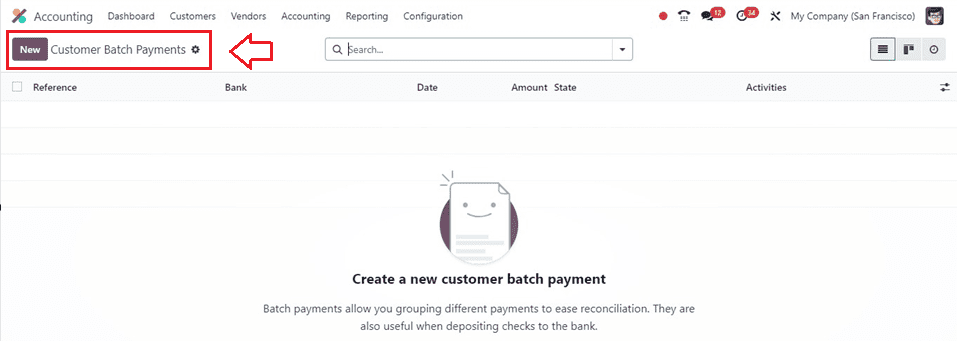
Press the ‘New’ button to create a new batch of payments and provide the details, such as the Batch Type, Bank, Payment Method, Date, and Reference, as shown below.

Inside the ‘Batch Content’ tab, provide the Number, Date, Customer/Vendor, Reference, and Amount by clicking on the ‘Add a line’ button and choosing a payments journal from the displayed pop-up window as shown below.
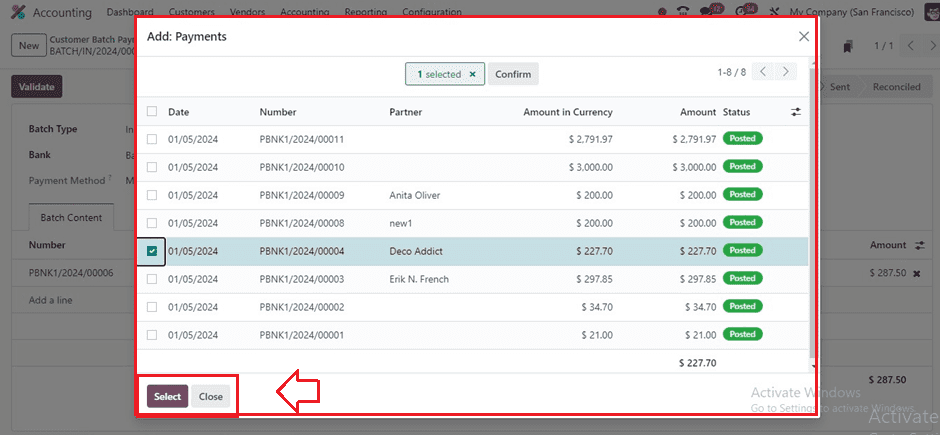
After adding a payment line, save the Batch Payment details and validate them using the ‘Validate’ button. Then, you can use these batch payments for later use
Customized Reporting
The reporting capabilities of Odoo 17 enable businesses to generate customized reports related to vendor bills and payments. Analytical reports, aged payables, and cash flow statements provide valuable insights, aiding in strategic financial decision-making.
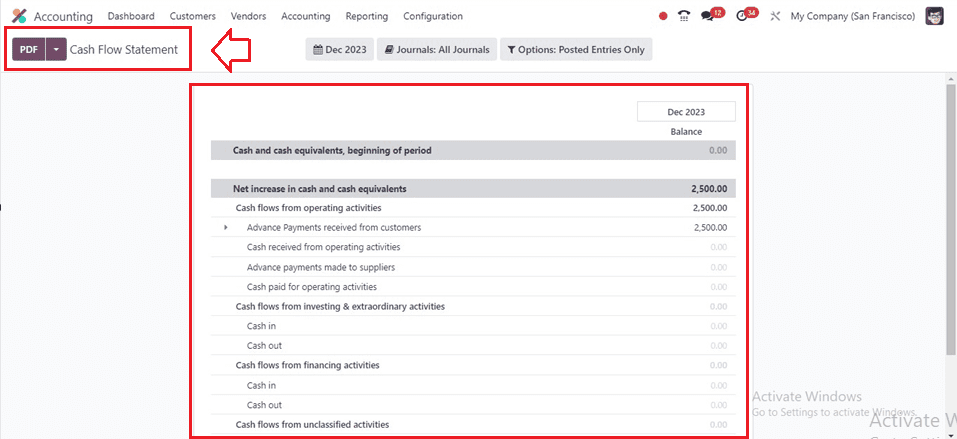
For businesses operating globally, Odoo 17 offers robust multi-currency support. This feature allows seamless handling of vendor bills and payments in various currencies, simplifying international transactions.
Odoo 17 accounting module significantly elevates the efficiency of managing vendor bills and payments. The platform's user-friendly interface, automation capabilities, document management features, and integration options contribute to a streamlined and organized financial workflow. By leveraging Odoo 17, businesses can enhance accuracy, reduce manual workload, and gain better control over their vendor-related financial processes.