In the case of business workflows where there are tasks that do not require direct human intervention but need to be executed at regular intervals of time, the Automated or Scheduled Actions come to the rescue. Scheduled actions are also known as cron jobs, which is a powerful tool that allows for automating routine and time-based tasks. Let’s see how cron jobs are executed in Odoo 18. It runs the background job easily by simply inserting a record into the ir.cron model, and Odoo will execute it as defined.
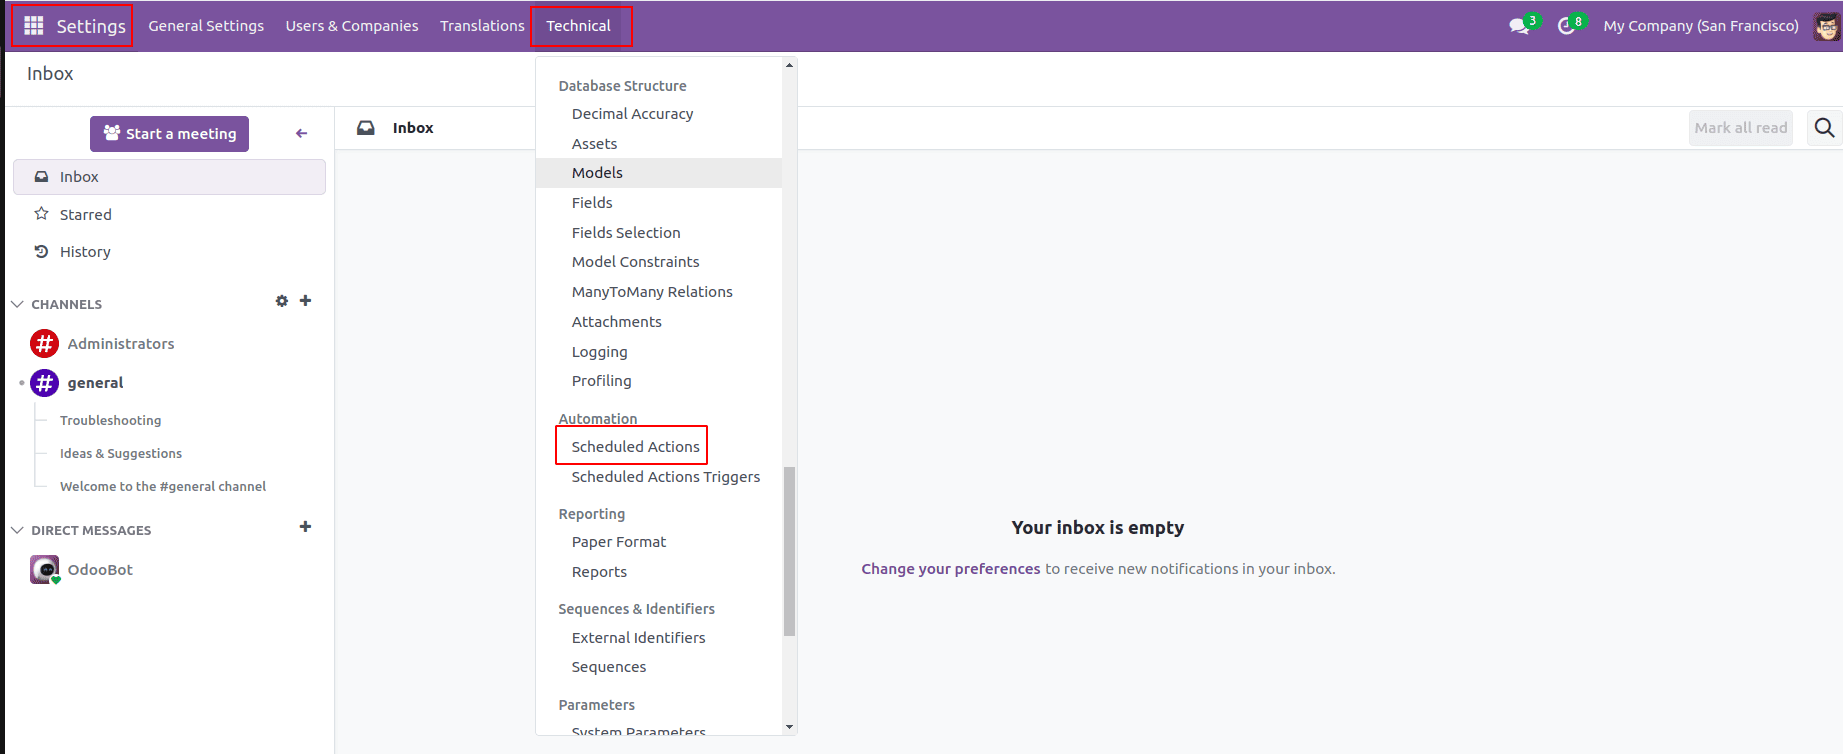
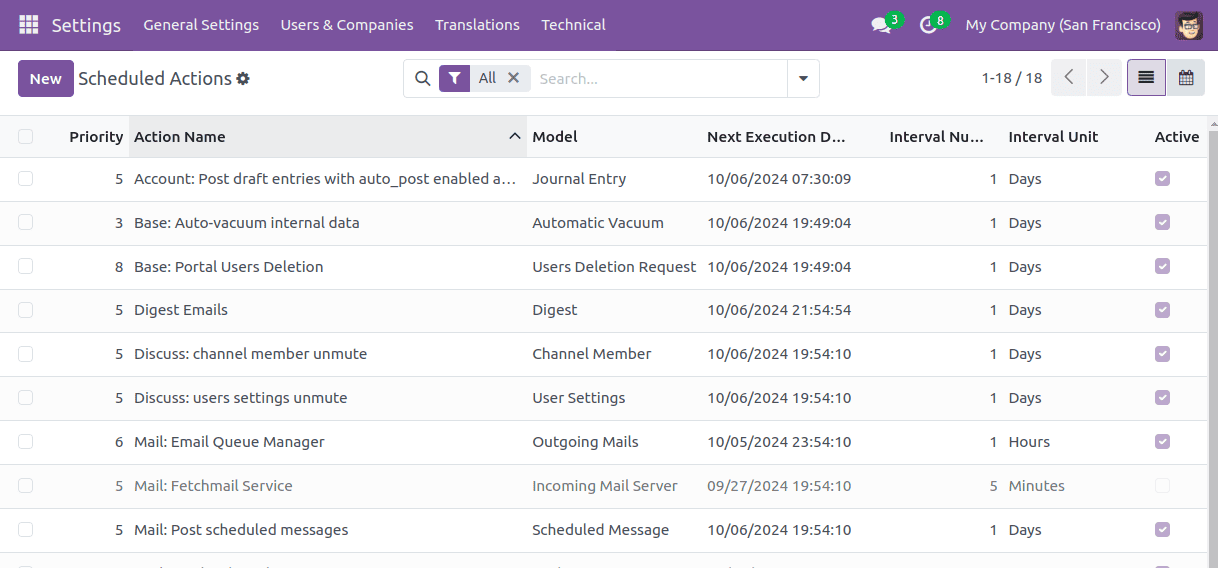
All the scheduled actions created so far can be seen from the menu General Settings > Technical > Scheduled Actions.
From the menu, we will get a view of all the scheduled actions with details such as Action Name, Model, Priority, Active, etc.
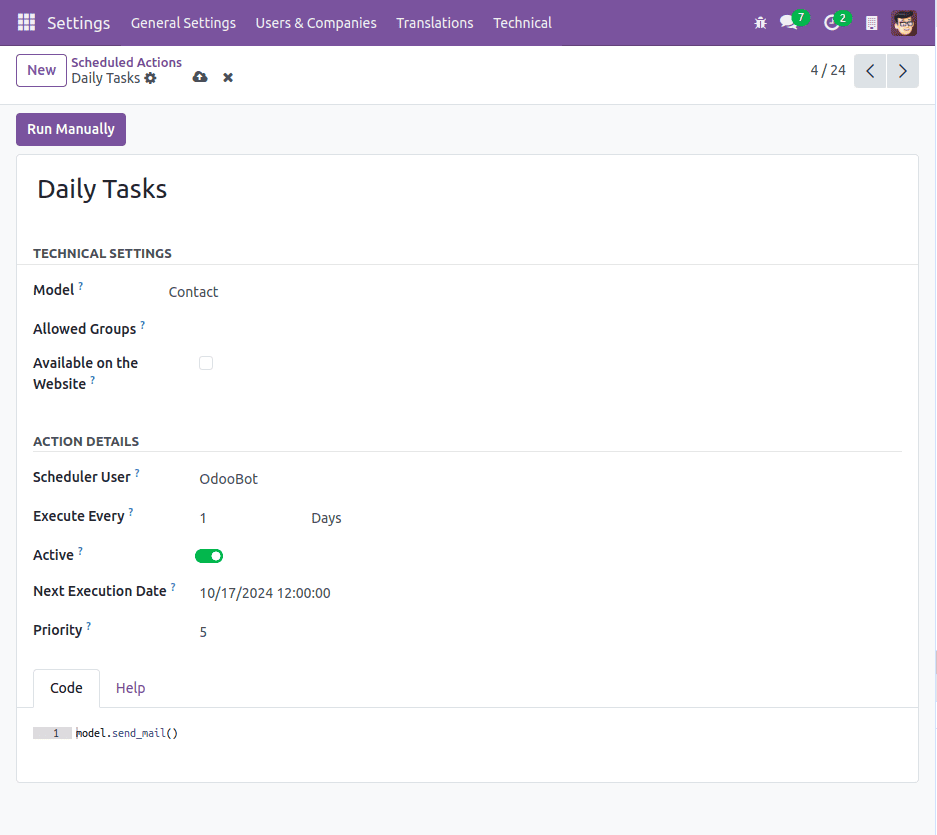
Clicking on the top left button named ‘New’, we get a form view in the UI in which we can add the needed details like Name, Technical Settings, Action Details, and Code marked as below to run the scheduled action.

However, configuring Scheduled Action through code is also possible, which requires creating an XML file with the standard name as ir_cron_data.xml inside the data directory of the module being created for the purpose.
The scheduled action is created using the XML code
<?xml version="1.0" encoding="UTF-8" ?>
<odoo>
   <data noupdate="1">
       <record id="daily_task_arrange" model="ir.cron">
           <field name="name">Daily Tasks</field>
           <field name="model_id" ref="model_res_partner"/>
           <field name="state">code</field>
           <field name="code">model.send_mail()</field>
           <field name="user_id" ref="base.user_root"/>
           <field name='interval_number'>1</field>
           <field name='interval_type'>days</field>
           <field name="nextcall"
                  eval="(DateTime.now() + timedelta(days=1)).strftime('%Y-%m-%d 12:00:00')"/>
           <field name="priority">1</field>
       </record>
   </data>
</odoo>
Let’s explore each line of code now. When the module is installed, inside the <odoo> tag pair, ‘noupdate’ is initialized to 1 as
<data noupdate="1">
Then the code inside this will not get updated for every upgrade.
Then a record is created with a proper unique identifiable ID in the table ‘ir_cron’
<record id="daily_task_arrange" model="ir.cron">
Now, it’s time to define various attributes for the record being created. There are many attributes like ‘name’, ‘state’, ‘model_id’, ‘code’, etc. Let’s discuss each of them.
<field name="name">Daily Tasks</field>
This is used to set a name for the ir_cron record. Here in between the <field> and </field> tag pair, we have given the name ‘Daily Tasks’ as the name.
<field name="model_id" ref="model_res_partner"/>
This attribute specifies on which Odoo model, the automatic action is getting called.
<field name="state">code</field>
<field name="code">model.send_mail()</field>
These two can be defined together. The attribute ‘state’ says about the type of server action. Here we set it like ‘code’, which indicates to execution of a block of Python code. Besides, the ‘code’ attribute specifies the name of the method in which the Python code is written. We have to write the Python code that the action will execute. Here the method send_mail() is used on the model object.
<field name="user_id" ref="base.user_root"/>
The ‘user_id’ is the ID of the user who is connected with the cron job. Mostly, the user will be the root user of the base module.
<field name='interval_number'>1</field>
Interval_number attribute specifies the interval of time in which the scheduled action should be activated. Here we give the value 1, which means it should run every 1 unit of the specified interval type.
<field name='interval_type'>days</field>
The interval type can be minutes, hours, days, weeks, months.
<field name="nextcall"
      eval="(DateTime.now() + timedelta(days=1)).strftime('%Y-%m-%d 12:00:00')"/>
‘nextcall’ determines when the execution of the scheduled cron job is planned. Here the time is set as 12:00:00 daily.
<field name="priority">1</field>
This is used to specify the priority of the job, as an integer. The digit 0 is used for the lowest priority and 10 for the highest priority.
After all these attributes are set, we need to define the method send_mail in the res.partner model. Here in this code, the Python code just sends a test mail.
def send_mail(self):
   mail_template = self.env.ref('mail.mail_template_test').with_context(lang=self.env.user.lang)
   mail_template.send_mail(self.id, force_send=True)
Then, after upgrading the module, the Scheduled action can be seen from the earlier mentioned menu in the General settings.
In short, the scheduled actions in Odoo 18 are extremely useful in cases where we need to automate the tasks to run periodically. These can be used to generate reports, send mails, etc, that should occur without human intervention and thereby make the workflow of the ERP so smooth and ensure consistency. Refer to our previous blog about Configurations of Schedule actions in Odoo 17 ERP.