The term "salary structure" describes how a remuneration's many components are divided, determining the compensation's overall structure. Individuals may get different monthly sums under various salary arrangements, which can lead to pay discrepancies.
In-hand pay, gross income, net salary, allowances, and other forms of pay and perks are all determined by the wage structure, which is vital for employees. Employees are unable to compute their cash on hand or savings components like the Employee Provident Fund without accurate information. For businesses to pay employees fairly, compete for talent, encourage internal pay parity, and reward employees fairly for their performance, they must have a well-designed wage structure.
Odoo 16 Payroll Module provides an end-to-end solution for managing employee payments and wages. The platform gives an exclusive configuration section itself for managing employee salaries. In accordance with the salary structures, we can determine employee wages based on job postings and provide payslips for payroll. For the purpose of calculating payslips, you can specify a variety of criteria that are contained inside a wage structure. One wage structure is utilized by the whole department or group.
We can do the salary structure management and riles configuration functions from the “Salary” section of the “Configuration” menu of the Odoo 16 Payroll Module.
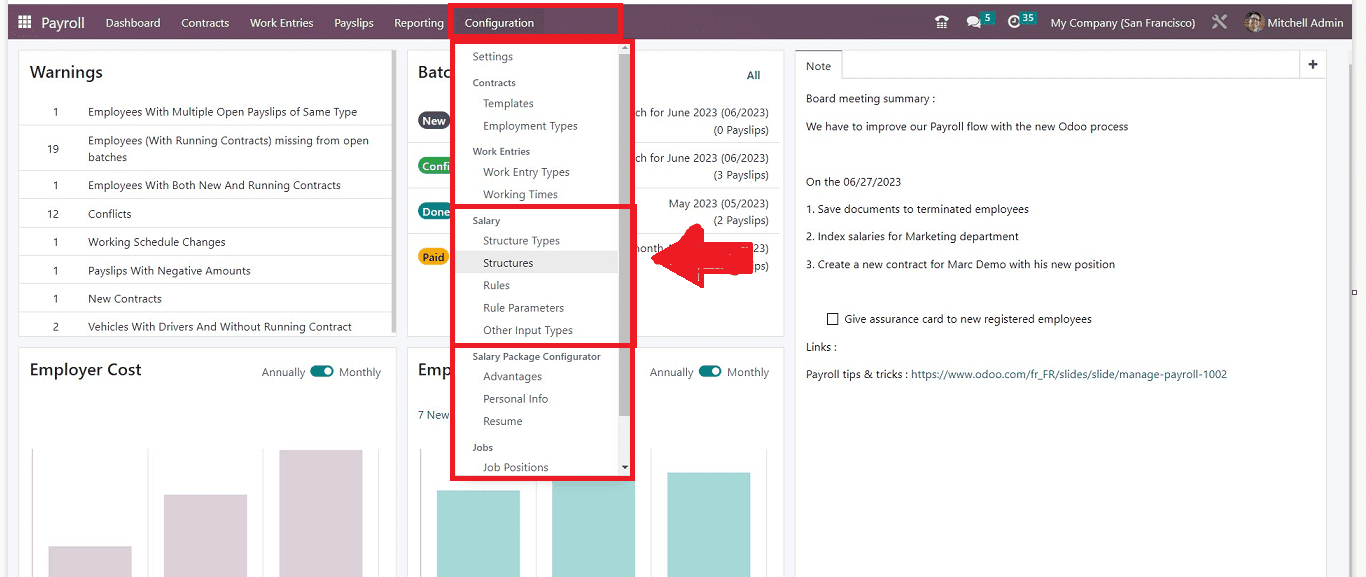
We can discuss the “Salary Structures” and the “Rules” configuration processes in this blog.
Salary Structures
Go to the “Structures” option available in the Salary section of the “Configuration” menu. Clicking on the option will immediately open the homepage of the “Structures” menu, as shown below.

This homepage window contains a dashboard of all the existing Salary Structure Types arranged in the order of structure “Name,” “Salary Rule,” and “Country.” you can sort or filter the salary structures using the “Group By,” “Filter,” and “Favorites” options. Clicking on any particular structure column will open the corresponding salary structure configuration form. Users are able to change the list view into Kanban View by clicking on the Kanban Icon provided in the upper right part of the page. The “NEW” button will assist you in creating an updated salary structure by opening a configuration form, as shown below.
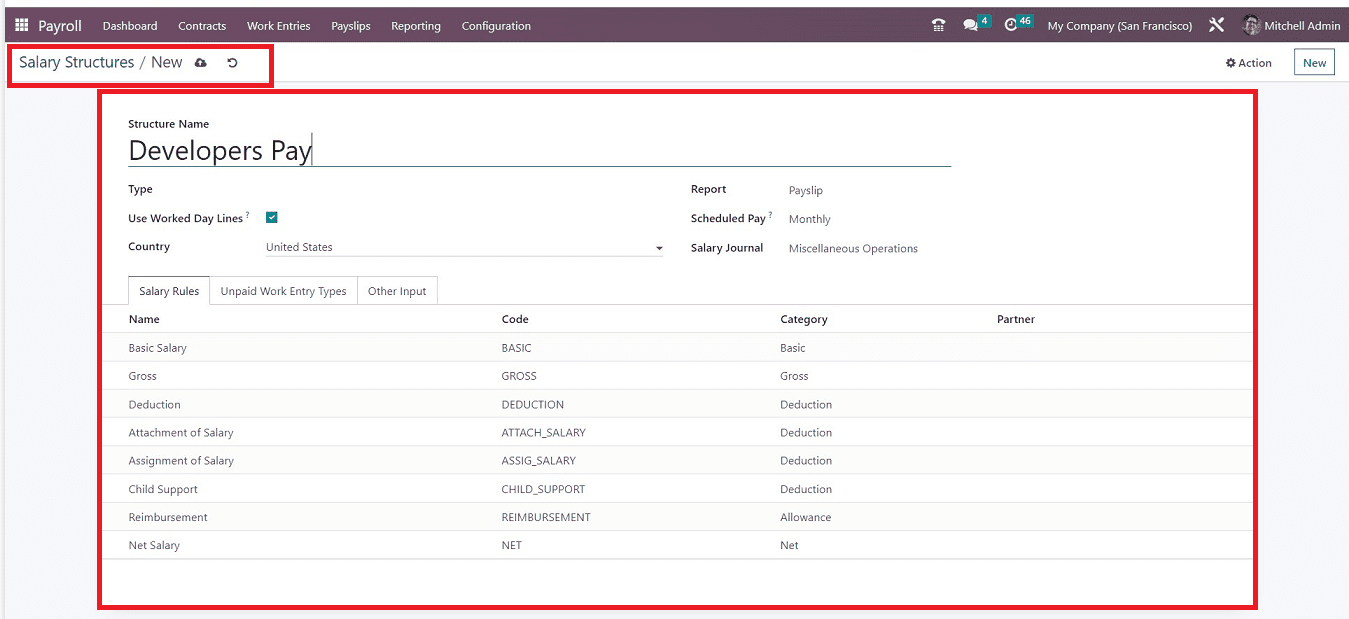
Firstly, give an appropriate “Structure Name.” In the “Type” area, you have to enter the category of Structure Type as “Employee/Worker.” The “Use worked Day Lines” must be enabled in order to see working days on an employee's payslip. Also, mention the employee’s “Country.”
Then we have the option of selecting a “Report” on employee pay structures such as Payslips, Payslips Double Holidays/13th Month, Terminations, Termination Holidays, and more. Additionally, you can choose the schedule of the wage payment in the “Scheduled Pay” area, including Weekly, Annually, Monthly, and more. After that, depending on the payment system, we can select the appropriate “Salary Journal.”
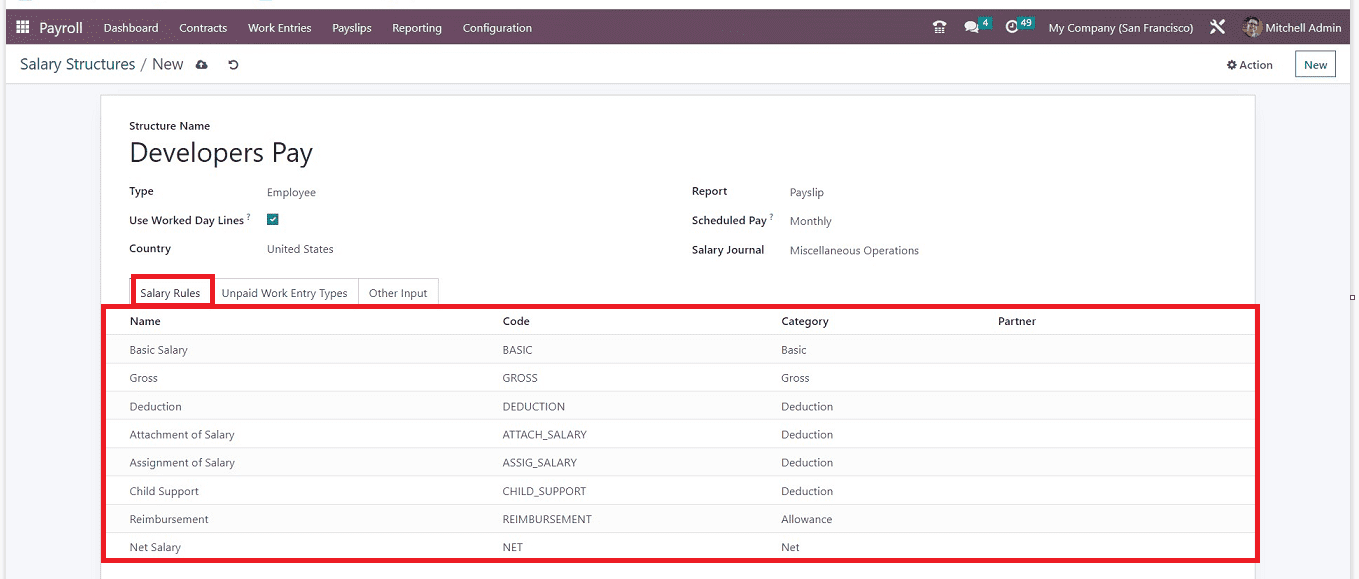
This configuration form contains three form tab sections such as “Salary Rules,” “Unpaid Work Entry Types,” and “Other Input.” Now, we can just discuss them in detail.
Salary Rules Tab Section
It is possible to implement particular employee wage structure rules and regulations. To accomplish this, you can choose an option from the “Salary Rules” tab and provide the requirements for your employee wage structure.
Unpaid Work Entry Types Tab Section
In this tab section, we can set the rules or edit the details of unpaid work entry types by pressing the “Add a Line” option illustrated in the screenshot below.
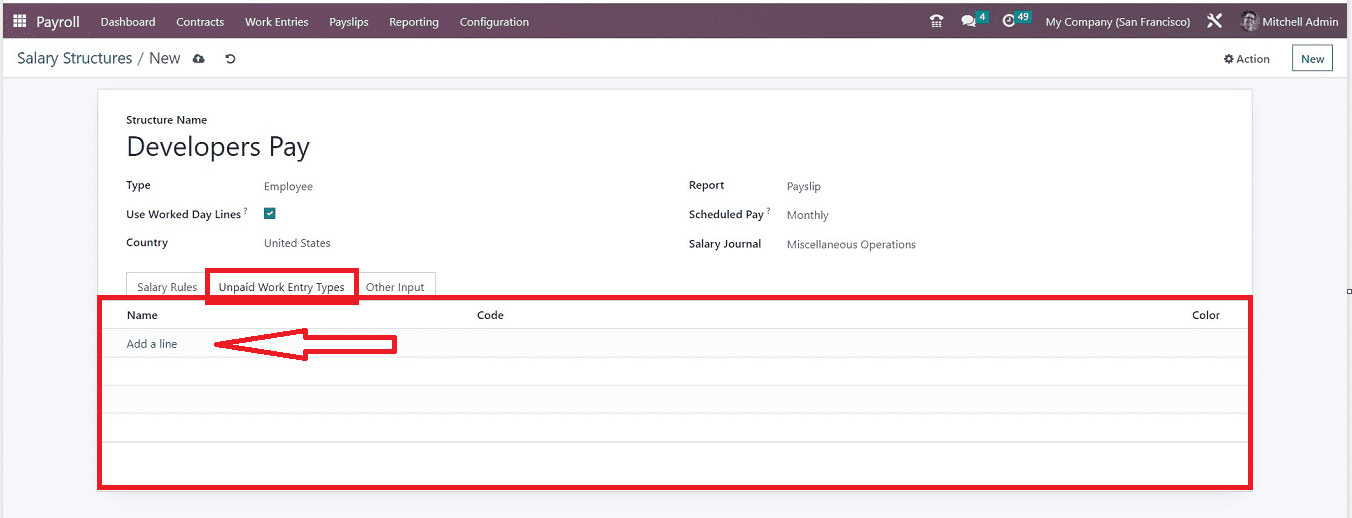
When you select the "Add a Line" option, a pop-up box containing a list of possible entries for unpaid work entries will appear, as shown below.
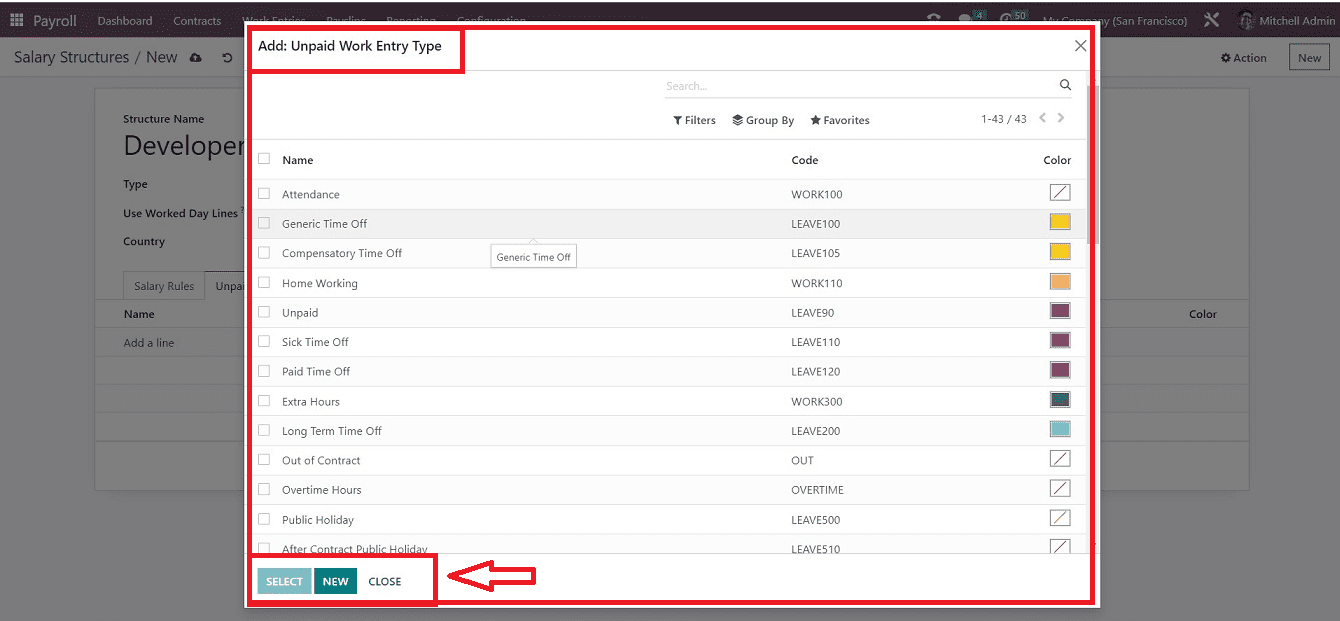
Just select the appropriate unpaid work entry from the list and click the “SELECT” button, or you can create a new one without leaving the window using the “NEW” button. Our new entry will be added to the unpaid work entry type tab section, as depicted below.
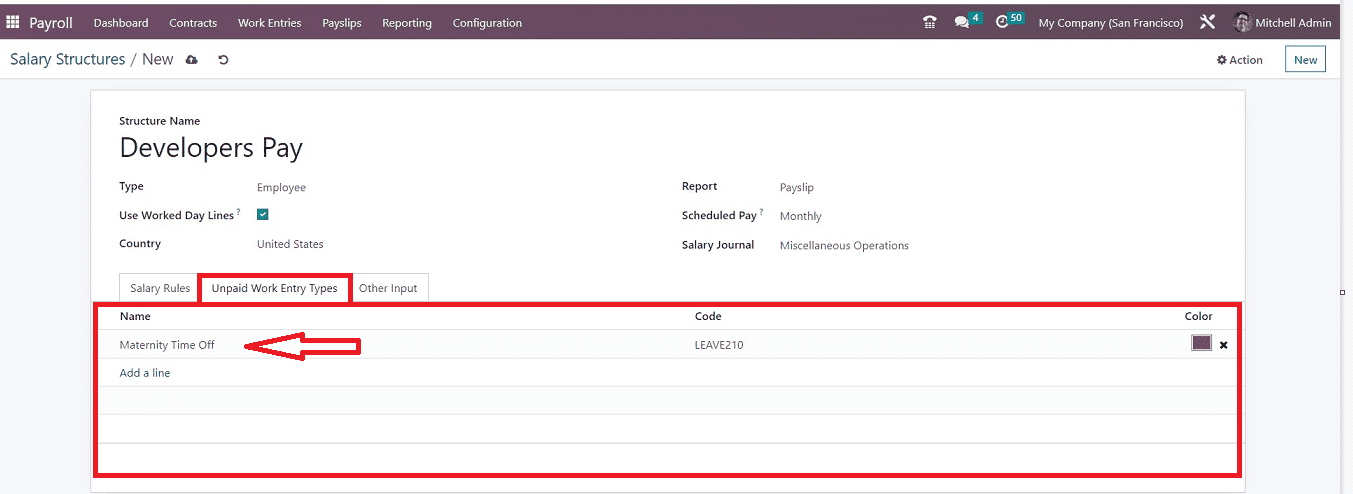
Odoo will produce a code and a color for the specific work entry when you pick the unpaid work entry type, which can be found in the "Code" & “Color” sections. Through modifications, you can make them more customized.
Other Input Tab Section
You can add any other special conditions or rules regarding the salary structure in the “Other Input” tab of the Salary Structure configuration form.
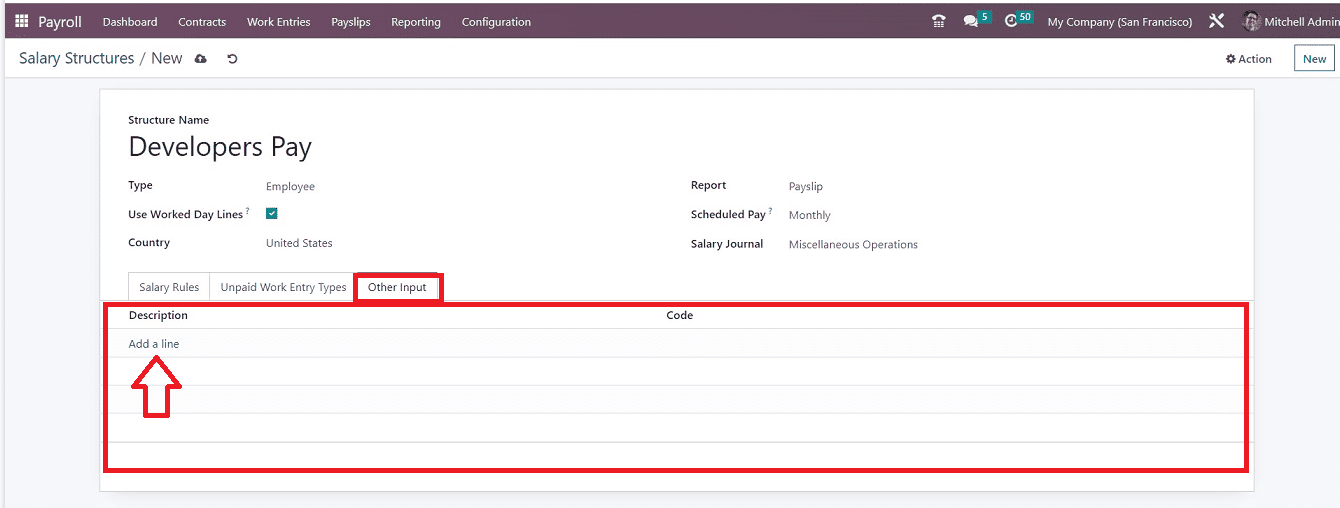
We can pick an additional rule to configure the new compensation structure by clicking on the "Add a Line" option, and a new popup window will appear. Then, choose any input line from the list and click the "SELECT" button to include them in your updated wage structure rules.
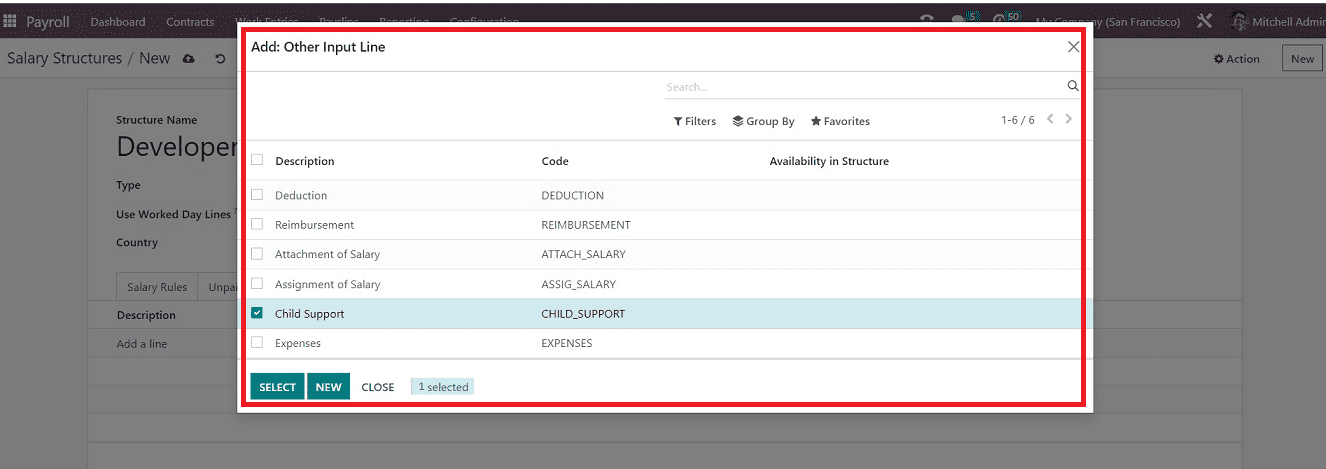
You can add multiple input lines by following the same procedure. After adding the required data, save your details from the “Salary Structures” configuration form.
Now you can see the newly created salary structure has been added to the “Salary structures” dashboard, as illustrated below, so that you can edit and update it from the dashboard itself.

Salary Rules
The success of an organization depends on a strong wage structure. Making regulations, setting fair compensation, and making plans in advance are all essential components of effective management. These regulations make it possible to determine wage amounts for numerous groups. Selecting the “Rules” option from the “Configuration” menu will give you access to the “Salary Rules” window.

The “Salary Rules” page contains the dashboard of all the rules organized in the order of the Rule “Name,” “Code,” “Category,” and “Partner.” The salary rule data can also be filtered or sorted using the available filter options. By using the "NEW" button, Odoo has made it simple to establish a new salary rule. The configuration form displayed in the screenshot below can be used to create a new rule.
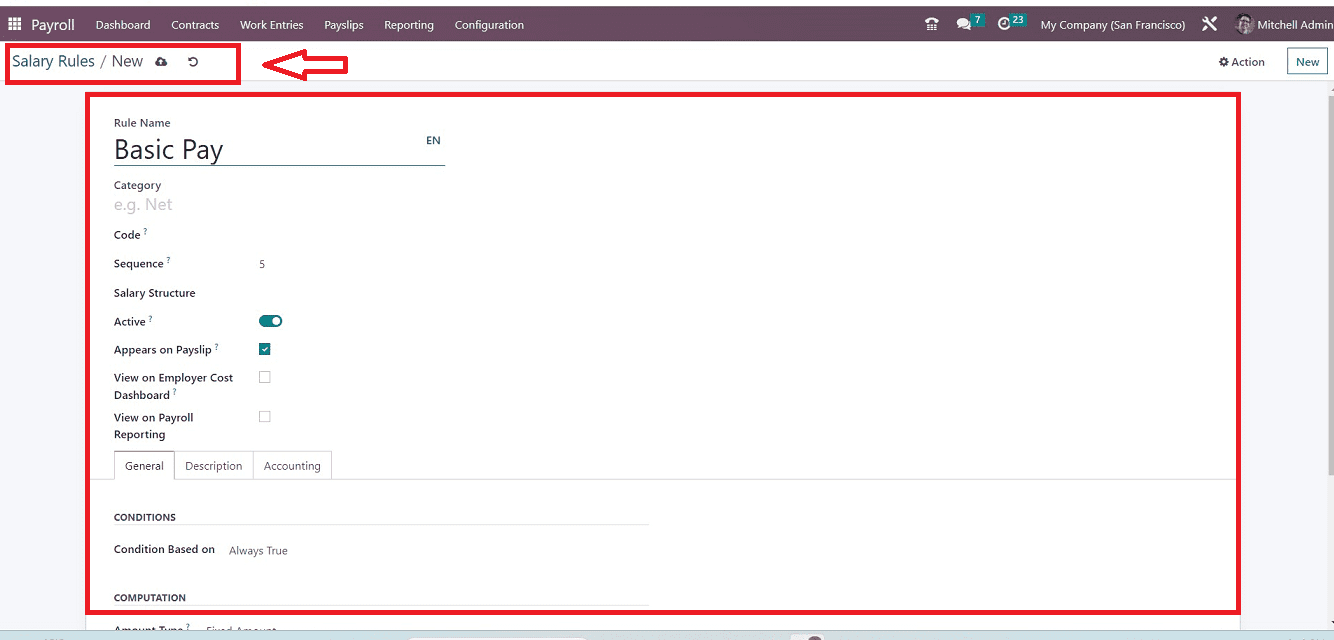
Add a “Rule Name” in the salary rules form., then select a “Category” depending on your new Rule Name. Users can give a “Code” to quickly identify the rule. Don't forget to include a serial number to facilitate sequence computation in the “Sequence” line. The “Salary Structure” line can be used to mention the salary type, such as Regular Pay, Worker's Pay, 13th Month End Of Year Bonus, etc. Additionally, you can activate the rule by turning the “Active” button.
We can observe the salary rule within a payslip by turning on the “Appears on Payslip” option. Displaying the employer cost figure on the dashboard can be done after enabling the “View on Employer Cost Dashboard” option. The salary rule goes into effect on payroll reporting by activating the "View on Payroll Reporting" box in the Salary Rules window. This form consists of three tab sections named “General,” “Description,” and “Accounting.”
General Tab
We can alter the “CONDITIONS,” “COMPUTATIONS,” and “COMPANY CONTRIBUTION” below the General tab.
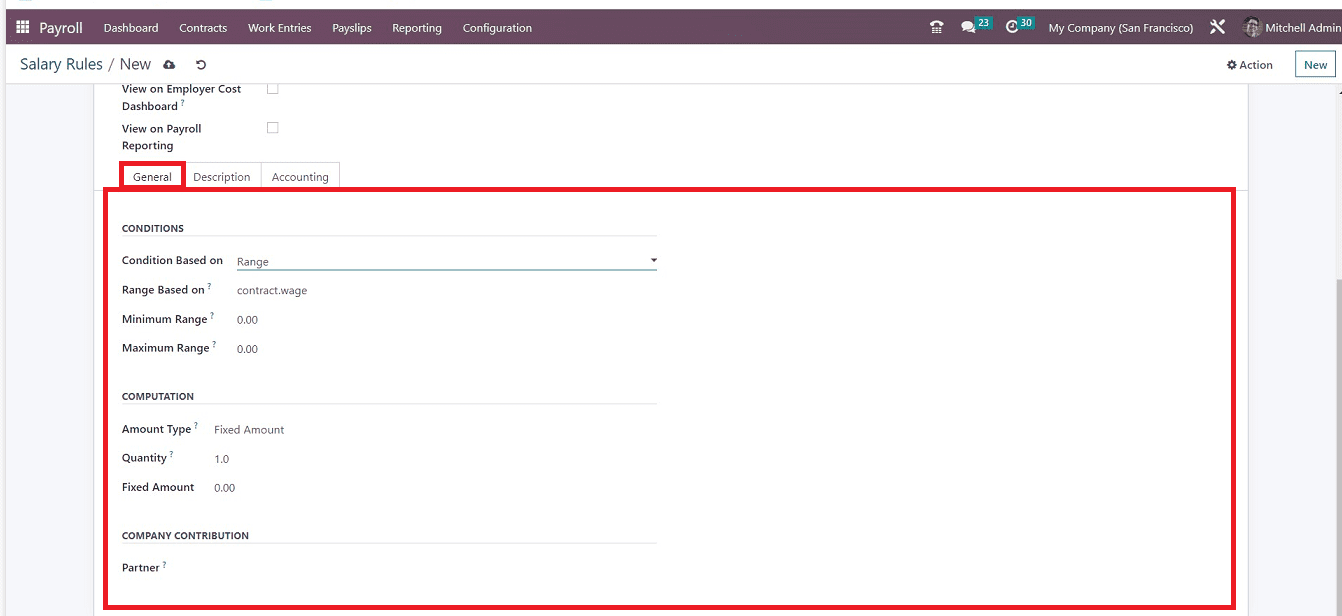
The "Condition based on" section allows us to specify three different options for the salary rule's condition: range, always true, and Python condition. By selecting the Always True option, it is simple to establish the correct pay rule for salary computation.
You must provide information on the Maximum Range, Range based on, and Minimum Range after selecting the Range option. Field values that are automatically assigned are computed using the Range Based option.
You must provide information on the Maximum Range, Range based on, and Minimum Range after selecting the Range option. Field values that are automatically assigned are computed using the Range Based option.
You can select an appropriate “Amount Type” that includes Fixed Amount, Python Code, or Percentage. Additionally, users can compute the salary rule using Python code. Fill up the Amount Type column with Python code to do it. You can then afterward specify the Python code according to the Python attributes.
Set your “Quantity” and “Fixed amount” in the respective fields.
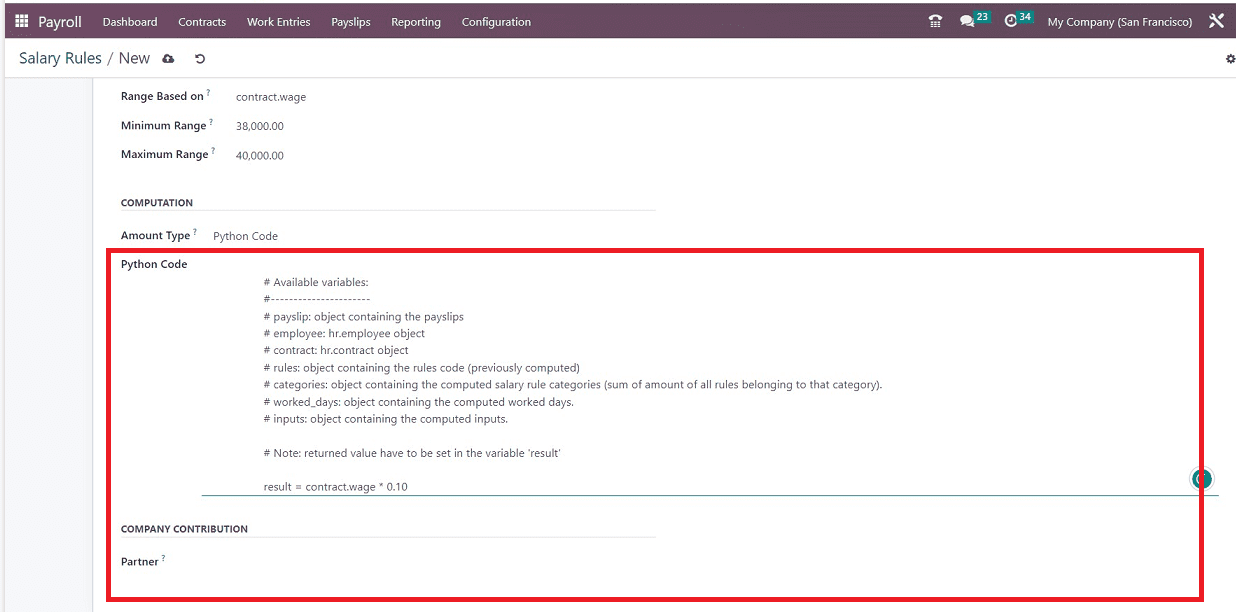
The “Partner” option in the “COMPANY CONTRIBUTION” section helps you to specify the third party participating in employee payments.
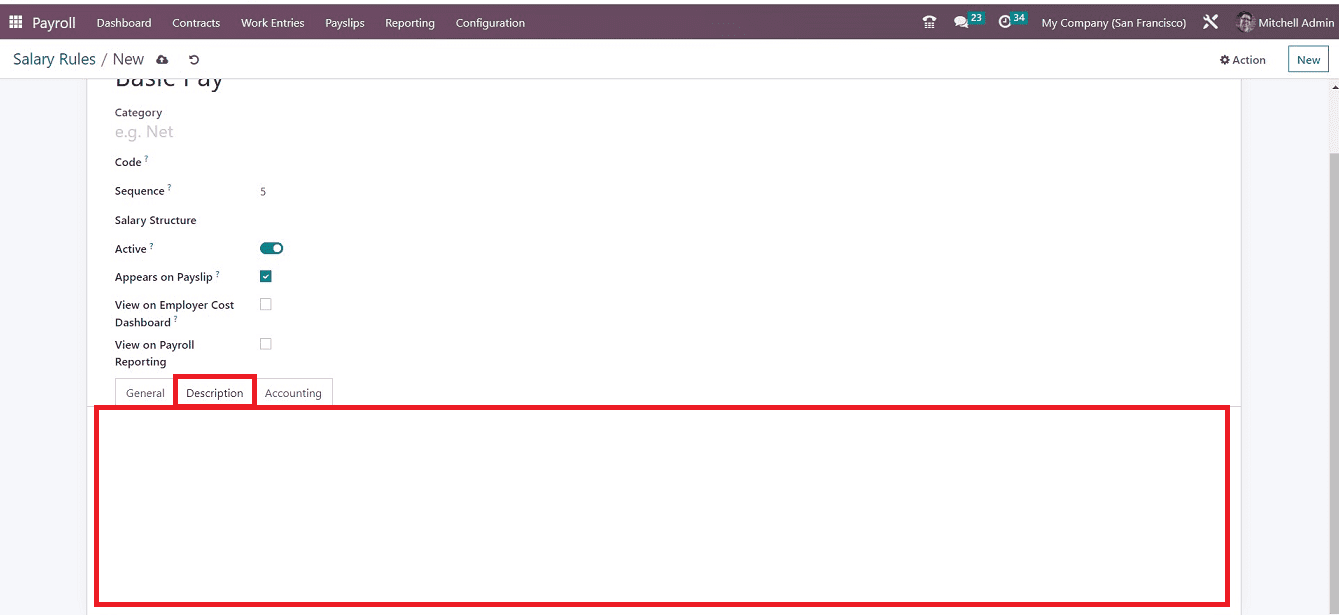
Description tab
You can edit any notes or descriptions regarding the salary rule in the text area provided in the “Description” tab.
Accounting Tab
The “Accounting” tab section can be used for configuring the details for the “Debit Account,” “Credit Account,” and “Analytic Account.” The Net Salary Rule Value will be eliminated after the "Not Computed in net accountability" option has been enabled in the Accounting section.
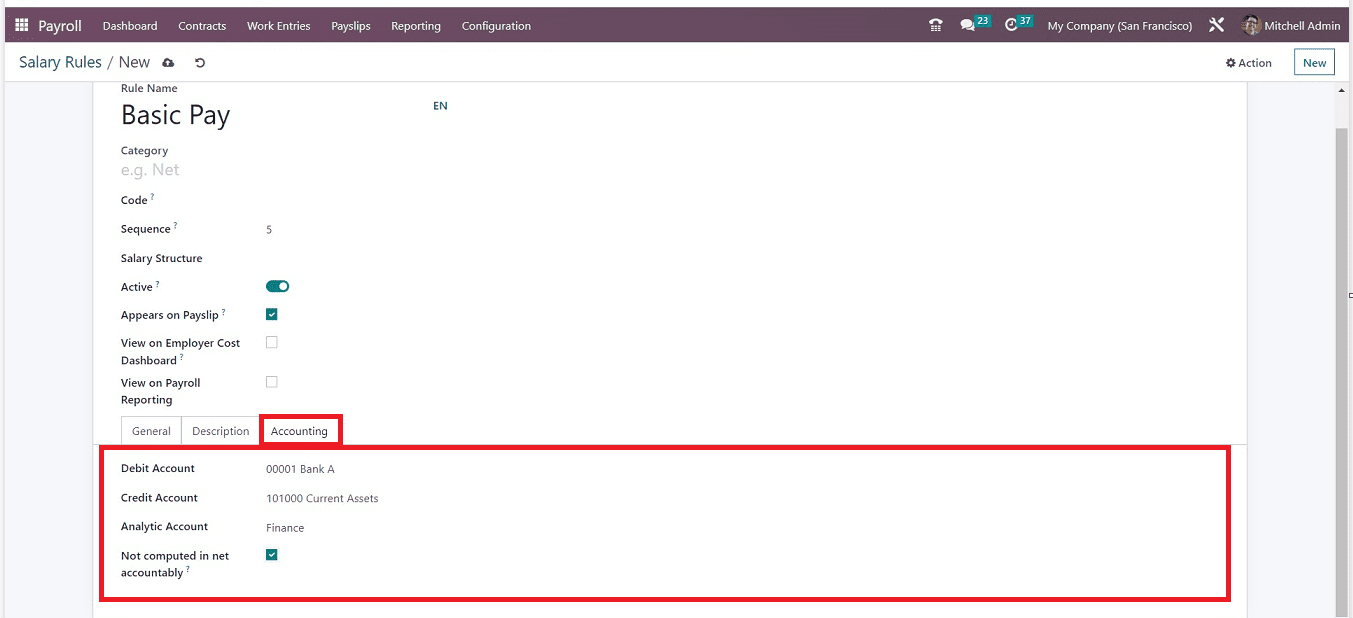
You can choose the appropriate account details from the preconfigured bank accounts available in the dropdown section of respective fields. After providing the details, save your Salary Rules in the Odoo payroll database. Now your new “Salary Rules” are ready to activate in the employee payroll procedures.
The steps for generating a new salary structure and rules in the Odoo 16 Payroll Module are explained in this blog session. Users can easily and transparently manage their employee pay structures using these functions.