The PLM Module provides strong versioning capabilities for products and Bills of Materials (BOMs) in Odoo 16. With this capability, firms can guarantee precise documentation and visibility by successfully managing modifications and iterations throughout a product's lifespan. The PLM Module's simplified version control enables businesses to keep clear insight into product revisions, foster collaboration, and better product management.
Let's check how the versioning process happens with the help of the PLM Module.
Inside the PLM module, versioning can be done by making ECO Changes. While opening the PLM Module inside the Configuration tab, ECO Stages, ECO Types, and ECO Tags can be configured.
Refer to the following blog to configure ECO types, ECO stages, and ECO requests.
Now let's check how to change the version of a product and the Bill of Material.
Changing the version of the Product
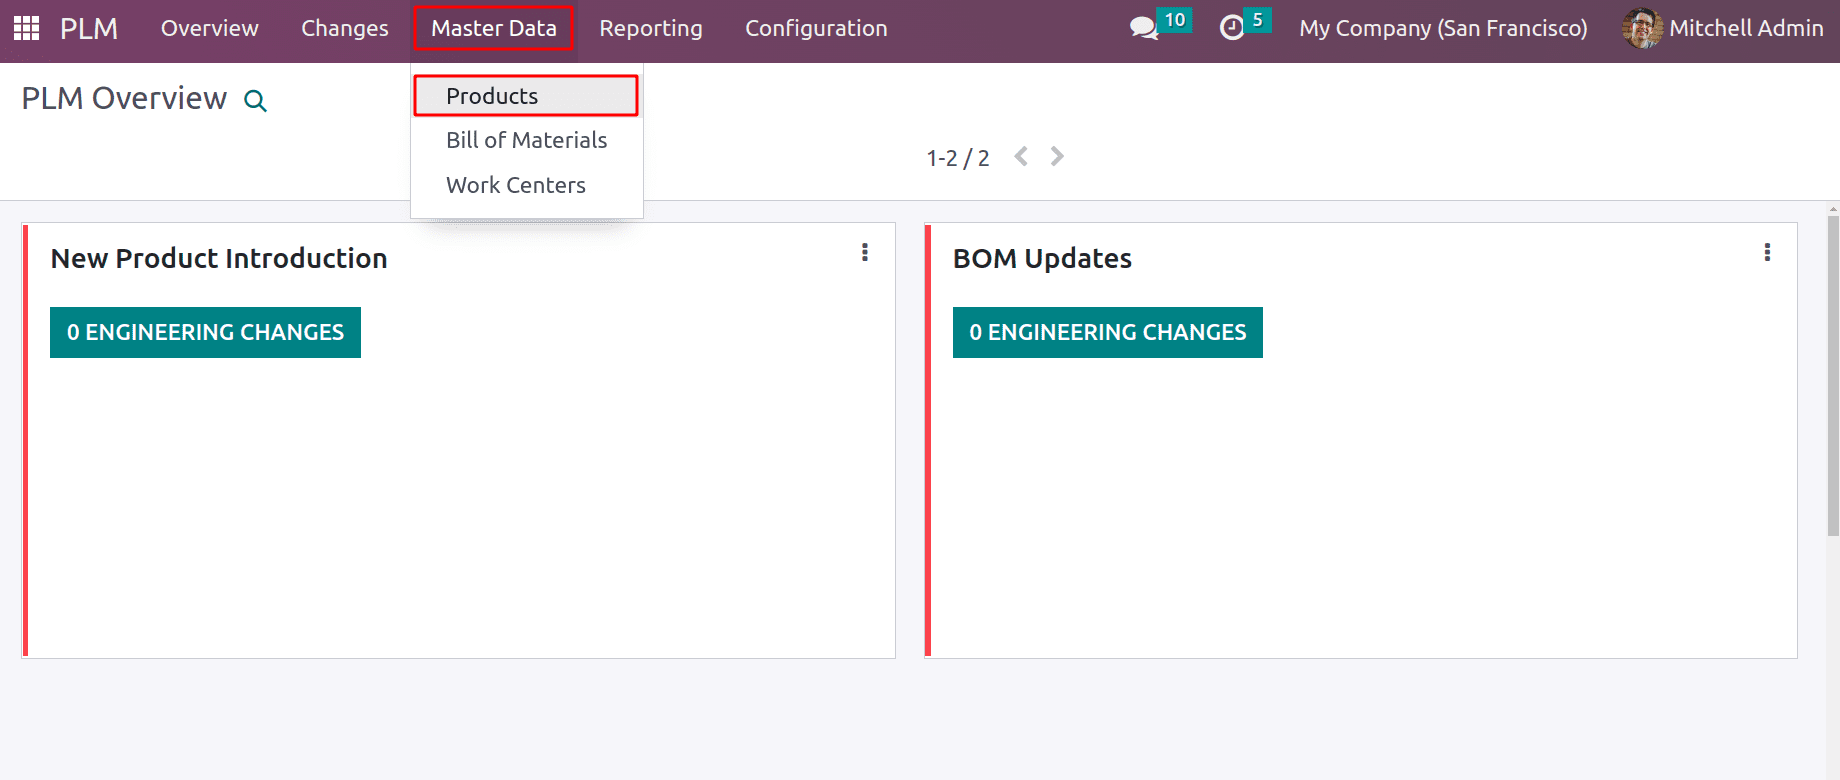
Let's make a new product to deal with that. Go to the Master Data tab and select Products from the dropdown list that displays.
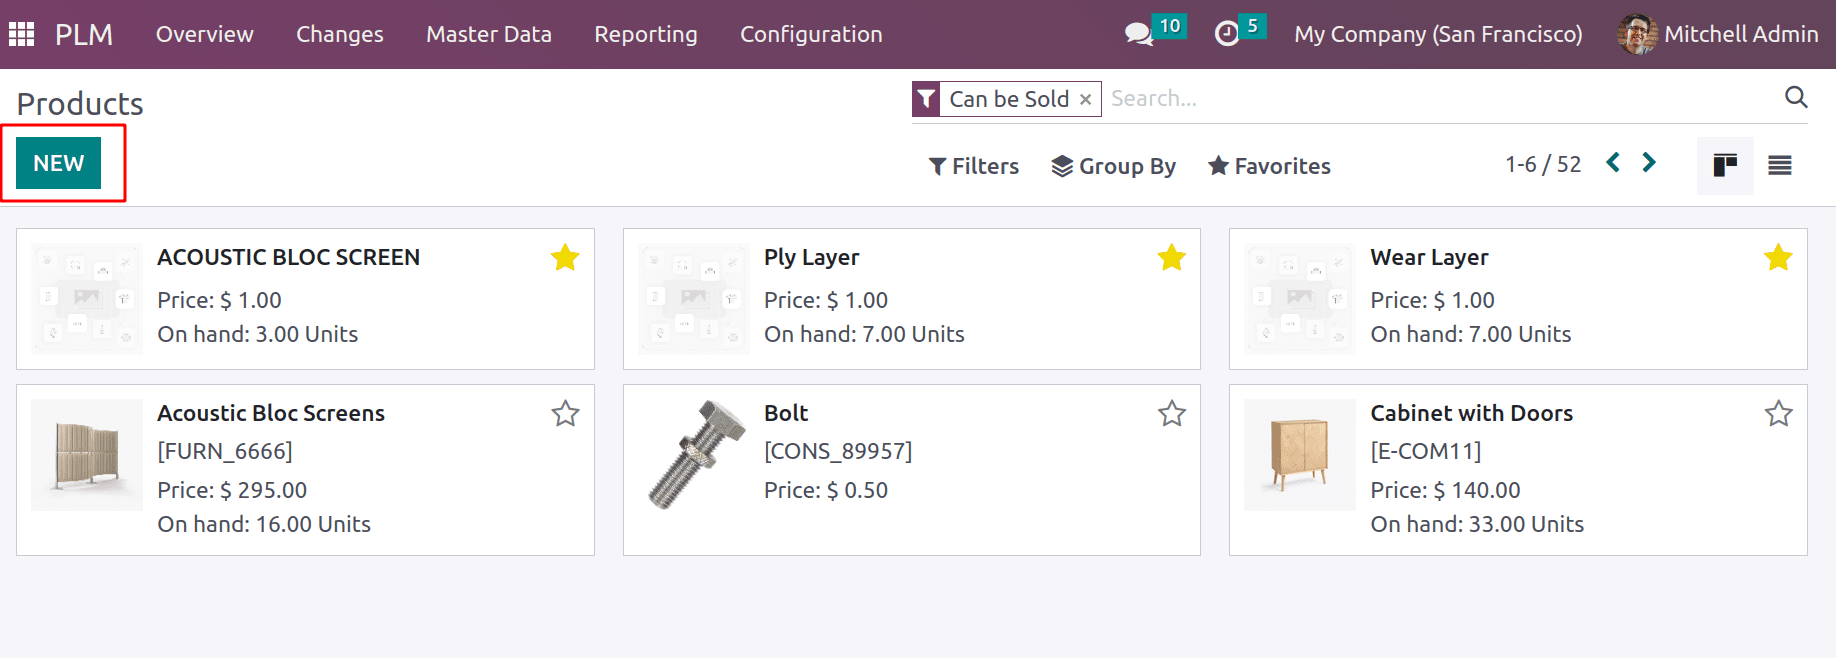
There will be a list of the company's previously configured products. Click the NEW button to start creating a new product.
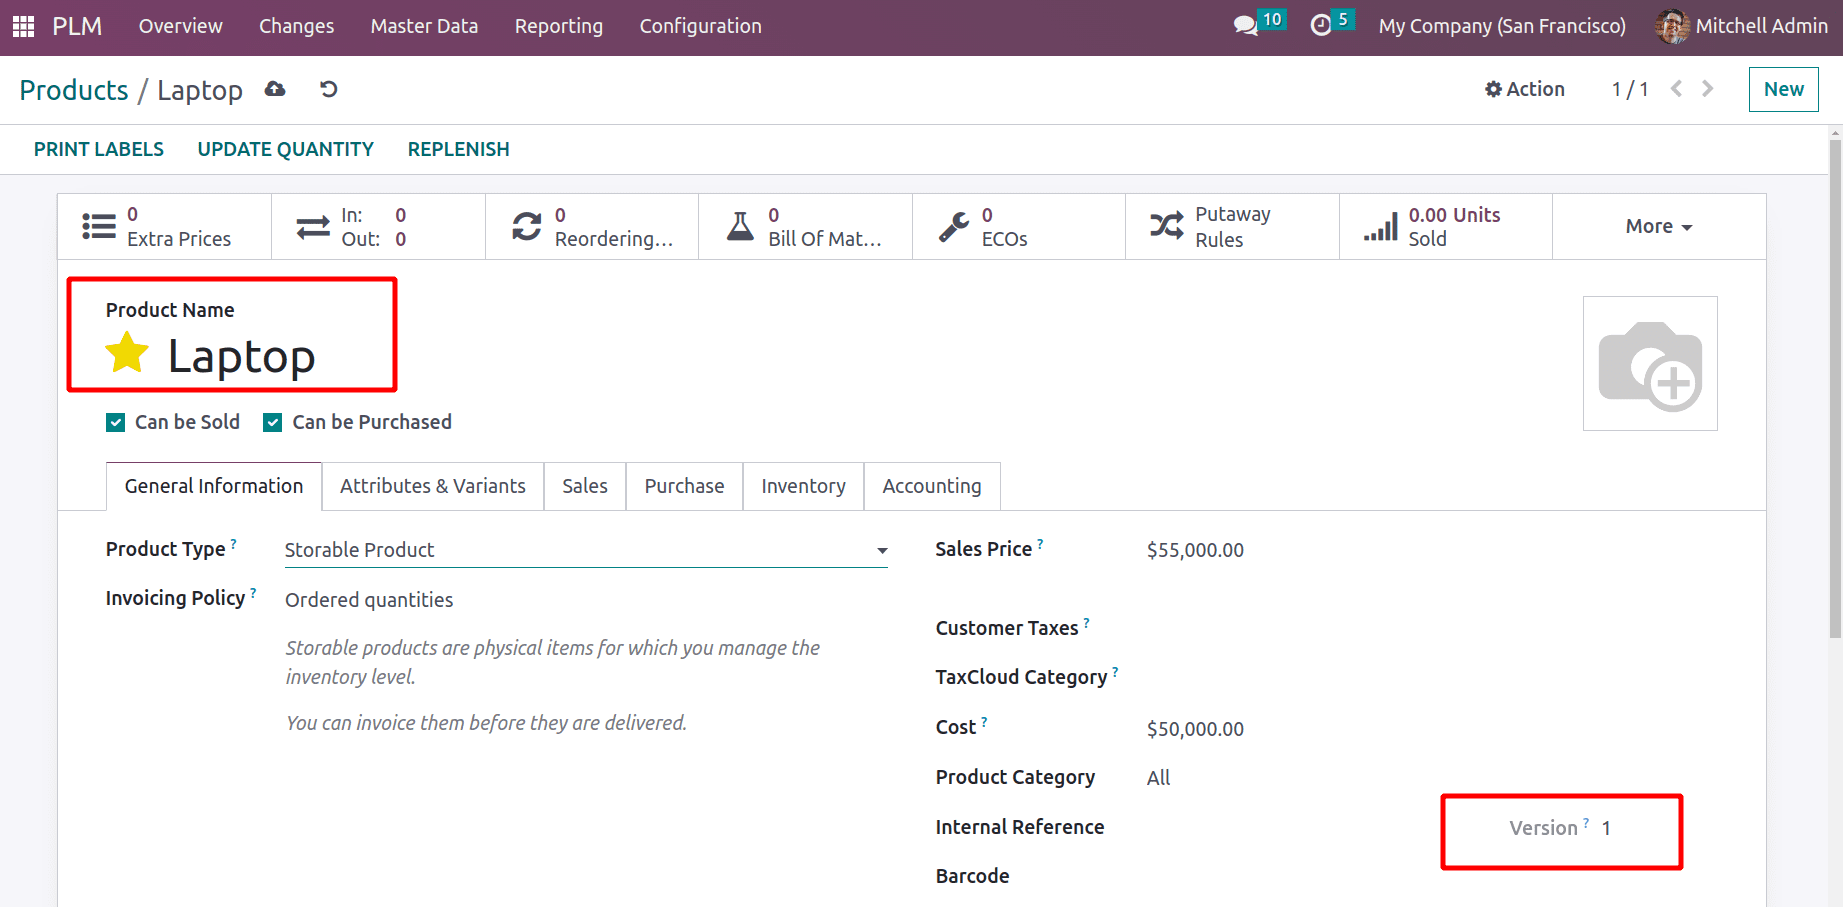
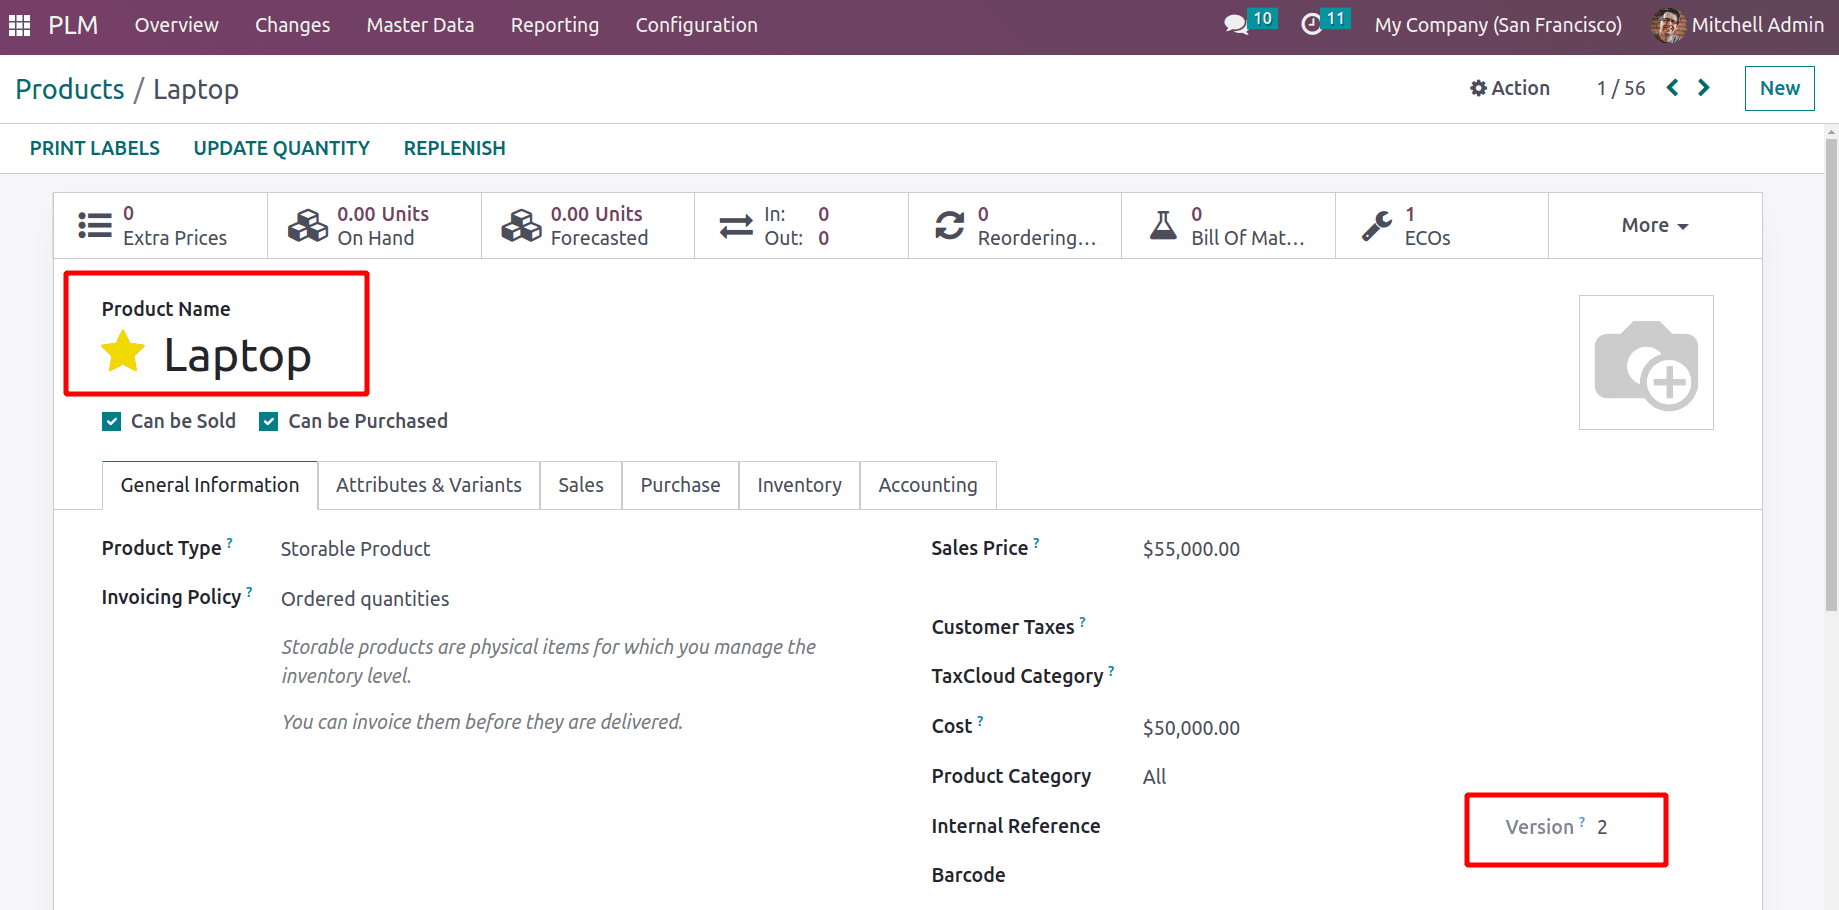
In this case, the product is a storable one with the name Laptop. When checking the product's version, Version 1 is what is currently displayed.
Let's investigate how the PLM Module handled version changes for products now. Click the Changes tab to do that. Above displays the ECO Types' predefined phases. As previously indicated, the Configuration tab allows for configuring new Types and Stages for this purpose. Click the NEW button to create a new eco change using these steps.
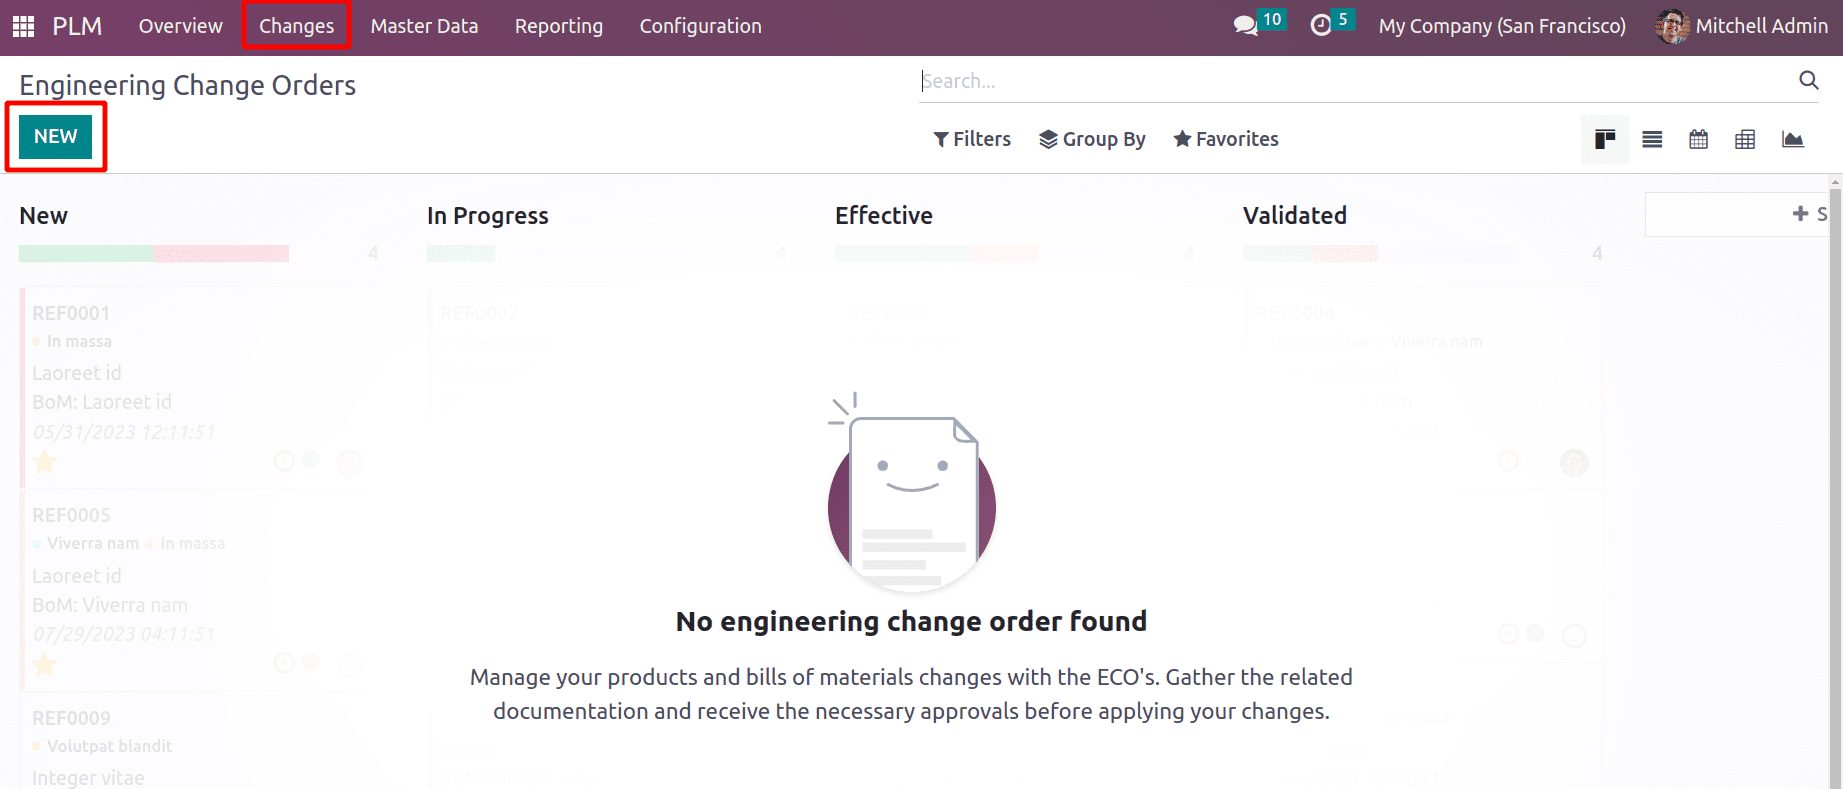
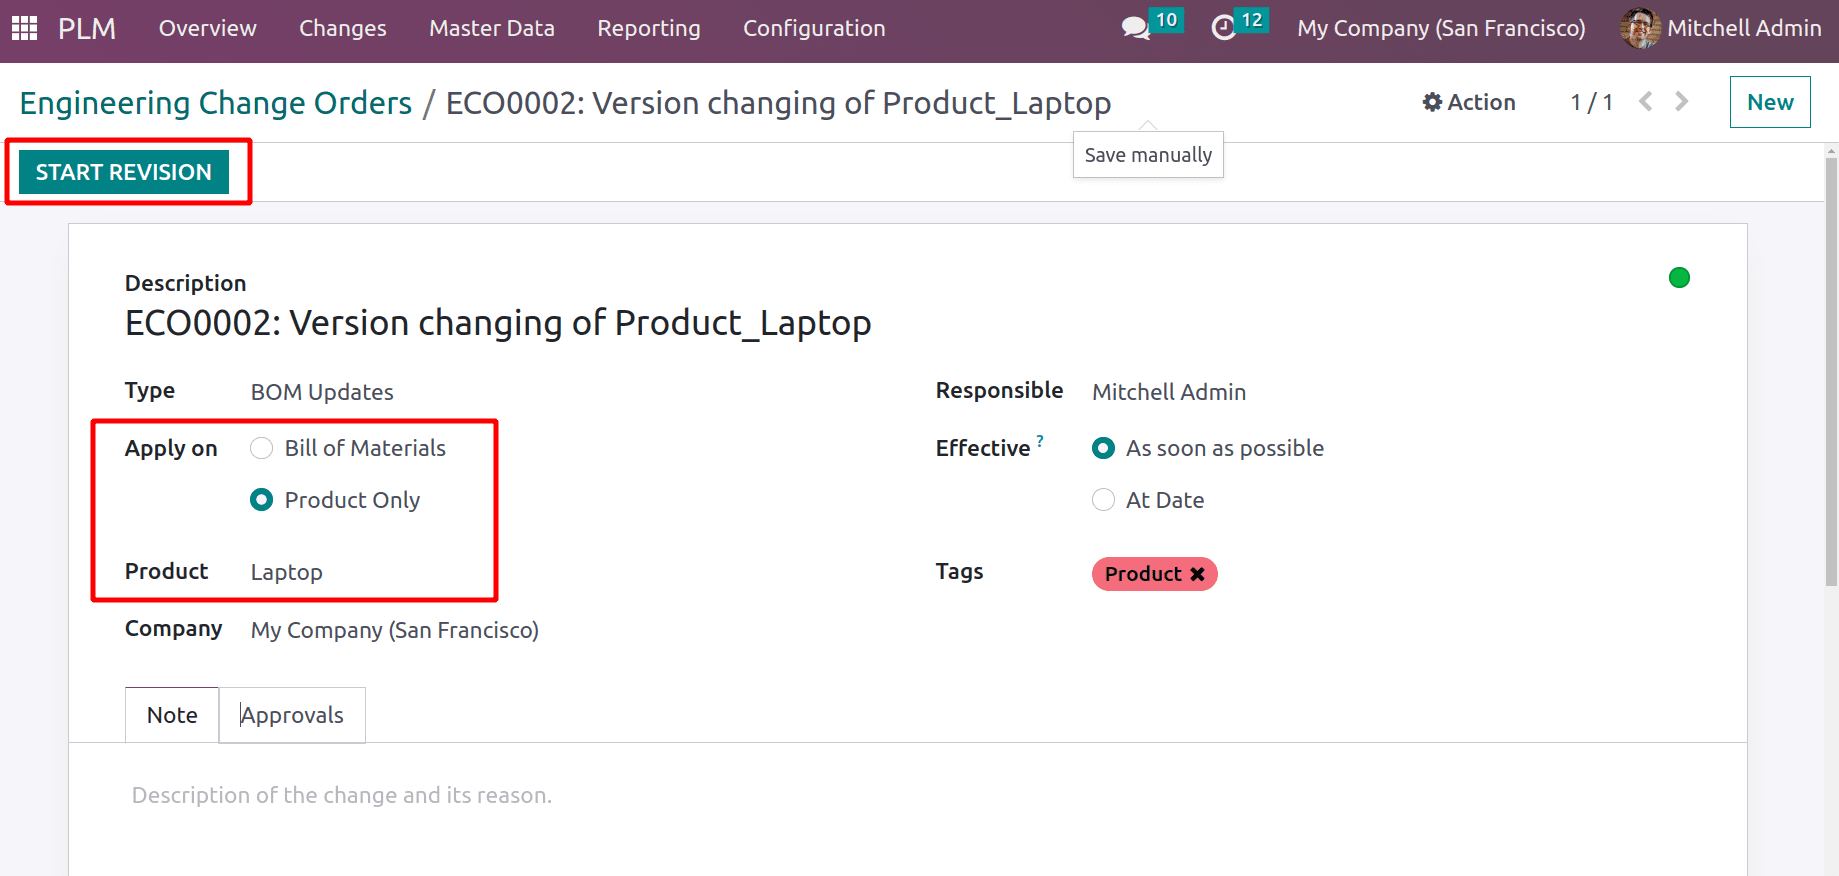
The opening of a new window. There, create a process description, and select the ECO Type. Secondly, there are two choices, so it is possible to apply to both the Product and the BoM. Choose ‘Product Only’ as it is a product-specific application. Then pick the newly formed product, Laptop, in the Product field. Mention the Company and the Responsible Person. When the Eco changes take effect,there are 2 options one is As soon as possible and on a specific date. Here As soon as possible, the option is picked. And allocated the tag "Product." Once the necessary information has been added, select Start Revision to begin the procedure.
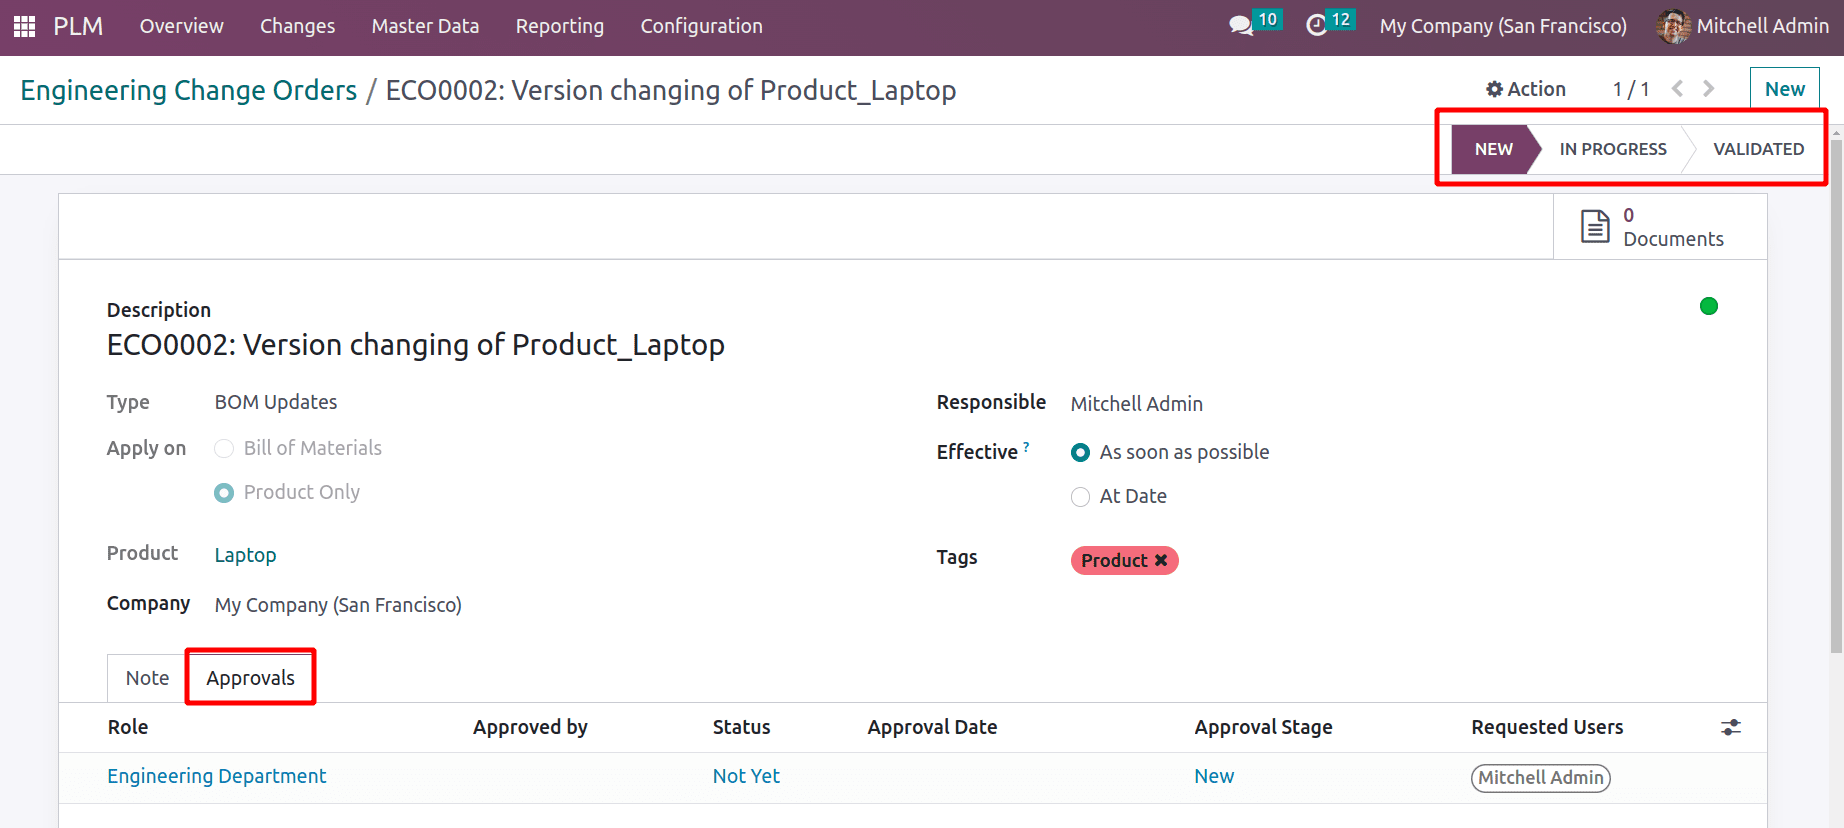
Here, there are three pre-configured stages. This is presently in the NEW stage. In this NEW stage, we require user Mitchell Admin's consent. The approvals are displayed in the Approval tab and are configured in the ECO Stages.
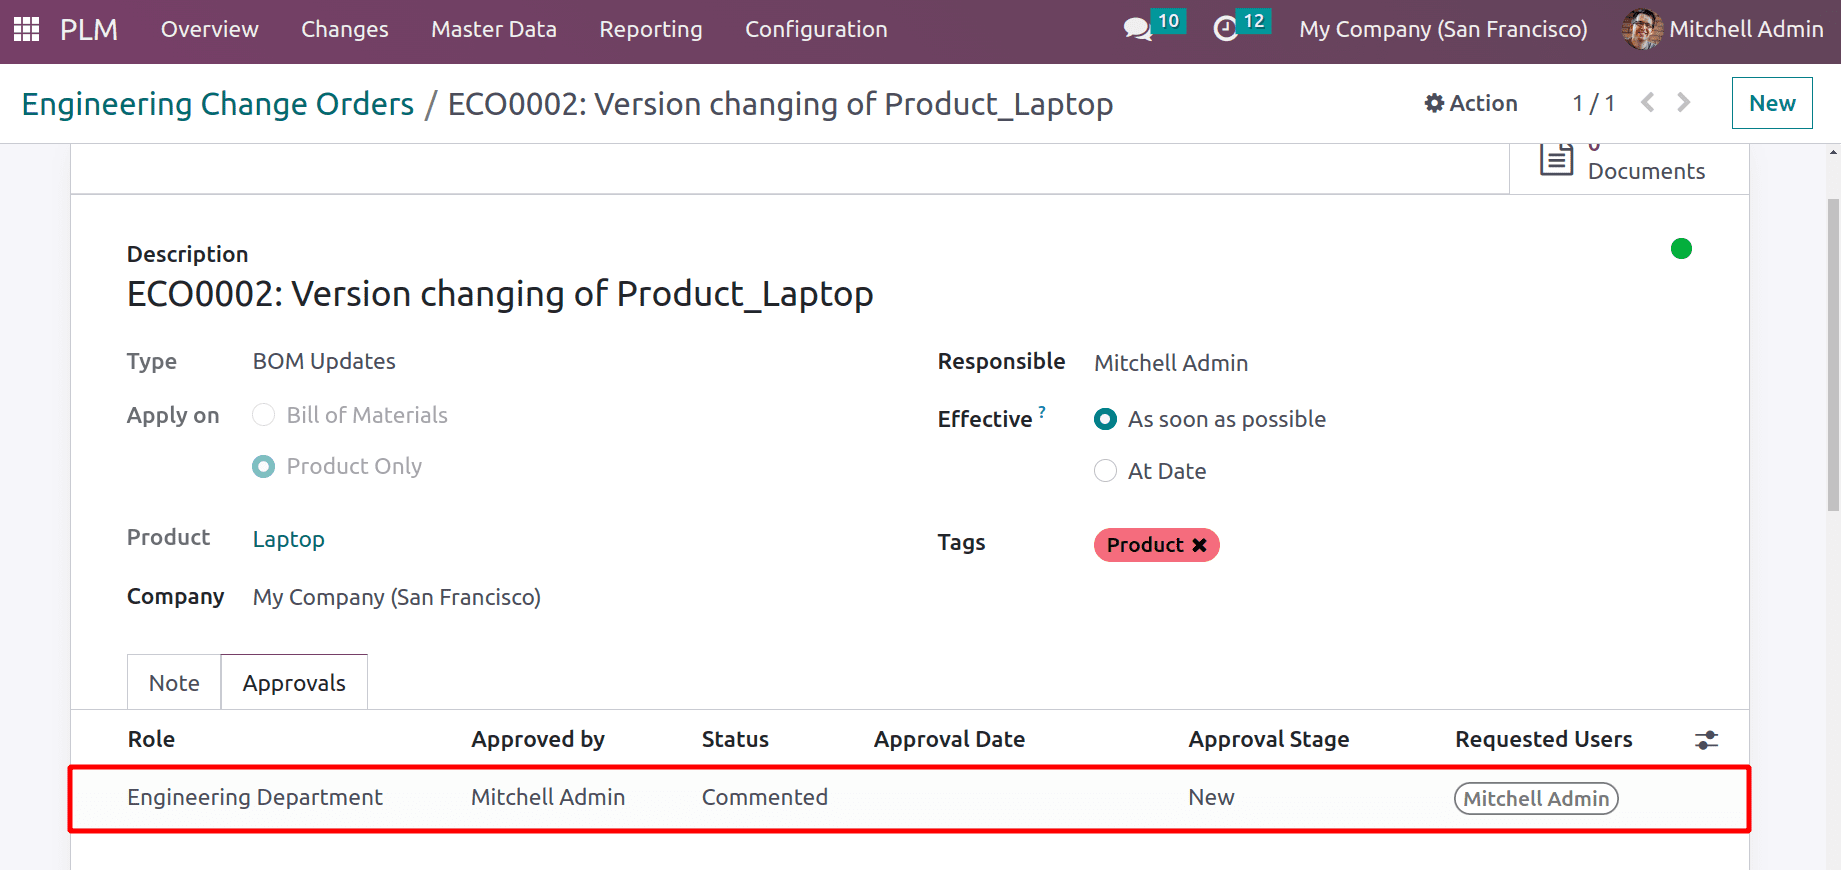
The approval type is a comment. By including a Log Note, the user may add a comment.

The approval status will automatically change when a person comments. Then go to a different ECO stage.
The second stage is In Progress. In that stage, the change order needs approval, and changes to the product will be added and applied in this stage.
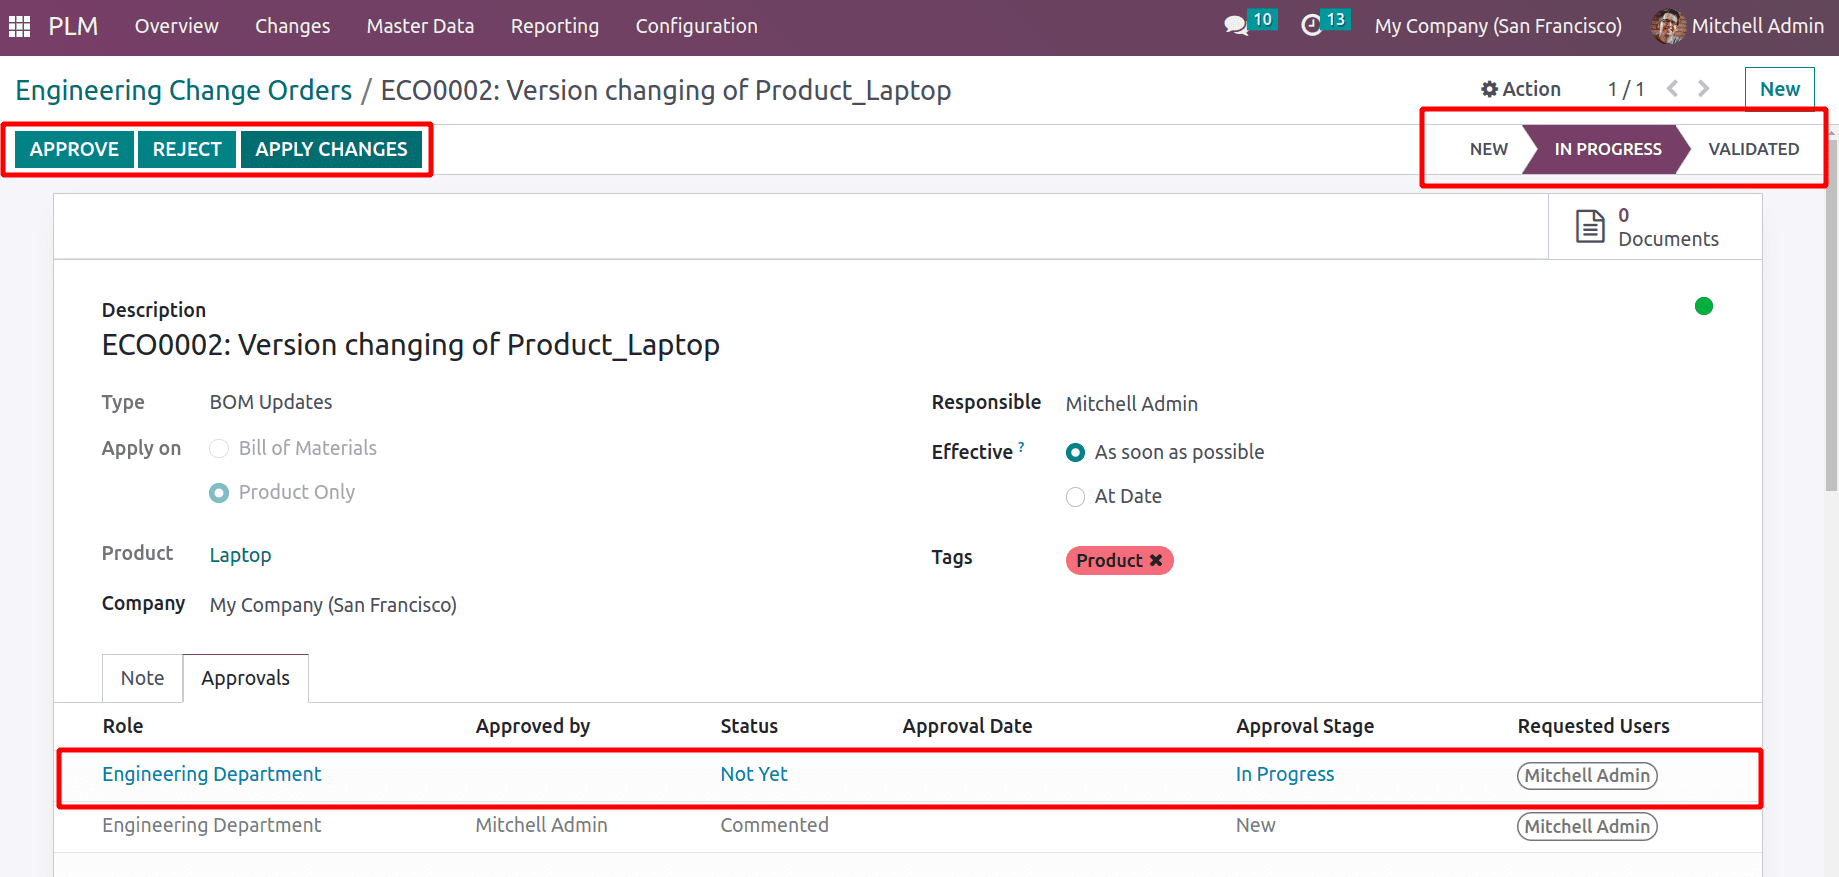
First, let's make changes to the product. For that, click on Documents, which shows as a smart tab there. Currently, no document is there. Let's add some documents that open that smart tab.
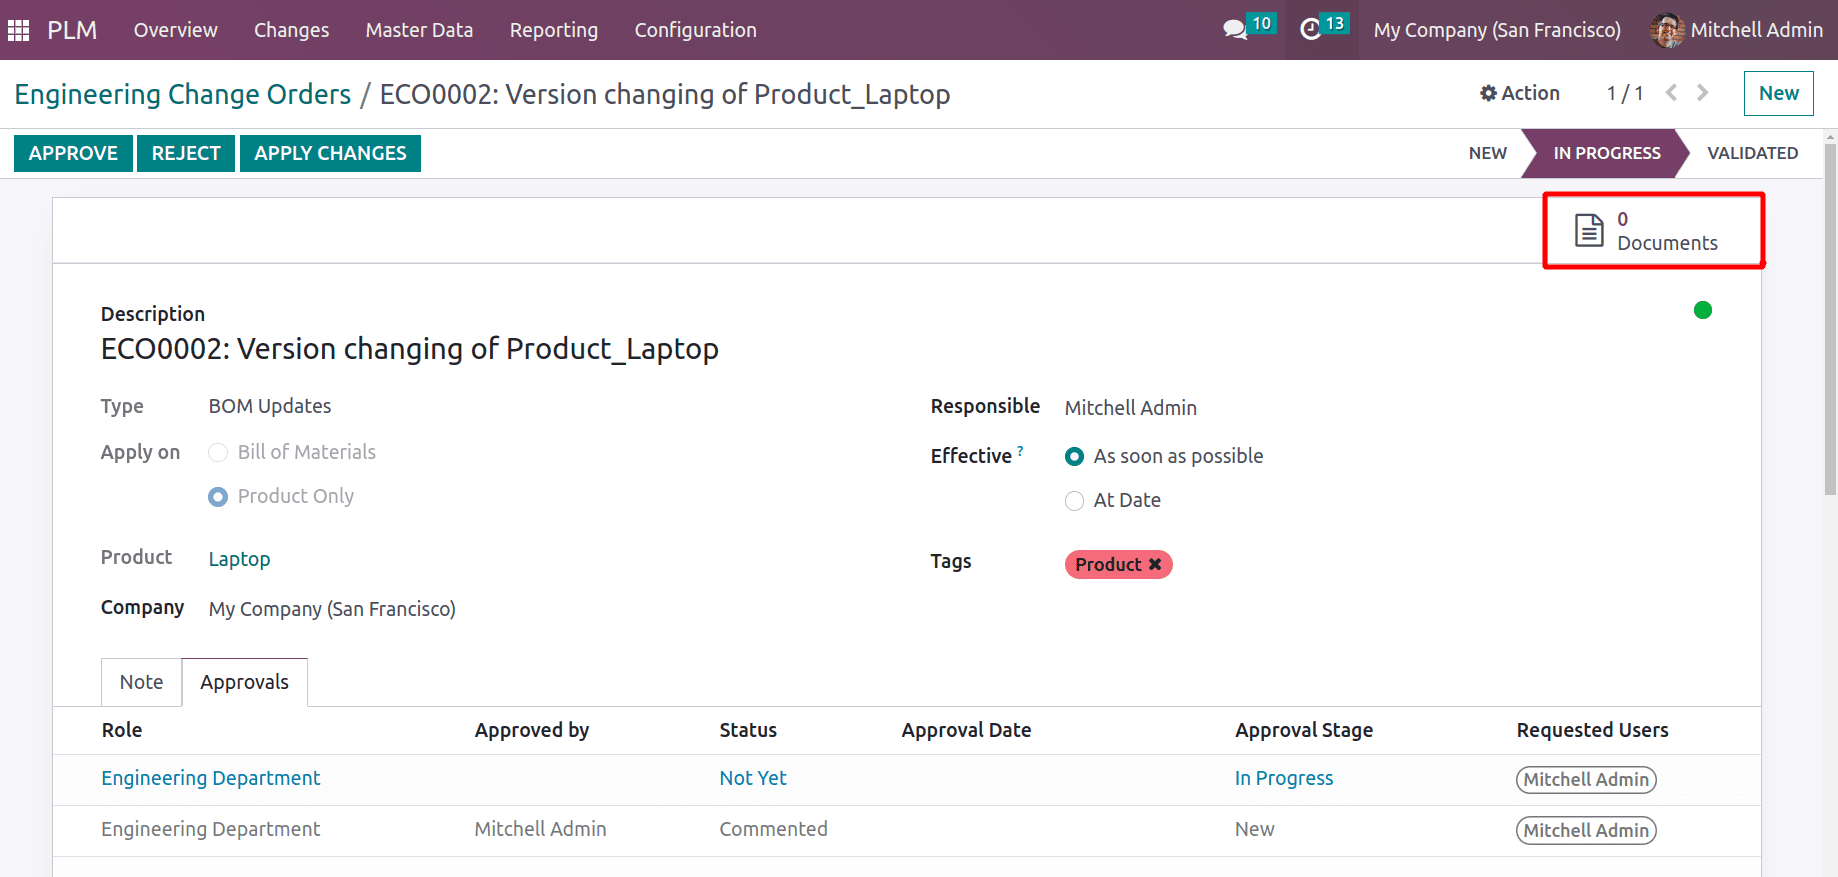
There is a UPLOAD button. Click on that and upload the corresponding document for that product.
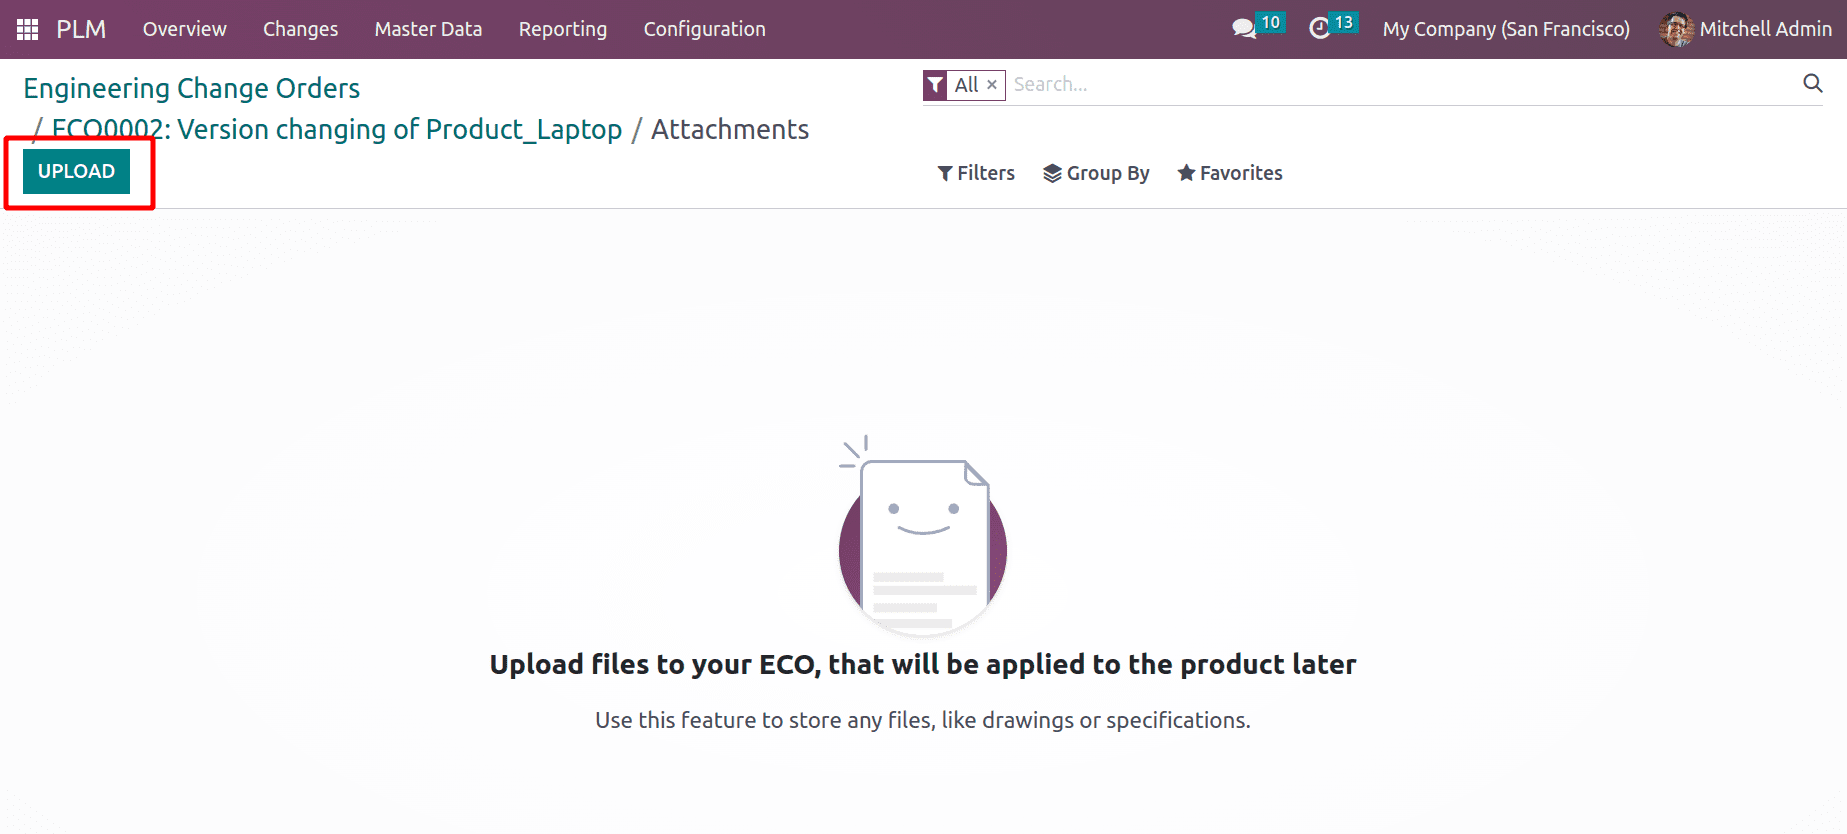
Using the Upload button, users can add any document about the product. Here added a new document, which is seen as shown in the below screenshot.

When checking the ECO Change order, a smart tab named Document will appear, and here there is one document. Then click on the APPLY CHANGES button.
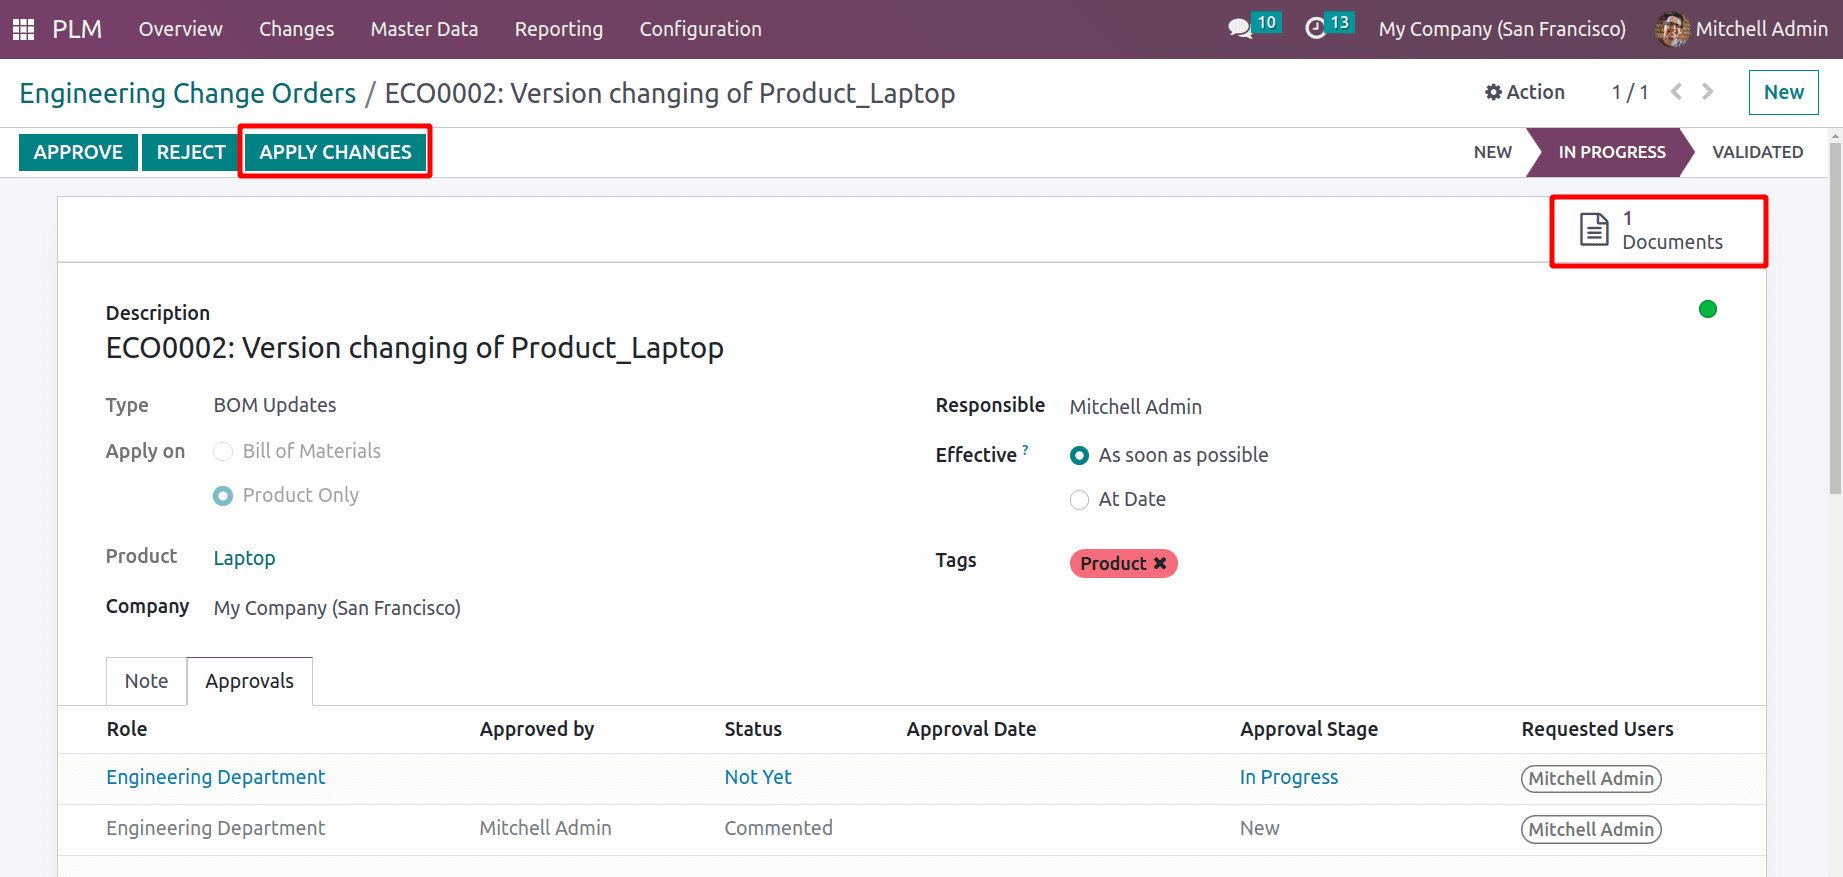
The user then has the option of accepting or rejecting the changes. Click the Approve button to accept the modification.
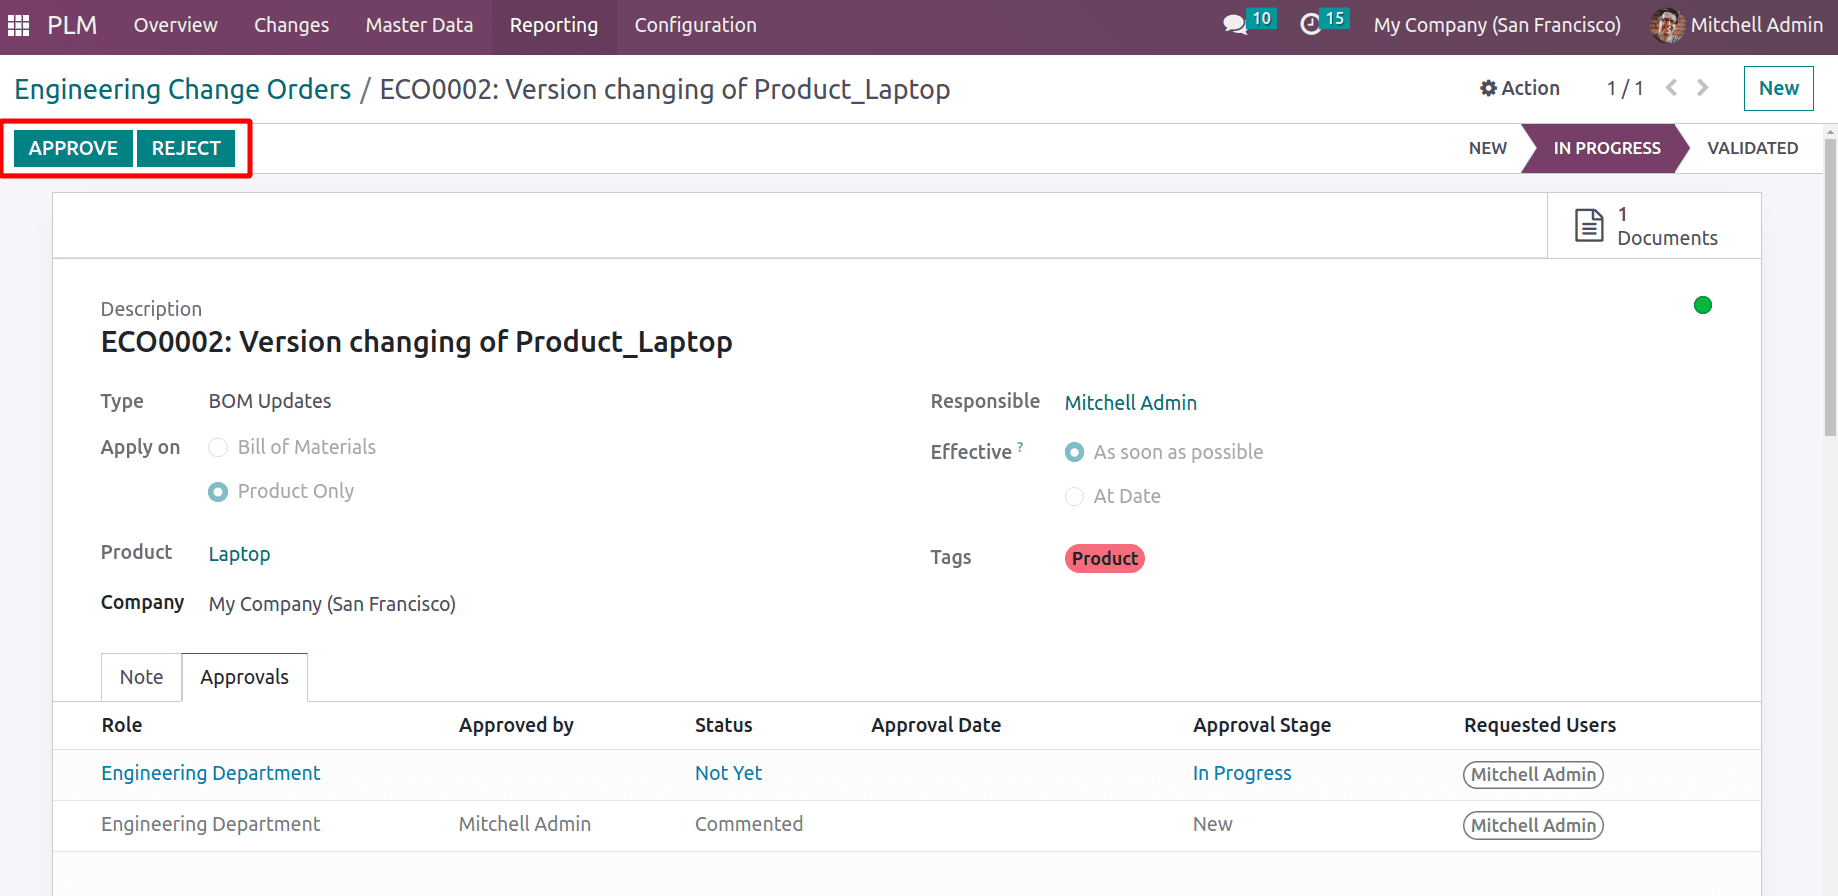
Once approved, the status is instantly updated under the Approval tab. Proceed to the final stage to complete the engineering change order.
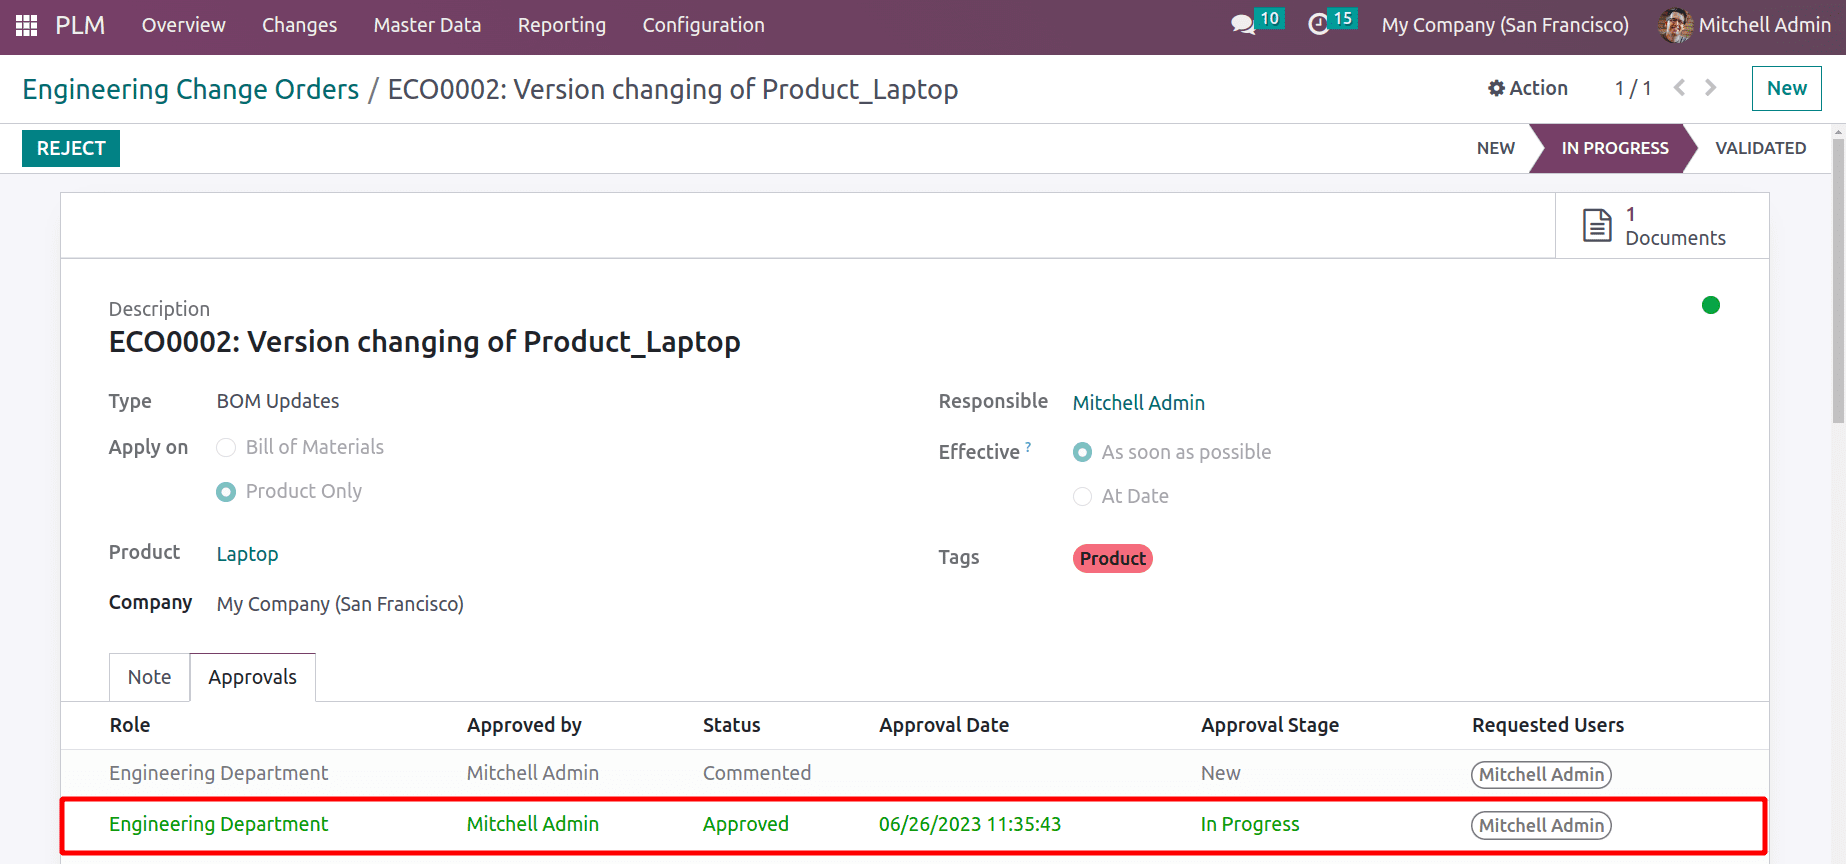
The final step, known as validation, also requires user approval to complete the procedure successfully. Select "Approve" from the menu.
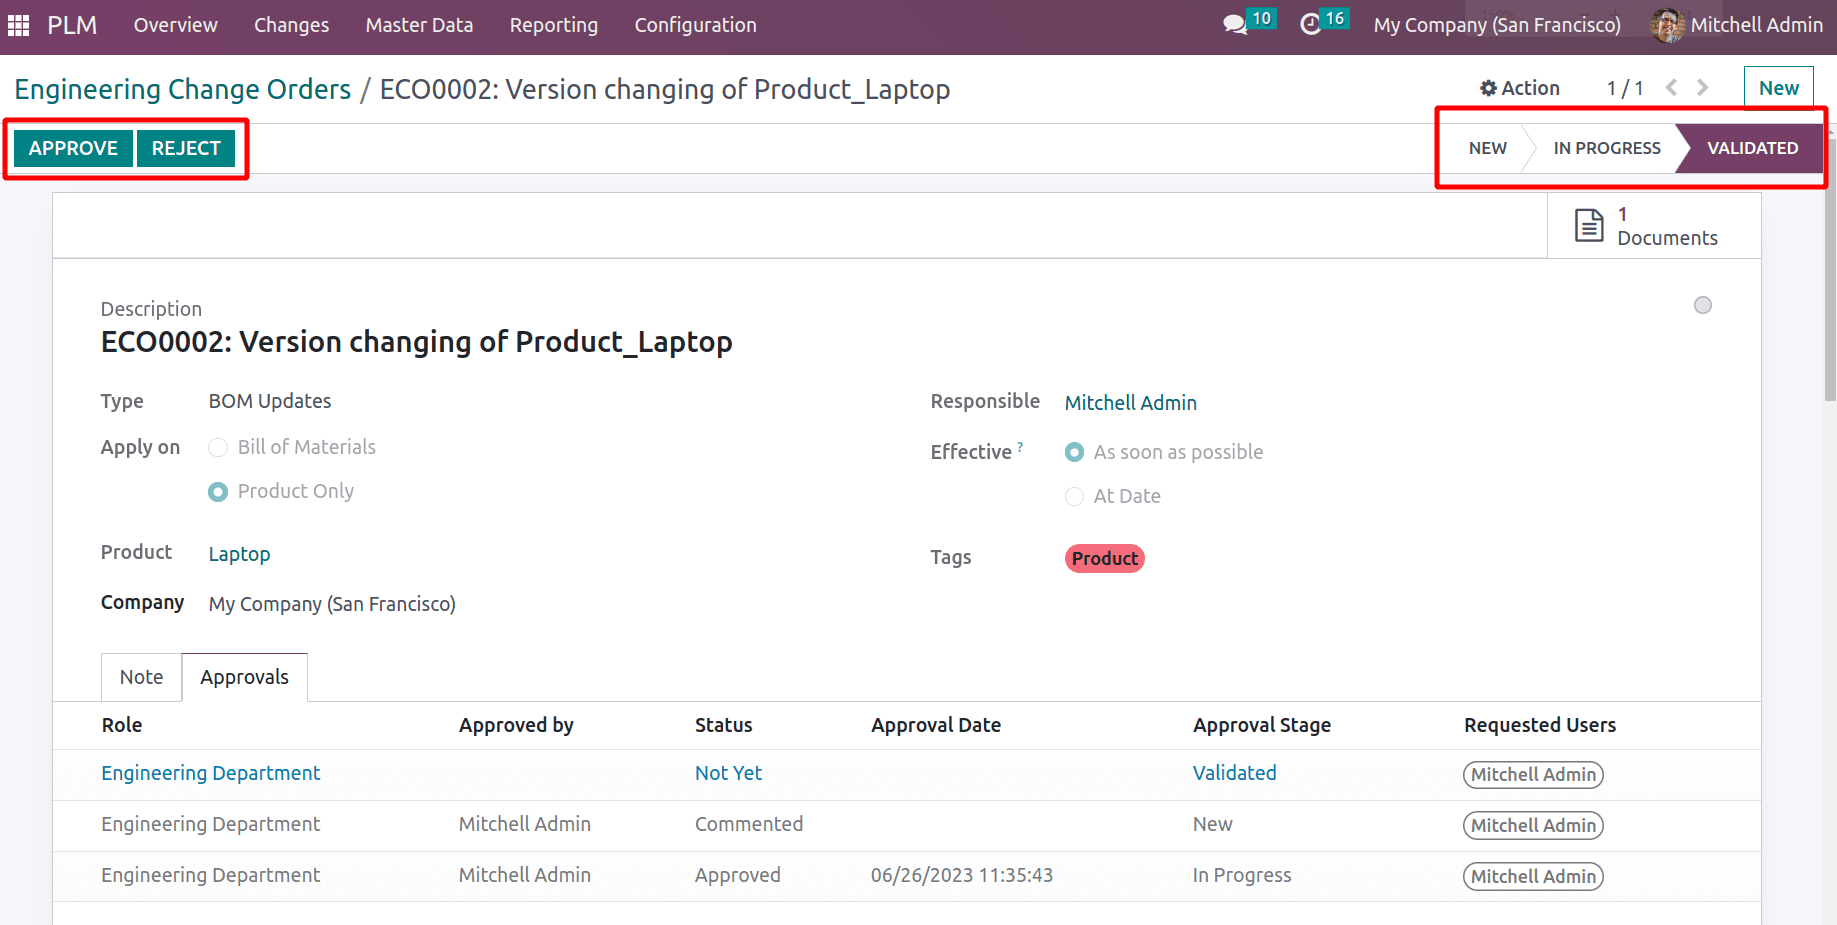
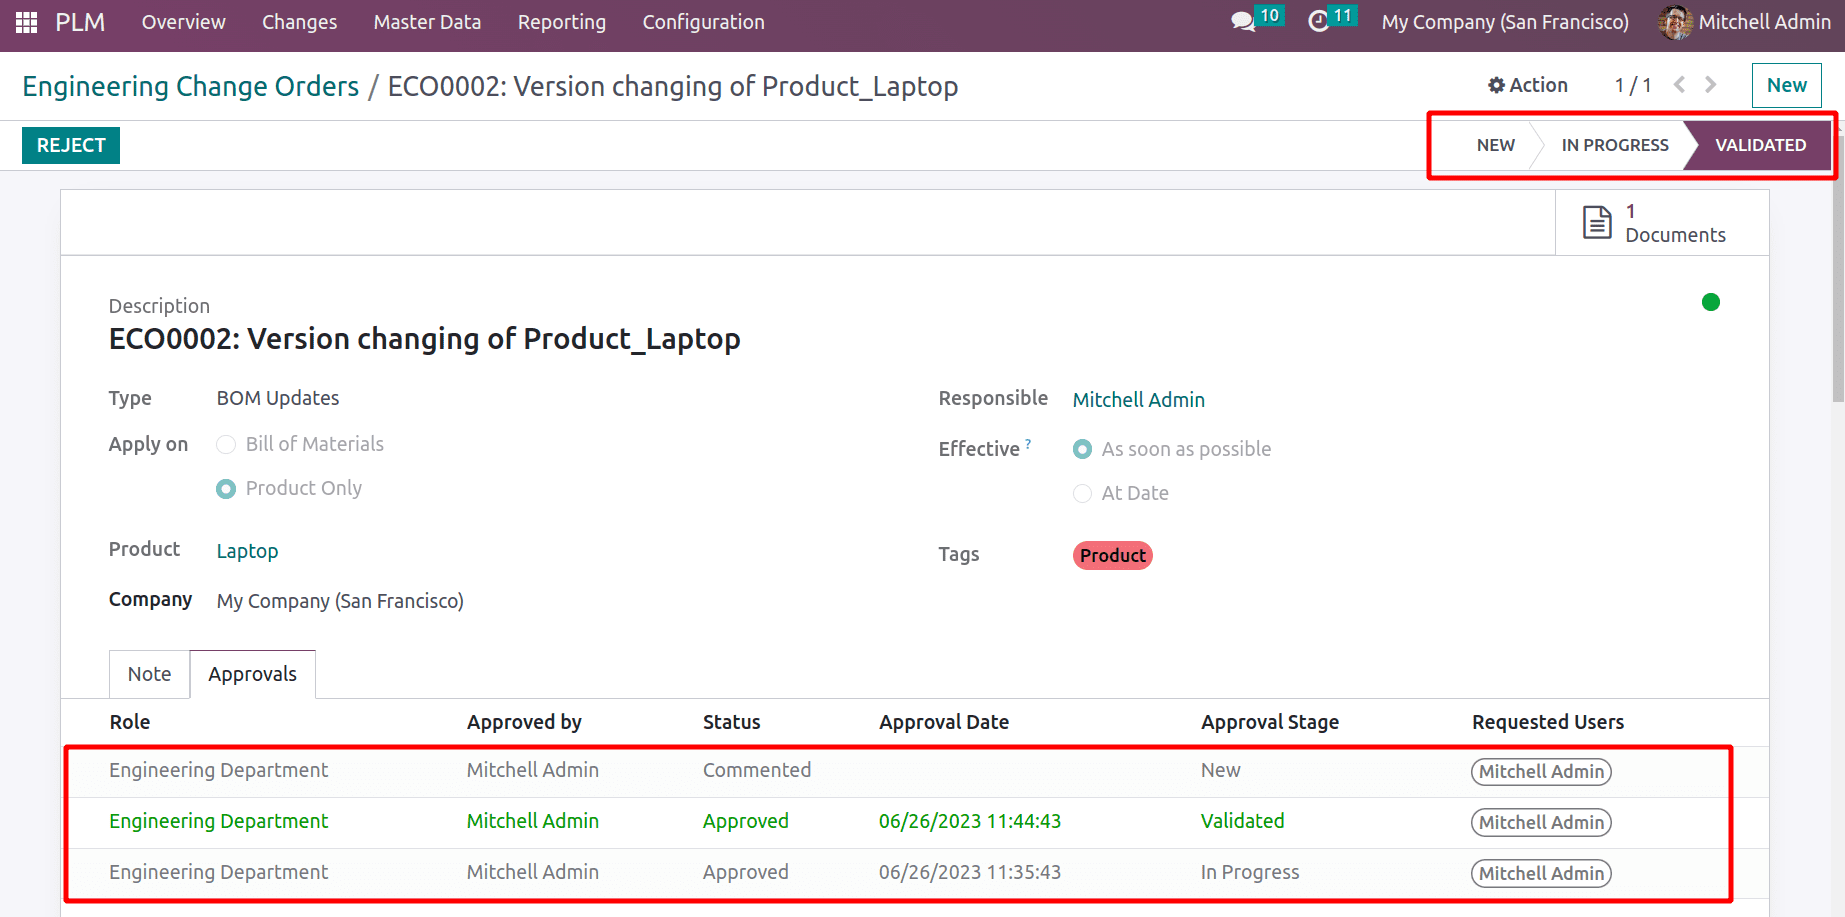
Here the ECO Change Order was reached at the last stage,so now the process is completed.
The approvals from previous stages with information like role, approved by whom, approval status, approval date and time, approval stage, and requested user are given inside the Approval tab.
Let's examine the product version after completing the ECO Change Order. To do that, select Products from the list after clicking the Master Data tab and then looking for the item Laptop. Version 2 of the product was introduced inside the General Information tab.
Changing the version of the Bill of Materials (BoM)
Let's go to change the version of the bill of materials now. Create a new BoM for this procedure initially. Select the Bill of Materials option from the Master Data menu, as indicated previously. Click the NEW button from there to start a new BoM.

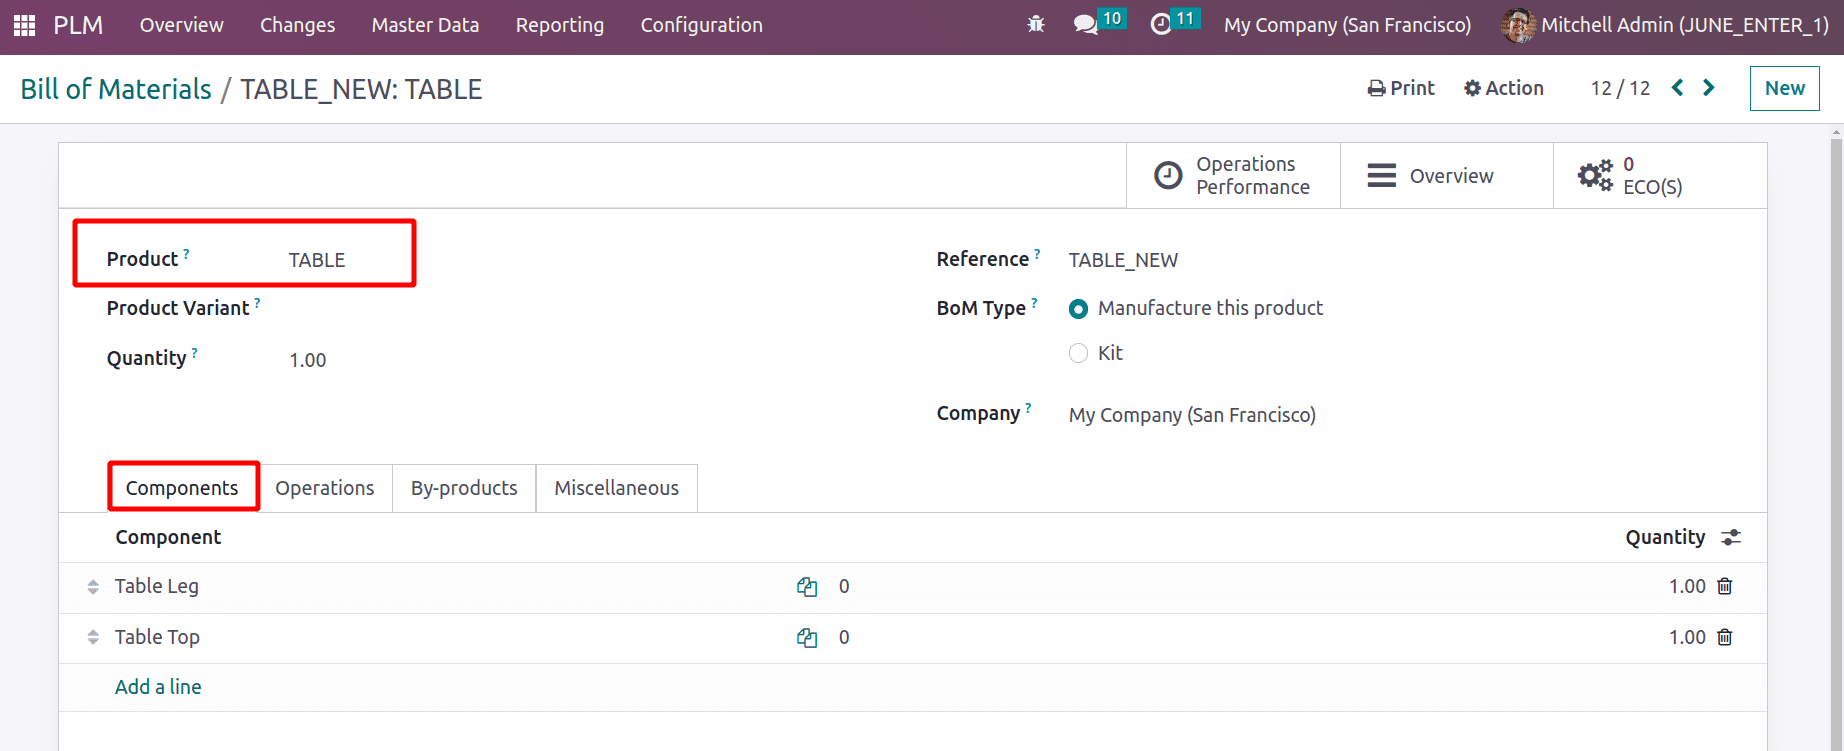
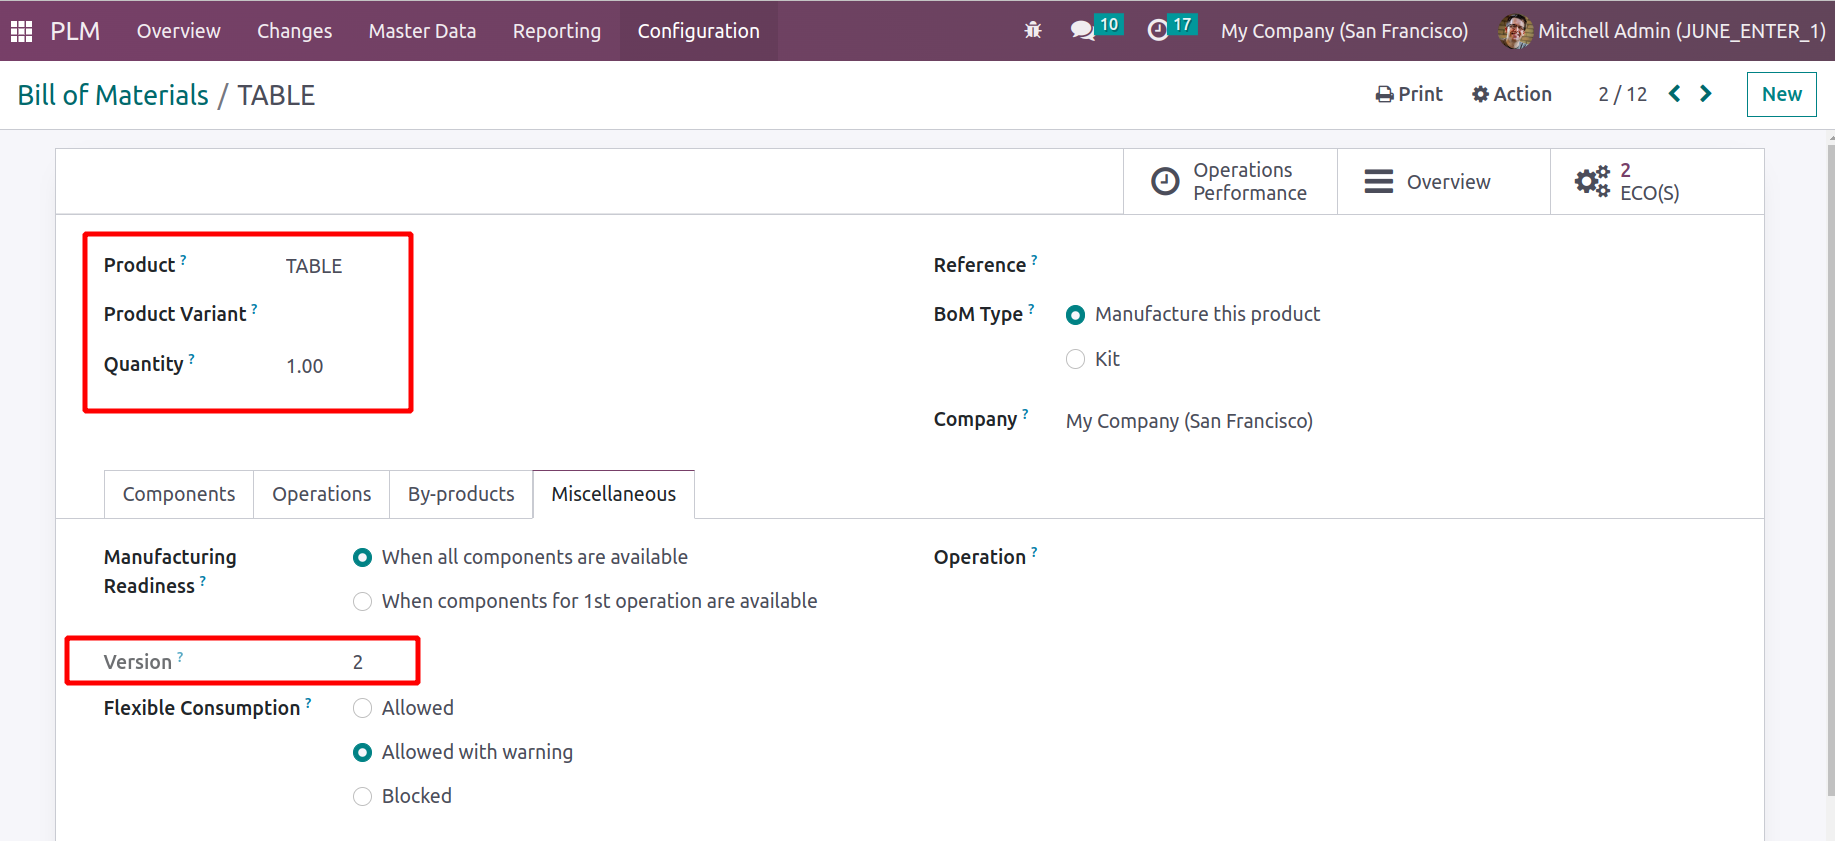
Select the manufactured product, a product variant, and a quantity. In this case, the product is a TABLE. Here, a reference is added. The Manufacturing BoM is formed since the Manufacturing BoM Type was selected. Add the product's manufacturing-related components to the Components tab. The table Leg and Table Top are two of the components that are added here in this with one quantity each.
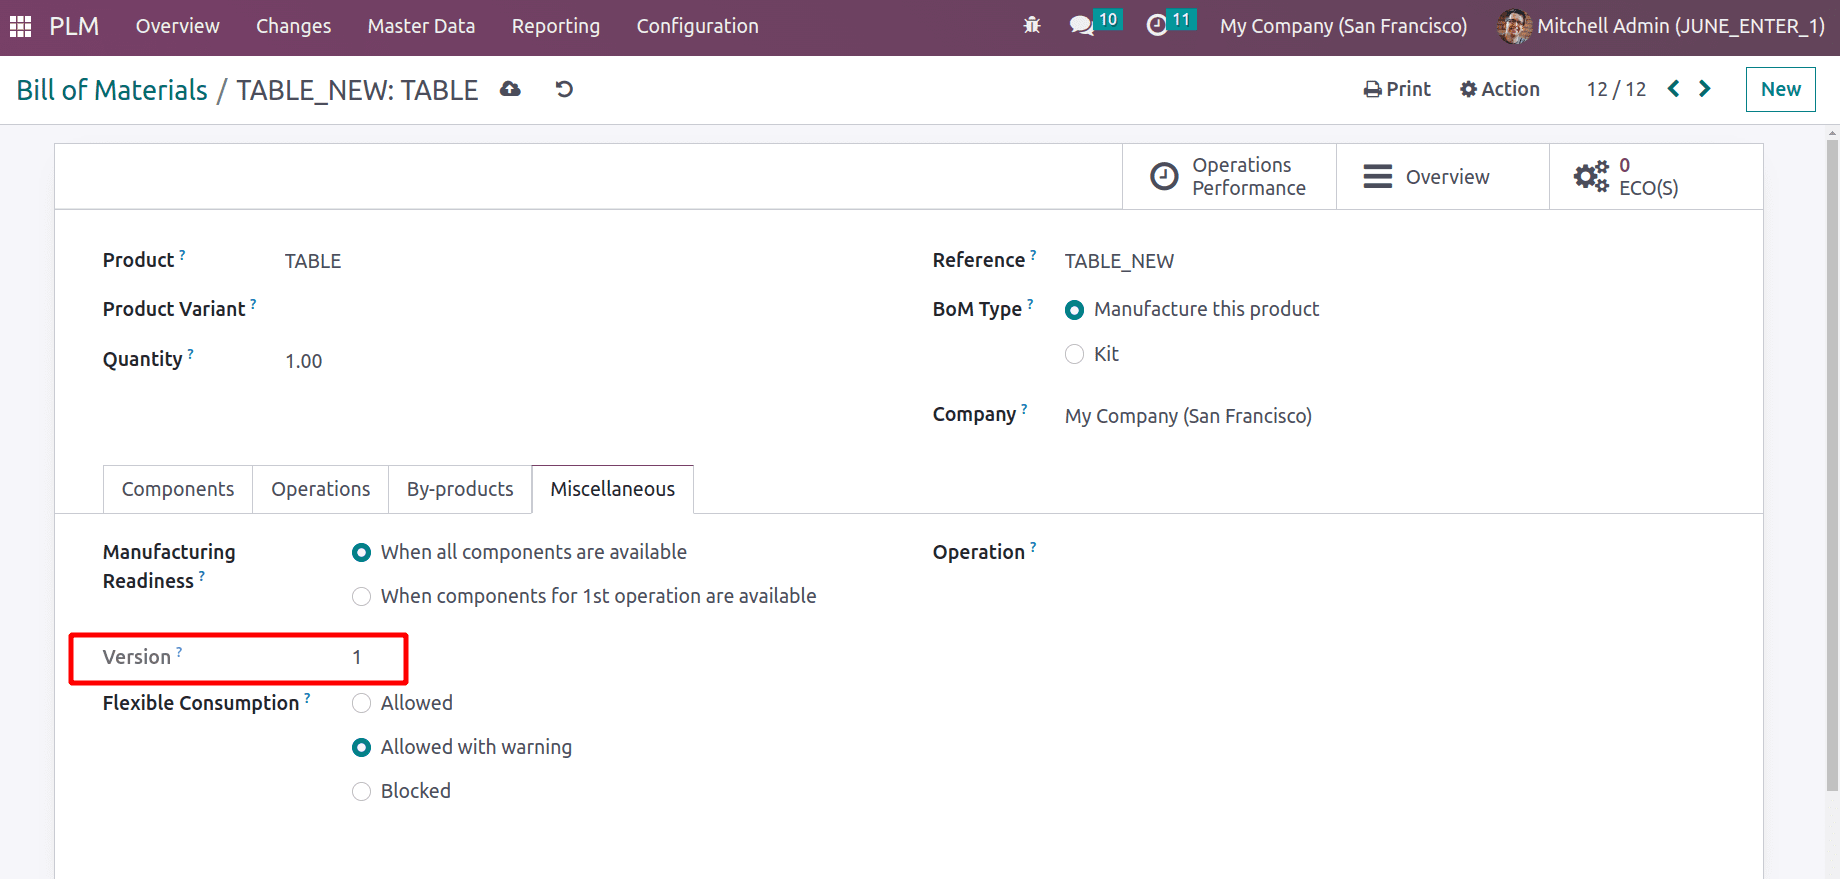
The user can then list the operations that must be performed during production in the operations tab. Byproducts can be added to the byproduct tab. BoM's version will be set to the Miscellaneous tab. Currently the version of this BoM is Version 1. Save the Bill of Materials.
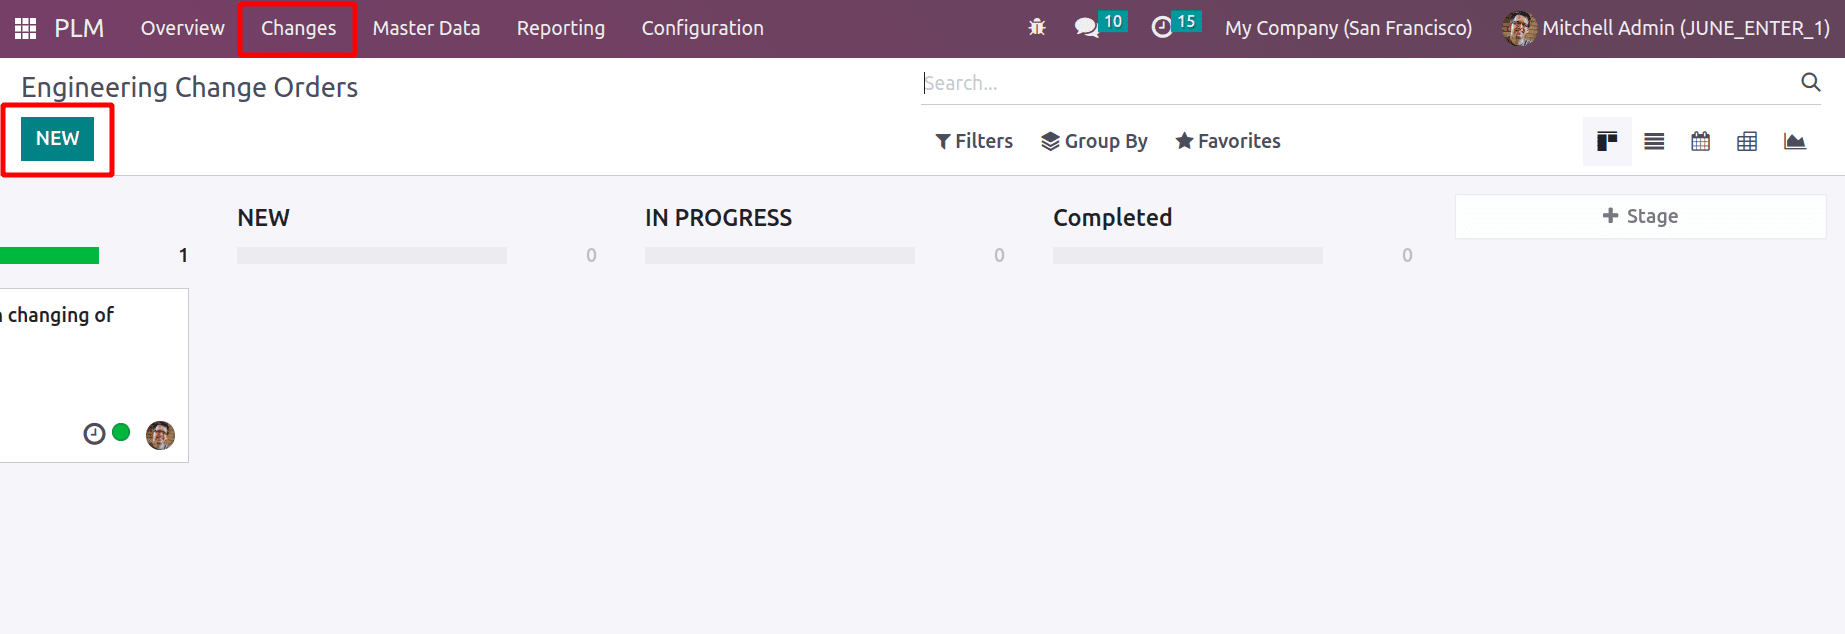
To add ECO Changes to the newly formed BoM, select the Changes tab.
Describe it in the description field. Select the Type, responsible person, and effective options. Bill of Material was selected as the Apply on option at this time. Selecting the manufacturing product from the product tab will automatically add the corresponding bill of material to the BoM field. Then press the button marked "start revision."
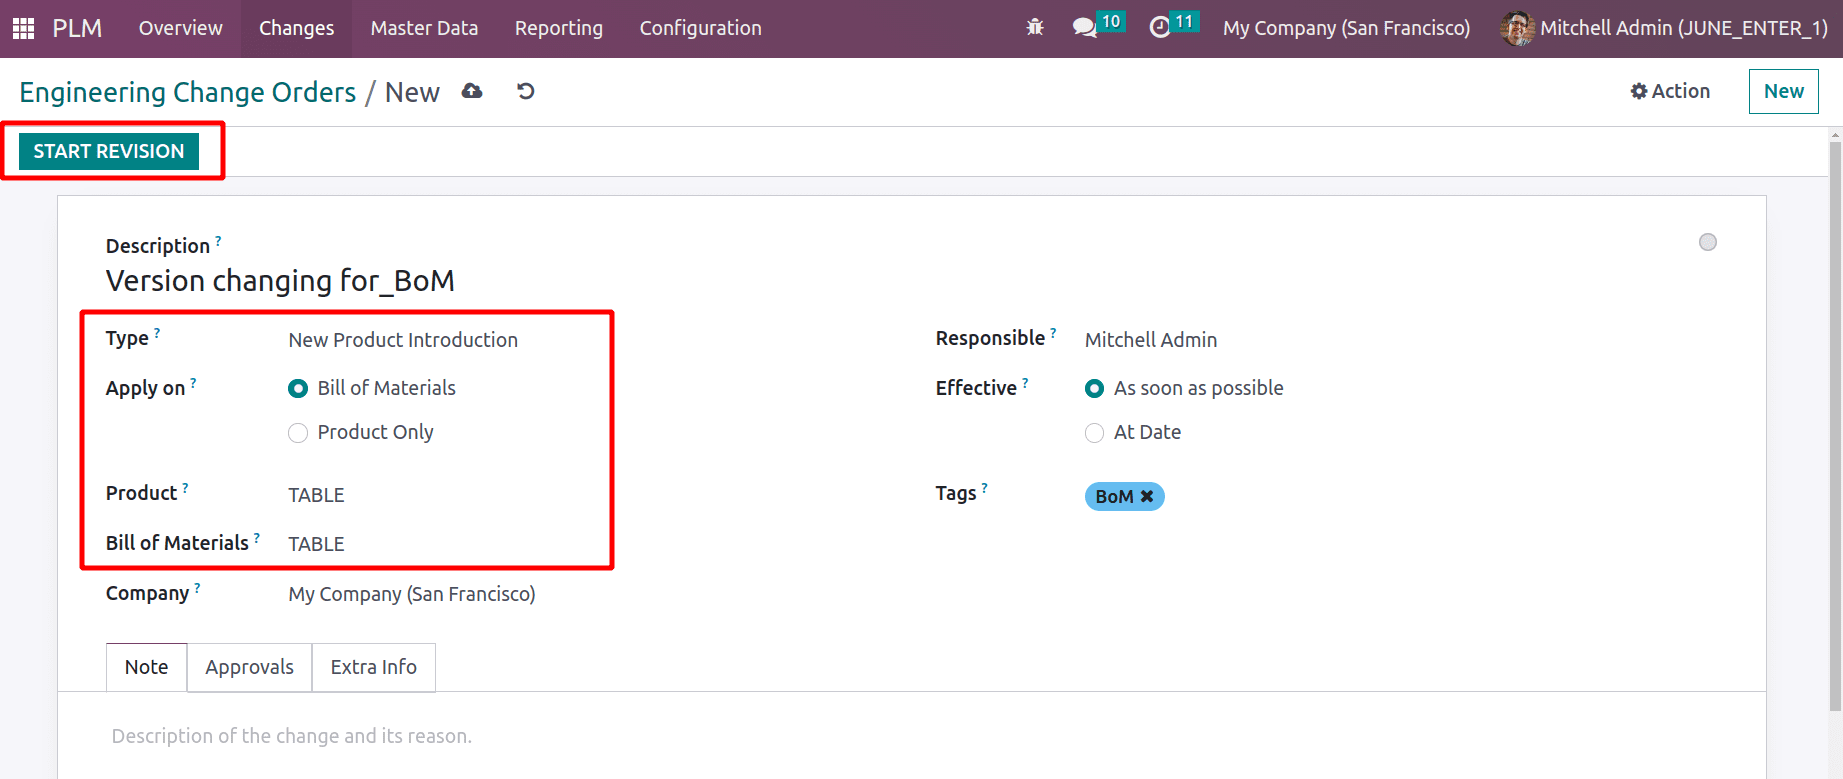
The ECO Change Order is now in the NEW Stage of the process. The Mitchell Admin must approve this stage.
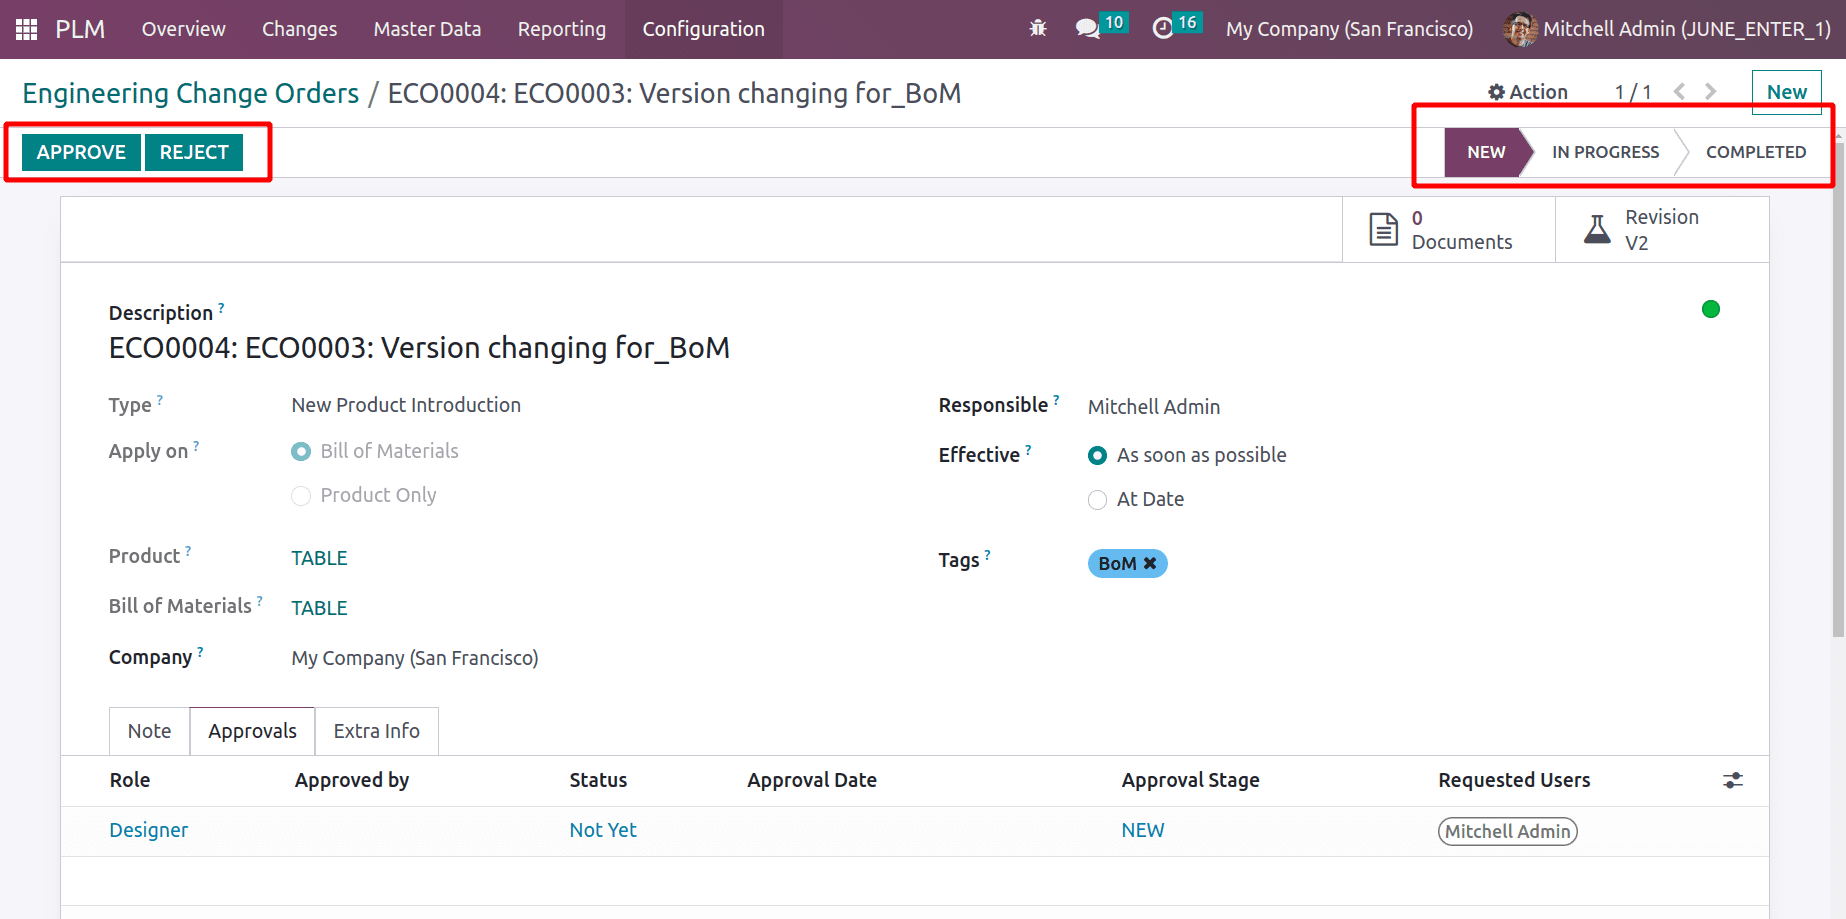
In order to change the stage to IN PROGRESS, click the Approve button. The two more smart tabs. Revision V2 is one, and Documents is another. Simply select the Revision V2 tab.
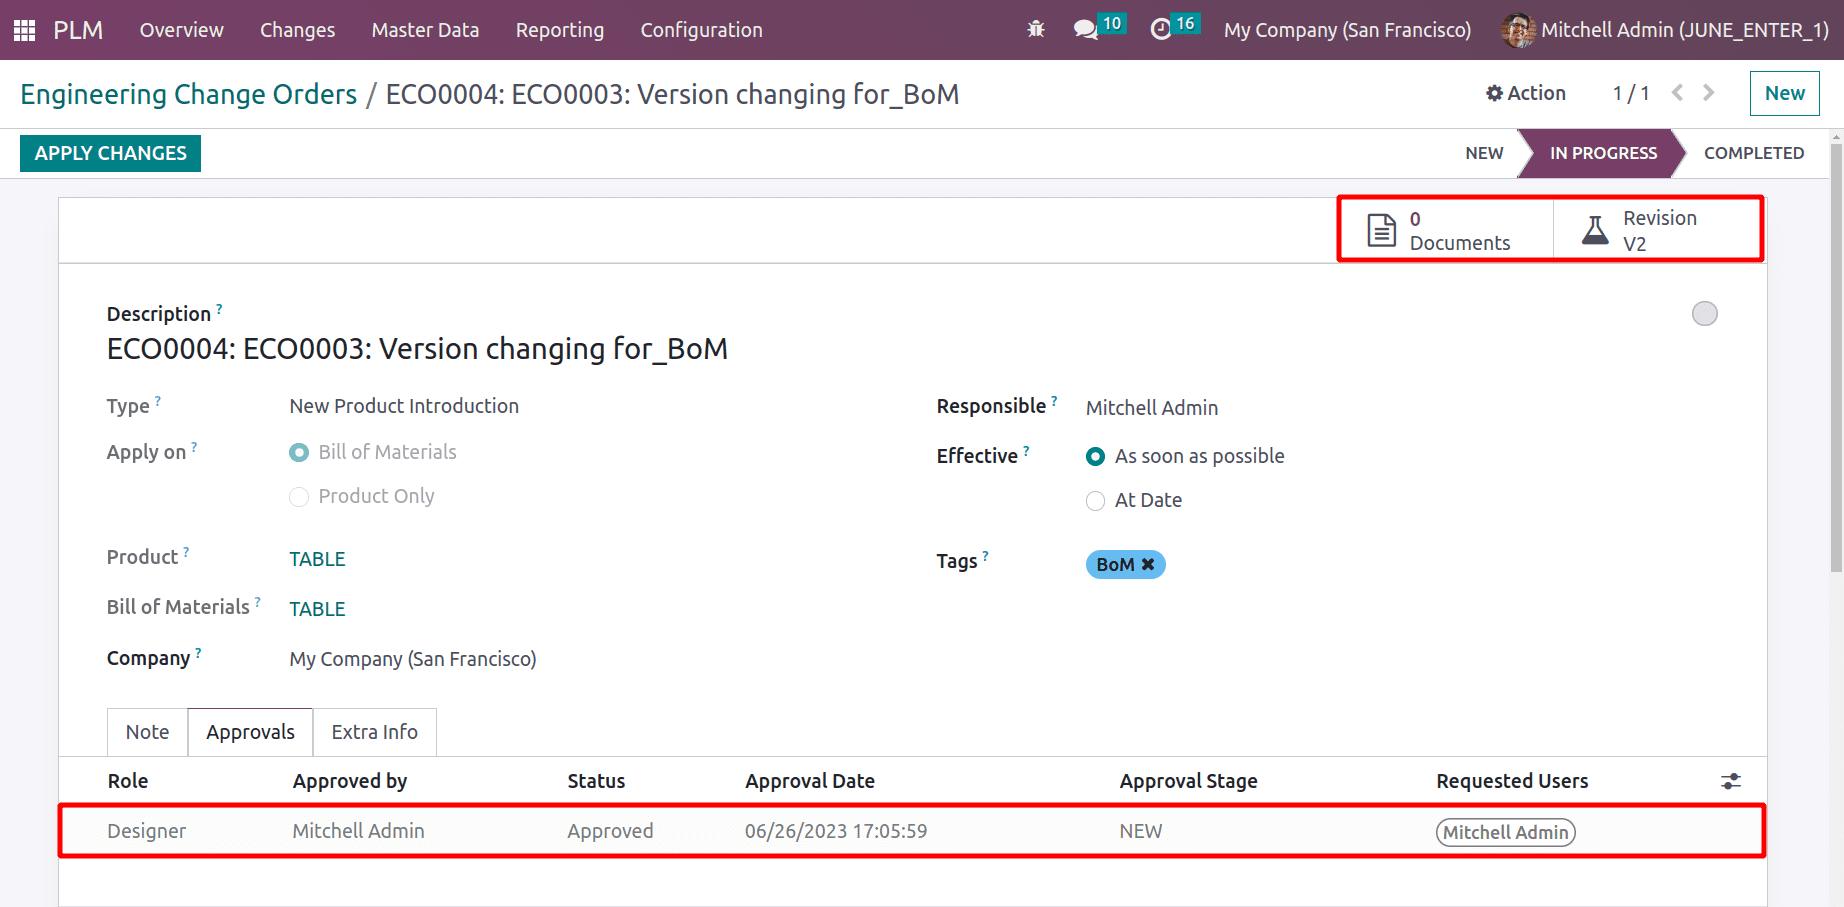
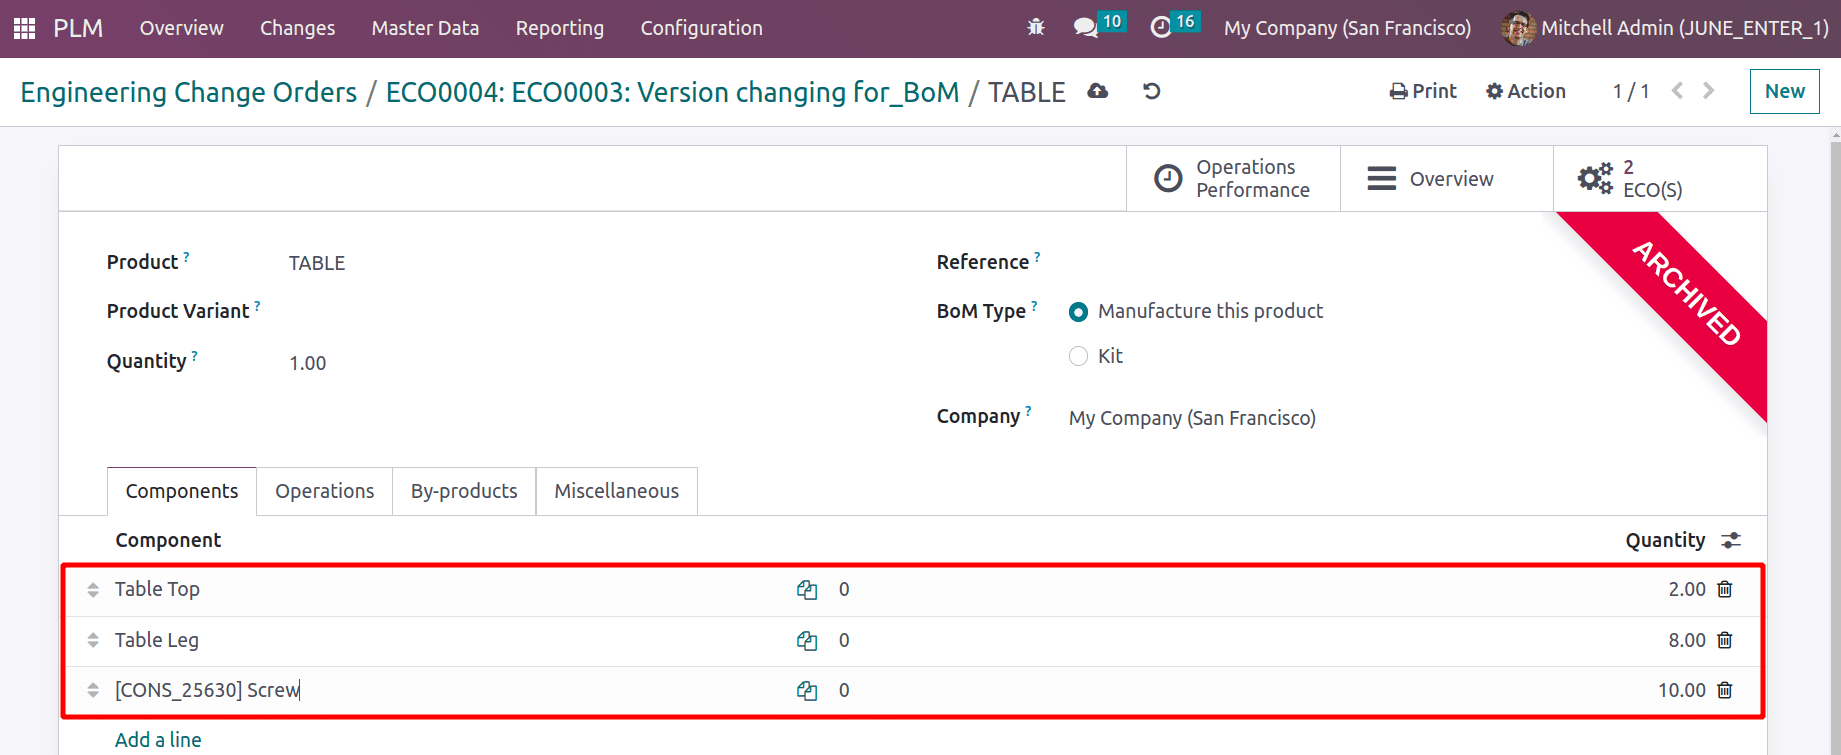
The previously constructed BoM, which is in the Archived stage, will appear once the user opens that tab. Users can make any changes to this BoM from here. Here, enhance the number of components and introduce a new component.
Ten screws are required and added two Table Tops and eight Table Legs to the component count.
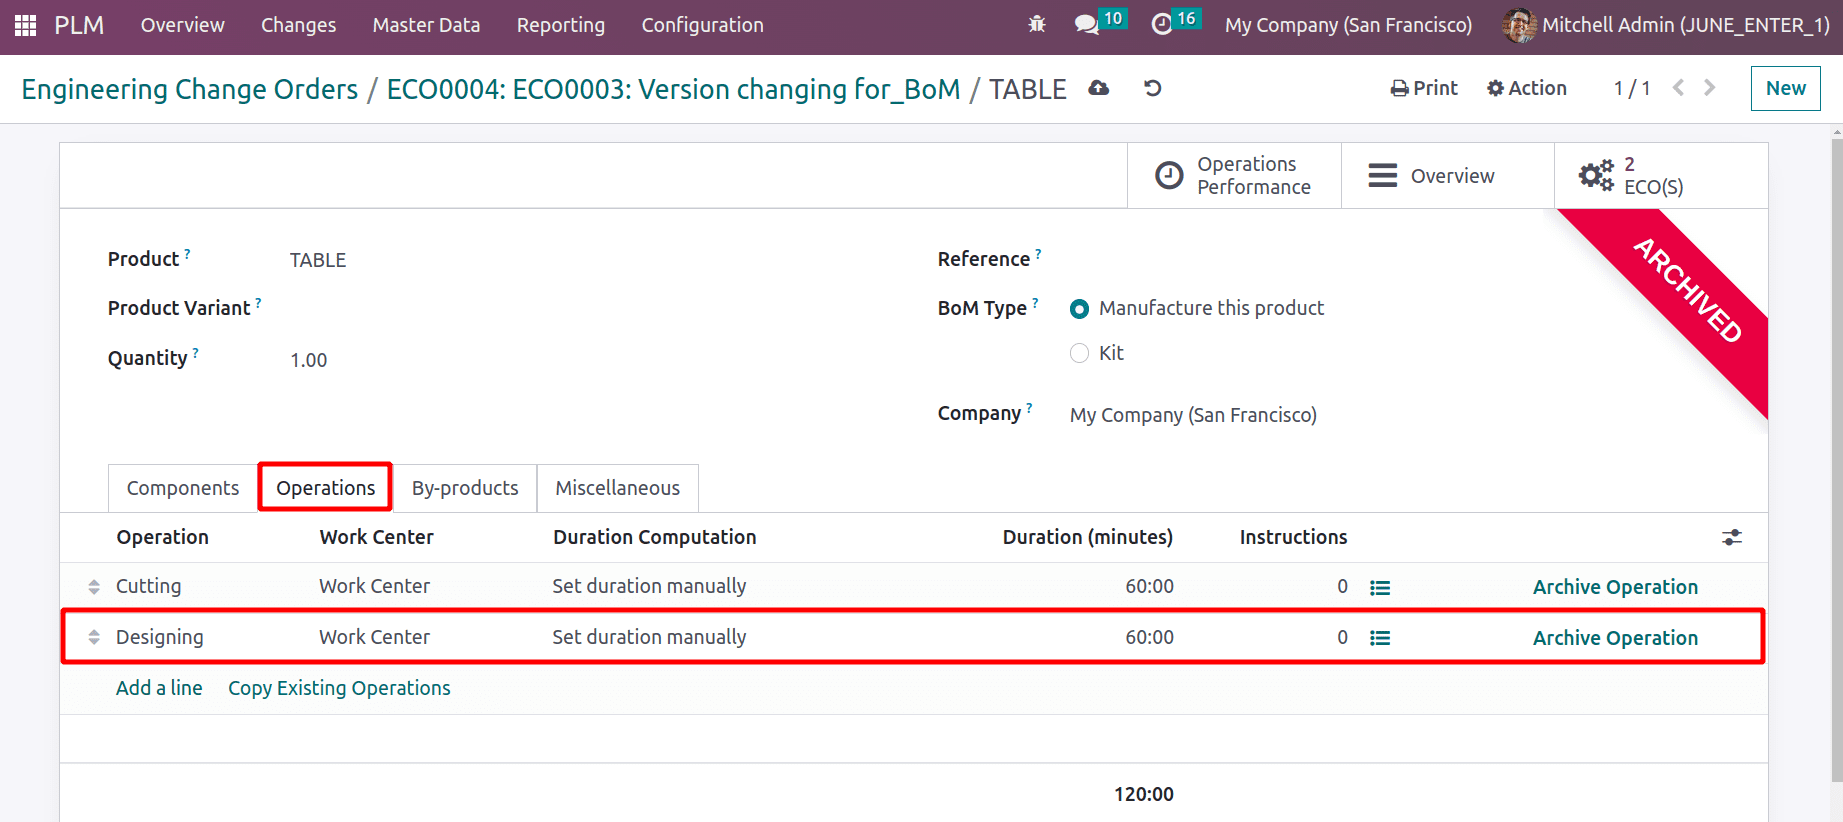
Two operations, the first one is Cutting and the second operation, Designing, were added inside the operation tab. Return to the ECO Change Order after adding changes to the BoM.
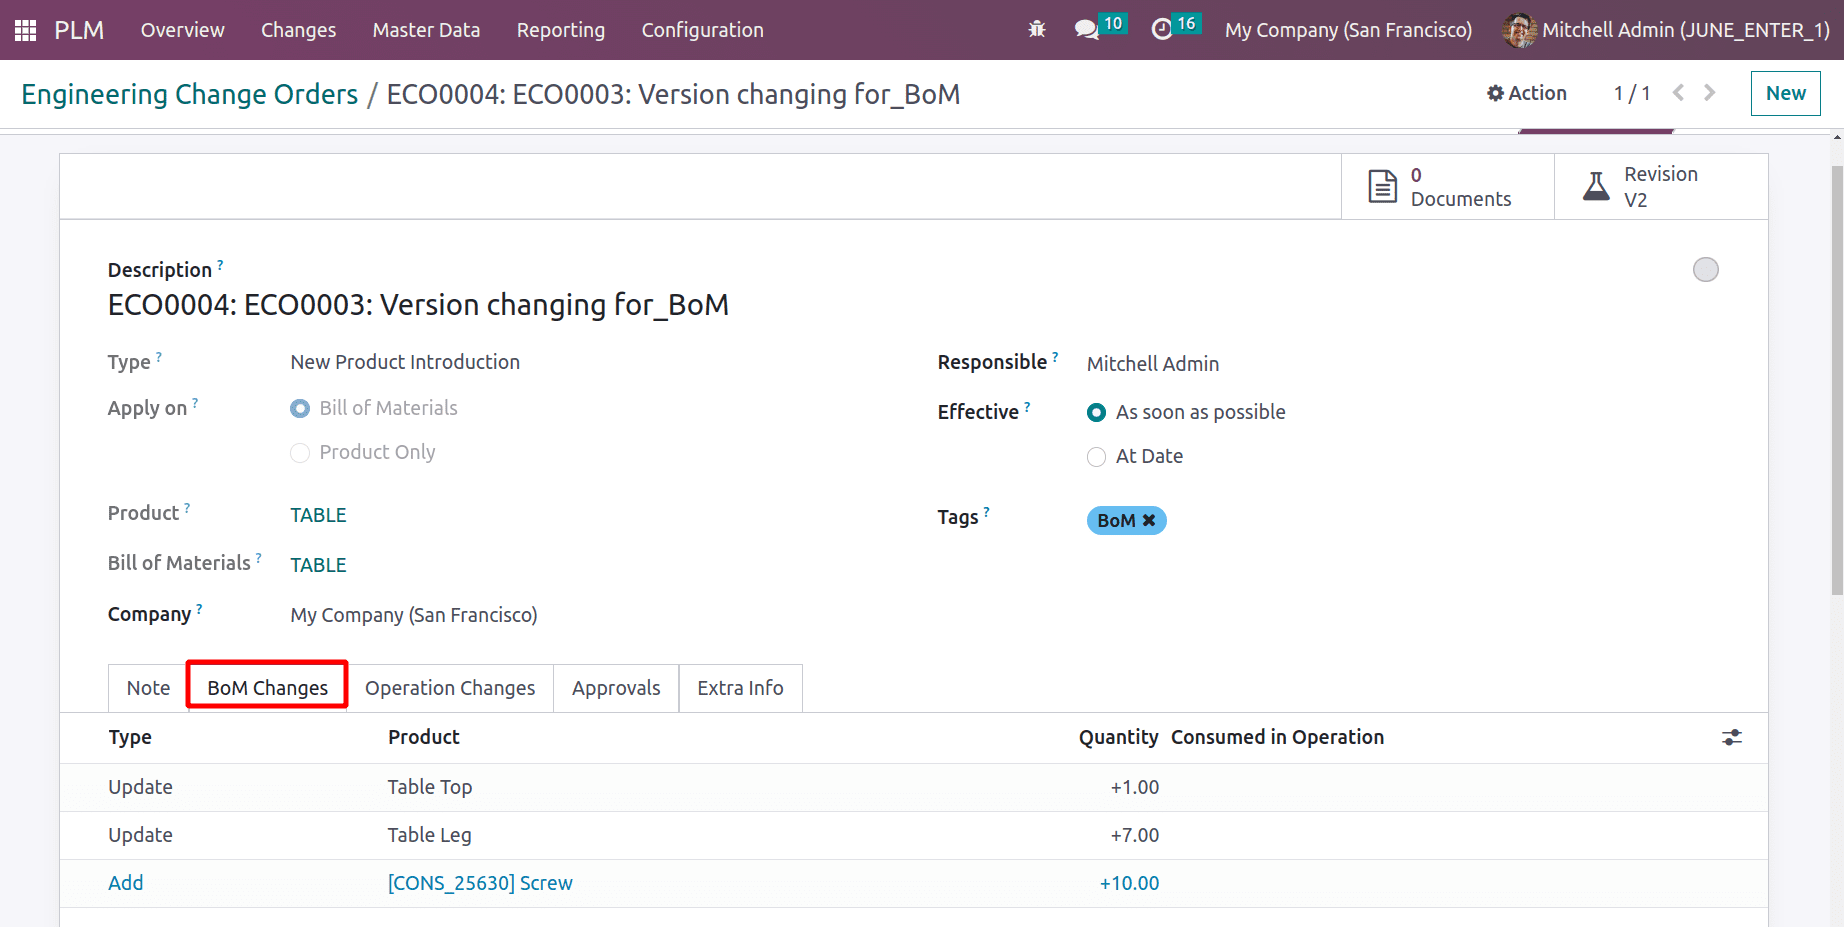
Additional two tabs formed inside the ECO Change Order. Details on newly introduced components are provided in the BoM Changes tab. There, the quantity of Table Top and Table Leg have been increased by one, hence the type here is Update. The additional components added during Revision are also visible there.
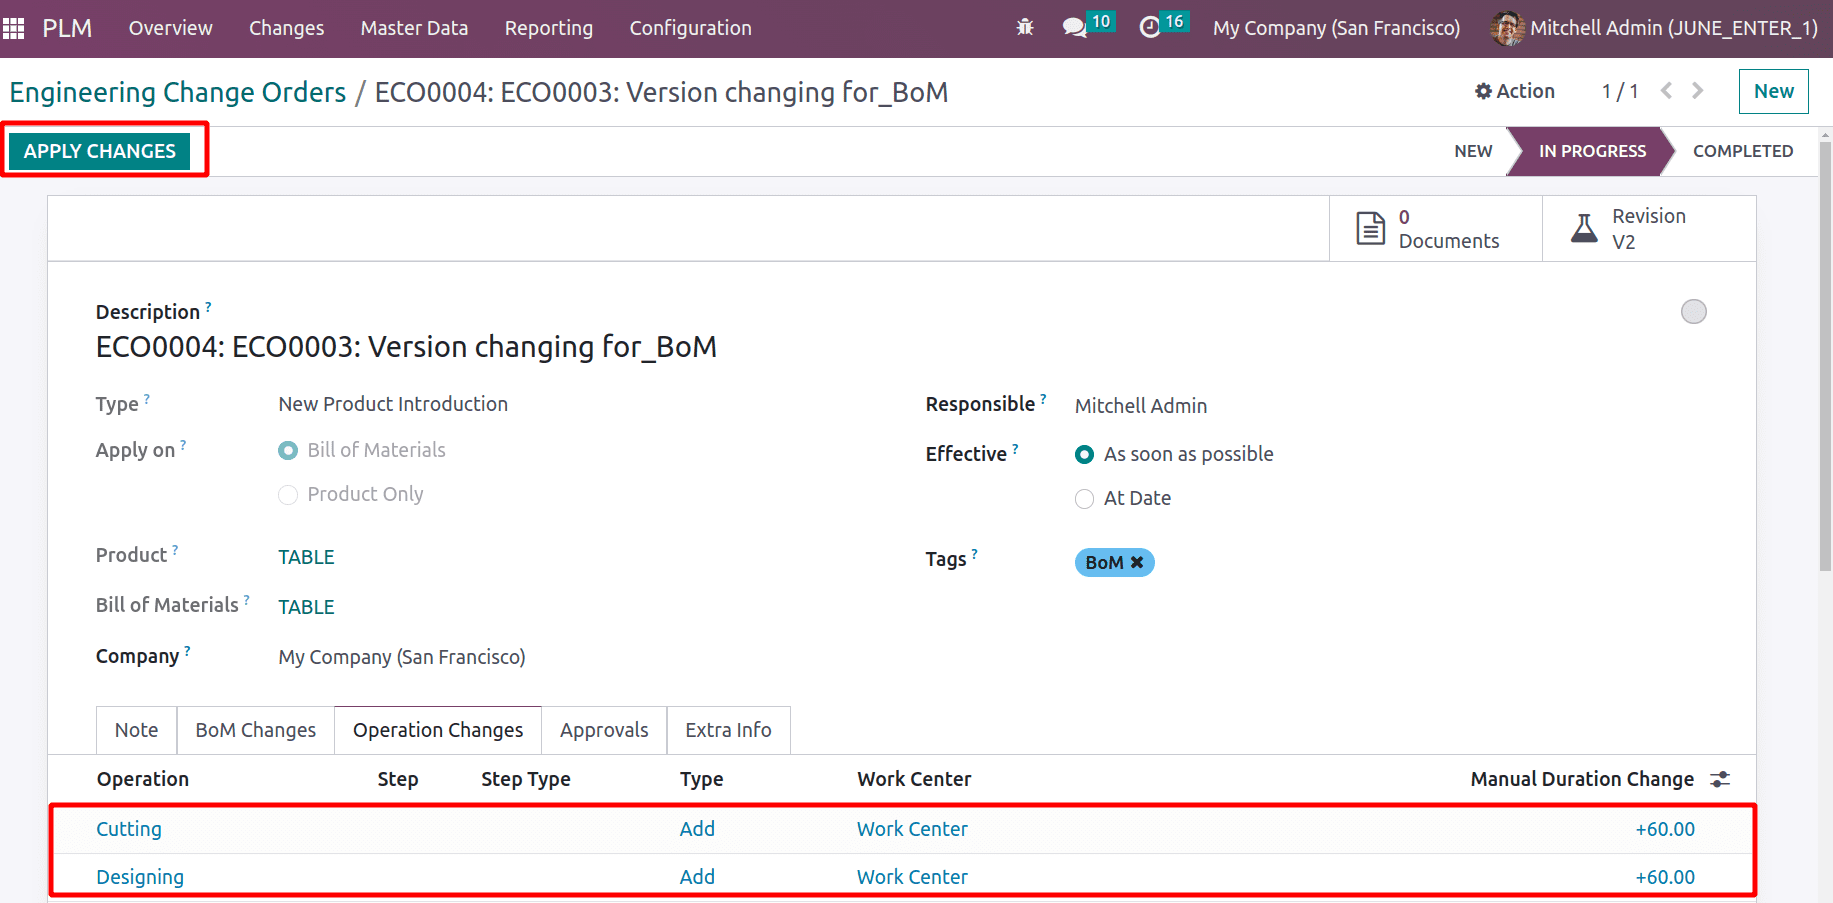
Additionally, two operations of cutting and designing will appear on the Operation Changes page.
Then add the changes by clicking the APPLY CHANGES button.
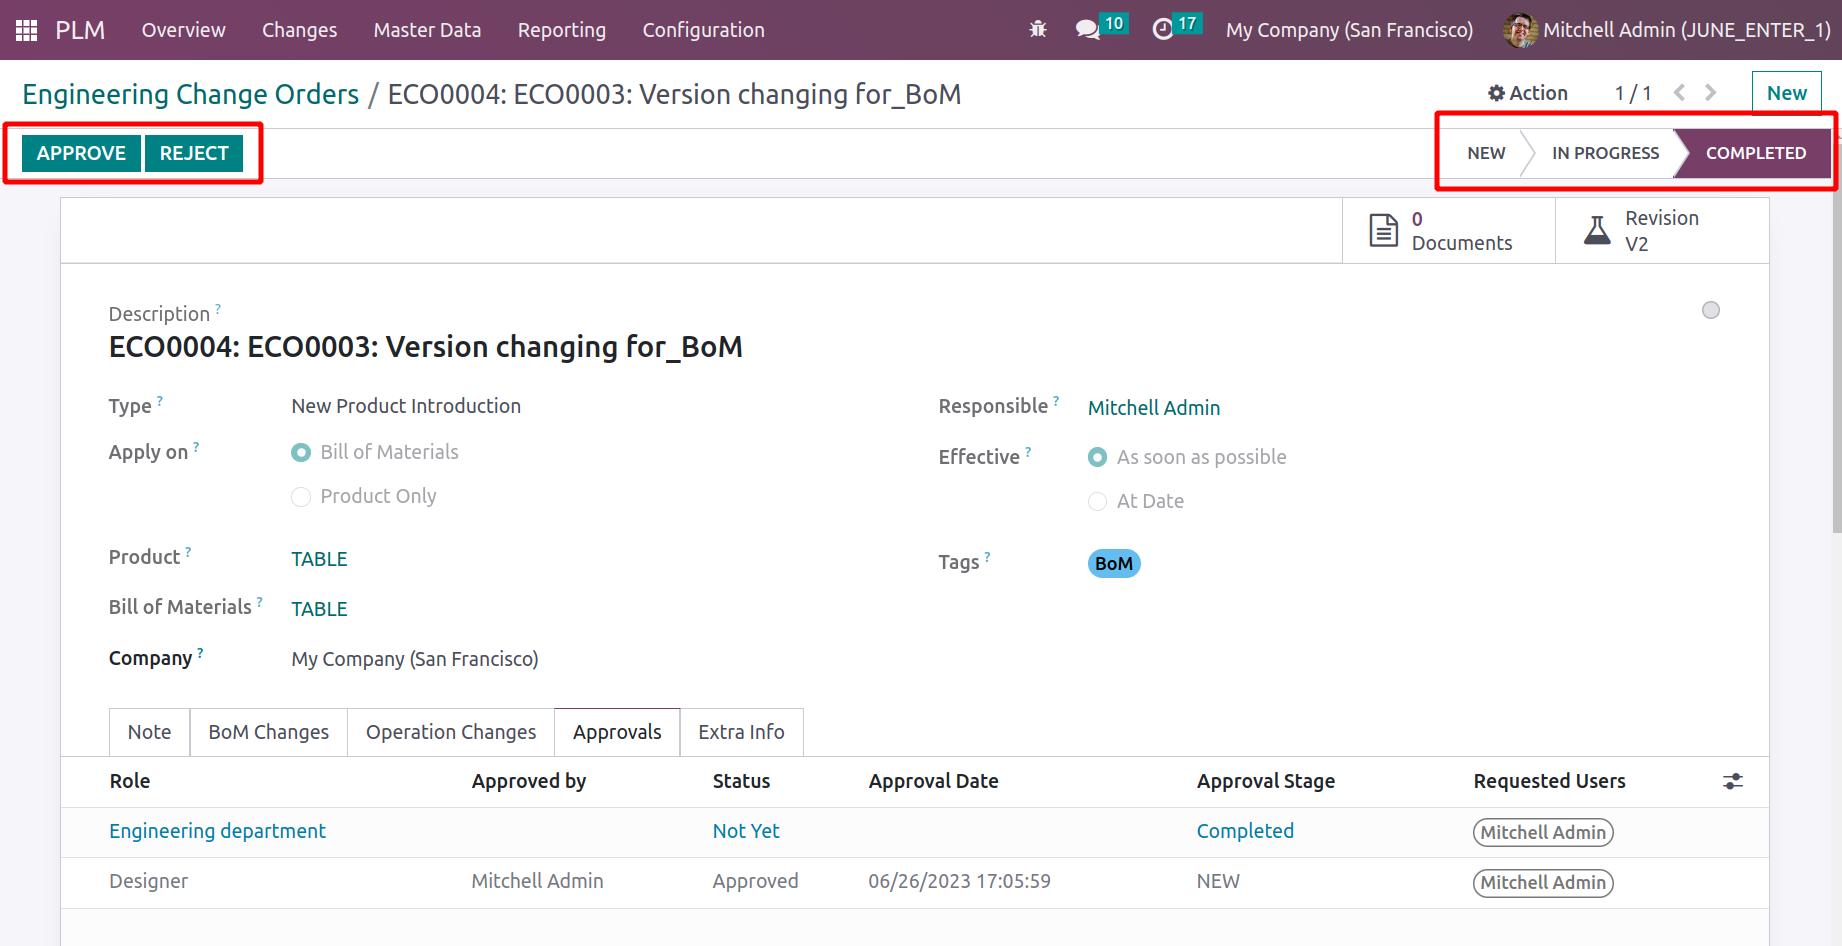
The process is now complete after the final stage, which requires the user's approval. Click the Approve button to finish.
Select Bill of Material from the list on the Master Data tab. Search the BoM that was initially established. Check the Miscellaneous page to see what version of BoM you are using. There, the Version is changed to ‘2’, and is changed automatically.
In conclusion, PLM Module will help the users to update the version of the Product and Bill of Material to improve its effectiveness. The main advantage is that the process becomes more simple for the user and helps them to manage the process properly.