Automatic Invoicing is the process of setting up an invoice procedure for a customer. Invoicing customers is an essential component of most business operations when marketing a good or service. An invoice informs a customer of the price, quantity, and other details of a product. A customer can easily determine the entire cost of an item they have purchased from an invoice. The majority of customers occasionally make an order and pay for the product through online retailers. In these circumstances, we can create an automated invoice from the business. You may manage invoice policies for different clients or customers with ERP software.
With the help of this blog, users can create automated invoices in the Odoo 18 Sales module.
The automated invoicing capability was added to Odoo 18 after an online payment was confirmed. With Odoo ERP support, we can easily manage all of the invoices that are generated for customers. Here's how you set up an automated invoice in Odoo 18 following a customer payment.
Enable the Automatic Invoice in the Odoo 18 Sales
In order to generate an invoice automatically, users must select the Automatic Invoice option from the Settings window. The Automatic Invoice option can be viewed in the Invoicing section and activated, as shown in the screenshot below.
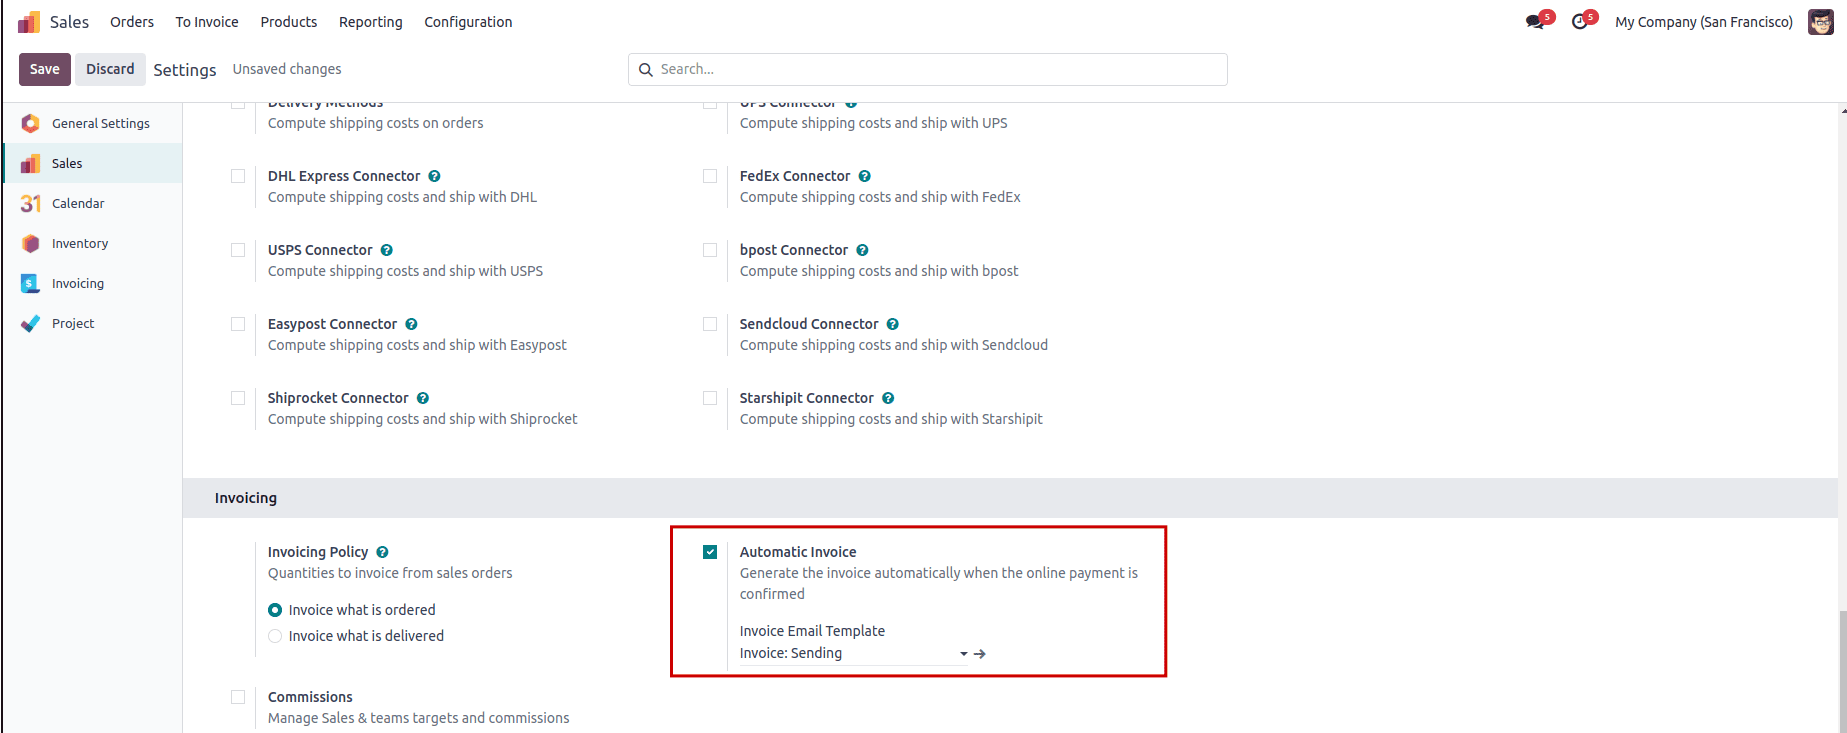
If the Automatic Invoice option is enabled, the customer's online payment will be confirmed and an invoice will be generated automatically. Furthermore, you need to turn on the ‘Invoice what is ordered’ feature, which is located beneath the Invoice Policy section. Once the required features are enabled, click the SAVE button in the Settings.
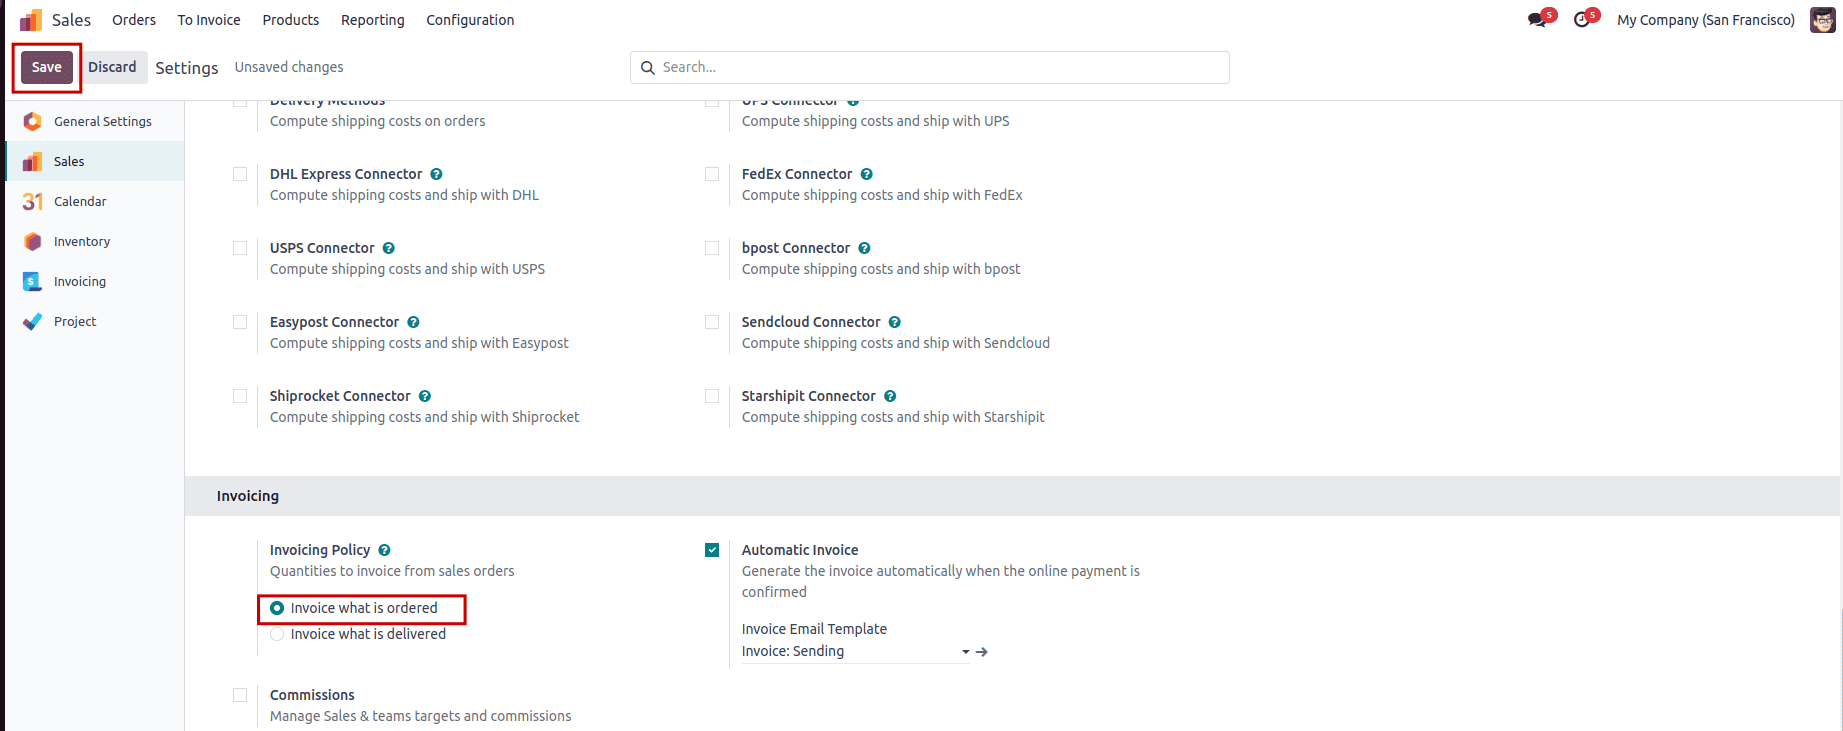
View the automatic invoice creation for a product based on an invoice policy set with ordered quantities.
How to Develop Automatic Invoice for a Sales Order in Odoo 18?
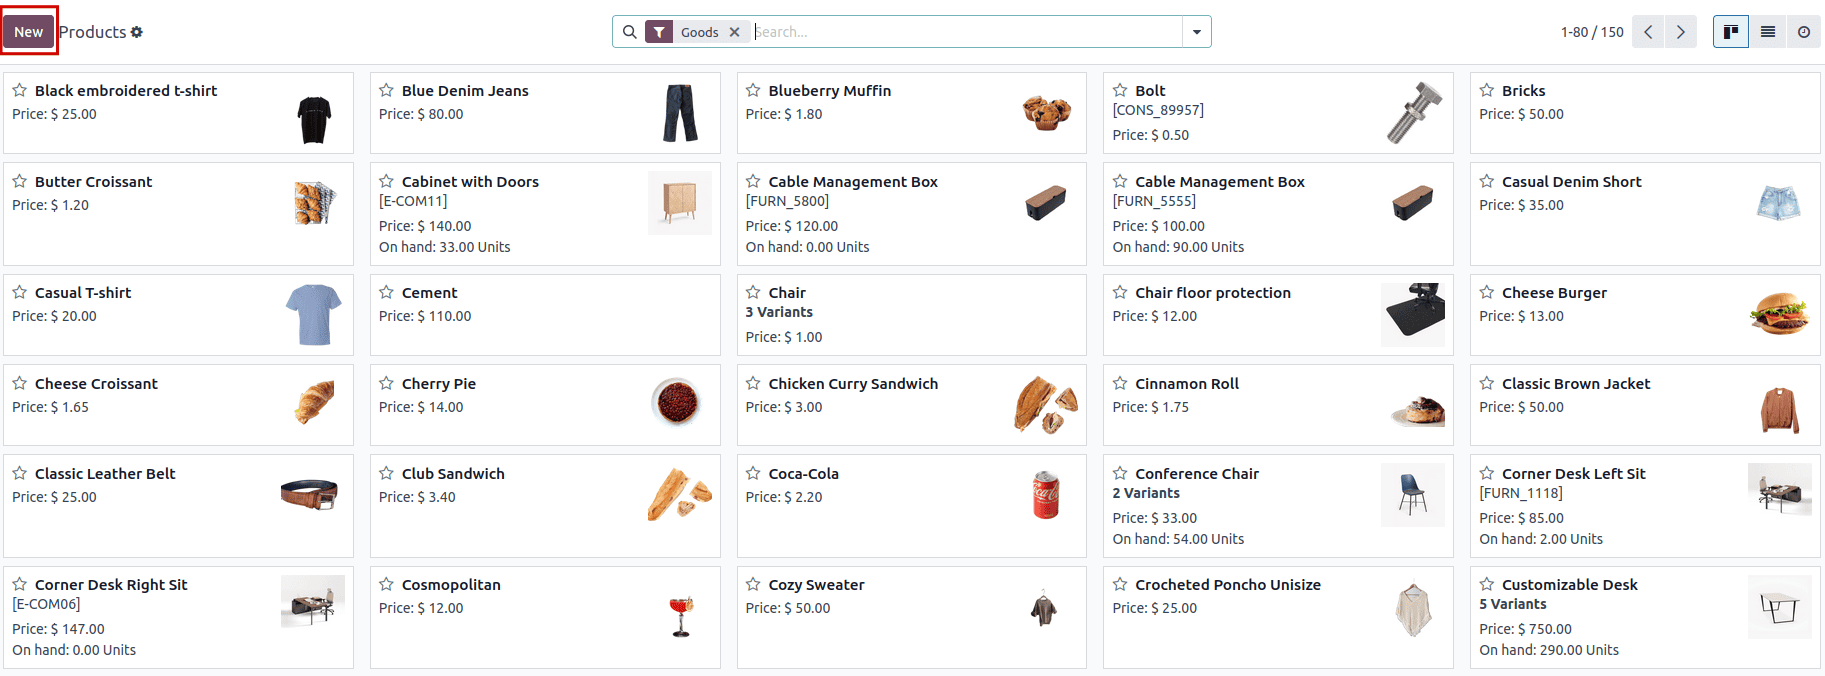
Firstly, we must create a product with an ordered quantities invoice policy. Selecting the Products menu allows the user to view the details of every produced item in the Products window. To proceed with a new commodity, select the NEW icon in the Products window, as seen in the screenshot below.
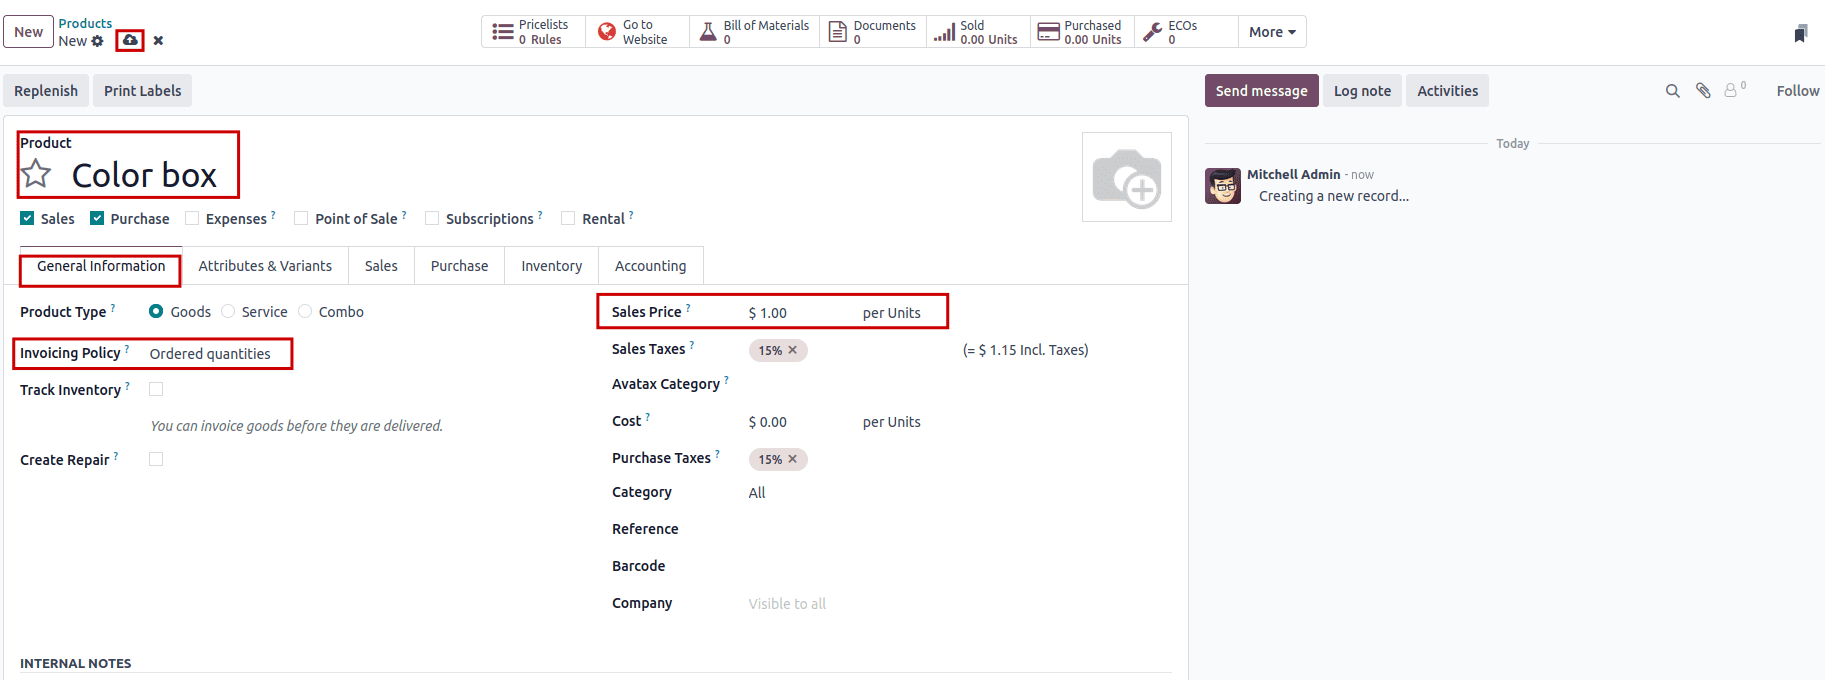
Add a color box to the Products Name field on the new screen. Select the ordered quantity invoicing policy option under the General Information tab. After entering the essential product details click the SAVE button.
Next, we can provide the customer with access to the grant portal.
Portal users are external users, such as customers or clients, who can be granted specific access rights by an administrator. These users are limited to viewing or reading content on the website and do not have the ability to edit or change it. This access can be given from the customer's form in the Sales module. Once a customer is created in Odoo, portal access can be granted by selecting the "Grant portal access" option from the Action menu at the top of the customer's form.
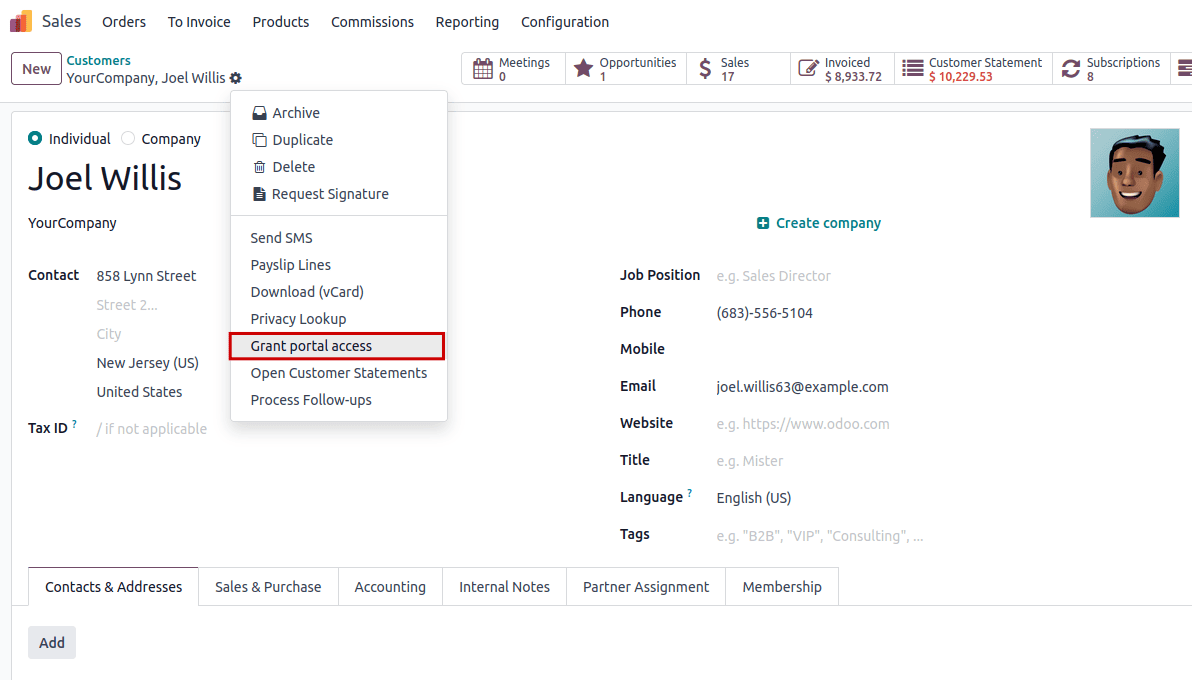
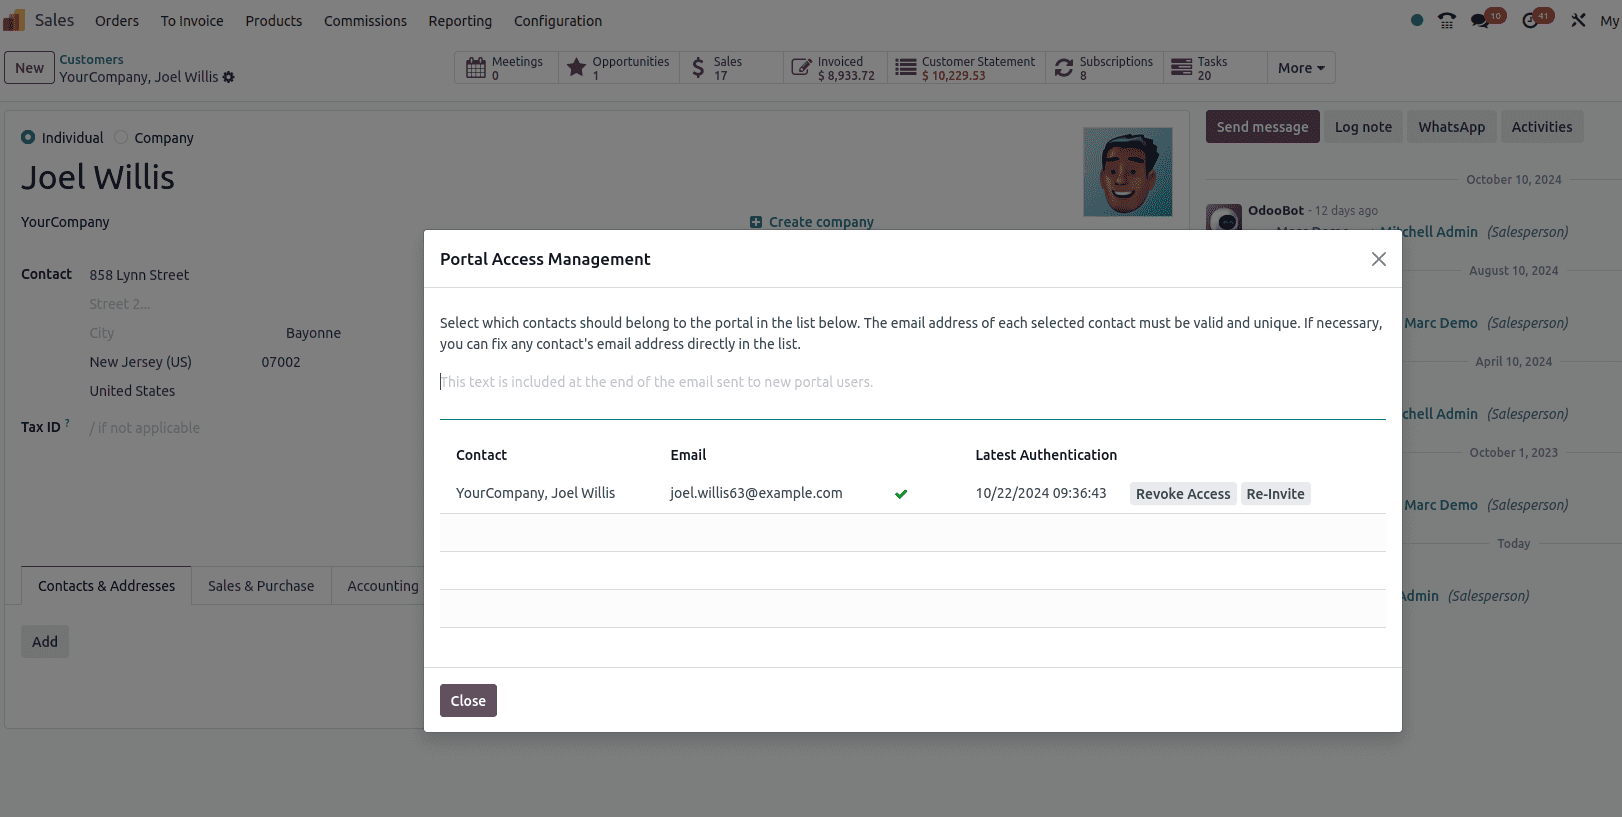
When you select "Grant portal access," a wizard will appear, requesting you to enter an email address and enable the grant access option, as illustrated in the image below. Ensure the email address provided is valid, as the customer will access the portal exclusively through this email.
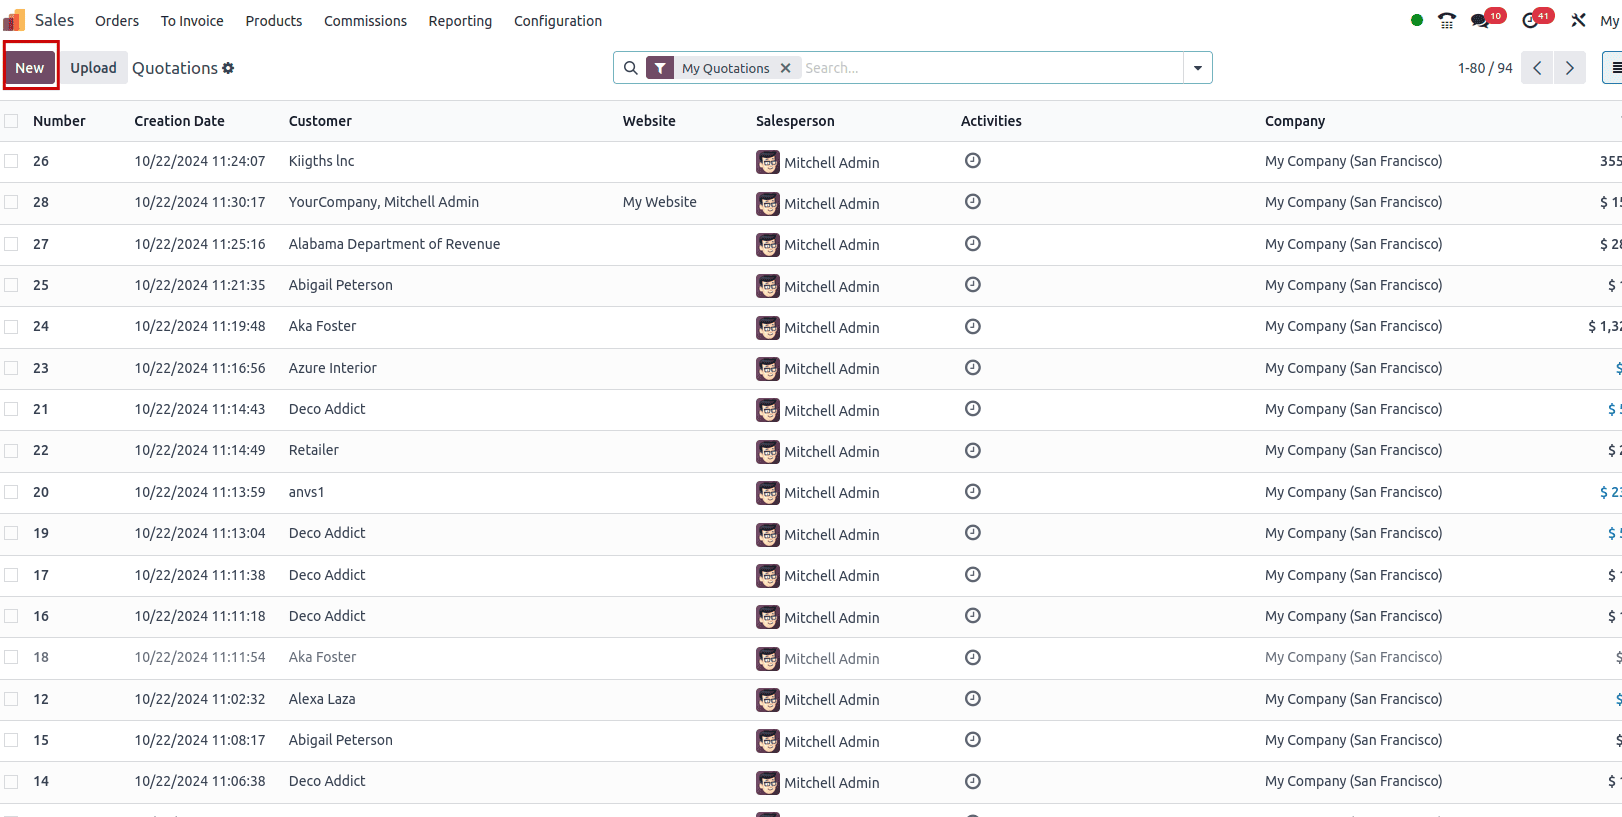
To create a Quotation for the product, click the 'NEW' button in the Odoo 18 sales module. This will open a new order form, as shown in the screenshot.
So a mail has been sent to the customer with a link to log into the customer portal. Thus, customers are allowed to log into the portal by adding credentials.
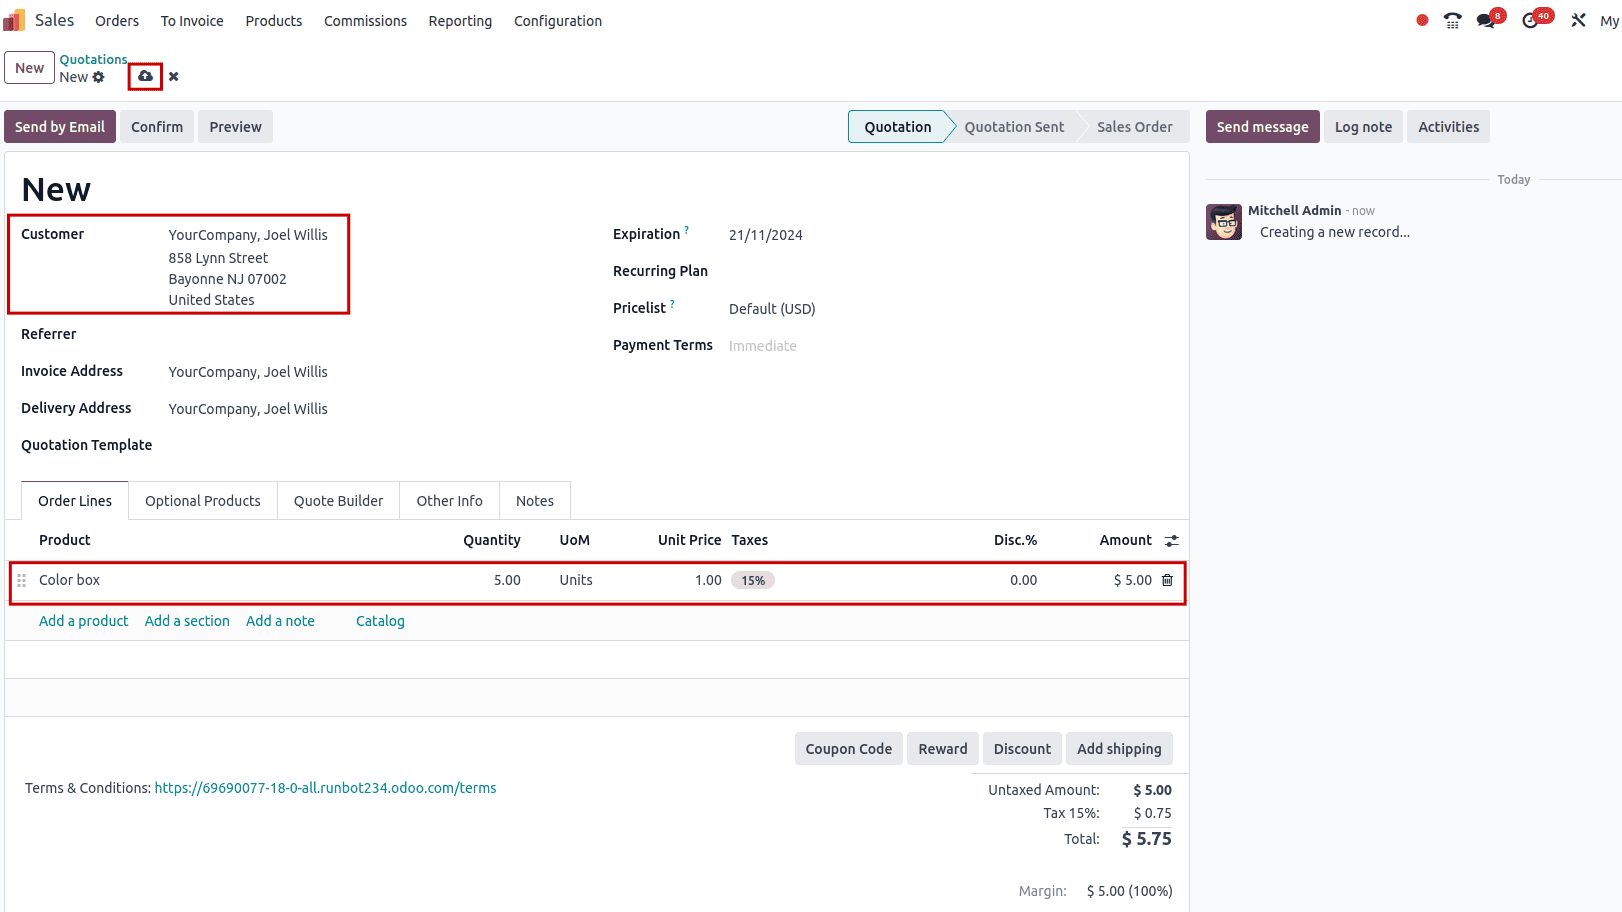
In the new window, select your Customer and then choose the product "Color Box" under the Order Lines tab. Enter the number of products and save your changes.
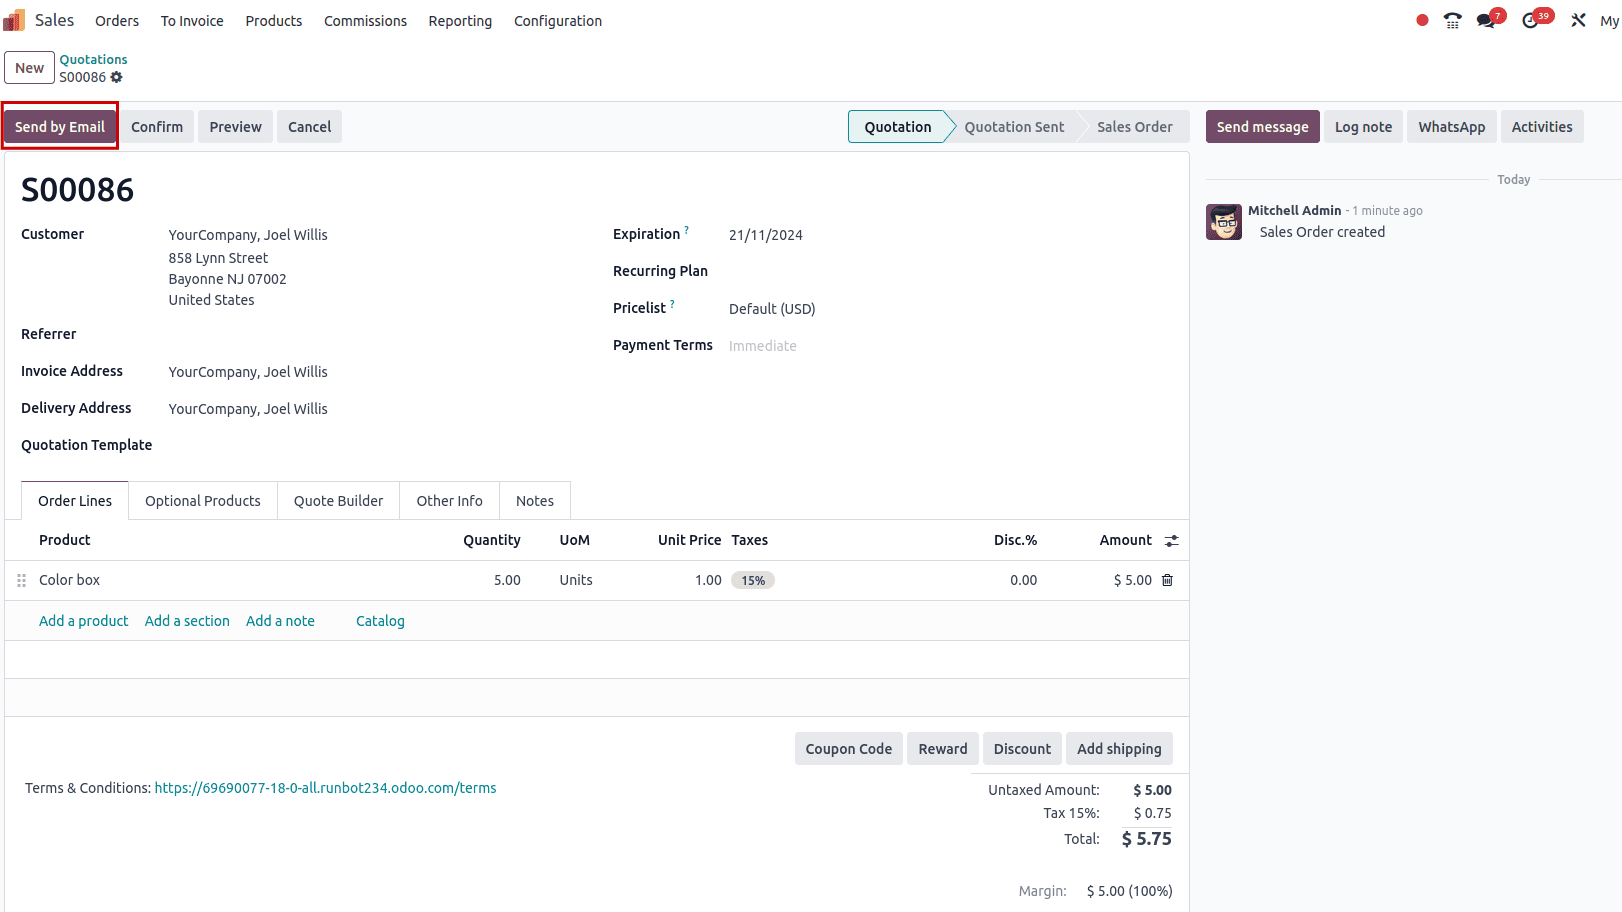
You can send the order details to the customer directly from the Sales Order window. To do this, click the "Send by email" button, as shown in the screenshot below.
A new window will open where you can see the customer's details in the Recipients field. You can also view and edit the Subject and Email text, as illustrated in the screenshot below. Additionally, you can upload extra documents by clicking on the attachments icon in the Odoo window. After entering all the necessary information, click the SEND button, as shown in the screenshot below.
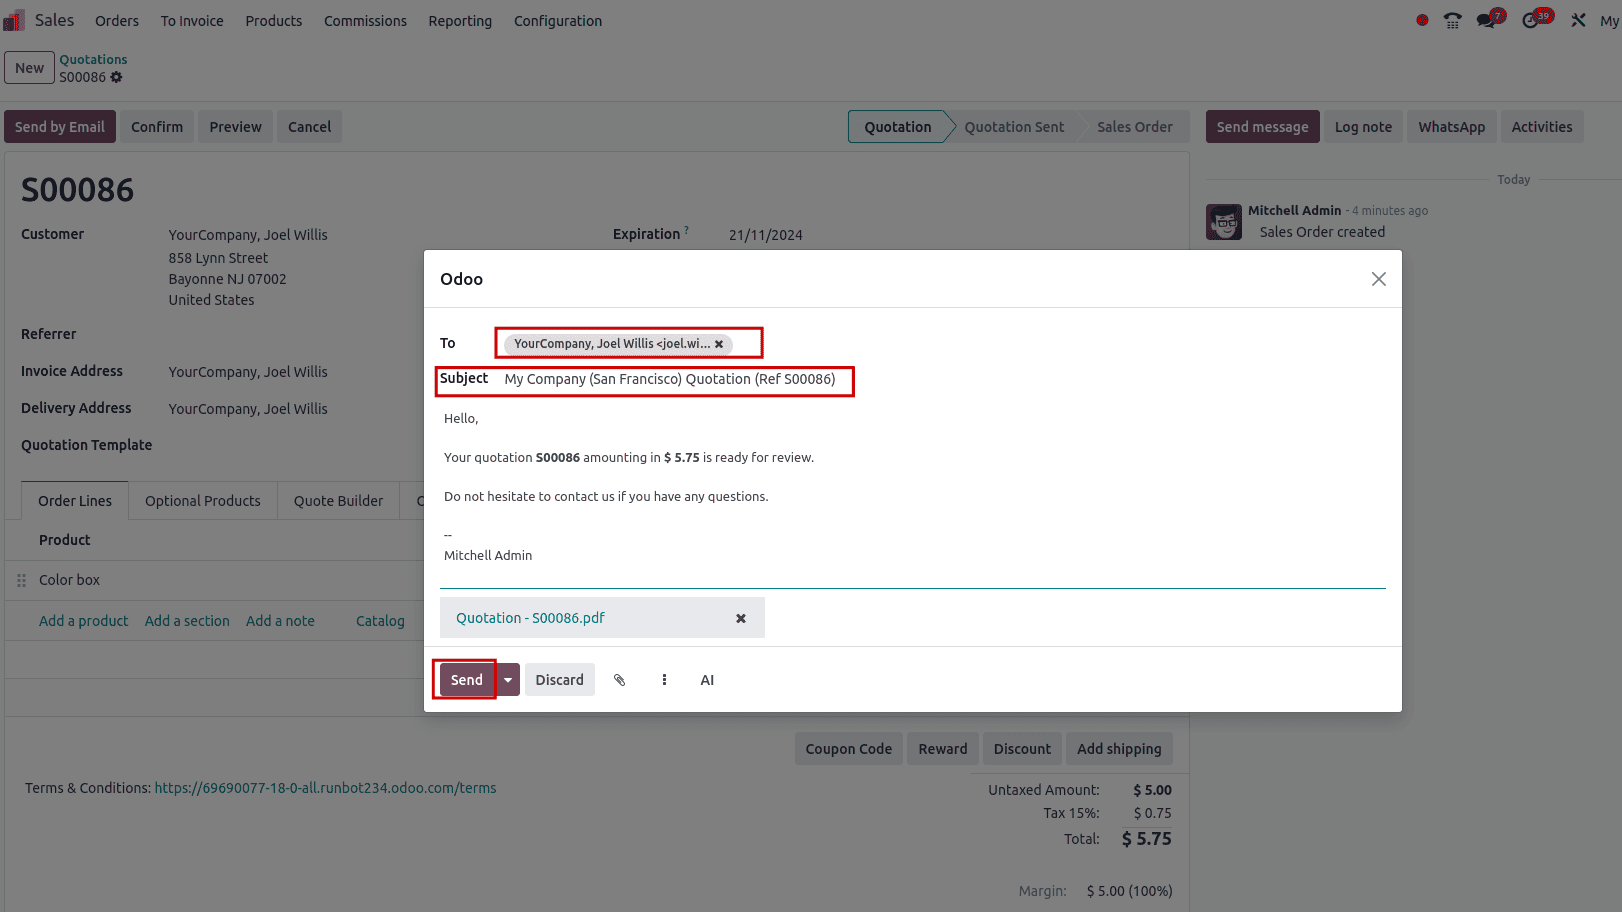
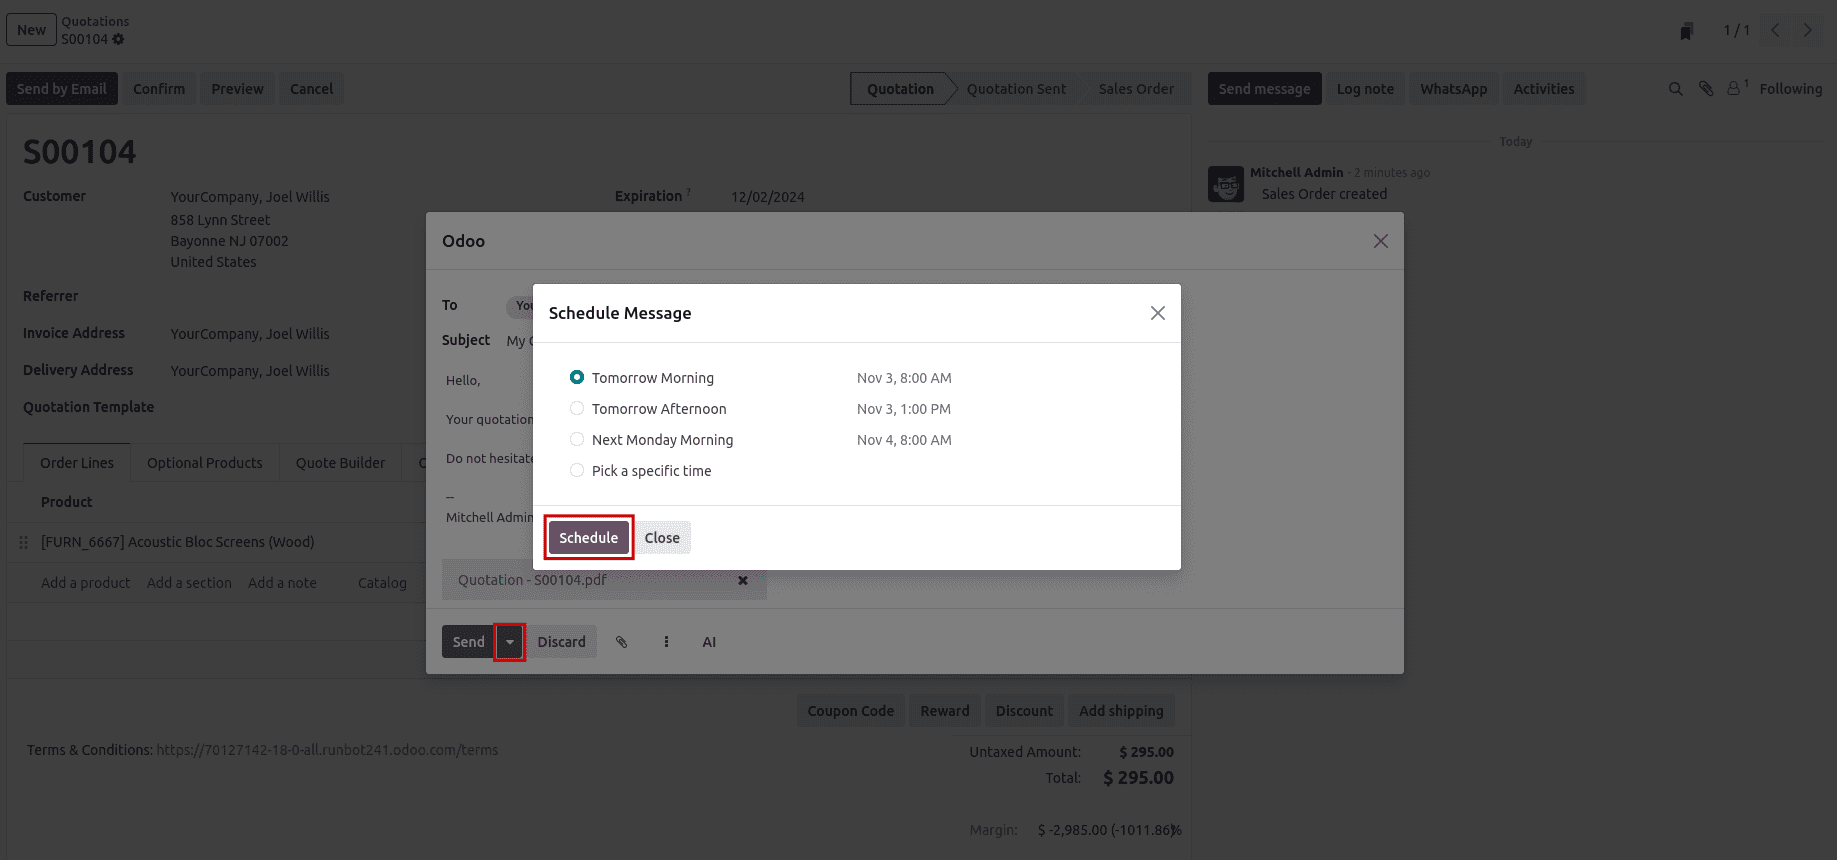
In Odoo 18, a new feature has been introduced for scheduling emails and leveraging an AI tool to create text for email templates.
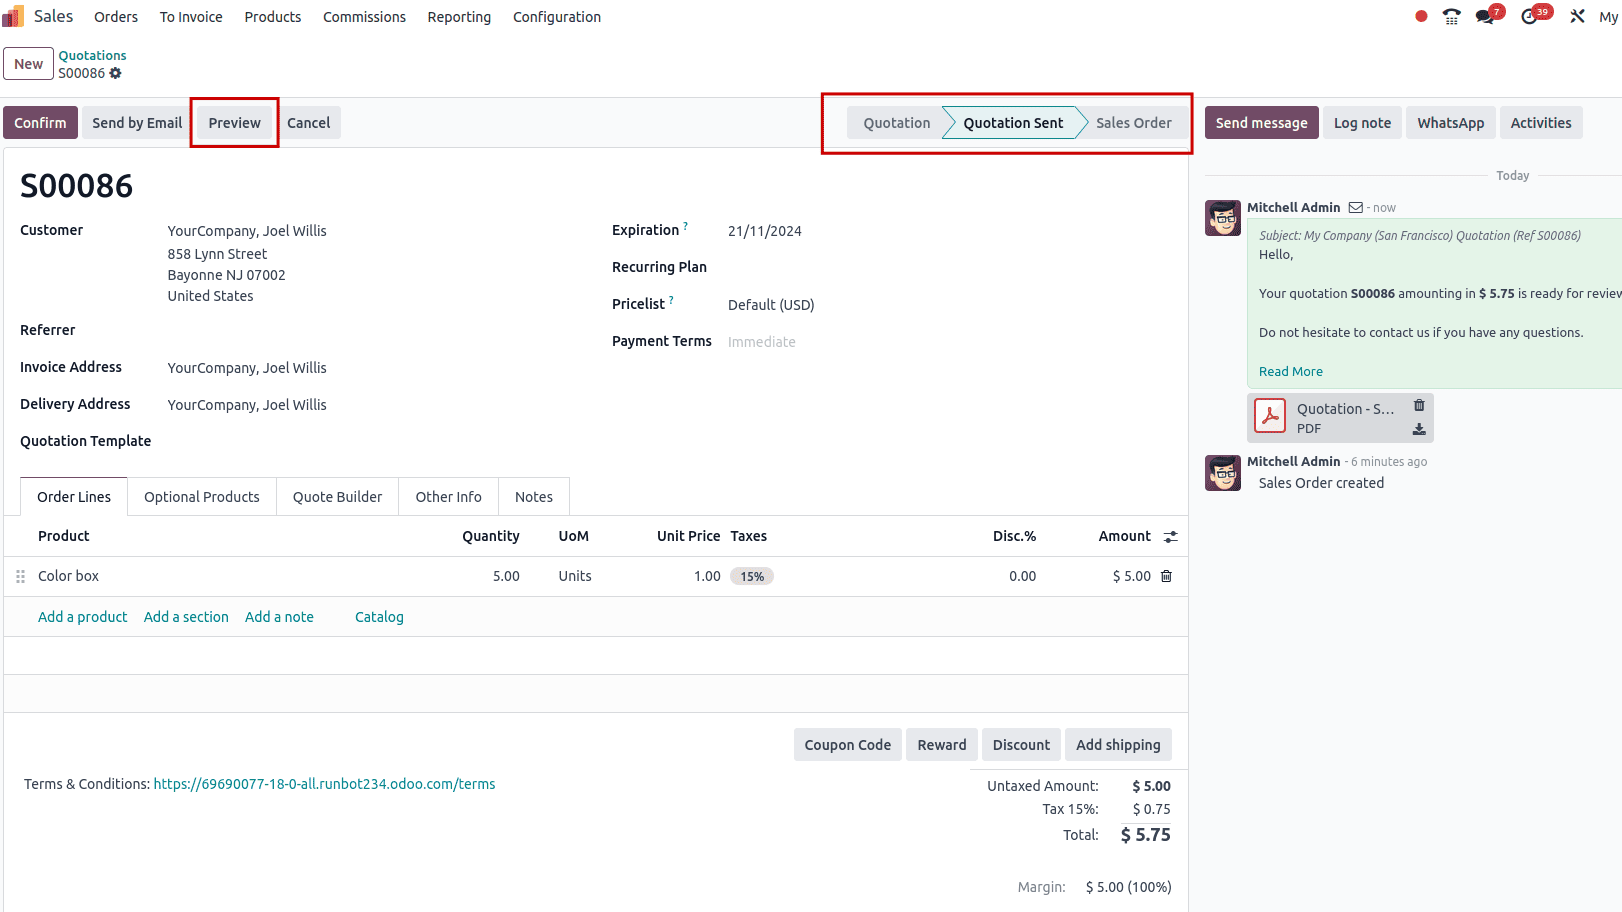
After the email is sent, the stage will change from Quotation to Quotation Sent. You can access the customer portal by clicking on the Preview smart button in the Sales Orders window.
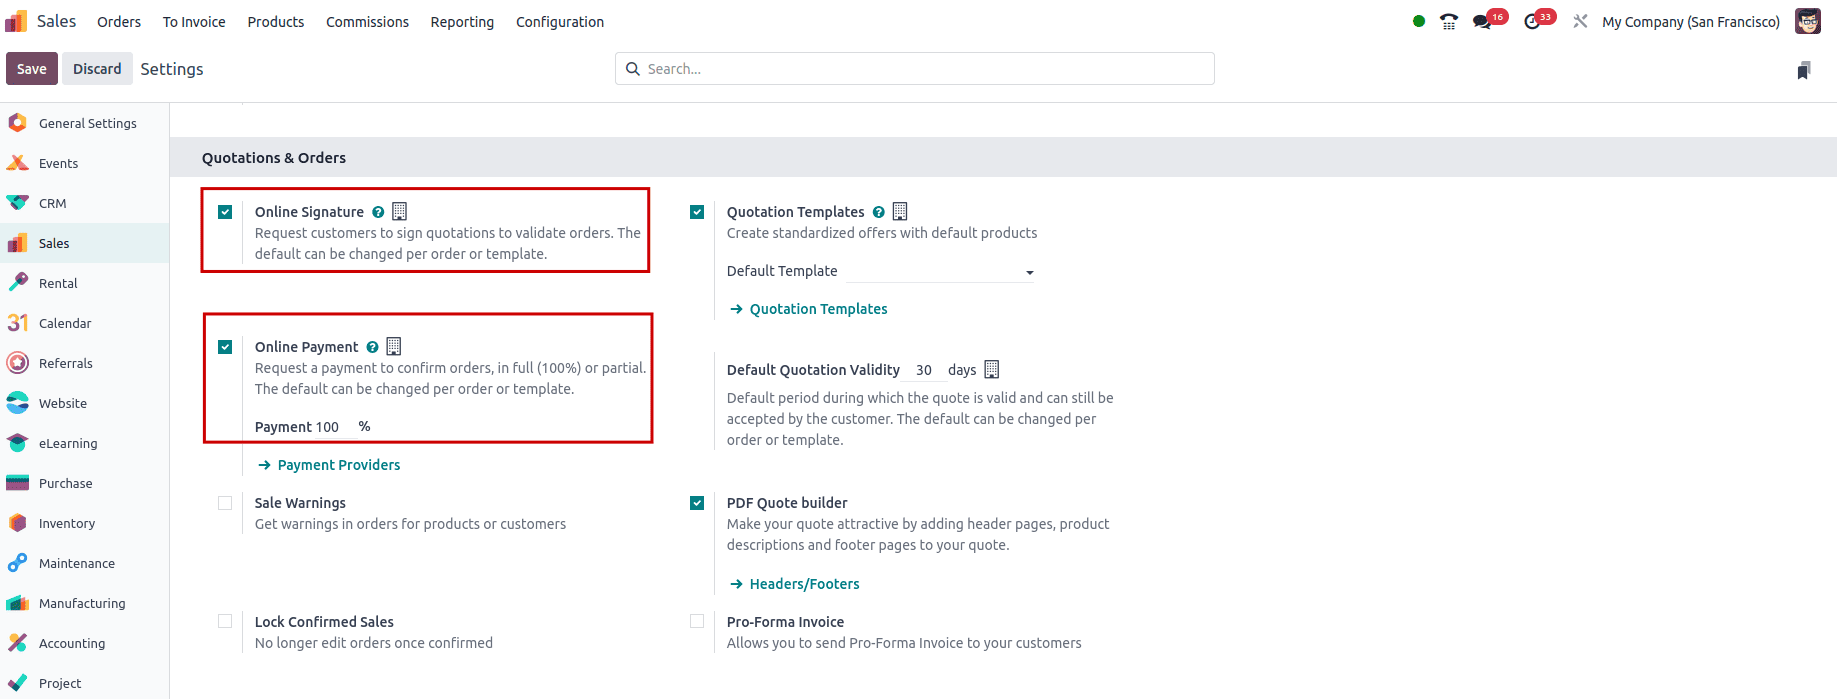
Enable online payment and online signature in the configuration settings. See the screenshot below.
Log in as a portal user to view the customer quotation. Customers can easily make payments through the customer portal after accepting a quotation. The portal displays essential quotation details, such as the Expiration Date, Quotation Date, Invoicing, and Shipping Address. To complete the payment for the item, customers simply need to click the Sign & Pay button.

A validated order window appears for the customer, requiring their signature on the quotation. They can sign using the Auto, Draw, or Load options, as indicated in the screenshot below.
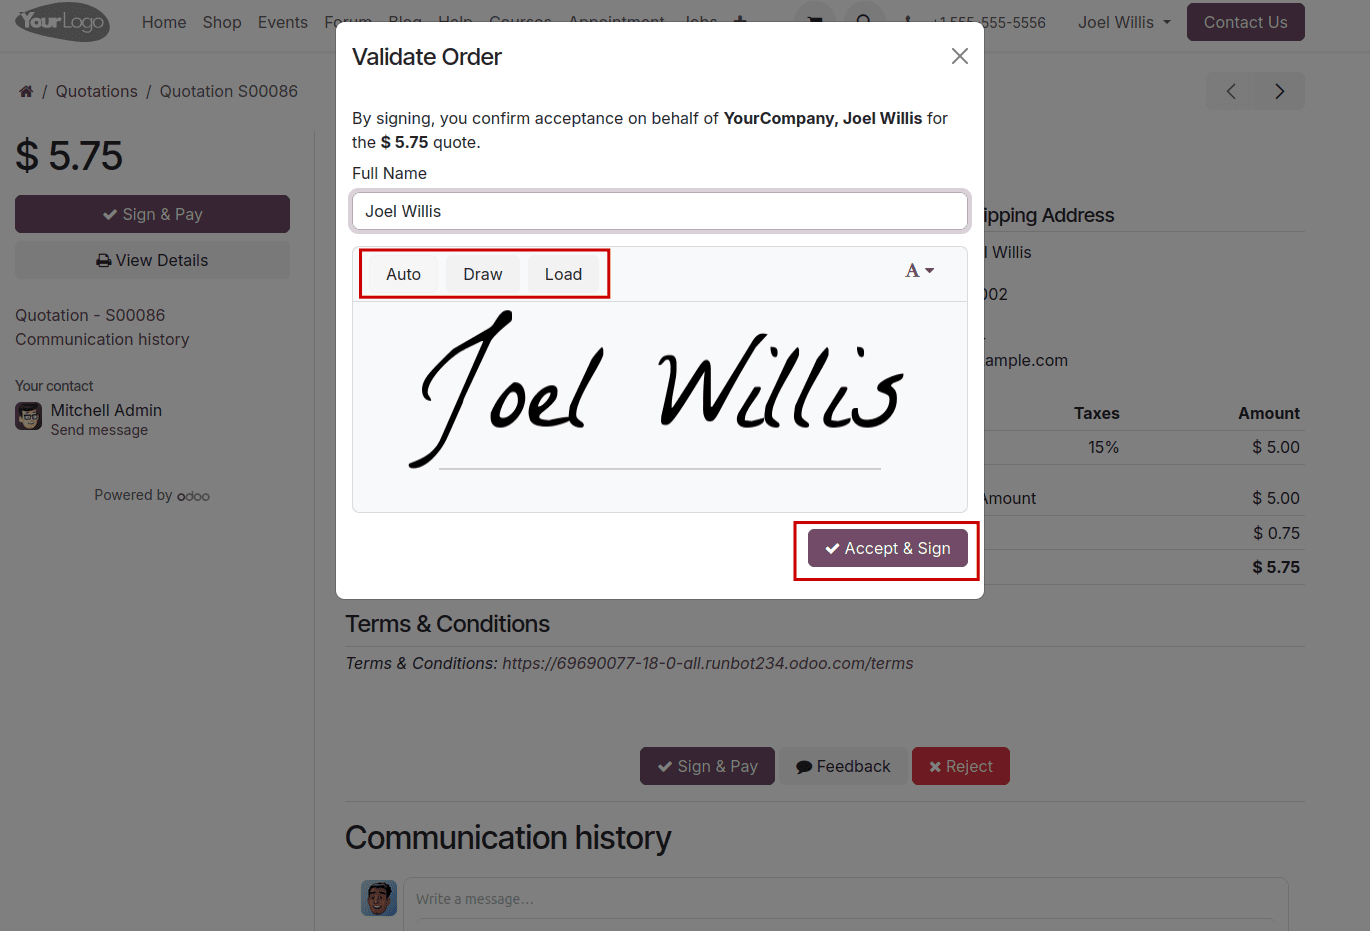
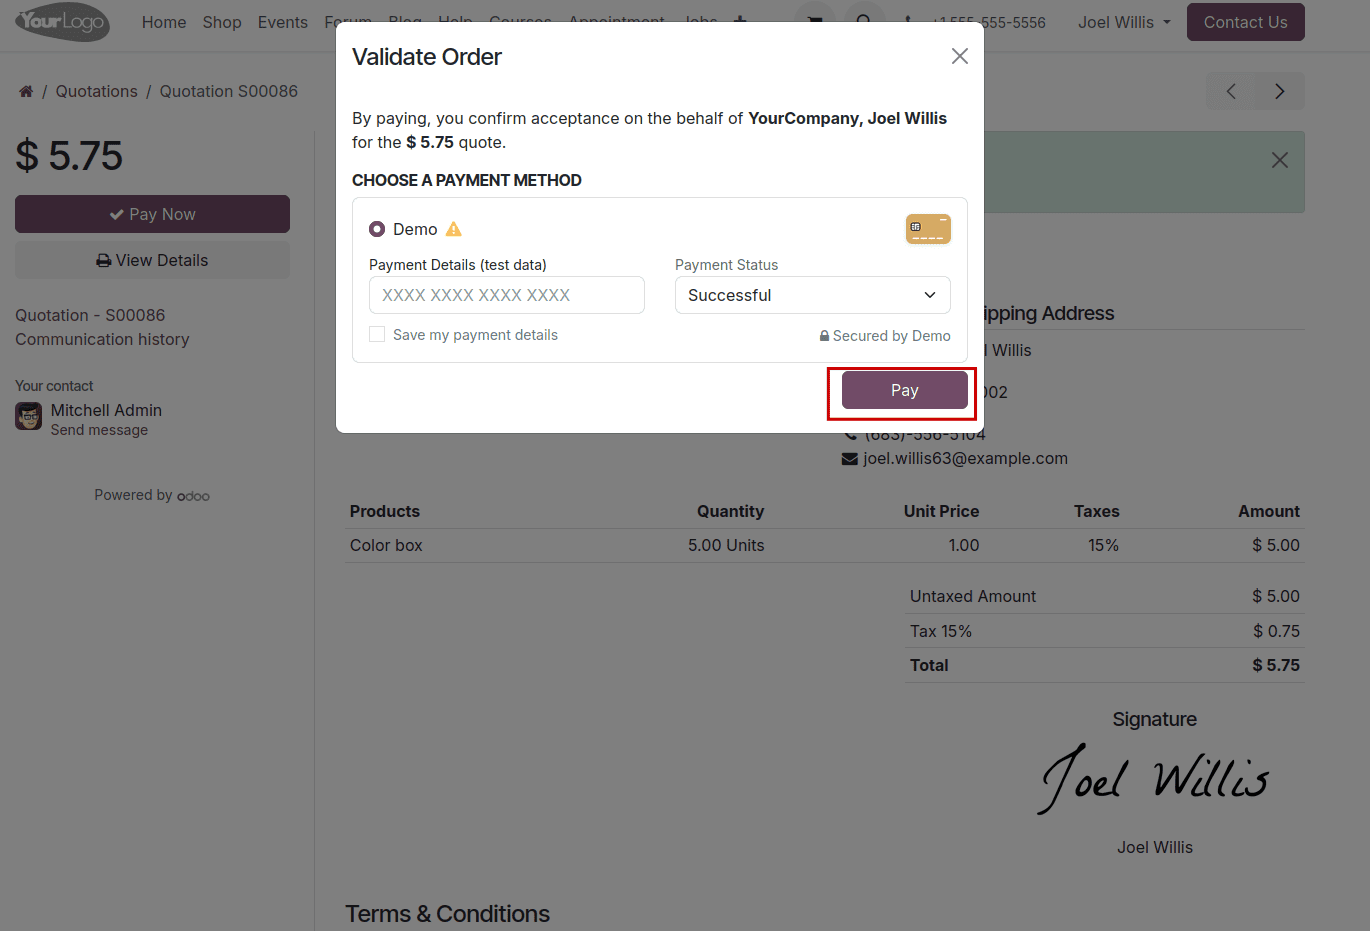
Here, we choose the Auto option and click the Accept & Sign button, as depicted in the screenshot above. Next, we proceed to the payment steps for the quotation. After selecting the appropriate payment method, click the PAY icon in the Validate Order window.
The customer portal shows that the payment has been processed successfully.
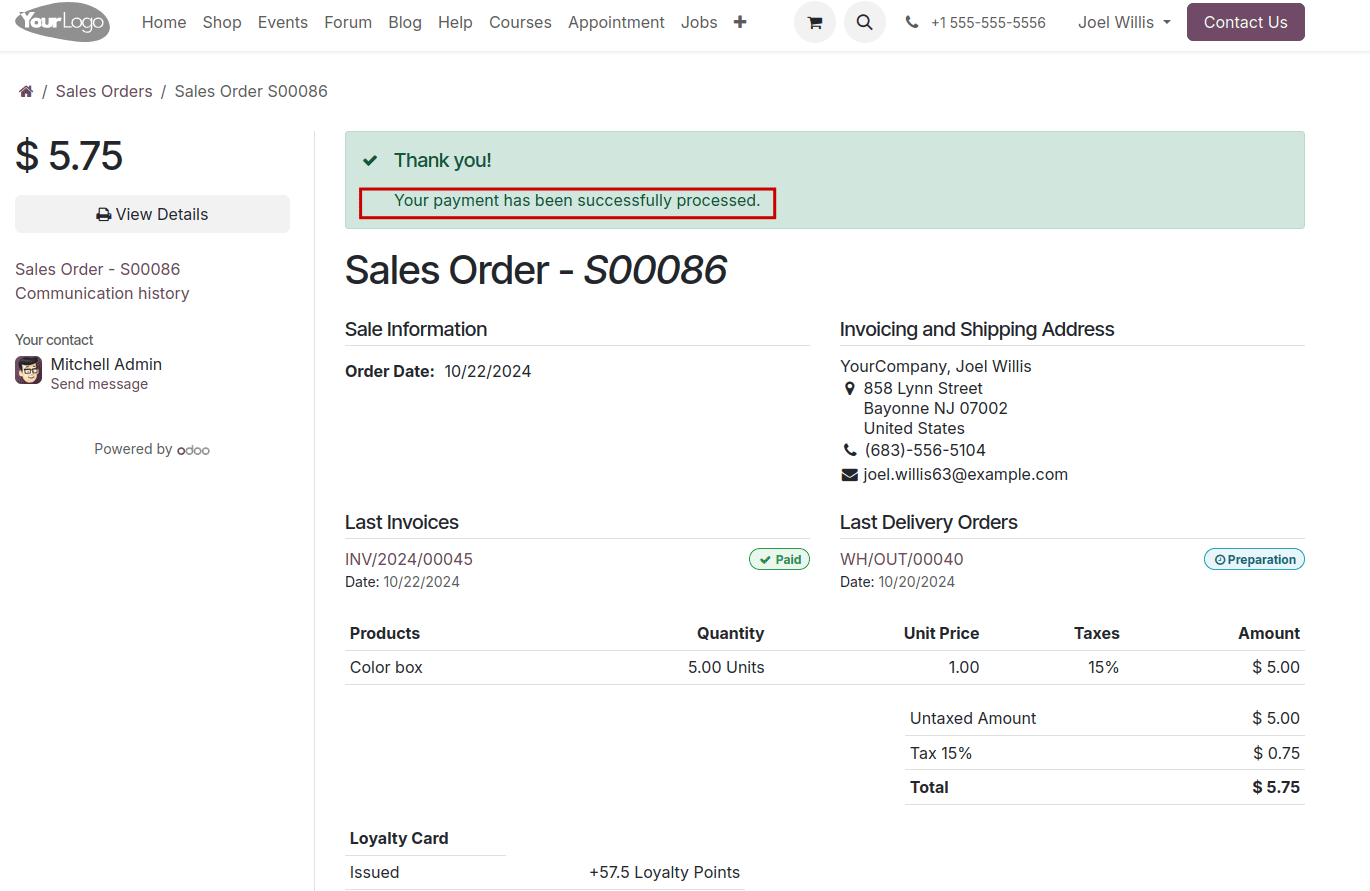
Return to the Sales Order window, and you will see that the stage has changed to Sale Order. Additionally, two new smart tabs, Delivery and Invoice, will be available.
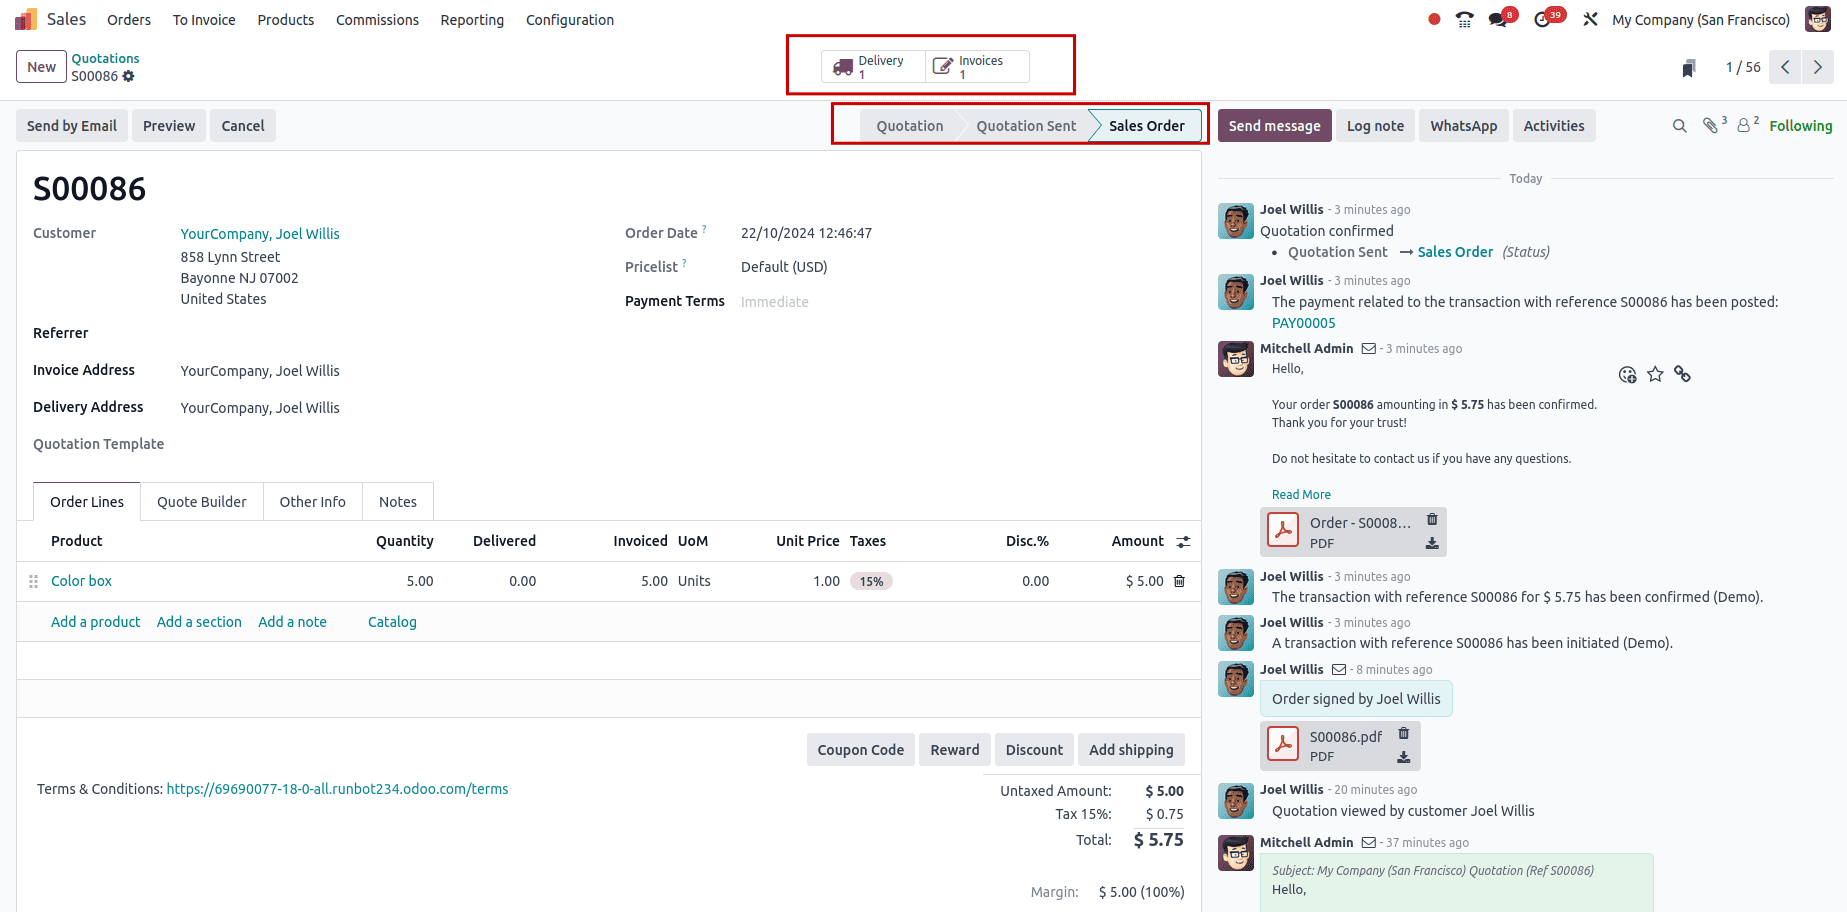
Here, the invoice is automatically generated after the customer completes the payment. Upon accessing the Invoice tab, the user can view the details of the created invoice, which is currently in the IN PAYMENT stage, as shown in the screenshot below.
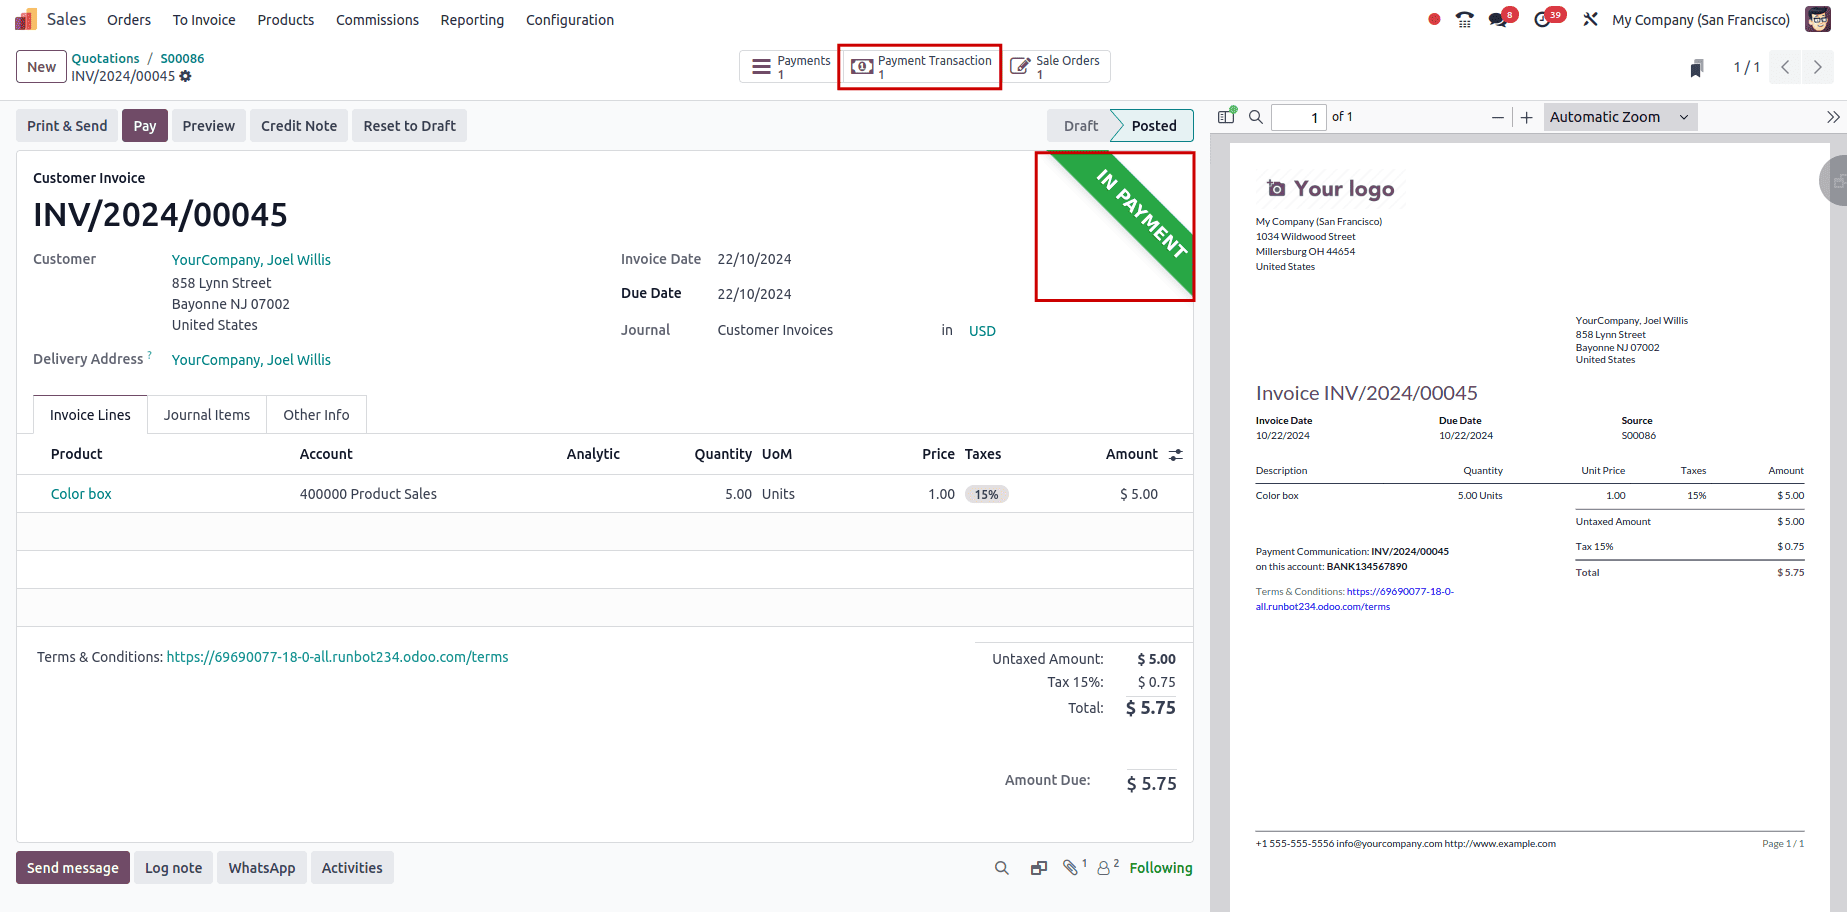
To view the transaction information, click on the Payment Transaction smart button. This will display details such as Provider, Amount, Company, Created Date, and Partner Name, as shown in the screenshot below.

Therefore, generating an invoice automatically after payment is straightforward.
A company enhances its invoice procedures automatically using the Odoo 18 Sales module. This ERP software allows for the efficient processing of online payments for products and the creation of invoices. Effective invoice management contributes to business sales growth within the company.
To read more about How to Configure Invoicing Policies in Odoo 18, refer to our blog How to Configure Invoicing Policies in Odoo 18.