In all types of firms, it is essential to manage staff effectively. Human resources need to be properly monitored and managed in order to guarantee a smooth workflow within the company. To manage all forms of employee-related tasks, you need a suitable system. All of your employee information will be stored in a single database by the Odoo ERP system, allowing you to quickly and simply obtain any information you need about a specific employee. In the Odoo 16 Employee module, you may create records of employees based on their job descriptions and places of employment. The Employee module can be connected with other Odoo-based HR modules to increase the system's functionality.
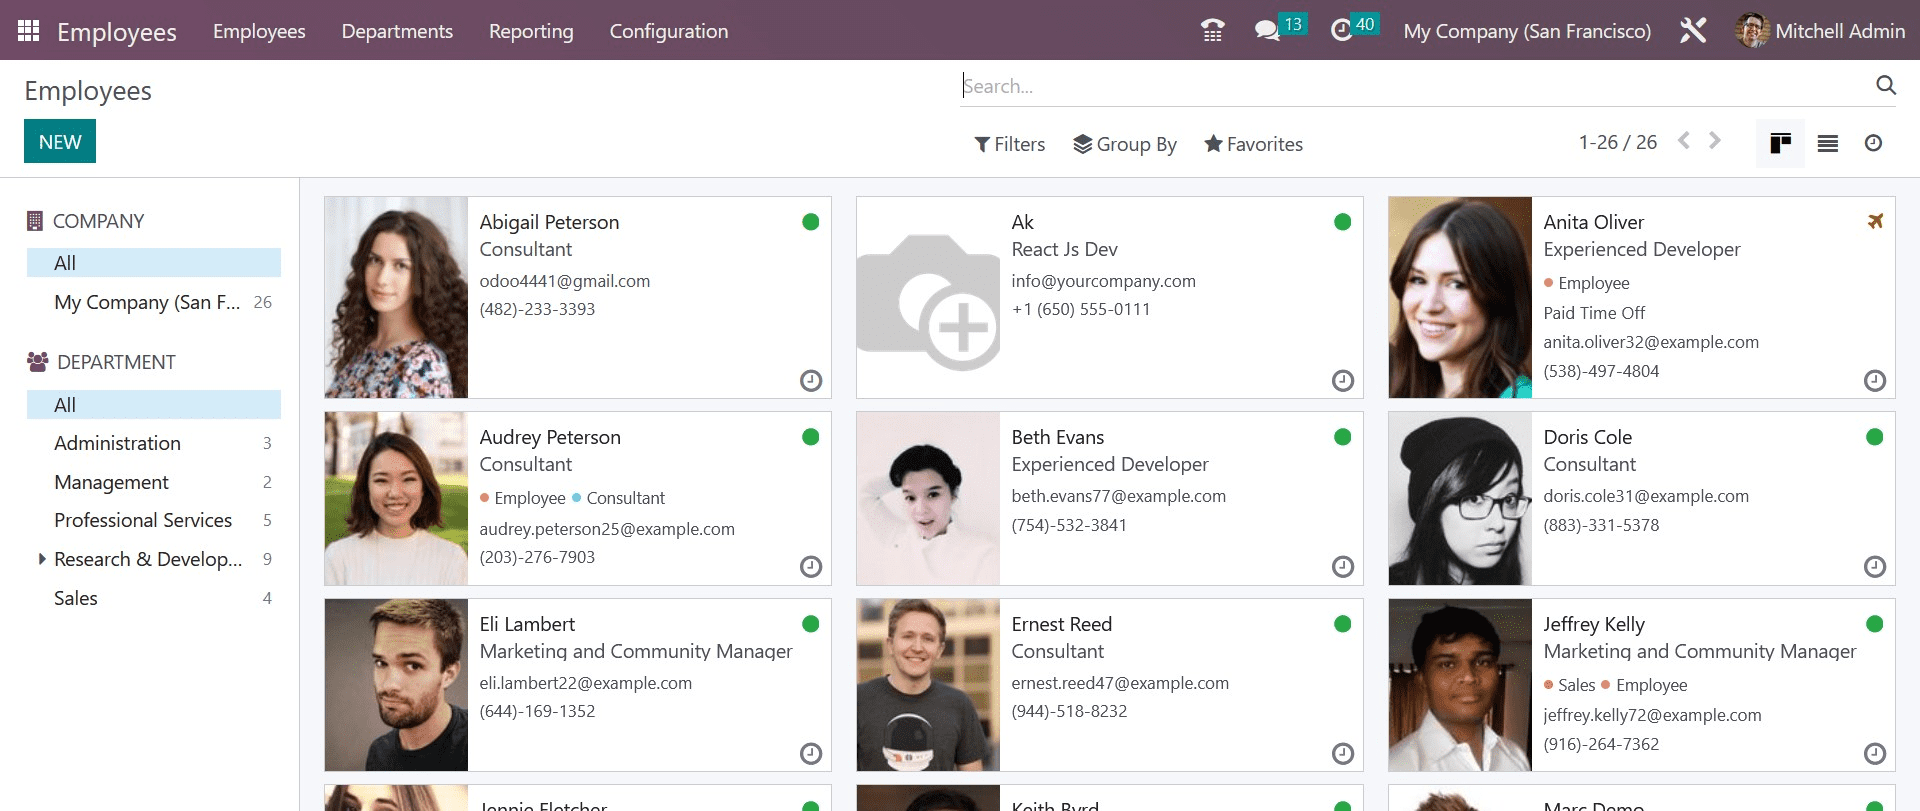
The Employee module can create an employee profile that includes personal information, employment details, a contract, a resume, and many other things. When you create an employee profile in the module, you may use the profile window to access documents, timesheets, contracts, equipment, work entries, and payslips linked to the employee, as well as schedule or plan activities with the specific person. When you launch the module, you will see a Kanban view of the employee profiles saved in the system.
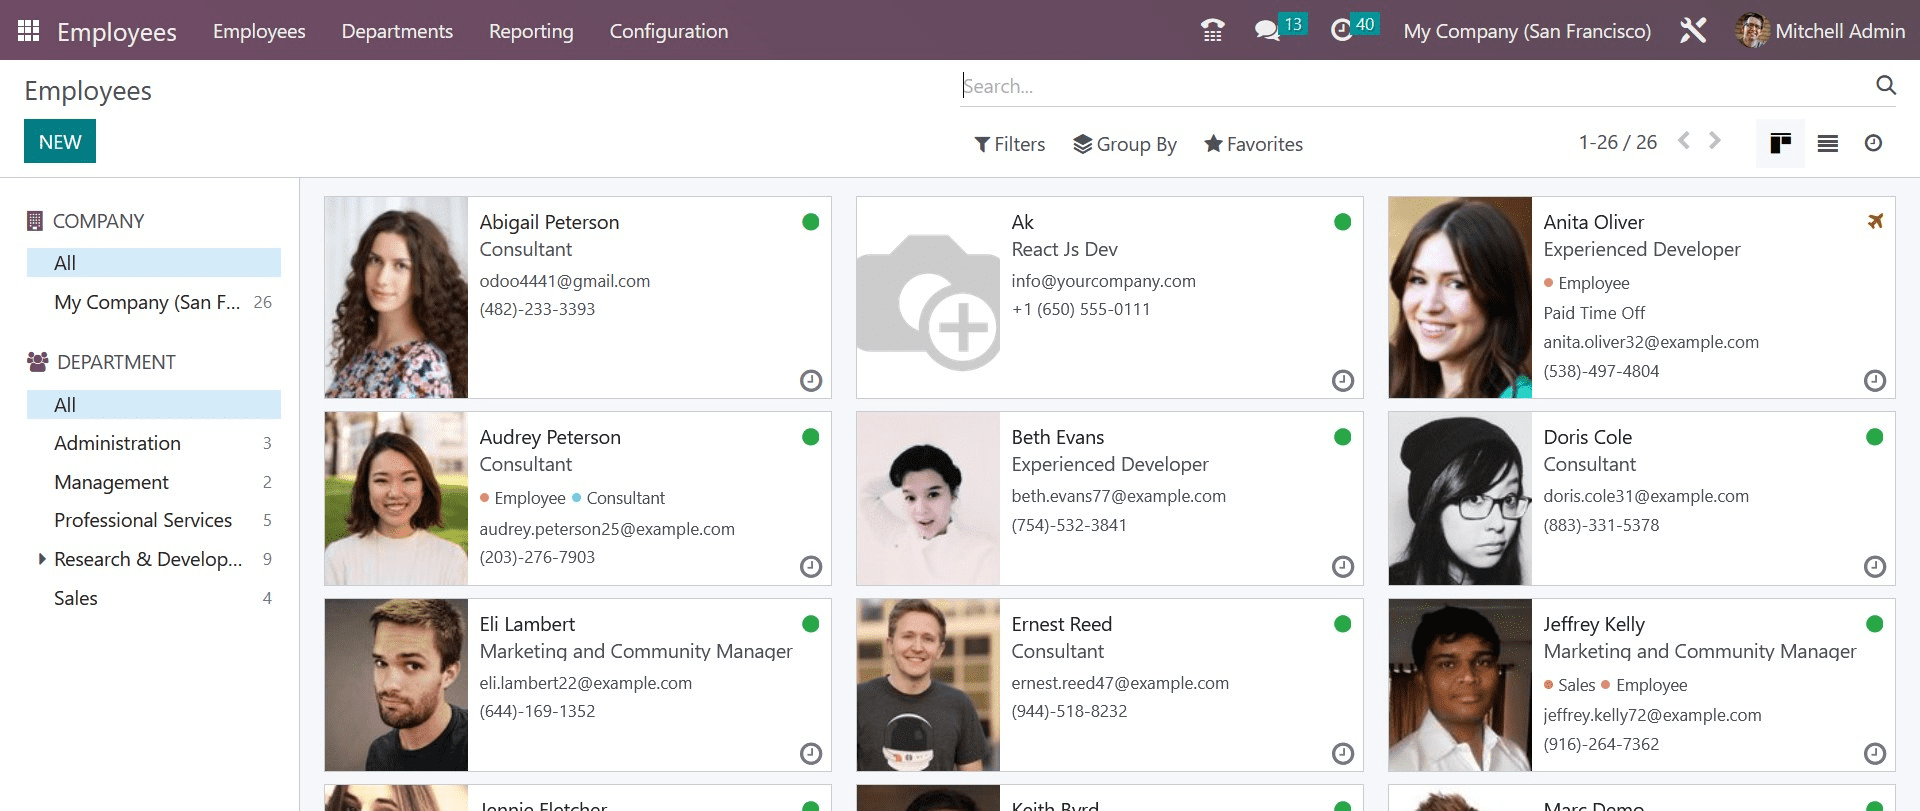
The fundamental information about each employee, such as name, position held, contact details, and a photo, will be included on their profile. Using the panel on the left side of the screen, you can quickly categorize the personnel of each firm if you work in a multi-company scenario. You can also view personnel according to their departments.
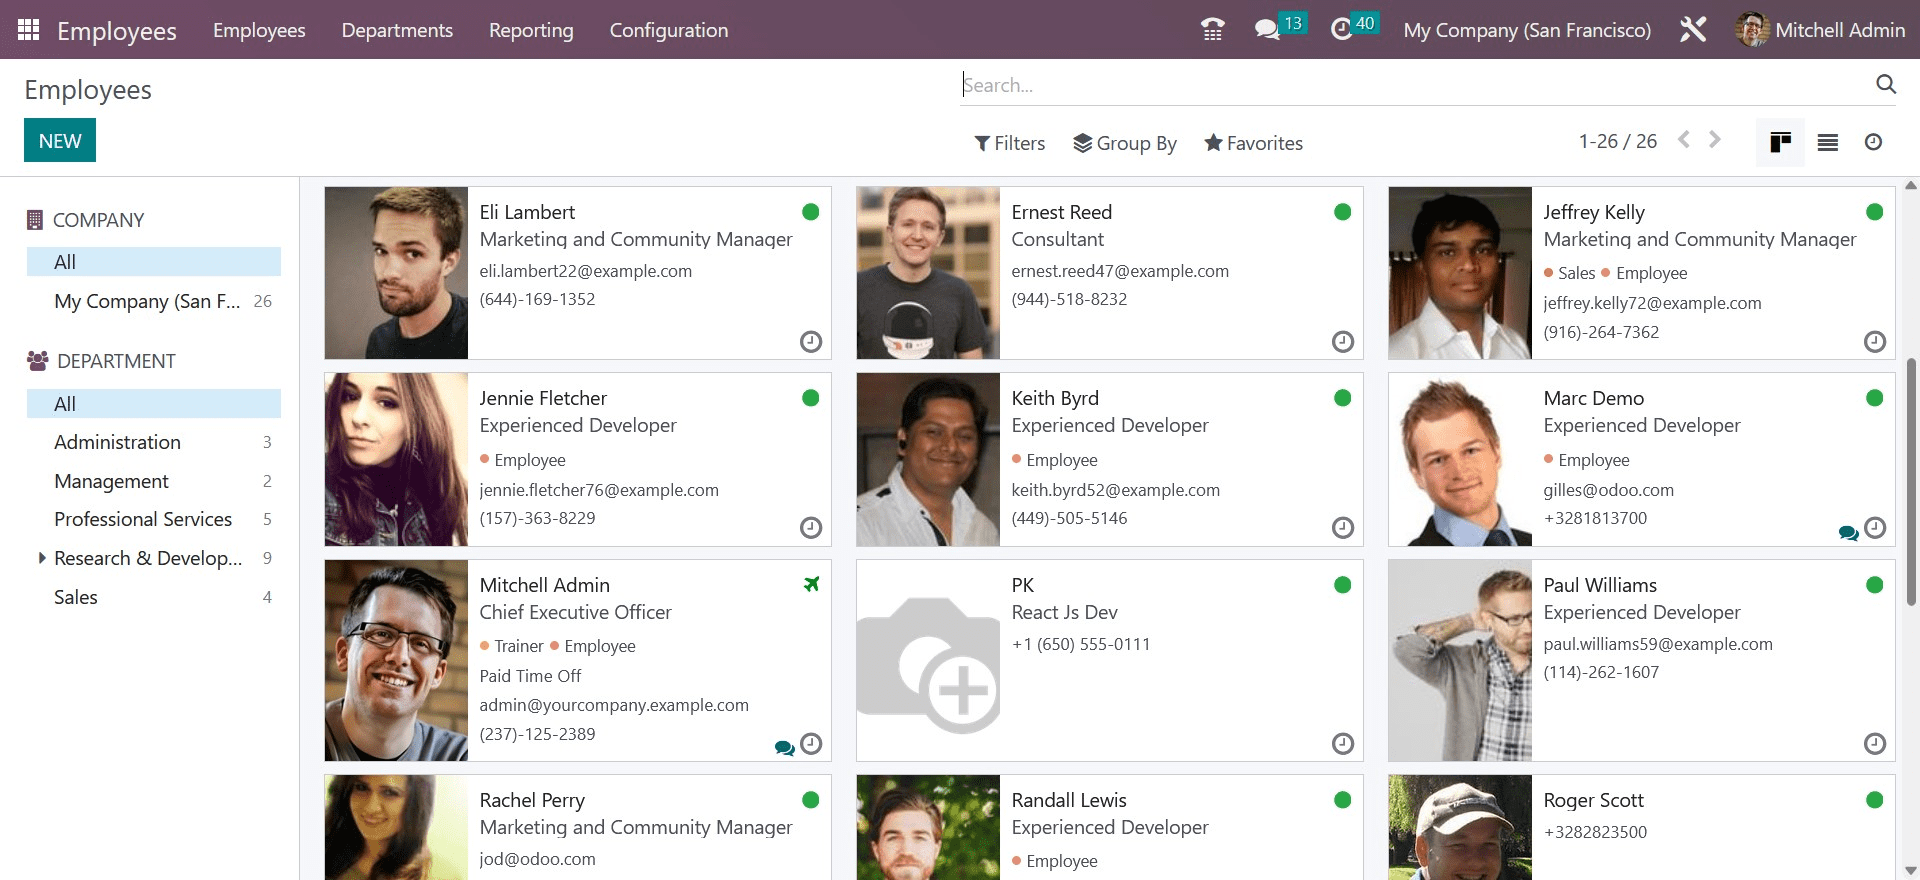
The employee is online, as seen by the tiny green circle on their profile. You can tell an employee isn't there if their profile displays a tiny airplane icon. Each profile includes a little clock icon that may be used to schedule different activities with the related employee. To communicate with that employee directly, utilize the chat icon.
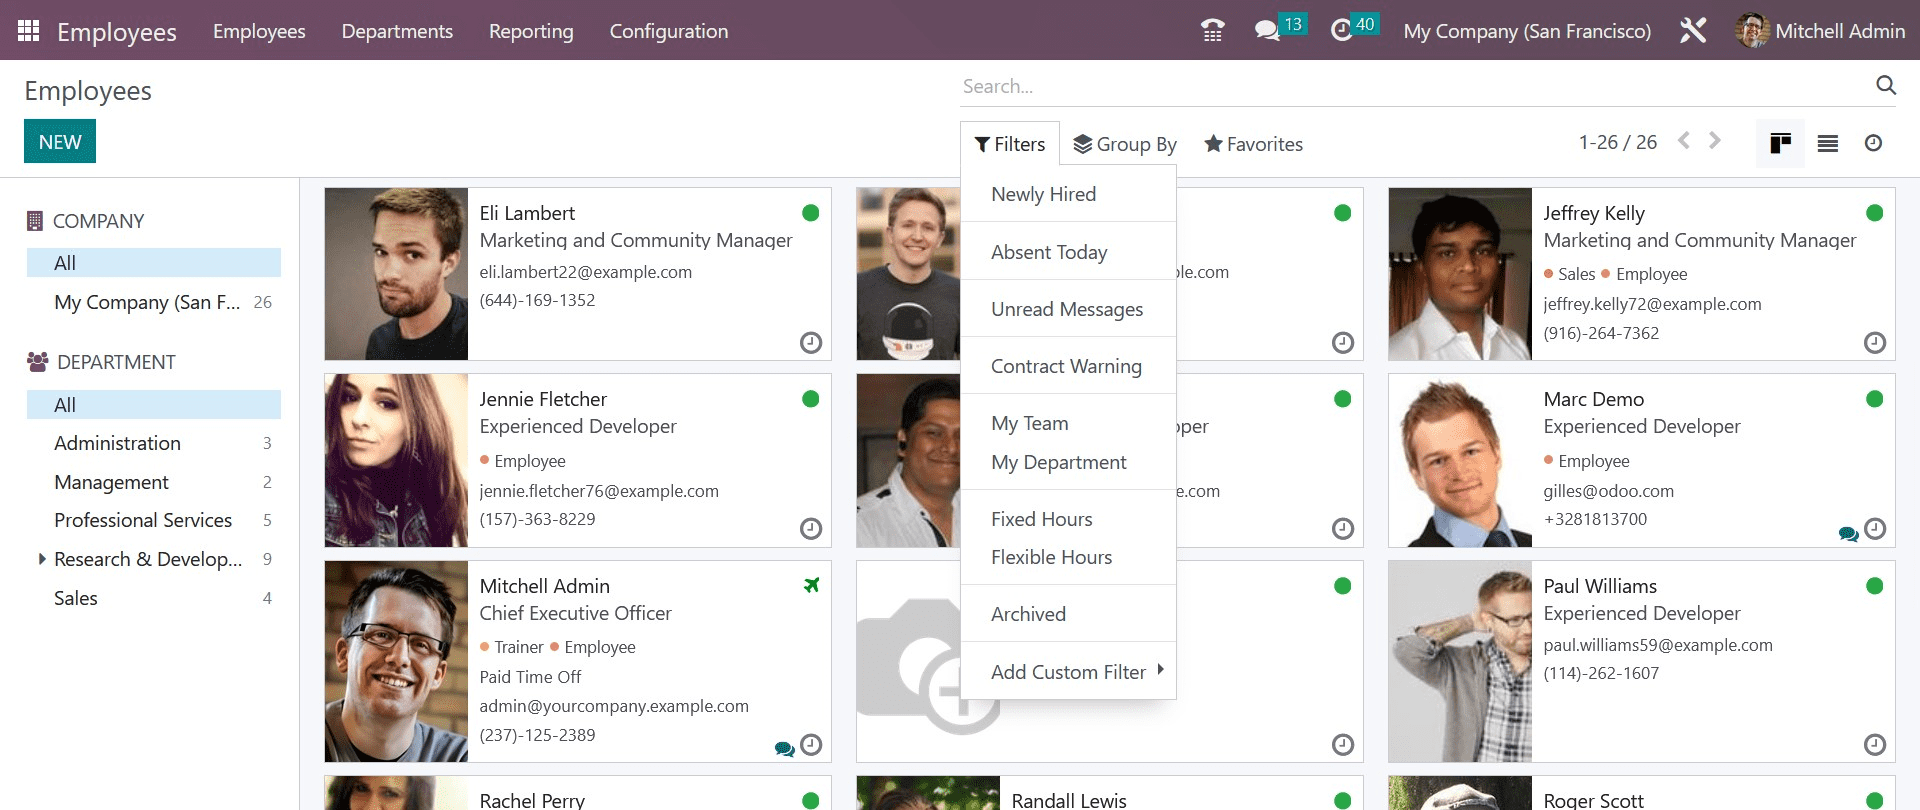
As default filters, you'll have access to Newly Hired, Absent Today, Unread Messages, Contract Warning, My Team, My Department, Fixed Hours, Flexible Hours, and Archived.
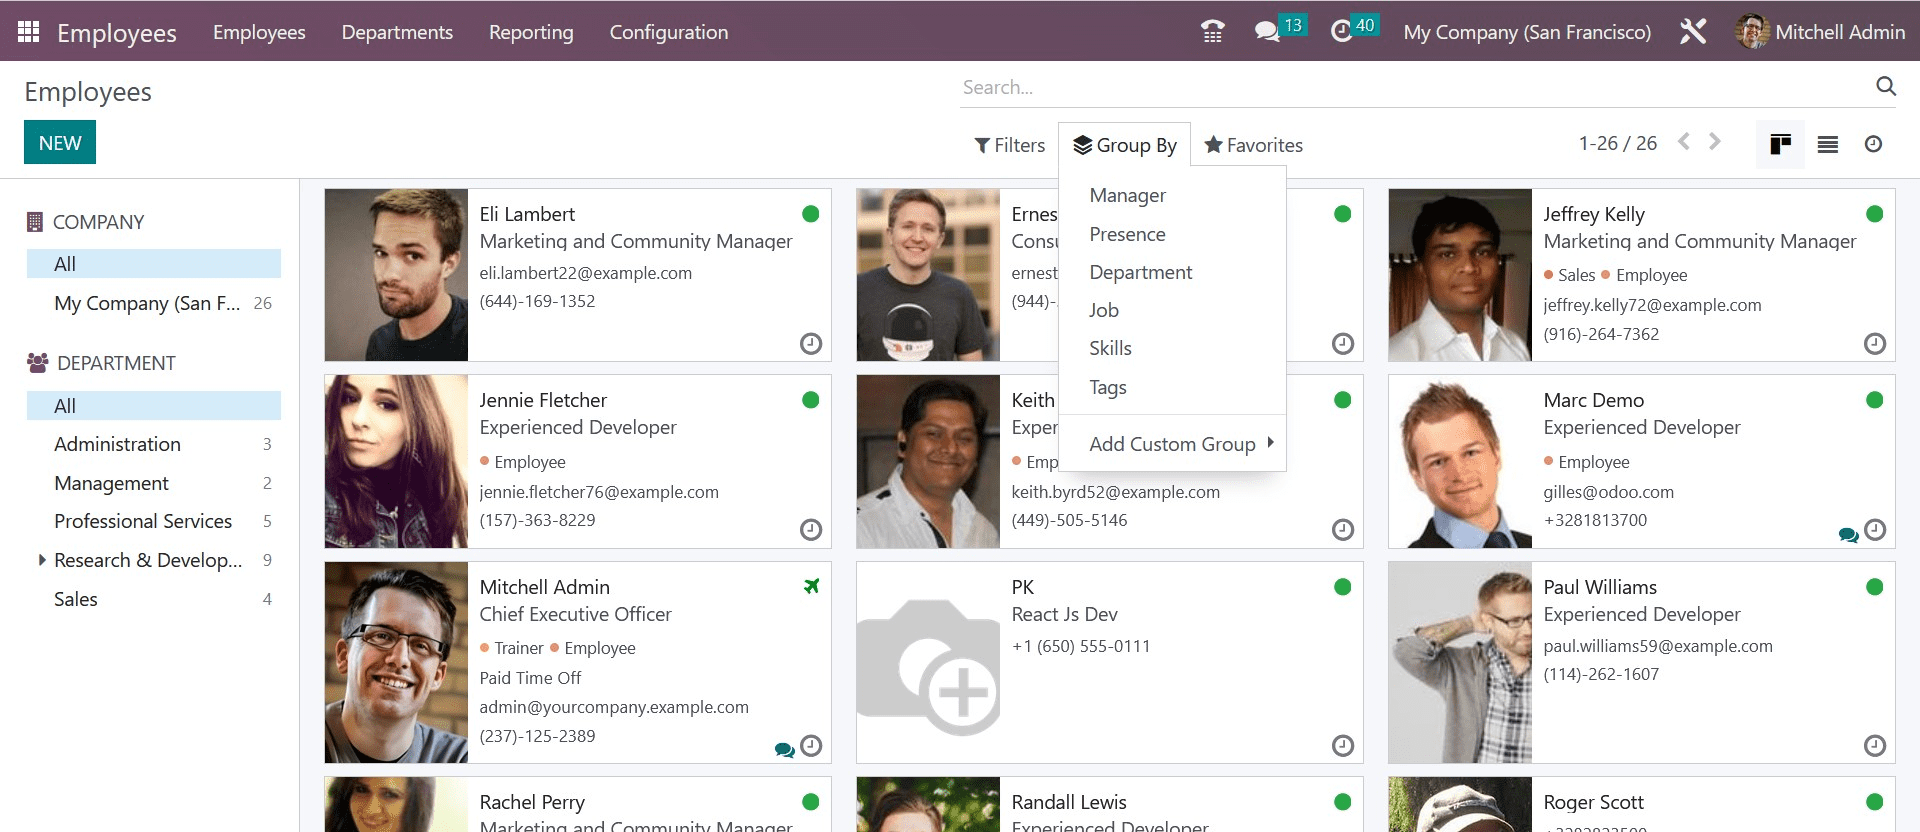
To categorize the employees according to their manager, presence, department, job, skills, and tags, use the categorize By option.
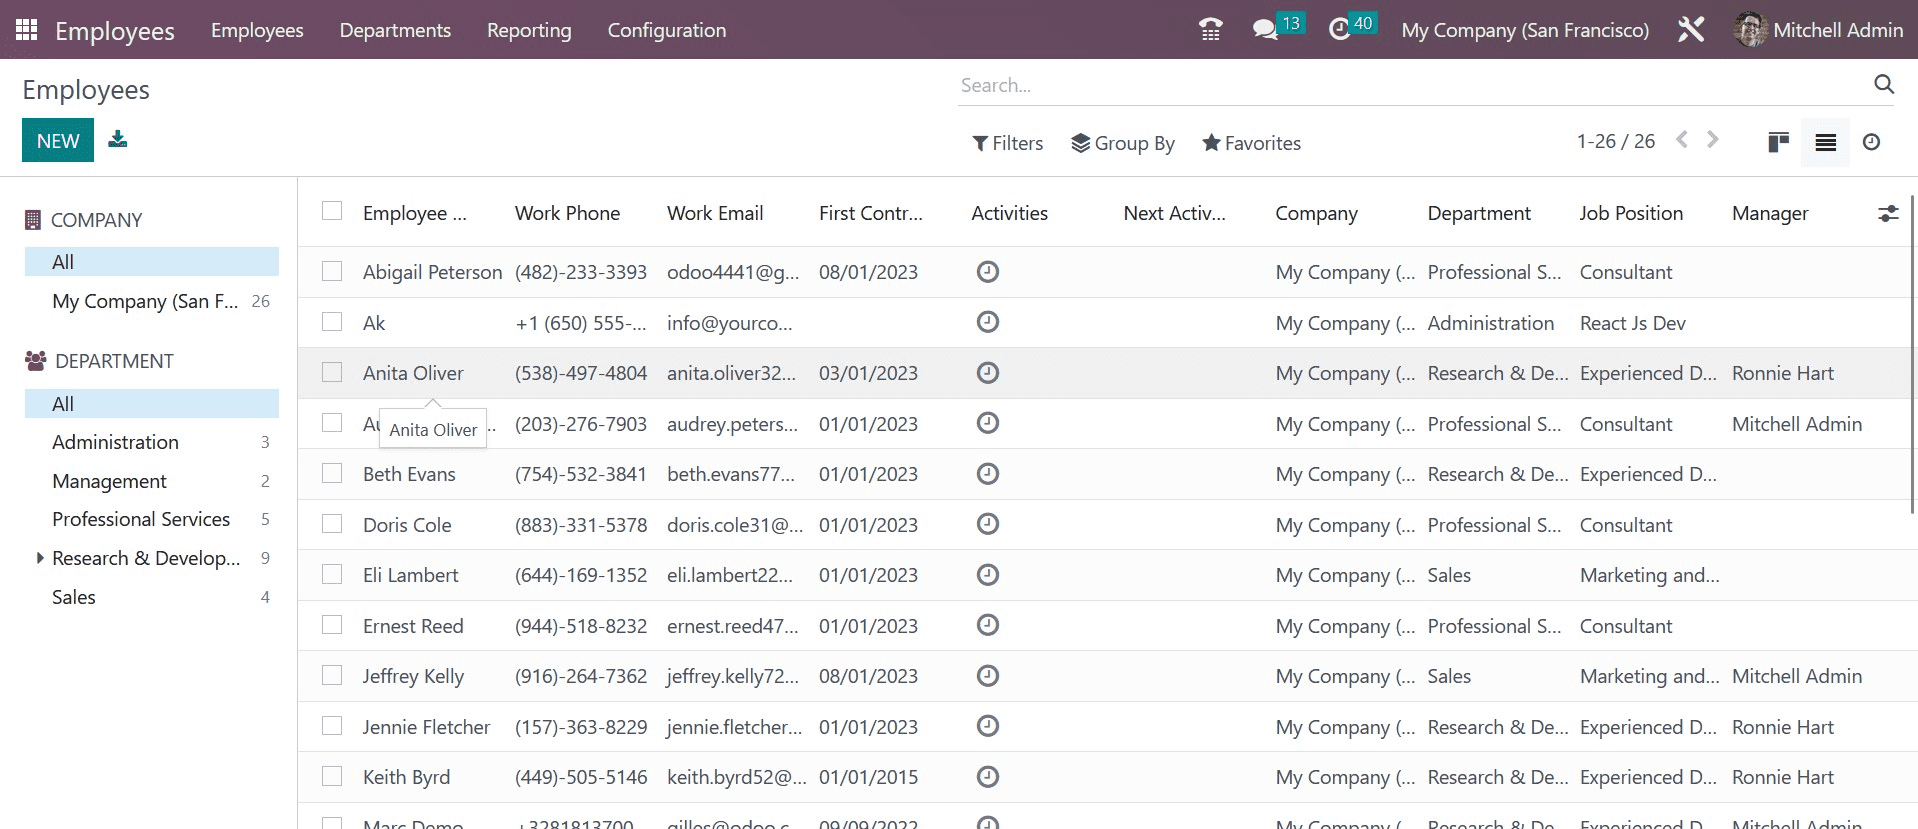
Name, Work Phone, Work Email, First Contract, Activities, Next Activities, Company, Department, Job Position, and Manager are all displayed in the list view of the employees. You can now create a new profile by clicking the Create button.
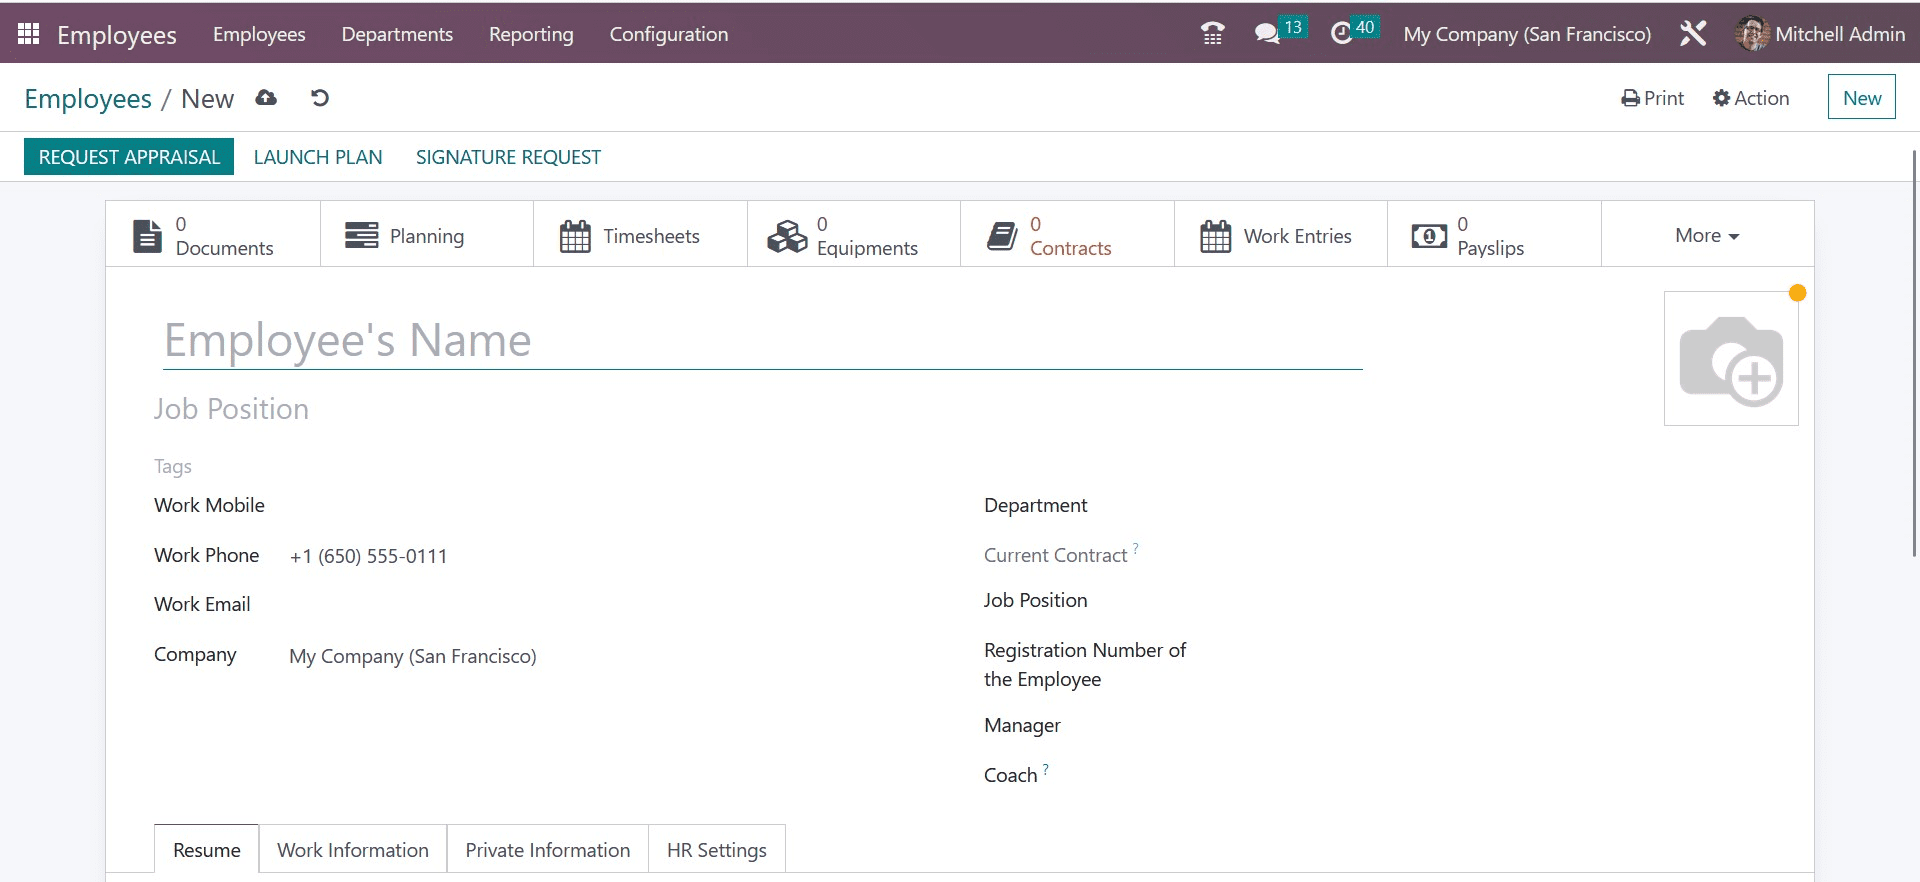
There will be a new form view where you may edit the employee's information. Include the employee's name and position within the organization in the relevant boxes. Additionally, you can provide the employee with the appropriate tags. You will be given particular fields to enter the employee's company, department, manager, and coach, as well as their work mobile, work phone, and work email. An area will be designated where an employee's photo can be uploaded.
Let's update the employee profile by adding the resume and the skills. You will receive the Resume tab for this, as displayed below.
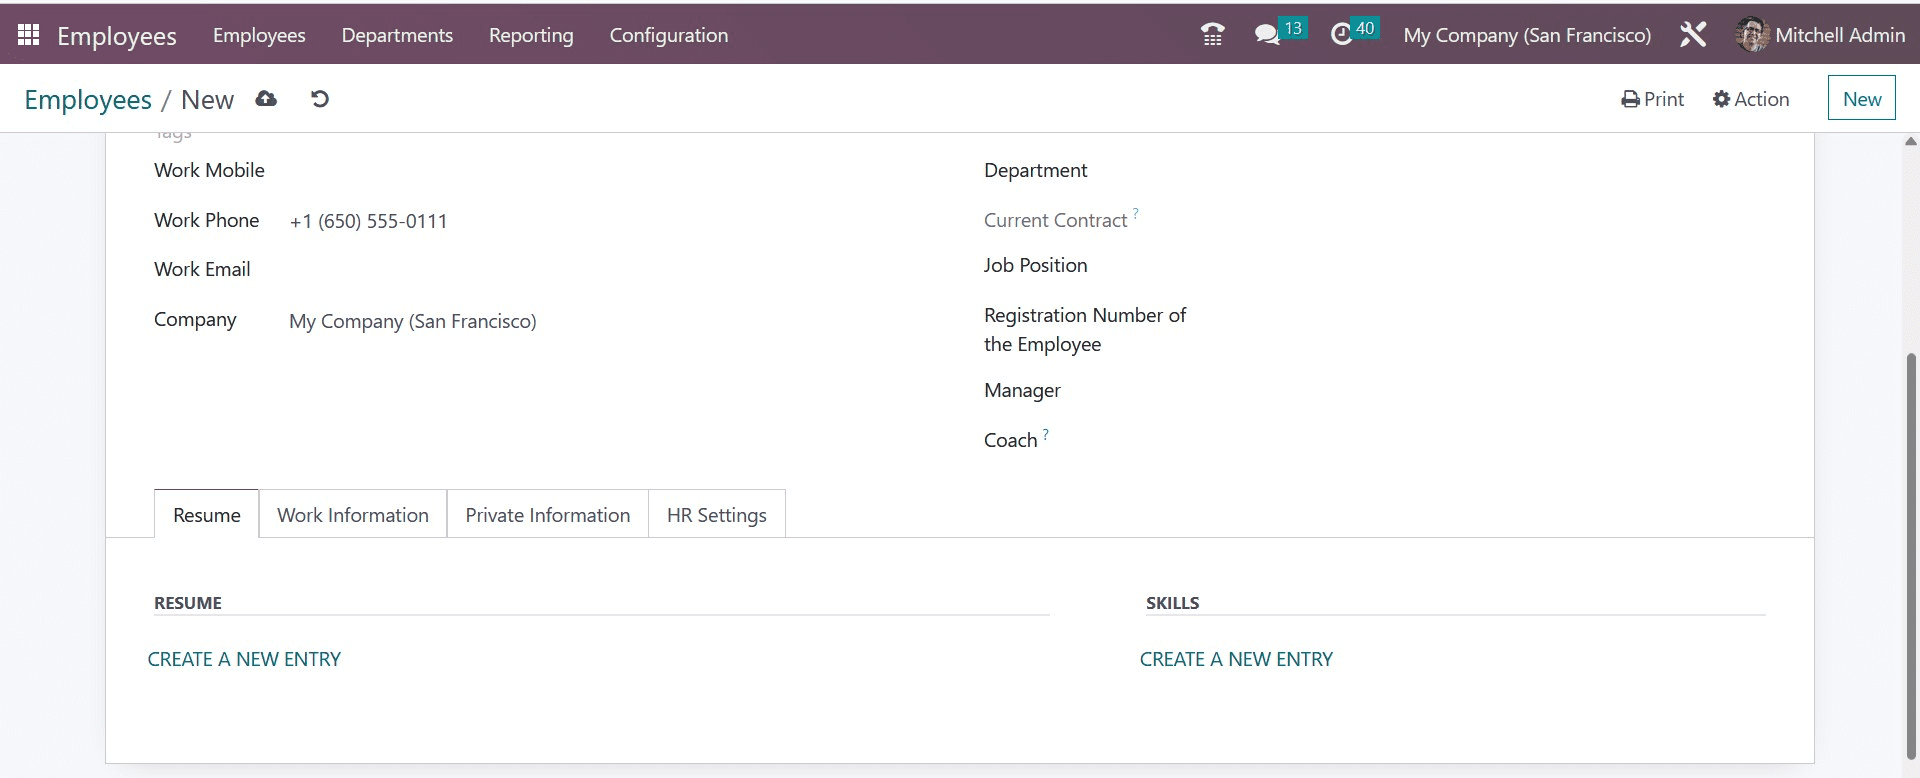
If you want to add resume lines to your profile, click Create a New Entry.
Under the Resume, you can provide information about your schooling, professional experiences, internal certifications, training history, and other qualifications. As displayed below, a pop-up will open as soon as you click this button.
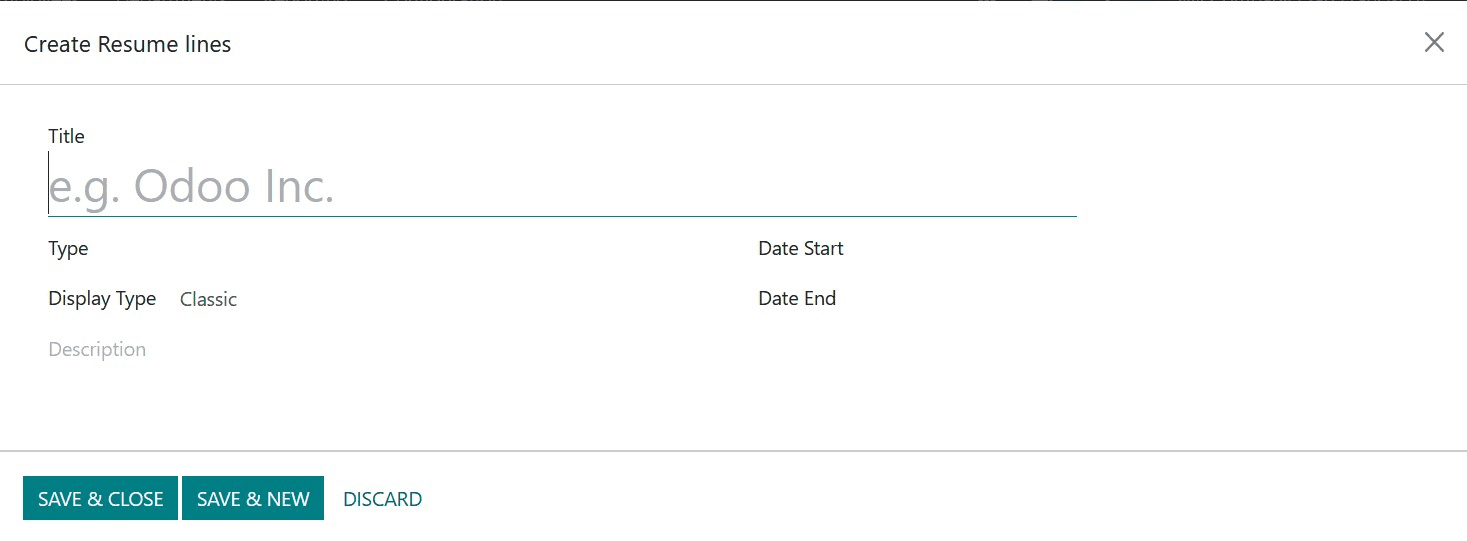
Enter a Title and choose Type from the drop-down menu. Experience, education, internal certifications, or internal training are all viable options.
Additionally, you can build a new Resume Line Type using the module's Configuration menu. You can choose Classic, Certification, or Course as the Display Type after mentioning the Type. In the Date Start and Date End boxes, specify the time frame. You may provide more information about this resume line in the description area.

This is what it appears like after adding resume lines. You may add more resume lines to this tab by using the Add button. Click the Create New Entry button in the talents field to add the employee's talents.

You will see a pop-up where you may choose the employee's skill type and specify a specific skill. Mark the employee's skill level in the Skill Level field.
You can add new skills Using the Add button on the Resume tab.
The essential employee-related job information fields can be found on the job Information tab.
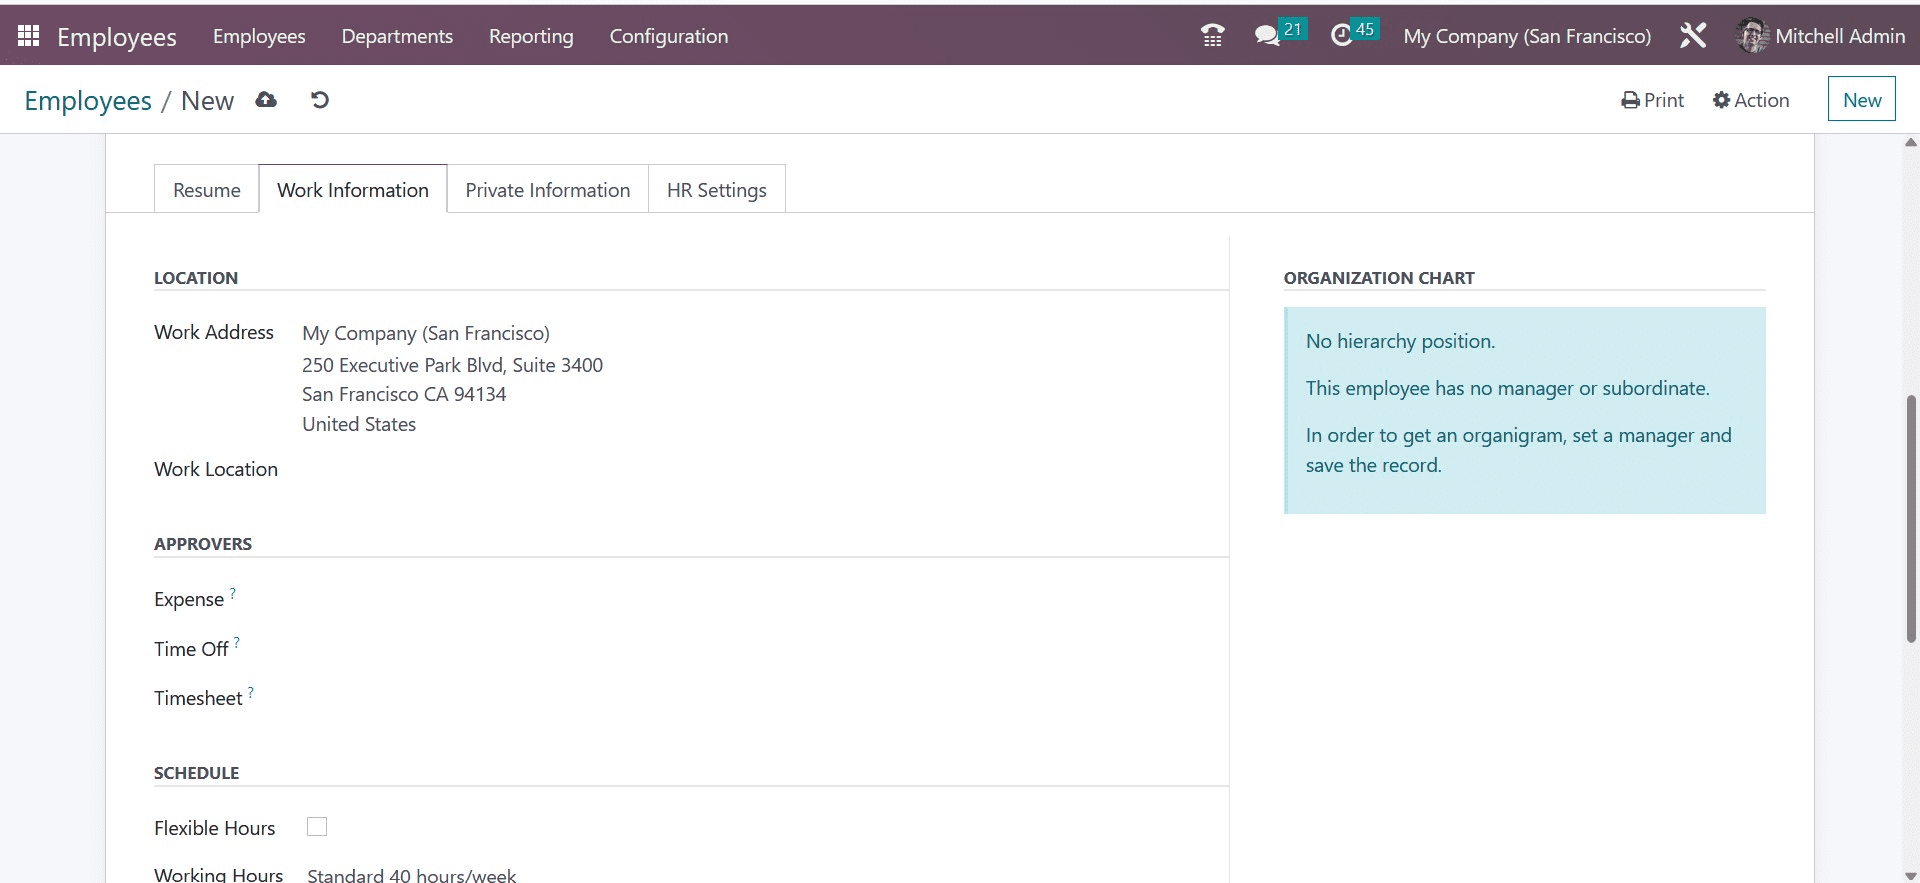
Mention the work address and location in the Location section. The approvers of this employee's expense, time off, and timesheet can be included in the Approvers area. The Schedule section will provide details about the employee's work schedule. You can turn on the Flexible Hours field if the employee is permitted to work flexible hours. In any other case, you must state the employee's weekly working hours.
Set the time zone to specify the time zone in which the resources will operate. Mention the position that the worker is qualified to hold. Only the shift templates for these positions will be visible when establishing a shift for this employee. The Default Planning Role allows users to specify the role that will be automatically chosen when creating a shift for a particular employee.
Details pertaining to Private Contact, Family Status, Education, Work Permit, and Citizenship can be mentioned under the Private Information tab.
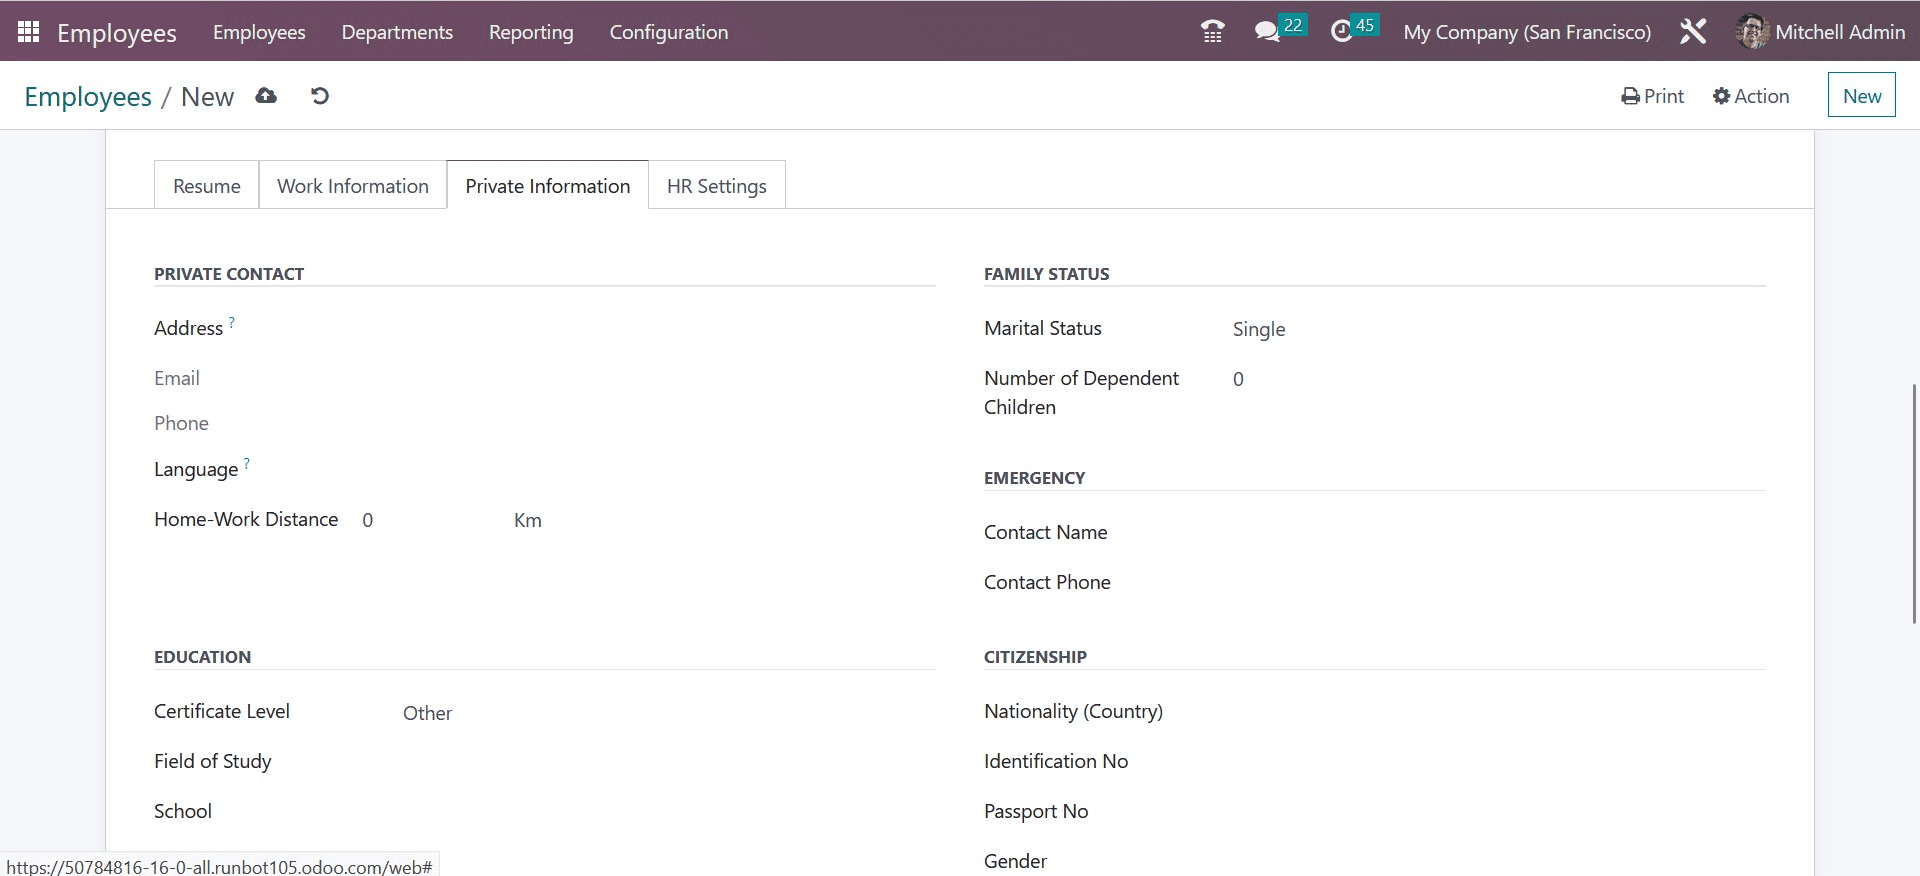
Mention the employee's private address, email, phone number, language, and distance between home and work under the "Private Contact" area. The employee's marital status, the number of dependent children, the name of the emergency contact, and their contact number can all be added under "Family Status."
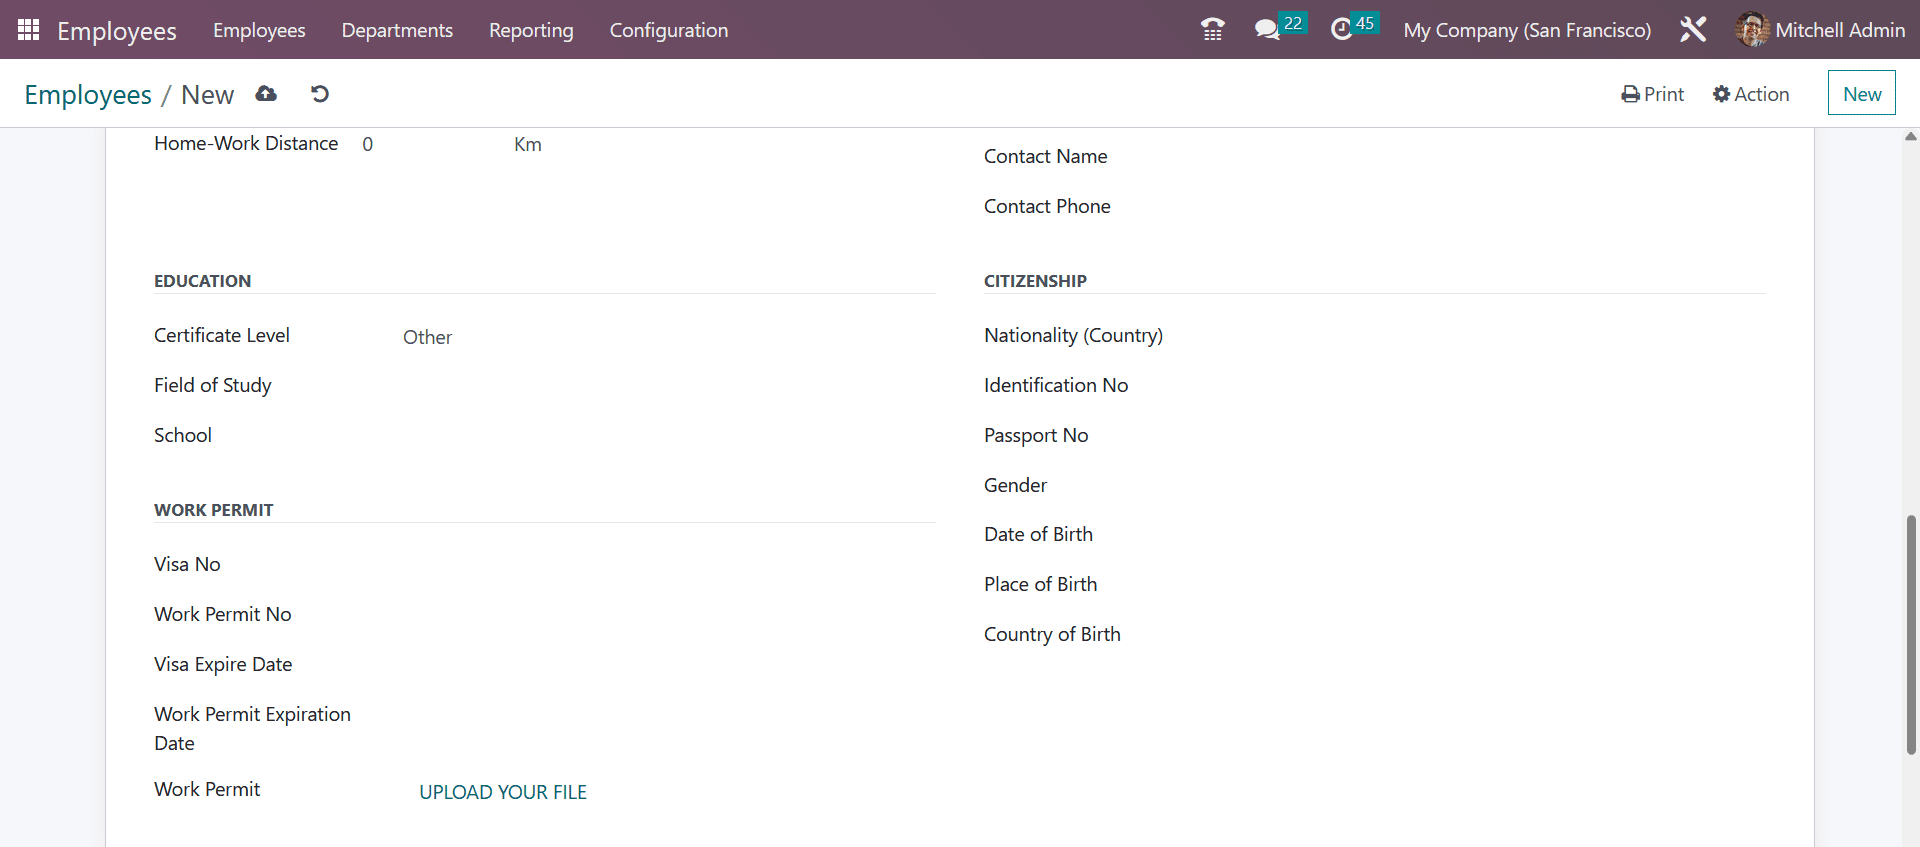
You can include information about the Certificate Level, Field of Study, and School under the Education section. The relevant fields allow for the addition of the Visa No., Work Permit No., Visa Expire Date, and Work Permit Expiration Date. You will be given a specific field to upload the employee's work permit. Nationality, ID number, passport number, gender, date of birth, place of birth, and country of birth are among the details of citizenship.
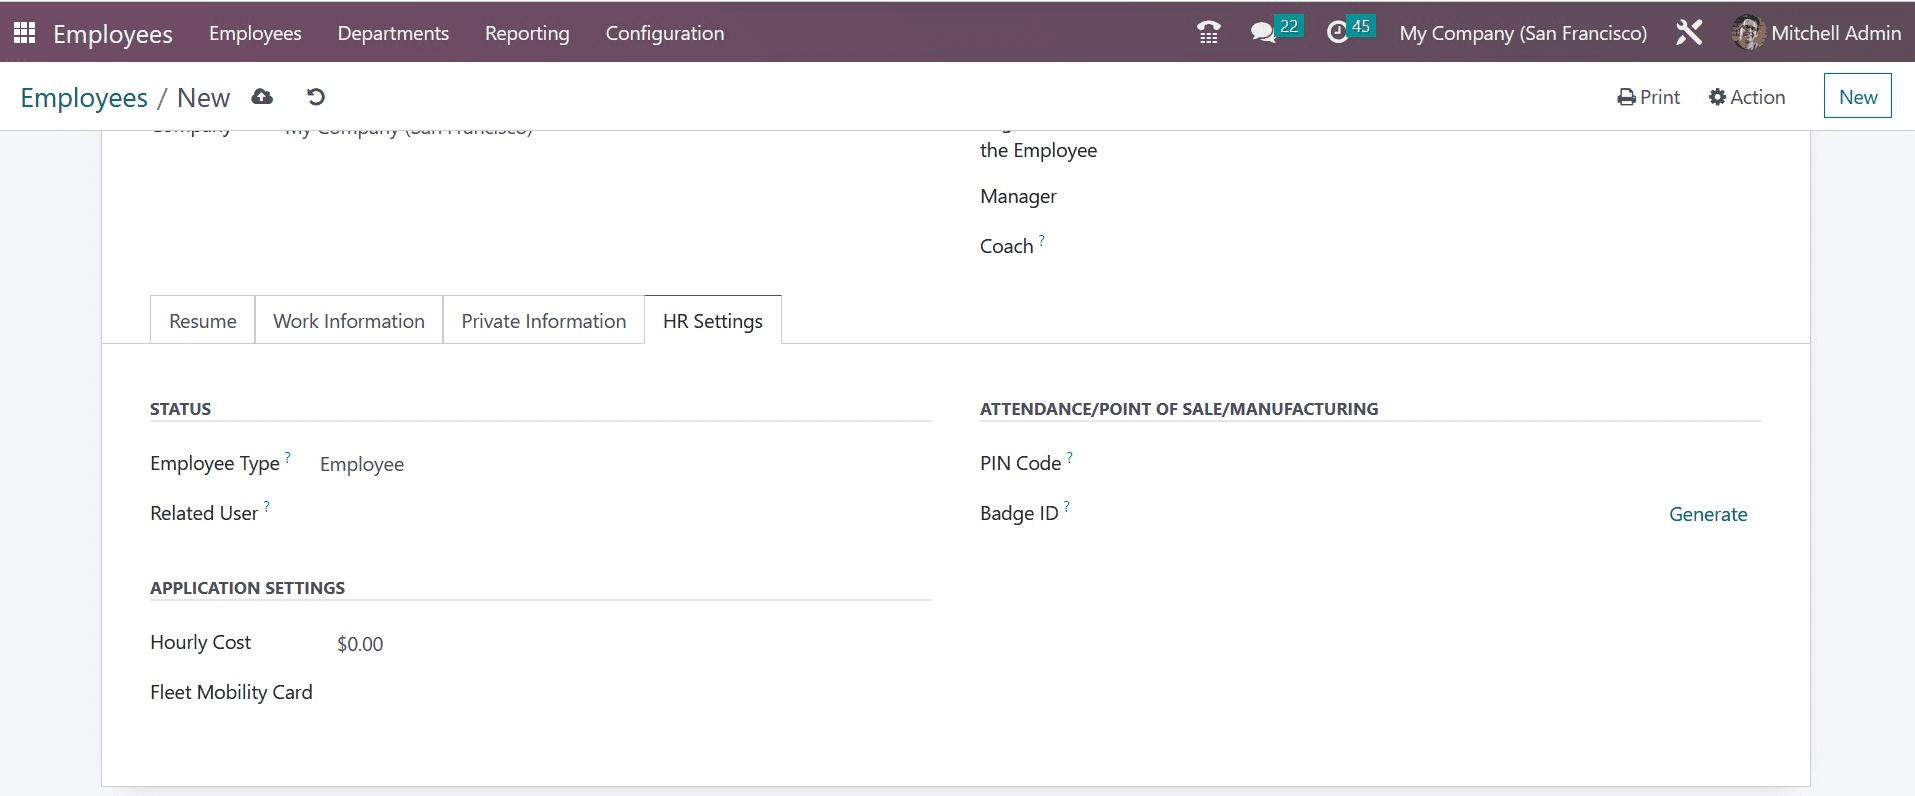
The HR Settings tab can add the Status, Payroll, Attendance/PoS/Manufacturing, and Application Settings. You have the option of setting the Employee Type to Employee, Student, Trainee, Contractor, or Freelancer. The resource can have a Related User name added to the field to control access. You can provide the employee's Current Contract, Job Position, and Registration Number under the Payroll section. You can assign an employee a PIN Code and a Badge ID so they can log in to Manufacturing, PoS, and Attendance. You can enter the Hourly Cost provided to the Employee, Fleet Mobility Card, and Next Appraisal Date in the Application Settings section.
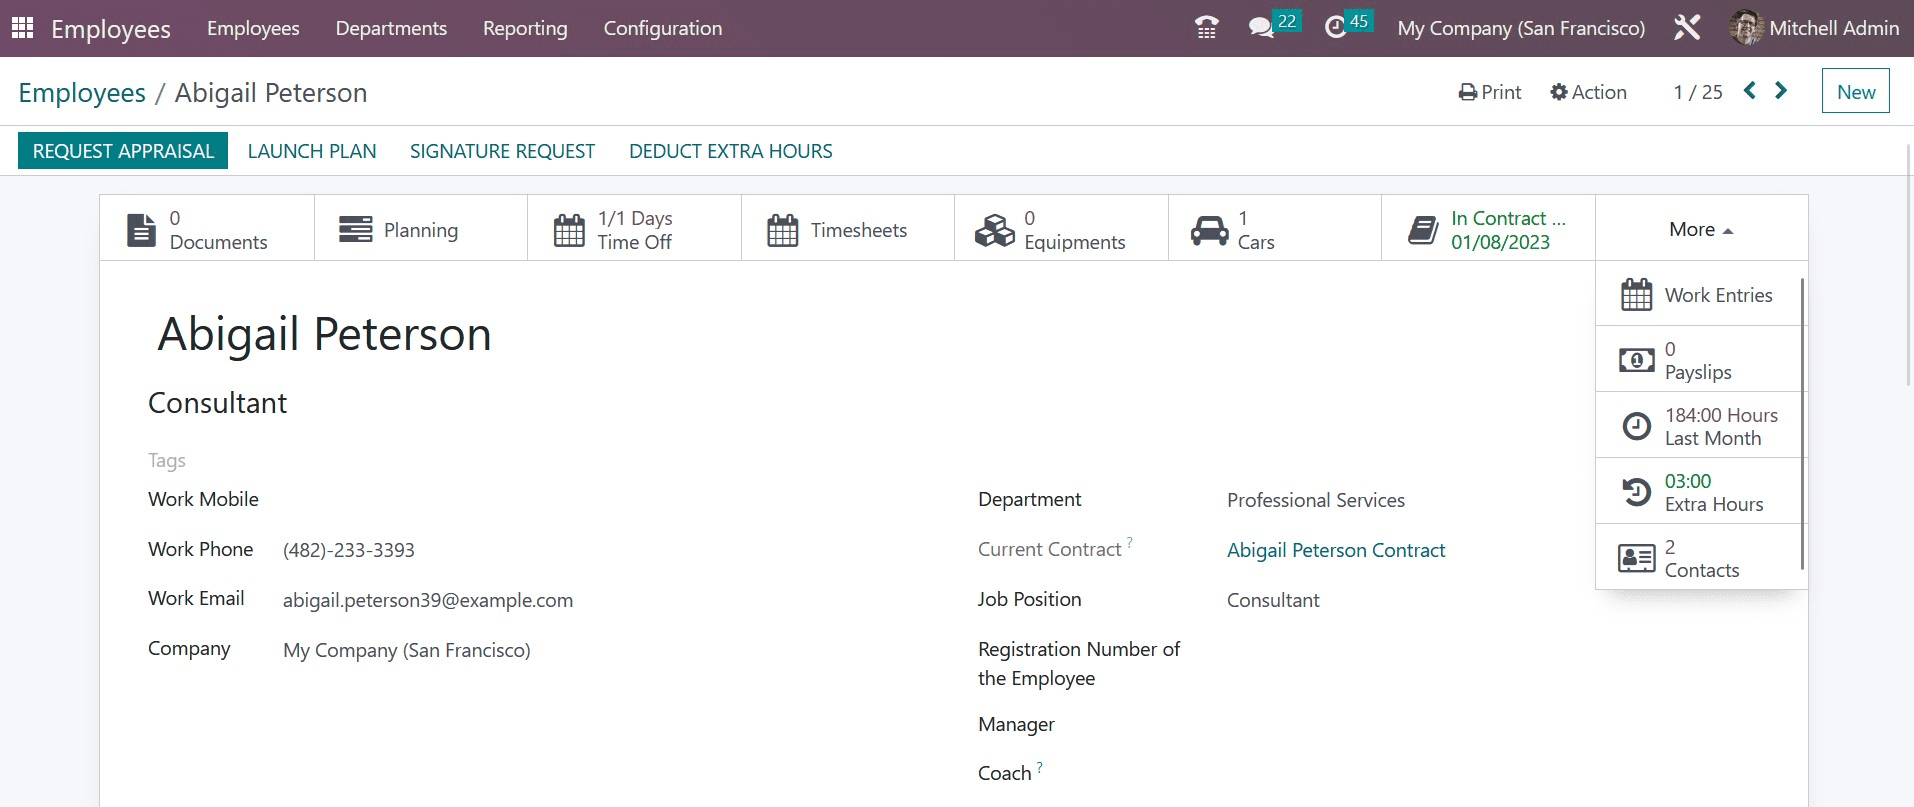
You will have access to a number of smart buttons on the form view to track the employee's associated operations once you have finished configuring the employee profile. The employee's associated documents will be seen when you click the Document button. If the employee has any equipment assigned to them, you can control it using the Equipment smart button.
The Planning smart button can be used to view a variety of scheduled activities involving this employee. Details of the planned actions will be provided in the Gantt view, as seen below. From this window, you can schedule new tasks with this employee.

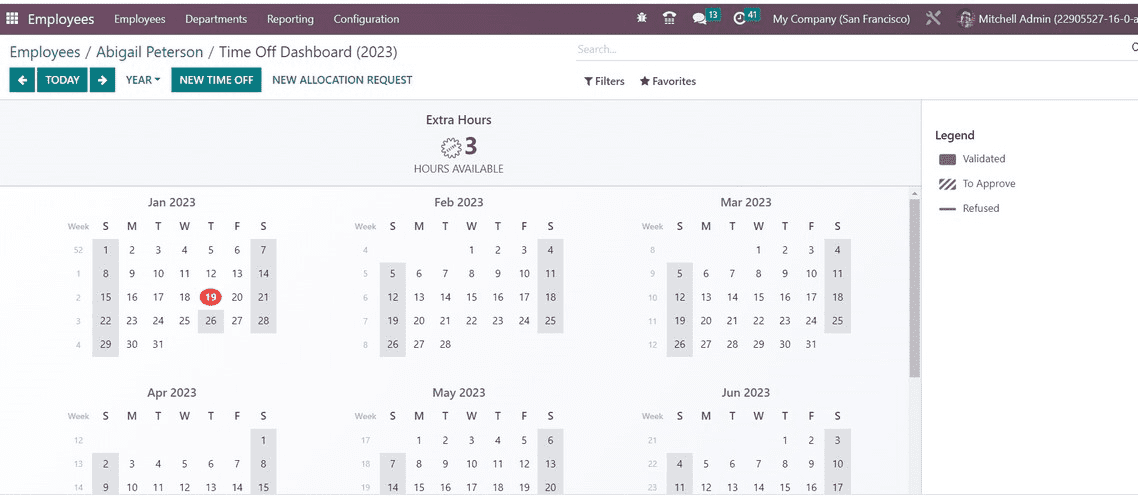
Using the Time Off option, it is possible to view the employee's time off taken monthly and annually.
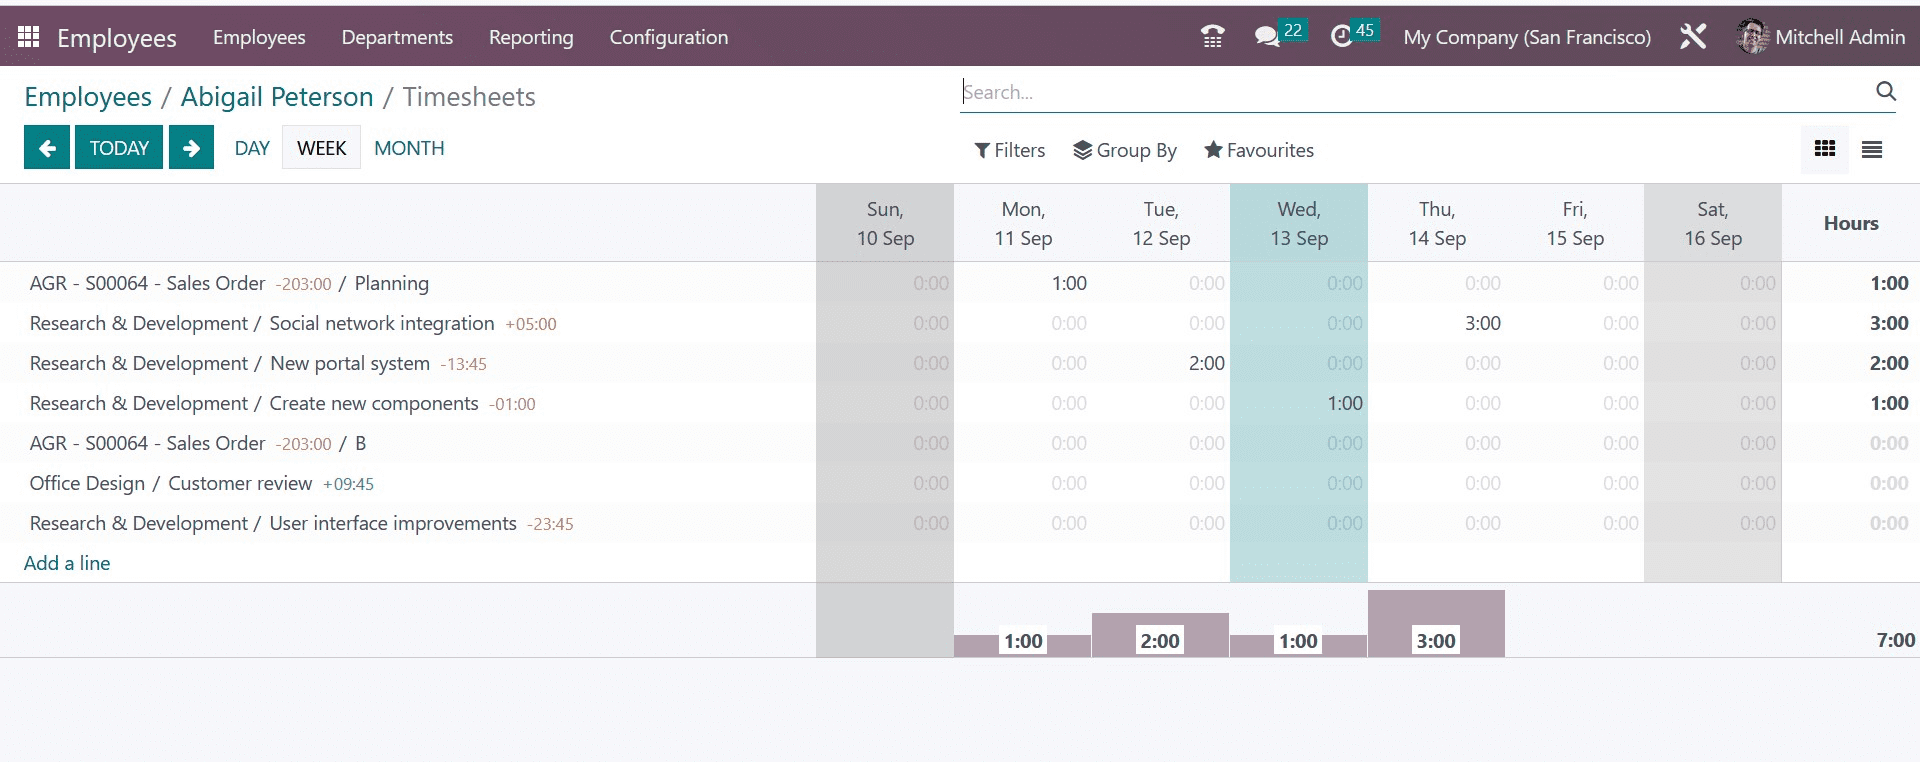
The employee's timesheet will be displayed when you click the Timesheets button. It will display the employee's logged time spent on each task.
The employee's assigned vehicle can be viewed by selecting the Cars button. The vehicle information, Start Date, End Date, and Number of Attachments are all displayed in the employee car history report.

The employee's active contract will be shown when you click the Contract smart button.
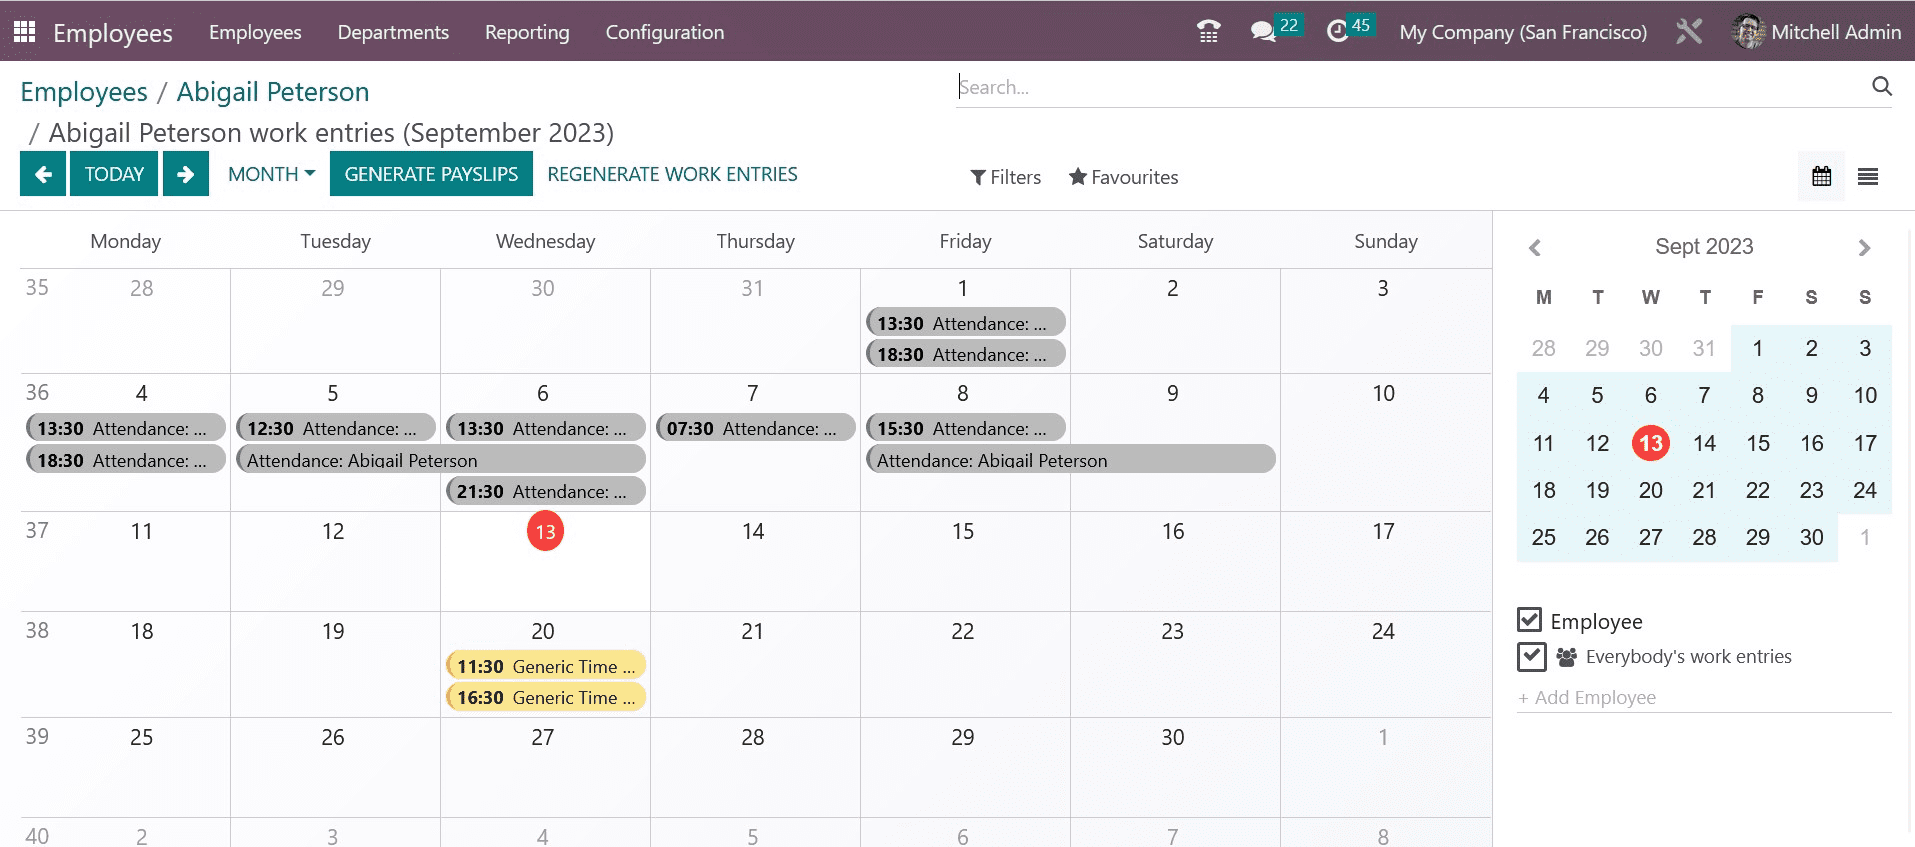
Using the appropriate smart button, you can view work entries that are relevant to the employee. The employee's work entries for a specific month will be displayed in the calendar view.
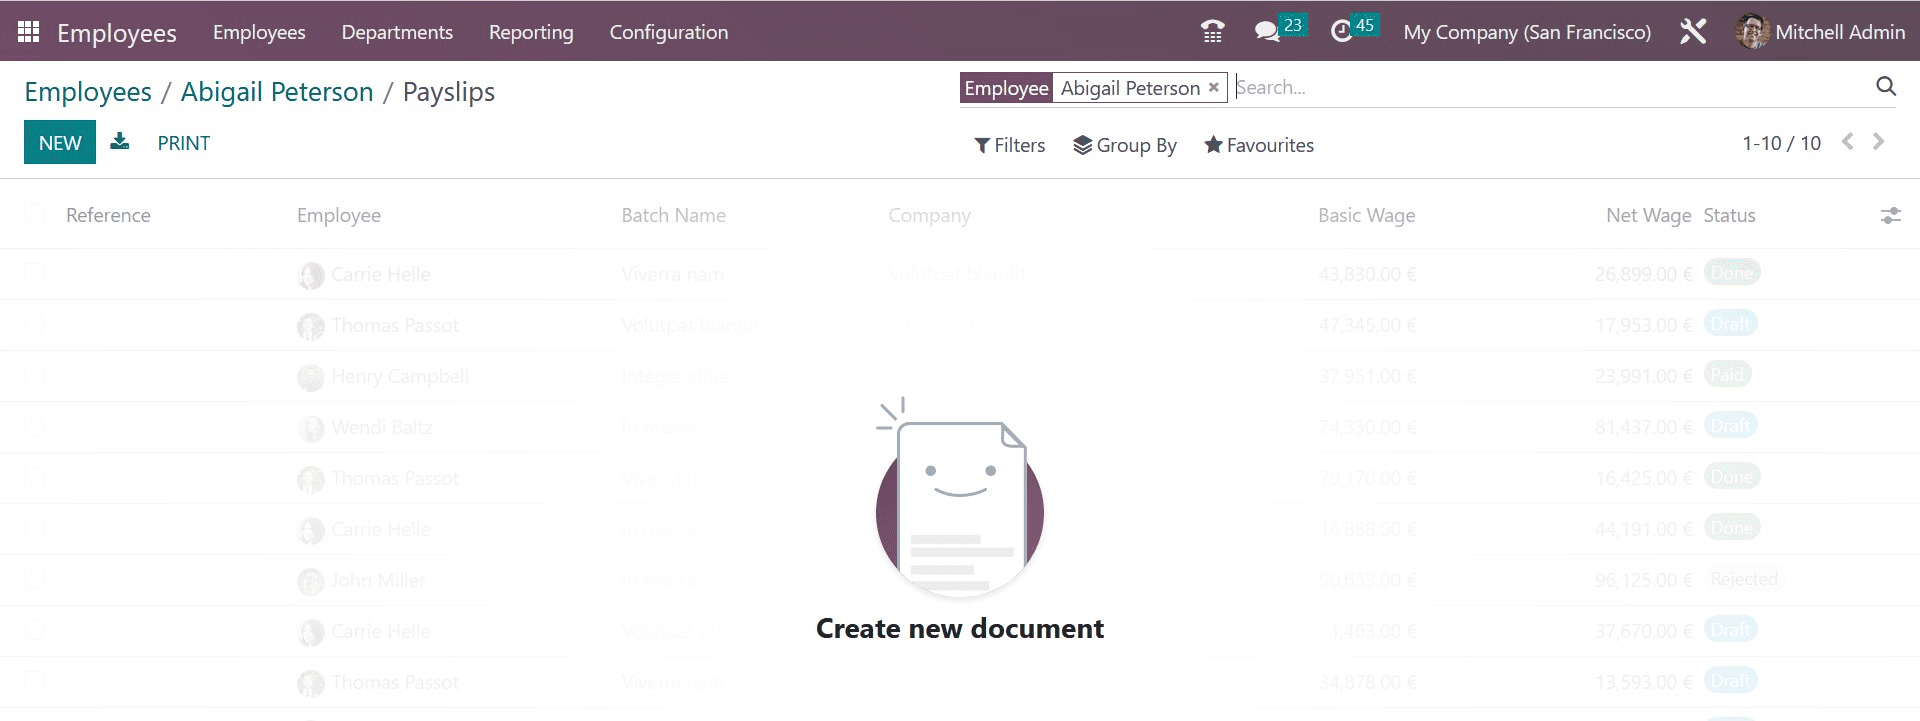
The payslip created for the specific employee will be displayed through the Payslip smart button. The Reference, Employee, Batch Name, Company, Basic Wage, Next Wage, and Status are displayed in the list view.
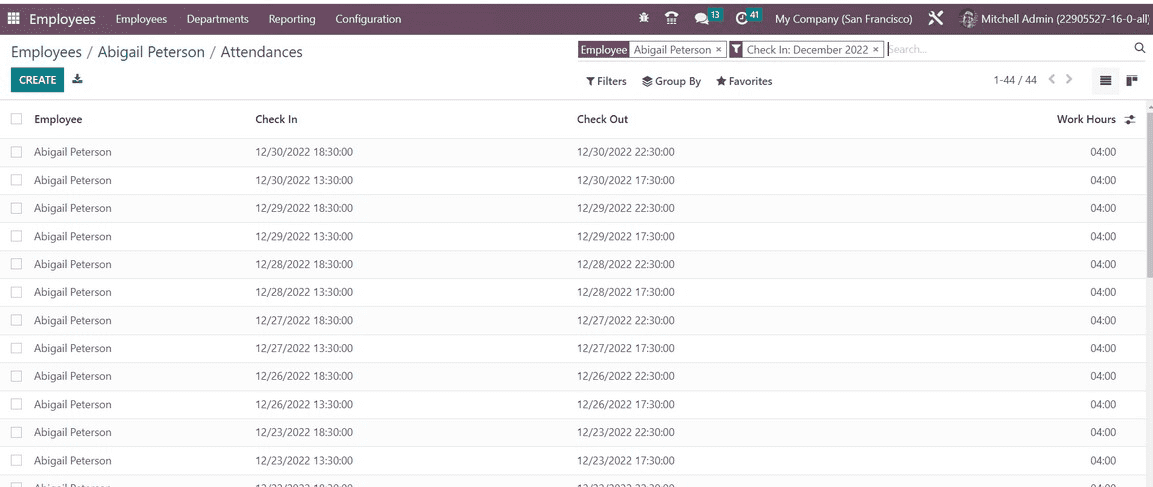
The Attendance button will take you to the employee's attendance record, which displays the employee, check-in and check-out times, and work hours.
The Extra Hours smart button, as seen below, allows you to track any overtime hours logged for this specific employee.

The related contacts button will display the profiles of coworkers of the currently logged-in employee.

On the form view, you will find the Request Appraisal button, which can be used to create a request for the employee's appraisal.

You may start the employee's onboarding and offboarding plans using the Launch Plan button. To send a request for signature on specific documents, use the Signature Request button. Use the matching option on the window to subtract additional hours.
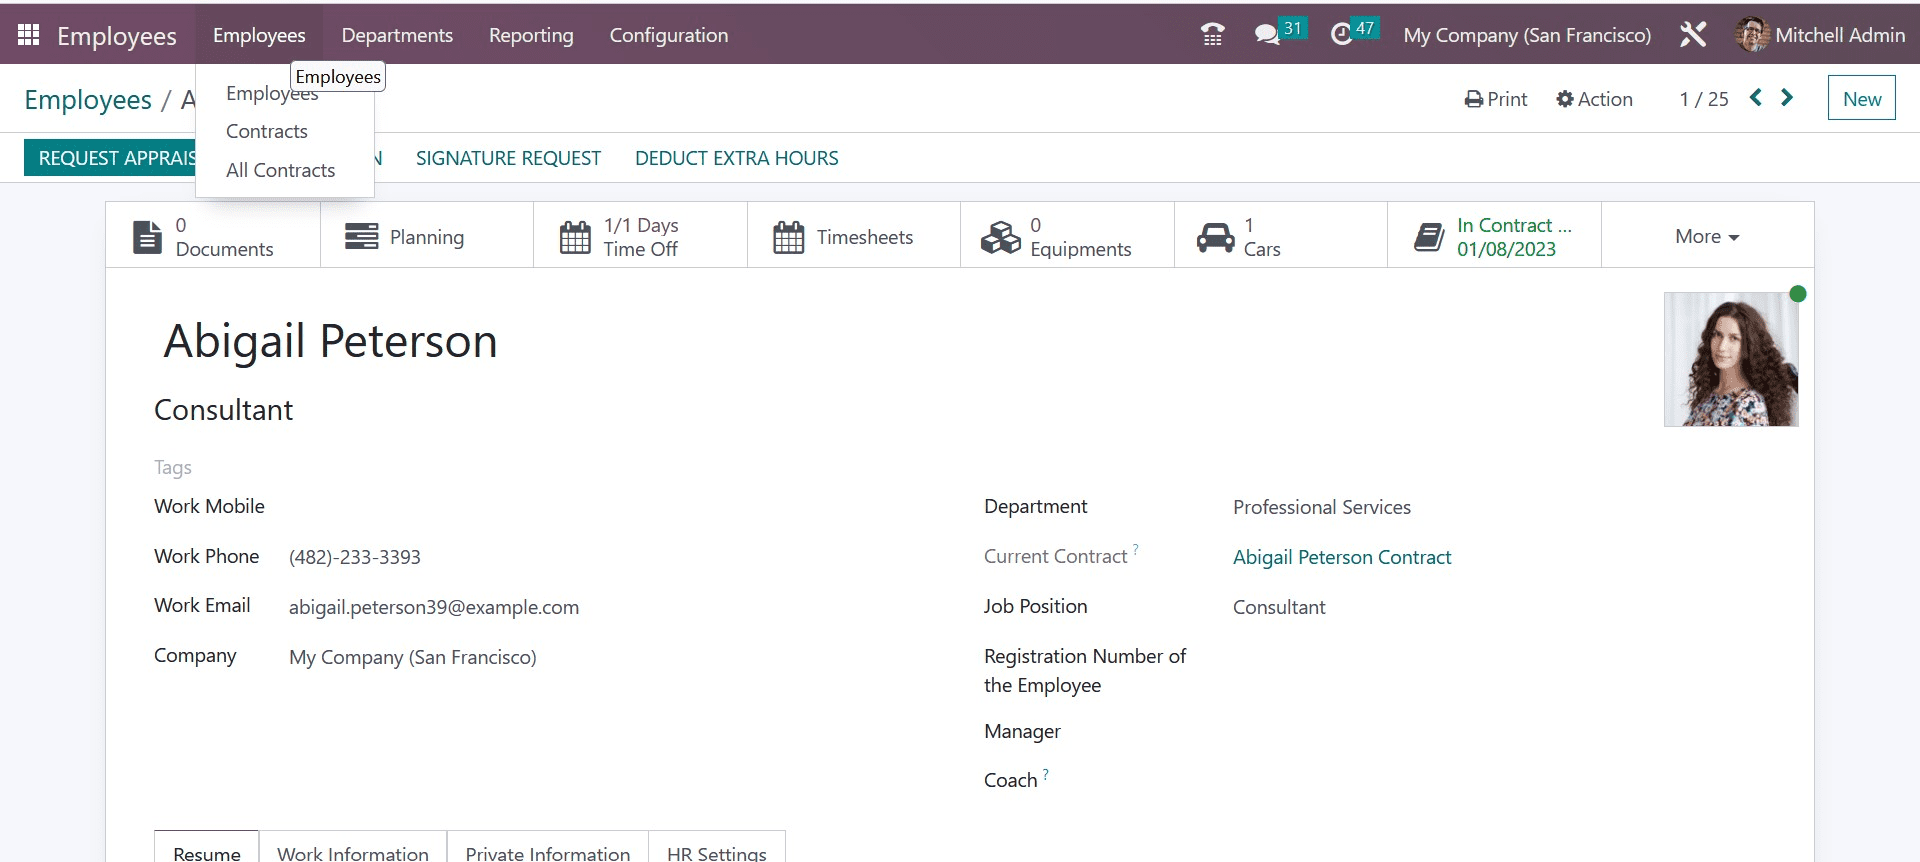
Now, let us look at different menus under the employee module. Those menus are employee, department, reporting, and configuration. Under the employee menu, you have the options, such as employees, contracts, and all contracts, as in the image below. To view the contracts set up for various employees in the organization, choose the All Contract menu option from the Odoo Employees module.
Under the Departments menu, you have the list of departments, as in the image below.

You may quickly classify individuals based on their departments by configuring the data of the departments that are available in your company.
Under the reporting menu, you will get the analysis, where reporting and analysis are always important to comprehend the present working process and to help with new improvements that can be made to enhance the current situation.

This platform can be used to evaluate employee performance using the appropriate metrics. On this platform, Odoo provides Pivot and Graphical views. Based on the last 365 days and the date, you can filter the reports that are available.
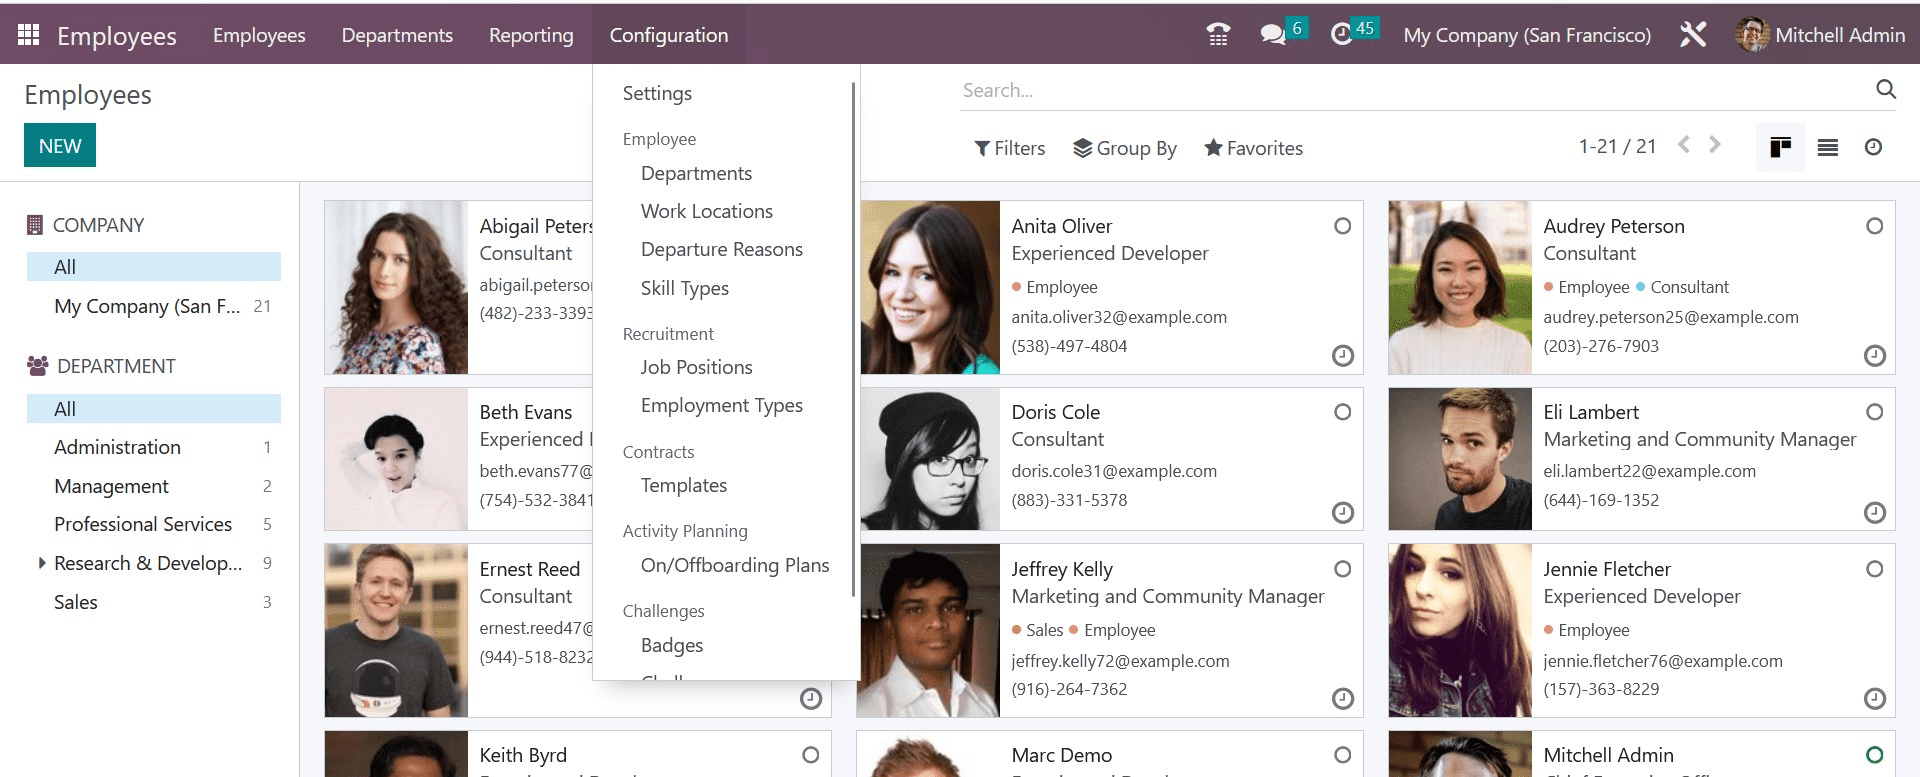
Now, under the Configuration menu, you have the options, such as in the image below.
The Employees module offers cutting-edge features and functionalities that lessen the workload of a company's HR division. You may rely on this module to manage your employees' regular records in an efficient and appropriate manner.
To read more about configuring employee allocation to production in Odoo 16, refer to our blog How to Configure Employee Allocation to Production in Odoo 16