Project profitability management in every sector necessitates a methodical organization of activities. By creating a detailed plan for each stage of the project before beginning, an organization may lessen the stress and expense of planning. Planning and observing numerous activities inside a project will help your business' operational clarity.
A project will operate more smoothly if you can see its expenses, revenues, profitability, tasks, time, and personnel all in one spot. It helps you to make better business decisions since you know where you stand and can alter course if necessary.
Odoo makes it simple to calculate a project's profitability. Profitability is critical regardless of the scope and complexity of a project. It will assist you in determining whether or not to proceed with the project. After creating project invoices, the profitability of the project may be determined. Invoices can be generated depending on the ordered quantity, milestones met, or the timesheets of the allocated staff. Profitability is determined by subtracting the entire amount spent on the project from the total amount invoiced.
Now, let us see how Project updates and Project profitability can be used with the Odoo 16 Project module.
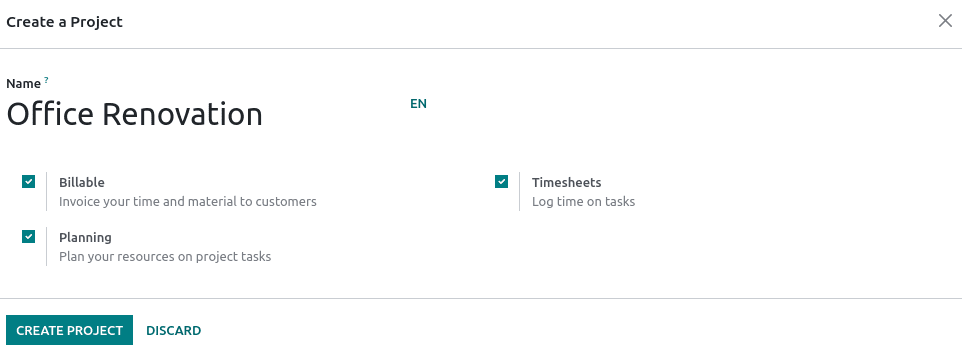
Firstly, let's create a new Project, a new wizard displays, asking you to enter the project name. There are several checkboxes shown. Check the Billable box if the task's time and task need to be invoiced. If you enable Timesheets, you will be able to add an employee's timesheet to a project. Utilizing resource planning in a project allows for planning.
This takes you to another page where you may build the project's task stages. Various stage names ought to be included. By using the ADD button, further stages can be added to the specified name.

A task must be created at each level. For each step, Odoo lets you add several tasks. A resource can also be assigned particular tasks. Create a task, assign resources to it, and then click "add."
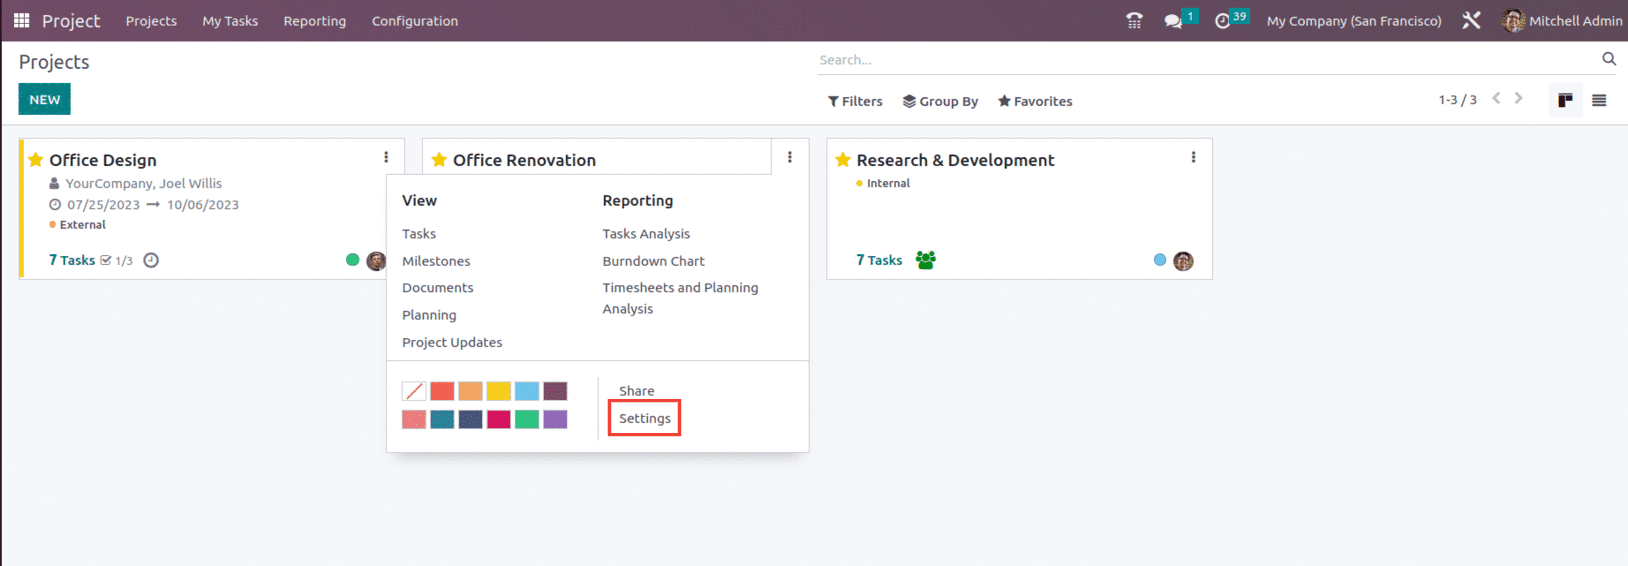
To examine the project's profitability, an overview button has to be enabled. Click on the three dots in the top right corner of the project and choose the setting option.
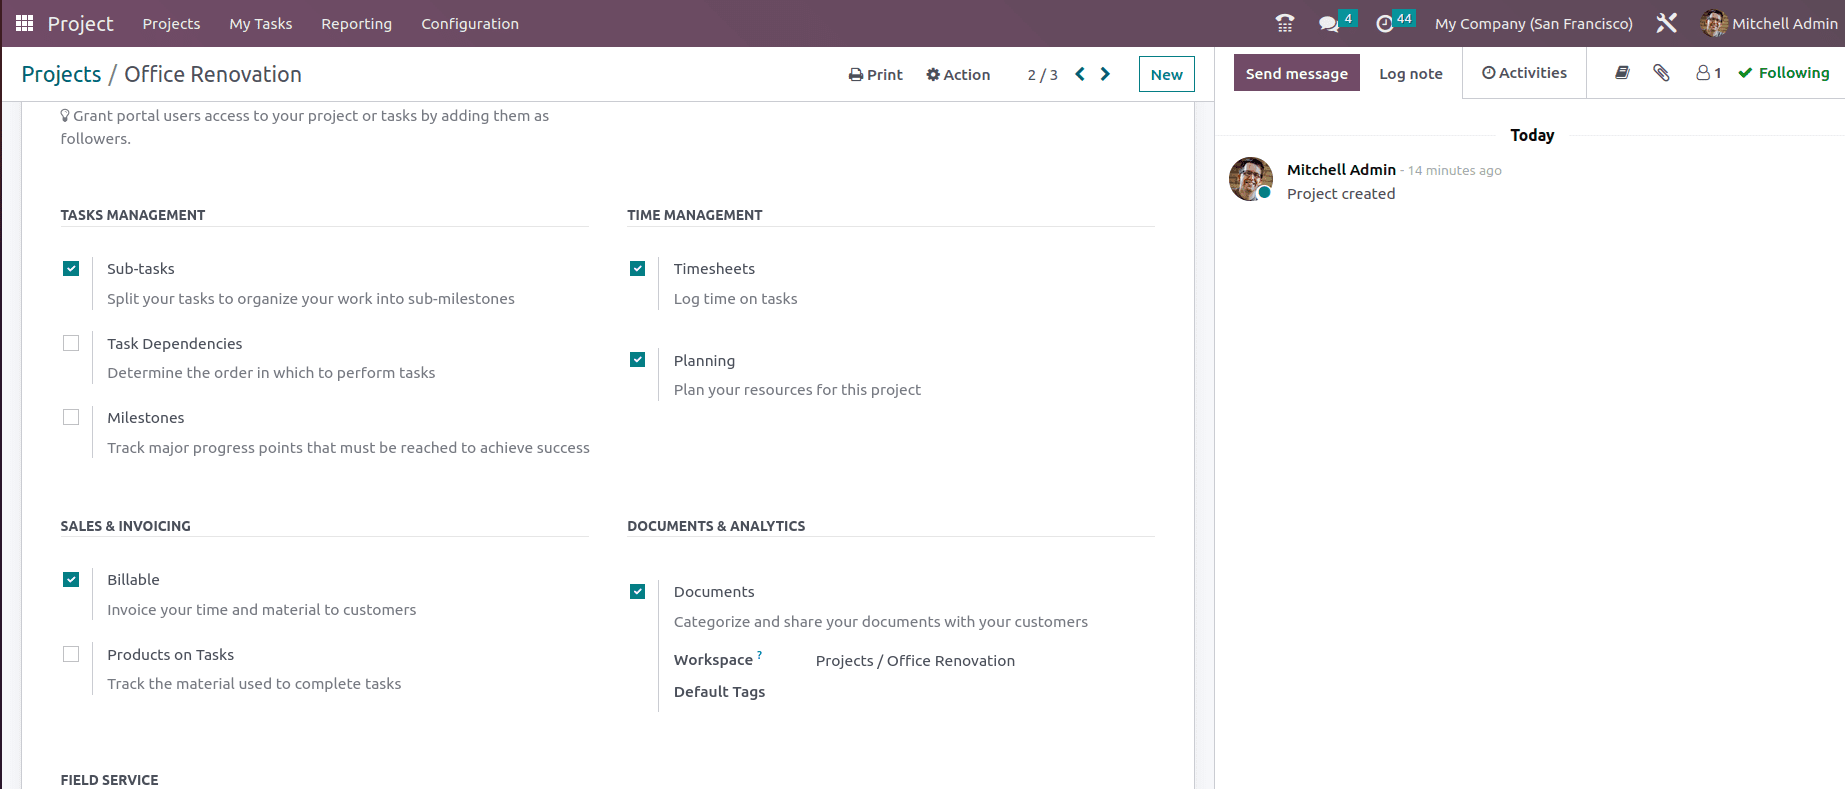
In the new project creation box, enter the Project name, Tasks, Customer, Tags, Project Manager, Scheduled Date, and Company. You may choose the Billable option in the project's Settings tab, which will allow you to invoice the time and materials used on the project.
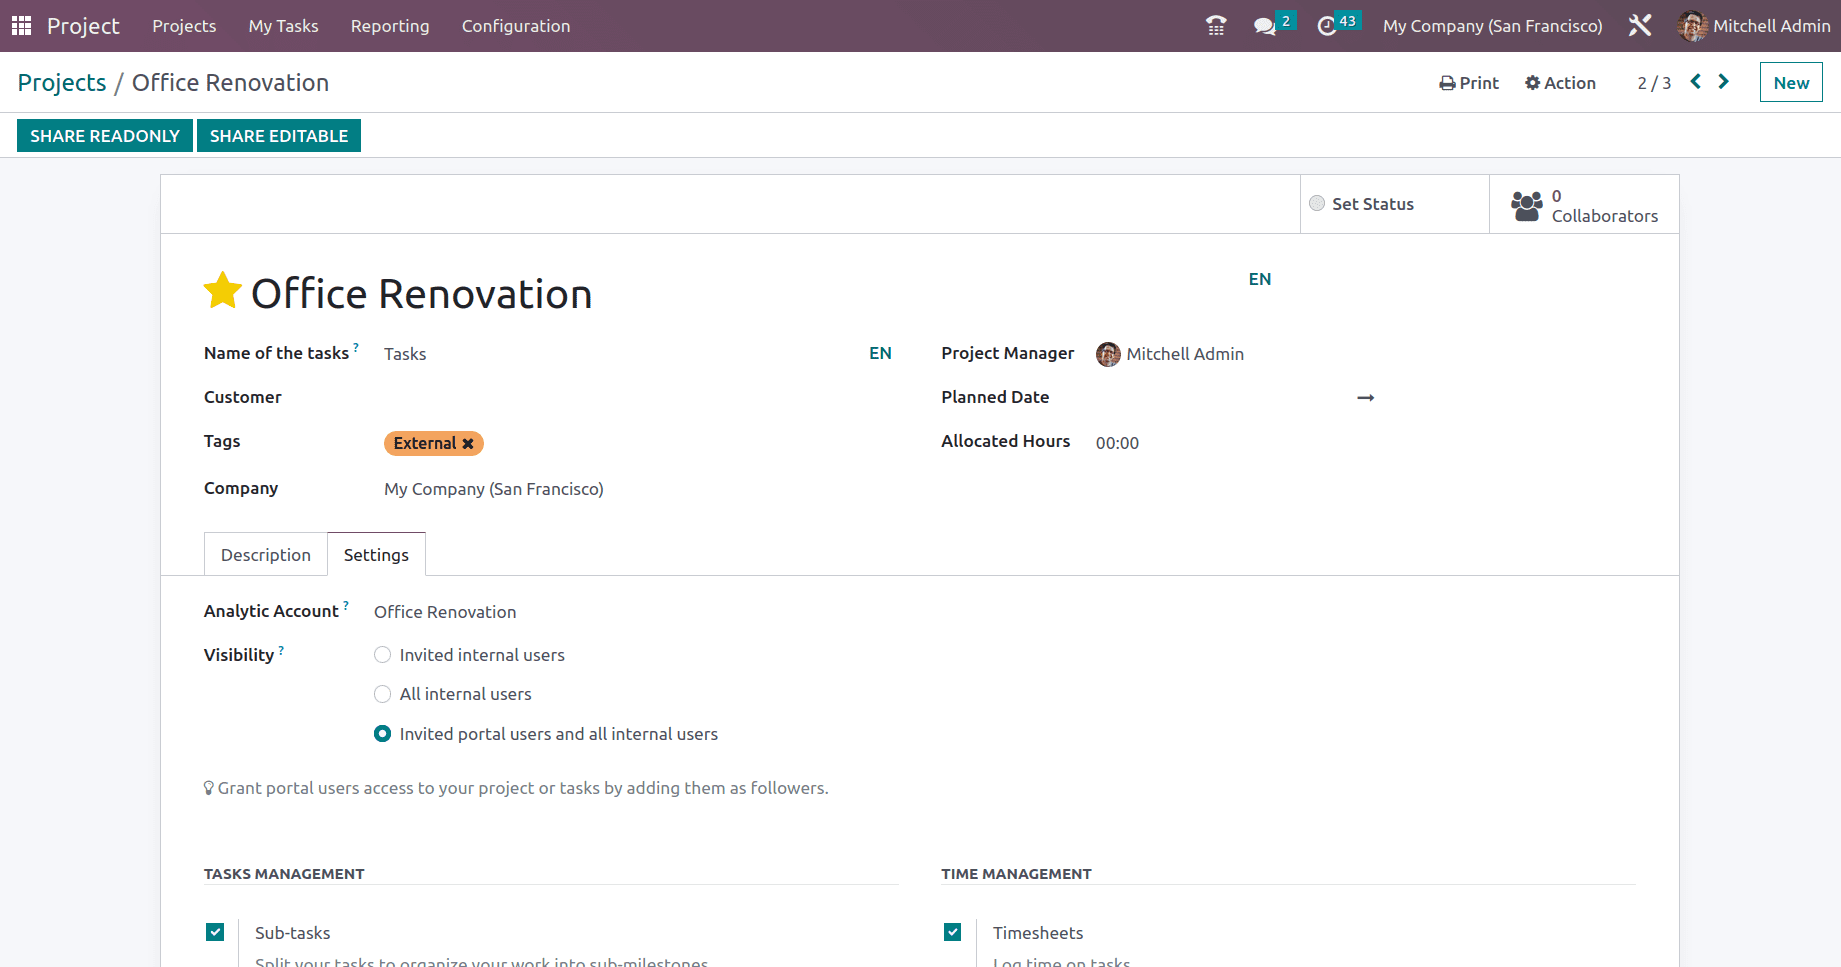
When you start a new project in this module, an analytical account with the same name as the project is generated. This analytical account will contain the project's expenses and earnings. The recorded costs and income will assist you in estimating profitability so that you can simply determine if the project is profitable or not.
Once a new project has been created, you can establish a sales order for it in the project window to link timesheets to the order and produce invoices. Before establishing a sales order, add the project as a service product and set the Invoicing Policy to Fixed Price/Prepaid, Milestones, Timesheets, or based on Delivered quantity as needed.
Now, let's create a new Sales order from the sales module and mention the project's customer together with the Invoice Address, Delivery Address, Quotation Template, Referrer, Order Date, Pricelist, and Payment Terms in the sales order. The service product can be added to the Order Lines. Use the Confirm button to make your selections after establishing the Sales Order.
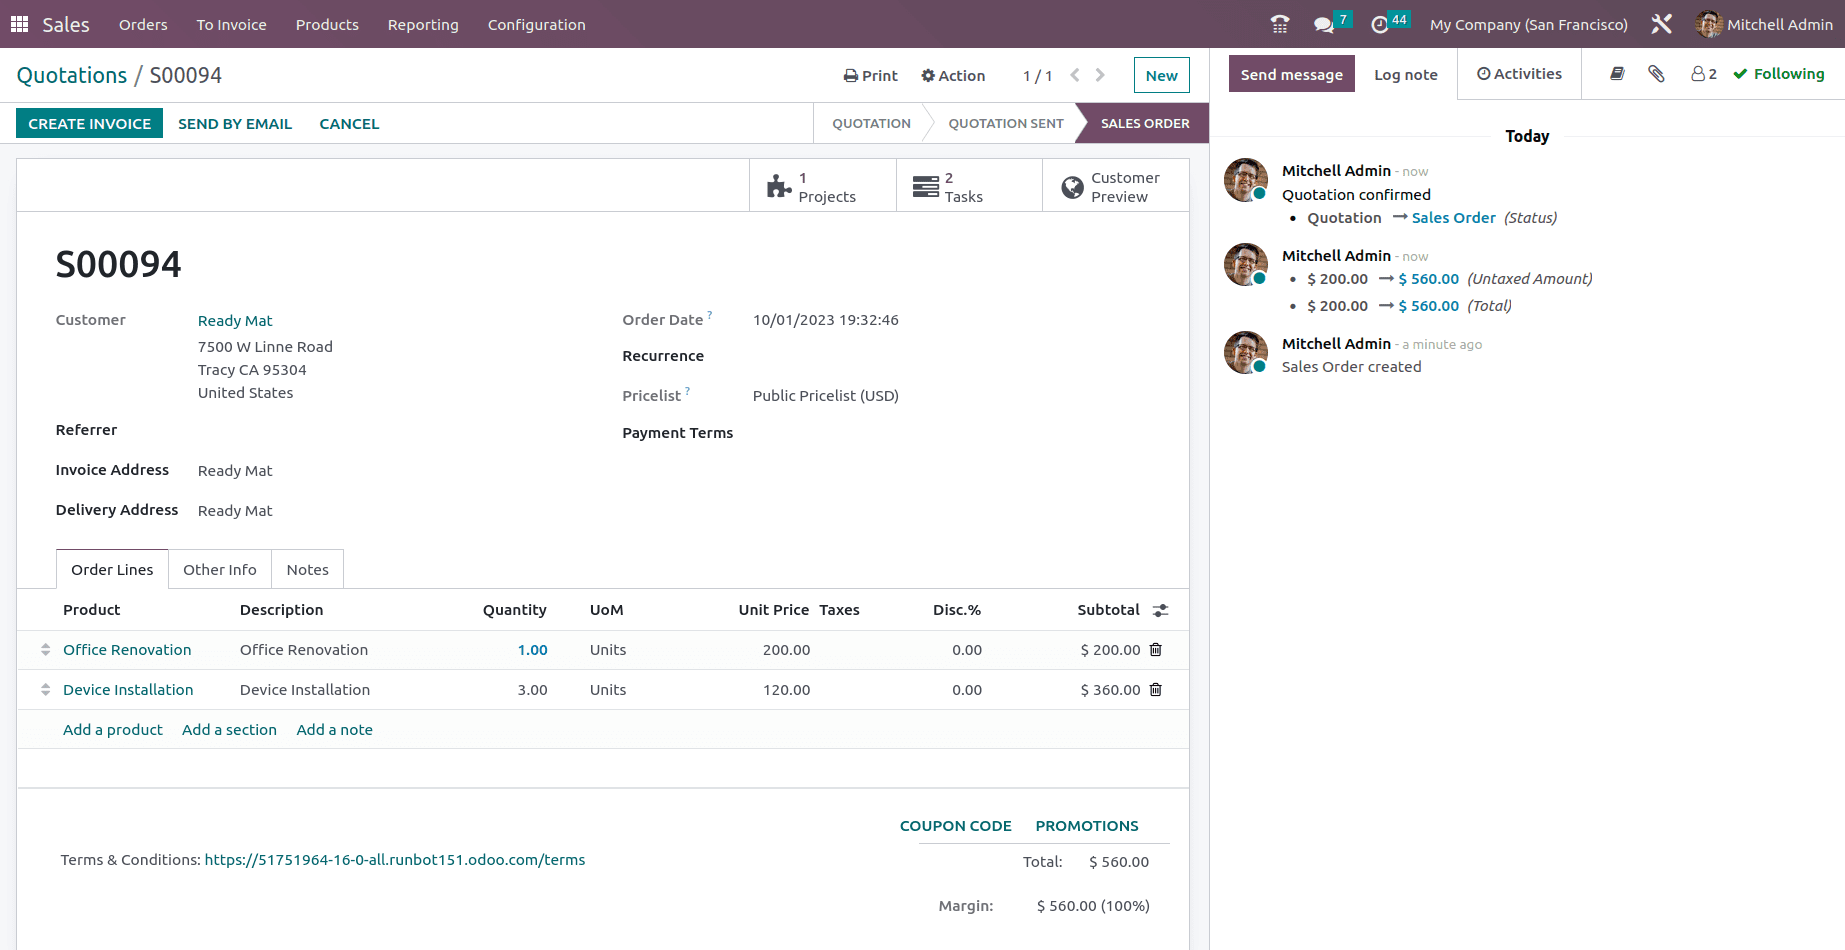
Within the sale order, the products are added, which are the Service types with different invoicing policy, as shown below.
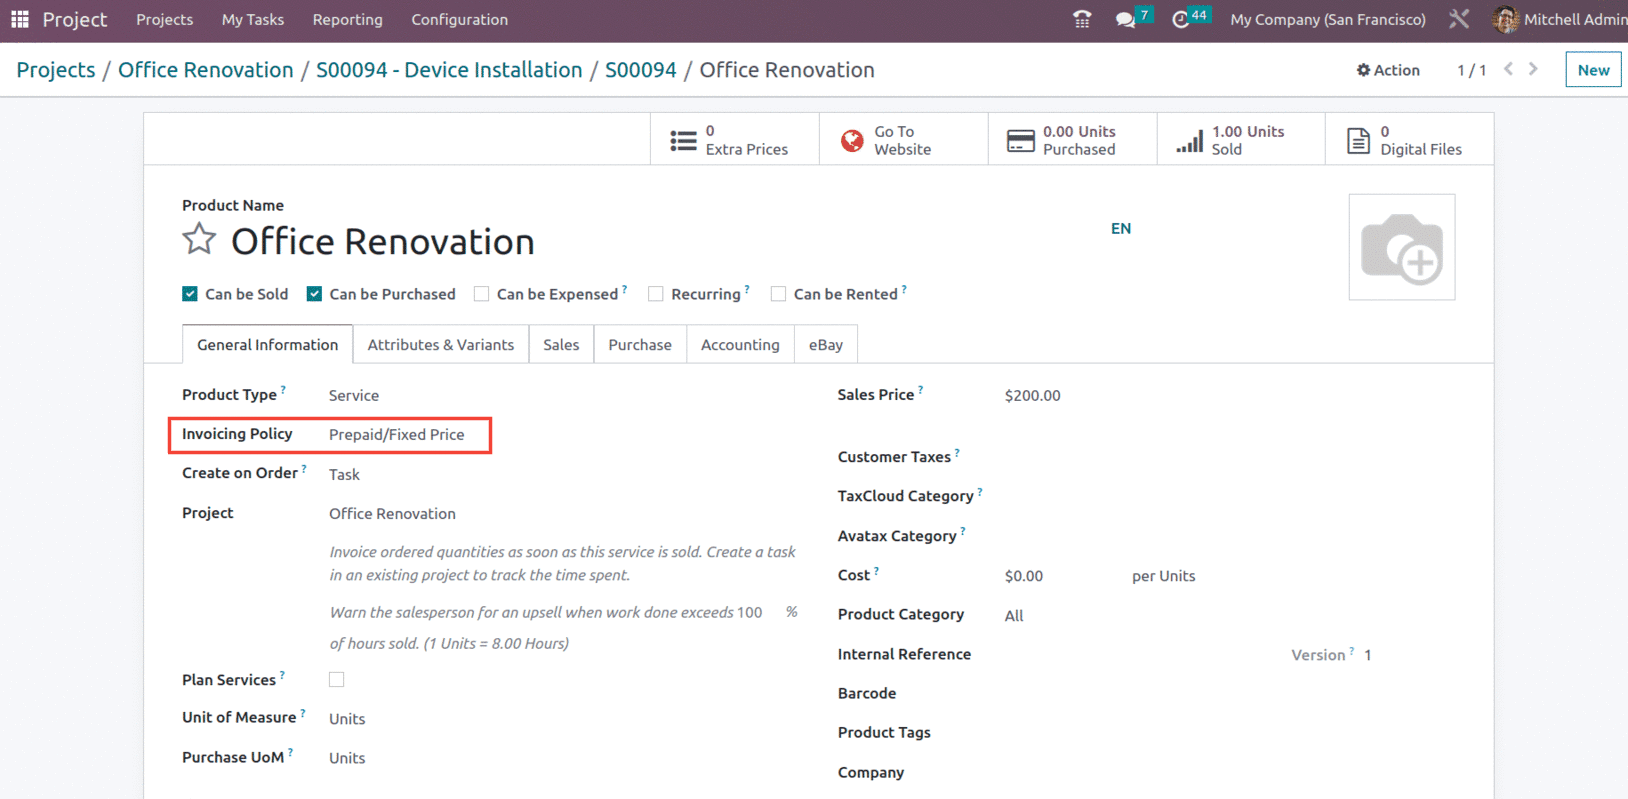
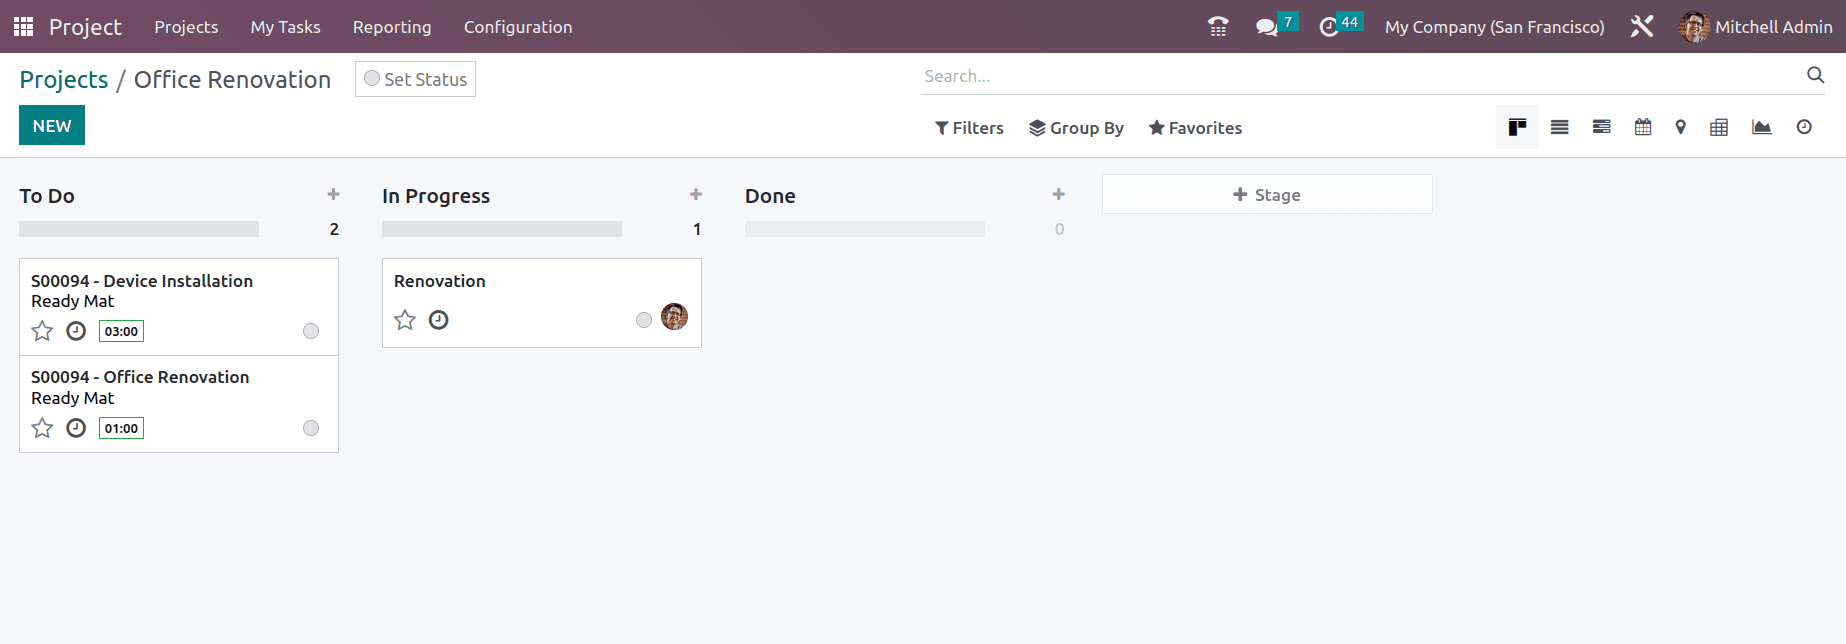
The advanced Odoo functionality makes it possible to link the create quotation to the sales module by mentioning the Project within the product, which will create a Task as Create an Order is given as Task. Doing so creates a task within the mentioned project with the sale order details, as shown below.
The created task includes the Project details with Project name, Customer and Sale order item, as shown below.
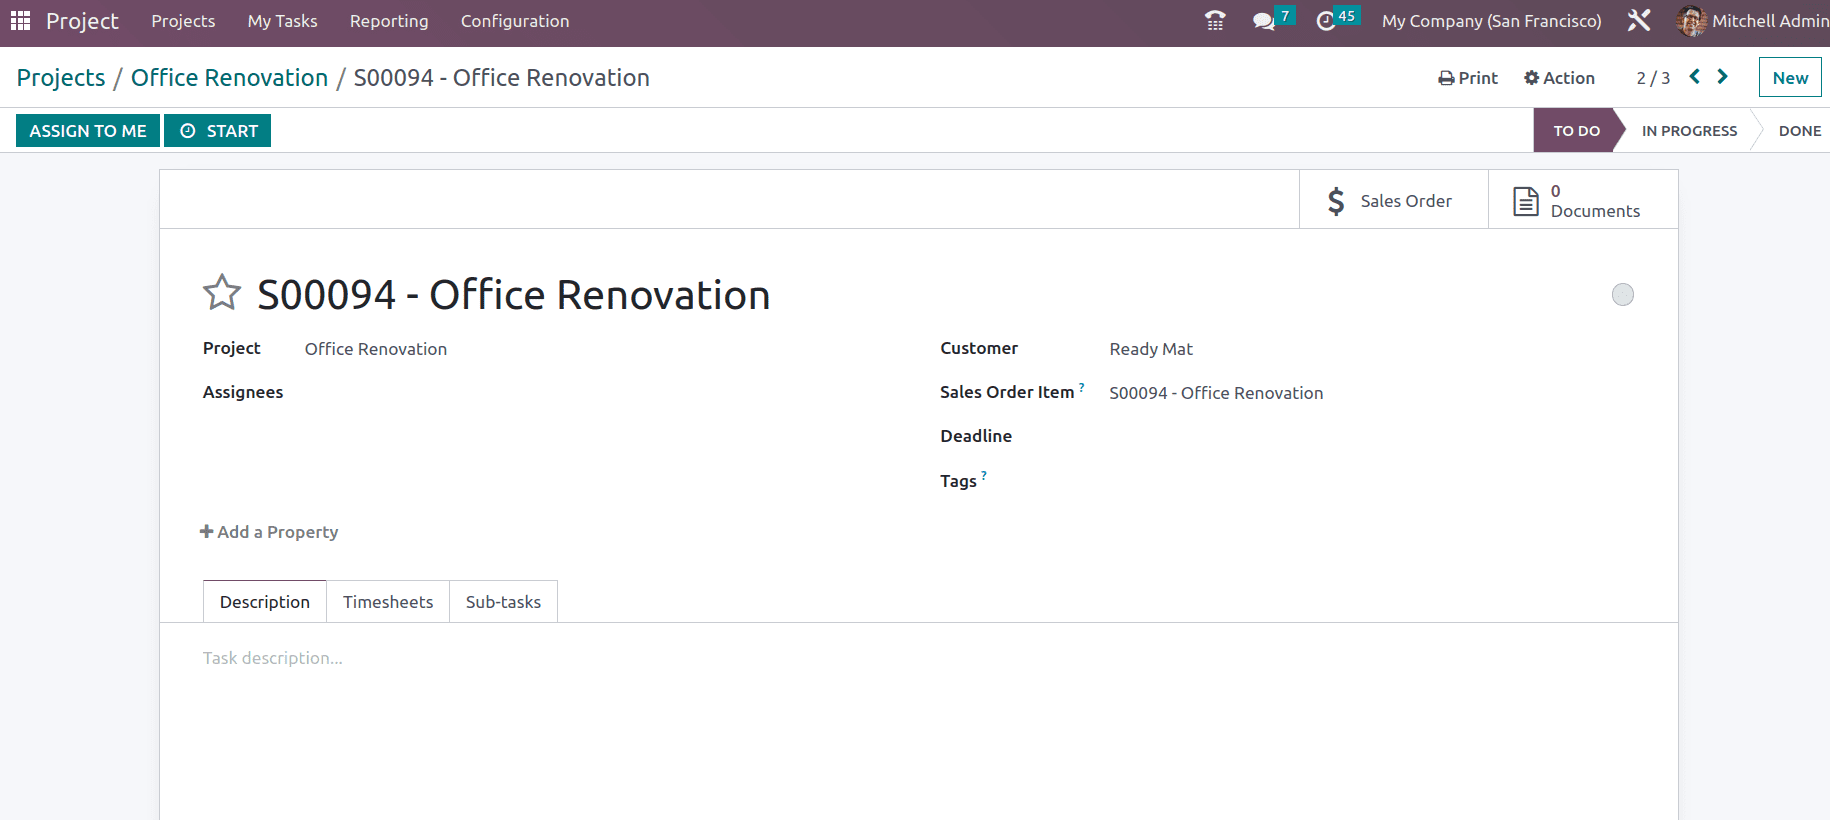
You may enter more information about the task in the Description tab. Enter the work's initially anticipated hours, the task's progress as a percentage, the employee's time spent on the task, and a description of the task under the Timesheets tab.
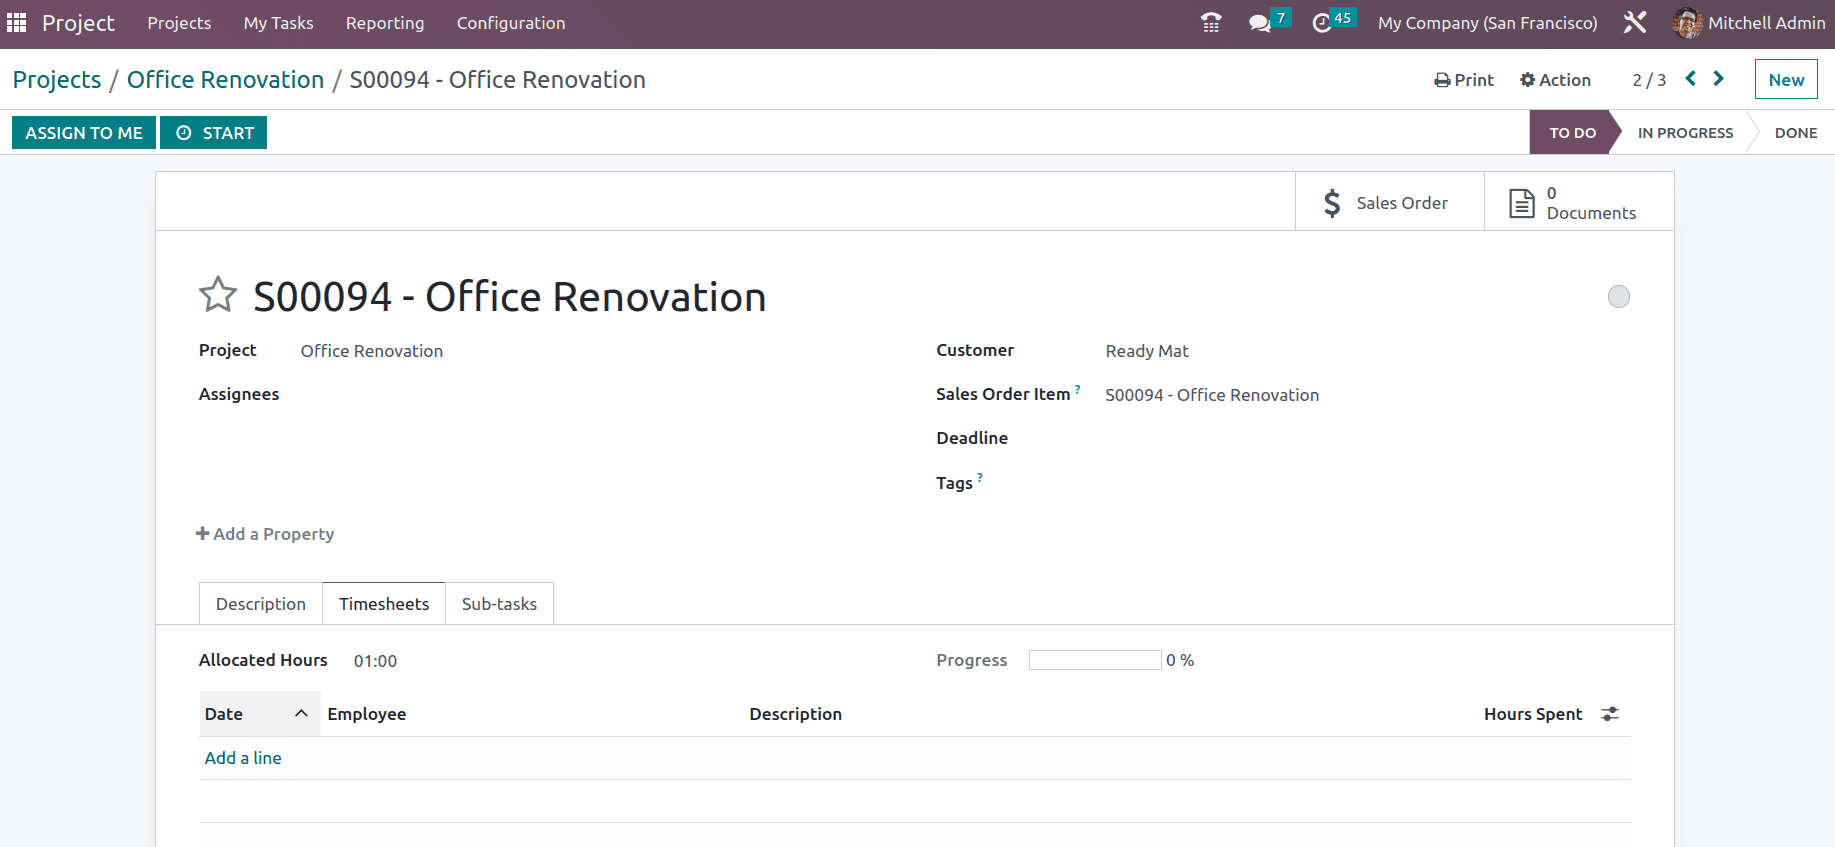
By using the ASSIGN TO ME button, you can assign the task to yourself. You can choose the START button once the job begins to run. This allows you to determine how long the task will take. The PAUSE button allows for quick pausing of the timer that displays after selecting the START button. Additionally, pressing the end button will end the timer. When the work is finished, you may check the time spent and provide a description of the task in the pop-up box.
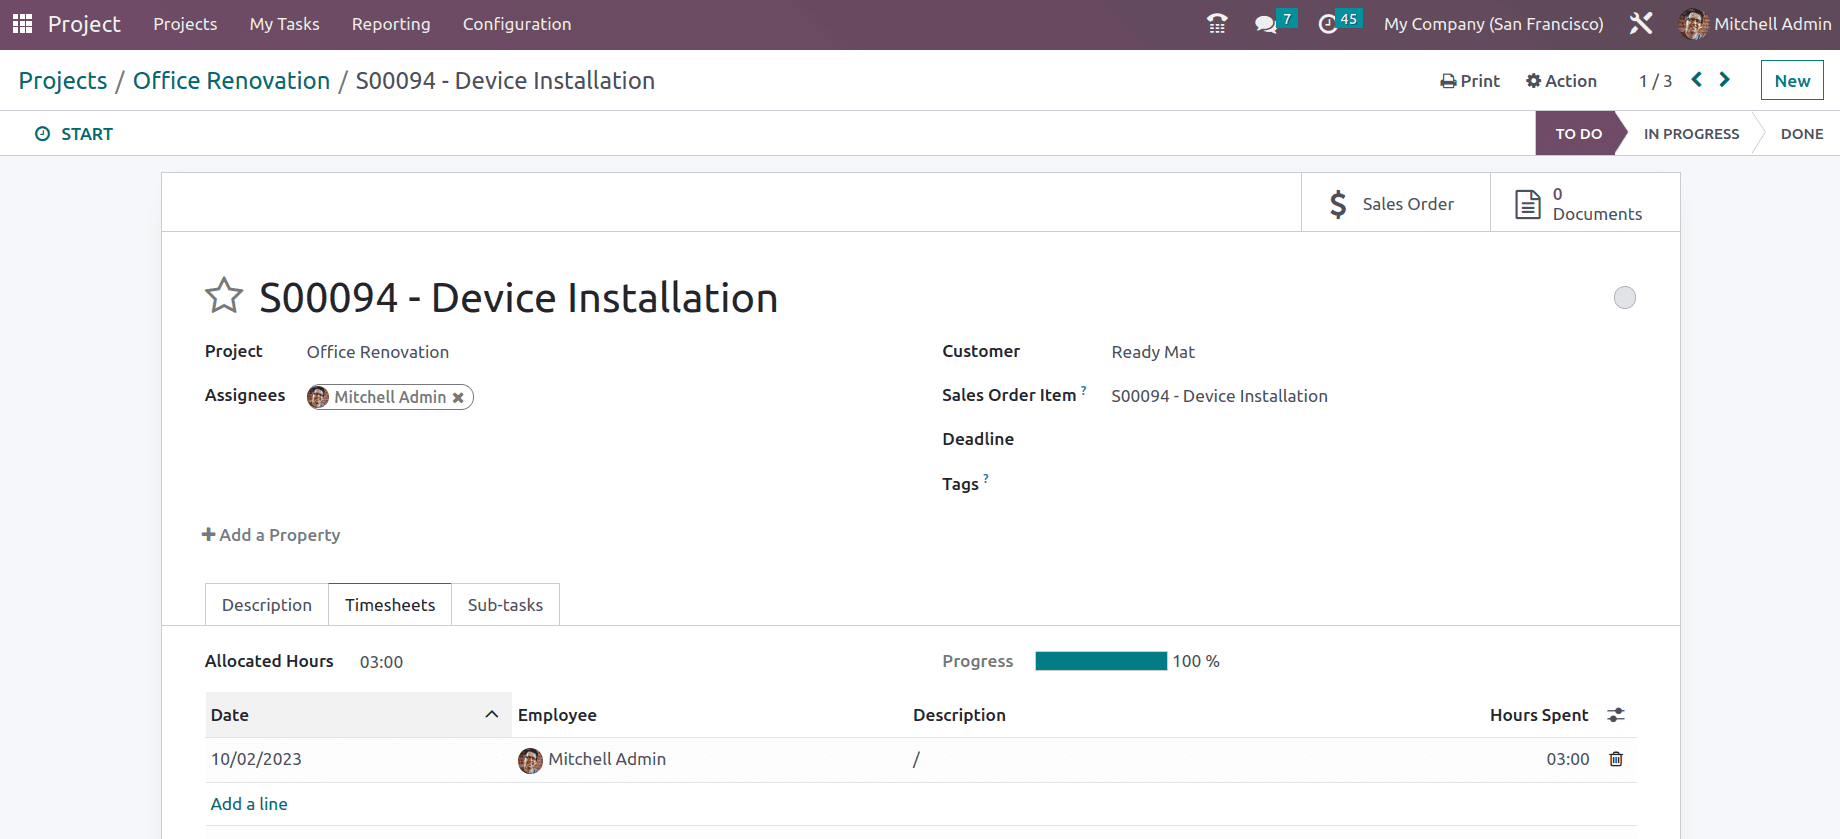
Once the time is tracked, the next step is to create an invoice for the project, for which the user can take the sales smart button within the project and confirm the order, as shown below.
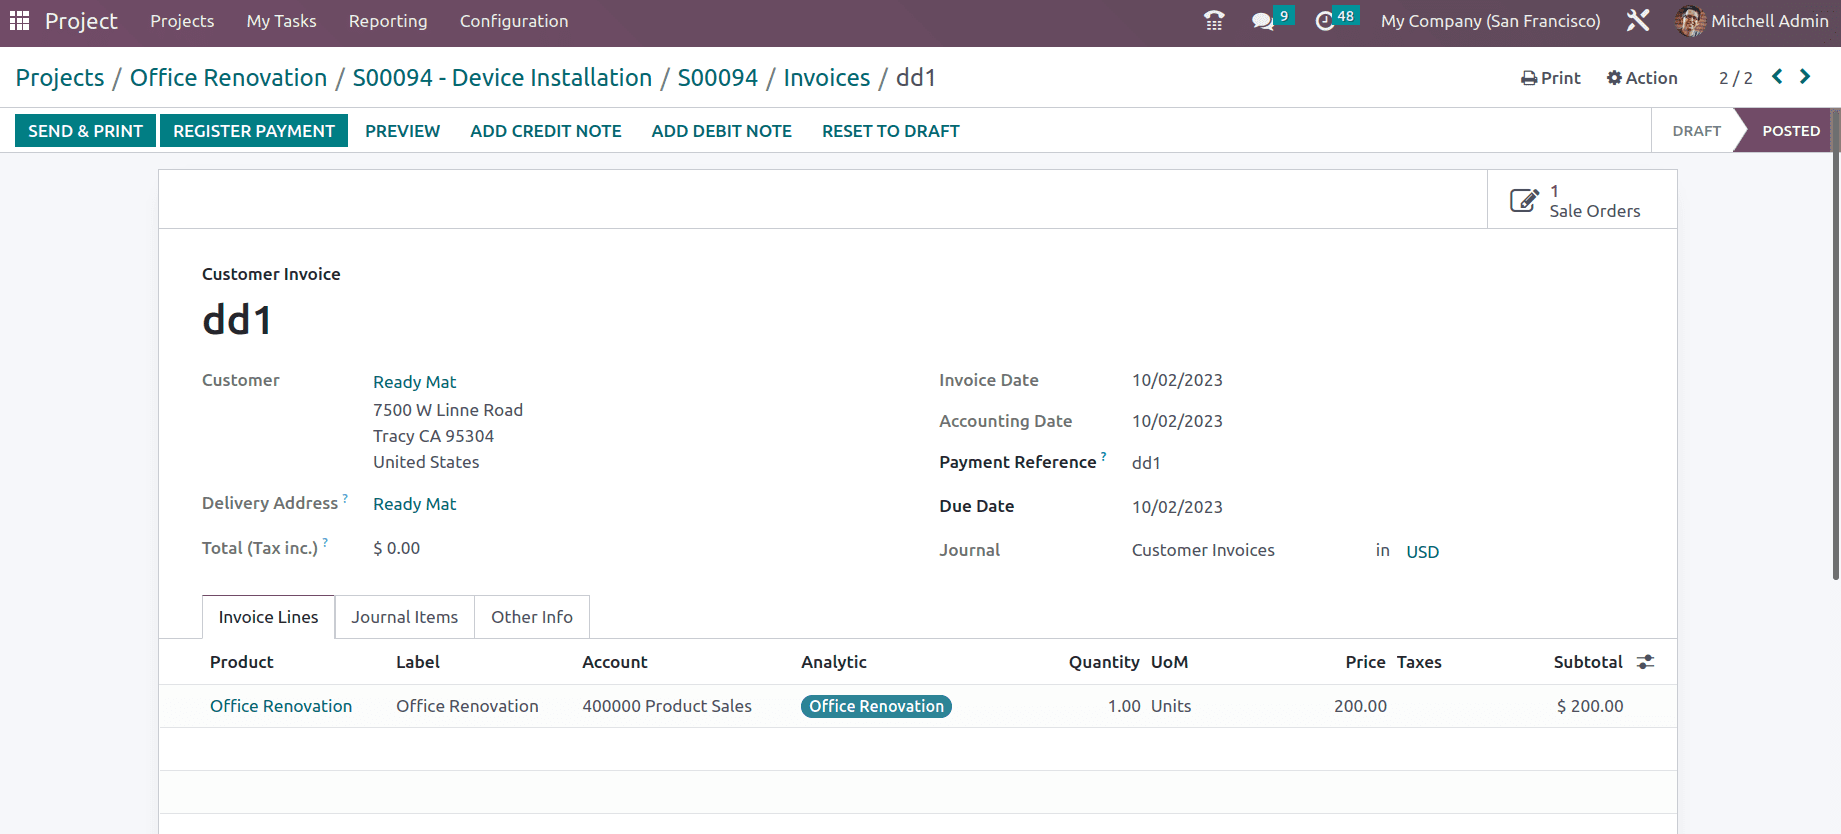
The invoice for the next product is shown below.
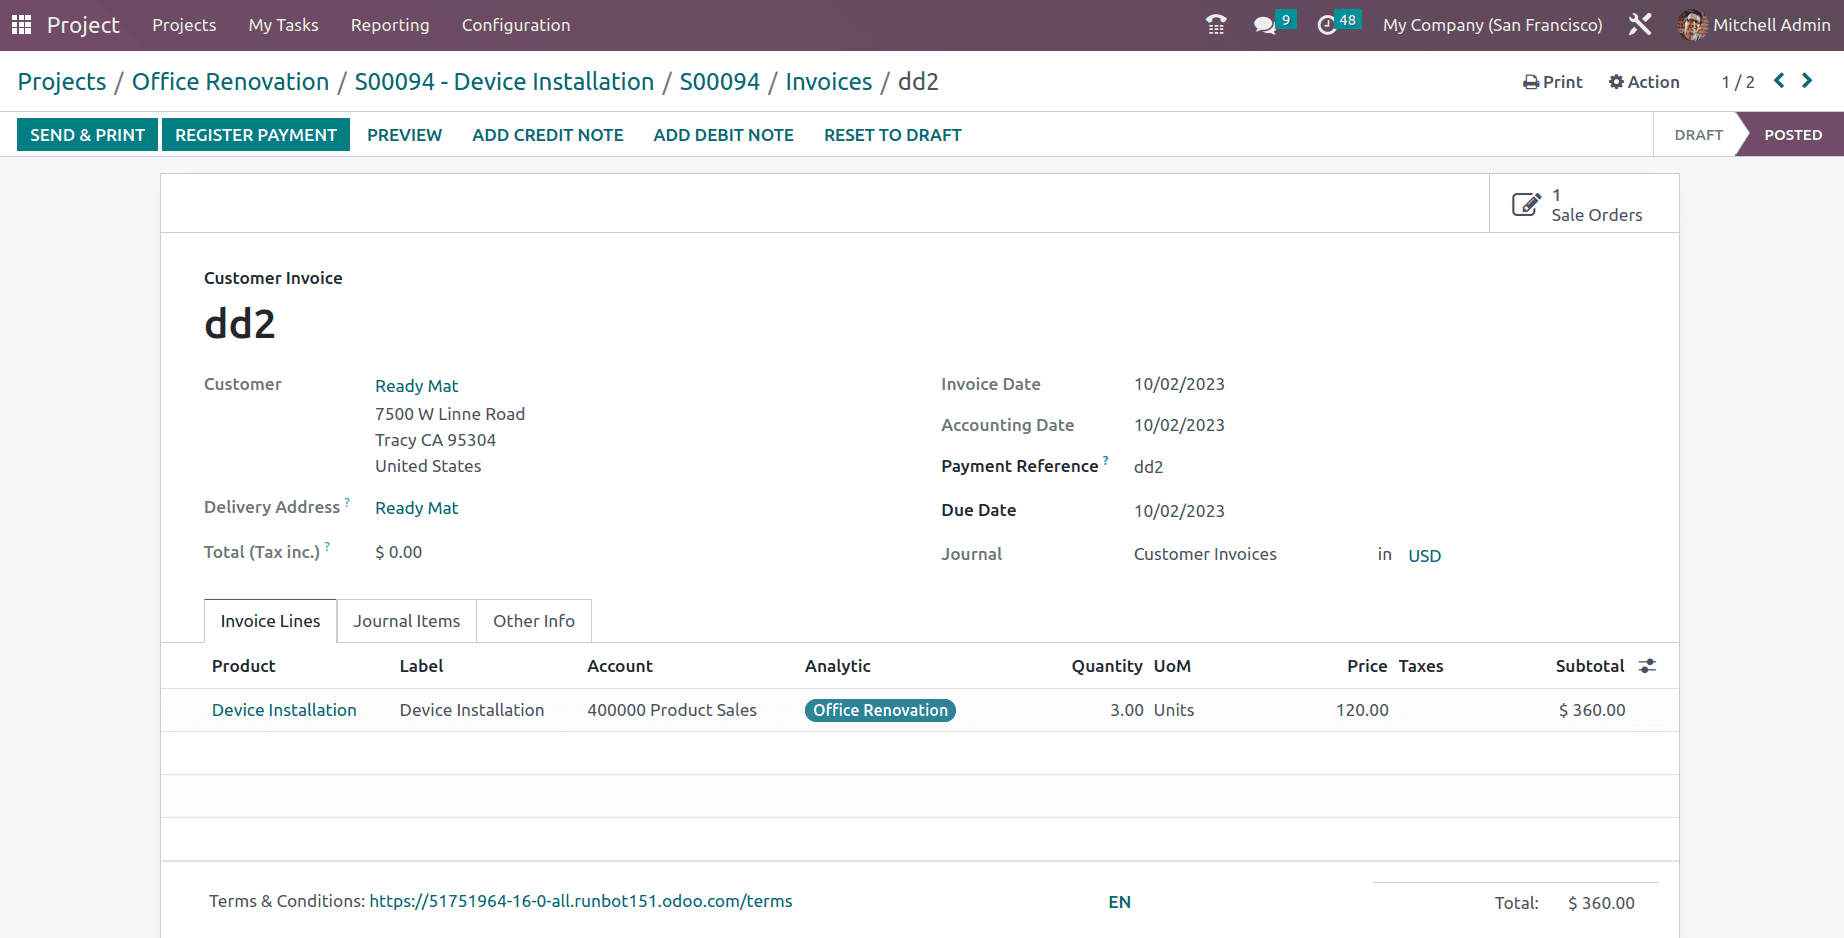
After you've confirmed the invoice, click the Register Payment option to register the payment. After finishing the project, go to the Project module's project dashboard to find out how profitable it was.
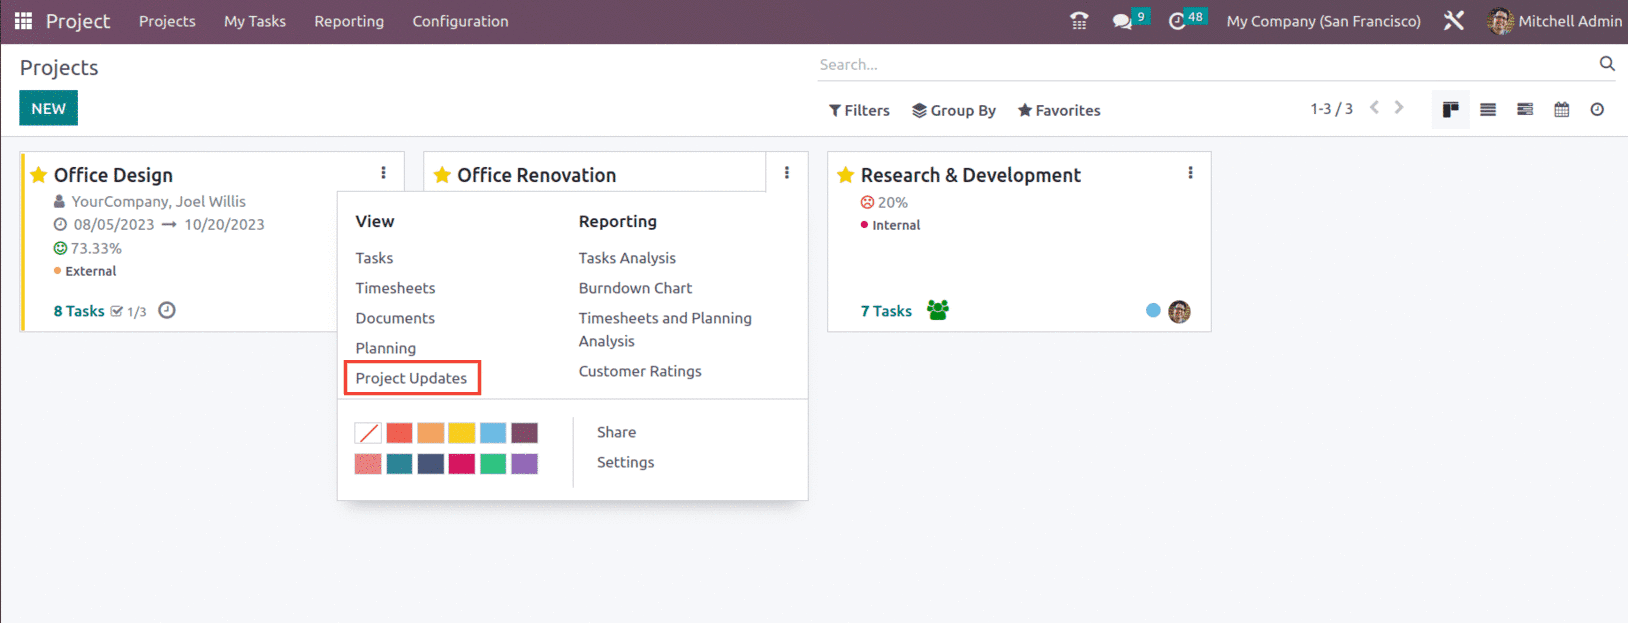
The project dashboard's Kanban view displays all defined projects in the module. The three vertical dots in the upper right corner of each project tab will display choices to examine and report on various project operations. Reviewing the profitability may be done using the Project Updates option.
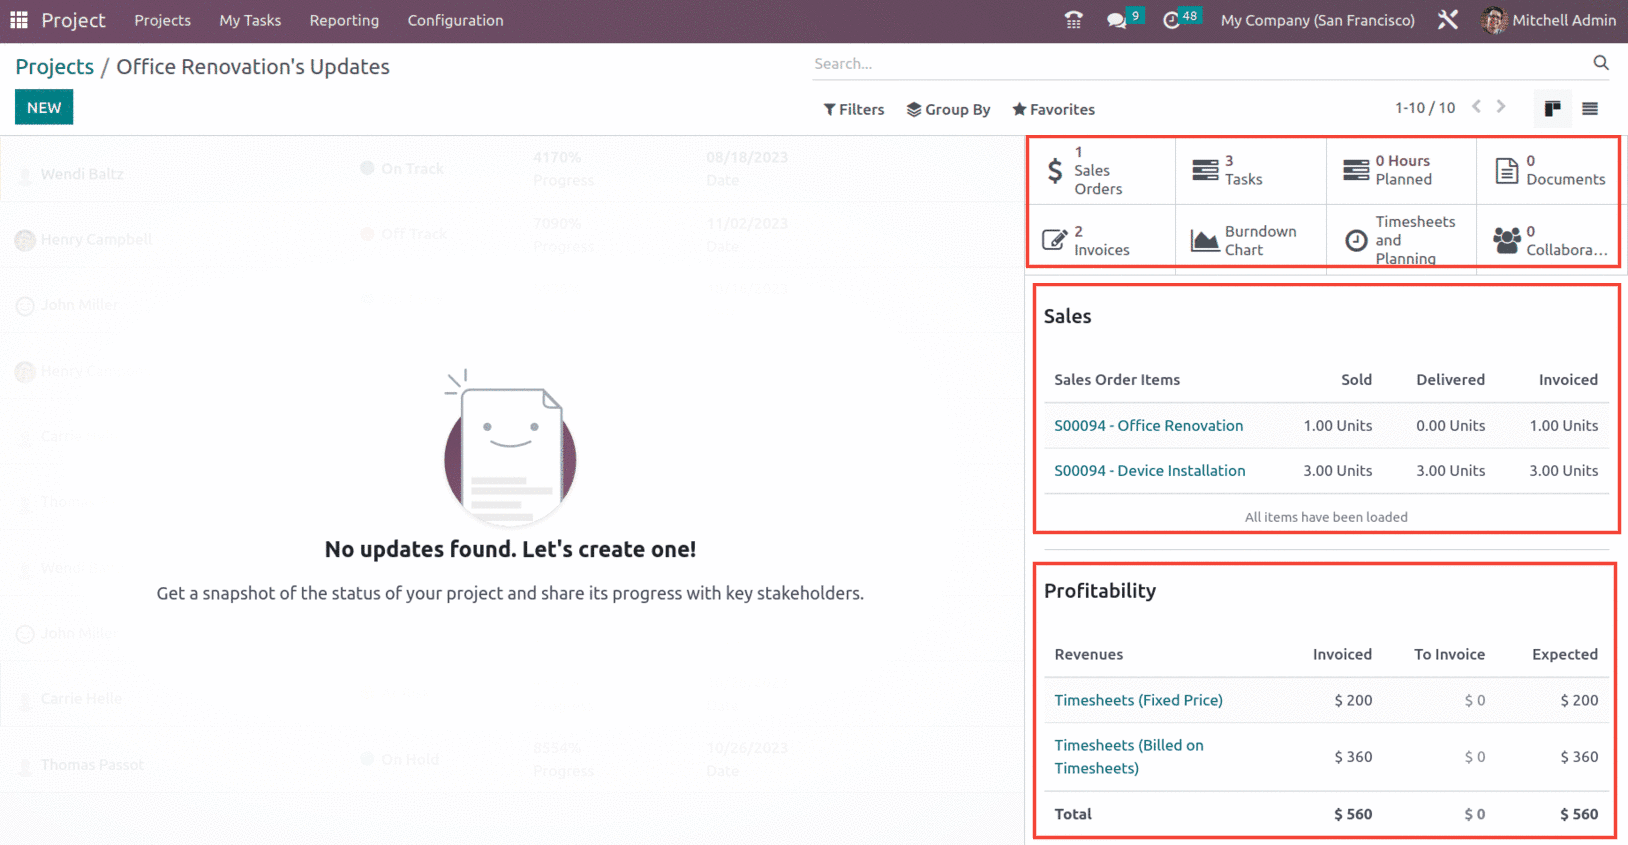
As seen in the picture above, one side of the screen displays project progress information. You may monitor and control the Sales Order, Tasks, Recorded Hours, Forecasted Hours, Burndown Chart, Timesheets & Planning, Billable Time, Invoices, Budget, Gross Margin, and Collaborators using the smart buttons on the right side of the page.

The Profitability menu provides information about the projected profitability based on the budget and expenditure amount. It is stated what portion of the project's money was spent. With this information, the project's current cost is computed, along with the Margin, Costs, and Revenue.
Under Profitability, we have a Revenue and Costs section. The cost and income from the analytical account are shown here. To determine the Project Margin, subtract the project's costs and expenses from the project's revenue. Positive margins indicate project success, whilst negative margins indicate project failure.
By precisely capturing the information about the project, the Odoo Project module helps you identify the gain or loss in a project. So this is how Project updates and profitability is managed in the Odoo 16 Project module.