Better productivity and effective tracking result from a well-organized composition. Educational ERP is a strong, all-encompassing, user-friendly ERP solution designed specifically for school administration. Details like student entrance, enrollment information, faculty records, class management, and subject management are simple to administer. An extensive database containing all relevant and up-to-date information about students and faculty members within the school is managed and maintained by Educational ERP. It acts as a single point of contact for all activities connected to the school. We can experience the most intelligent school management with ERP for education.
In this blog, we can discuss how to configure Educational ERP System with Odoo.
Step 1: Install the Educational ERP app
APP LINK: Educational ERP Core
Download the app and install it.
Step 2: How to set up the Educational system
The educational theme module, which forms the basis of the educational ERP Software core, must be installed in addition to the module. Data will automatically be added to each model when we install the module. That helps to create each field in the particular models.
The module contains three menus such as admission, Report, and Configuration.
Let us discuss the Configuration Menu,
It contains the class and application part, and the class includes standards, subjects, syllabi, and particular documents. The application consists of the reject reason and the document type.

First, we need to create the division that contains each standard,

The model only contains the name field, so we use the create button and can create the division for each class.
Amenities:
That help to create the school amenities creation, It maintains a database of many facilities, such as the class board, chalks, cabinets, and seating characteristics allotted to a particular class. In the event of inaccurate reporting, the database guarantees easy distribution and replacement of the amenities.

The model contains the name and the particular code for the amenities data.
Academic year:

The model contains the academic details including name, time, and further information.
Document type:
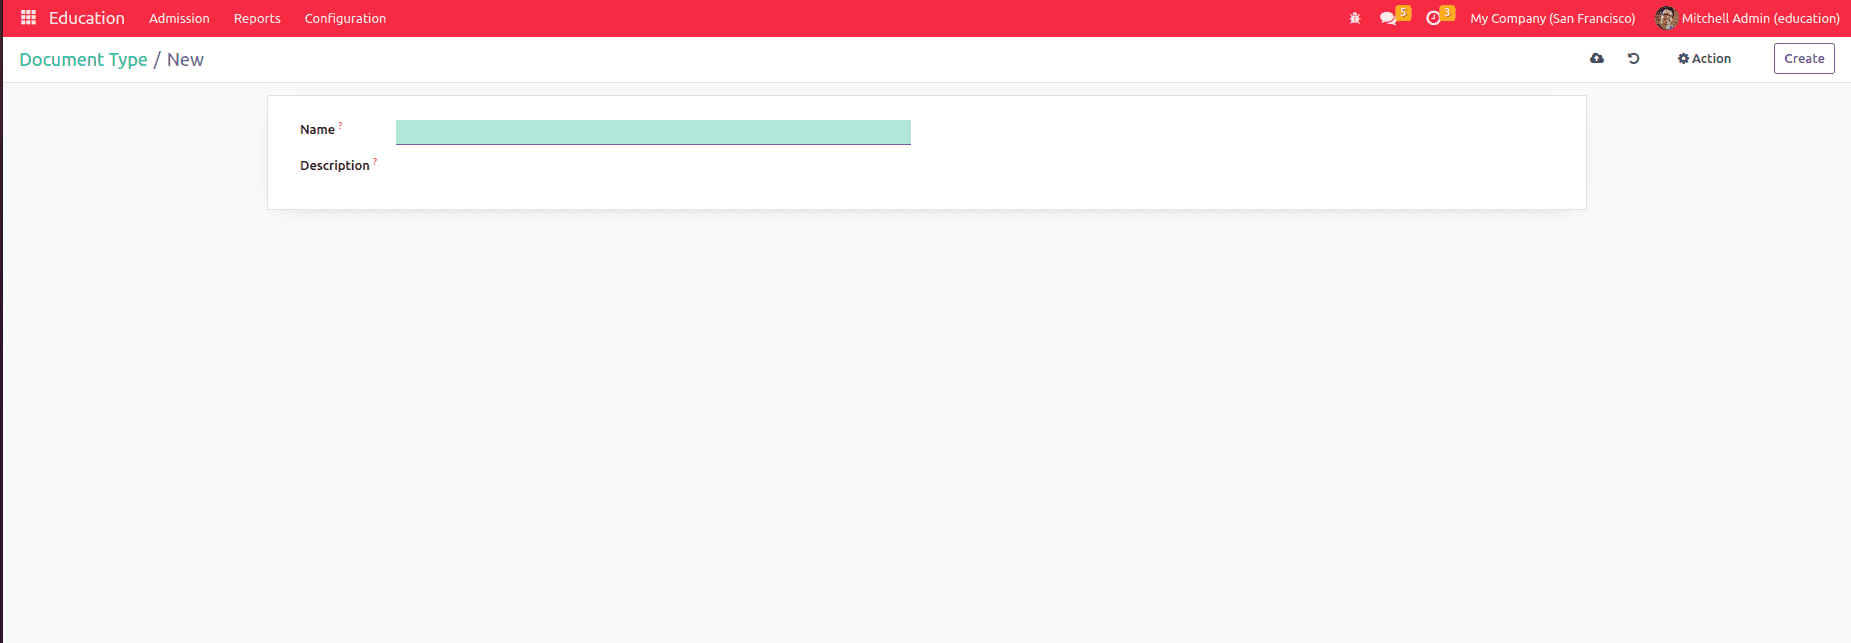
The document type form view contains the name and description of the file.
Reject Reason:
When we suggest rejecting a student or staff in that form, we need the reject reason.

Standard creation:

This form includes the standard's name as well as the syllabus's models.

When we create the syllabus, a record is also created in the syllabus in the section.
Subject Management:

The form includes the subject, types, code, weightage, and boolean fields that mention it as a lab subject or language subject. One can effectively manage the class and keep all subjects focused by giving students and faculty the information they need on the topic being covered today. Time management effectively handles those as mentioned above.
Document Management:
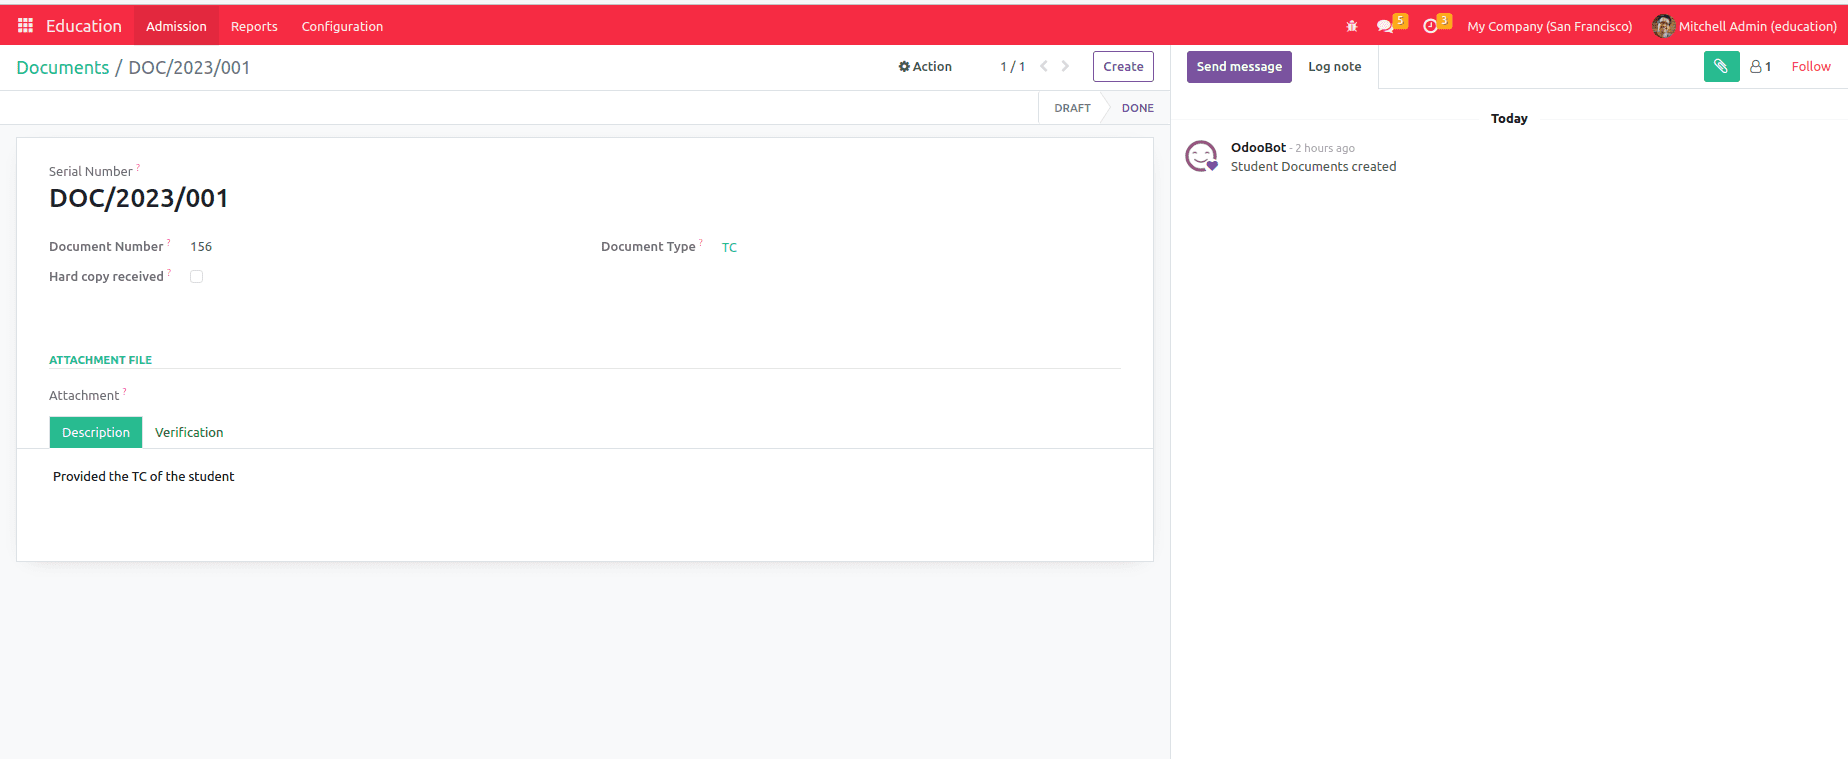
When we create a record, the serial number is automatically generated, and the form contains the name, document type, and attachments. There is a boolean field that includes whether you need the hard copy. Also, the verification and precise details are contained in the verification tab.
Step 3: Create an Admission record:
Both returning and new students' registration and admission procedures are handled by it. It arranges all of the applications in chronological sequence according to earned credits and guarantees the efficient operation of a school.
The form view includes the student's name and the student's image. And the academic details and personal details. The academic details contain the academic year, admission date, second language class, medium of the class, and the previous institution the student was studying.
The personal details include the blood group, gender, mother tongue, date of birth, guardian, nationality, and other personal data.
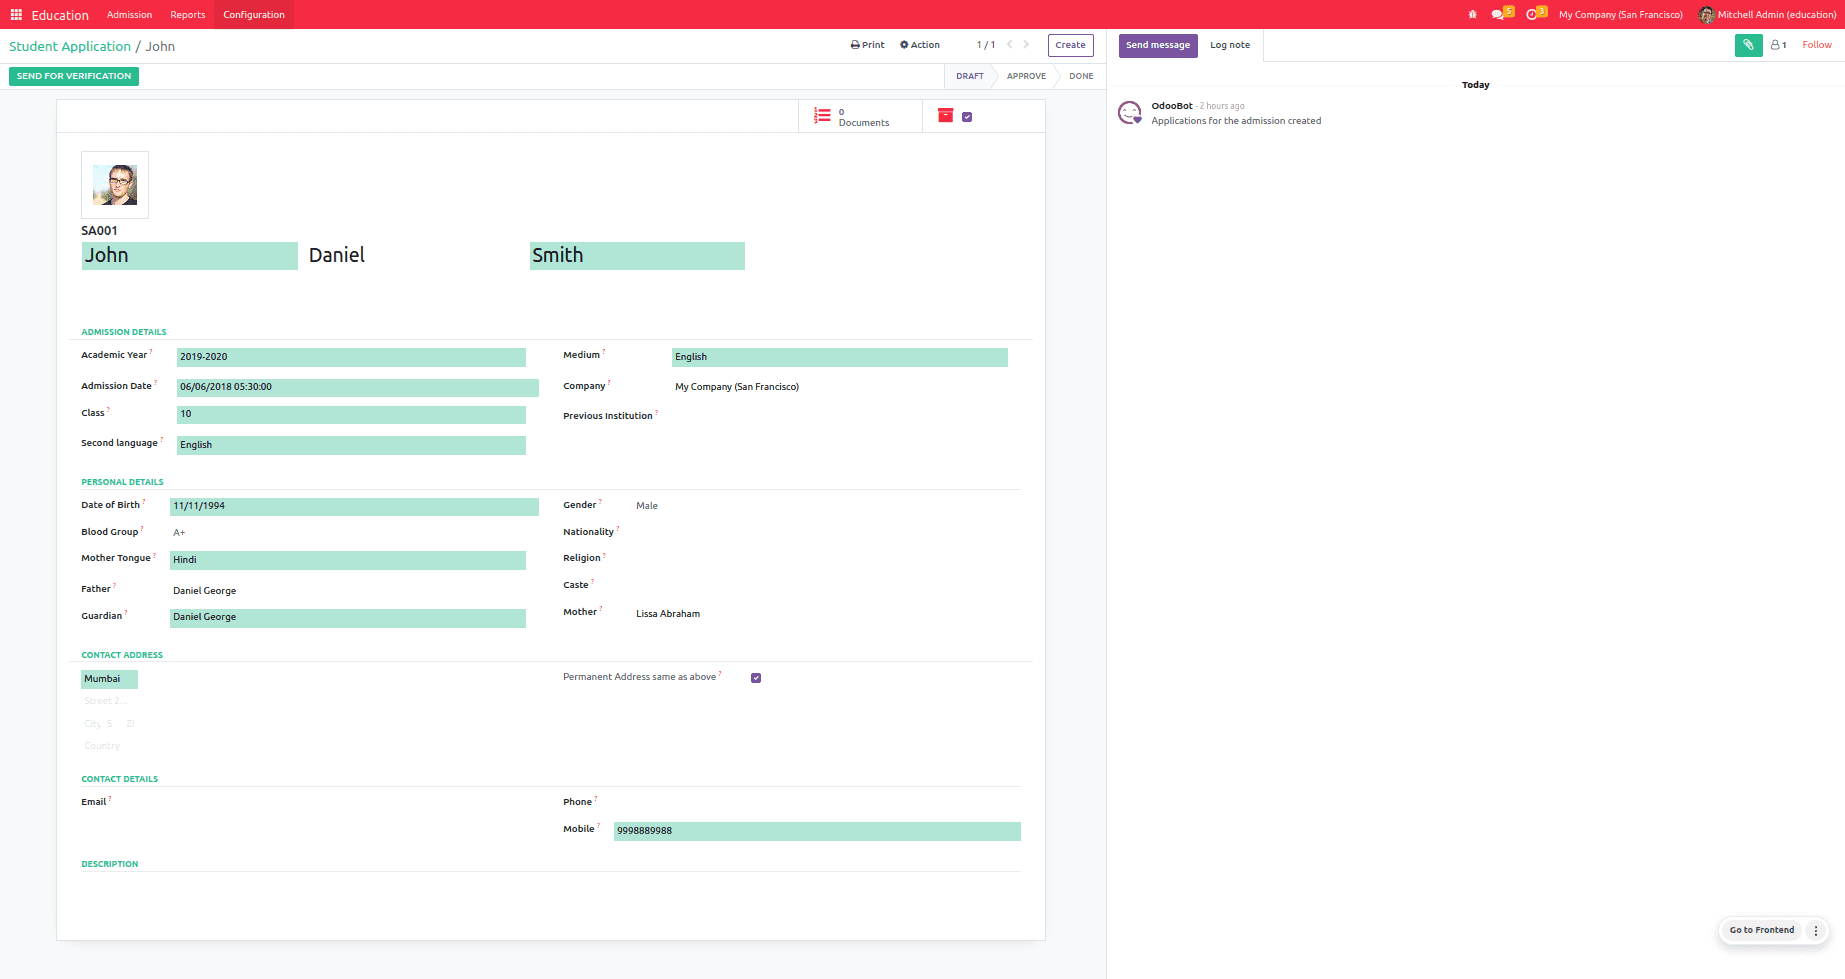
Also, it contains the student's contact details and then creates the record. We didn’t make the documents for the applicant, so we can't continue the process; they show a validation error.

Before the validation, we need to create the document details. First, choose the smart tab document, and the delete tab is mentioned as the active record.
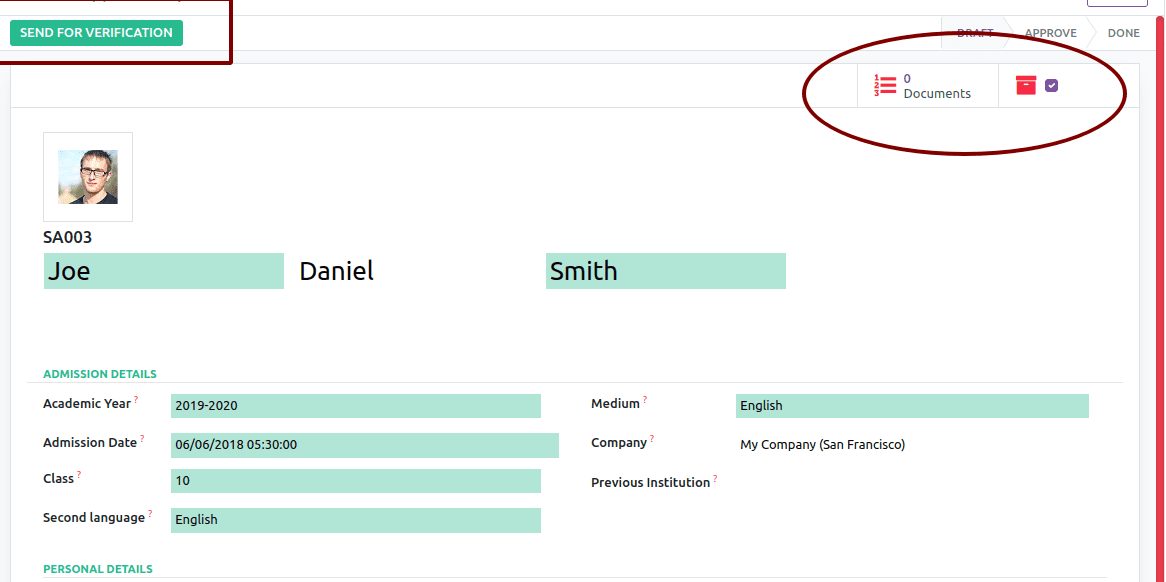
Clicking on the Documents smart button, there has an option for creating the document record.
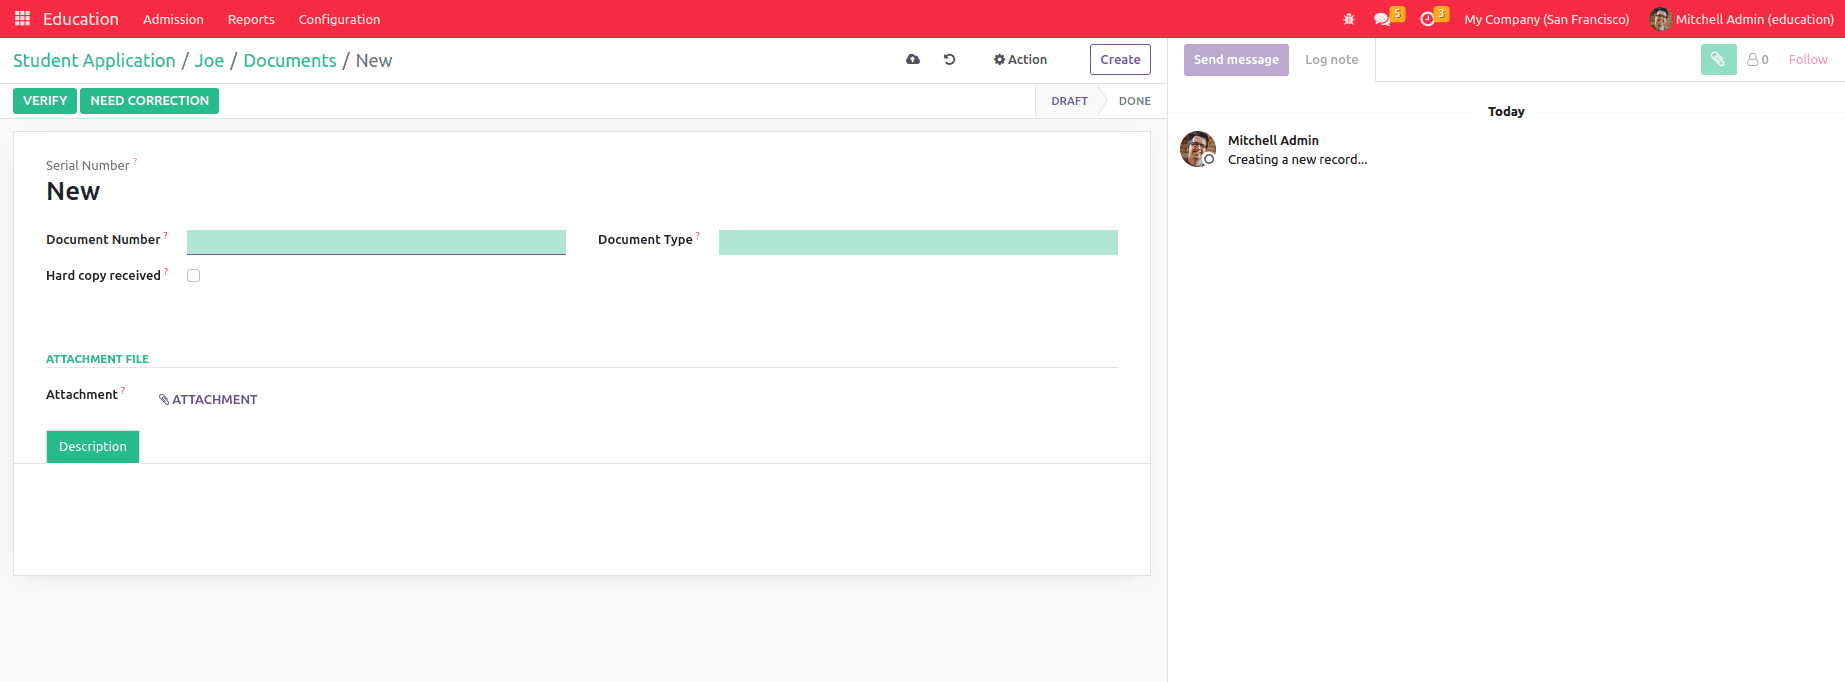
After making the record, the boolean hard copy, including the received location and other related data, is obtained.
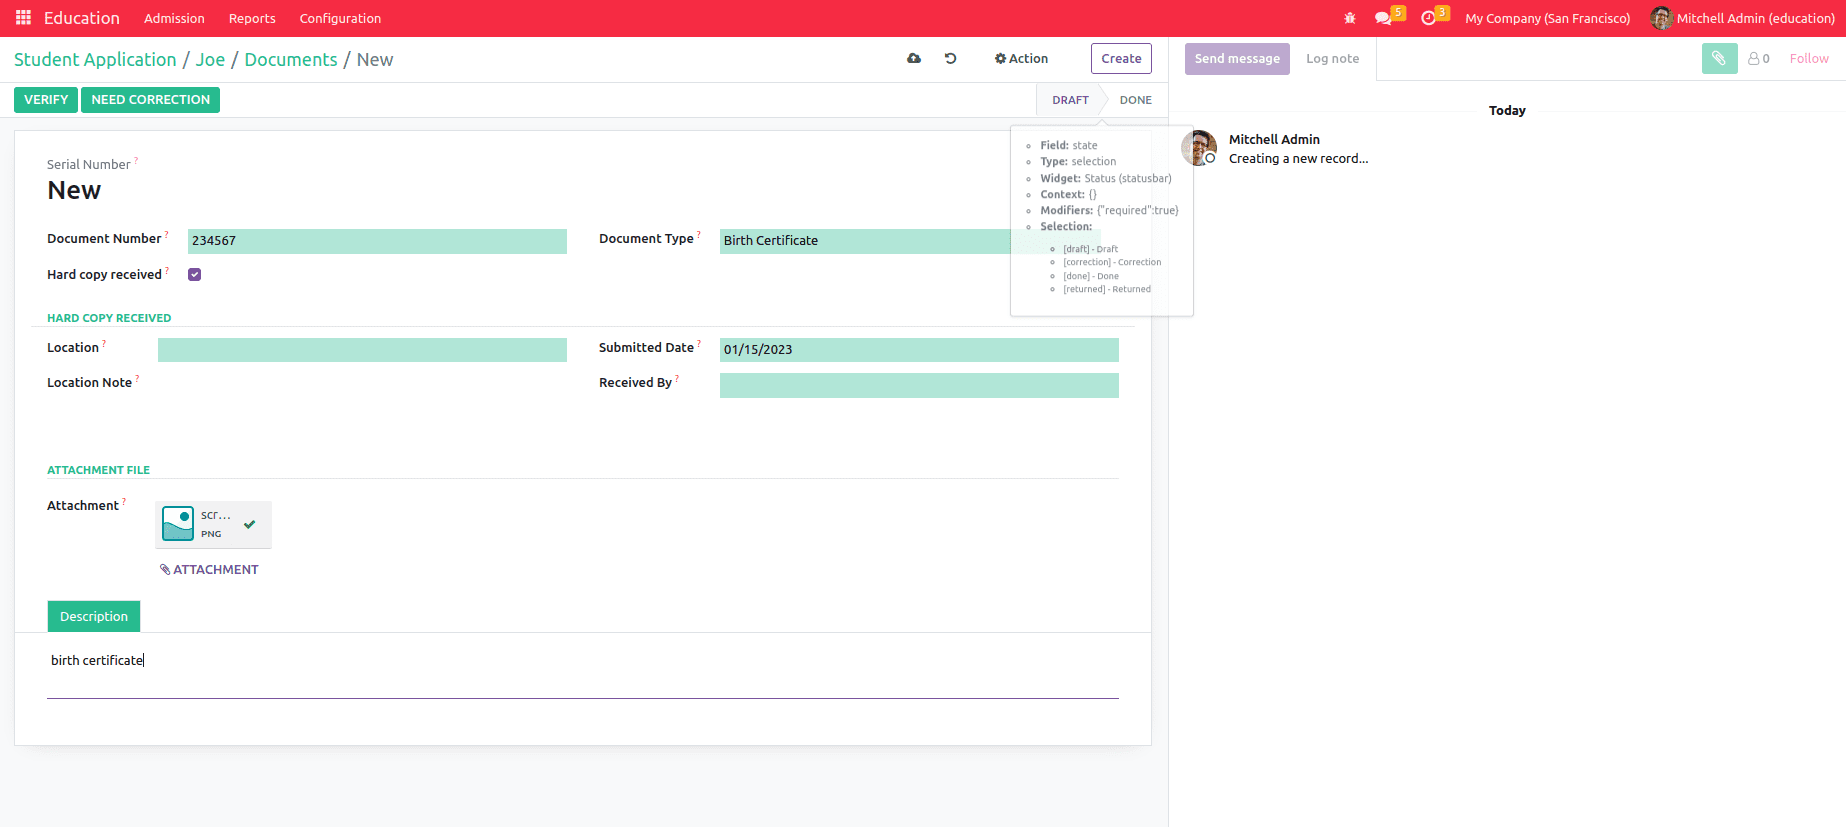
There are two buttons for verifying, and they need correction. For clicking the verify button, the documents need to be confirmed; otherwise, it needs revision.
Going back to the student's details, we can verify the student's records and generates an option for the applicant to student creation.
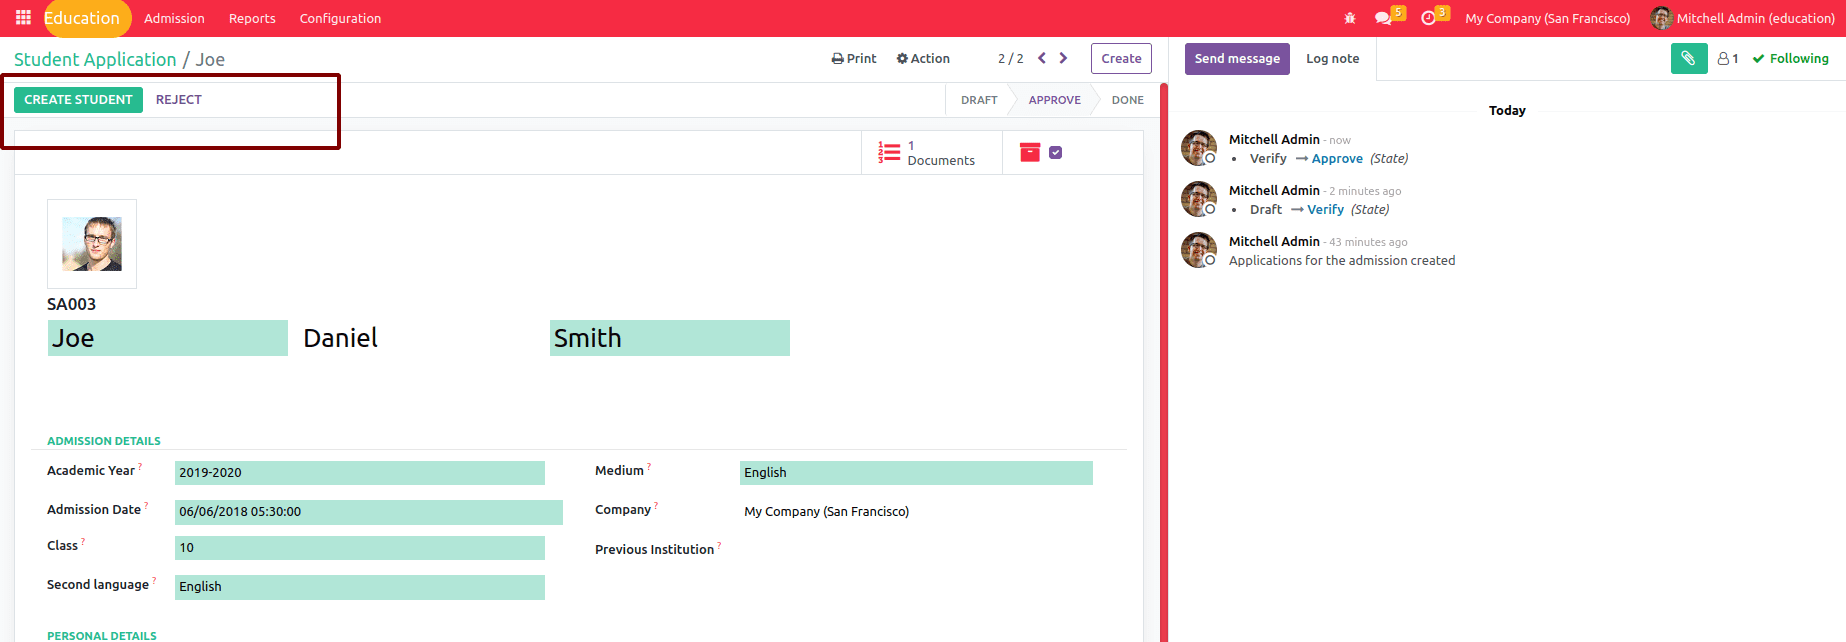
After clicking the button CREATE STUDENT, the applicant changes to a student, and we can specify their class and related data.
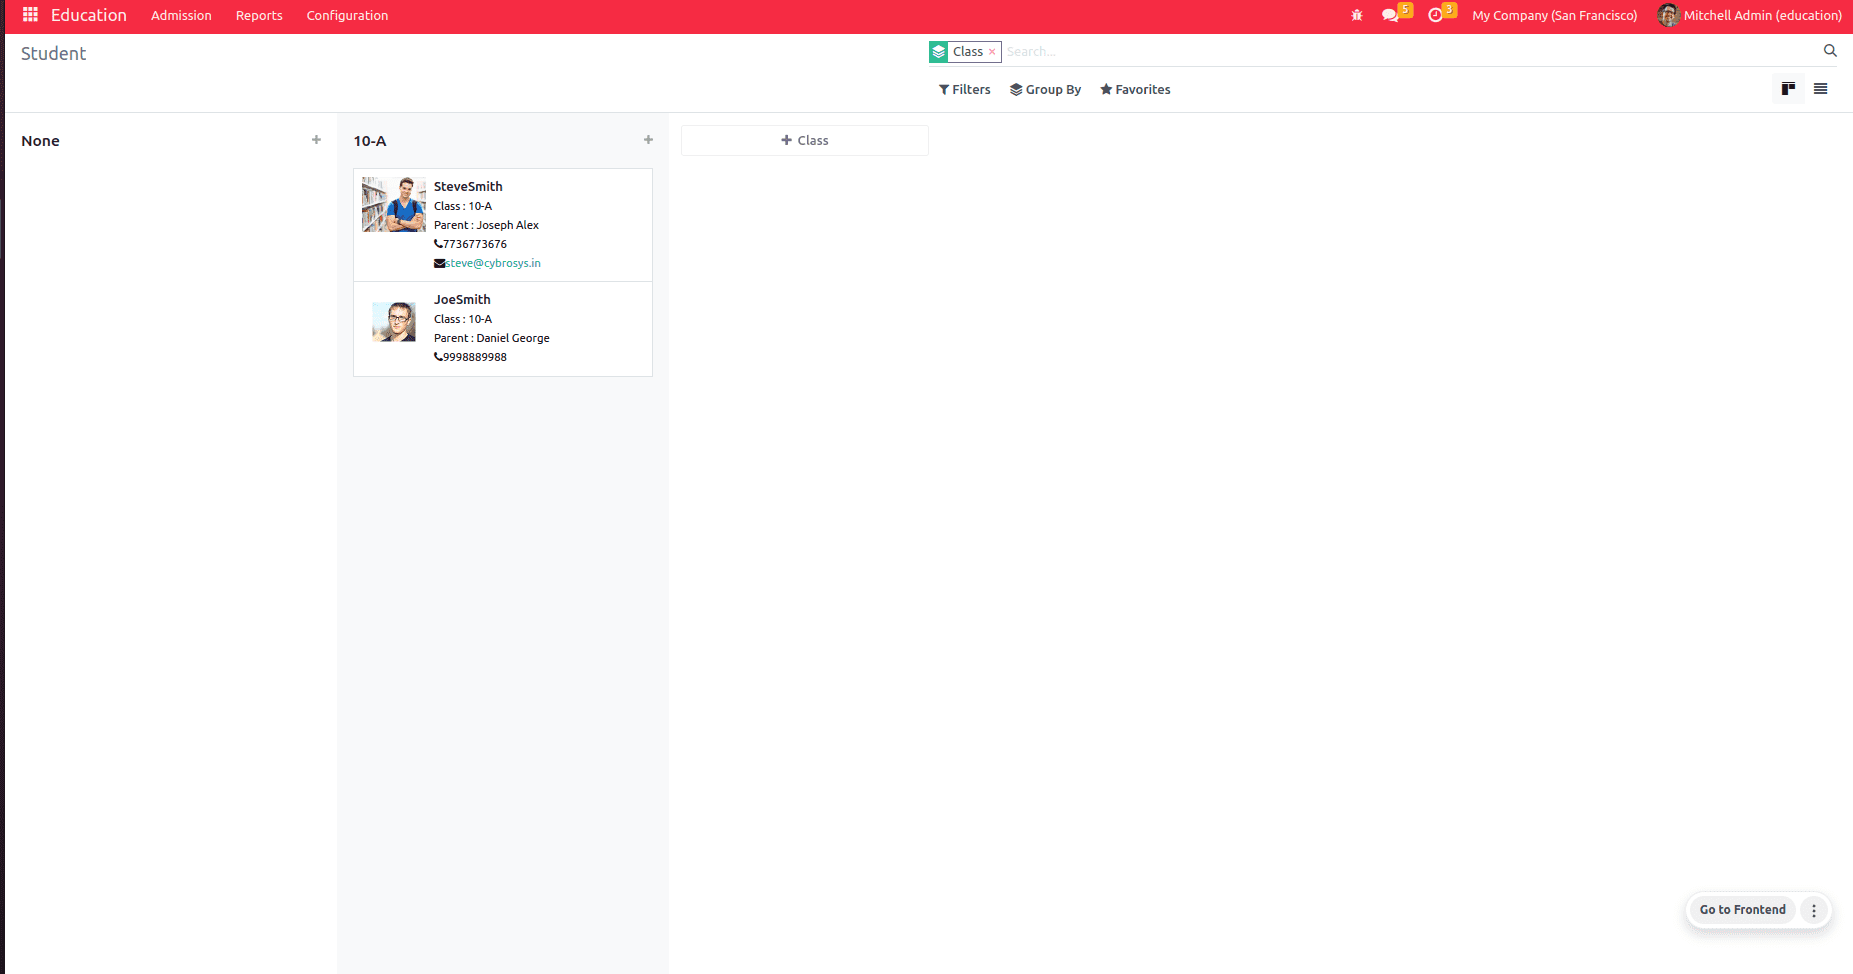
After confirming the student record from the application form, a student is correctly guided to a certain division or class. Make it simple for the faculty to assign students to their appropriate classes.

Updating the class history of the student also creates the class and division record of the particular student.
Step 4: Faculty Creation:
Efficiently manages all faculty information, including their qualifications, experience, and educational background. Each instructor is associated with a specific employee, allowing for proper tracking of pay stubs and other financial benefits.

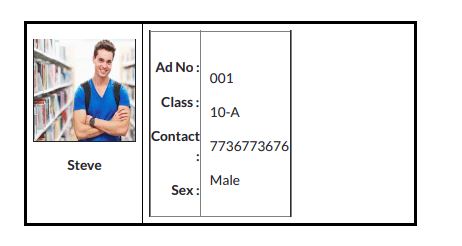
Step 5: Id Card for students and faculty

When clicking on the print button, we can create the id card for the students and faculty.
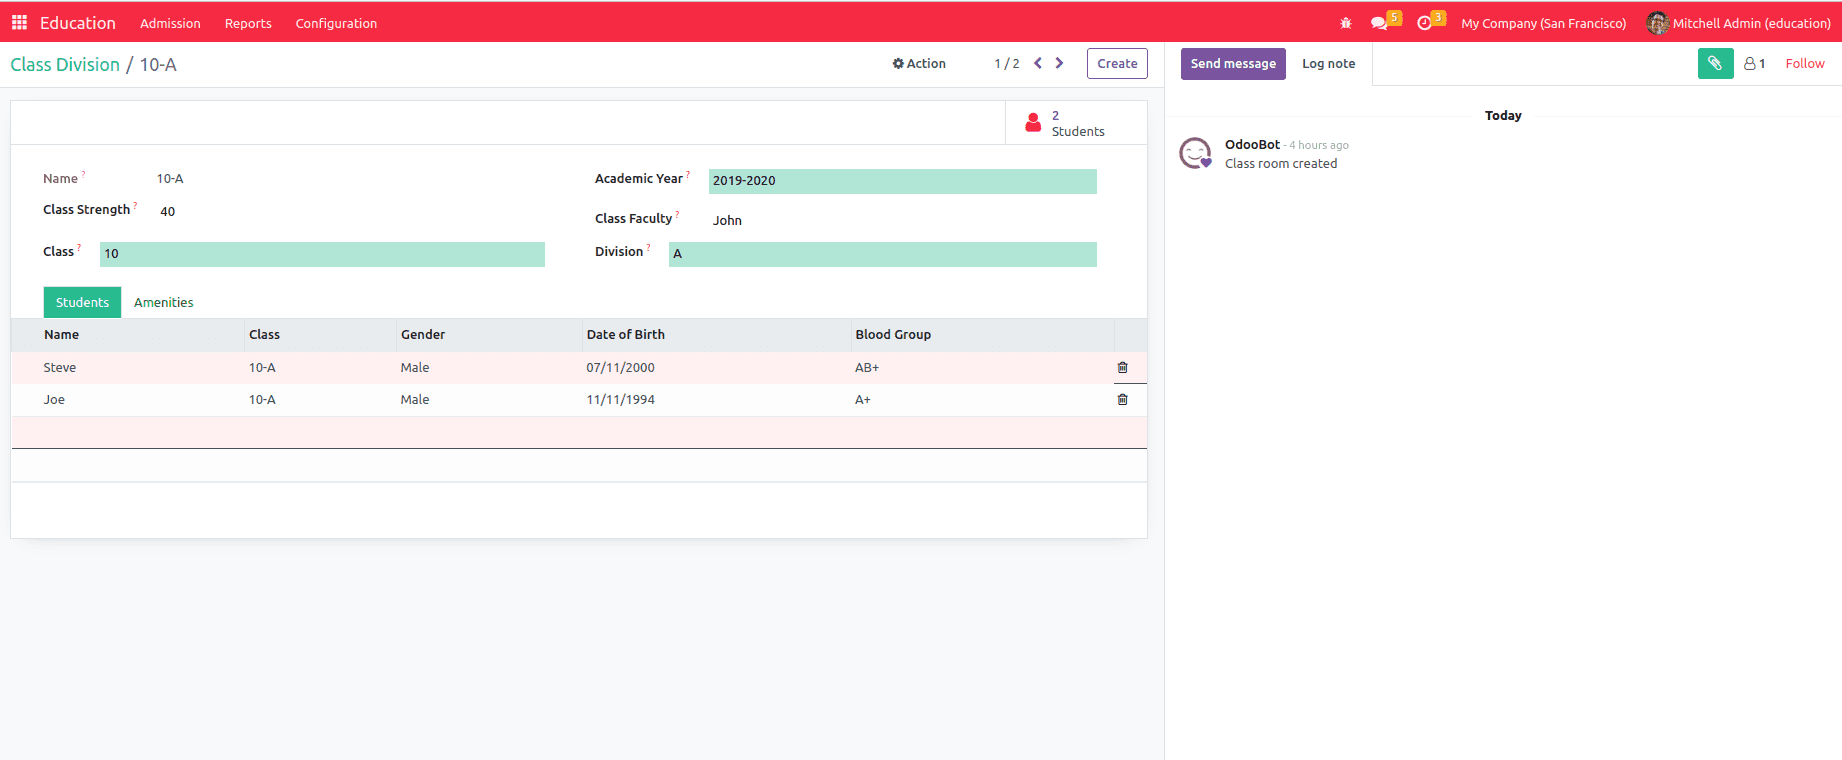
Step 6: Class Room Management
By taking into account every aspect of the students and designated faculty, the classroom may be managed effectively. It summarizes the number of students in each class and their allocated professors.
Step 7: Report for application analysis
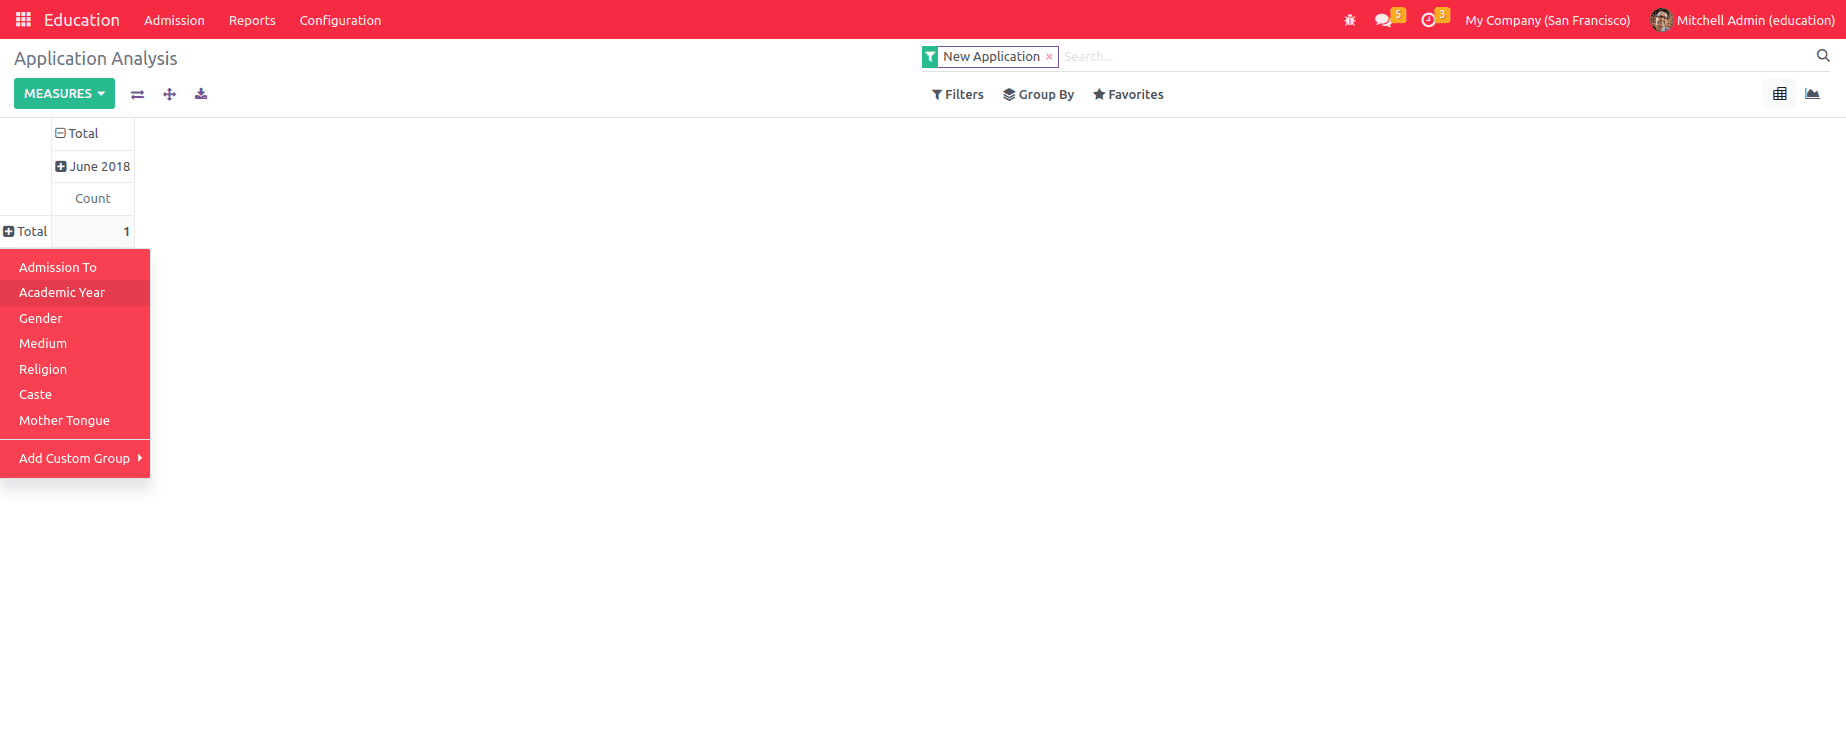
This is used to analyze the educational ERP system's application history and further data. The report was created as a pivot view and a graphical representation.
This way, we can configure Education ERP with Odoo and perform the above-mentioned operations.
Have a look at the following blog to explore more about How to Install Odoo 16. How to Install Odoo 16