Consent received from authority is a vital part of starting work in a company. A US company requires approval for every activity from payment to budgeting. Before the approval, a lot of process takes place in an organization. Sometimes, managing these approvals is the hardest task for many firms. The standardization of the organization is made possible through an approval process. By implementing ERP software, you can remove the worries in your business. Odoo 16 Approval module is helpful to save time once managing the requests of all employees.
This blog identifies the process of applying new approval request in a US Company.
Odoo 16 Approval module enables users to configure approval types, products, and more. It is easy to create approval types as per company or employee needs. Let’s view the steps to apply a new approval request using Odoo 16 Approval module in a US Company.
To Formulate an Approval Type in the Odoo 16
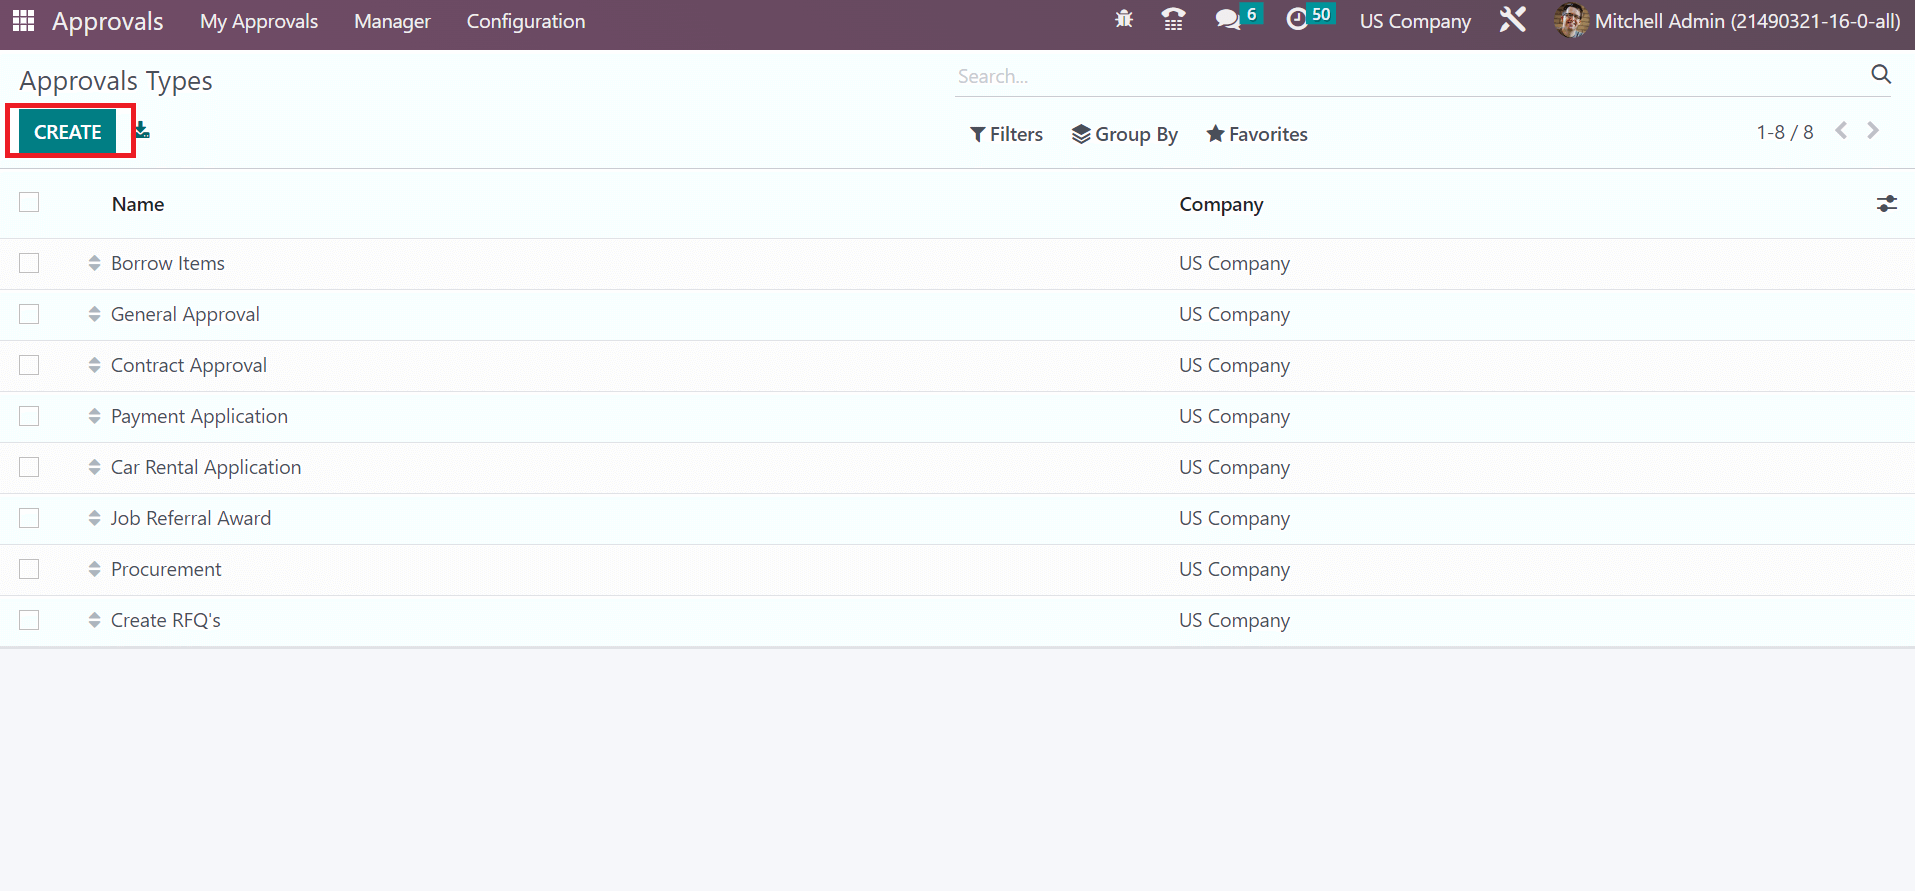
A type of approval needed for company or laborers' requirements concerning vital applications is referred to as the Approval type. Users can design a new one by choosing the Approval Type menu in the Configuration tab. The data relating to each approval type, such as Name and Company, are visible to the user. Press the CREATE icon to generate a new Approval type as marked in the screenshot below.
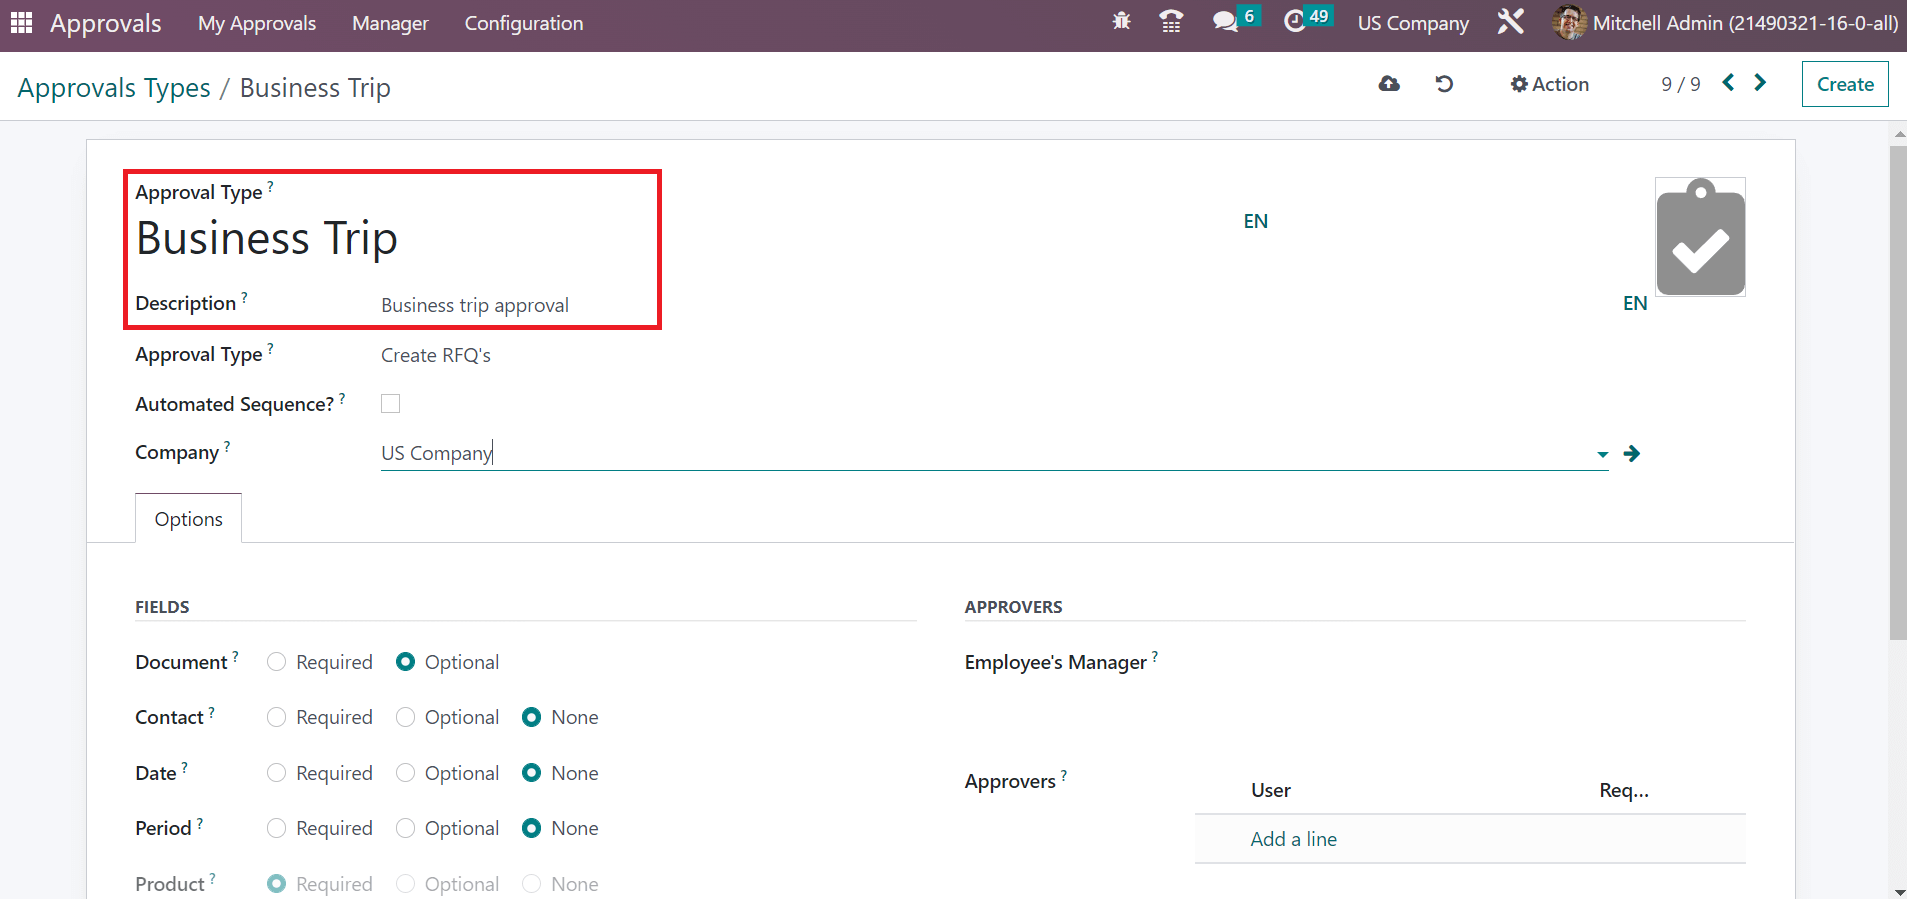
On the open page, apply the approval name within the Approval Type field. Enter the summary of your approval in the Description field, as denoted in the screenshot below.
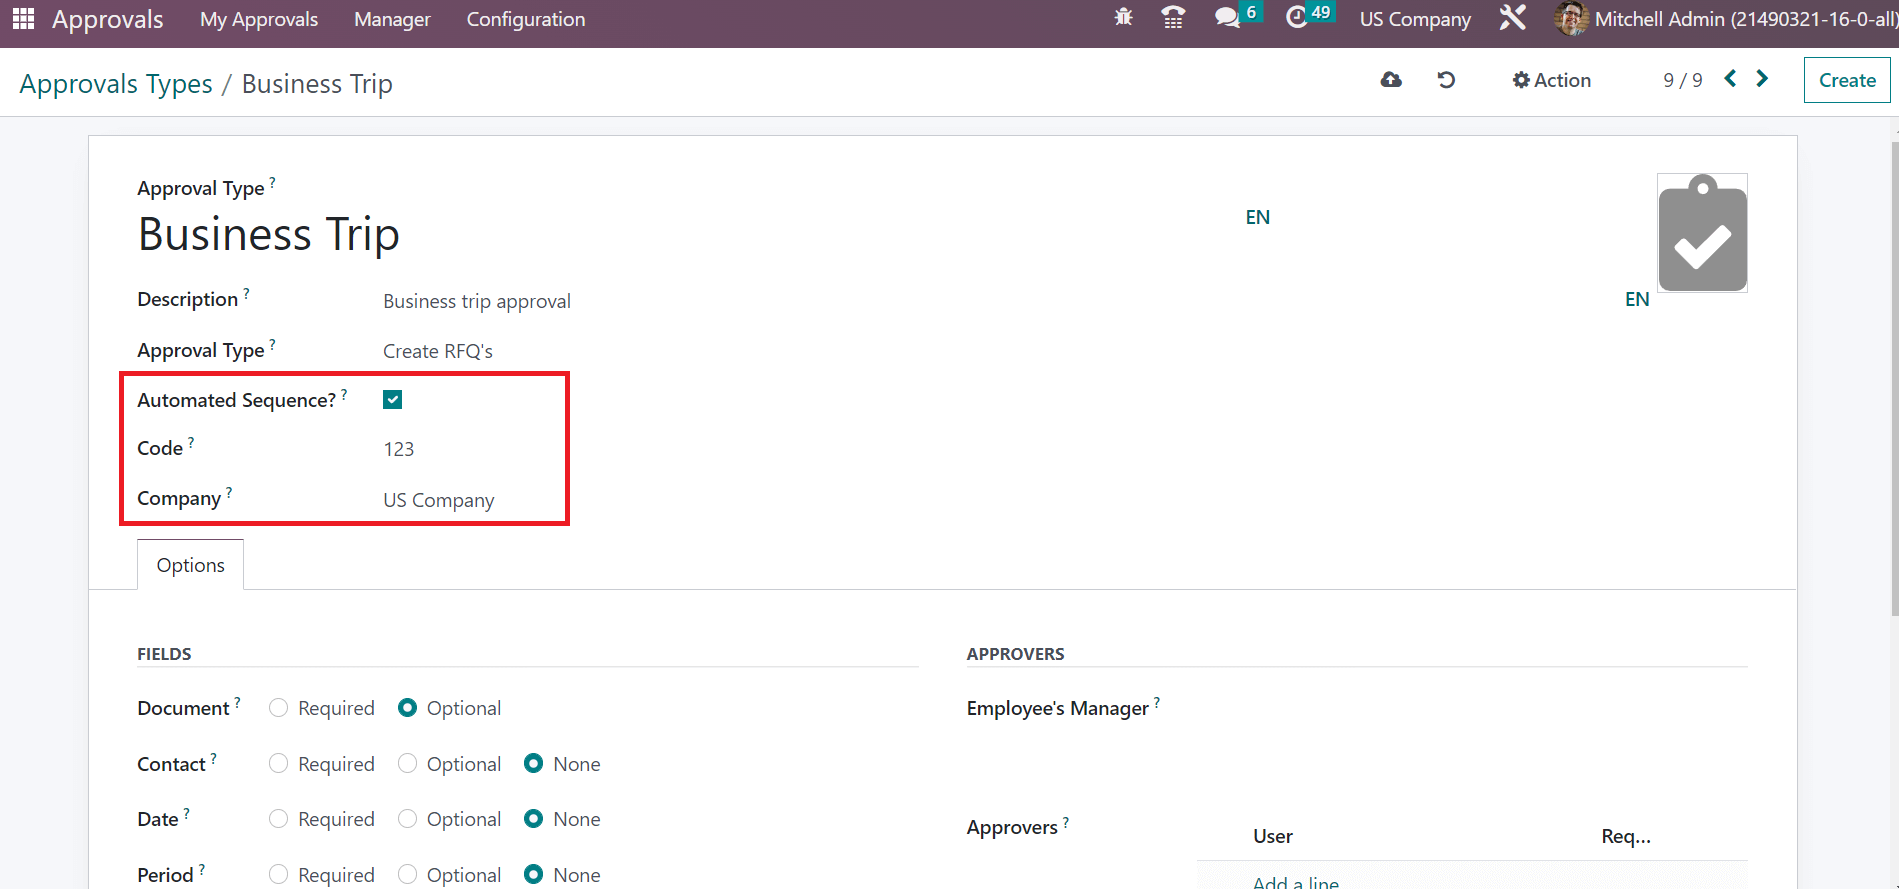
The approval Type field assists you in creating documents once approved the request. Users can choose the specific document in the Approval Type field. Once enabling the Automated Sequence field, we can automatically activate approval requests based on code. A Code option is viewable to you after the activation and enters the code for a manual approval request.
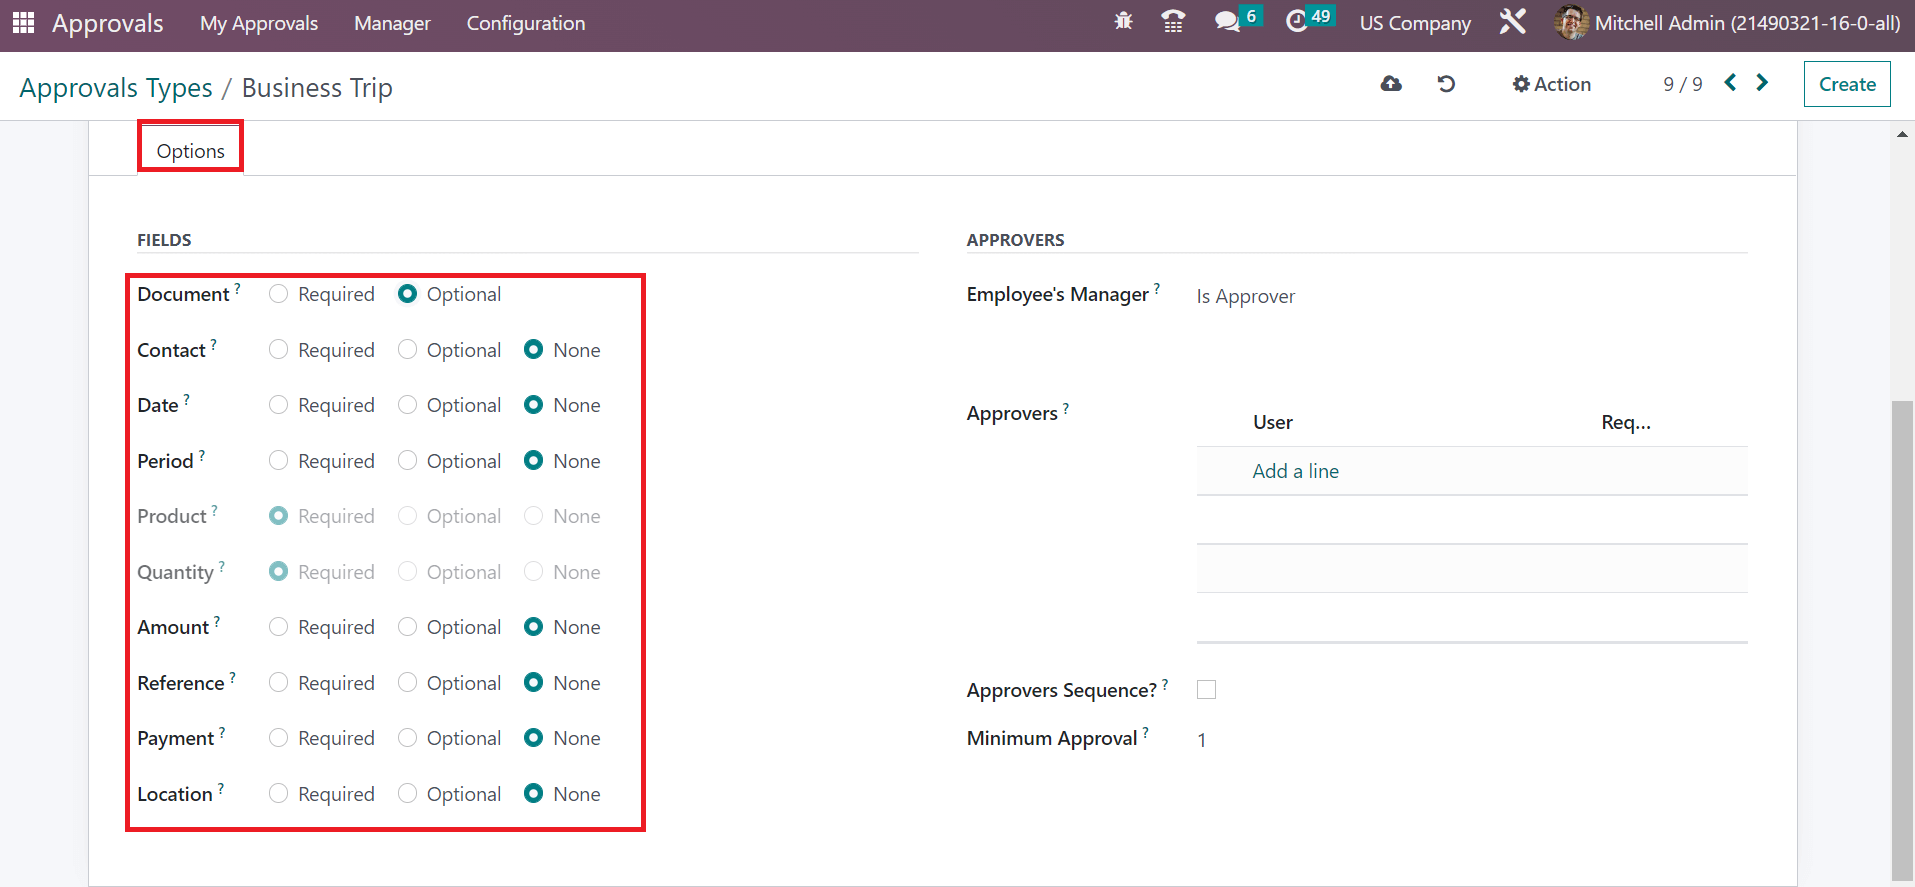
Below the FIELDS section under the Options tab, the user can set the activation of various fields as Required, None, or Optional. We selected the most of fields as None except Document one as displayed in the screenshot below.
Users can mention the employee-manager interaction with the approval type. The approval of the employee-manager classifies as Is Approver and Is Required Approver.
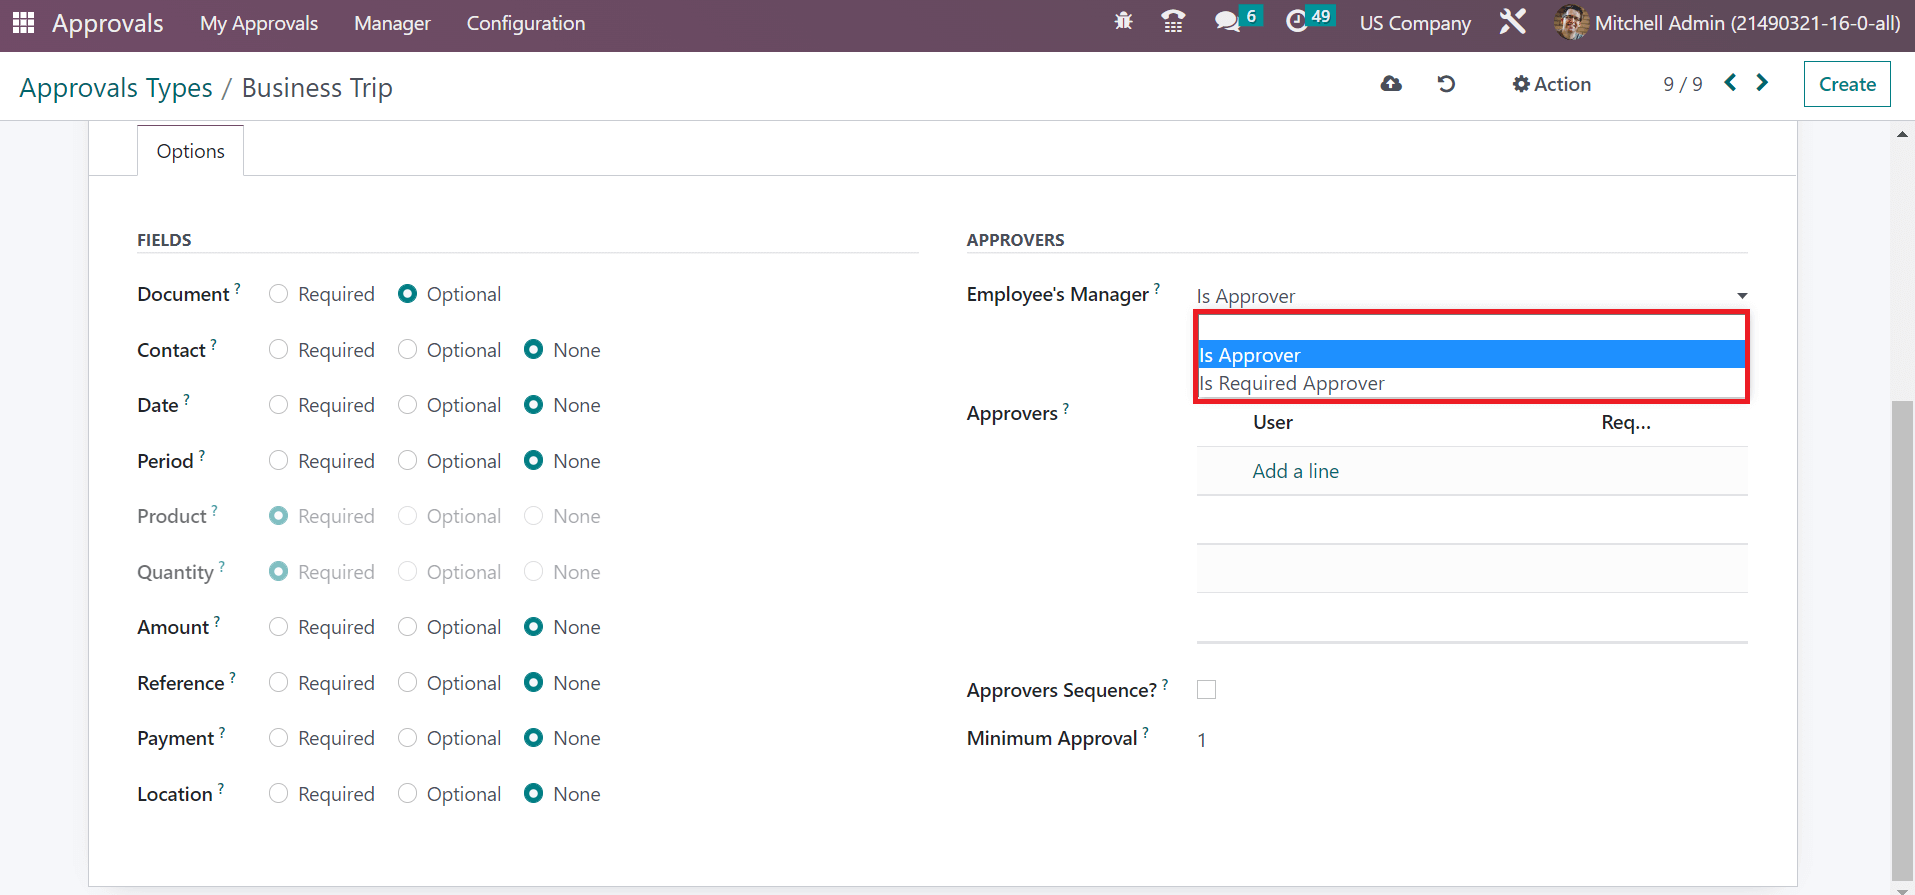
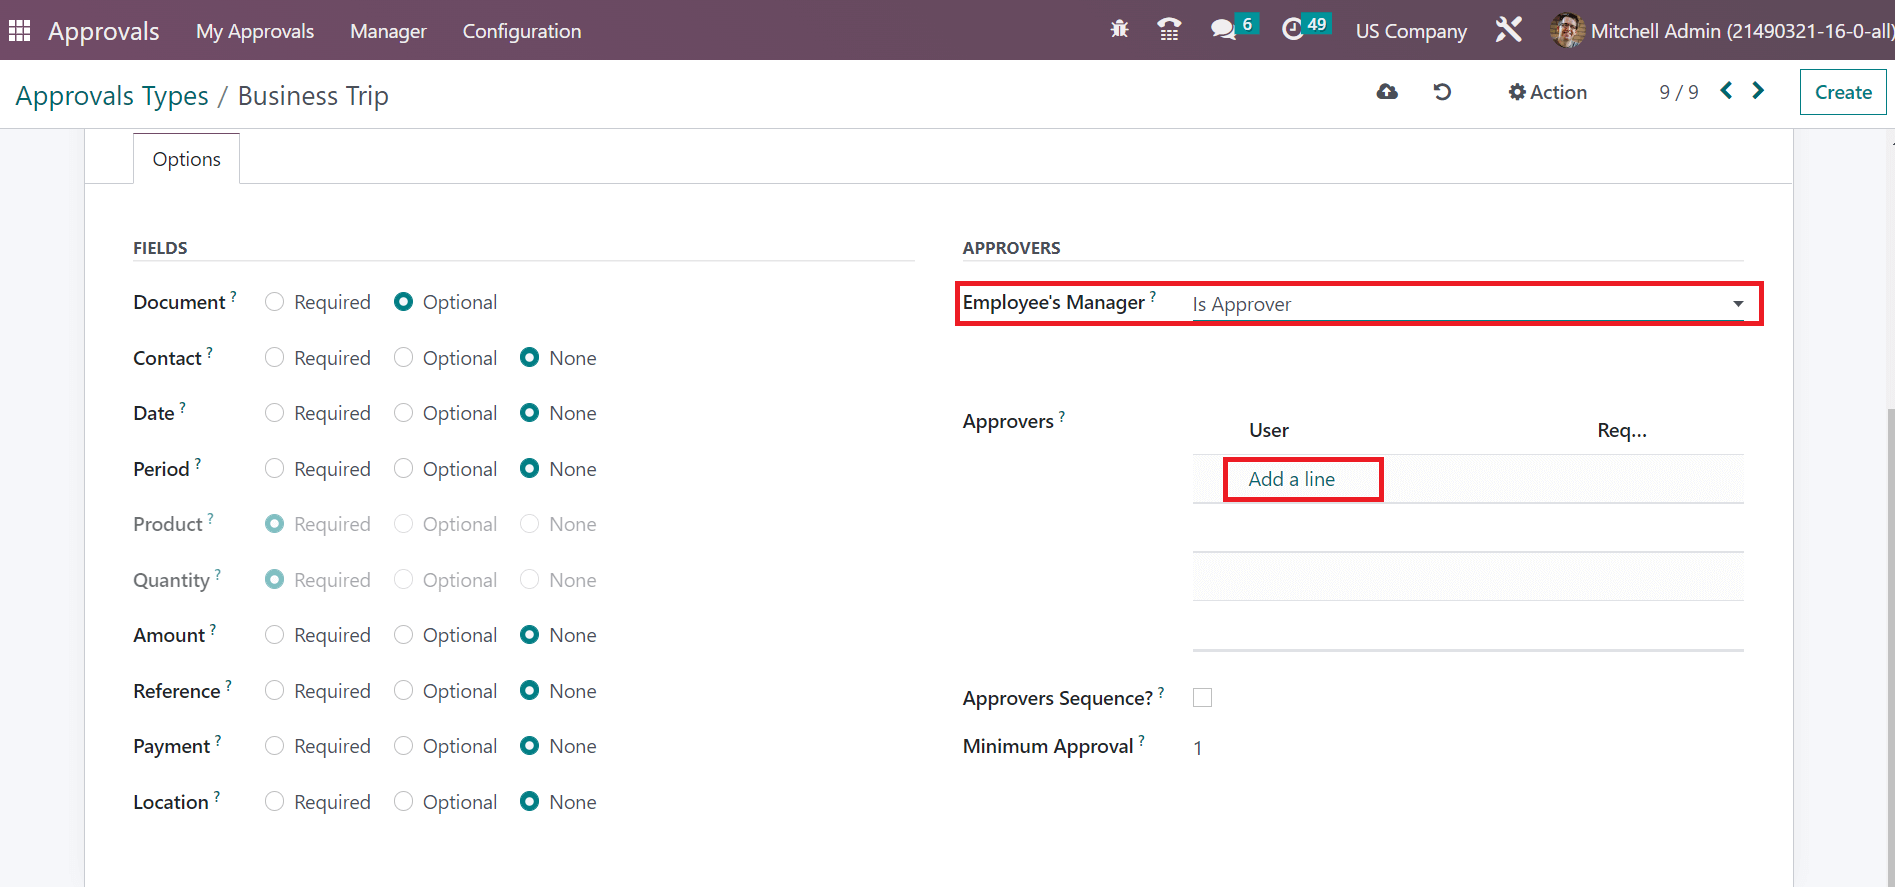
The employee's manager is added to the approved list once the Is Approver option is chosen. In contrast, the manager will be needed to approve the request by selecting the Is Required Approver option. So, we choose Is Approver option in Employee’s Manager field, and an Approvers field opens to you. By pressing the Add a line option under the User title, we can pick the necessary approvers for the approval type.
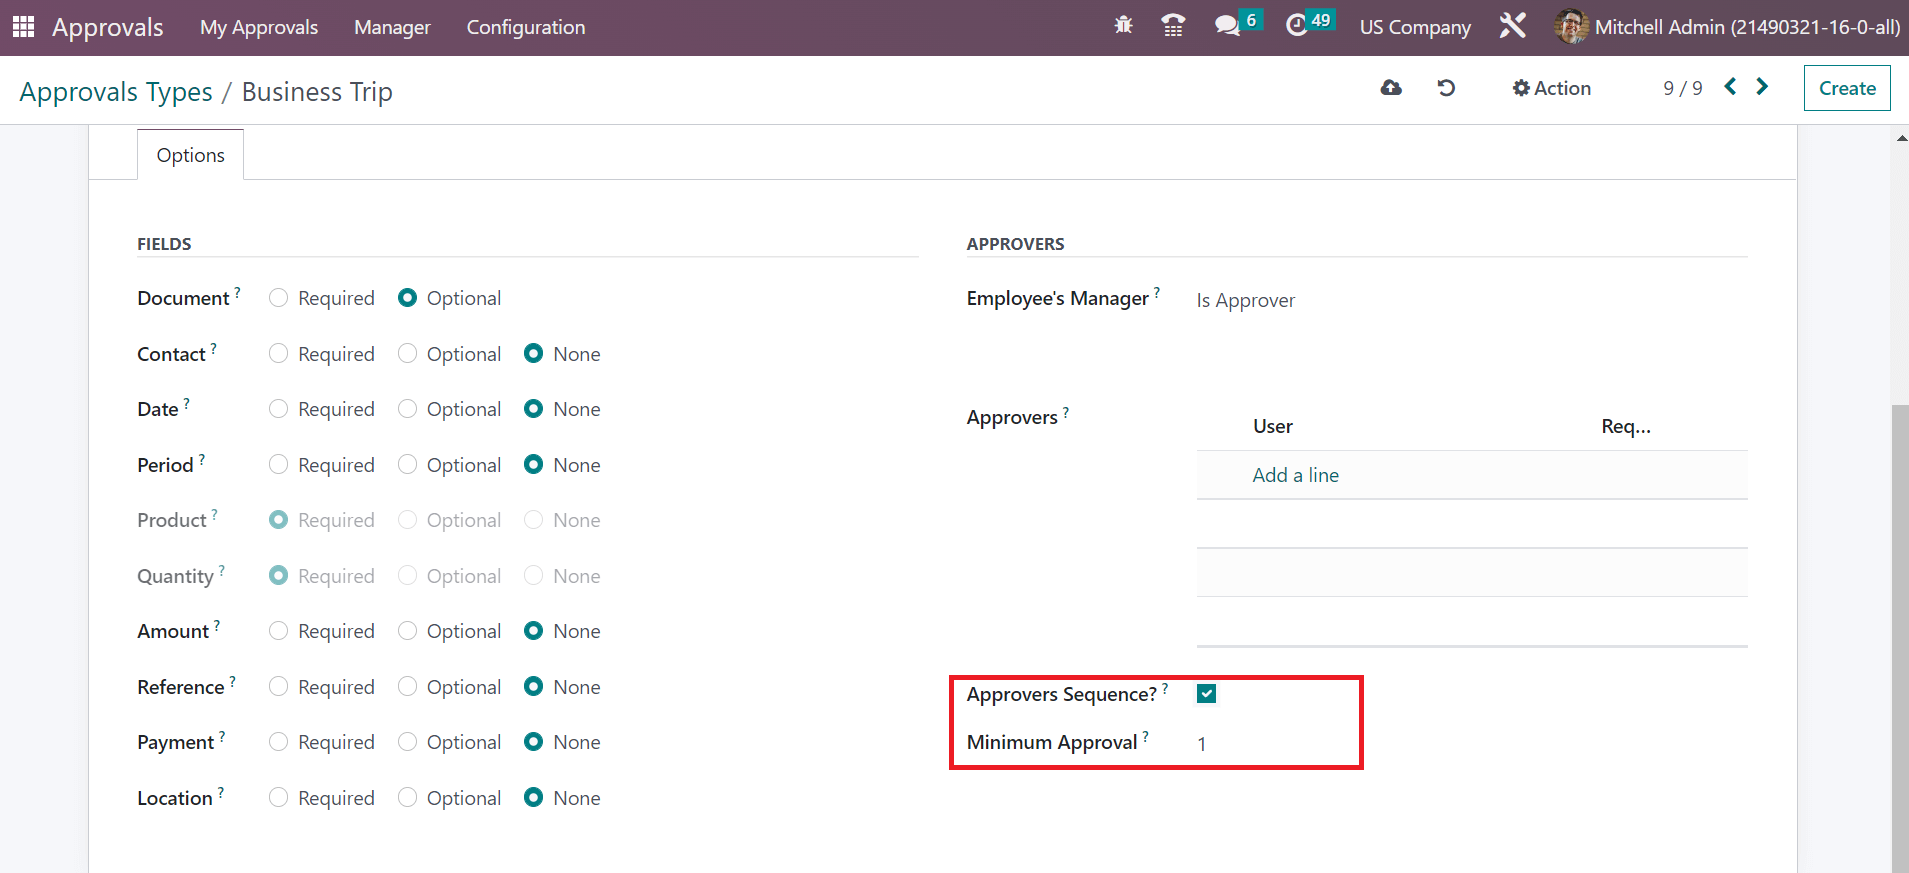
Approvers need to approve in a sequence after activating the Approvers Sequence field. Also, mention the minimum approval count in the minimum Approval field as specified in the screenshot below.
Each data regarding approval type is manually saved in the Odoo 16. Your created approval type is viewable in the Approval Types window.
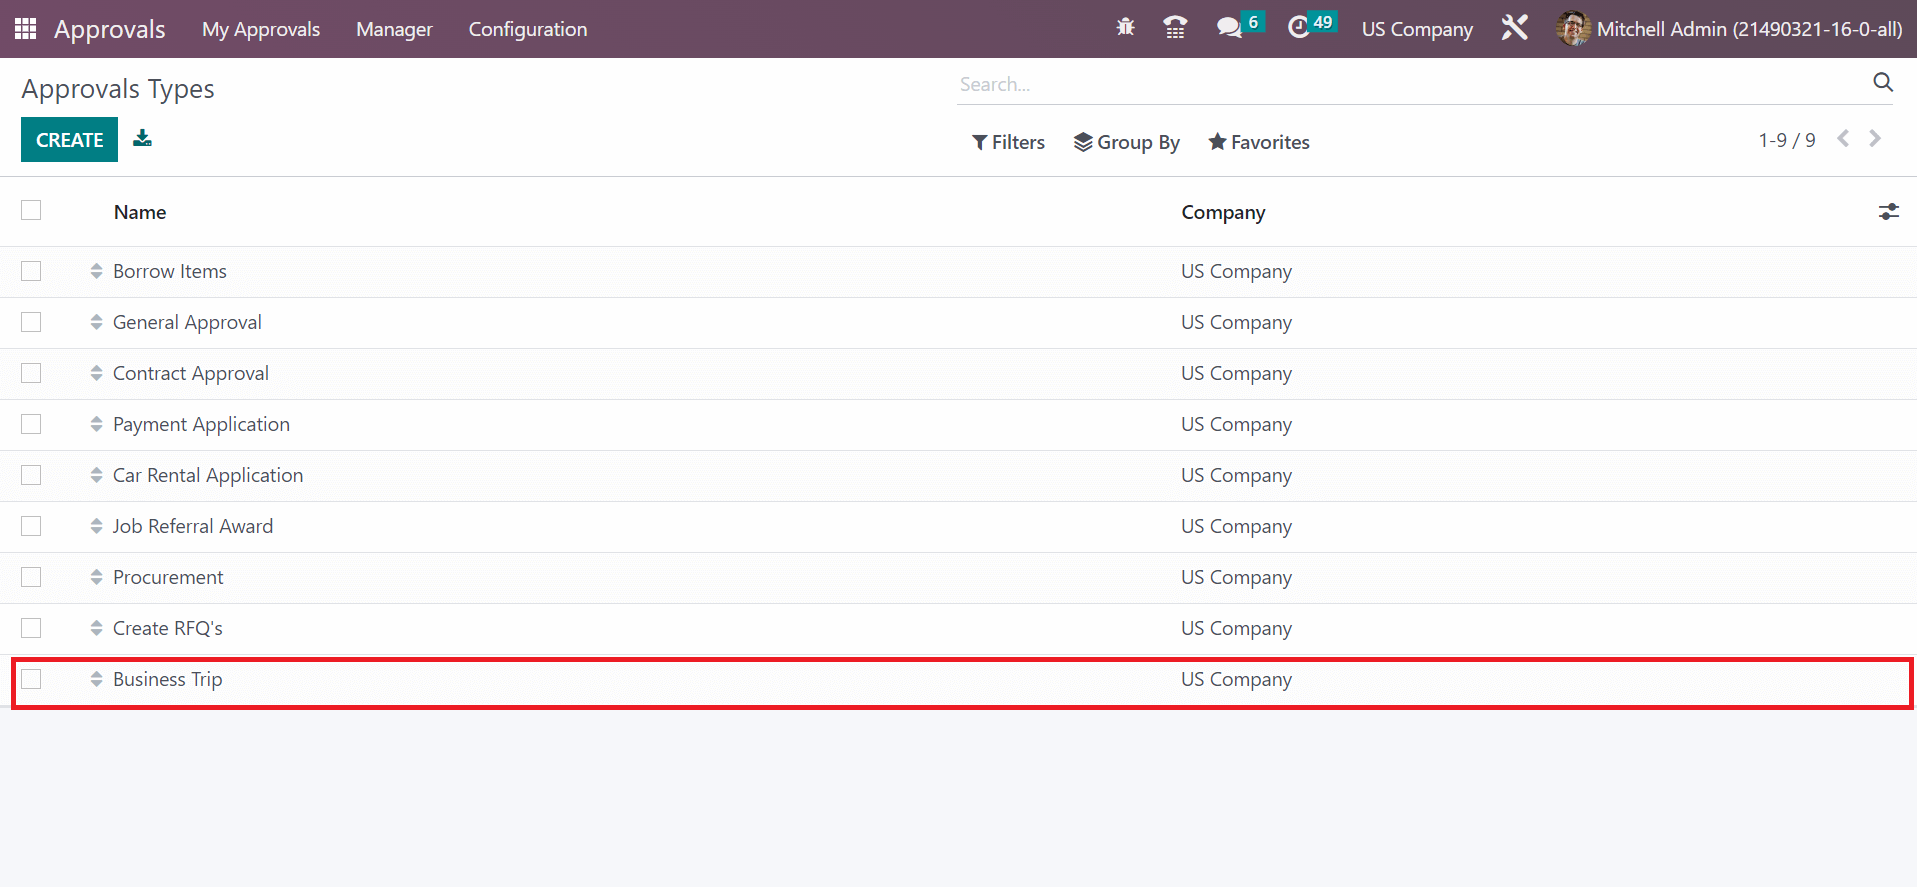
Next, we can define an approval for your Business Trip in the Odoo 16.
How to Generate a New Approval Request in the Odoo 16?
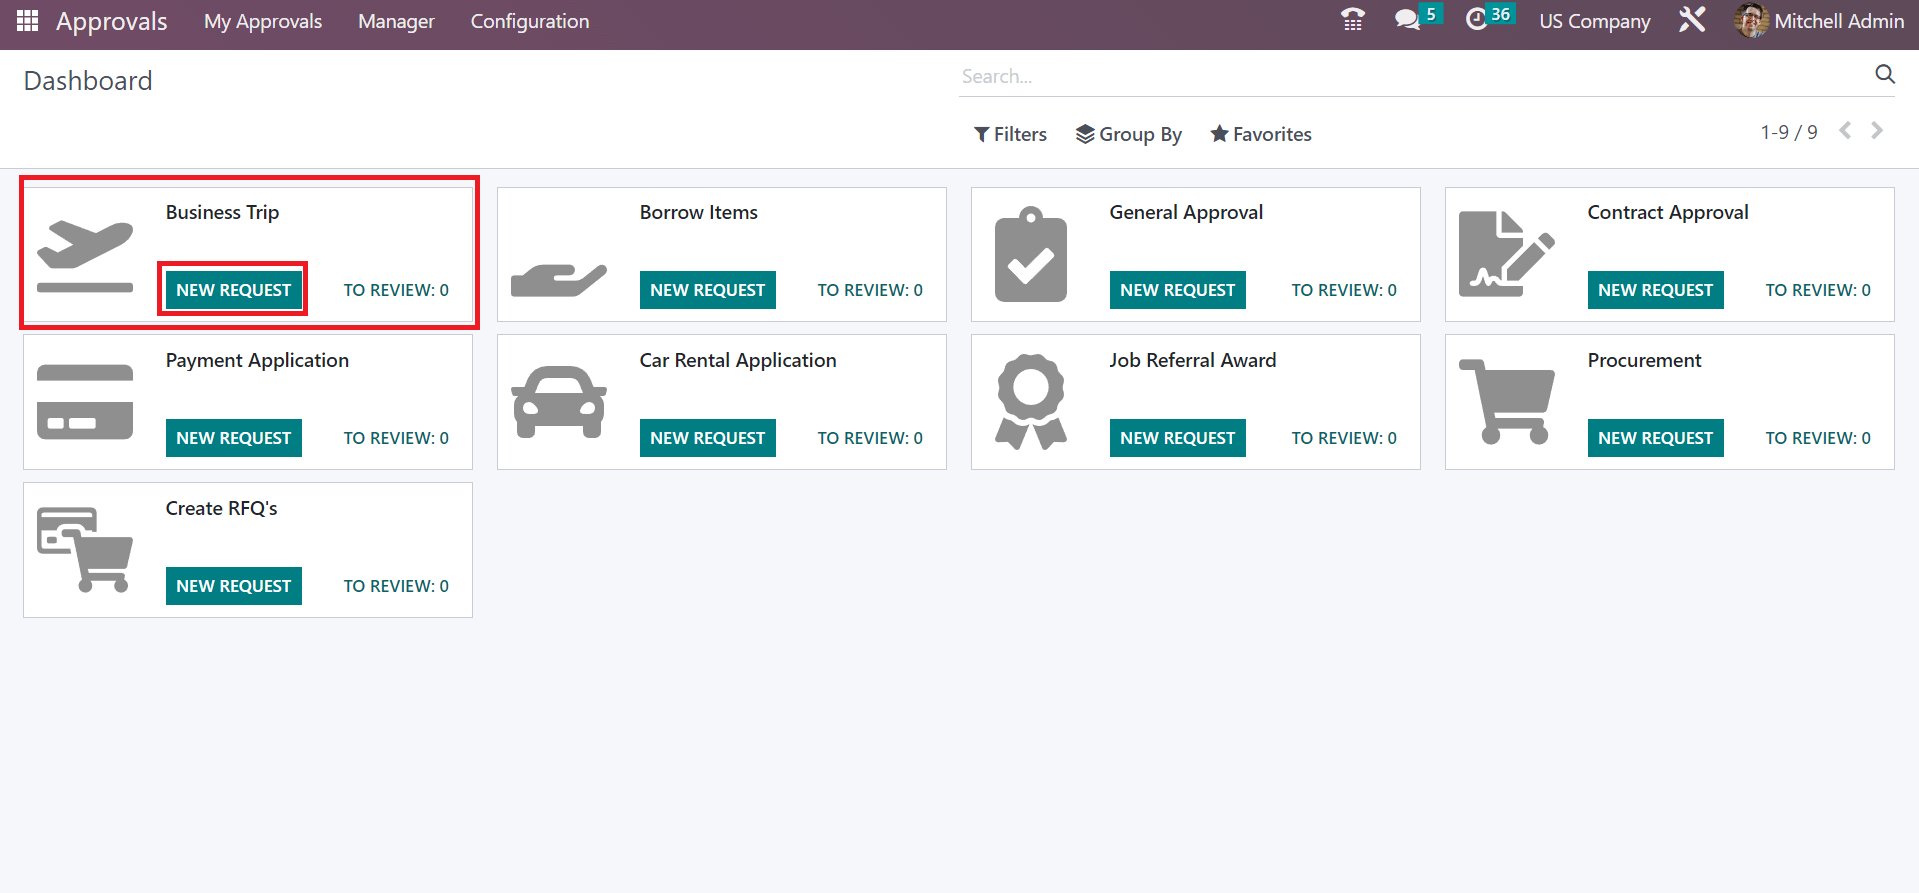
After developing your approval type, let’s move to the Dashboard window of Odoo 16 Approval by choosing the New Requests menu in the My Approvals tab. We can acquire the record of each approval type in the open screen. Your created approval type Business Trip is also visible here clicks the NEW REQUEST icon as mentioned in the screenshot below.
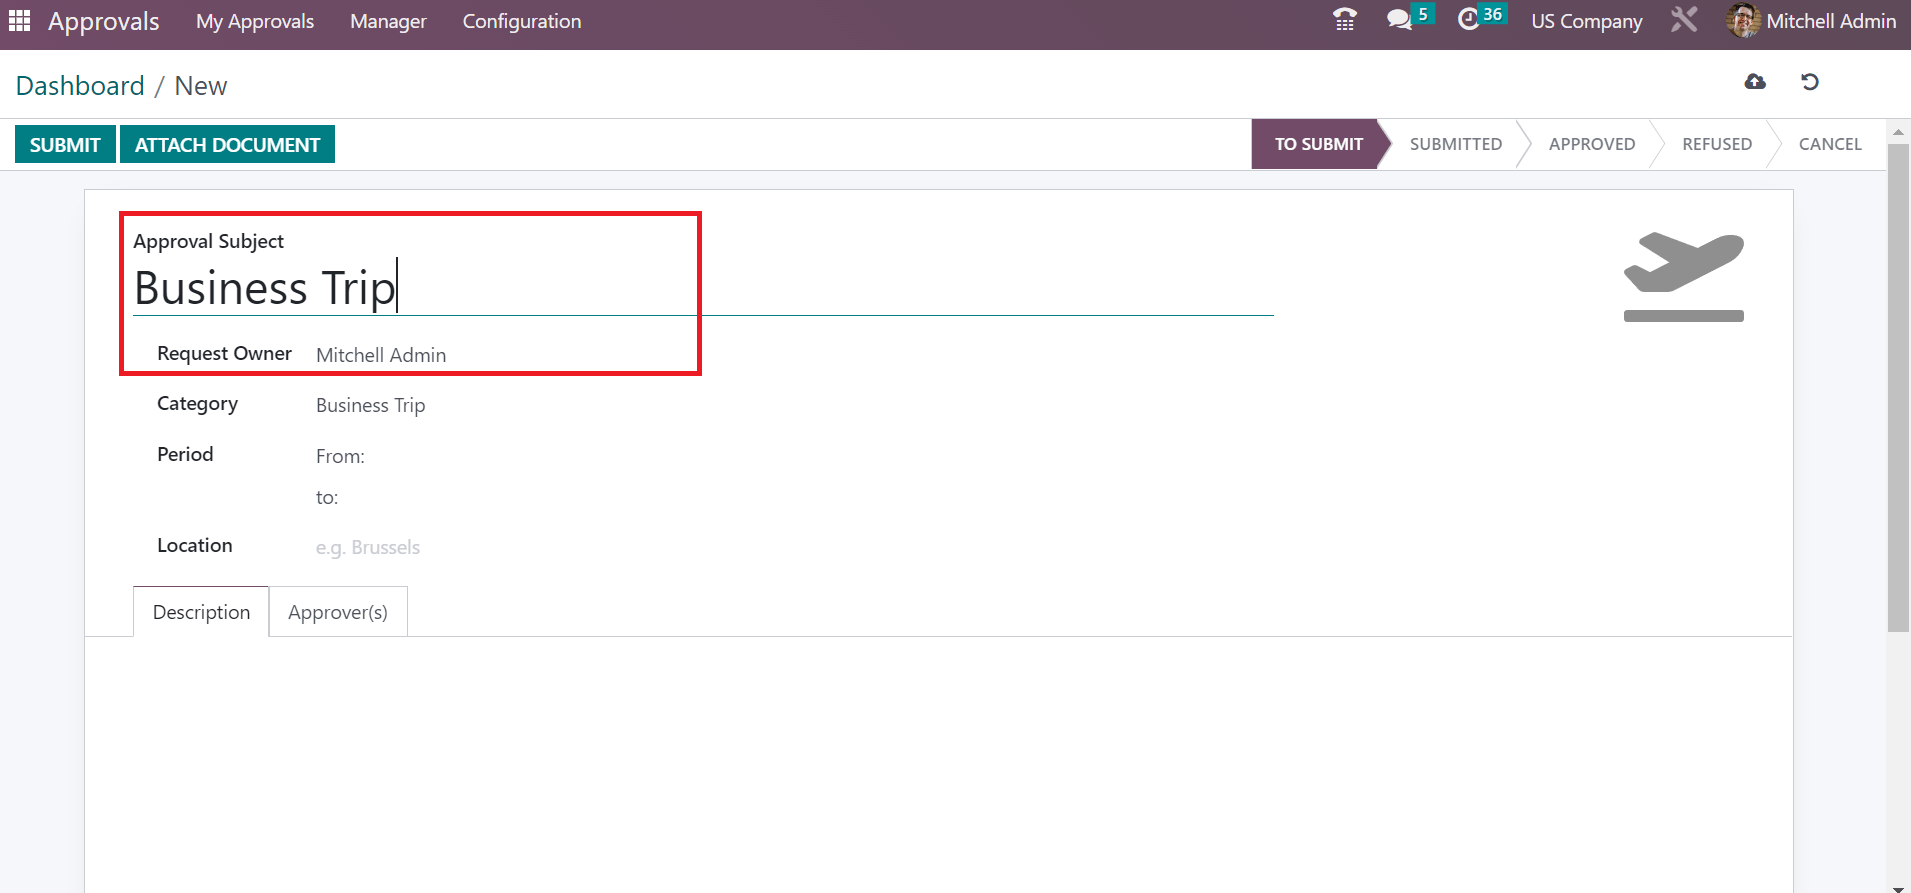
On the new page, enter the approval request name as Business Trip in the Approval Subject field. Add the laborer name who requested approval within the Request Owner field, as presented in the screenshot below.
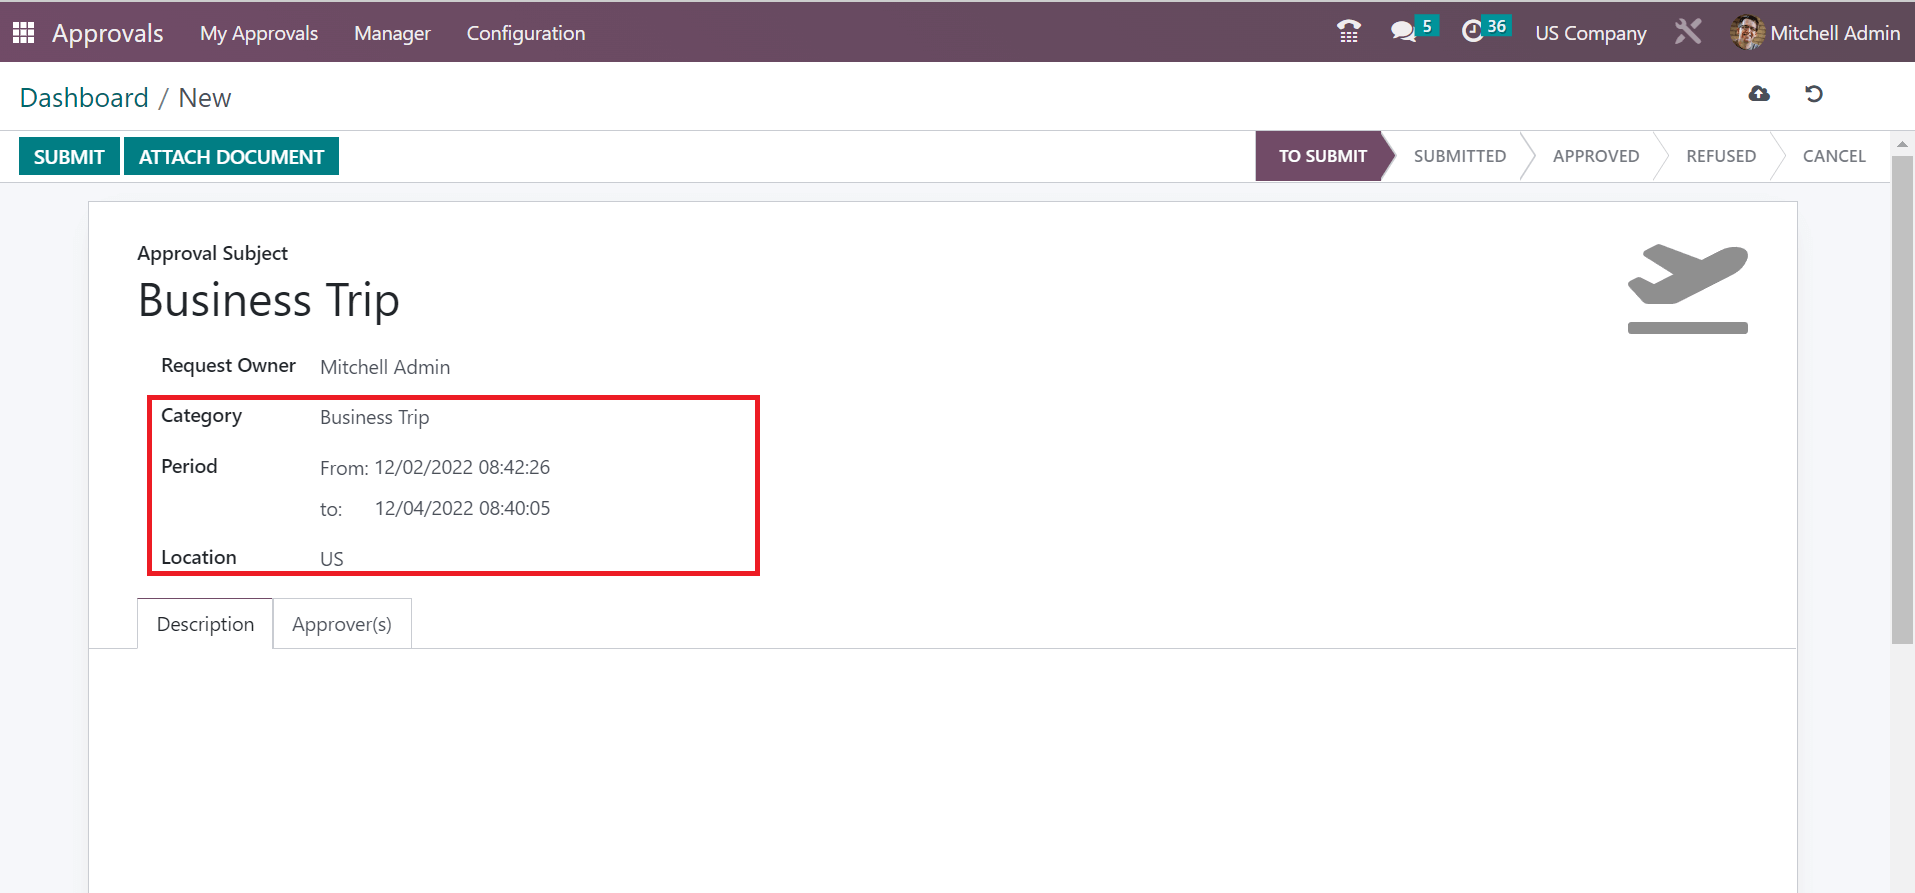
Apply the approval type of your created request in the Category field. Moreover, the user can set the start and end date of needed approval in the Period field. Enter the place concerning to laborer in the Location field as the US.
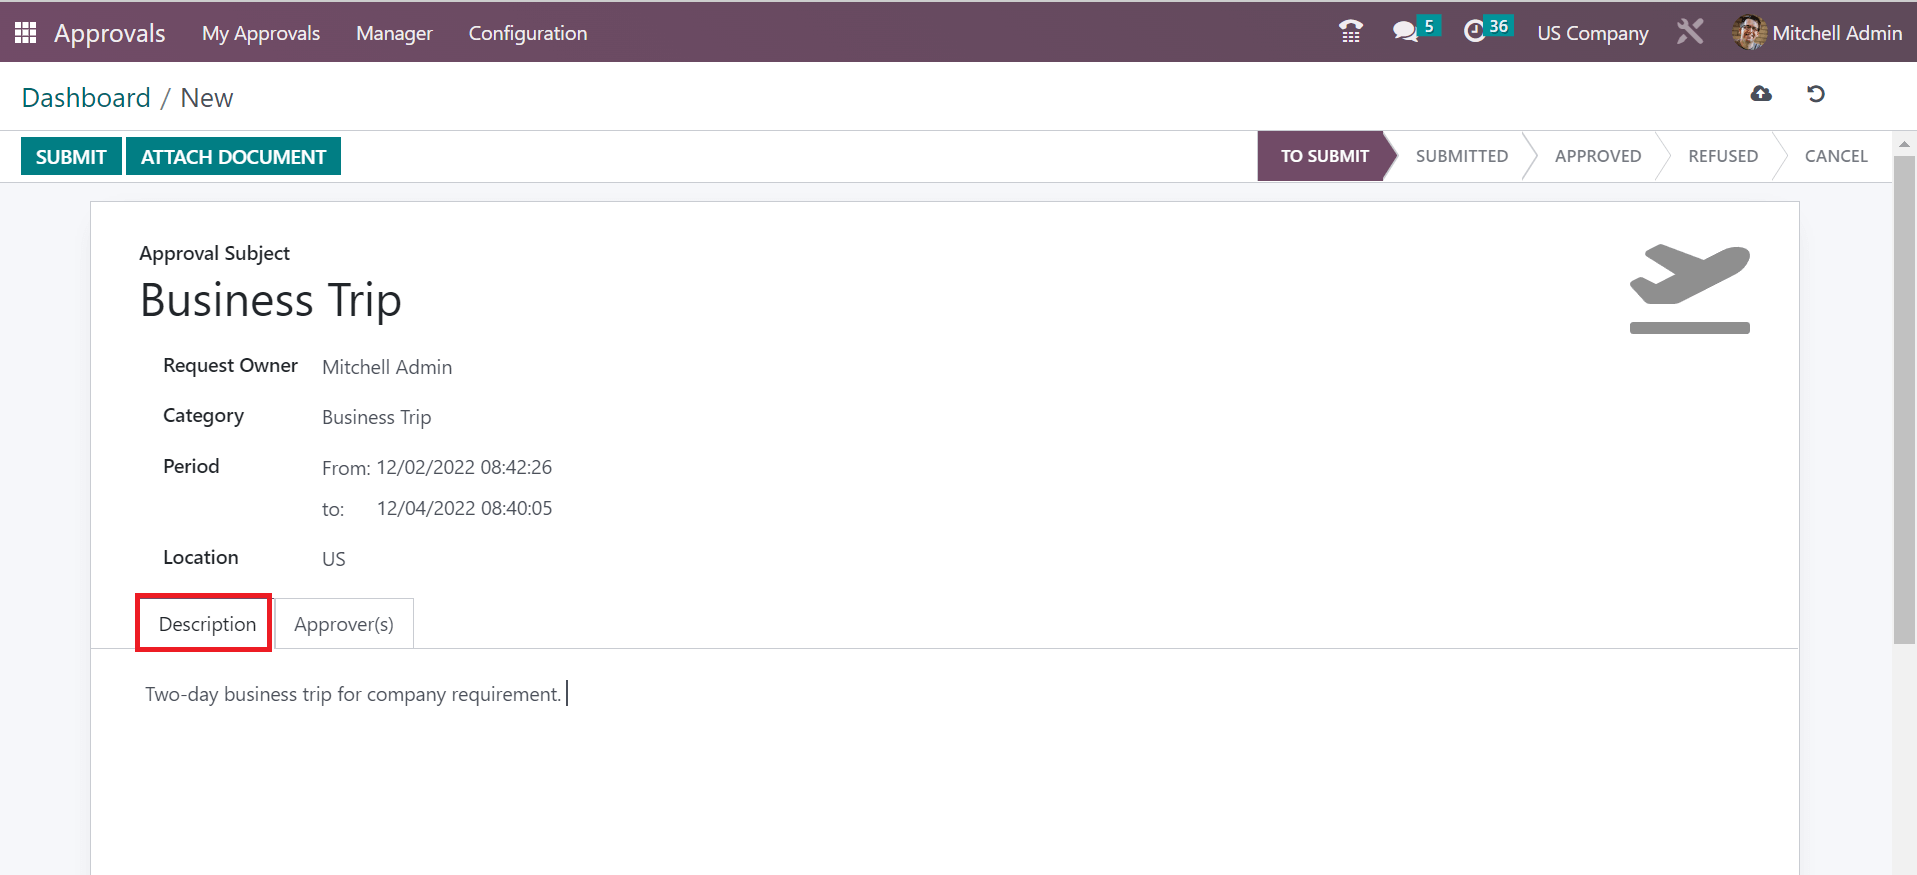
Mention the detailed information about approval inside the Description tab, as portrayed in the screenshot below.
Below the Approvers tab, we can add members to validate an approval once selecting the Add a line. All created approvers' details are viewable to the user as defined in the screenshot below.
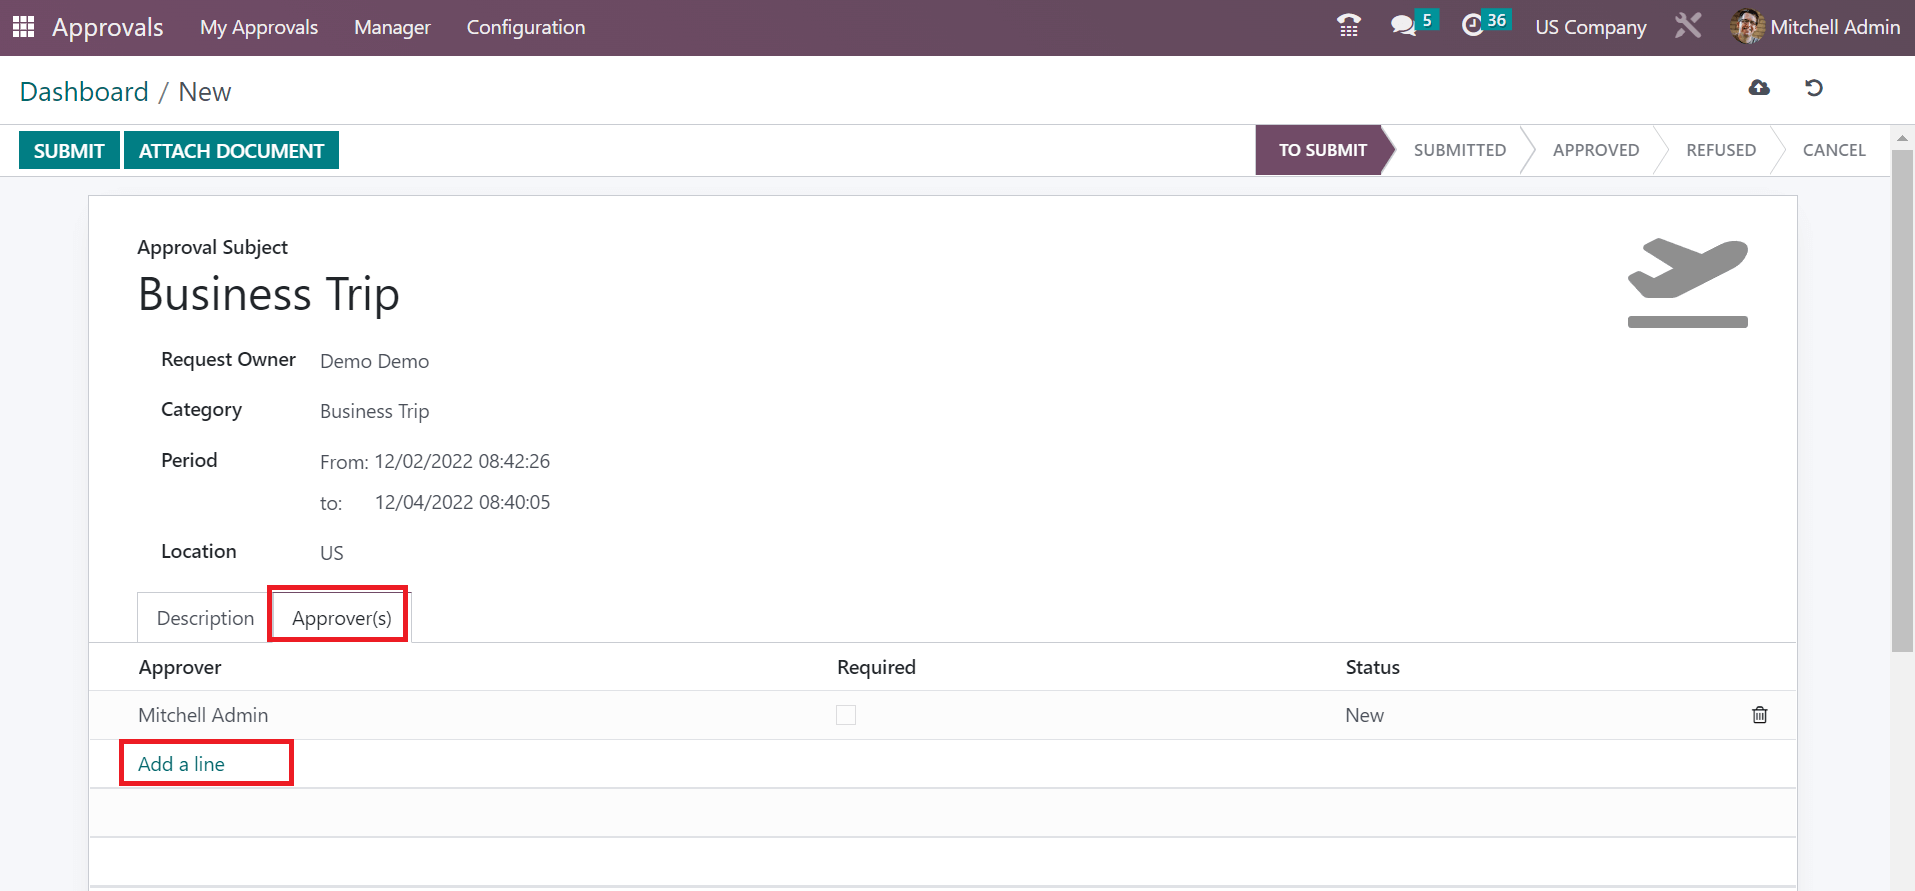
Data concerning the approval subject is saved easily in the Odoo 16. To upload any additional field related to approval, press the ATTACH DOCUMENT icon.
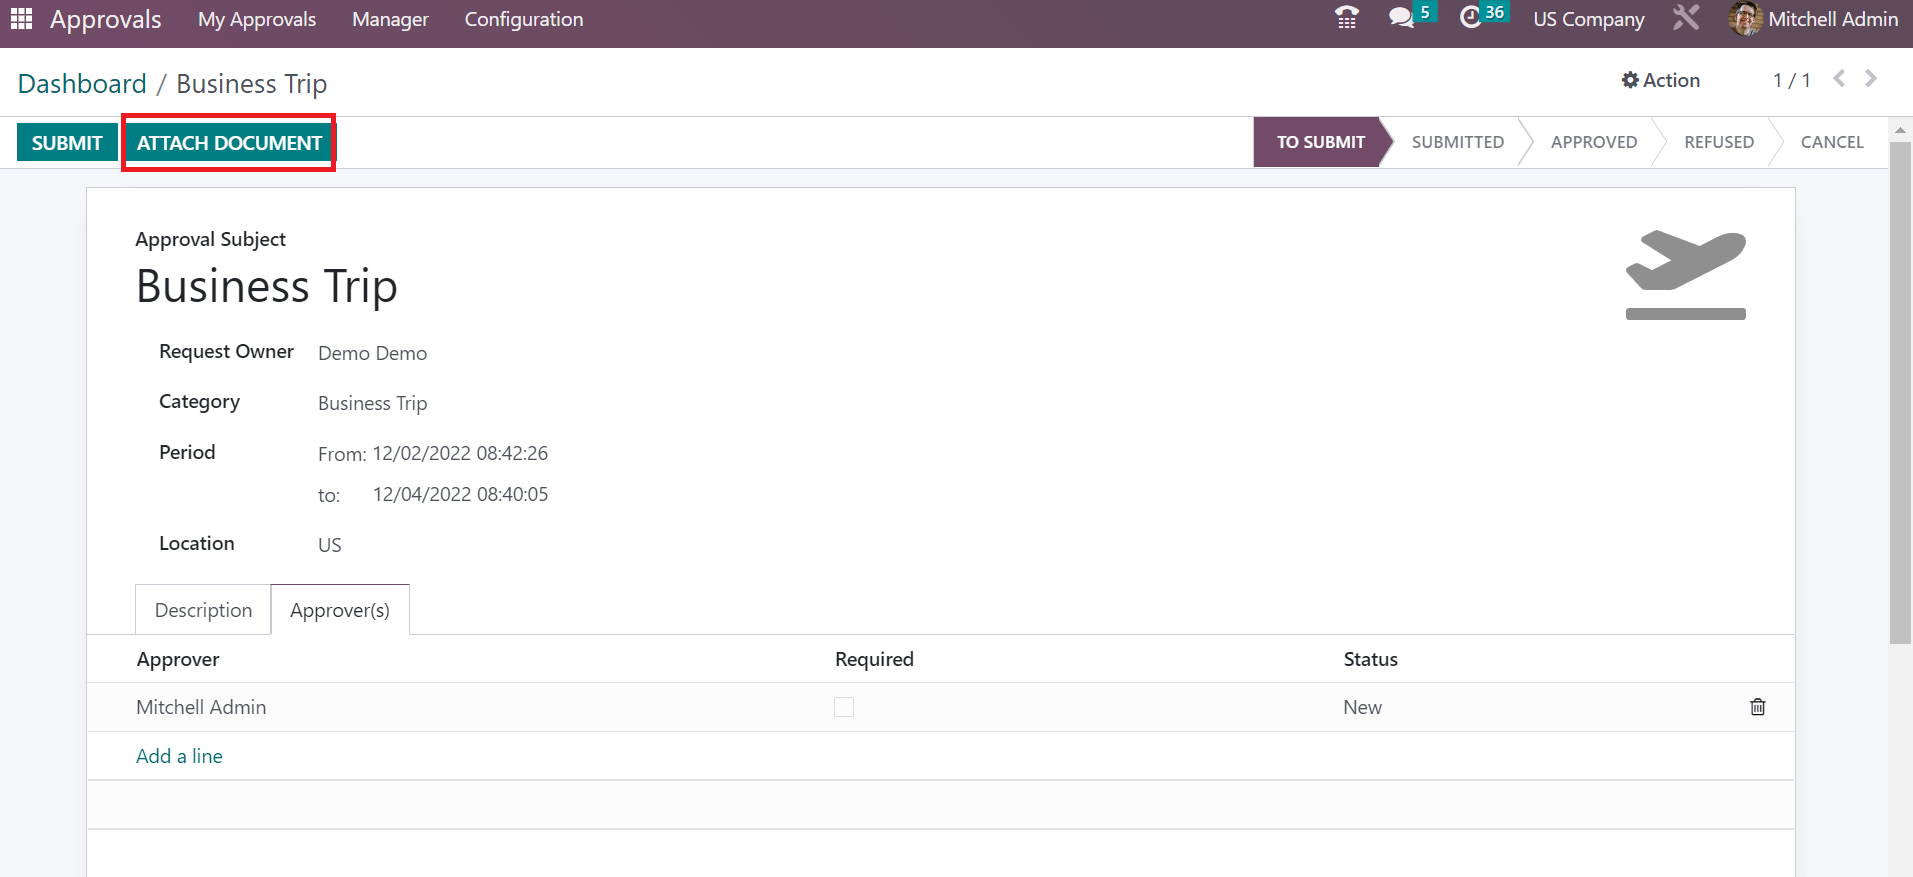
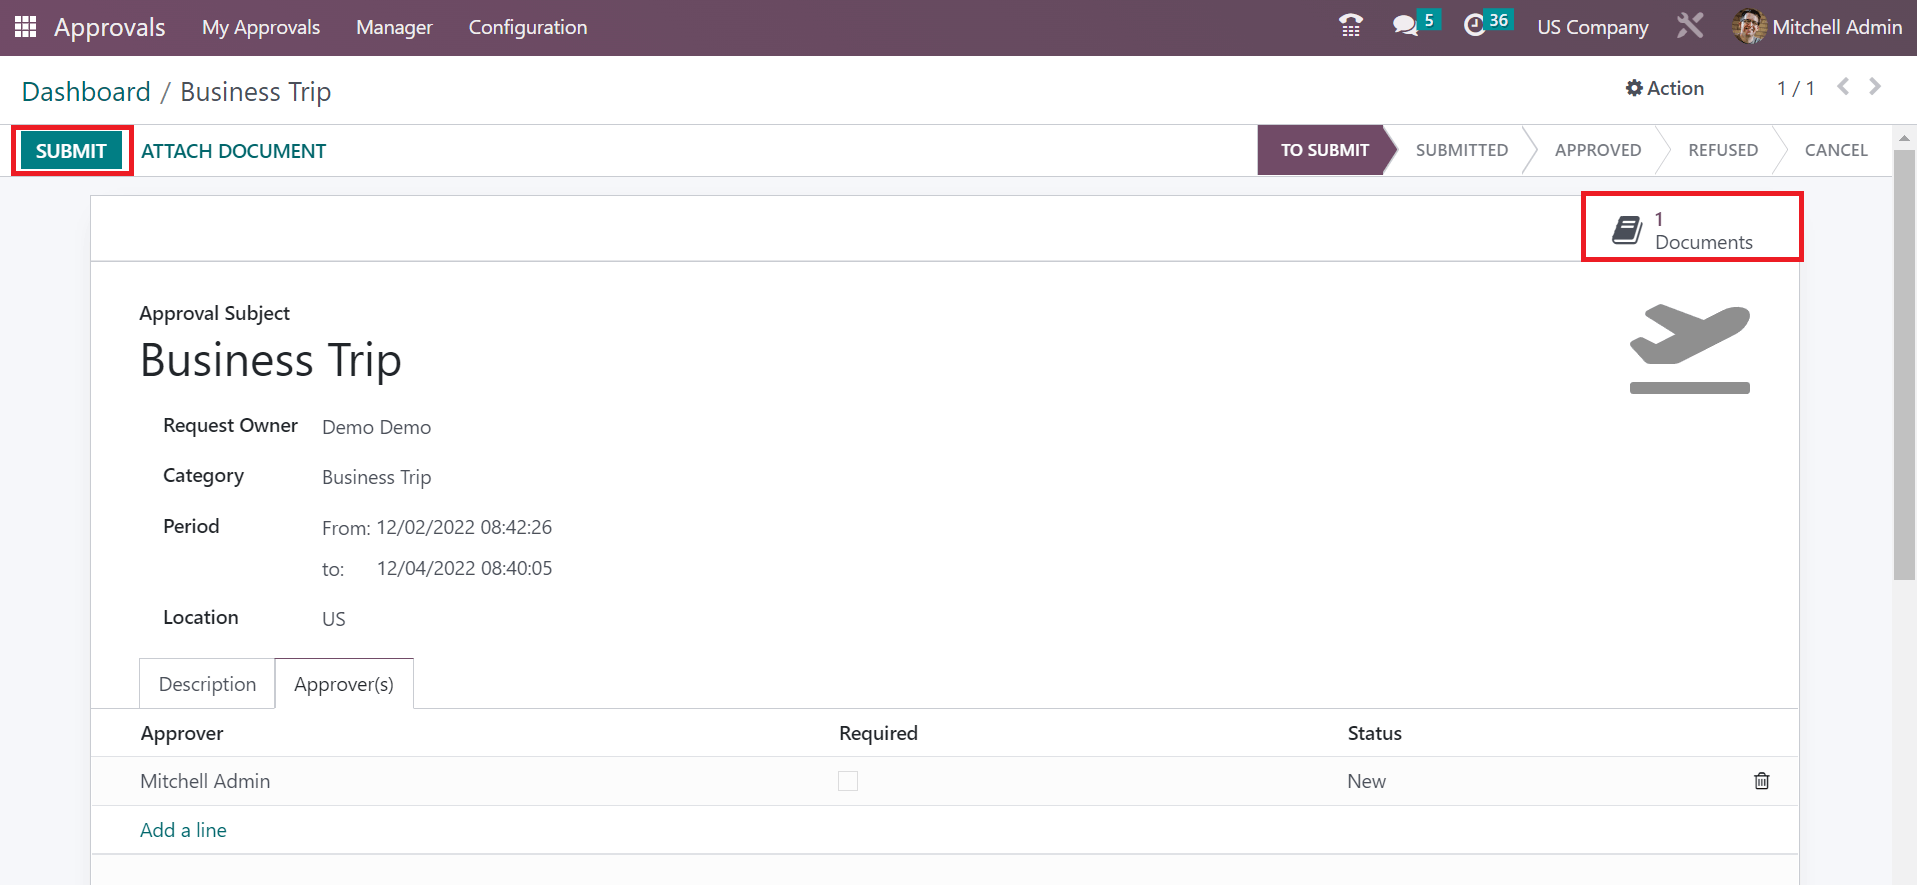
So, you can upload the file from your system, and a Documents smart button is viewable. Next, we can validate the approval request to a higher authority. To move forward with the request, click the SUBMIT icon, as indicated in the screenshot below.
After submitting the approval request, the stage changes from TO SUBMIT to SUBMITTED.
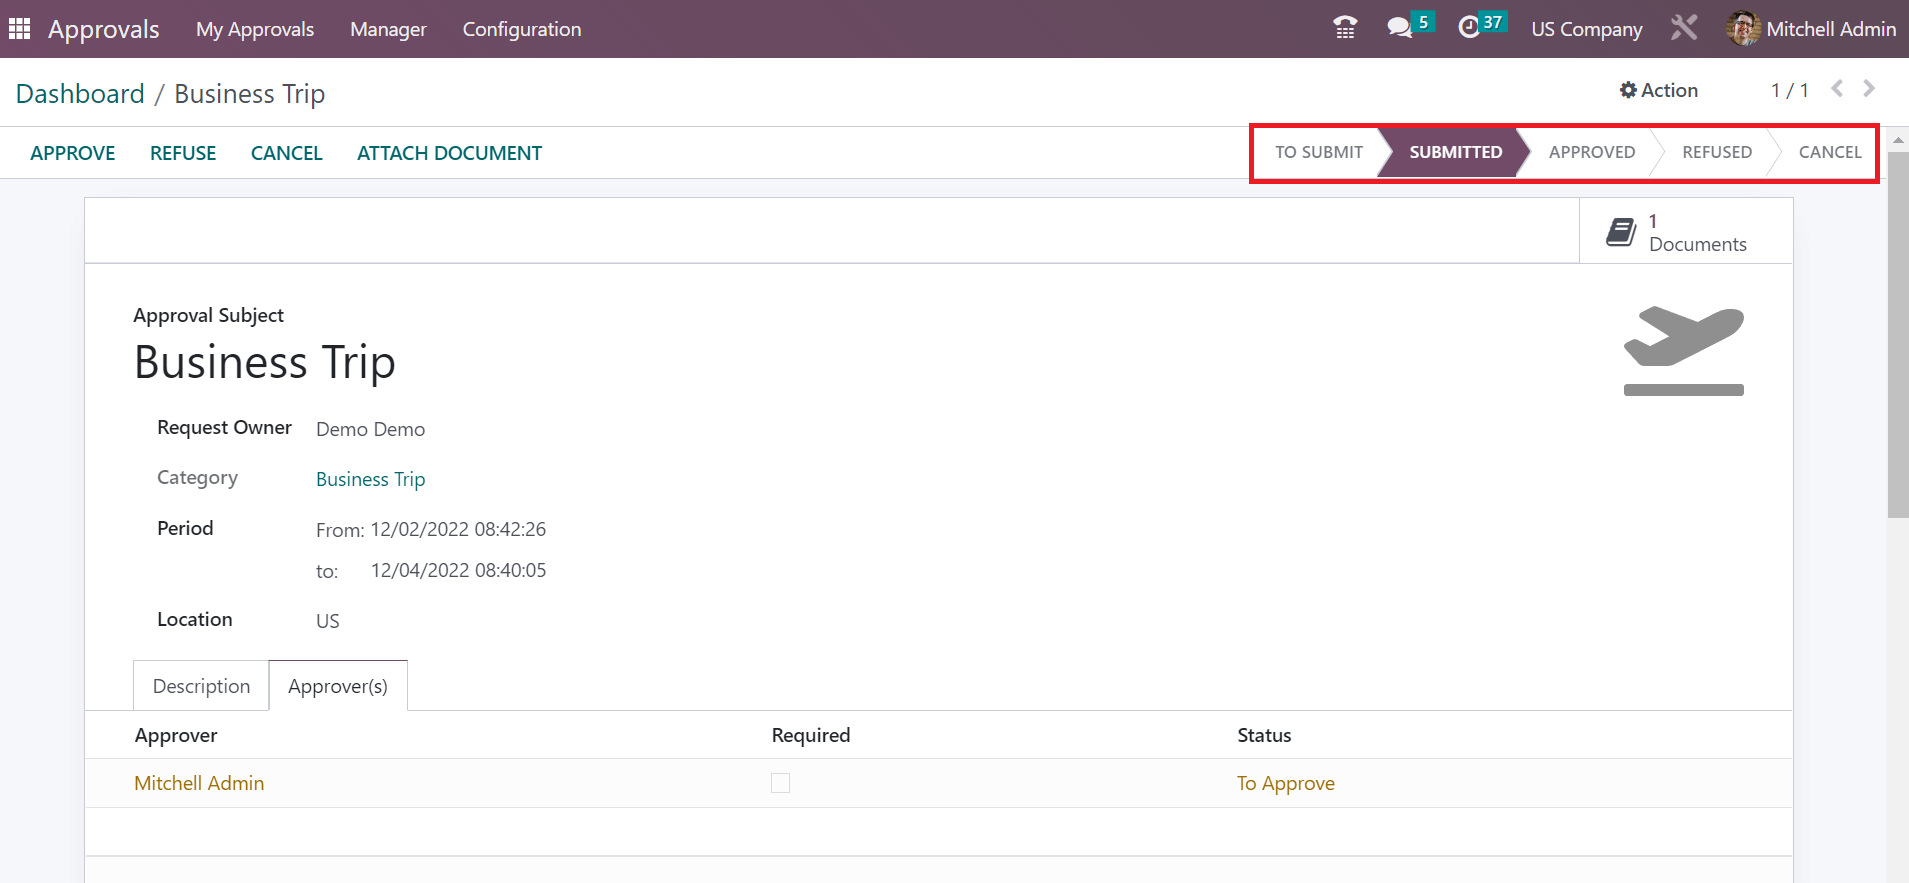
Managers can approve the request quickly by choosing the Approvals to Review icon under the Manager tab. In the Approval to Review window, the user can obtain the created approval Business Trip.
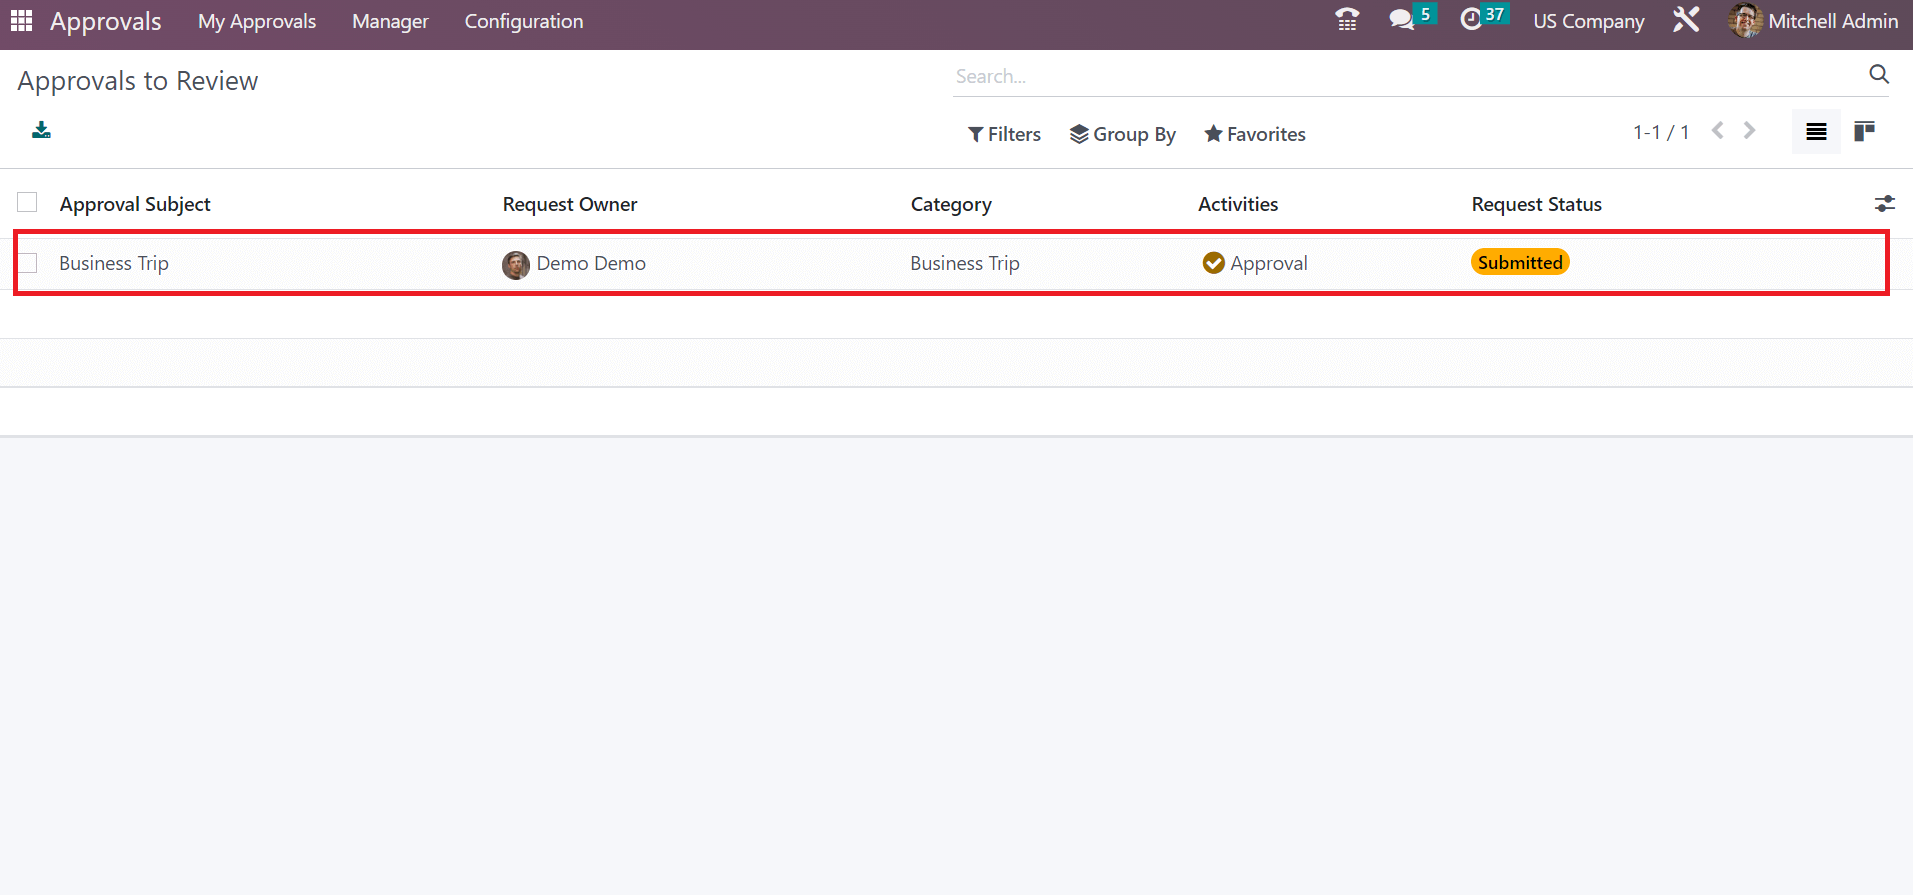
After selecting this approval, press the APPROVE button for the business trip approval.
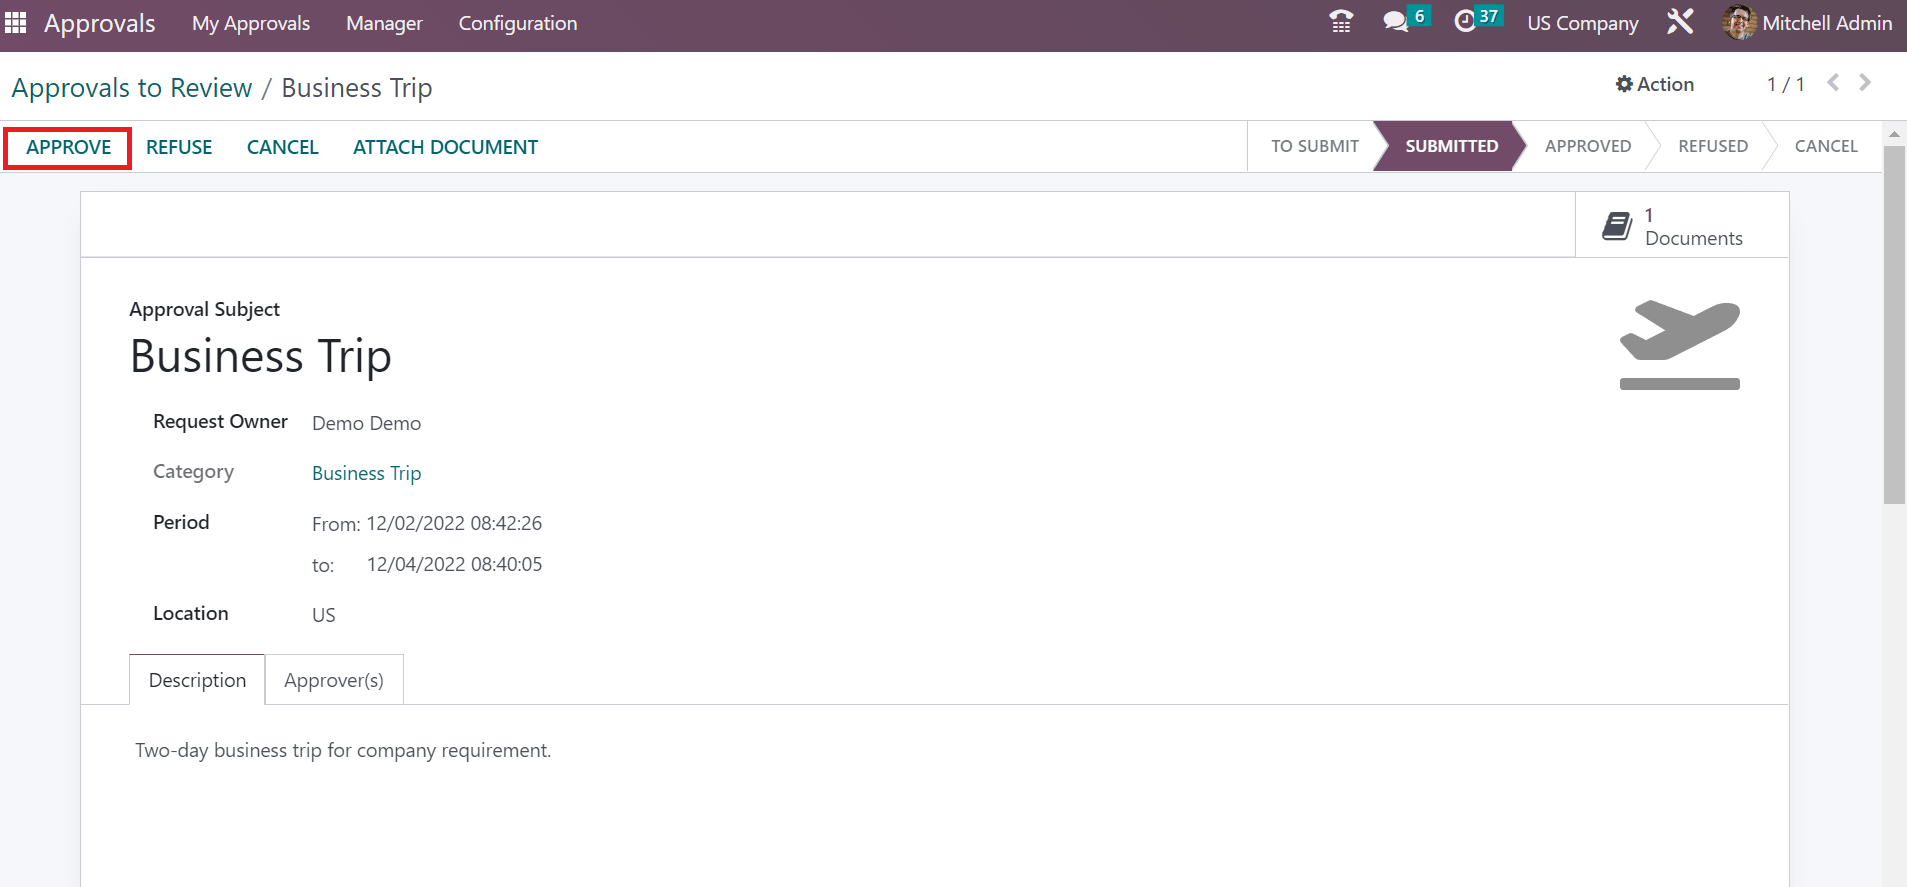
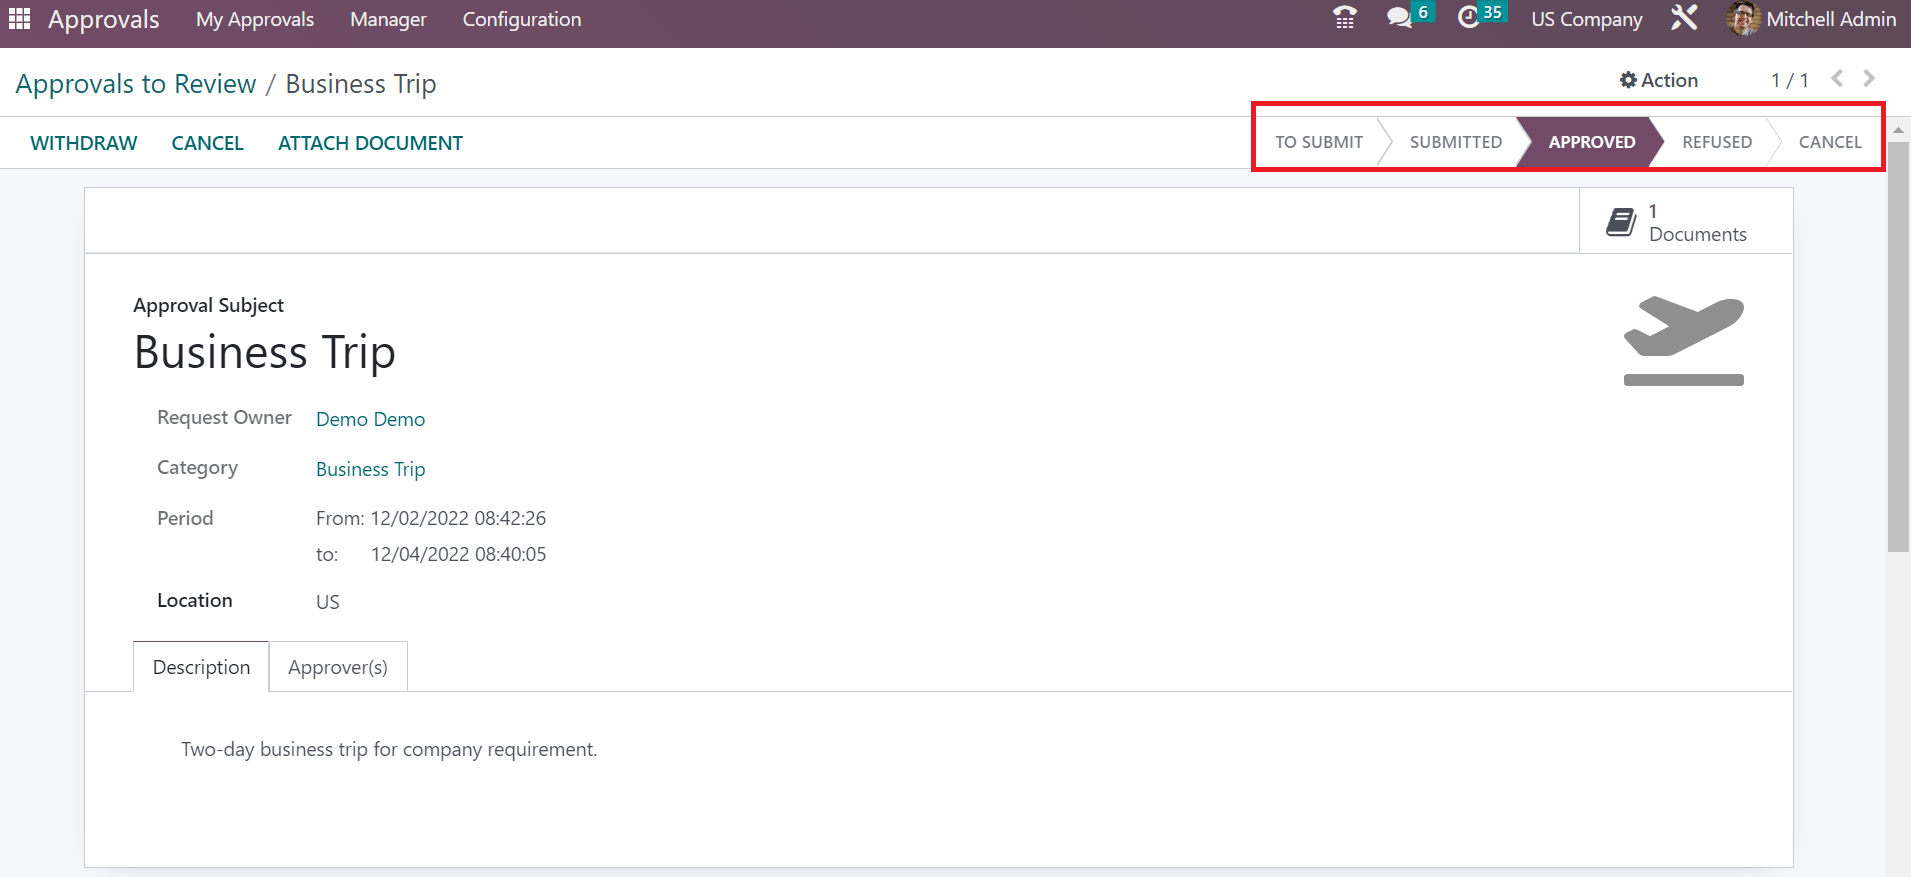
Stage changes into APPROVED once validated the approval by the manager.
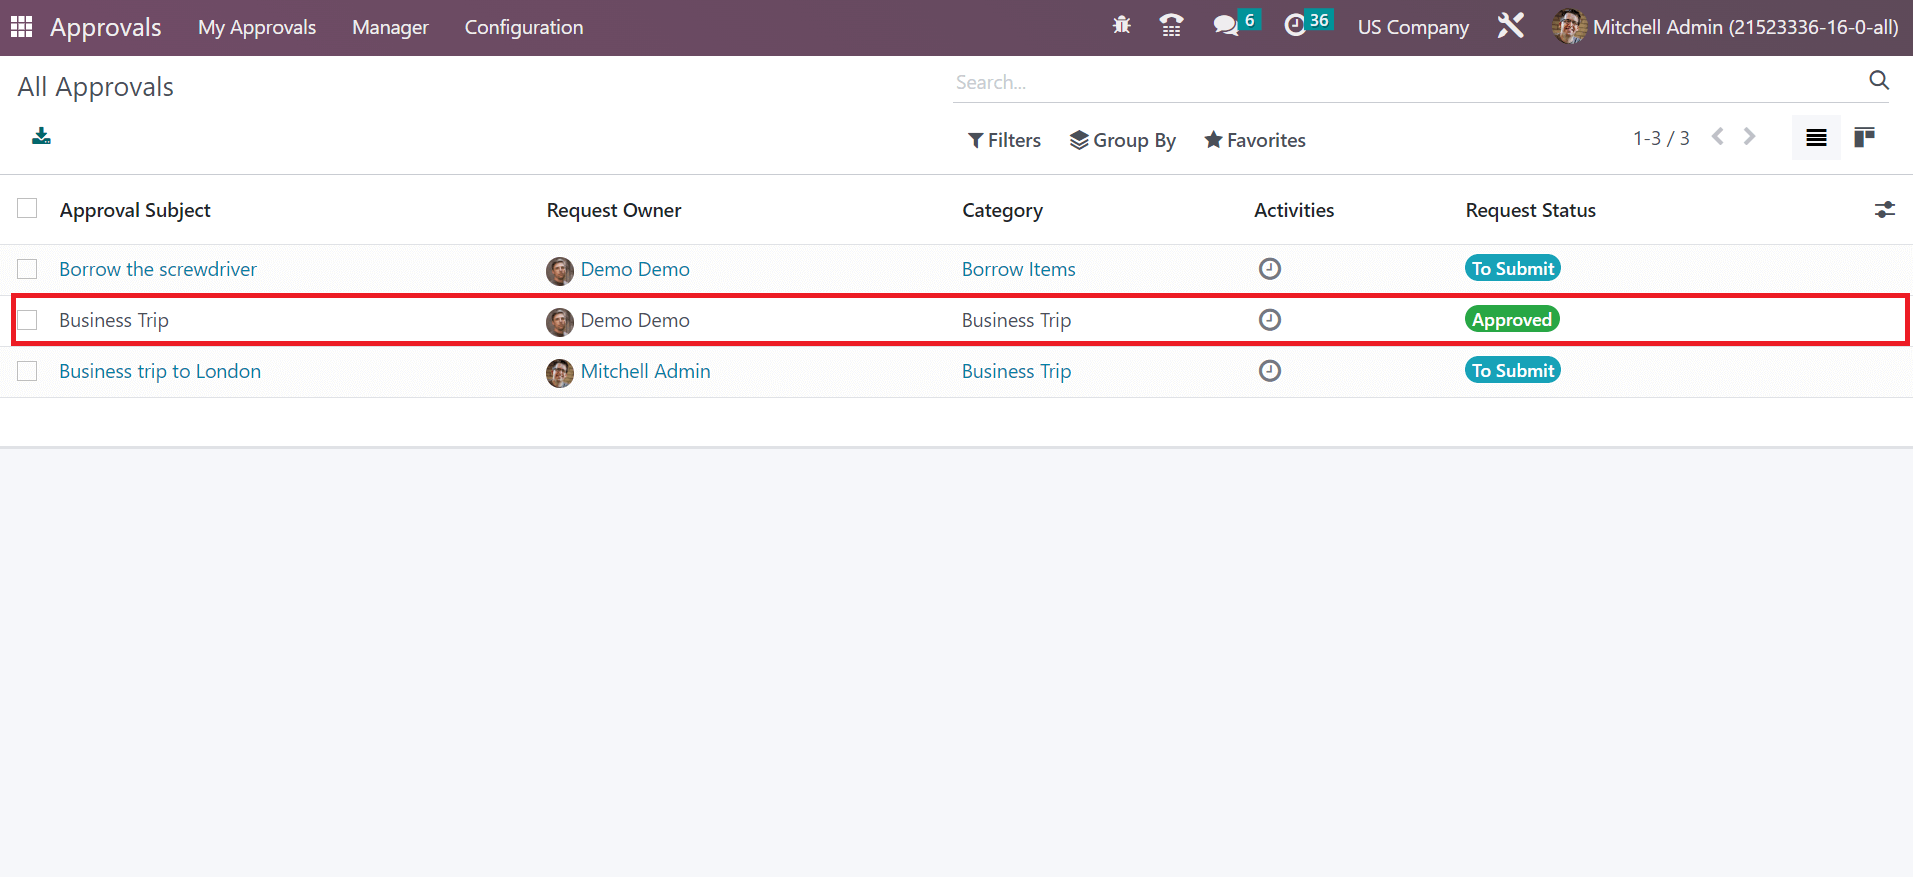
We can get the approved request details by selecting the All Approvals menu inside the Manager tab. You can access data related to each approval, such as Category, Request Status, Approval Subject, and more. Users can identify the Request Status of the Business Trip as Approved, as described in the screenshot below.
Odoo 16 Approval module ensures you configure approvals and validate them by a manager. Creating approval types and submitting permissions in a firm becomes a simple task using Odoo ERP. Improvisation of business growth is made possible by managing your company approvals.