Odoo Point of Sale is an excellent solution for managing your stores, restaurants, accountancy, inventory, and sales. It has an intuitive UI and is easily compatible with all devices. Despite the fact that the point of sale needs an internet connection to operate, it continues to operate even after a complete disconnect. It implies that you may manage your offline business in Odoo with ease from anywhere at any time.
Retail management is the administrative process involved in providing clients with products and services for use in their daily lives. Customers can purchase the goods they want through retail, and firms can make significant profits. Retail is the practice of selling products directly to consumers, and managing it within an organization can occasionally be problematic. You may put all your concerns about managing your retail business to rest by using ERP software.
Now let's discuss how retail shop configuration is managed in Odoo 16 PoS.
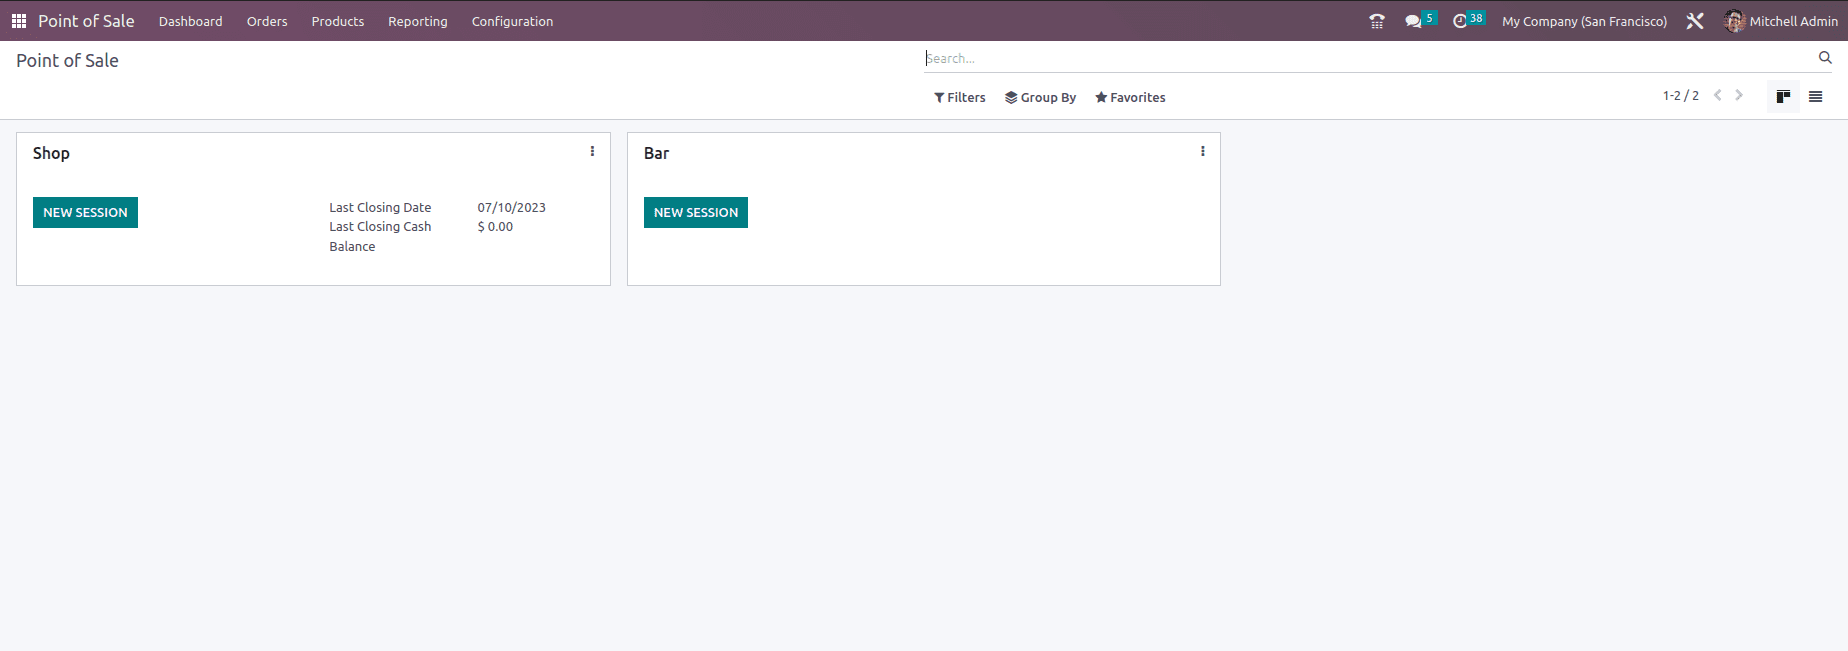
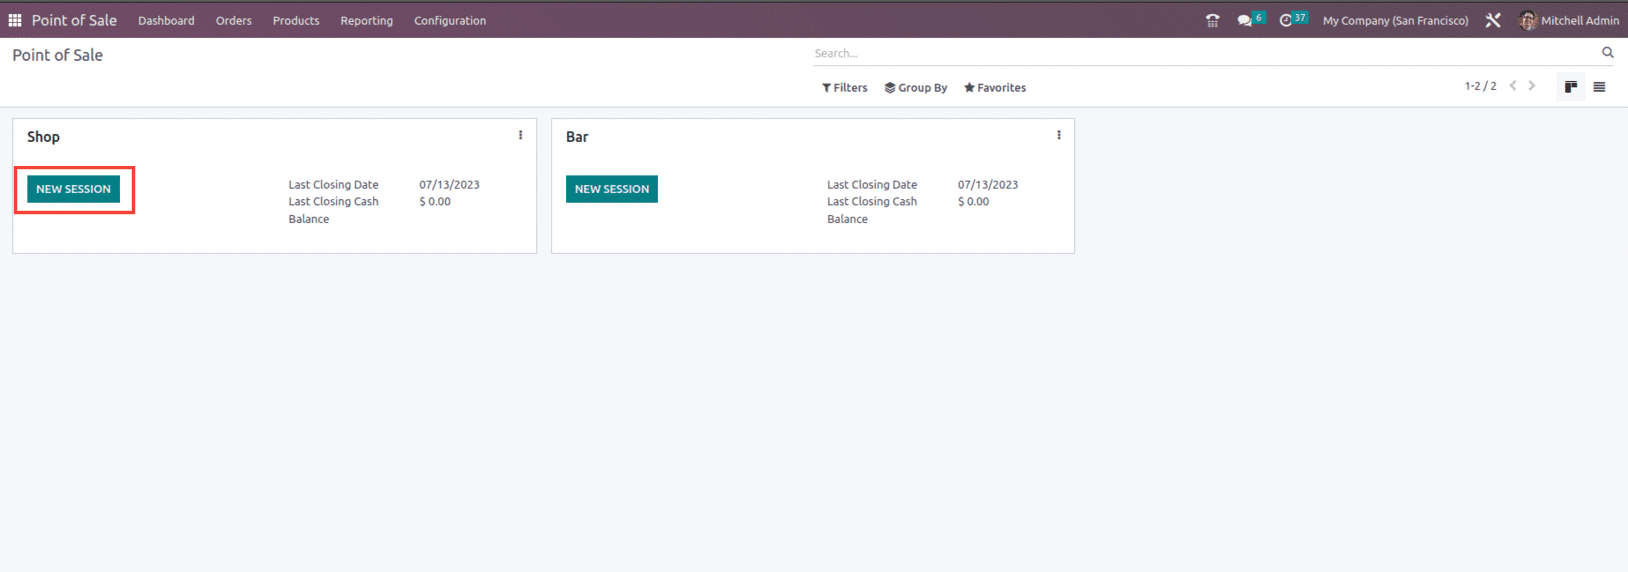
The present point of sale session can be viewed from the Odoo 16 Point of Sale module dashboard. Along with their names, the last closing date, cash, and balance are stated. The Configuration Settings allow for the creation of fresh point-of-sale sessions.
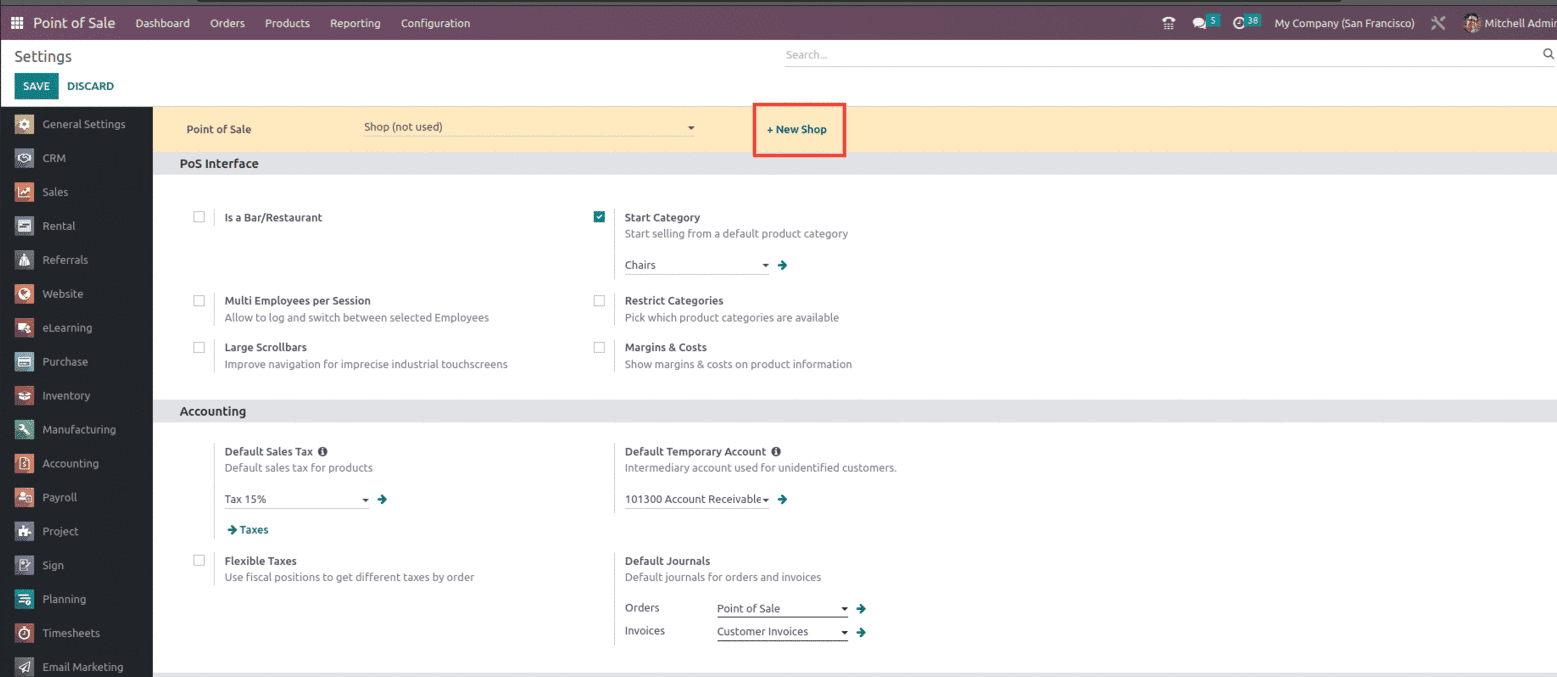
Odoo Point of Sale's configuration feature guarantees that users will establish points of sale in accordance with the needs of the business. To start a fresh Point of Sale session, select the +New Shop icon under Configuration -> Settings as seen in the screenshot below.
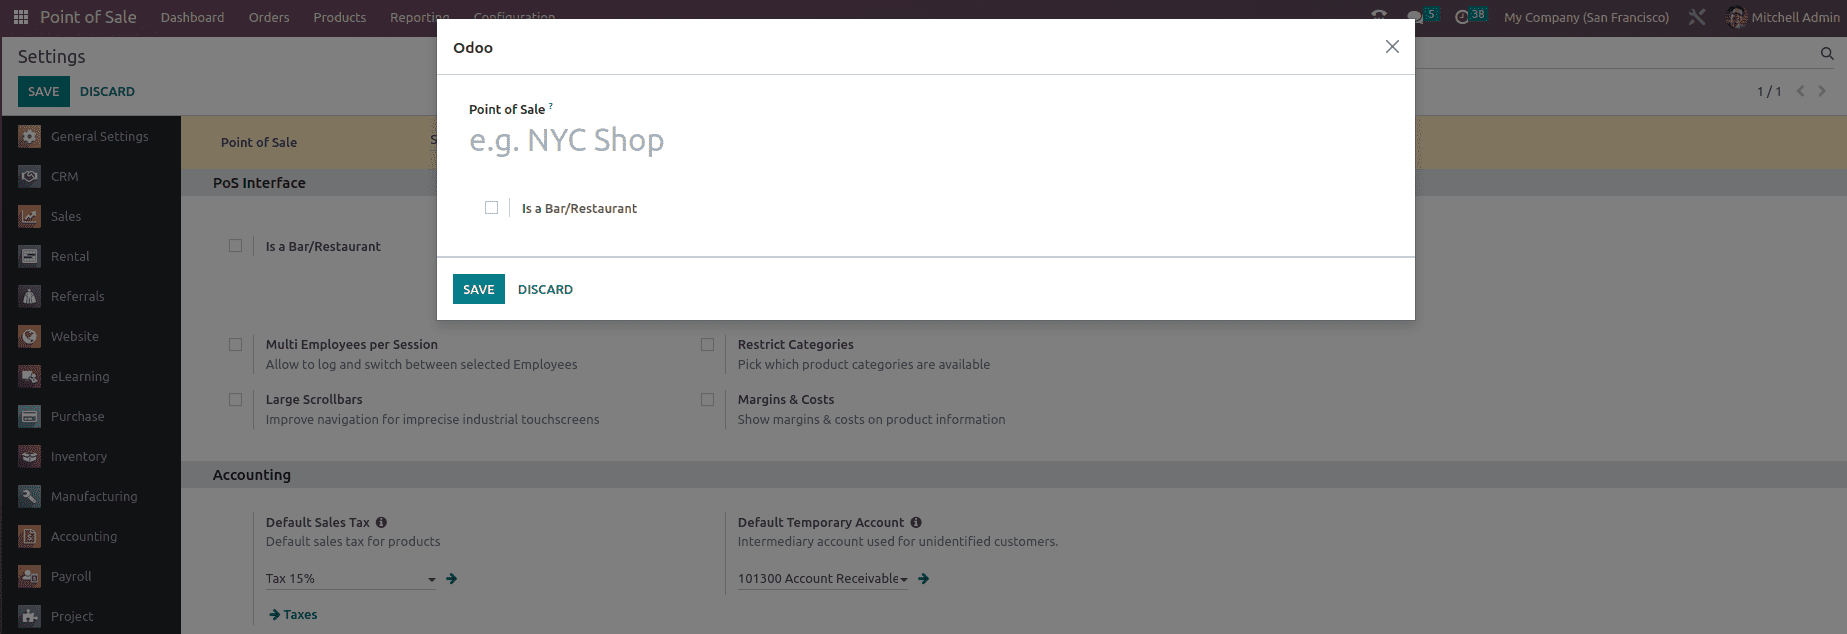
On clicking the +New Shop button, it will display a window which allows the users to provide the name of the Point of Sale and select whether it's a Bar/Restaurant, as shown below.
With Odoo 16 Retail management, there are several other features that are mentioned below.
Start Category: On the product screen, select a default product category to begin selling from. The All category is the default category when the Start Category option is left blank. Multi Employees per Session: Allow to log and switch between selected Employees. Restrict Categories: Allows the user to pick which product categories are available. Margins & Costs: Show margins & costs on product information

You can set a default tax for all products for sale by selecting an existing tax figure from the drop down box. Additionally, you have the option of setting an intermediary account, which will appear by default when no payment method is selected, Users also have the option to Use fiscal positions to get different taxes by order and option to mention the Default journals for orders and invoices as seen in the screenshot below, the account can be chosen from the drop-down menu.

You can set up automated discounts and multiple price lists for the products in Odoo depending on your business' needs. You can choose either the Advanced price rules option, which includes discounts and formulas, or Multiple prices per product. Global Discounts feature allows the user to add a button to set a global discount to the customers accordingly. Enabling the Coupons & Promotions option will enable coupons and promotion programs. By turning on the Gift Card option from the Settings, gift cards that are given to customers to draw them in can be given at the point of sale sessions. Along with these feature users also gets the option to Restrict price modification to managers with Price control feature, as shown below.

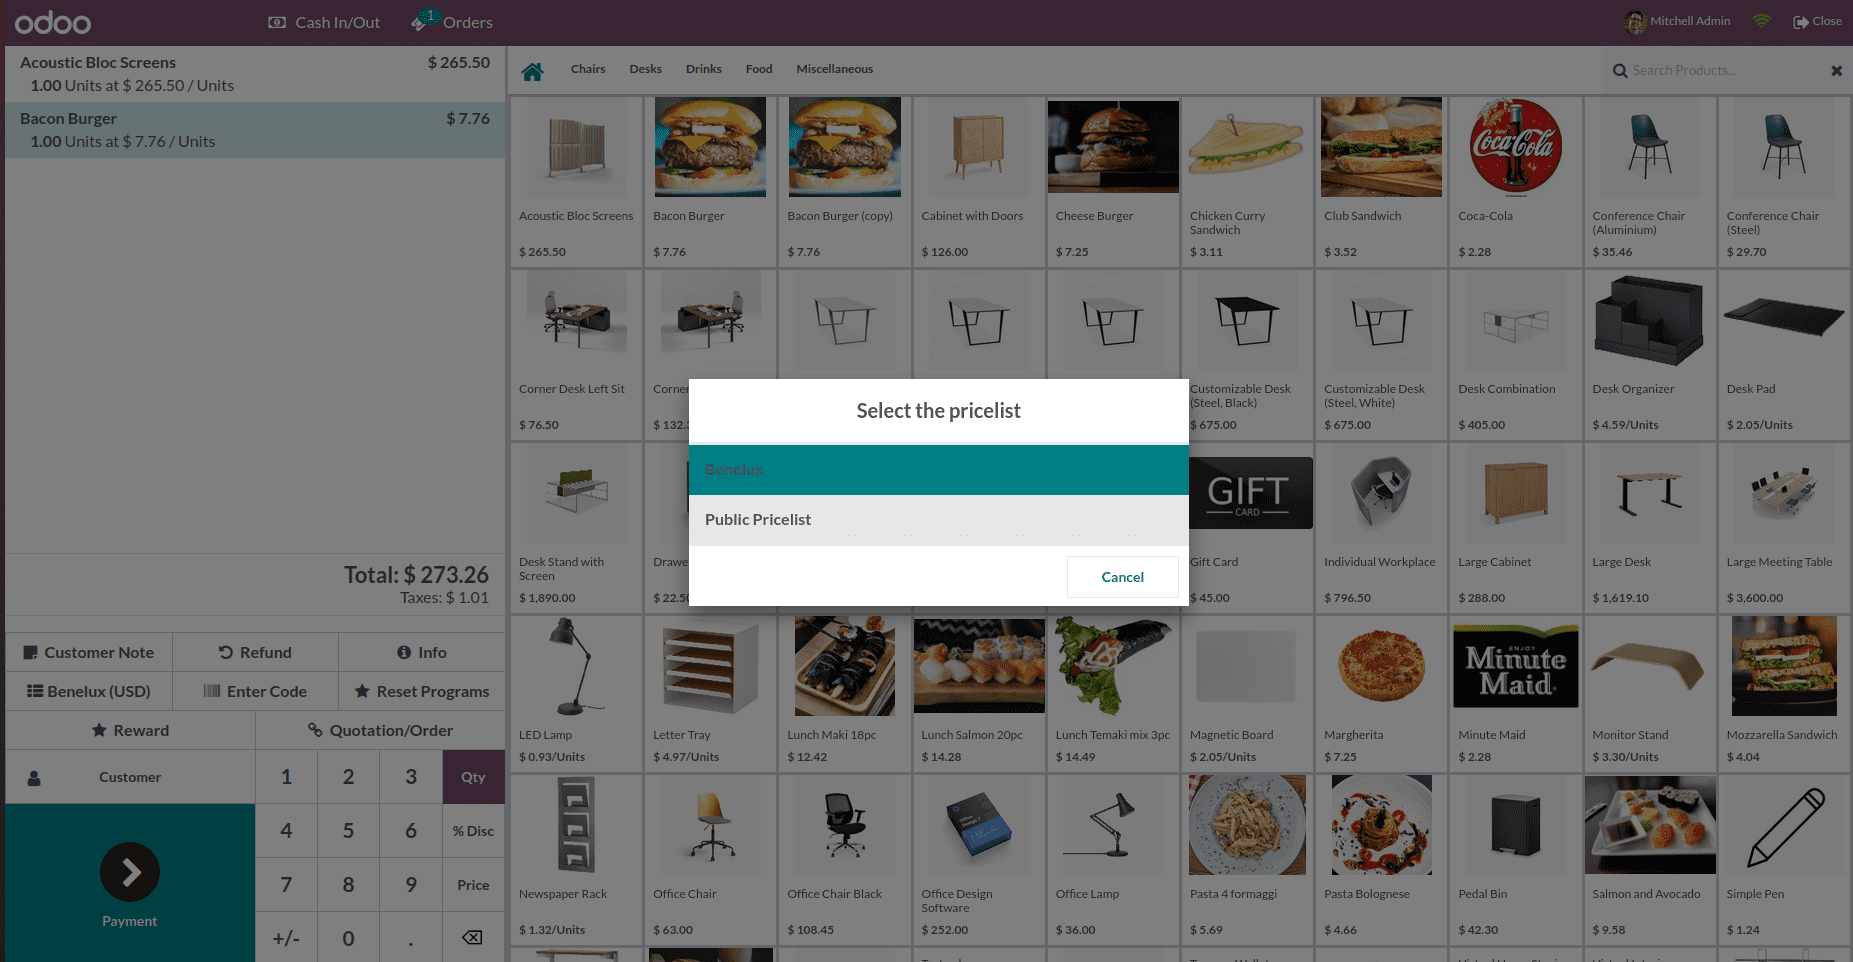
With pricelist enabled from the settings it will help the user to use different pricelist within the session, as shown below.
The Bill and receipt management for the shop includes features like Custom Header & Footer to add a custom message to the header and footer. Automatic Receipt Printing to Print receipts automatically once the payment is registered Use the QR code on the ticket option to Print a QR code on the receipt to allow the user to easily request the invoice for an order.

Next, under the Payments area, we must specify the payment options for your store. As seen in the screenshot below, select the Payment Methods option under Payments.

Along with that, the user can use the Cash Rounding to define the smallest coinage of the currency used to pay by cash. The other feature is Set Maximum Difference which allows the user to set a maximum difference allowed between the expected and counted money during the closing of the session and can also set coins/bills that will be used in opening and closing control with Coins/Bills feature, as shown in the above screenshot.
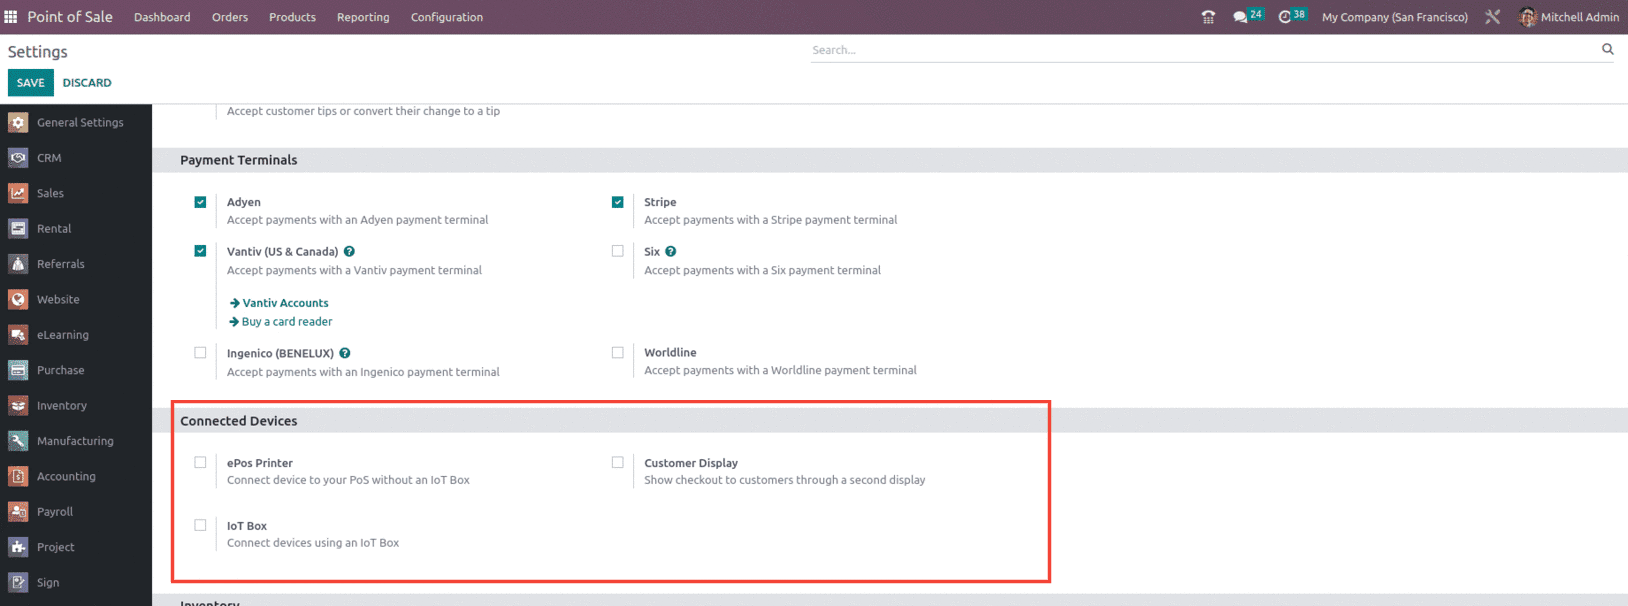
Connecting and integrating a payment terminal with your POS system enables you to accept different payment methods, including credit and debit cards, thereby improving payment efficiency using Adyen, Ingenico, SIX, Stripe, Vantiv, and Worldline, and this feature can be utilized from the payment terminal under the settings of the PoS module as shown below.

Then the user has the option to Connect the device to your PoS without an IoT Box or to Connect devices using an IoT Box and to Show checkout to customers through a second display as shown below.
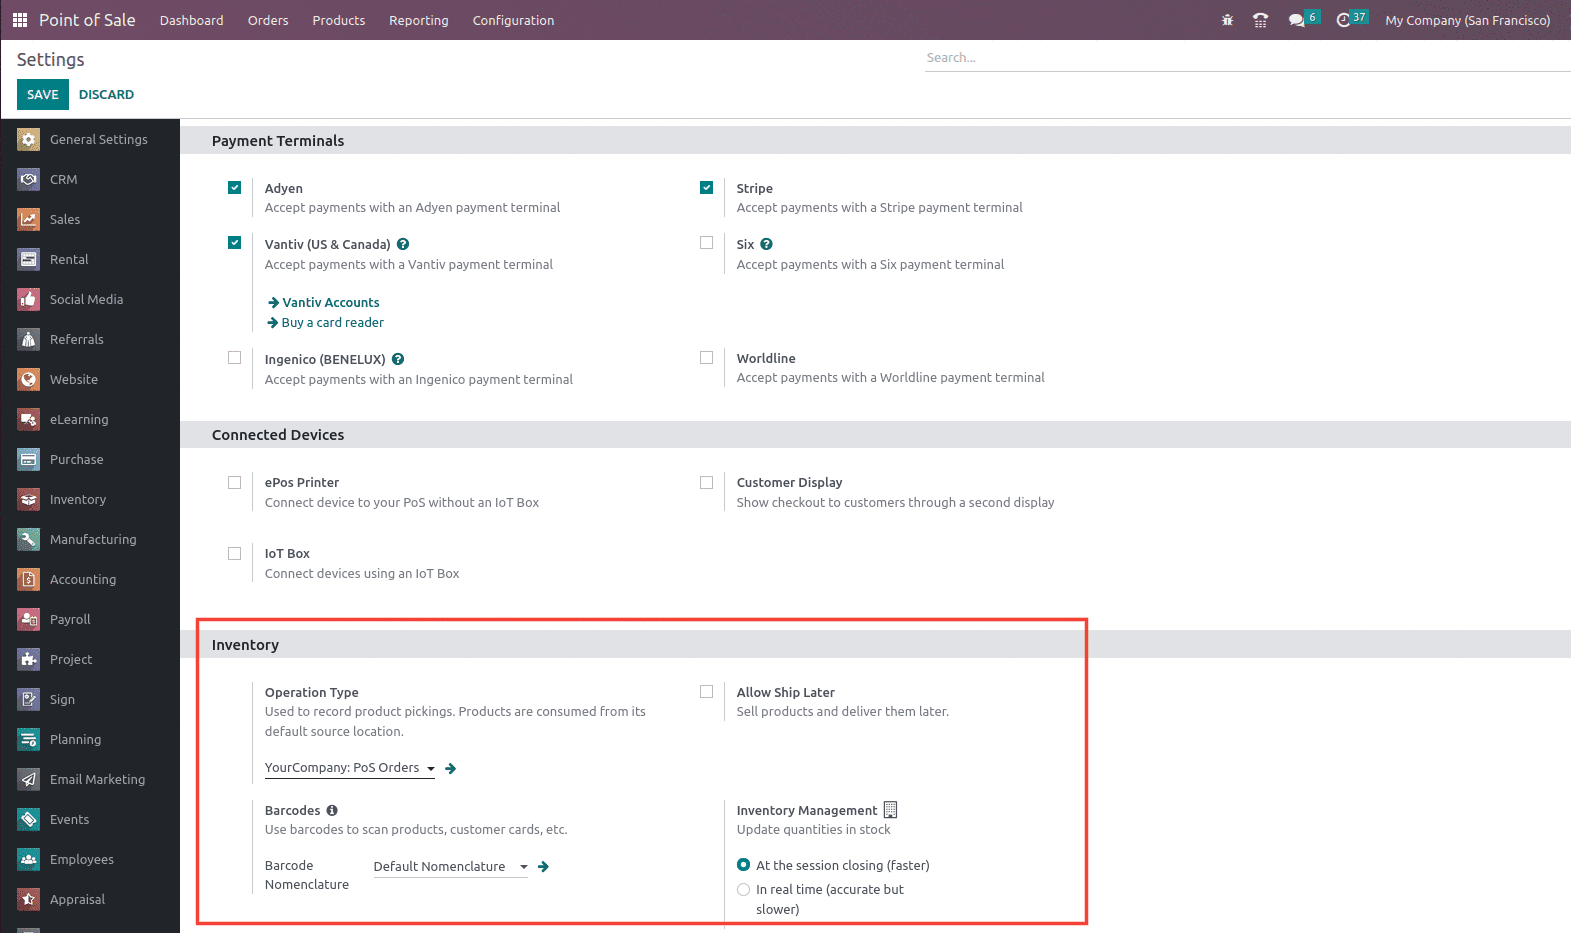
The inventories must be managed following each session. In the settings, you may choose between the options At the end of the current session and In real-time. By selecting this option, the picking will be generated for the full session after the session has ended. By choosing, Each order sent to the server generates its own picking in real time. Along with that it allows the option to Sell products and deliver them later with the Allow Ship Later option, as shown below.
Now let's see how to manage orders with Odoo 16 PoS shop management. For that, go to the Dashboard and select a new session for the Point of sale created for managing the retail shop as shown below.
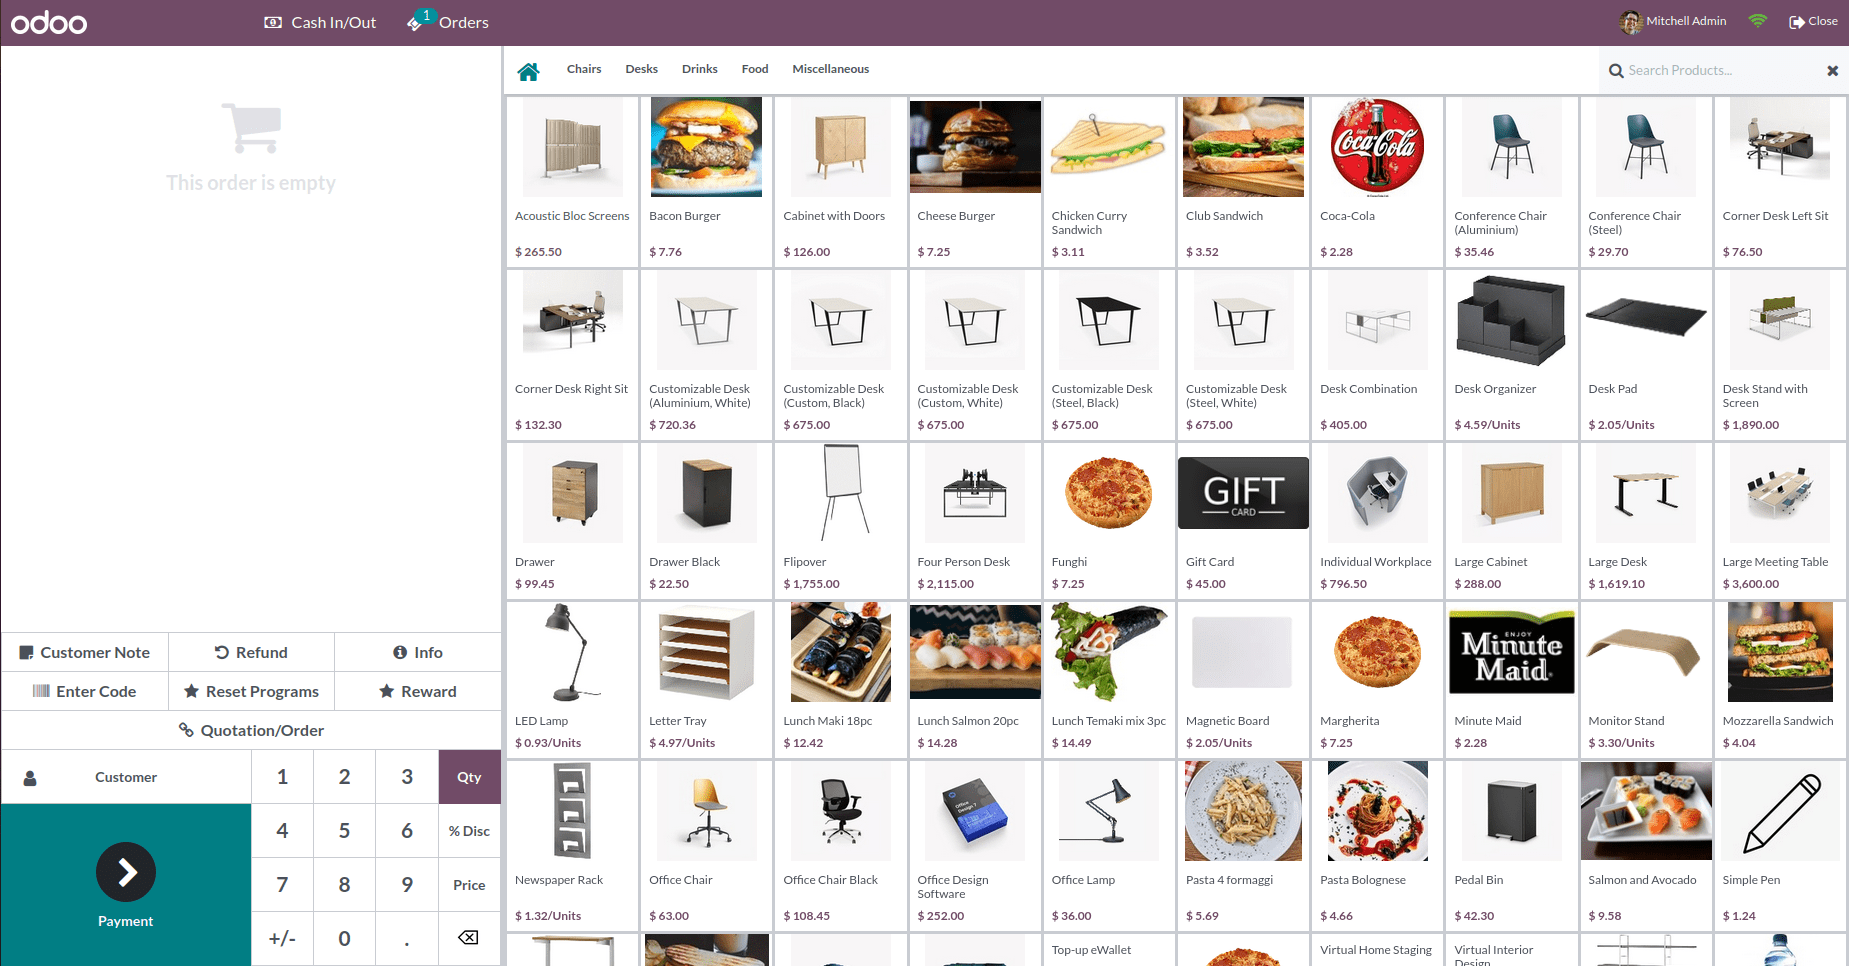
When you choose the option for a new session, the order interface will be displayed. Products are listed along with their name, price, and display image. You can choose to view different product categories. As a result, selecting the product is simple. From the product screen, you can choose the item, and an order will then be generated. The selected orders, together with Unit Price, Unit Quantity, and Total Amount, will be shown on the left side. Along with the subtotal and taxes, the order summary appears under the order. As seen in the screenshot below, you can enable the Customer Notes option to make notes about orders and the Refund option to return the order.
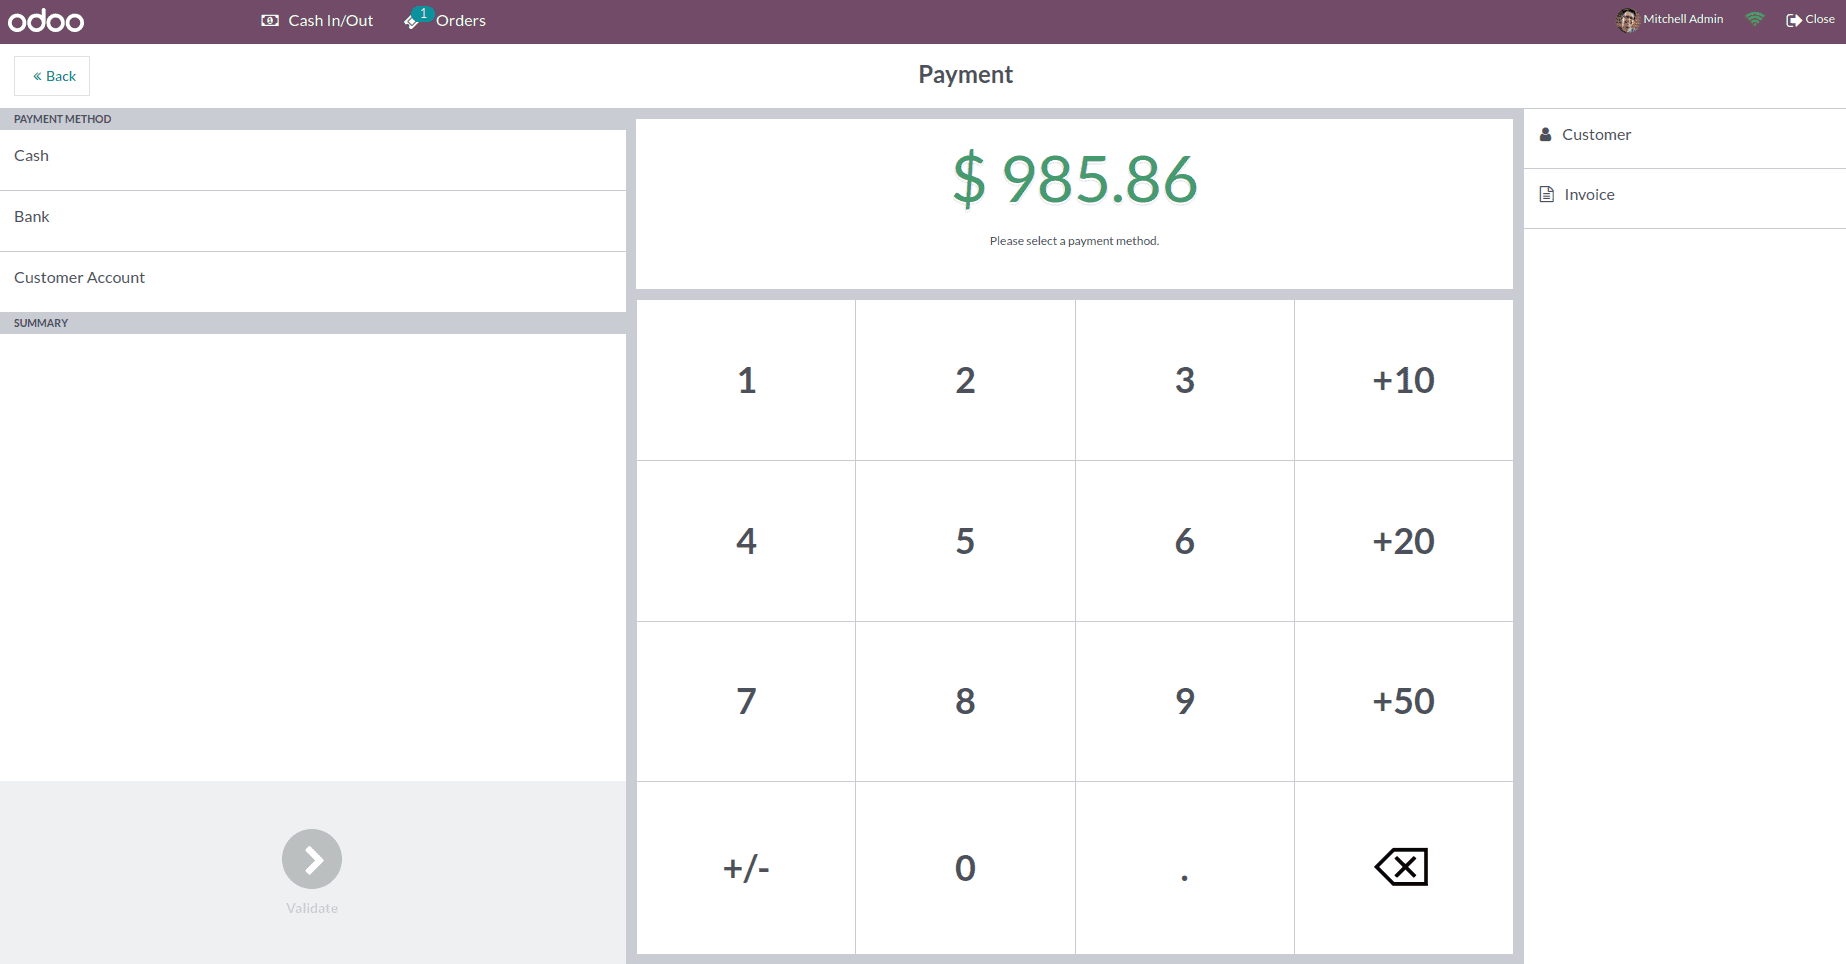
You will be sent to the payment screen by clicking the payment button. You have the option of paying with cash, a bank account, or a customer account. Using the keypad, enter the customer's payment amount. To create the invoice, click the Invoice button. Selecting the Validate button will validate the payment as shown below.
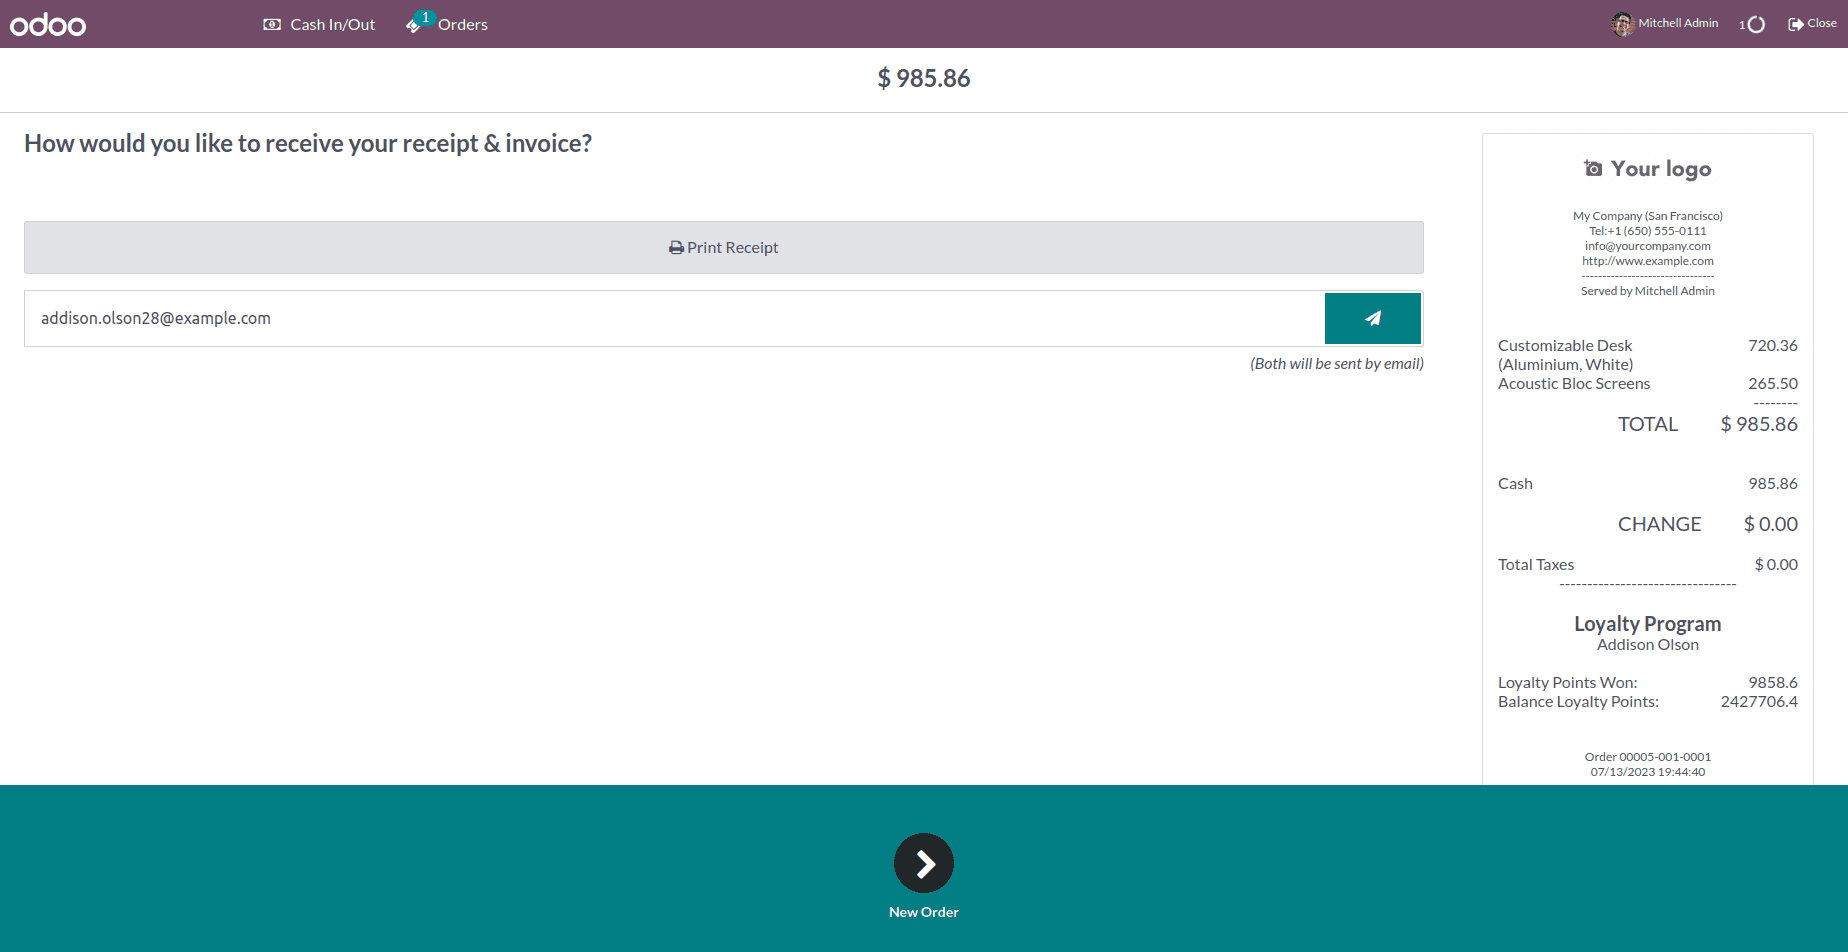
The receipt will be presented on the right side of the receipt screen; print the receipt by selecting the Print Receipt option. The receipt can also be emailed to the provided email address. When you choose New Order, you are taken there, as shown below.
The next thing that we have with retail shop management is Session, The activities of every session should be monitored. In Odoo, you can check the information of each session by selecting the Sessions option from the Orders tab, and it will also open up the point-of-sale dashboard where you can see your existing point of sales, go to Orders > Sessions. The list of sessions is shown, along with information about each one.

These are the certain features in the Odoo 16 PoS module using which the user can effectively manage the working of the retail shop.