Vendor Pricelists can be set up using the Odoo Purchase management module. These Vendor Pricelists will function effectively as a feature to improve business profitability. In other words, the vendor pricelists tool will assist you in establishing a set of prices for a given product for a particular group of customers for a specific amount of time. This is applicable when we buy goods from a vendor.
The vendor pricelist management solution from Odoo enables you to effectively manage supplier pricing and offers, ensuring that you can simply track and compare vendor pricing to support wise purchase decisions. The main components of Odoo's vendor pricelist management tool will be covered in this blog, along with how it can improve the efficiency of your purchasing procedure.
To configure the Vendor Pricelist, go to the Configuration tab and select the Vendor Pricelist option as shown below.
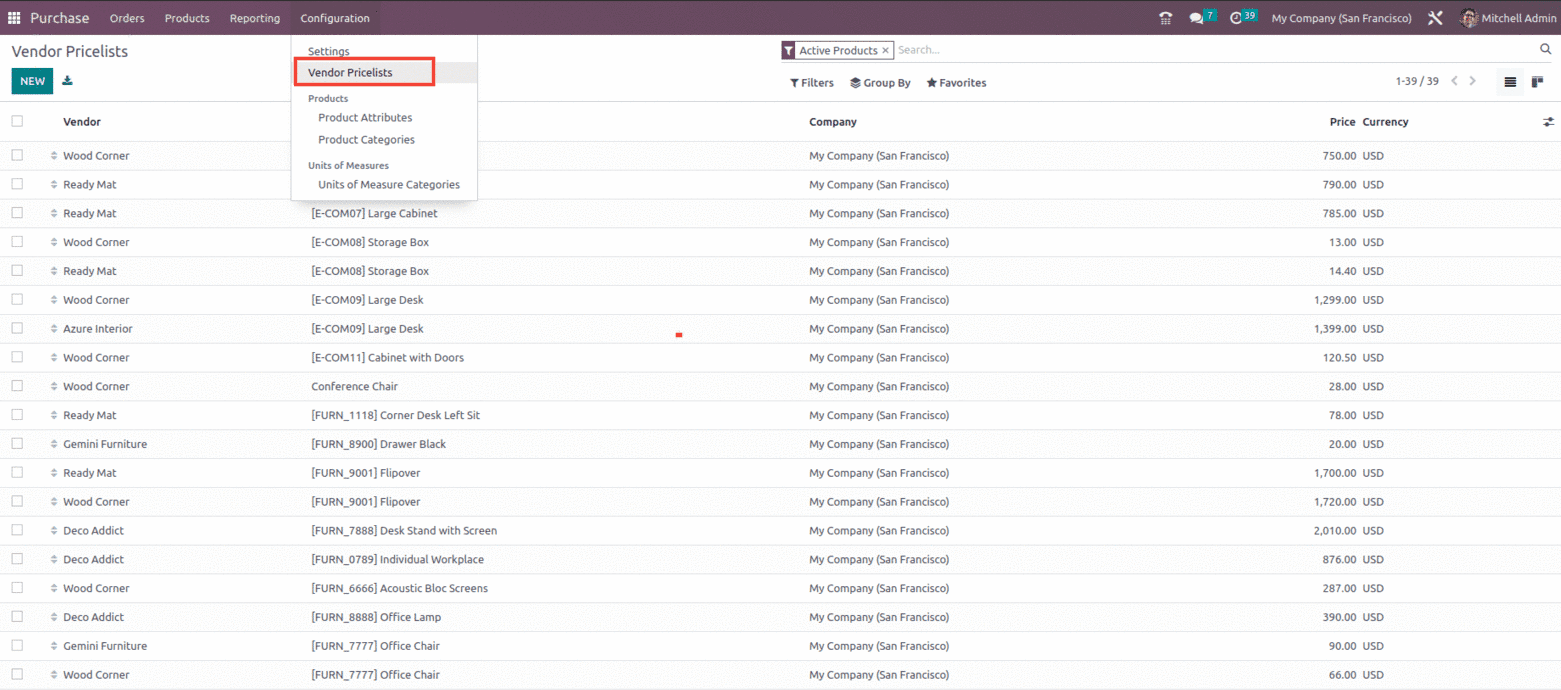
The list of current vendor pricelists will be shown, together with information like the vendor's name, whether or not they were subcontracted, the product's name, the currency used, the company's name, the quantity, the unit of measurement, and the price. The Vendor Pricelist can be viewed independently for each Vendor and Product as shown below.
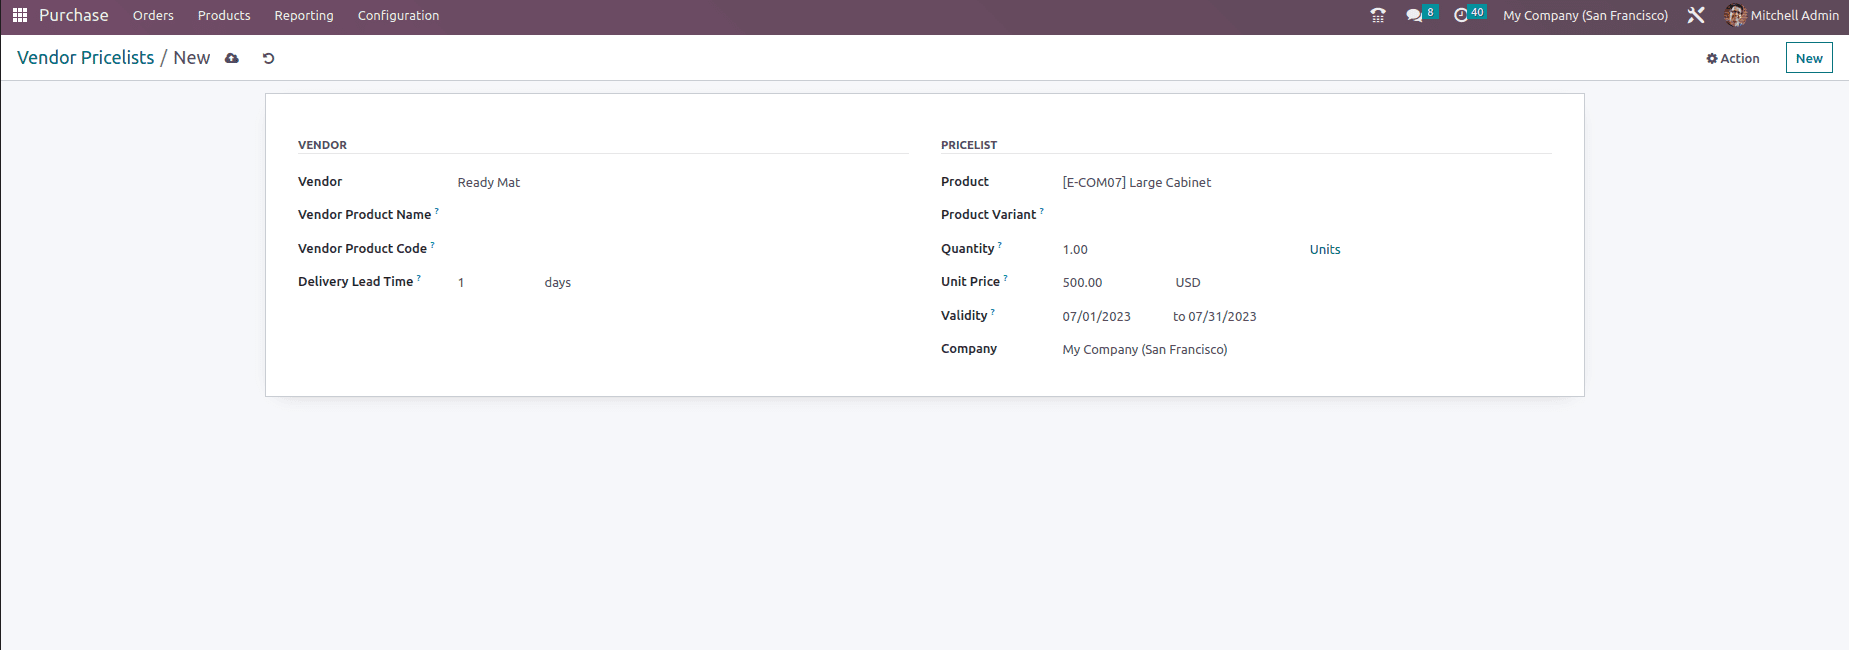
Vendor: Select the vendor for the pricelist creation.
Vendor Product Name: When printing a Request for Quotation (RFQ), the vendor's product name will be used. In order to utilize an internal product name, leave this field empty. This is crucial if the vendor uses a different term for the product than what it is called in Odoo.
Vendor Product Code: When printing an RFQ, the vendor's product code will be utilized. If you want to use an internal product code, leave this box blank. This is crucial if you, the customer, and the vendor both use separate product codes.
Delivery Lead Time: Enter the number of days between the purchase order's confirmation and the product's delivery.
Product: Select the product to which this pricelist is applicable.
Product Variant: Select the Product variant to which need to apply the pricelist or leave it as empty If this price applies to all variants of a product
Quantity: Enter the number of goods required to receive this pricing.
Unit Price: Enter the item's purchasing price.
Validity: Mention the time period for which this pricing is valid
Company: The name of the company is auto-populated, however, you can change it by clicking on the company line.
Now lets create a Purchase order for the vendor, for which we have created the pricelist and check how it works.
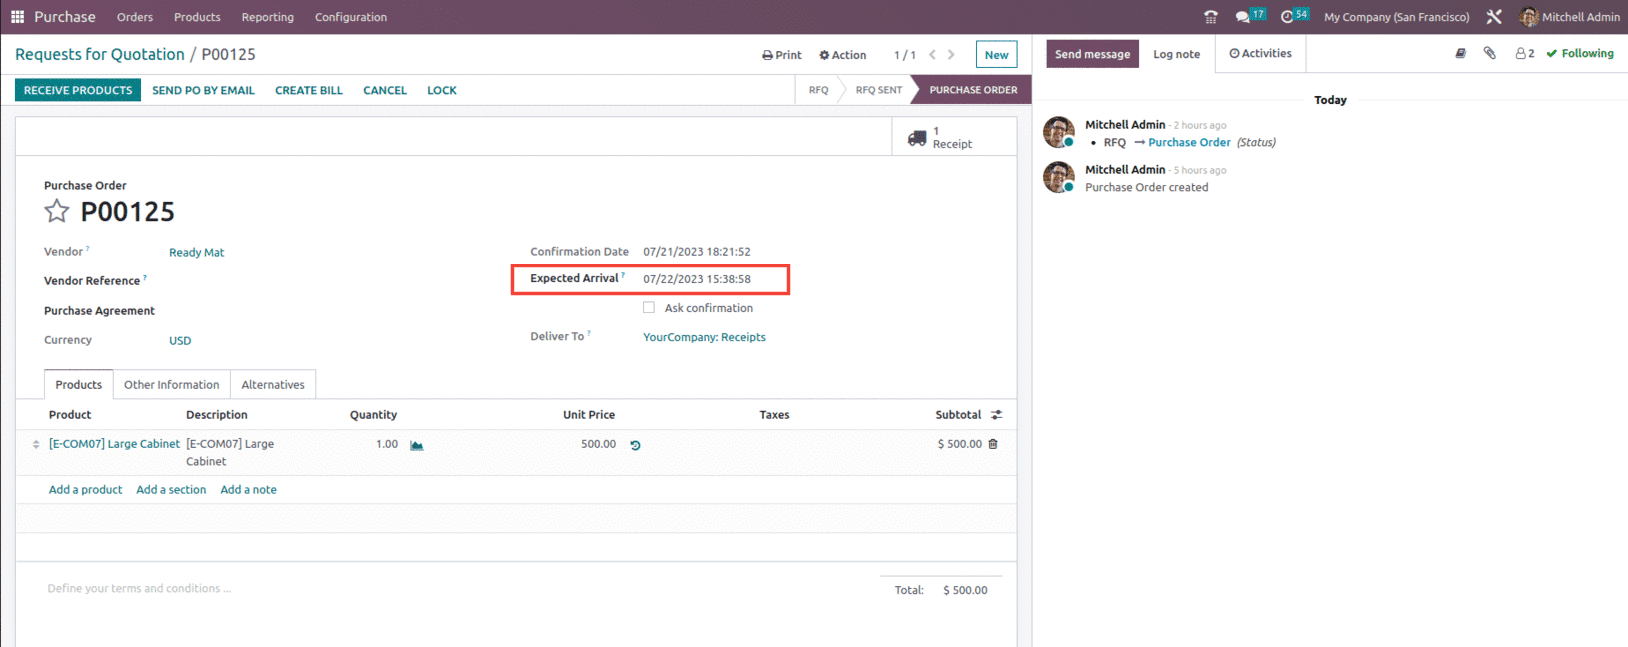
Create a Request for quotation with the vendor as Ready Mat and the product Large Cabinet for which we have set the pricelist, then automatically the price of the product changes to the $500 as set under the pricelist.
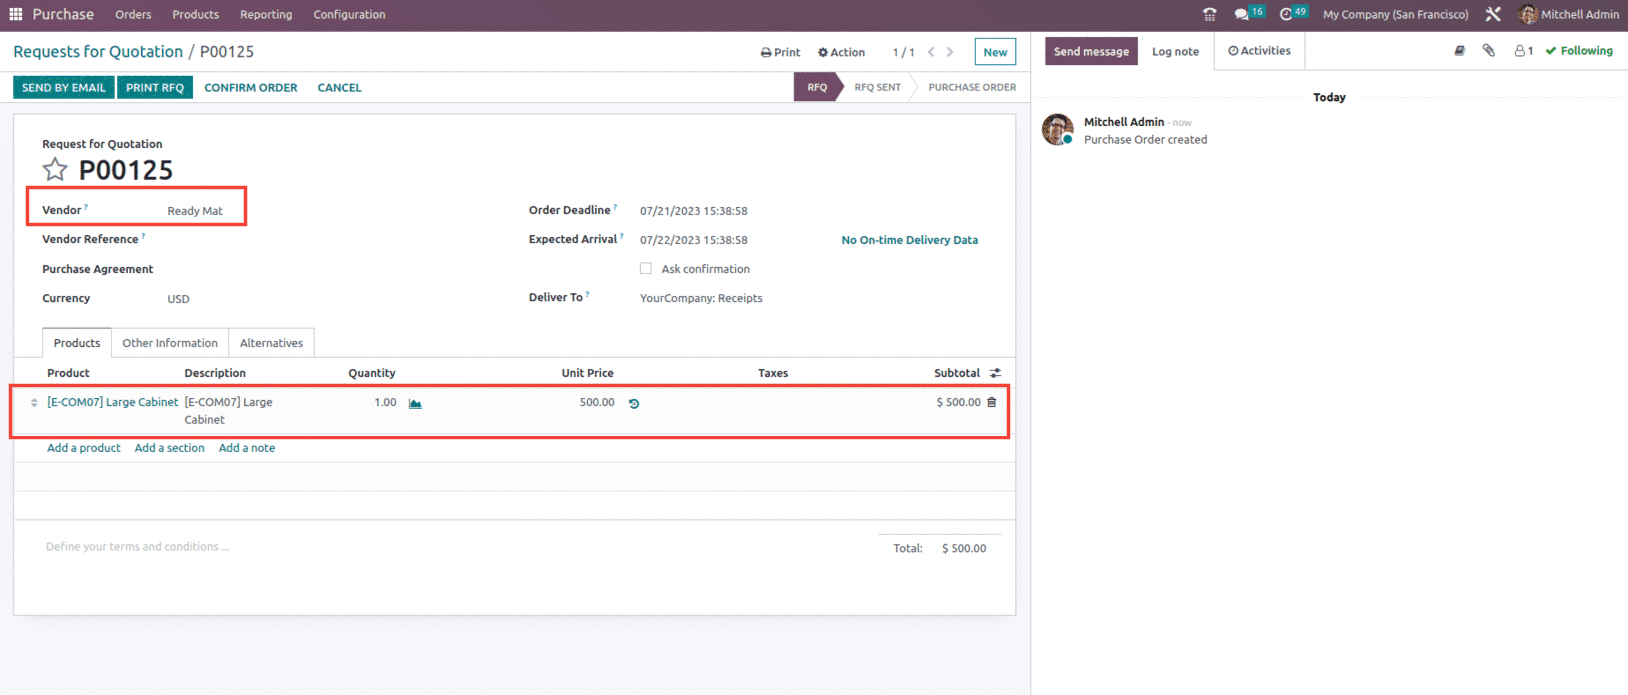
As shown in the above screenshot the vendor pricelist is applied with unit price as $500.
Now along with this let's check what is Vendor Lead time and how it works with odoo 16.
The term "vendor lead time" refers to the period of time needed for a product you ordered to be delivered to you. It is the same as "purchase lead time" and is used similarly. Vendor lead time can be created at time of creating the vendor pricelist, as shown below.
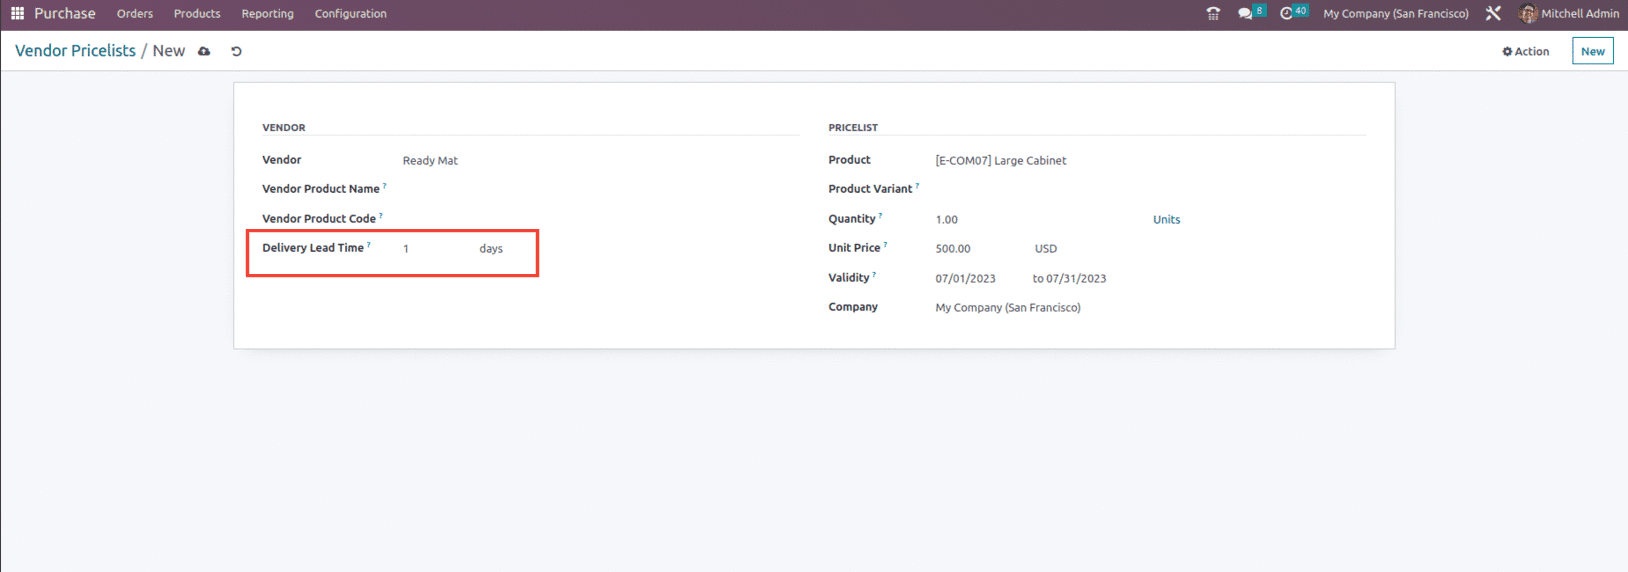
As we have seen in the purchase order the expected delivery date is scheduled one day after the order deadline since the delivery lead time is set as 1 day.
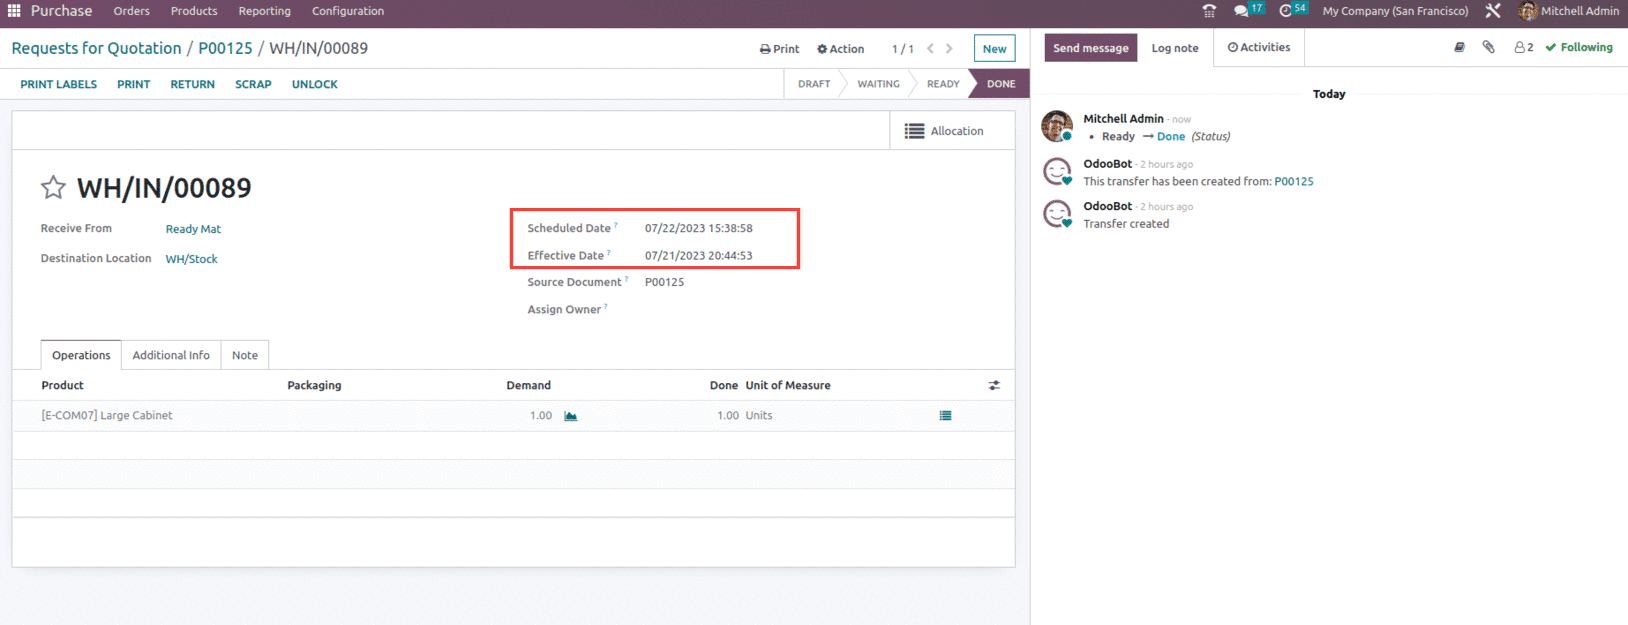
And once we validate the receipt and receive the item we can see that the scheduled date would be set as per the vendor lead time given as shown below.
This is how the user can manage Vendor Pricelist and Vendor lead time in odoo 16.