HOW TO CONFIGURE PAYROLL IN ODOO 14?
The Odoo consists of efficient modules for human resource management with the objective of easy and effective organization of all activities regarding employees and related functionings. Management of an organization’s payroll activities requires a large amount of time and effort to ensure accuracy in each payroll. Configuring payroll is integrated with other modules like Attendance, Employee Contract, Time off, Accounting, and many other HR management modules. Before generating payslips for the employee a company needs to configure their employment contract with respect to employee profiles. The payslip will be generated based on the work schedule, basic pay, duration, and overtime pay mentioned in the employee contracts.
Odoo simplifies all these activities related to payroll in a company with the help of the Odoo Payroll module. Payment for employees in an organization should be managed and organized with utmost attention and calculation based on the parameters mentioned in each of their contracts. Even a small error will lead to a big crisis that will be an unhealthy scenario for both the employees and company authorities. Odoo will help you to ensure accuracy in payroll by integrated actions with other HR management modules.
This blog will be discussing how to configure payroll in Odoo 14.
As we said earlier, to manage the payrolls of employees, we have to create a contract with a set of parameters and define a salary structure to calculate the payment. This contract should be created at the time of recruitment of the employee. First, install the Payroll module into your database from the Apps module.
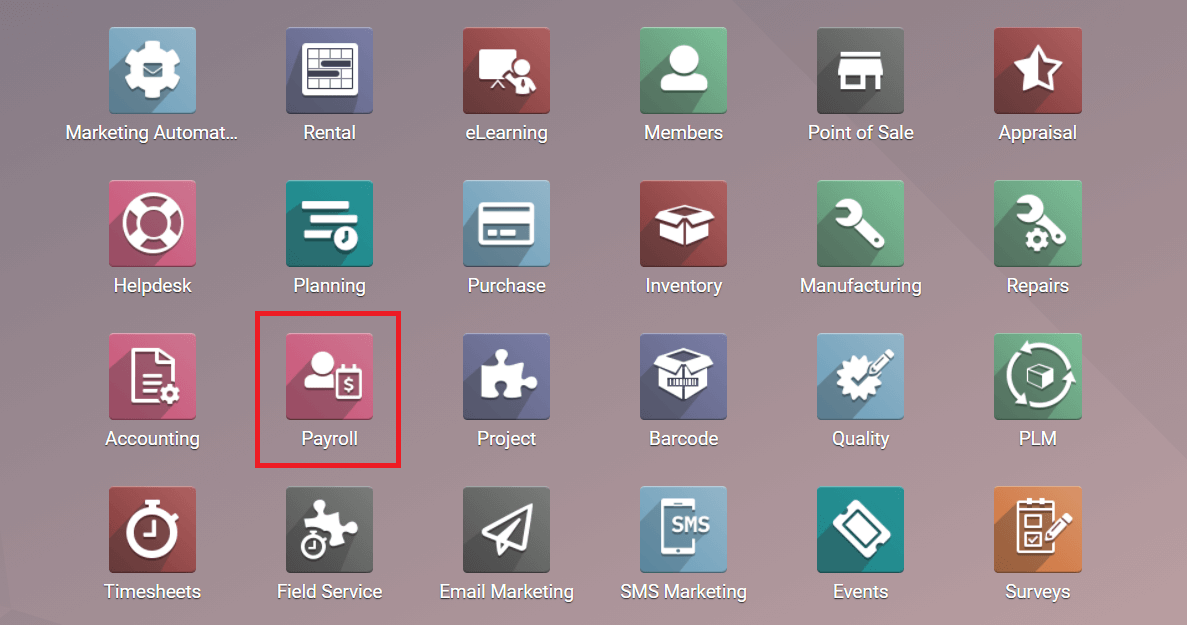
The salary amount of each employee is defined on the basis of the contract made between the company and employee. The salary package will be changed in accordance with the level of employment and job position. It is easy to configure employee contracts to the profile of an employee from this module.
Define Salary Package in Contracts
When we enter into the module we will get a list of all employee profiles on the home dashboard. If you want to change the salary package or create a new contract select the respective employee and configure a new contract to their data.
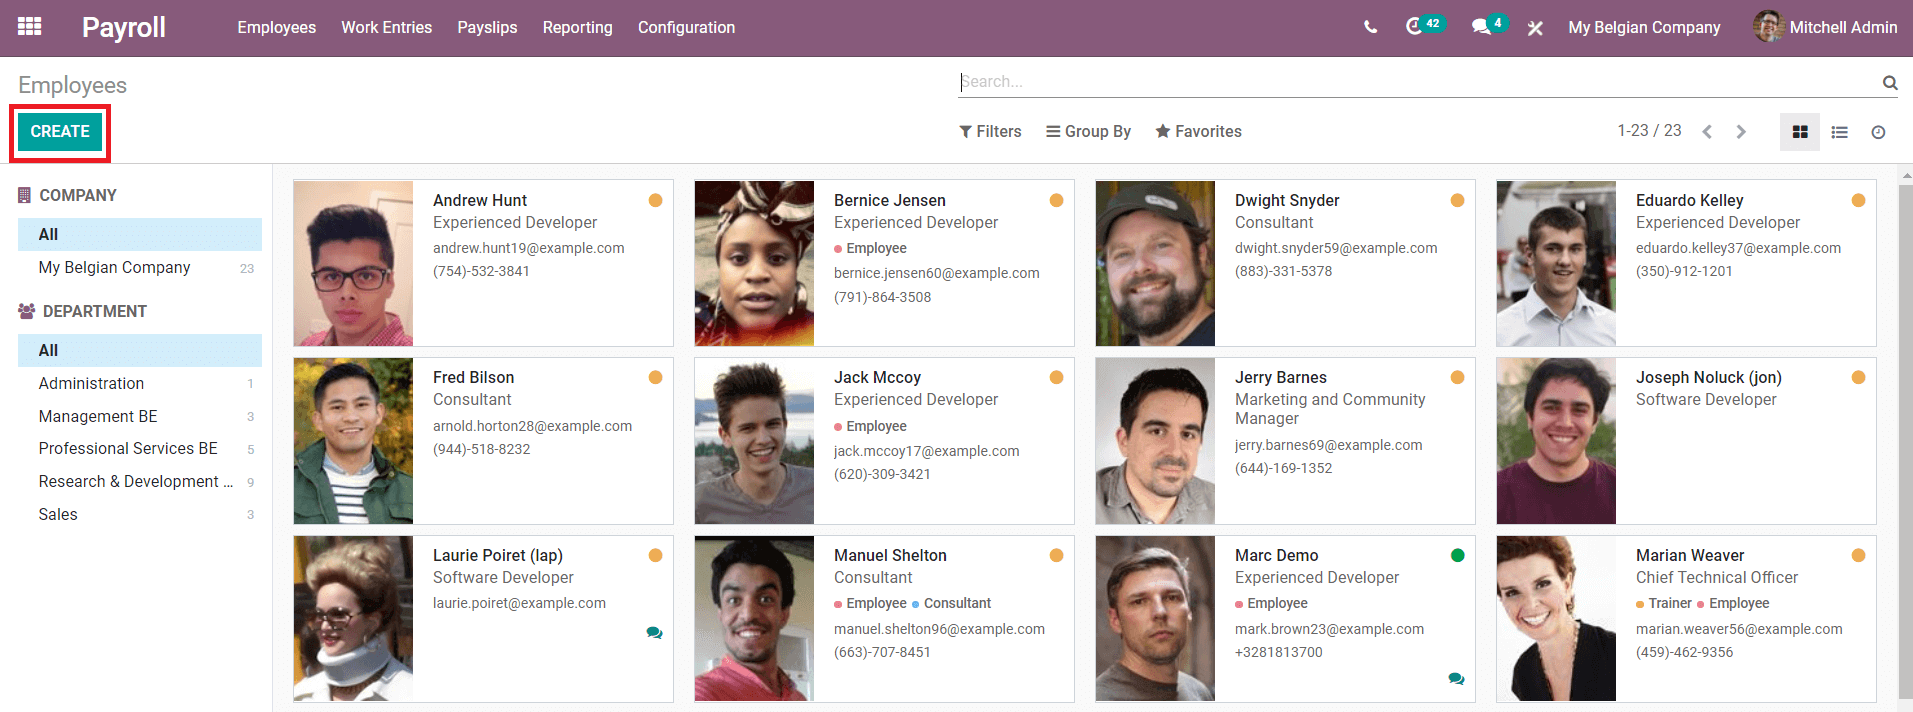
Using the ‘Create’ button’, we can add details about a new employee and their contract as we are doing in the Employee module. Here, select an employee and you can see the attached contract details in their profile.
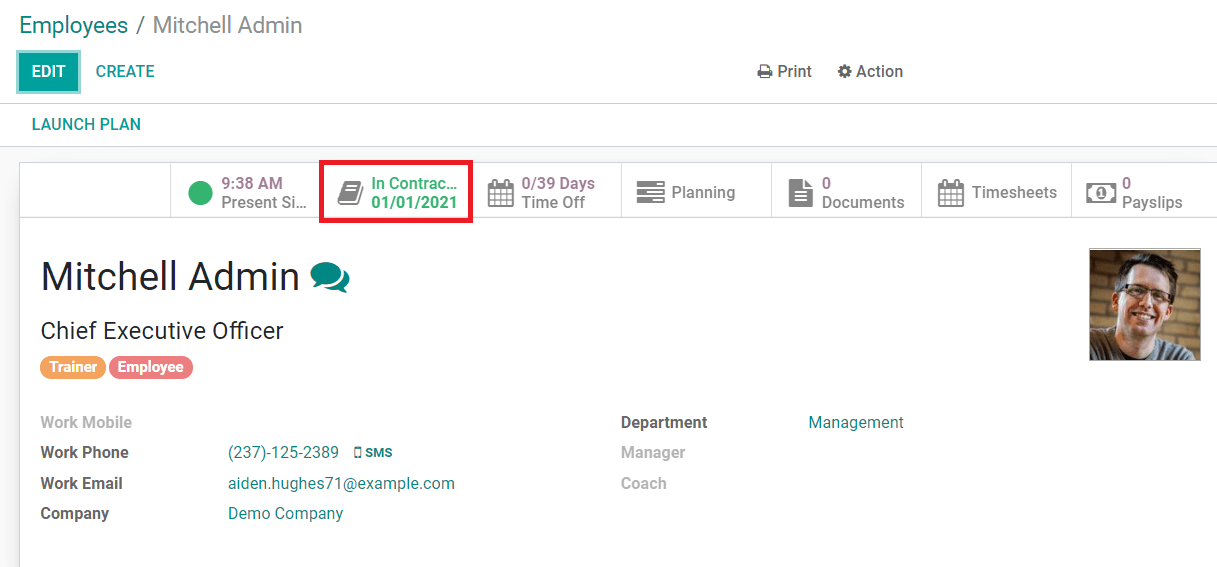
On selecting the contract icon from the menu, you will get to know the existing contracts of this employee. From the list, you can clearly view the status of the contracts and select the running contract to which the salary details can be estimated.

You will get all the details about the contract and salary information by clicking on the respective contract. If you want to edit the data, use the edit option to add or change current details.
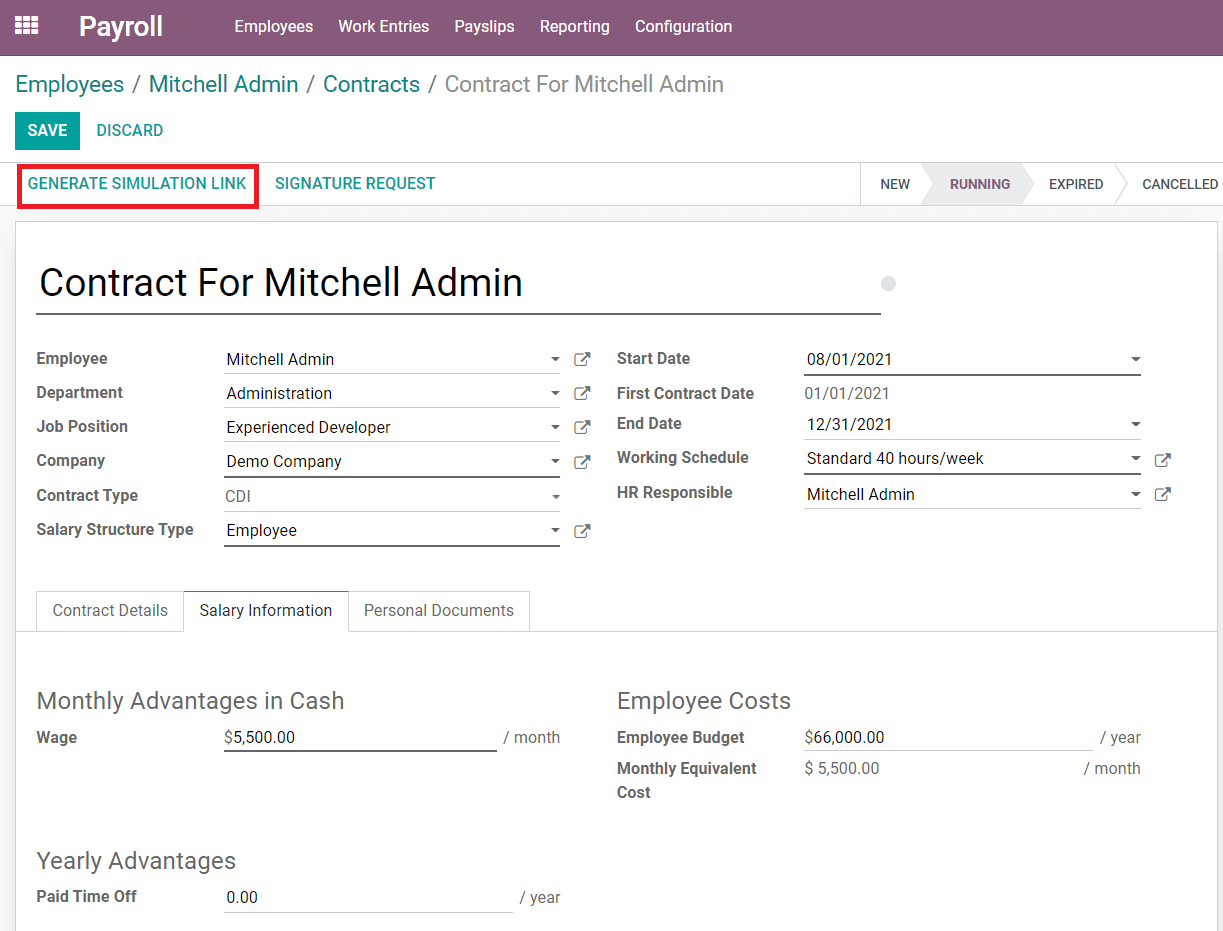
Along with details of job position and company the contract also includes the period of contract and working schedule. Under the Salary Information tab, you can define the remuneration of the employee. The newly created contract can be sent to the employee through the mail by generating a link using the ‘Generate Simulation Link’. The salary structure type of the employee is defined using the external link near to the ‘Salary Structure Type’ where a pop-up window will appear to add necessary details about salary.
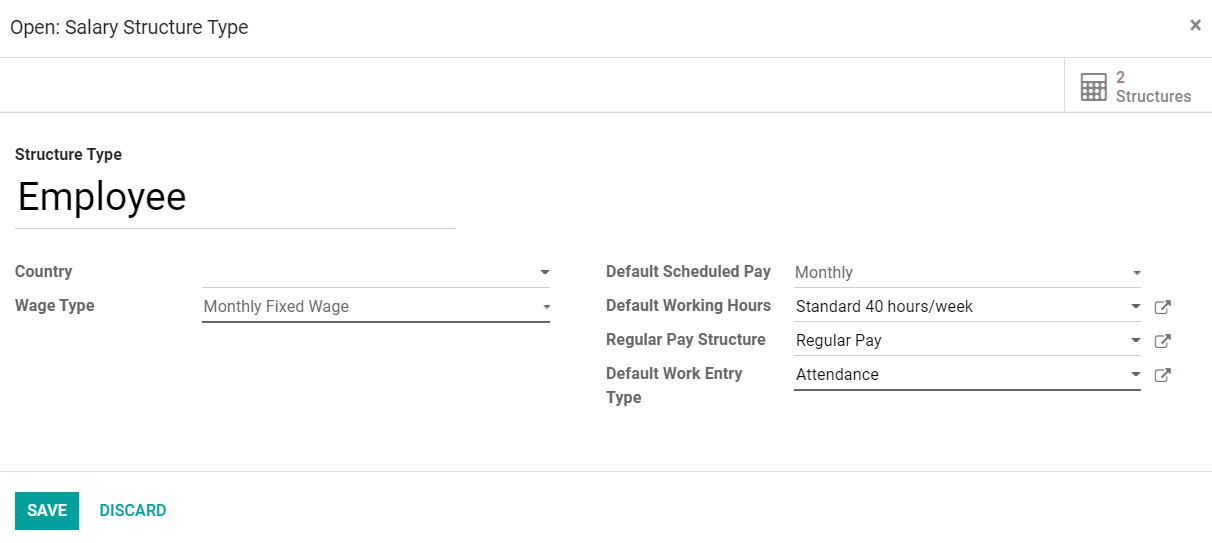
You can select the Country, Wage Type, Scheduled Pay type, Working Hours, Pay Structure, and Work Entry Type. You are also allowed to set the options according to the job position of the employee.
Generating Payrolls from Work Entries
Each employee’s attendance and time off are specifically recorded in the Odoo modules and this data will be integrated with the Payroll module for calculating payment. The payroll slips are generated from these work entries and you have to solve the conflicting errors that appeared in your entries.
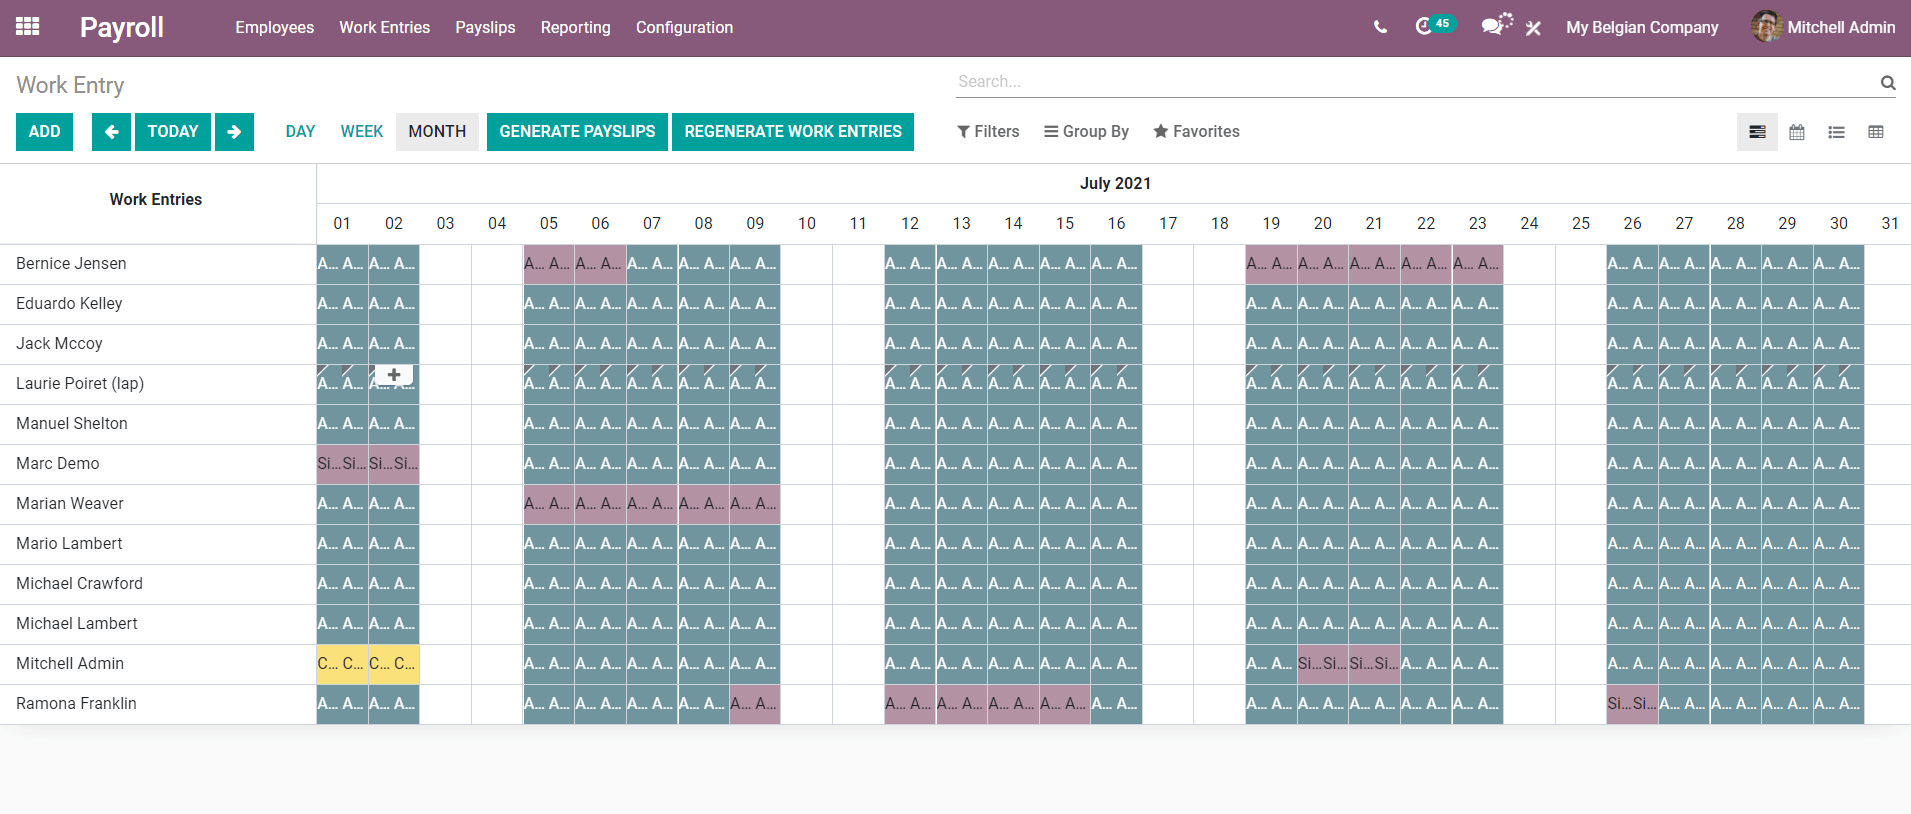
Select an employee’s monthly entry and you can see the conflicting errors that appeared on the respective list. A pop-up window will appear to resolve the conflict by selecting the respective conflicting date.
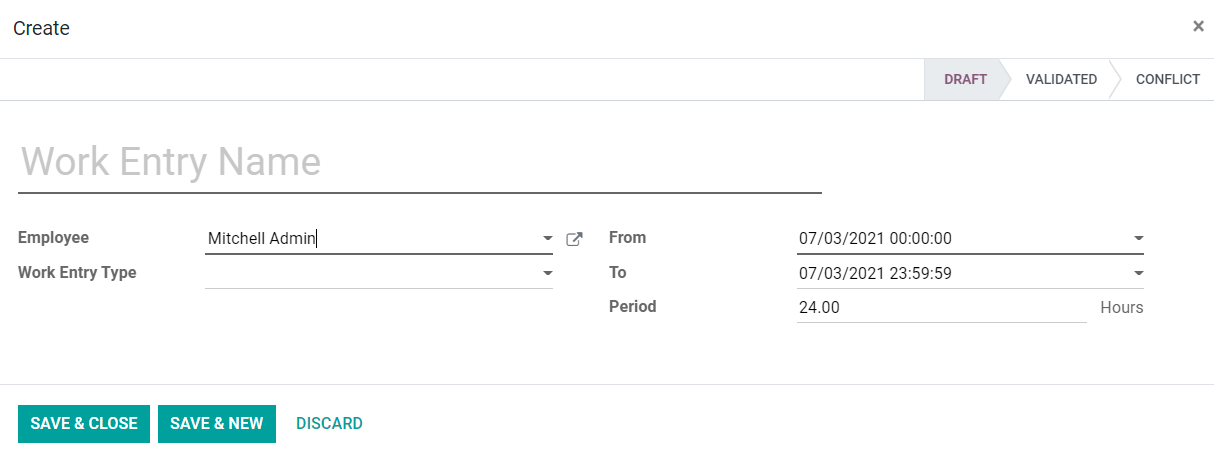
You can solve all conflicts in a month by this method. After clearing all errors you can generate payslips for each employee. Click the ‘Generate Payslips’ from the dashboard of the Work Entry.

You can create payslips for the respective month and the allowed play slips can be viewed from the window as shown in the image above.
Pay Slips for Employees
The payslips will include all information concerning the salary of the employee in a selected month. The payment will be decided on the basis of the basic pay in contracts, attendance rate, time off, and paid overtime works. Selecting the respective month from the Work Entry, you can see the payslips of employees. These records will be helpful to estimate the total remuneration of an employee.

As you can see in the image the payslips include the Reference number, Employee name, Bach Name, Payslip Period, Company, Basic Wage, Net Wage, and Status of the payslips. For a detailed view, select the respective employee’s payslip.
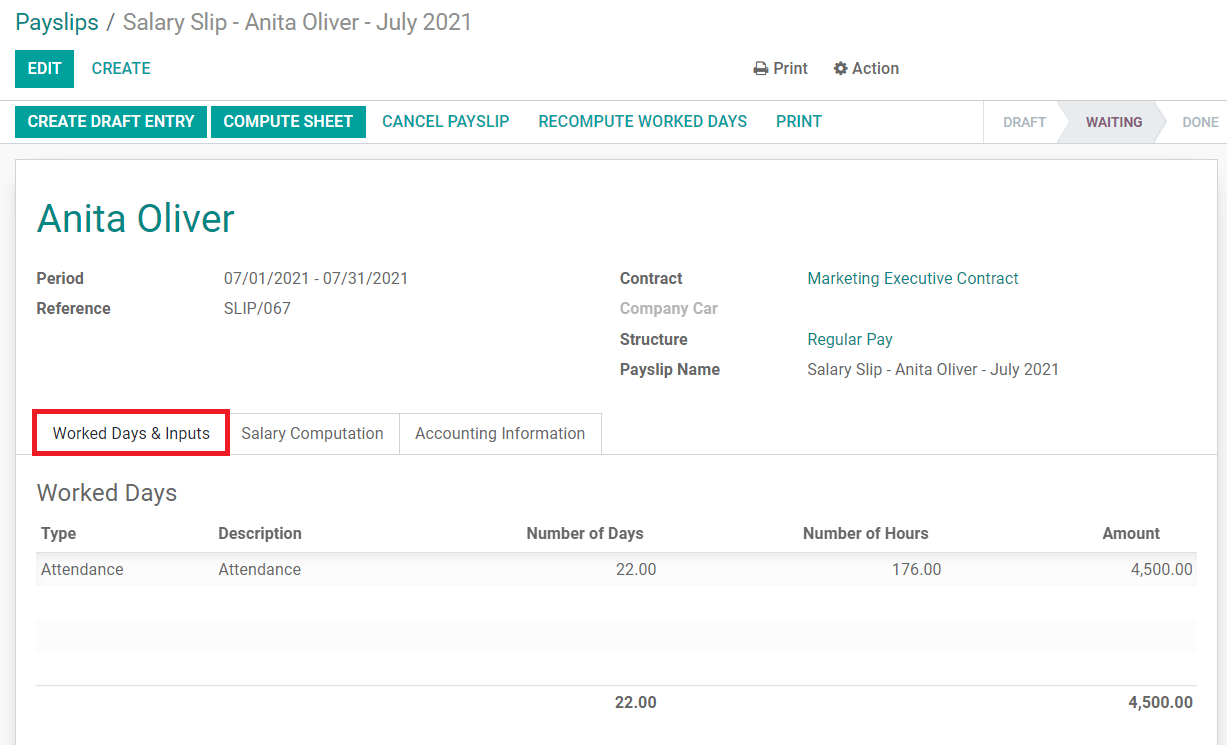
Under the ‘Worked Days & Inputs,’ the respective employee’s attendance can be viewed. In the ‘Salary Computation’ tab, the complete list and calculation of payment can be found.
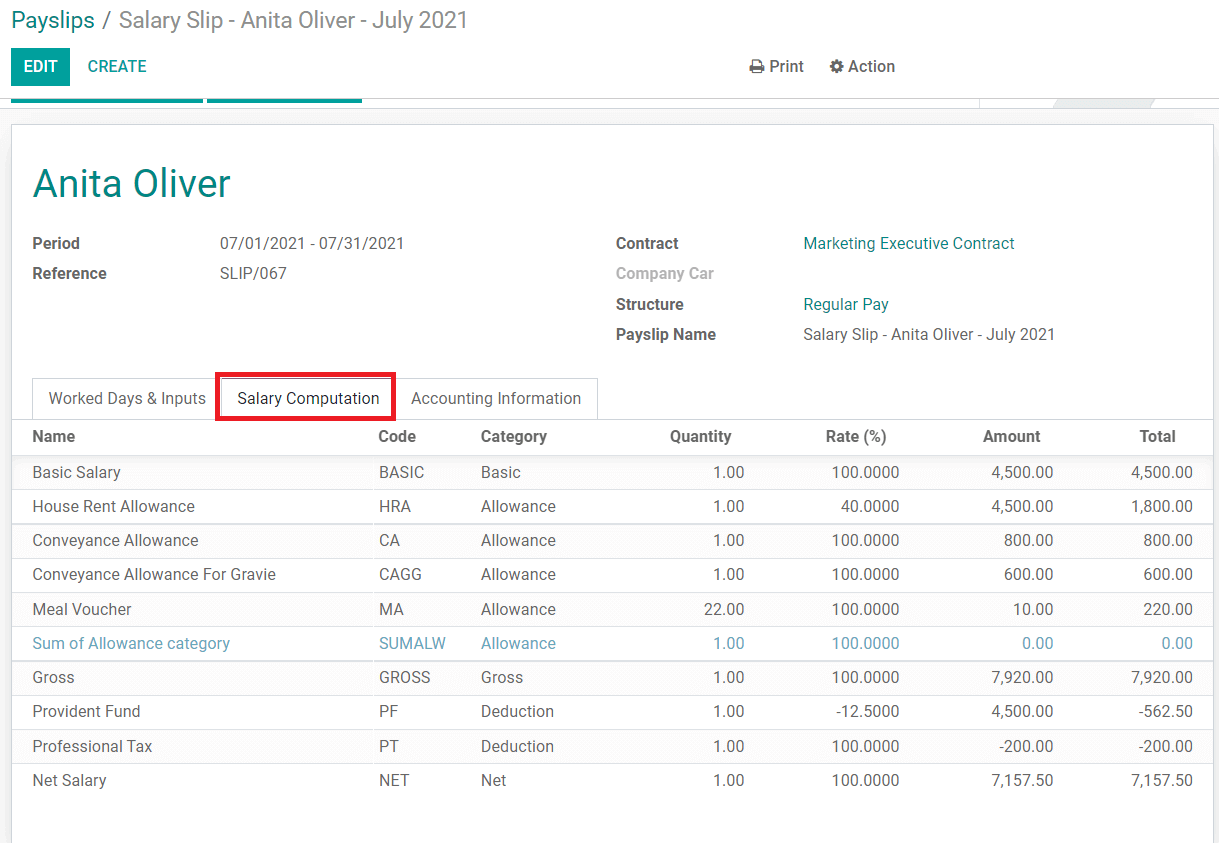
This includes all allowances, tax, salary structure, and all the aspects that are added to the monthly salary of the employee. Click the ‘Create a Draft Entry’ to proceed with the payslip.

There are other operations that are allowed in this payslip like if you want to compute the sheet you can choose the ‘Compute Sheet’ button. It is also possible to count the working days again using the ‘Recompute Worked Days’. Click the ‘Cancel Payslip’’ to cancel the slip of the employee.
After generating the payslips, you can see the status of the payslips has changed as shown below.

This is how Odoo helps to calculate the salaries of each employee based on the salary structure selected in the employee contract, manage employee’s payslips and generate records on each payment.