In business operations, there are different types of events needed to be conducted and managed to create new opportunities and a collaborative atmosphere. An event management system is necessary to facilitate the successful implementation and organization of events. An automated system for organizing each event and booking for new programs will ease the process of management of all events within an organization. This can help a company to reduce the workload on planning and conducting programs. Conducting effective events regularly is a marketing strategy of any business and it has the ability to increase publicity of the respective organizations.
Management of events is not an easy task and it takes a considerable amount of time and effort to end up with a successful result. The advances in technology have flourished enough to ease and automate the procedure of carrying an event with the help of an event management system. Odoo introduces you to such an all-in-one event management facility that is proficient in supervising events of any type or scale. Whether it is a seminar, workshop, an annual festival, conference, or any charity event, the amazing Events module in Odoo will assist you in organizing. From planning a program and making the arrangements to selling tickets and finding sponsors for the events, Odoo incorporates all tasks.
This blog will give you an overview of creating a new event using the Odoo Events management module.
Conducting an event and making it an immense success encompasses multiple segments like fixing suitable dates, scheduling appointments for guests, setting locations, and issuing tickets for the events. Through the Events module, Odoo ensures a simple and efficient system to organize all these activities. It will definitely act as a great assistance to your event management team.
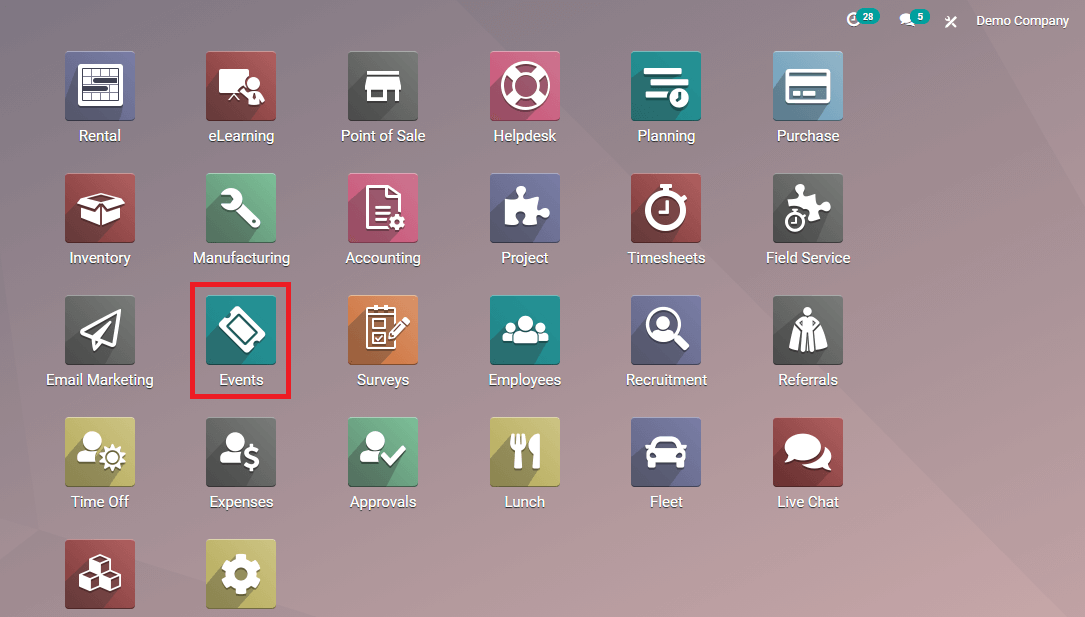
Let’s get into the series of actions to create a new event and advertise it on the website. First, make sure that you have installed the Events module, and then you will find the icon on the home dashboard of the Odoo.
When you open this module, you will get a view of all the events previously created using this platform. There are different stages that can be created for an event according to the progression in the execution. You can see some default states such as New, Booked, and Announced on the dashboard and you can shift your event in between them.
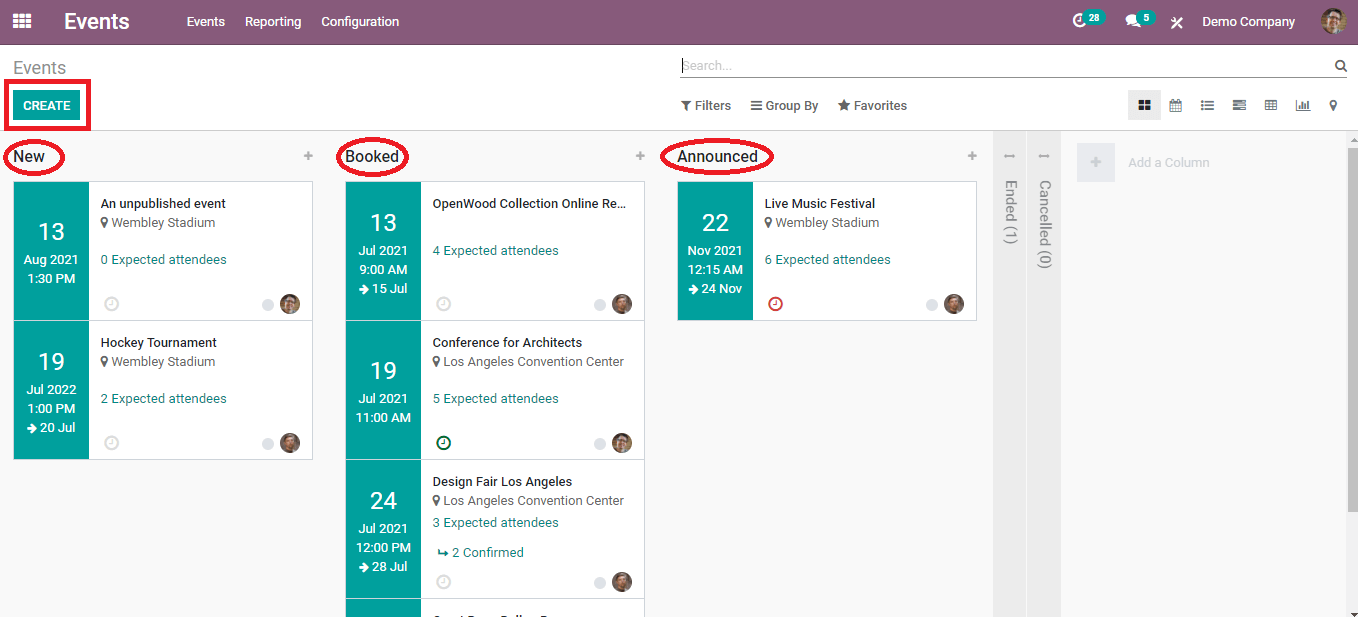
Each event that is shown on the dashboard will give a brief idea of the details included inside the main page of the event. The scheduled date can be viewed as highlighted on the left side and the prescription includes the name and location of the event and the number of expected attendees for the function. Like in any other module the Events module also contains filters and groups. You can make use of the default and custom options of each of them based on your purpose.
Clicking on any event will give a detailed description of the respective event as shown below.
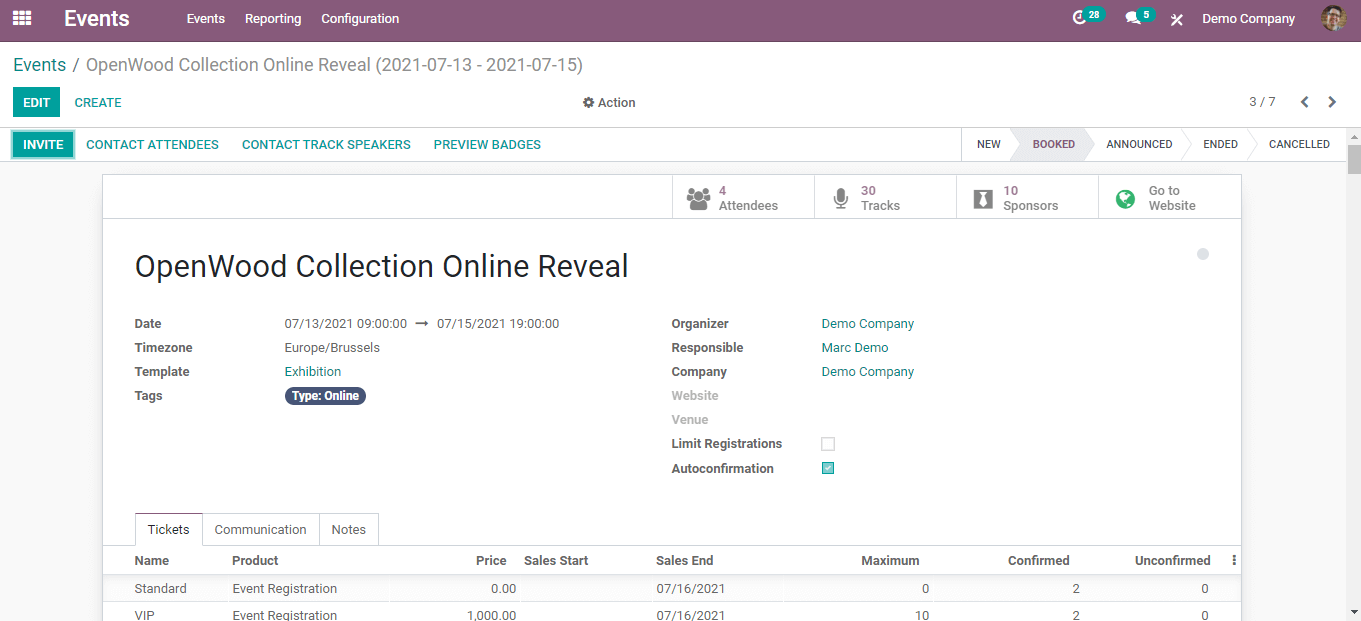
This includes the name of the event, scheduled time, organizer, responsible time, and company. There are many other fields also and we will discuss this later on the creation of the new event section.
Create a New Event
Click the ‘Create’ button given in the main dashboard of the Events module to create a new event. You will be depicted with a form to fill in the necessary details about the new event.
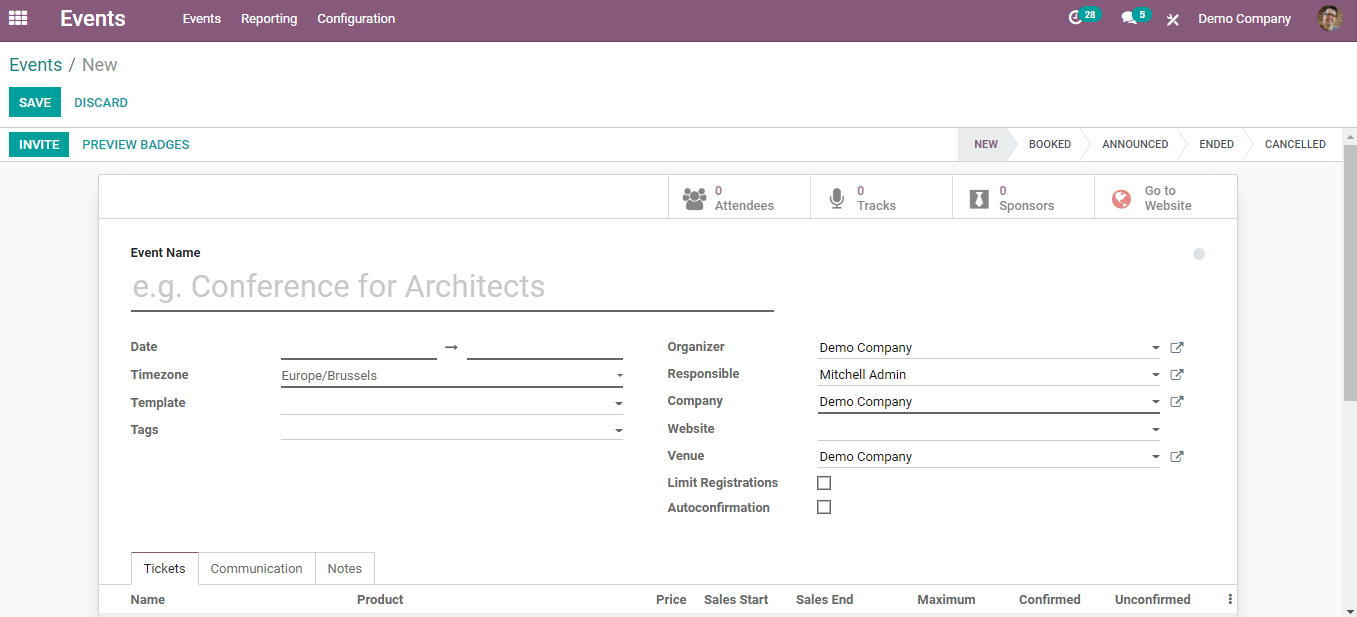
Give a suitable name for the event in the respective field. You can mention the dates on which the event starts and ends under the event’s name. Also add Templates, suitable Tags, Organizer, Responsible officer, the Organizing company, Website address where the event is going to be published, and Venue of the event in the specified sections. You are also allowed to limit the number of attendees to the events in the ‘Limit Registration’ option.
Arrange Tickets for the Events
After adding details to the new event creation form you can arrange tickets to your event.
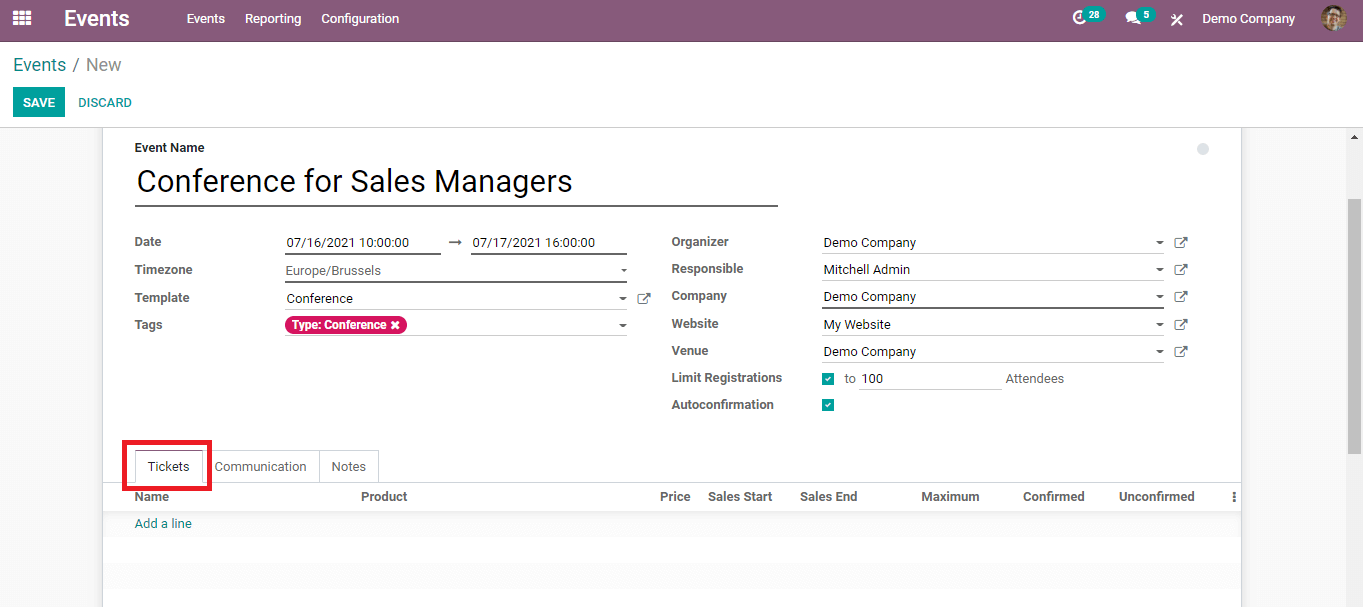
Under the ‘Tickets’ tab, you can use different types of tickets. You can set the type and price for each ticket and decide the number of tickets for each category. Click on the ‘Add a line’ to set these arrangements.

In this field, you can categorize different types of tickets and charge money according to the type of ticket. You are able to specify the starting and ending period of the ticket sale. It also allows you to mark confirmed and unconfirmed seats separately.
Communication
The ‘Communication’ tab helps you to start communication with the participants via email or SMS. You are allowed to decide the pattern of communication.

It helps to add templates according to the way of communication you choose. You can decide the intervals to send mail or SMS to the customer and you can set the Unit as immediately, hours, days, weeks, or months. Set the Trigger as After each registration, Before the event, or After the event. For example, if you selected the Unit as ‘immediately’ and Trigger as ‘After each registration’ then this indicates that the Odoo will send a mail or SMS to the customer immediately after each registration. Through this method, you can also send alert notifications to the participants.
Add Notes
If you want to include any important information, clarification, or instructions to the participants of the event, you can add notes under this tab.

This may include anything regarding the event and the organizer can give clear instructions and announcements using this facility. After completing all these procedures click the 'Save' button.
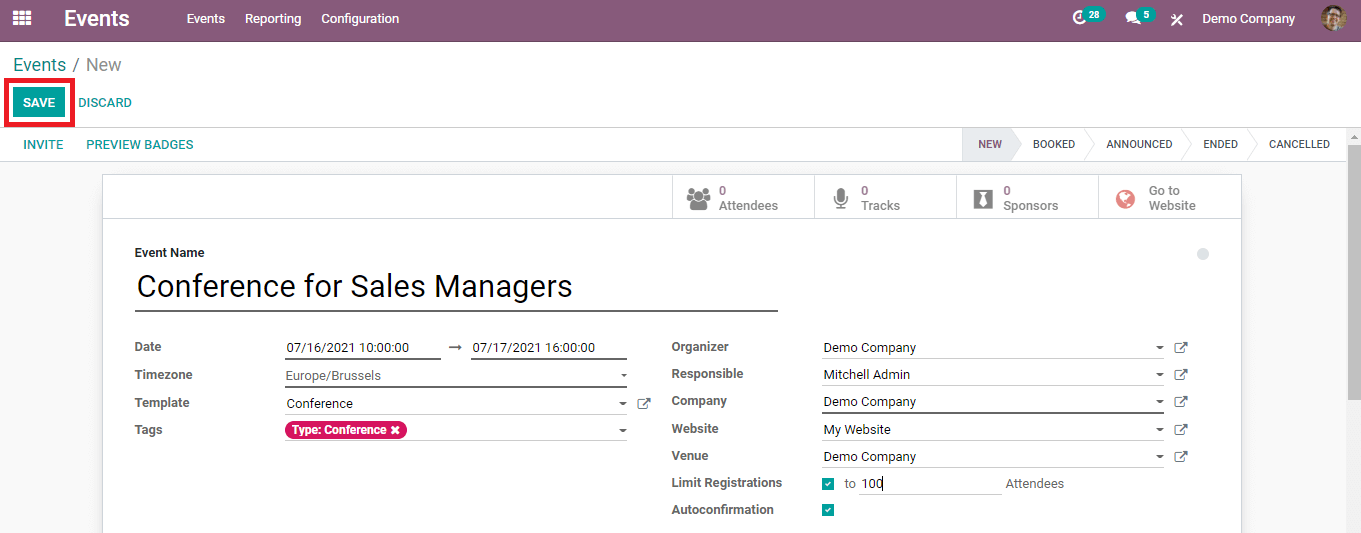
If any editing is needed in any field or you want to add something into the event form, use the 'Edit' option.
This is how Odoo helps a user to create new events using the Events module. As we said earlier, this module is a simple but effective option to create and organize events in your company. You don't need to worry about the series of activities on conducting an event successfully if you are using the Odoo ERP system.