Project Module of Odoo is suitable to manage all project related tasks of a company. This open source tool will make your project management easier and agile.
This tool can be of great help if you want to organize the project and tasks and get an efficient overview of the activities taking place. It will also support the business to schedule different activities and tasks and set deadlines for the activities. AS it can work in association with the calendar module we can also track the activities easily. This module will be a boost to plan your projects efficiently and plan the tasks and analyze the progress of the tasks.
This blog can be a source for learning how to create and manage projects using a software application.
Create Projects
First thing we have to do to manage a project is to install the Project module from the Odoo App store. Then we have our project menu which also works as the opening page of the application.
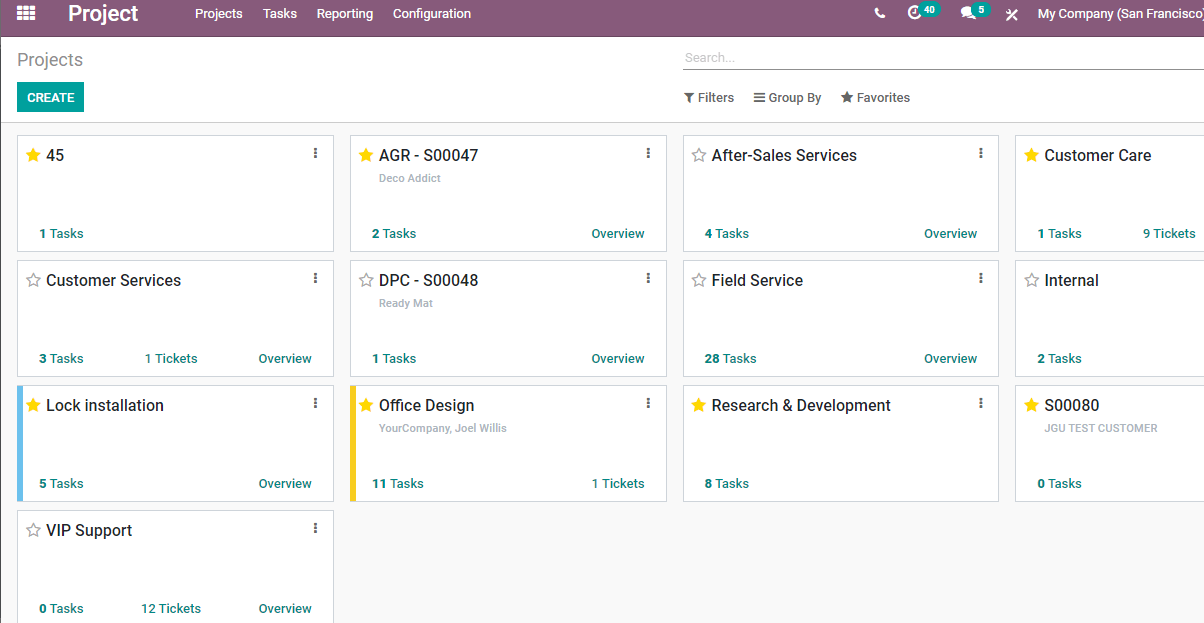
This page helps us in a great way to manage our project. Before starting about managing projects let us create a project.
We can create projects using the Configuration menu or the Projects menu.
First we can check the Configuration option.
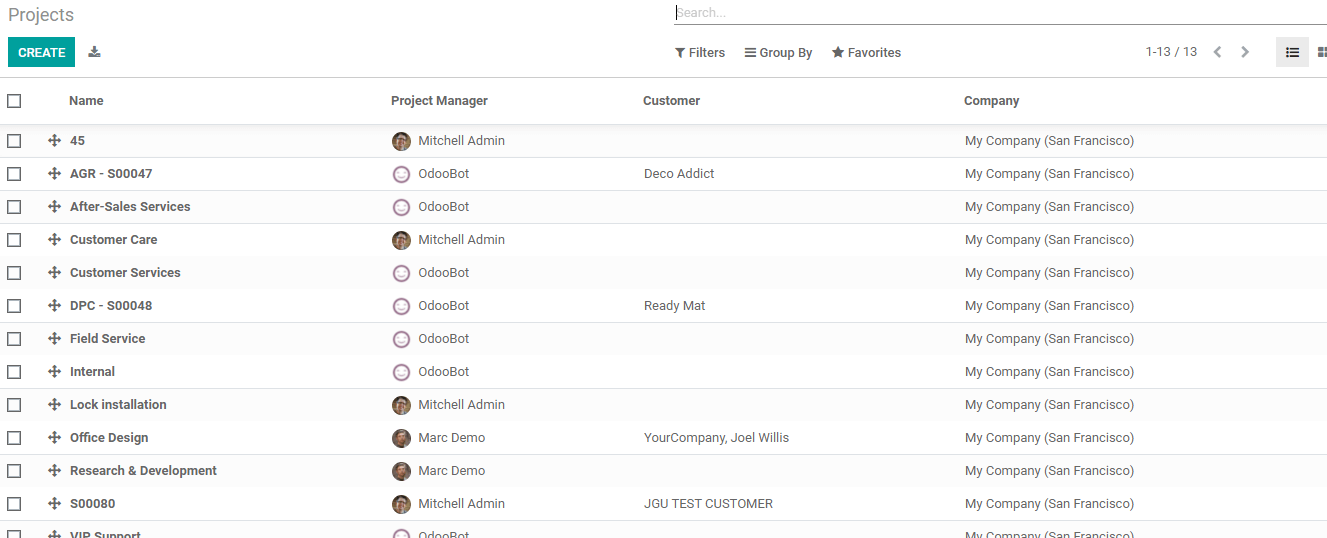
Here we have a set of already configured projects and have an option to Create a new project. Choose the create button to complete the project creation.
On clicking the Create button we get this page where we can give details like project name and description.
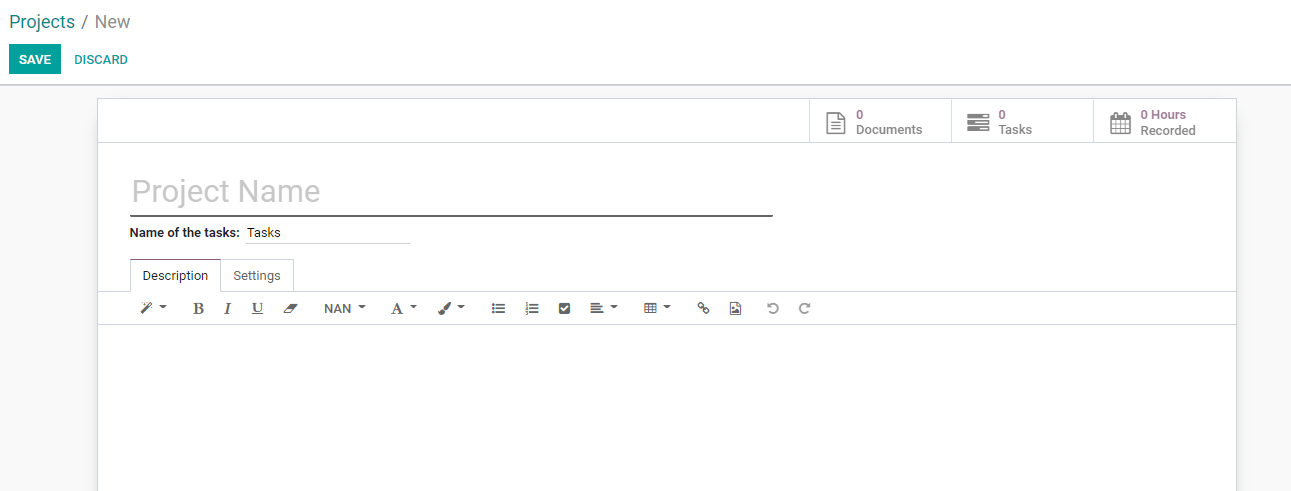
Our second option is to create a new project straight from the Projects menu.
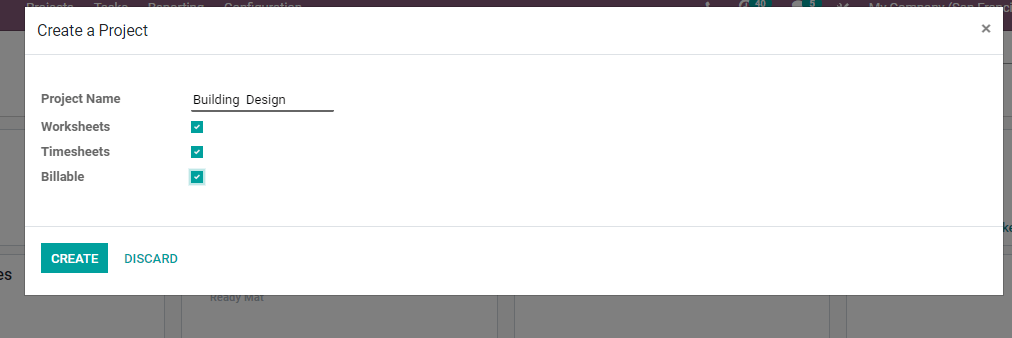
Here we can add the project name and enable other options like Worksheets, Timesheet, Billable etc.
After making necessary changes we can use the Create button.

We get this page when we create the project. In this page we can set different stages for the project.
We already have some columns here. We have created stages
New: We will have our new project in this stage
Assigned: We can move the project to this stage if it has been assigned to someone
In Progress: The stage when we start the project
Done: This stage is reached when we complete the project
This way we have created the project and this project appears in the opening page. It can be viewed on the extreme right.

We can find the new project Building Design along with other projects.
Now let us take this project out and manage the project.
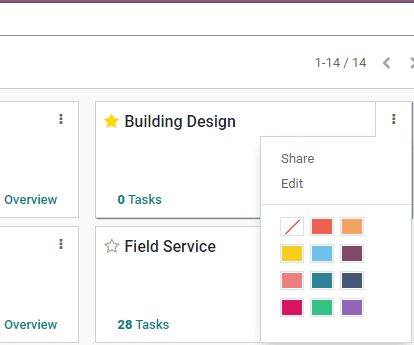
On the side of the project title we have three dots. These dots help us to edit or share the project.
First we can find how to edit the project.
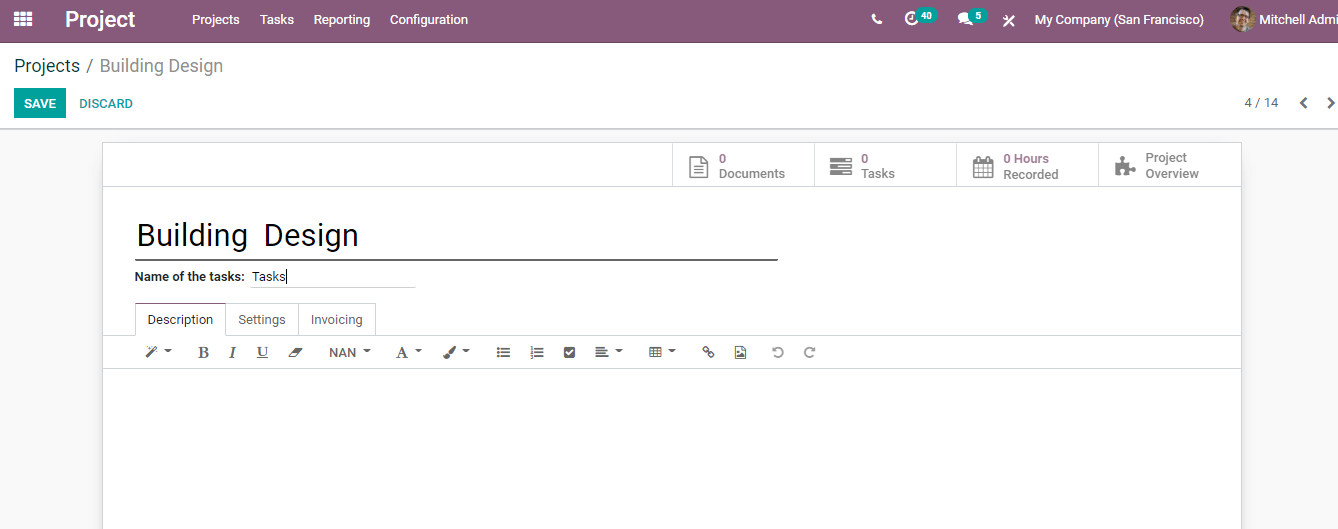
When we click the Edit option we get this page. This is the same page that we get when we configure a project using the Configuration menu.
We can edit the name of the project here. If needed, we can rename the task as well.
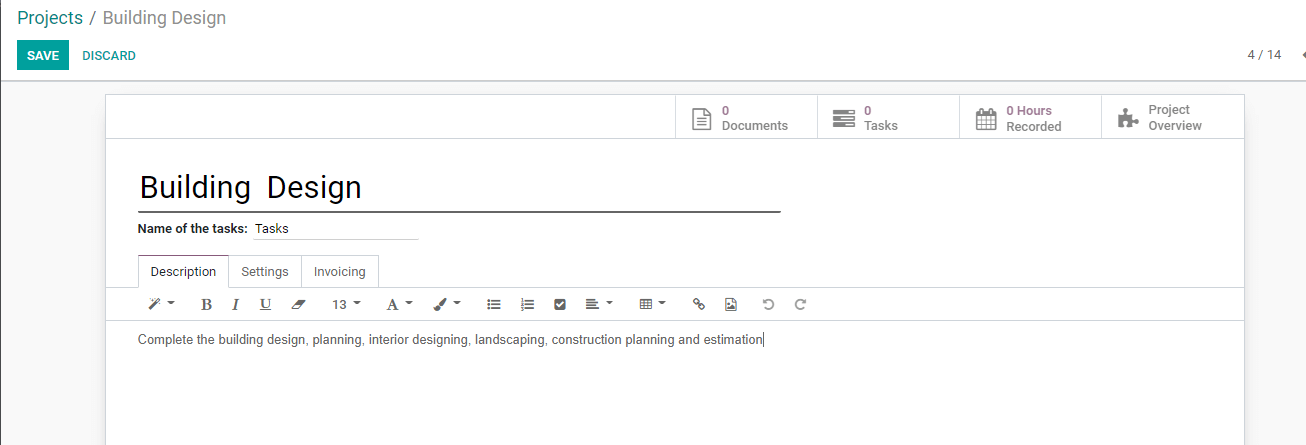
Then we have an option to add a description about the project.
Let us add a description “Complete the building design, planning, interior designing, landscaping, construction planning and estimation".
Settings Tab
We have the settings tab and this could help us to set the project manager, customer and other details.
We have many fields here:
Project Manager: The person in charge of the project can be chosen from the list
Customer: The details of the customer can also be added
Analytic Account: As we will have separate analytic account for the projects we can add the detail here
Visibility: This decides who can view the project details. Here we have three options
- Invited Internal Users
- All Internal Users
- Invited Portal users and All Internal Users.
Here we have enabled the third option.
Allowed Portal Users: In this field we can select the portal users who are allowed visibility

On the same page we have further details.
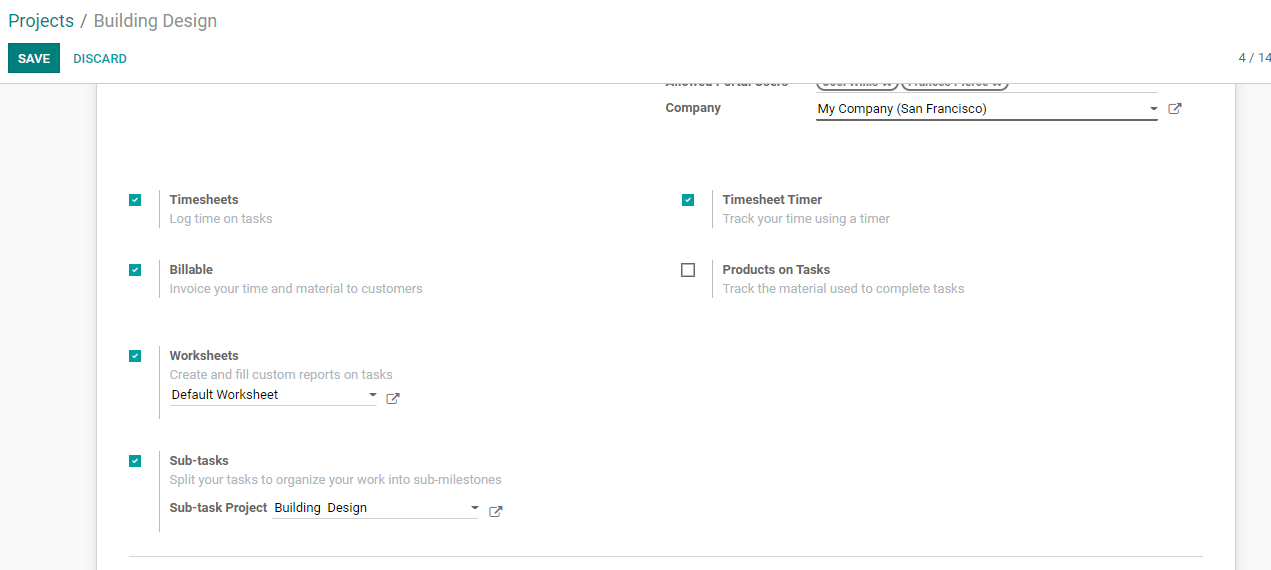
We can enable many options here based on our requirements.
Timesheets: We can enable timesheets so that we can have a log time on tasks. This feature will enable us to track the progress of the tasks with ease.
Billable: Once we enable the Billable option we can invoice the time we spent on the project or tasks along with the billing of the materials. This will help us to prepare a professional invoice for the customers.
Worksheet: We can choose the configured worksheets and this will help us to create new custom reports and fill in the details of the reports based on the task.
Subtasks: If we enable this option we will be able to split our tasks. This will also help us to systematise our work by dividing it into smaller tasks.
Timesheet Timer: This is a field which will help us to track our time. A timer will help us to do this.
Products on Tasks: We will be using different materials to complete each task and we can add the list of the materials after enabling this option.
Tasks
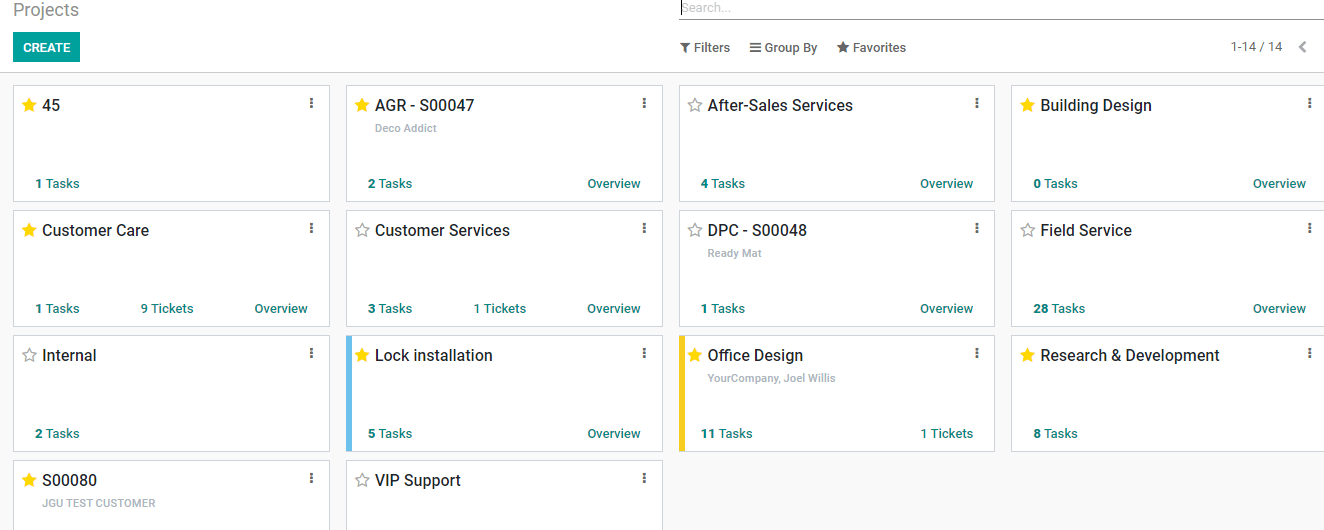
In this page we can find tasks and overview options to each and every project. Let us check what they are.
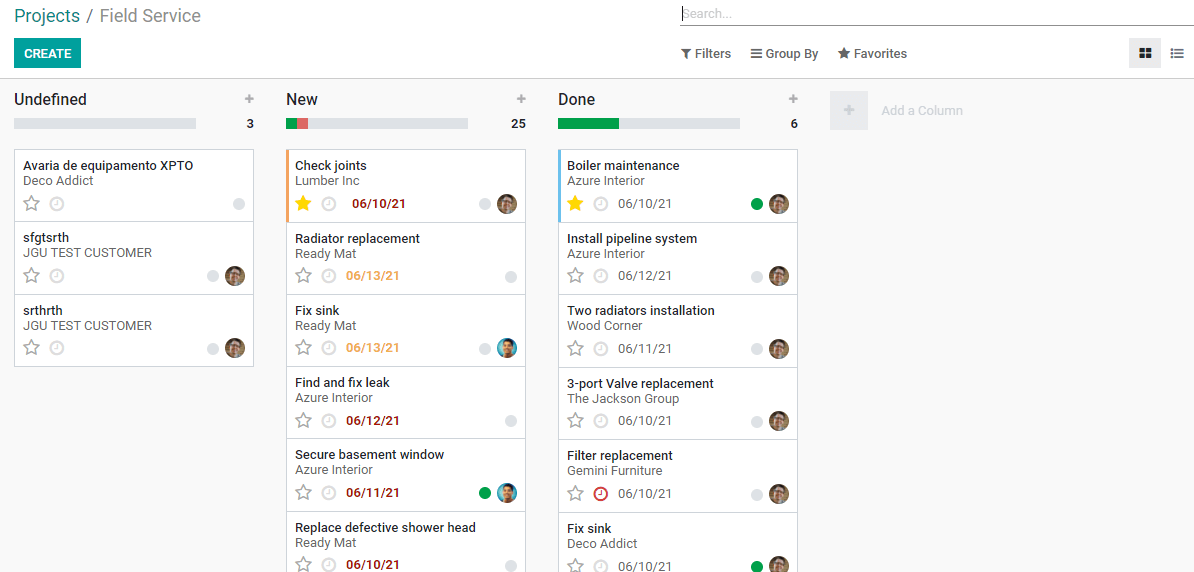
We have taken another project for checking out the same
When we choose the Tasks option we are taken to the above given page.
Here we can create new tasks and manage the tasks.
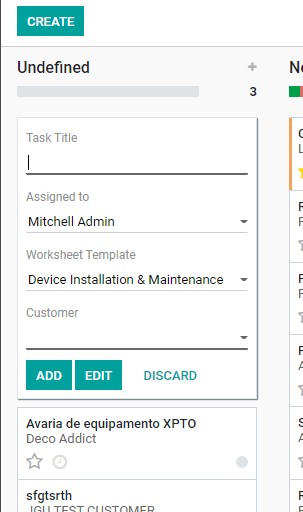
This process can be completed by using the Create button. We get a box where we have an option to add the task title and the person assigned the task. We can also select the worksheet template and the customer details and Add the task.
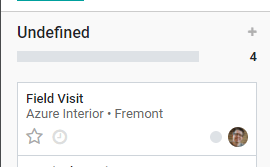
We have created a task Field Visit for the project Field Services
The tasks can be managed easily and the tasks move automatically to different stages based on their progress.
We can check in detail how to manage tasks in the following blogs.
Overview
The next option we have is to have a glance at the overview
Clicking this we get a page giving us an overview of the project.
Here we can find Recorded Hours and Profitability, Time by people, Timesheets and planning etc.
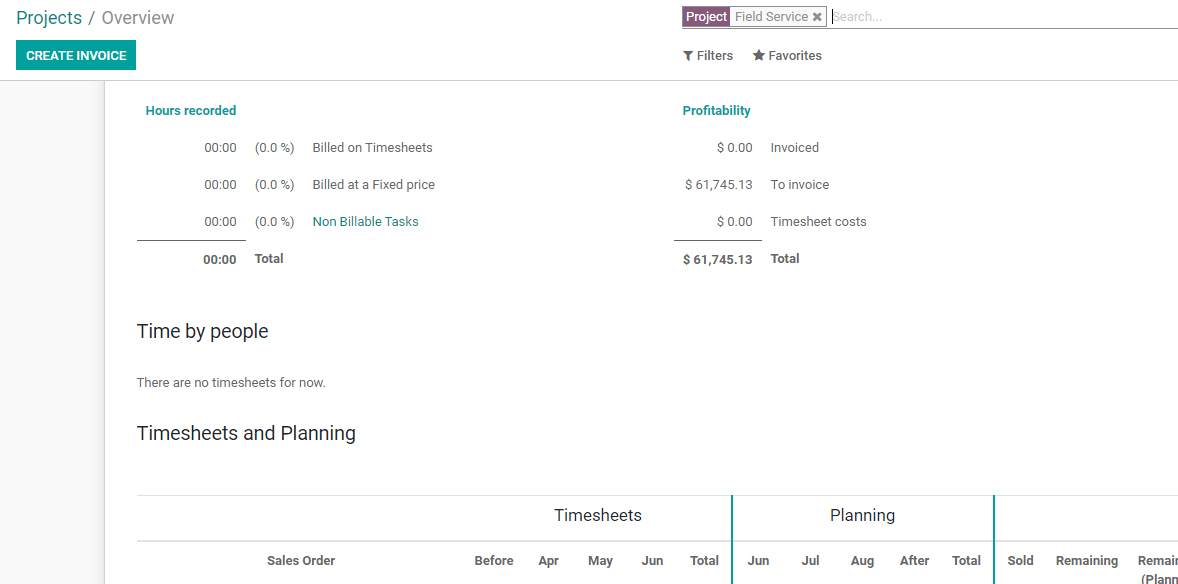
We can also create invoices from this Overview page.

This is how a project is created and managed using Odoo Projects Module.
Our website
www.cybrosys.com will be of help to you with many more blogs on different Odoo modules and ERP operations.