When we do a project we usually divide the project into different works based on the purpose. That means a project will be divided into different parts to complete the project in an easier way. These divisions are called the tasks.
Suppose a software development company Cybrosys is developing a new software application. Here, the development of a particular software application can be considered the project. Then there will be different team members to complete the project. To ease the work different team members who are experts in handling different types of software development activities will be entrusted with different tasks. For Example, there may be a back-end team, front-end team, etc. They do their work separately. But their common goal is to complete the project in a successful way. After each one completes the task the tasks are compiled for the completion of the project.
In short, we can say that project teams divide their project into different tasks for the ease of managing the work. This is why the Odoo Project module enables us to create tasks under different projects. Odoo Projects also enables us to create sub-tasks if required. Creating and managing tasks become simple and systematic with the Odoo Projects module. We can create tasks easily. It will also help us to manage the tasks at different stages of the projects. We can also edit the tasks and the tasks can be reviewed and assessed on a regular basis to view the progress.
In this blog, we can have a look at How the Odoo 14 Project enables us to manage and create tasks?
Settings
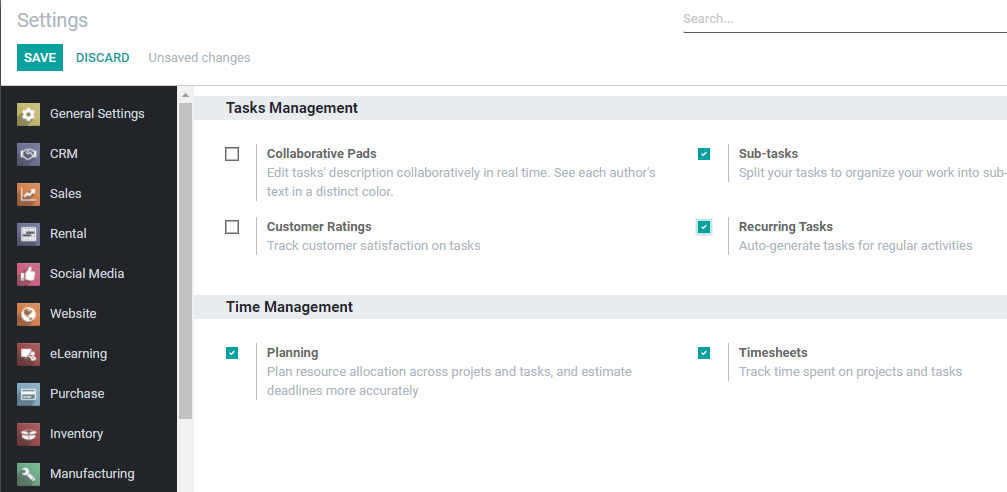
Before we go ahead with task creation we have to go to the Settings in Projects module and enable required options in Task Management. Here we can enable collaborative pads, subtasks, customer ratings, and recurring tasks based on your need. After this, we can save the changes.
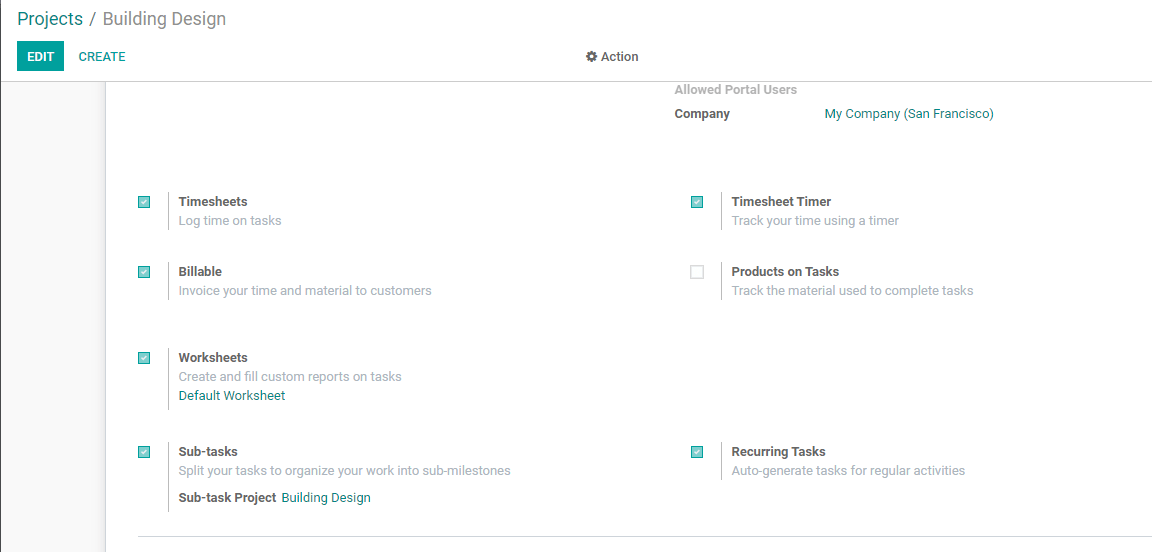
If we want to enable sub-tasks only for a particular project, we have to go to projects> Settings and enable sub-tasks.
Create Tasks
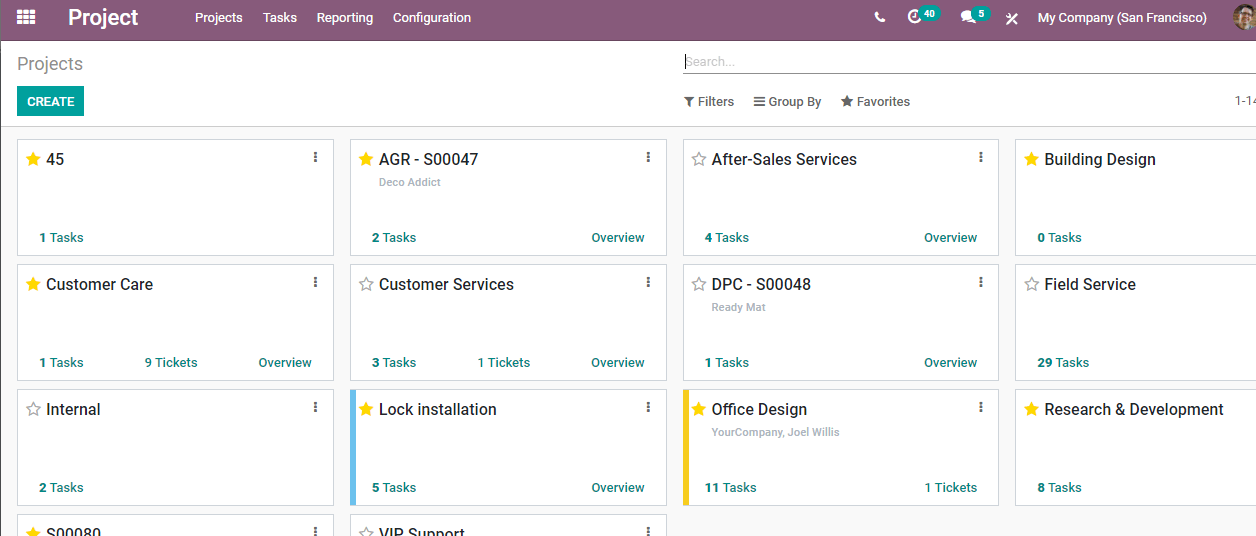
In the Odoo Projects module we can find different menus. Projects, Tasks, Reporting, and Configuration are the menus that we can access in this module. The project menu helps us to create and manage projects, whereas the Tasks menu helps us to manage tasks.
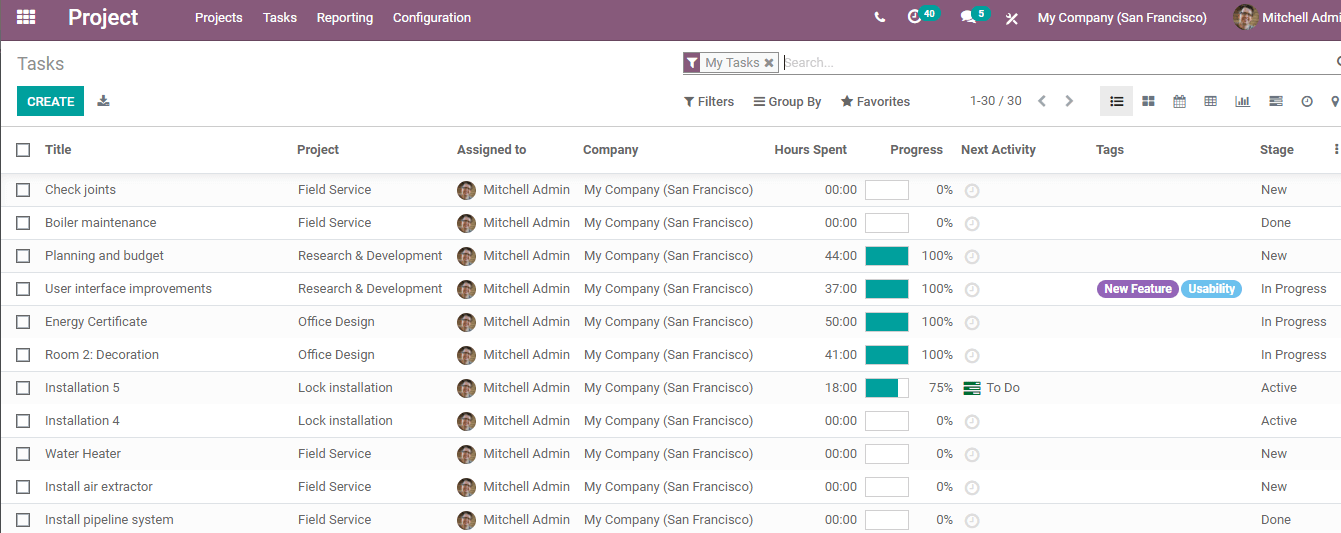
This is the Tasks menu and in this page, we can find the different tasks created by the company. We can find the details like Task Name, Project name, Assigned to details, Company name, hours spent, etc here. All these details can be accessed here, as we have already entered these details while creating the tasks.
So, we can check how to create Tasks.
Use the Create Button for this purpose.
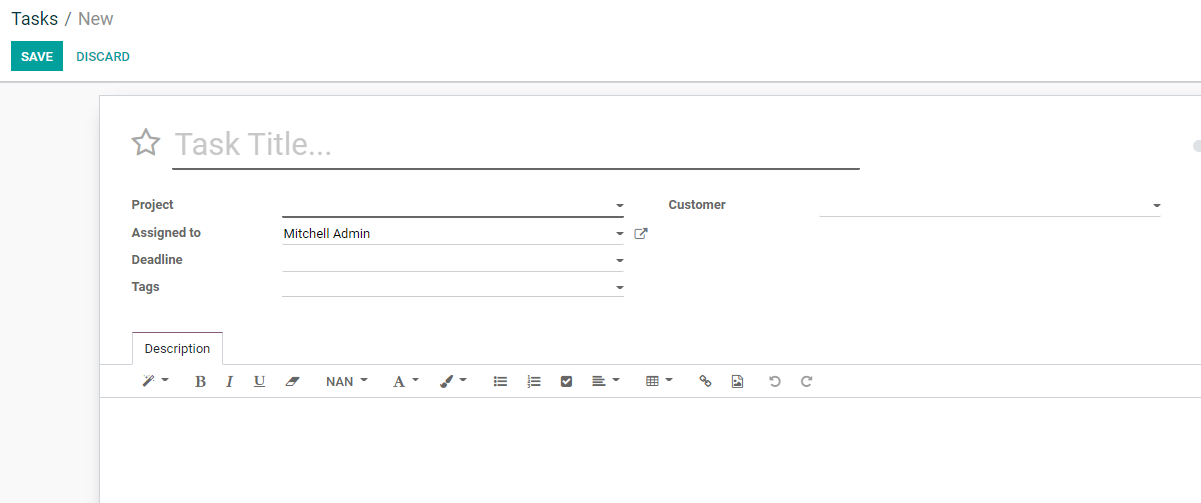
This is our task creation form.
Task Title: Here we have to enter the task title or the name that we would like to give the task.
Project: Then we have to enter the Project name. This is to identify the project to which the task belongs. We can also create tasks from each project. This we can check later.
Assigned to: This will help the project team to assign the task to a particular employee or a group of employees.
Deadline: The date on which the task has to be completed
Tags: We can select the tags from the list to specify the task
Customer: The details of the customer or client have to be provided here.
Description: This will help the team members or assigned persons to know more about the task.
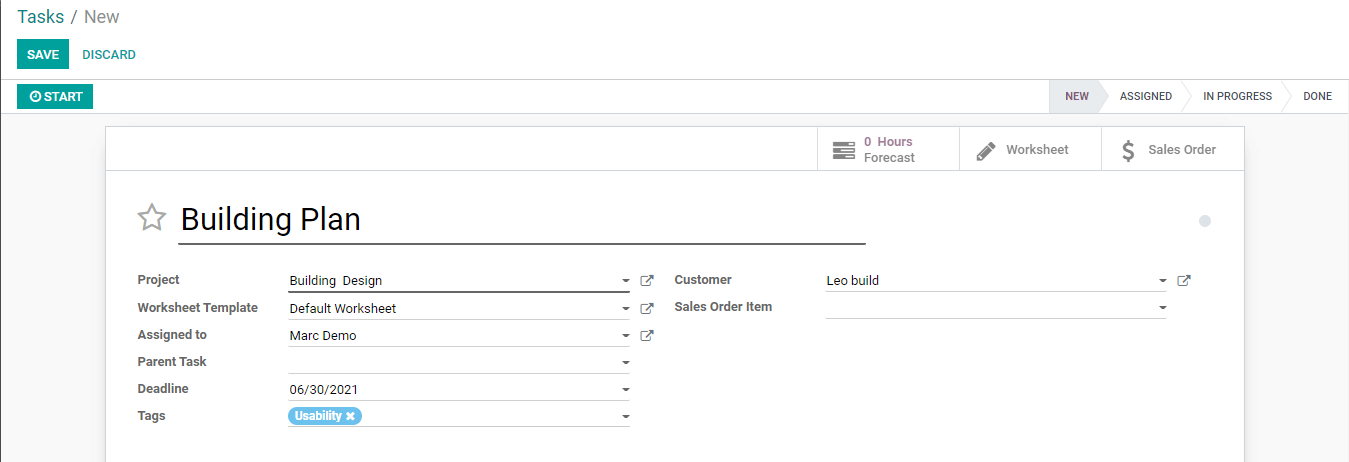
Parent task: If we are creating this task under any other task we can also add a parent task. If we choose a parent task, the newly created task will automatically become a sub-task.
Sales Order Item: We can add the Sales order details for the customer here.
Timesheet Tab
This tab helps us to add the timesheet representing the work hours of the employees.

Here we can set Initially Planned Hours. This is the expected time required for the completion of the task. Then we can create employee timesheets and update them. Once the employee time is updated the Progress will be shown. The progress will be shown as the percentage of work completed.
It is also possible to check the status of the task.
We can find New, Assigned, In Progress, and Done stages.
Then we can find a few icons also

Sub-Tasks

Clicking on the Sub-Tasks icon we can create new sub-tasks and also use the same icon to view the sub-tasks.
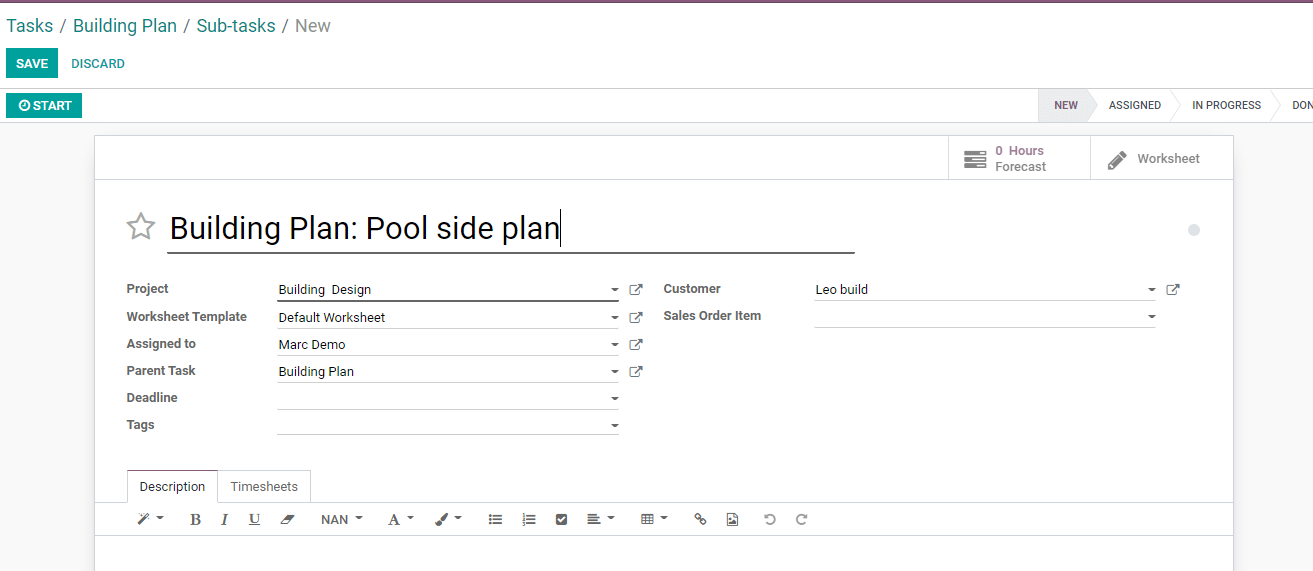
Here we can add the sub-task and I have added the sub-task as a Poolside plan. As we have created one sub-task we can find it reflected here.

If we want the sub-task to be the main task we just have to go to the edit option and remove the parent task.
We can also find the Forecast icon, worksheet, and sales order icons here. These folders will help us to access all related documents.
Let us return to Tasks

Here, we can find the newly created tasks, the project name, assigned to, company name, hours spent, progress, Next activity, tags, stage, etc.
We can review the task from here itself. If we want to review the tasks for each project separately we can go to Projects.

Here we can find Building Design and let us click the three dots to access settings.
We can find options Share and Edit here.
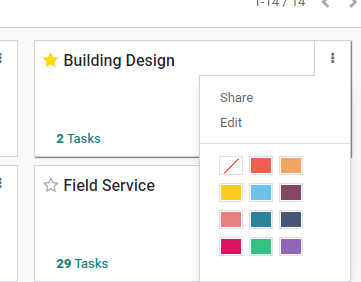
Edit
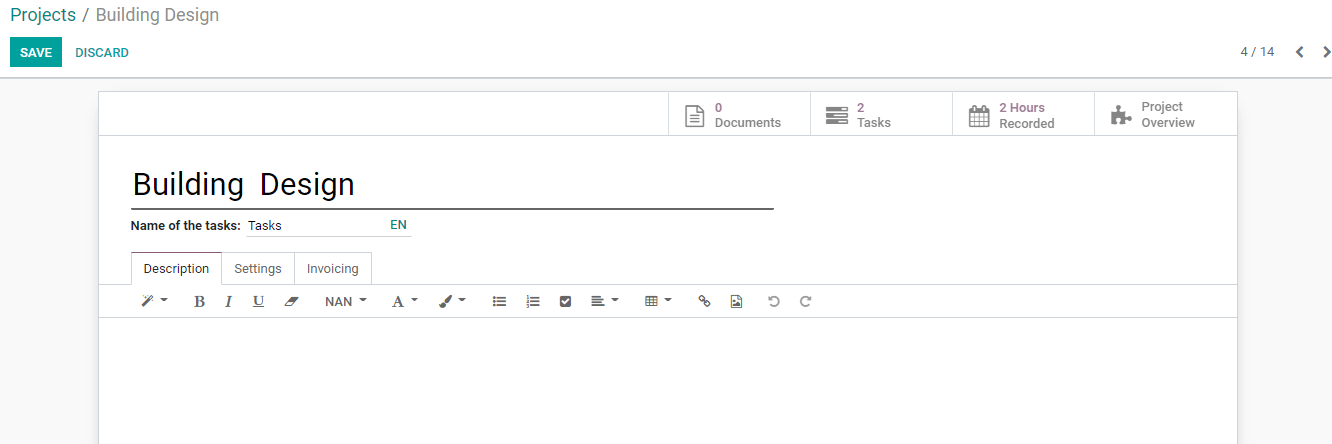
Clicking Edit we can find the number of tasks and the total hours recorded here.

We can also edit the settings and view the invoice and make changes.
The task folder will help us to view the tasks and edit the tasks.
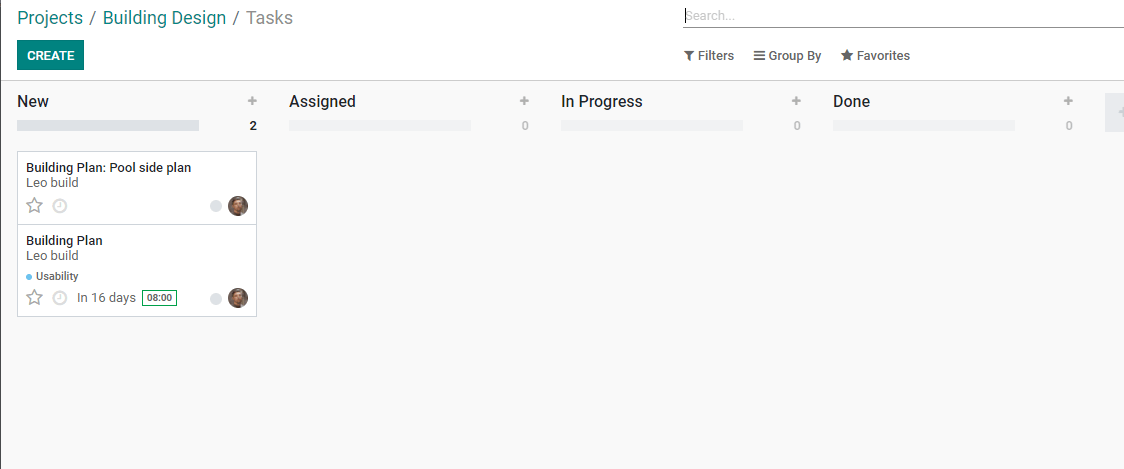
The two tasks are here. We can move it to the next stage by dragging it after the present stage is over.
We can create new tasks also from here using the create button.
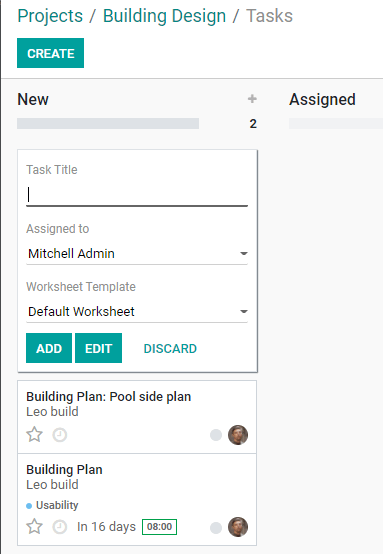
We just have to add the task title. It is also possible to name the employee who is assigned to do the task. We can also select the worksheet template. After finishing this we can add the task to the list.

Here, I have created a new task Building Estimate.
I have also shifted the other two tasks to other stages.
This is how we manage tasks and sub-tasks using Odoo 14 Project Module.
For further information use our website www.cybrosys.com