A purchasing Agreement is a contract that specifies the terms and conditions of a transaction between a seller and a buyer. It is a feature of the Odoo 17 purchasing module. When customers wish to buy items from a vendor, they submit a request for a quotation, and the merchant responds with a quote. Odoo 17 introduces a Purchase Agreement function to the Purchase module in order to meet these requirements. Purchase agreements must be produced to outline all transaction terms and conditions. This feature ensures that customers will receive accurate and comprehensive information on their purchasing decisions.
This tutorial will guide you through the process of creating Purchase Agreements, Blanket Orders, and Calls for Tender in the most recent Odoo 17 Purchase Module version.
Configuring Purchase Agreements in Odoo 17
We can configure the Purchase Agreements for creating Blanket Orders using the “Configuration” menu.
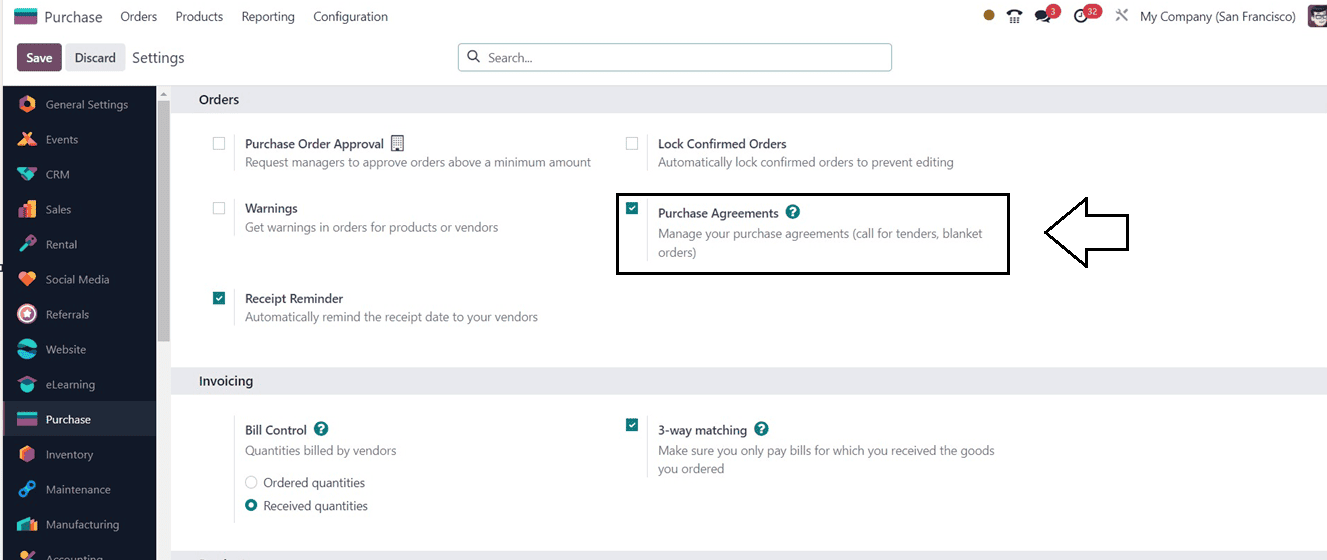
Inside the “Settings” window of the “Configuration” menu, you can enable the “Purchase Agreements” option available under the “Orders” section. After saving the settings alteration, we can go into the process of creating a new Blanket Order.
Create a new Blanket Order Purchase Agreement.
Long-term purchasing contracts, known as Blanket Orders, enable regular product deliveries at predefined prices between an organization and a vendor. They help save time and money by streamlining the ordering process and negotiating bulk pricing for items that are bought from the same vendor in various amounts at different periods.
Go to the "Blanket Order" option under the "Orders" menu in order to make a new blanket order.

From the “Blanket Orders’ window, you will get the dashboard of all the previously created Blanket Orders inside the Purchase Module database. The order reference, vendor, purchase representative, company, ordering date, agreement deadline, source document, and status will all be briefly summarised on the dashboard.
If there are a lot of records that are out there, the dashboard data may be sorted and filtered using the advanced search bar. The new action menu can be used to Import Records, Export Records, and Add data to Dashboards and Spreadsheets. Additionally, we can create informative Articles, Notes, etc, using the Knowledge Module properties.
A new Blanket Order configuration form will be opened immediately after pressing the “New” button. Now, Let’s start creating a new blanket order.
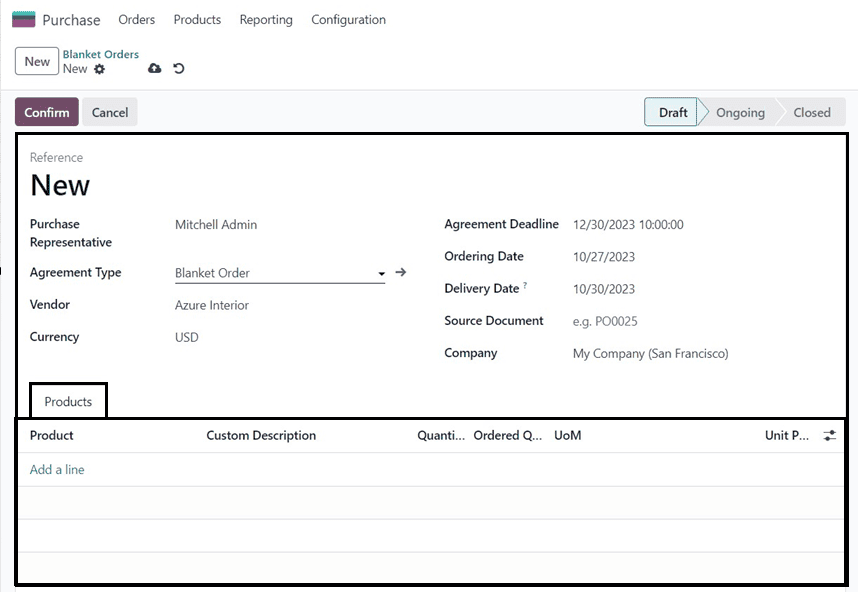
The user designated to a particular blanket order, the “Purchase Representative,” can be modified using the drop-down option adjacent to this field. The “Vendor” is the provider to whom the agreement is attached. and the “Agreement Type” is the category of purchase agreement this blanket order falls under. If more than one currency has been active in the database, the agreed-upon “Currency” for the exchange may be modified.
The purchase agreement's expiration date is known as the "Agreement Deadline," and the date on which a fresh quote formed straight from the form should be placed is known as the "Order Deadline." The “Delivery Date” is the anticipated date of delivery for goods included in a request for quotes that are generated straight from the form. The purchase order (PO) that serves as the basis for this blanket order is known as the “Source Document,” and the firm that is allocated to this particular blanket order is known as the “Company.”
So, fill in the required basic details inside the form view and save your data using the “Save” icon.
Products tab
The “Products” tab can be utilized to add the required products for our new blanket Order. Just click on the “Add a line” link to add products and choose the required ones from the dropdown list.
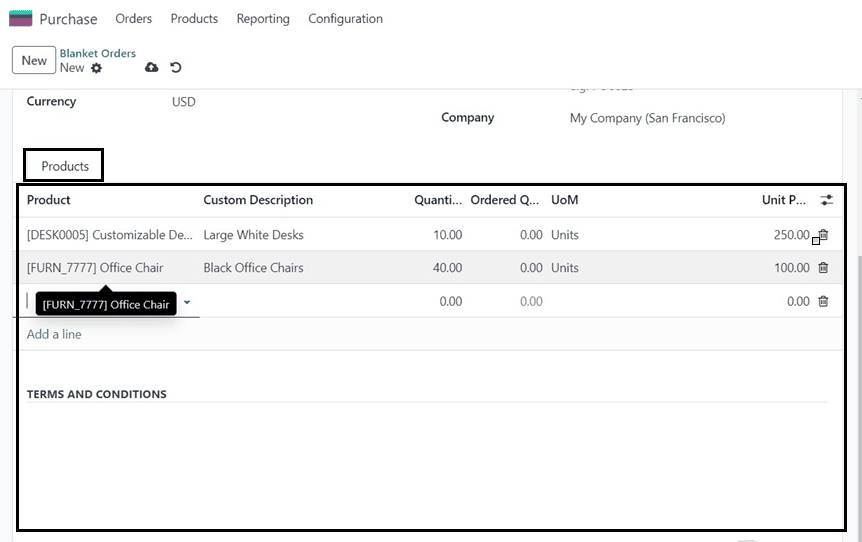
You can also provide any “Custom Description” for the chosen products. The ”Quantities” and “Ordered Quantities” can be mentioned. You can change the Unit of Measures to a different unit by using the "UoM" parameter tab. If you would like to allocate pre-existing product pricing to a new blanket order manually, you must change the “Unit Price” column value to the price that you have agreed upon with the listed vendor; if not, the price will be zero.
Inside the “TERMS AND CONDITIONS” area, you can lay out any terms and conditions for the Purchase Agreement or the Blanket Order.
Configuring Agreement Types
Click the arrow symbol in the blanket order form next to the “Agreement Type” field to change the blanket order's default purchase agreement settings.
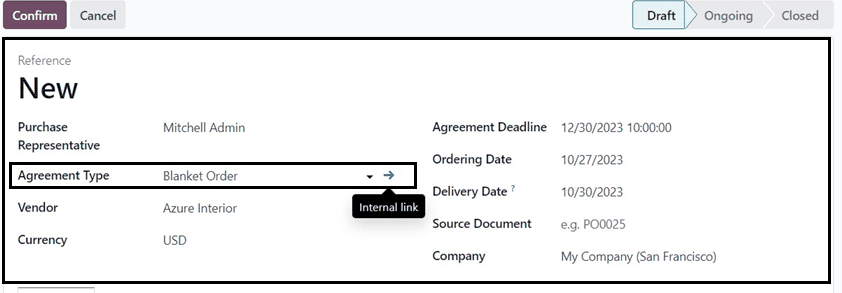
This will direct you to the blanket order settings, where you may modify the “AGREEMENT TYPE” and “DATA FOR NEW QUOTATIONS.”

Inside the “Agreement Type” field, you can edit the required agreement type. To choose the kind of selection, there are two possibilities inside the “Agreement Selection Type.”
1. Select only one RFQ (exclusive): The remaining purchase orders will be canceled upon confirmation of a confirmed order.
2. Select multiple RFQ (non-exclusive): Multiple purchase orders can be made, and once confirmed, there is no need to cancel any other purchases.
Using purchase agreements, users may modify the parameters for product lines and quantities on new quotes in the “DATA FOR NEW QUOTATIONS” area. There are two choices when it comes to “Lines”: either use “Lines of agreement,” which pre-populates product lines with the identical items that are listed on the blanket order, or “Do not create RfQ lines automatically.”
The “Quantities” can be set in two different methods.
1. Use quantities of agreement: If the blanket order is selected in a new quotation, the product quantities listed on the blanket order will pre-populate on the product lines.
2. Set quantities manually: Product lines automatically appear when you create a new quotation and choose an existing blanket order, but the amounts are set to 0. Thus, you must enter them manually.
Return to the “Blanket Orders” window after specifying the “Agreement Types.” After editing all the fields and saving all the order data inside the main form view, we can confirm the blanket order using the “Confirm” button.
When the confirmation icon is selected, a button to create a “New Quotation” will be displayed inside the form view, and an “RFQs/Orders” smart button that shows the related RFQs/Orders will be displayed at the top of the form view.
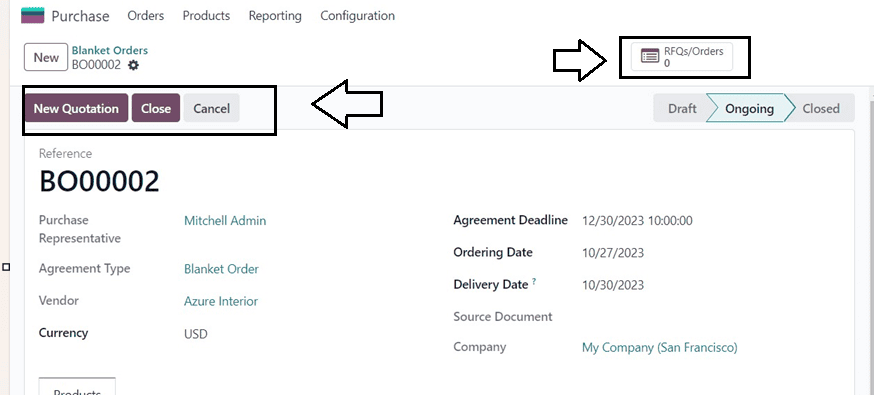
Creating a new RFQ Order
Click on the “RFQs/Orders” smart button to manage or create RFQ orders and Call for tenders. The RFQ dashboard is displayed, but currently, no such quotations are available.
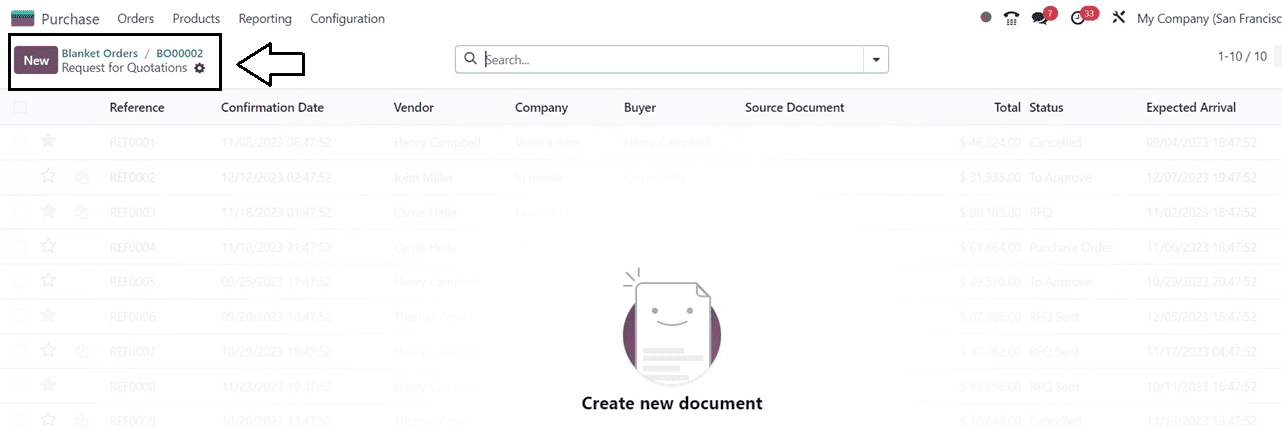
Now, Let’s create the Request for Quotation (RFQ) with the previously established Purchase Agreement using the “New” button.
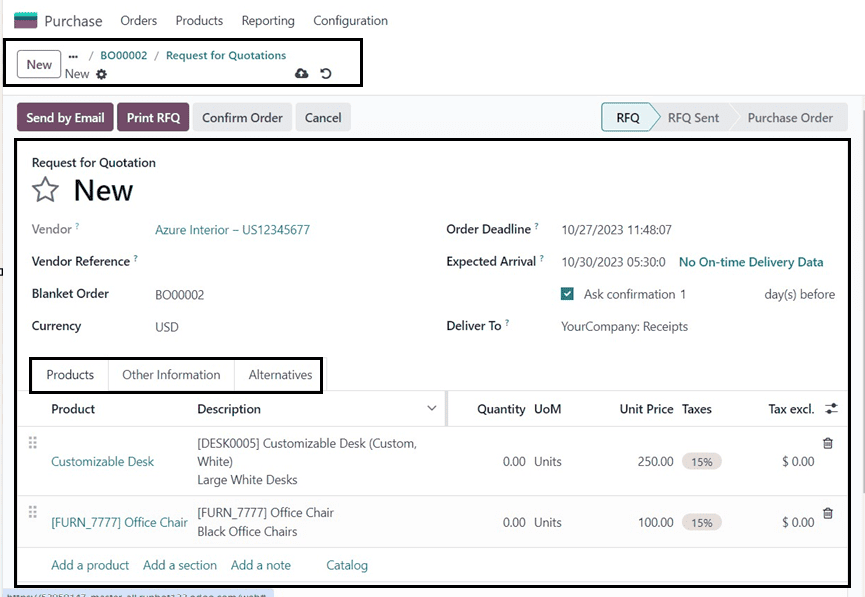
The displayed configuration contains many essential fields to create a new RFQ. These fields will be automatically filled according to the blanket order and purchase agreement that we configured earlier.
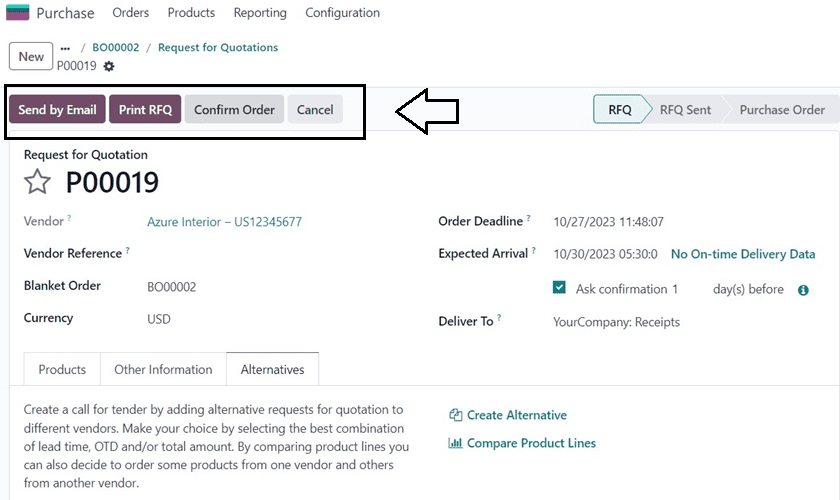
When the quotation is ready, click the “Confirm Order” to confirm the purchase order, and use the "Send by Email" option to email the specified vendor. The “Print RFQ” button can be used to download and print the quotation document.
Action Menu: Aside from these functions, the newly added action menu next to the form title section also facilitates the following actions: printing documents, copying orders, entering accumulated spending, sharing RFQ data, generating vendor invoices, and sending reminders.
The “Products” tab will show the selected products for the RFQ. Inside the “Other Information” Tab, you can set the Buyer details, Source Documents, product Incoterms, Fiscal Position, payment terms, etc. The “Alternatives” tab section enables the creation of separate RFQs for various vendors and also the creation of Calls for Tender.
Creating Alternatives and Calls for Tenders
Companies can request quotes from several suppliers at once using Odoo's alternative requests for quotations (RFQs), which enables them to choose the fastest and least expensive providers depending on their unique business requirements. Known by another name, a call for tender, this procedure is employed mainly by public sector institutions. However, small businesses can also utilize it to make cost-effective purchases.
After creating and mailing the RFQ Order to the vendor, we can choose which vendors to purchase things from by creating different RFQs and comparing pricing, delivery times, and other criteria. Now, we can create these alternatives for the call for tenders using the previously created RFQ order by choosing its “Alternatives” tab.
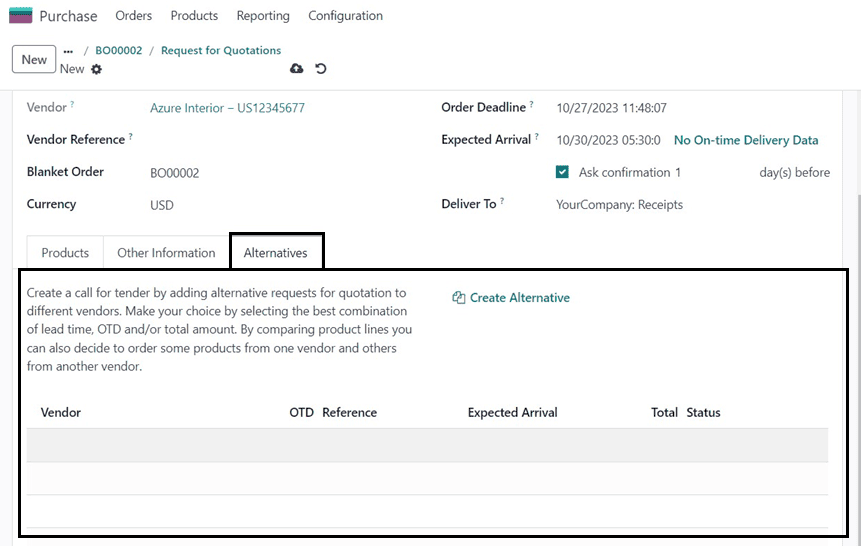
Click the "Create Alternative" button to generate a different quotation. This will display a pop-up wizard, as shown below.
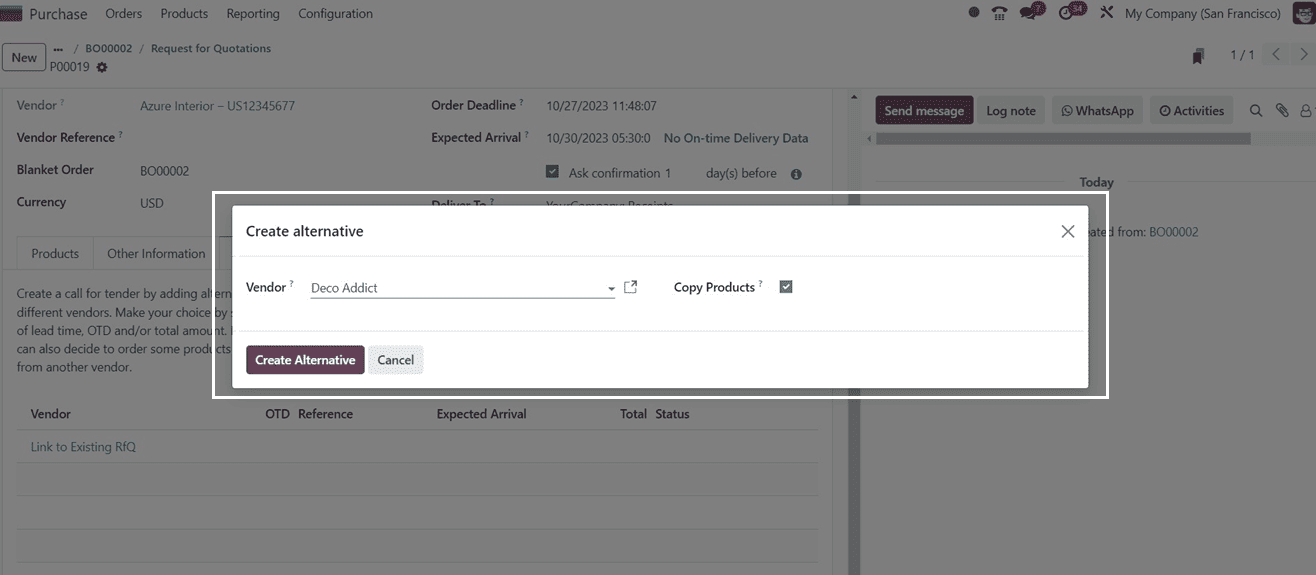
From the drop-down option next to the “Vendor” field, choose a different vendor, then check the "Copy Products" box. By doing this, the alternative will inherit the product quantities from the original purchase order or RFQ. To establish a new RFQ /Purchase Order, click the "Create Alternative" button.
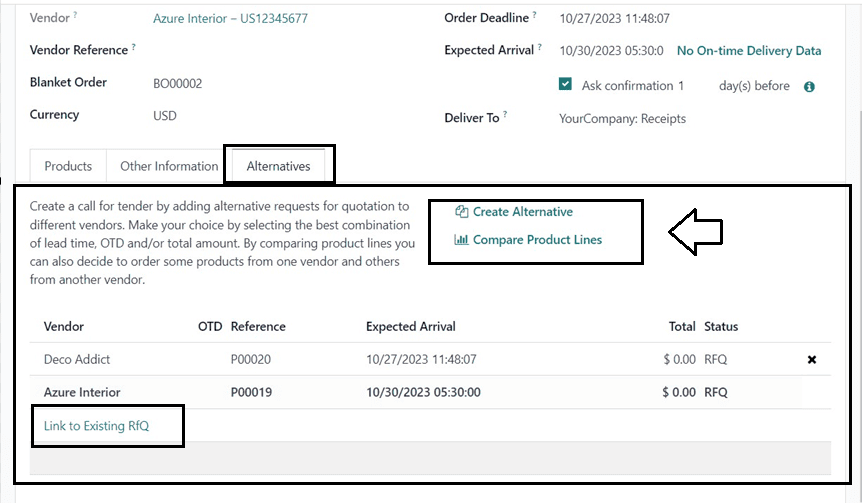
Linking the RFQ with Existing Quotations
The new purchase order was created separately, and no other orders are linked yet. To link this order with previously created alternatives, click on the “Link to Existing RfQ” link provided inside the “Vendor” column. This action will open another popup window that can be used to select the required purchase orders created previously.
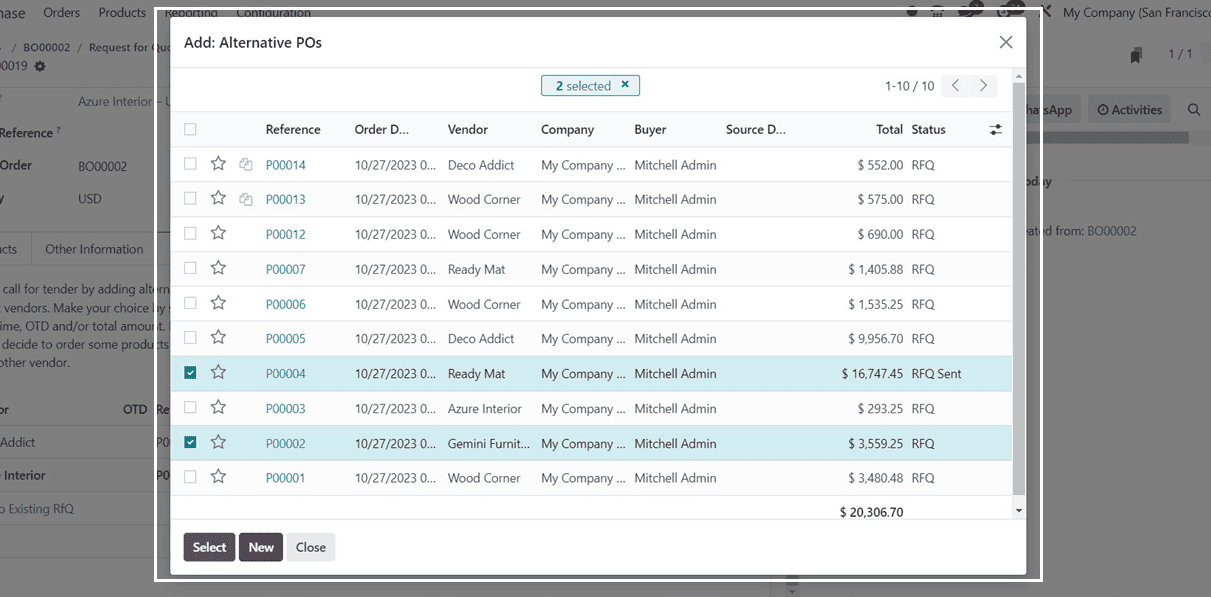
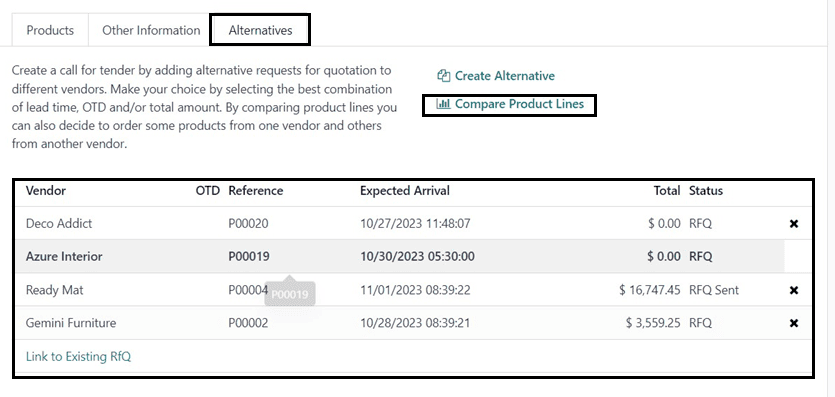
After choosing the alternative Purchase Order lines, click on the “Select” button. The selected POs will be added to the “Alternatives” tab of our newly created RFQ.
Compare Product Lines
To get the lowest prices on various items from various suppliers, click on the “Compare Product Lines” button. This will open a dashboard page where you may compare numerous RFQs side by side.
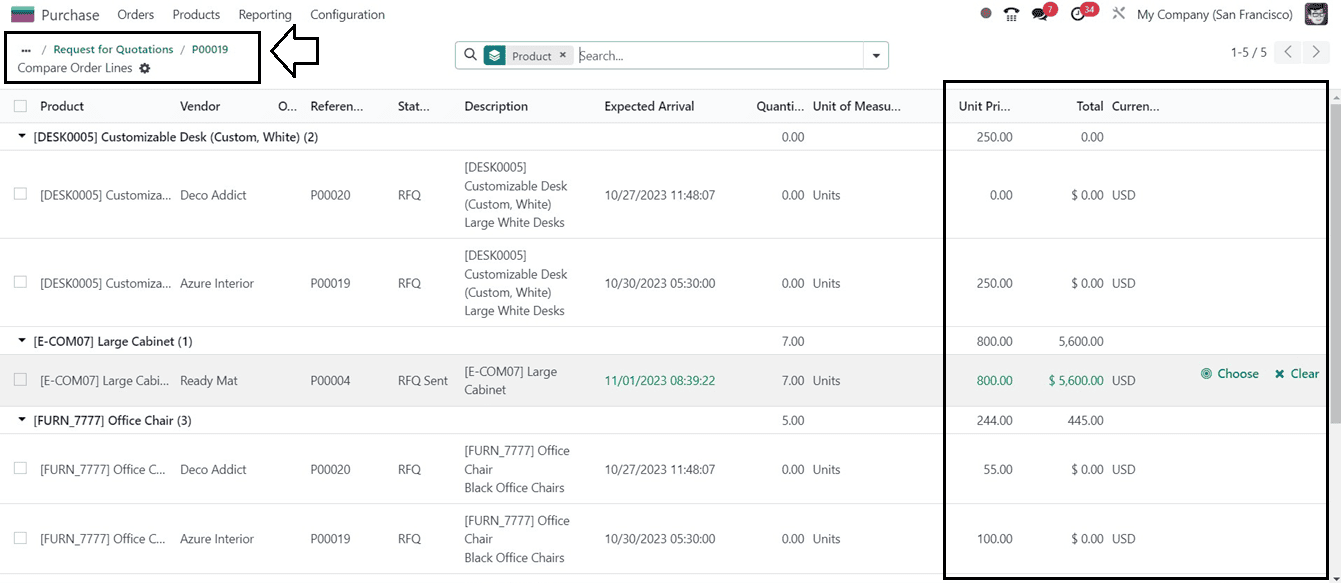
You can proceed with the purchase order or reselect the necessary alternatives after comparing items and being pleased with the chosen alternatives. We can now continue with the Pos. To validate the order, use the "Confirm Order" button situated at the top of the form view.
Clicking on the “Confirm Order” button will display an alternative warning window that gives you the option to accept or reject the alternatives, as depicted below.
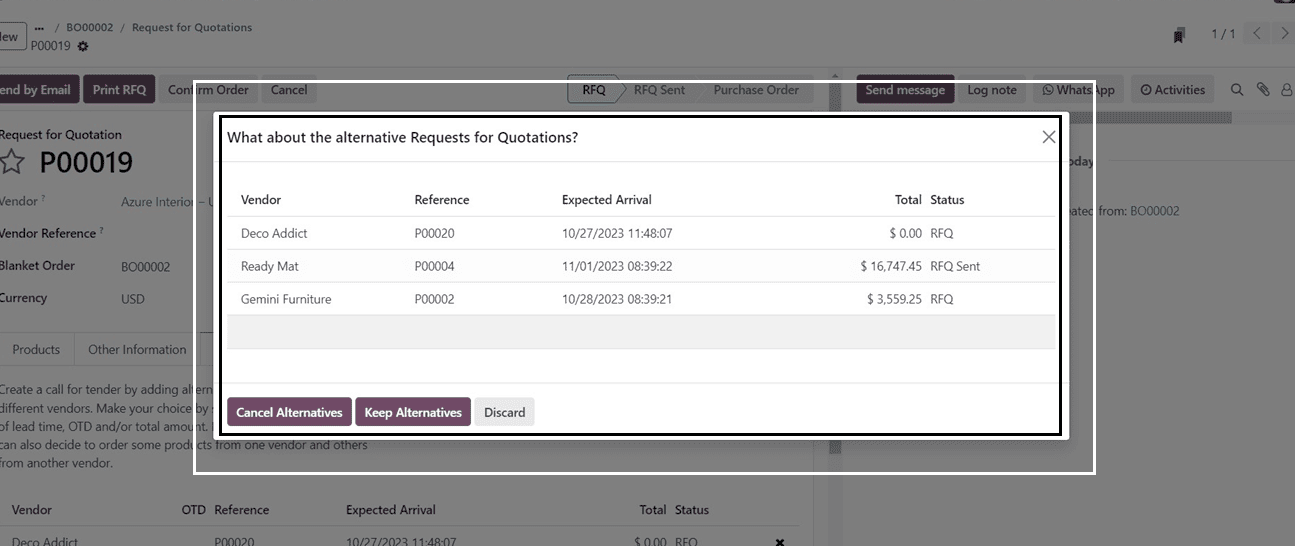
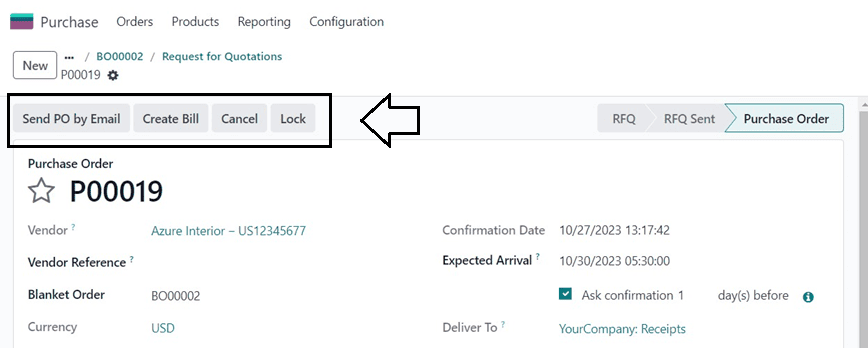
In this scenario, we will keep the alternatives, so click on the “Keep Alternatives” button. Now, we can proceed with billing the Purchase Order using the “Create Bill” button or send the mail regarding the order using the “Send PO by Email” button.
These are the functional workflow of creating new Blanket Orders and Calls for Tenders inside the 17th version of the Odoo Purchase Module.
To read more about purchase agreements in Odoo 16, refer to our blog What is a Purchase Agreement in Odoo 16