In the ever-evolving world of Customer Relationship Management (CRM), effectively managing leads is at the heart of a successful business. With the release of Odoo 17 CRM, organizations have a robust tool to streamline their lead management processes. One of the key features that make Odoo 17 CRM stand out is its powerful lead management system, driven by stages and pipelines. At the core of Odoo 17 CRM's lead management system are leads, stages, and pipelines. A lead represents a potential customer or business opportunity. Stages are the different phases a lead goes through, from initial contact to conversion, and pipelines are the overall workflows that encompass these stages.
Odoo 17 CRM offers a highly customizable environment for configuring stages and pipelines. Administrators can define specific stages and pipelines tailored to their organization's unique needs. This flexibility ensures that lead management aligns with the business's processes. Odoo 17 CRM makes it easier to nurture leads by providing tools for assigning tasks, scheduling follow-ups, and setting reminders. Automation can be employed to move leads through stages, ensuring that no opportunity is missed.
Managing Stages in CRM
Managing stages in Odoo CRM is a fundamental aspect of effective lead and opportunity management. Stages represent the different phases that a lead or opportunity goes through in the sales process. Here's how to manage stages in Odoo CRM:
1. Accessing Odoo CRM:
- Log in to your Odoo account and navigate to the CRM module.
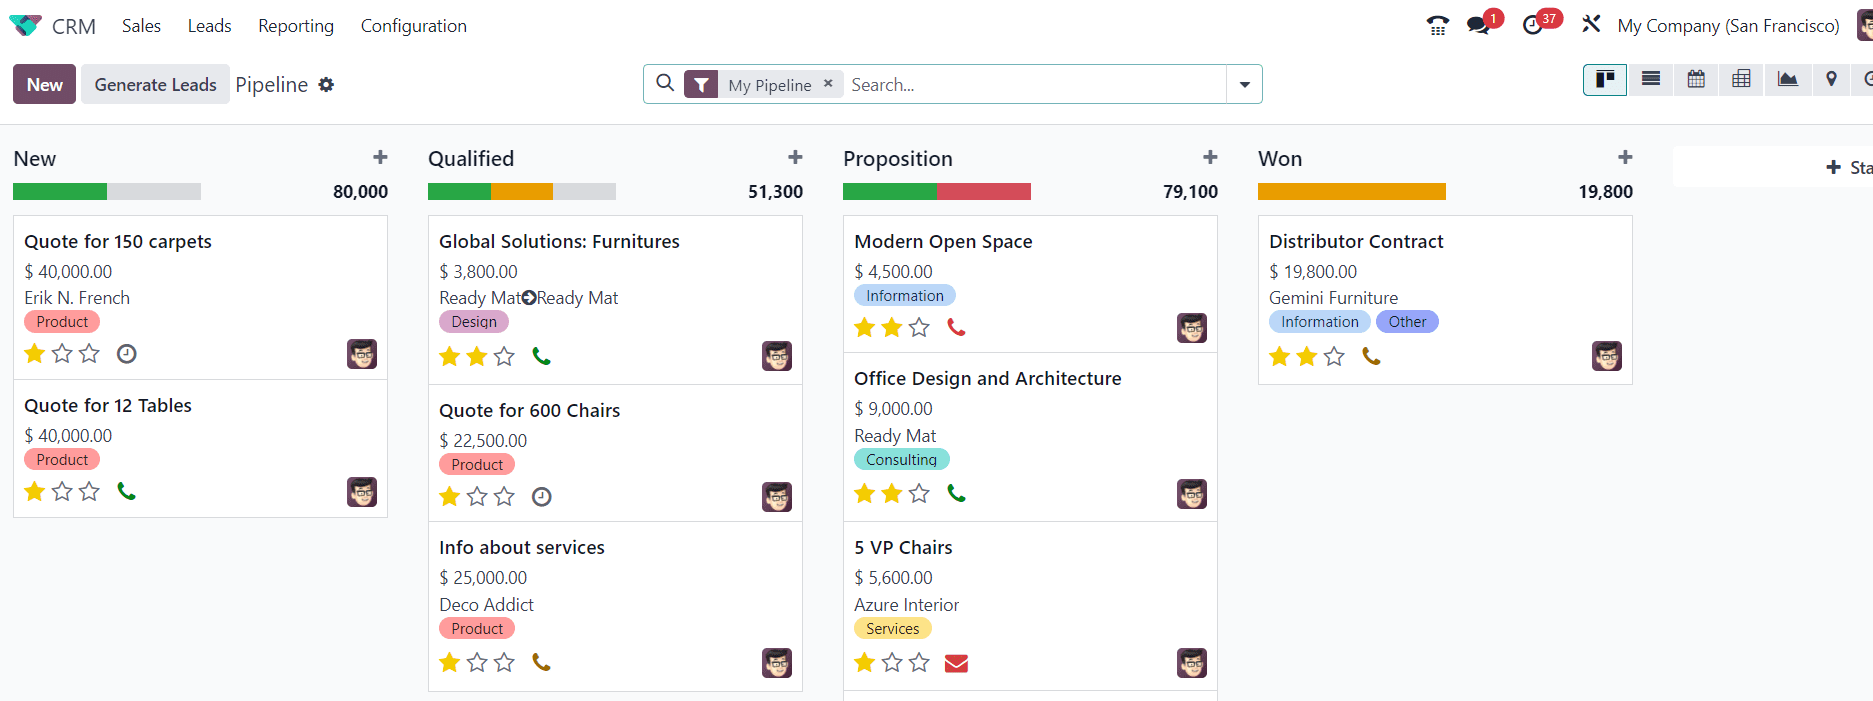
2. Adding and Customizing Stages:
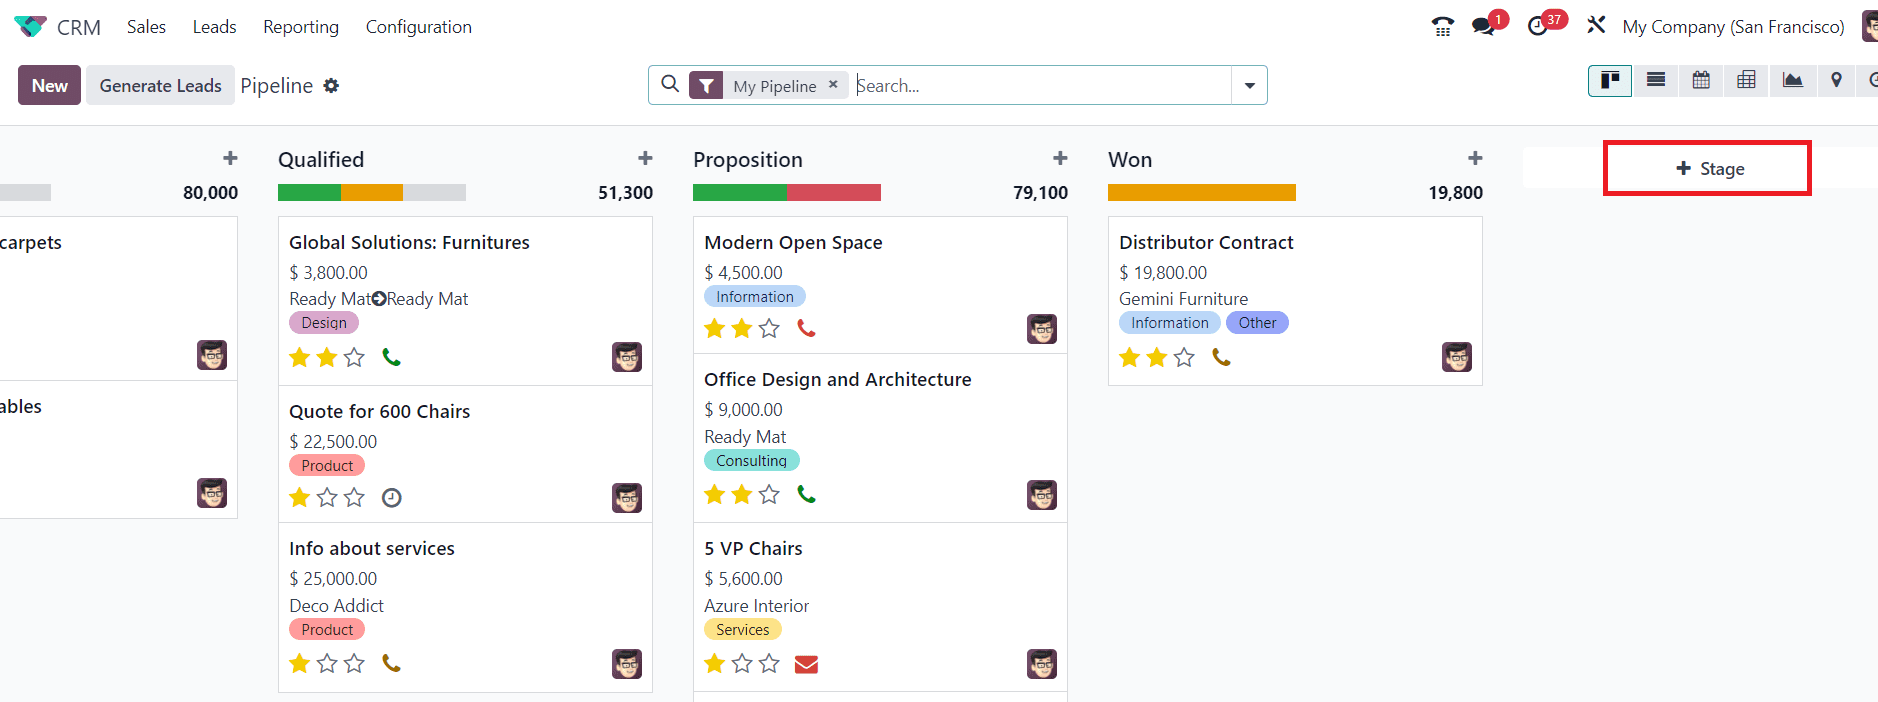
- Click on the "Pipeline" tab within the CRM module.
- Here, you can see the existing stages and add new ones as needed.
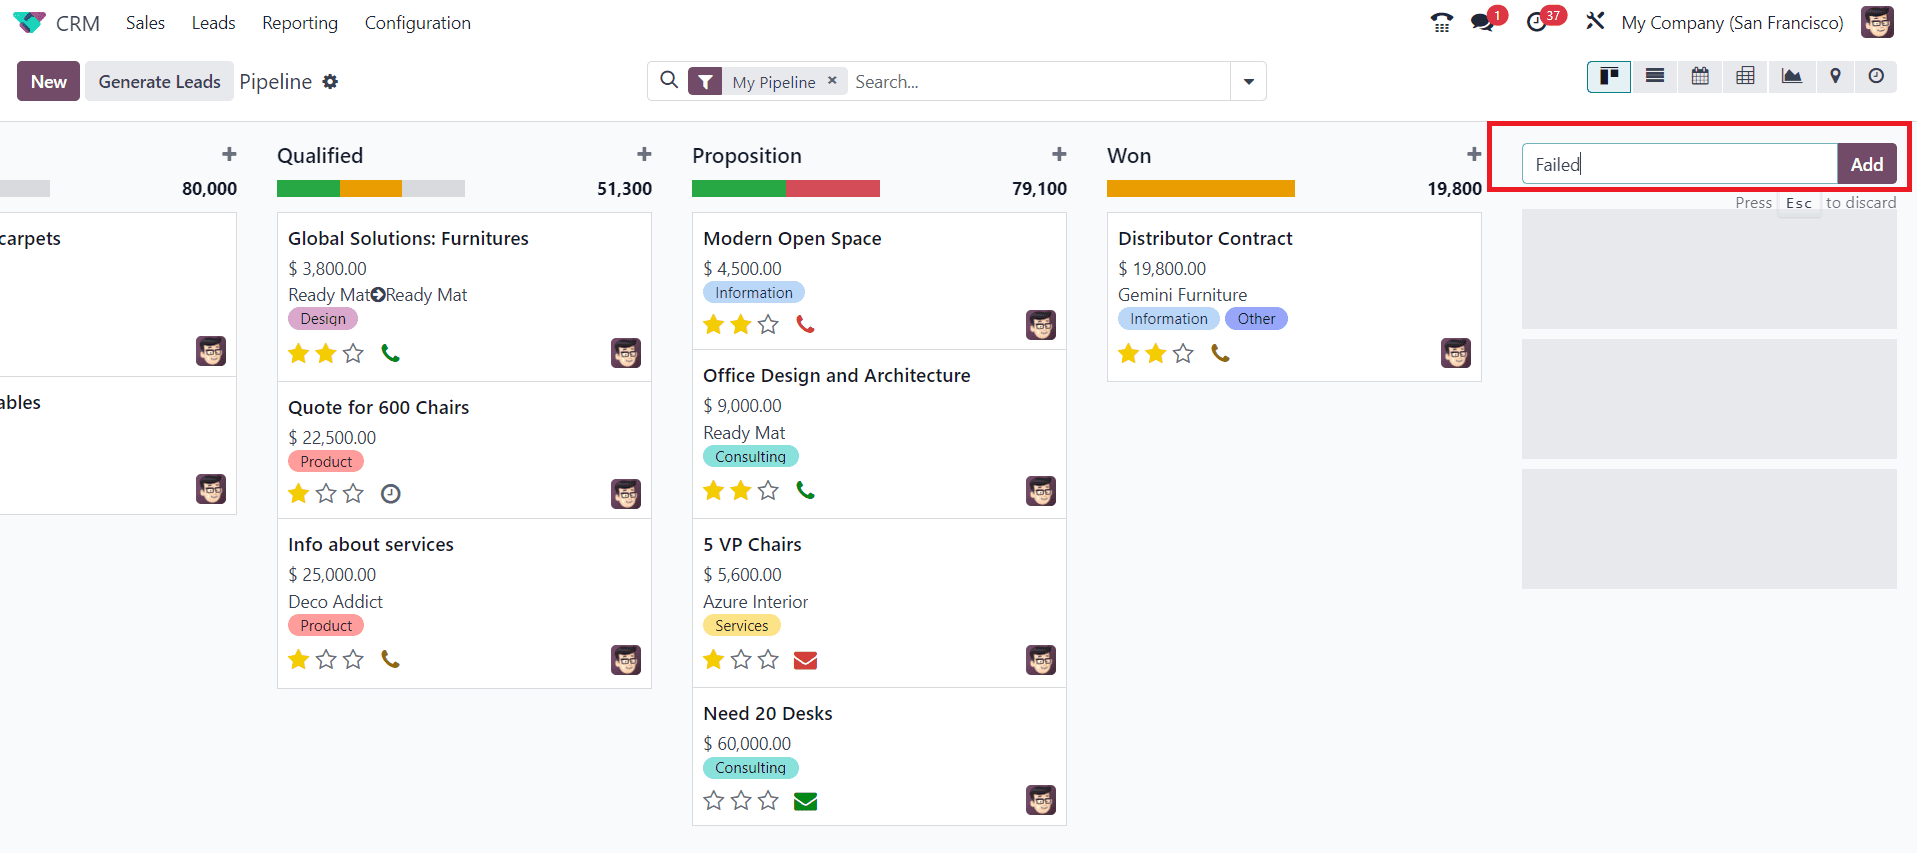
- Choose the "+Stage" button to access the stage management area.
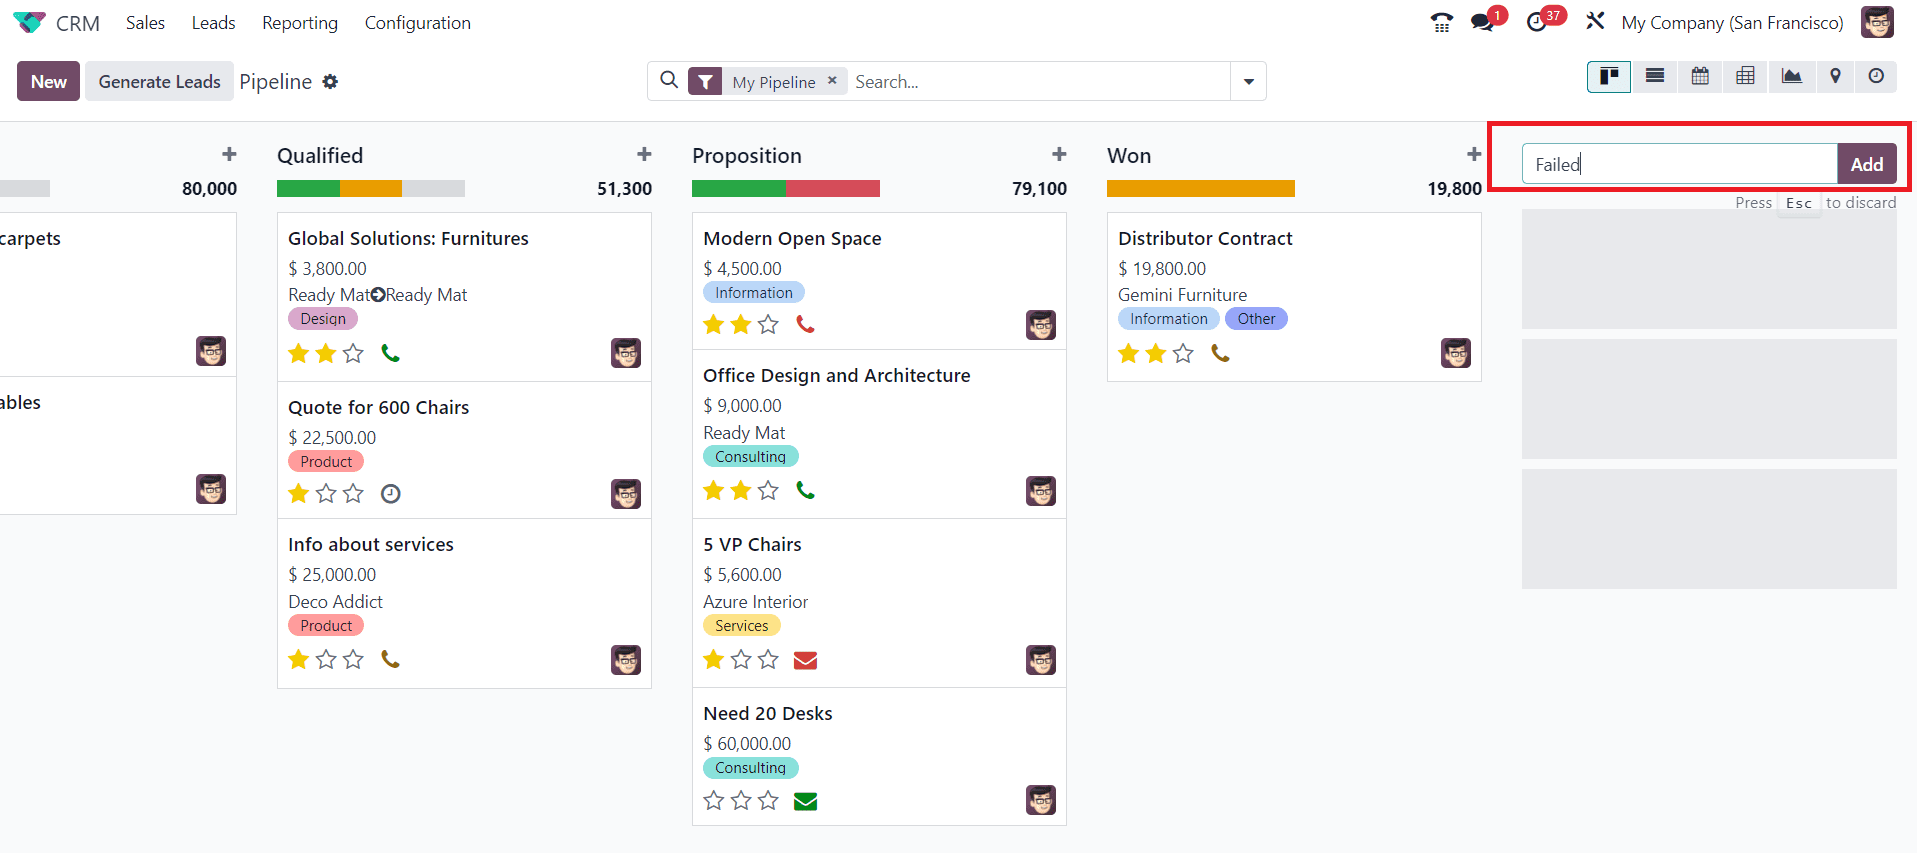
- You will get an additional space to mention the name of the new stage in the Pipeline window.
- Click the “Add” button to add the new stage to the available stages.
- Customize each stage by defining its name, sequence, and other attributes.
3. Defining Stage Sequences:
- Stages are usually organized in a specific sequence to reflect the sales process. Ensure that the stages are arranged in the order they occur.
- You can use the drag-and-drop method to set the stage's position within the sequence.
4. Editing Stages:
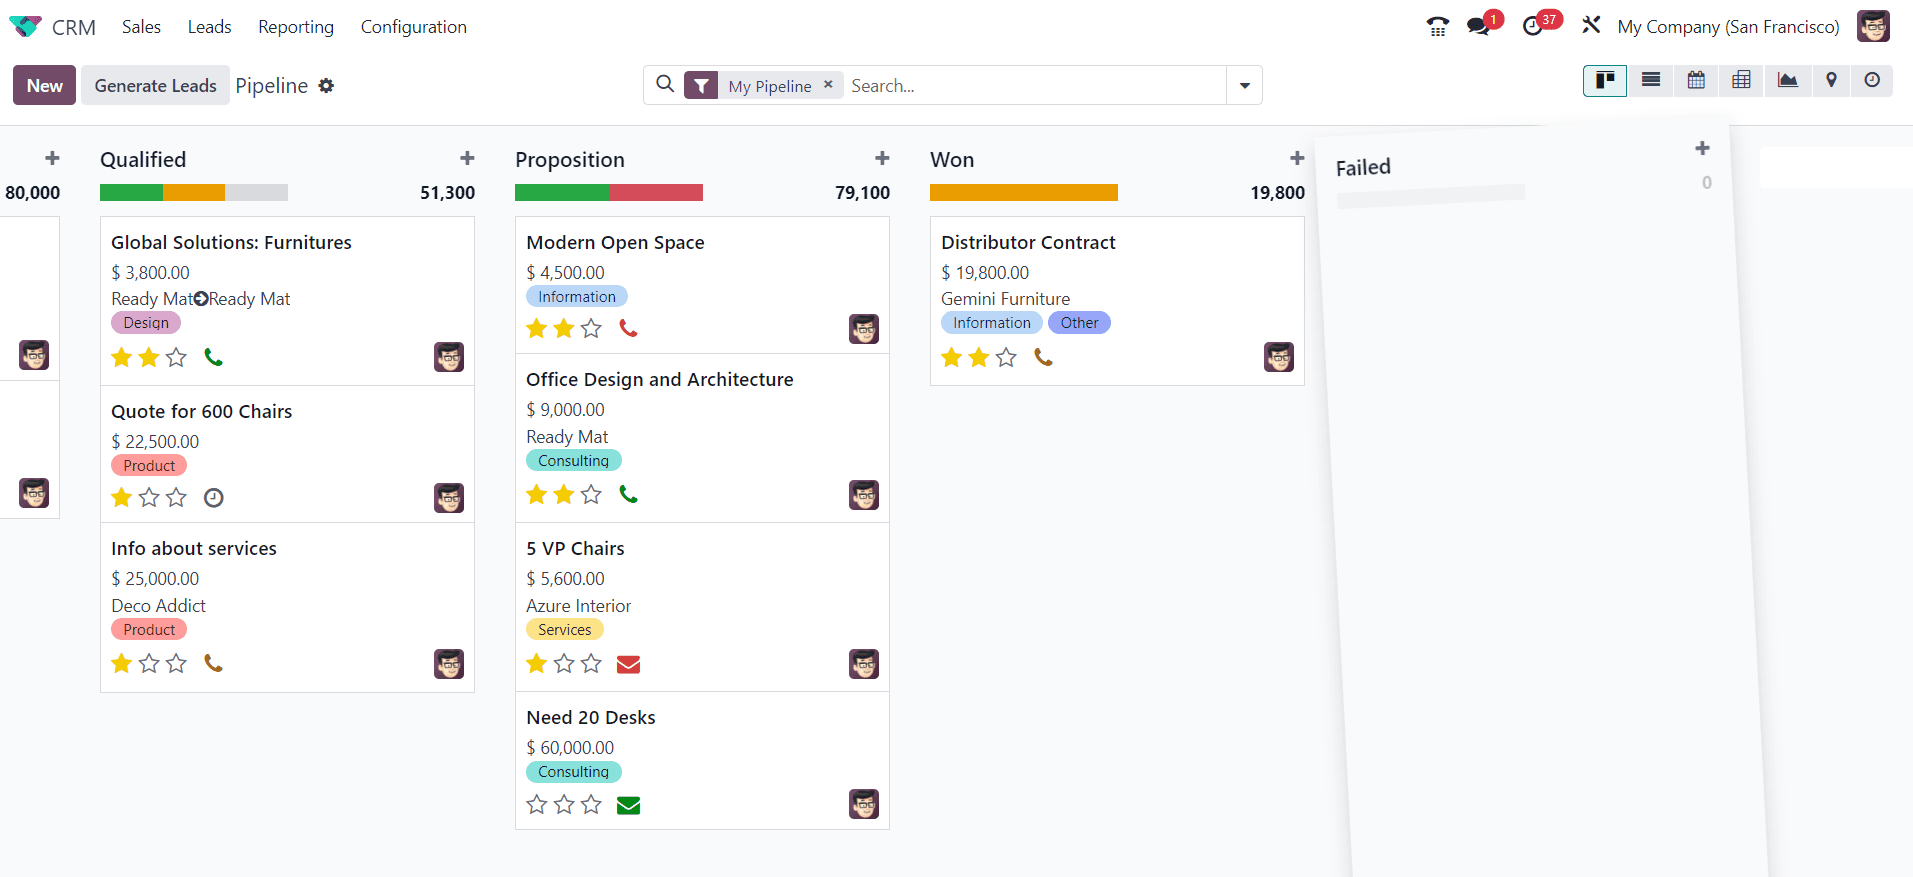
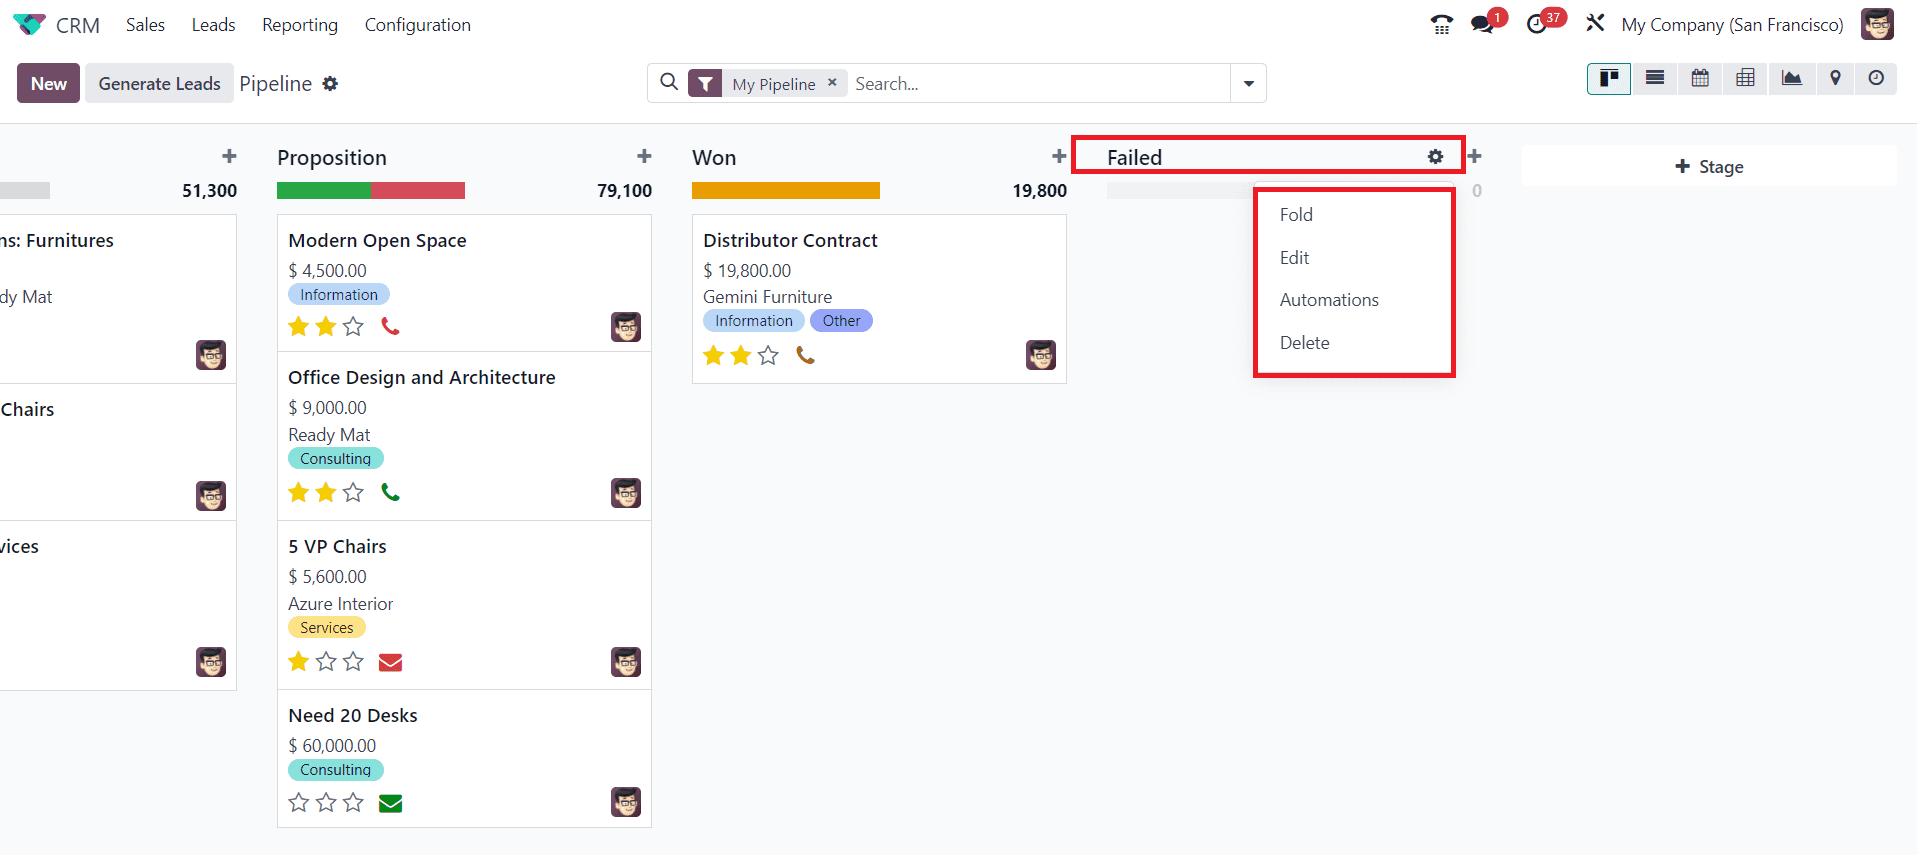
- To edit newly created stages, you can use the “Edit” option available in the Setting menu of the respective stage as shown in the image.
- A pop-up will appear on the screen where you can make changes in the configuration of the new stage.
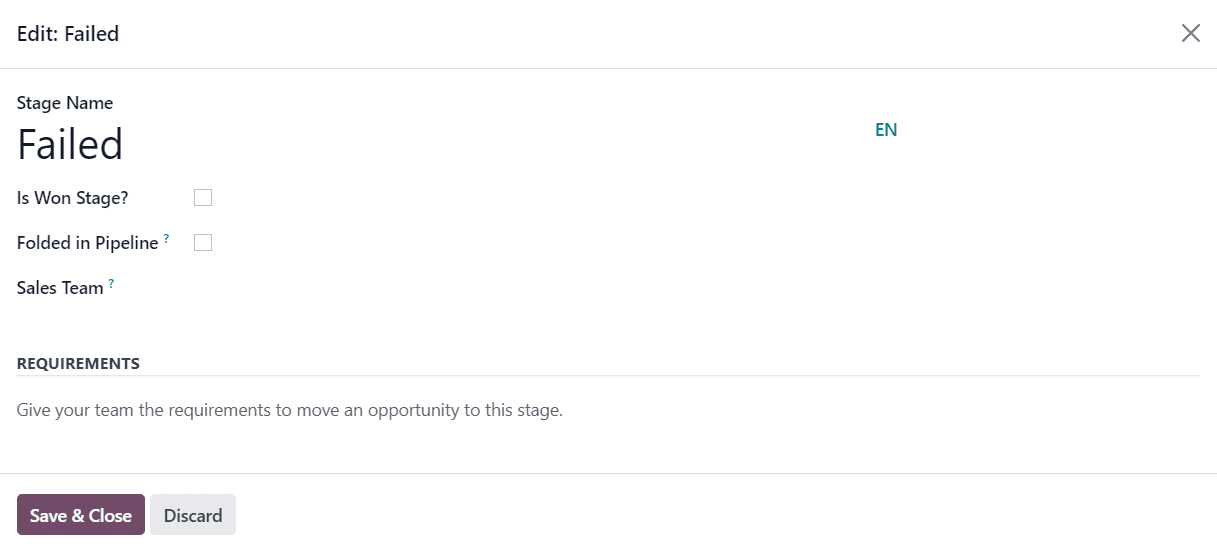
- If you want to consider this stage as Won, you can enable the “Is Won Stage” option.
- When there are no records to display in this stage, you can fold this stage in the Kanban view using the “Folded in Pipeline” option.
- Mention the specific “Sales Team” who uses this stage in the given space. By doing so, other teams will not be able to see or use this stage.
- You can enter the internal requirements for this stage in the “Requirements” field.
5. Folding Stages:
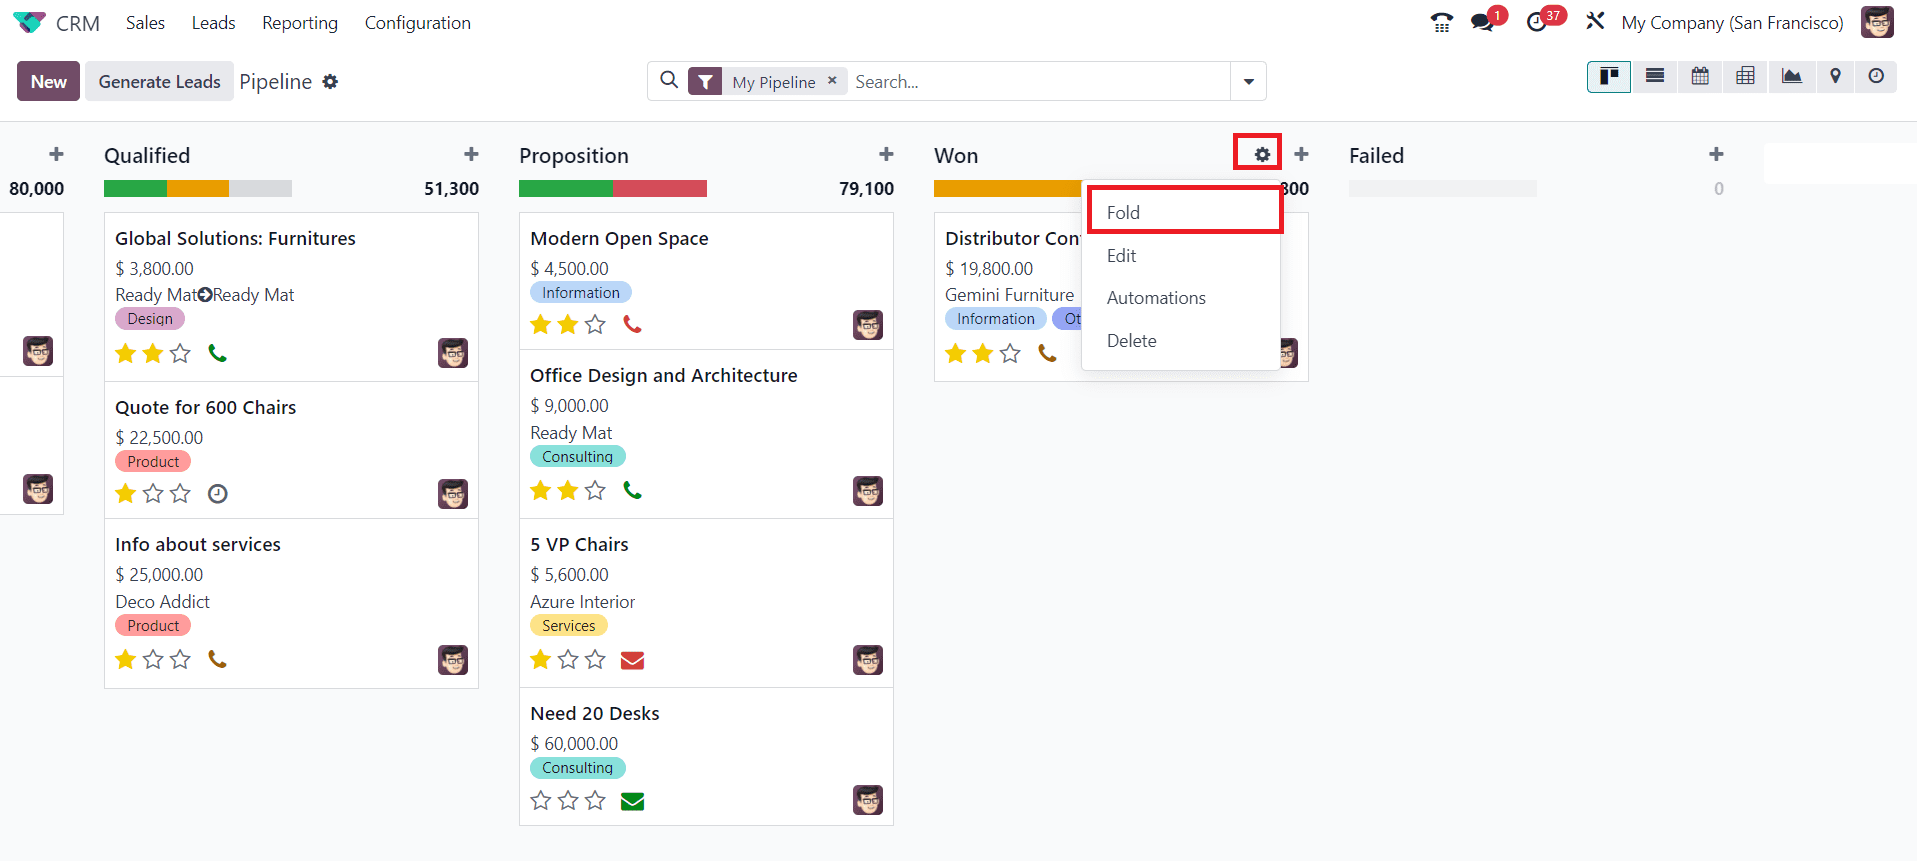
- In Odoo CRM's Kanban view, you can collapse or "fold" stages to simplify the view and focus on specific stages.
- To do this, navigate to your Kanban view, where you have your stages and opportunities or leads listed.
- Find the stage you want to fold. You'll see a small gear icon (??) or similar next to the stage name.
- Click on the settings icon next to the stage name, and select the “Fold” option. It should collapse or fold the stage, hiding the opportunities or leads in that stage.
- To expand or unfold the stage, click on the triangle icon again. By folding stages, you can streamline your view and concentrate on specific parts of your sales process in the Kanban view.
6. Assigning Stages to Pipelines:
- In Odoo CRM, leads and opportunities are associated with pipelines.
- Assign stages to the relevant pipelines to make sure that leads in each pipeline follow the appropriate sales process.
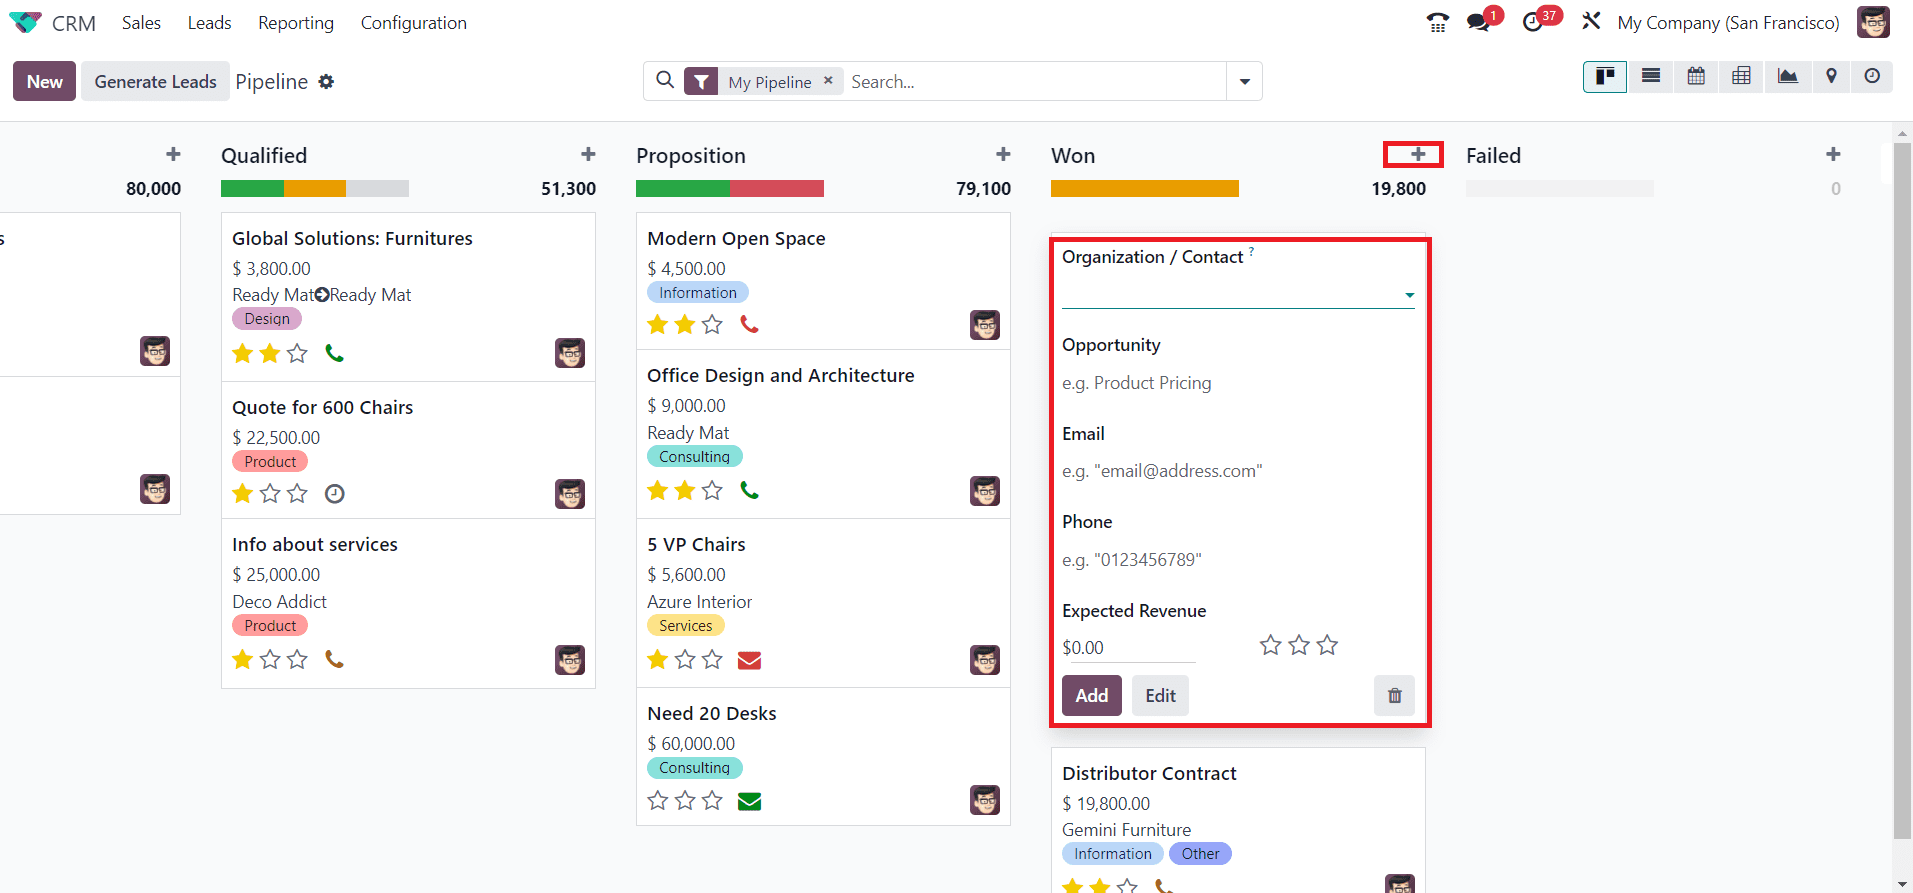
- You can add new leads directly to a particular stage using the + icon available next to the name of the respective stage.
7. Automation Rules:
- Automation rules can be configured to move leads or opportunities automatically from one stage to another based on specific conditions. For instance, you can set a rule to advance a lead to the next stage when a certain action is taken, like receiving a response from the lead.
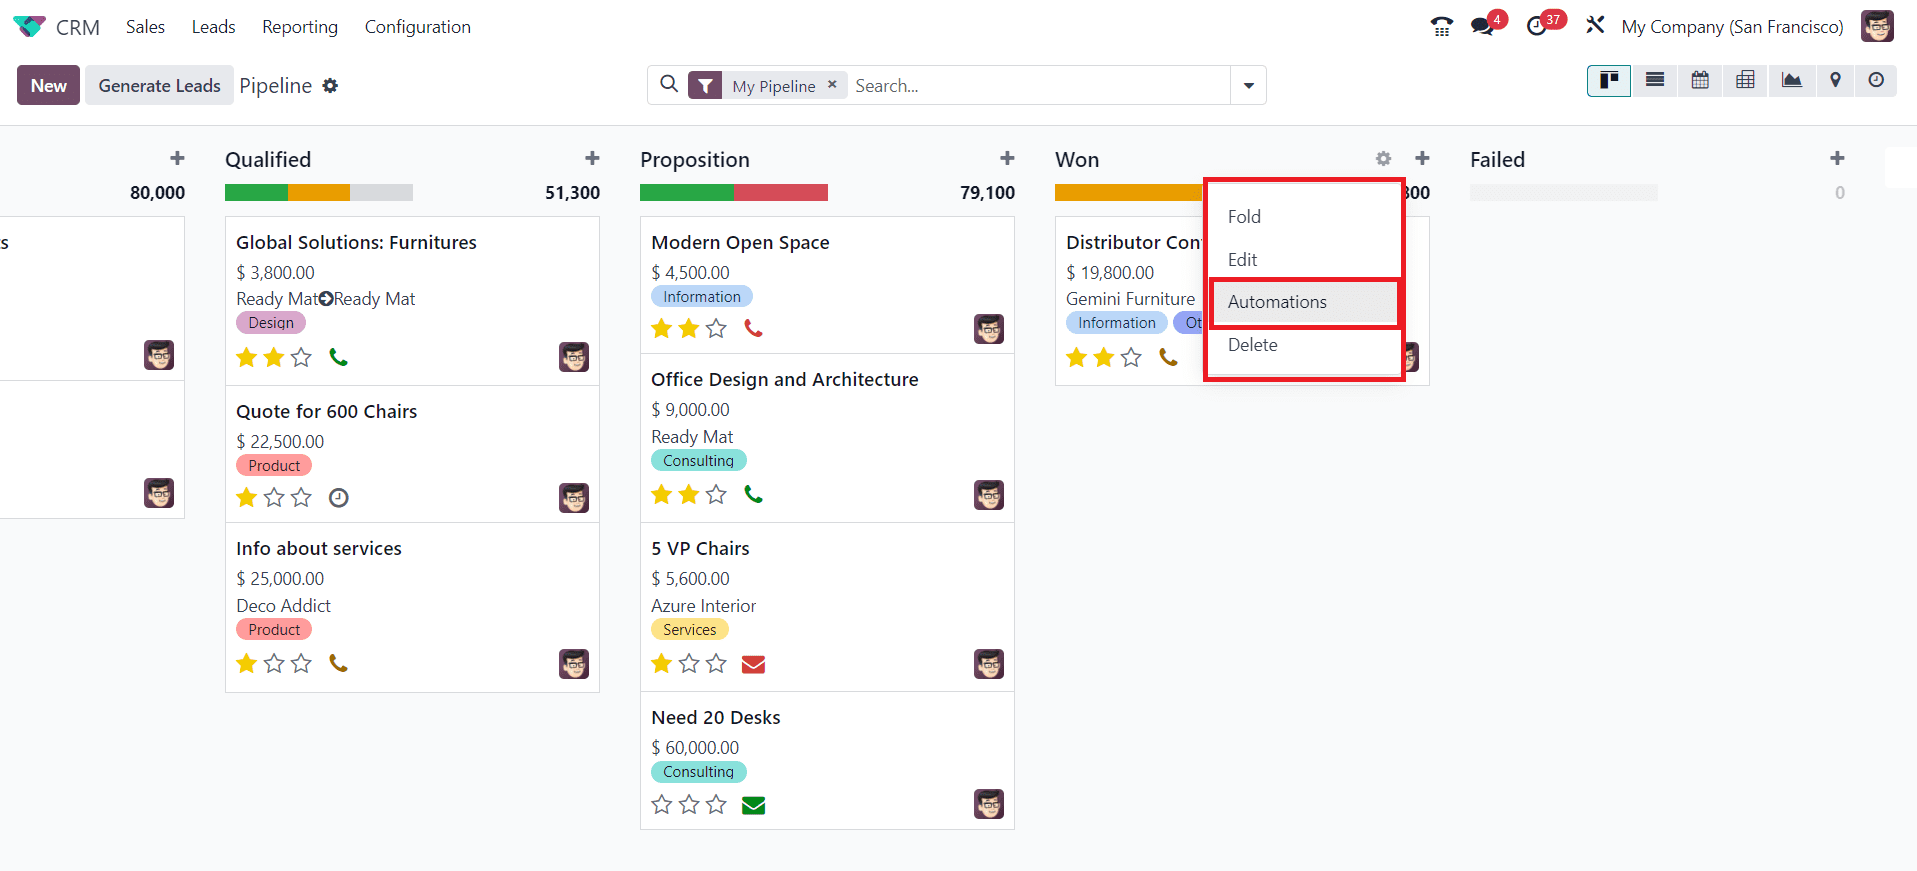
- Send an email when an object changes state, archive records after a month of inactivity, or remind yourself to follow up on tasks when a specific tag is added. With Automation Rules, you can automate any workflow.
8. Editing and Deleting Stages:
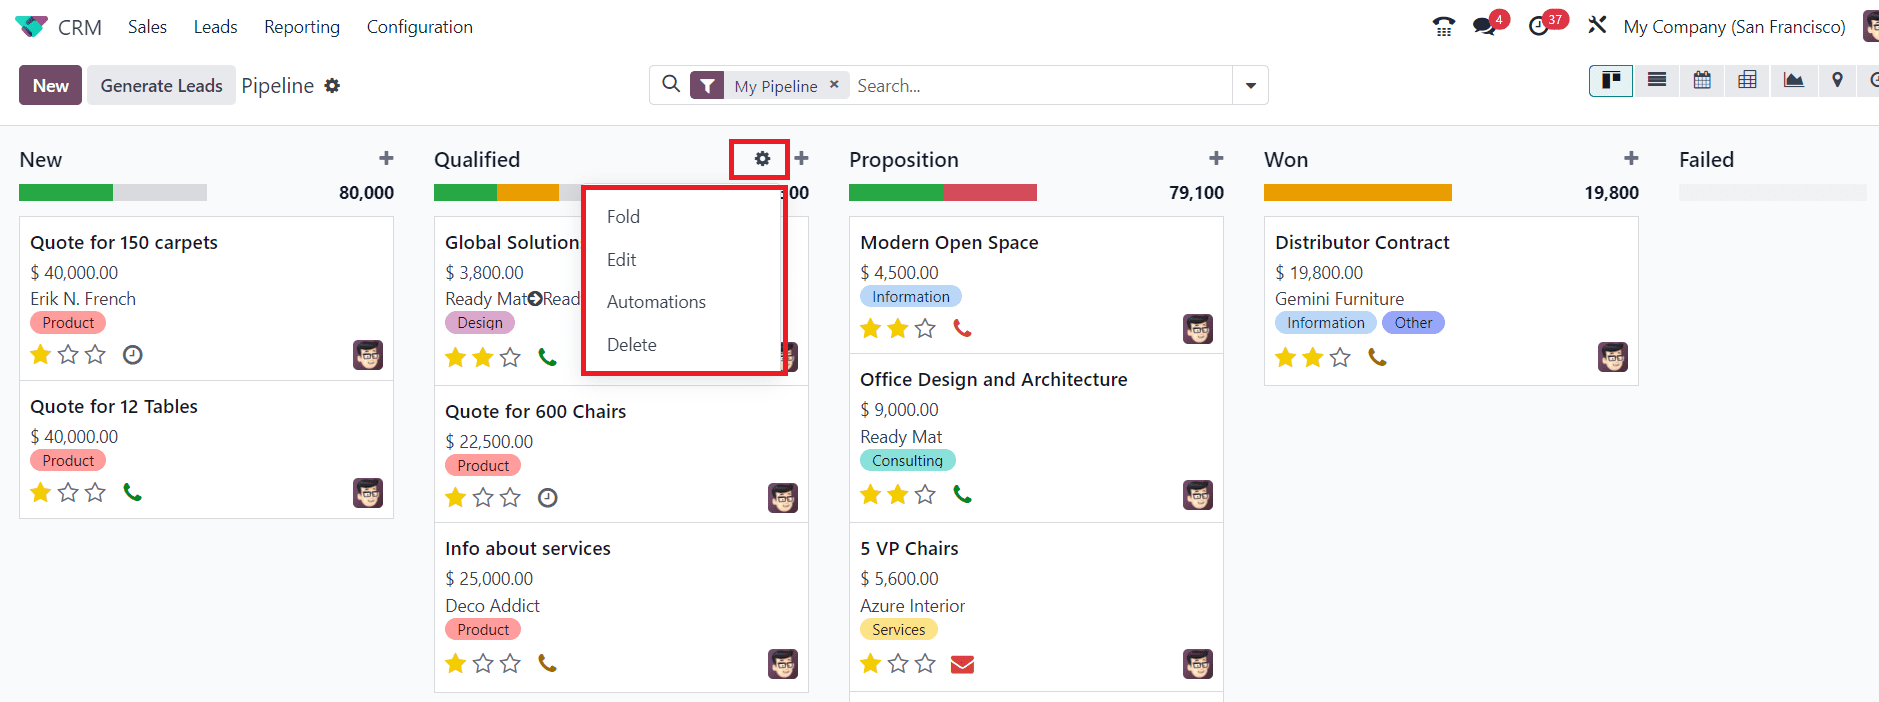
- You can edit or delete stages as needed. However, be cautious when making changes, especially if you have existing leads or opportunities in a particular stage.
9. Monitoring and Reporting:
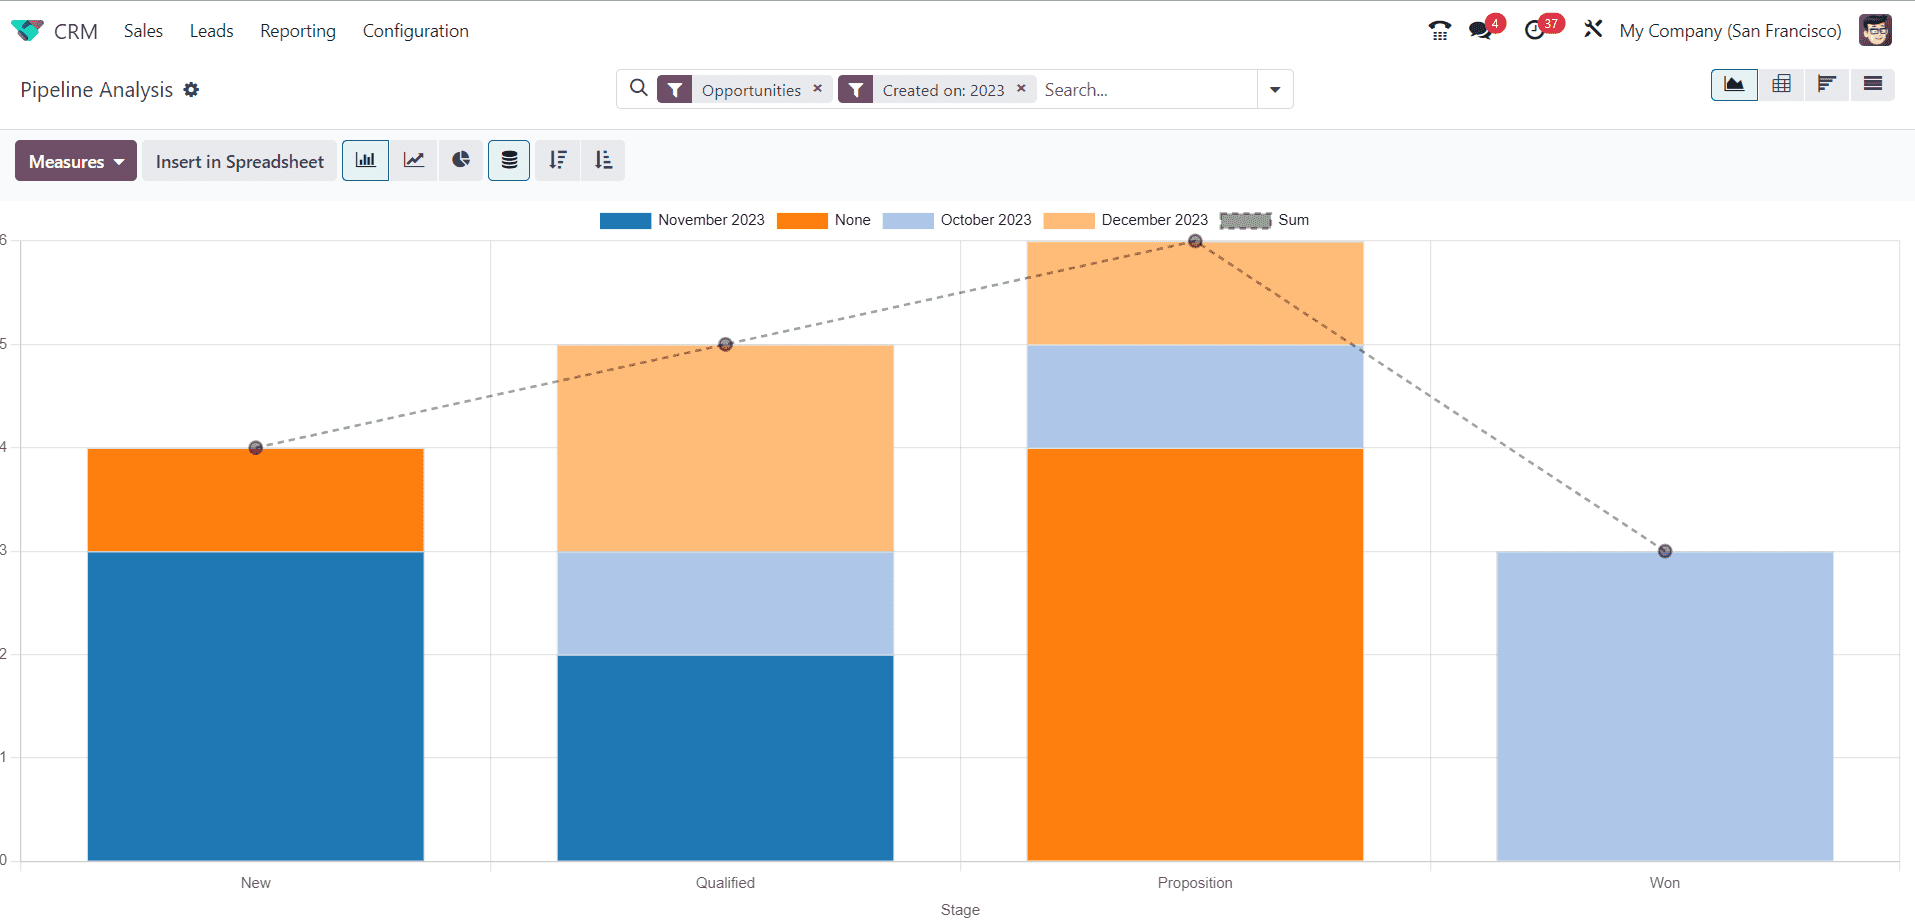
- Keep a close eye on the progress of leads or opportunities through the various stages. Utilize the reporting and analytics features in Odoo CRM to gain insights into how leads are moving through the stages and where improvements can be made.
- Periodically review and optimize your stages and pipelines to adapt to changing business needs and improve your sales process.
Managing Pipeline in CRM
Managing the CRM pipeline in Odoo is crucial for organizing and tracking your sales process effectively. Odoo provides a robust CRM module that allows you to manage your sales pipelines efficiently. Here are the key steps to manage your CRM pipeline in Odoo:
1. Accessing Odoo CRM:
- Log in to your Odoo account and navigate to the CRM module.
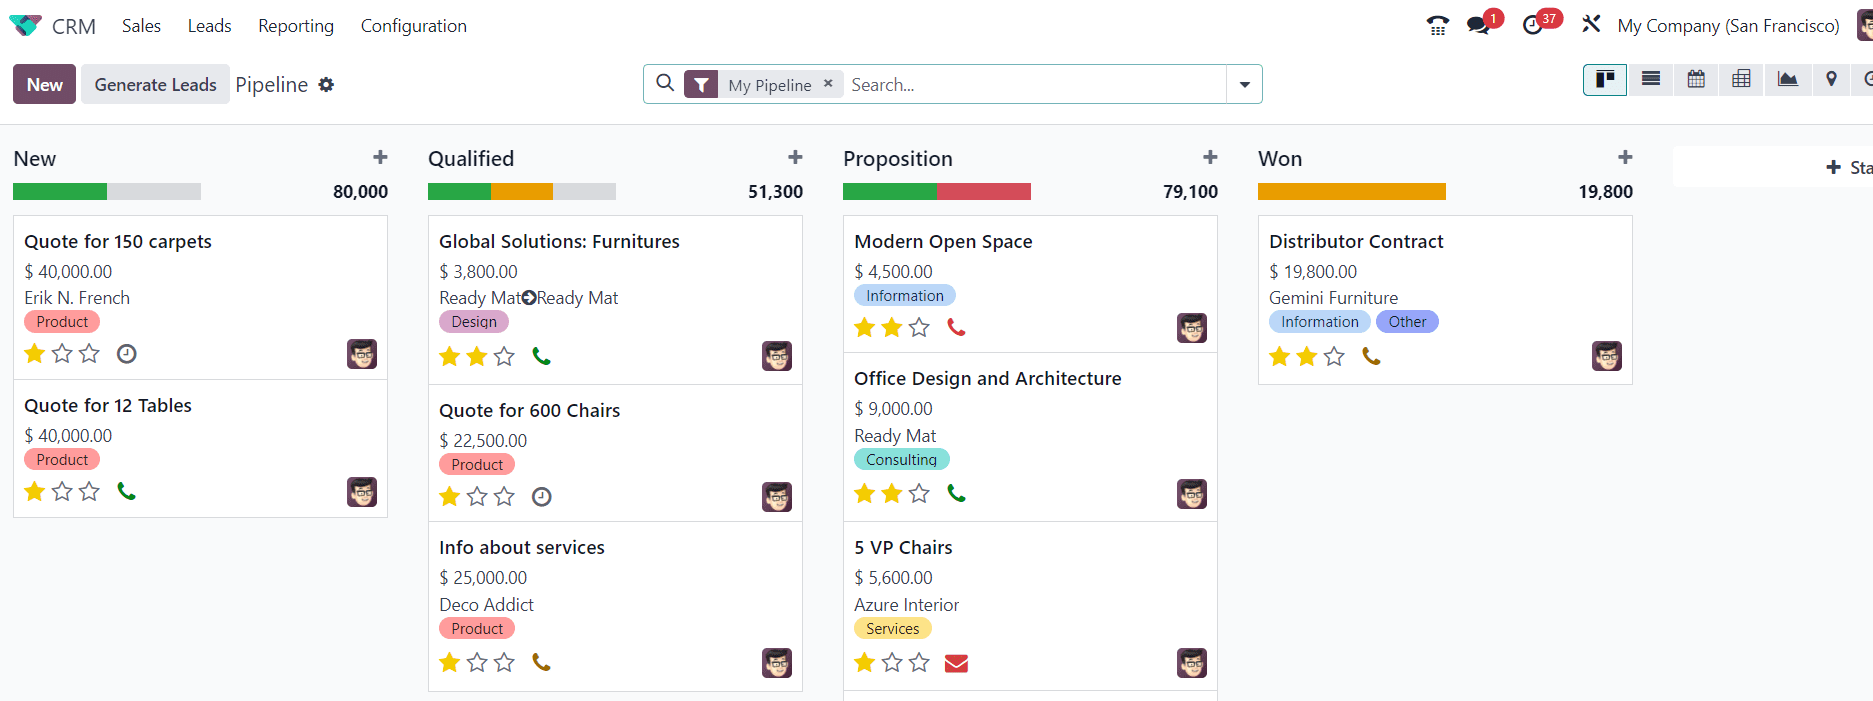
2. Adding and Customizing Stages:
- In Odoo CRM, pipelines are used to manage different sales processes. You can create new pipelines or customize existing ones to match your organization's specific needs.
- Stages represent the various steps that a lead or opportunity goes through in your sales process. Each pipeline can have its own set of stages.
- To create or customize stages, access the pipeline settings, and define the name, sequence, and other attributes for each stage.
3. Assigning Leads and Opportunities:
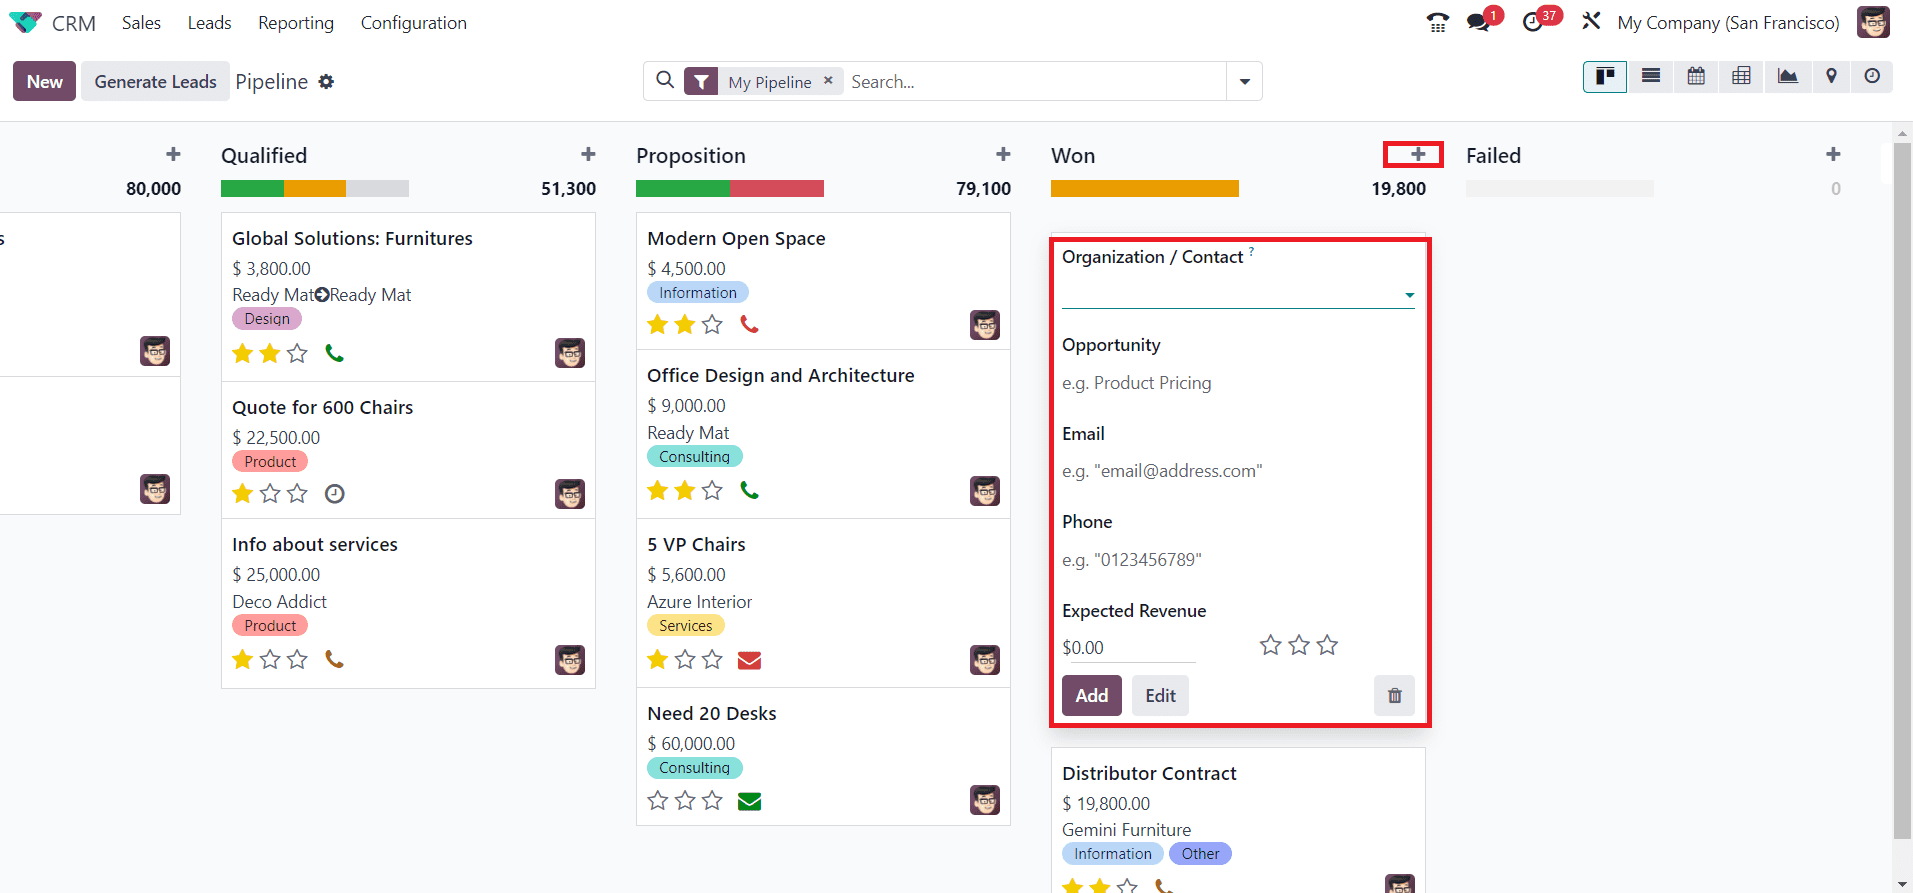
- Leads and opportunities are associated with specific pipelines. When you create or import leads or opportunities, make sure to assign them to the appropriate stage based on the nature of the sales process they belong to.
- As leads or opportunities progress in your sales process, you can manually move them from one stage to another. Simply drag and drop them from one stage to the next.

- Odoo CRM also allows for automation rules that can automatically advance leads or opportunities to the next stage when specific conditions are met. For instance, when a lead responds or reaches a certain milestone.
4. Monitoring and Reporting:
- Continuously monitor your pipeline to see how leads or opportunities are progressing through the stages.
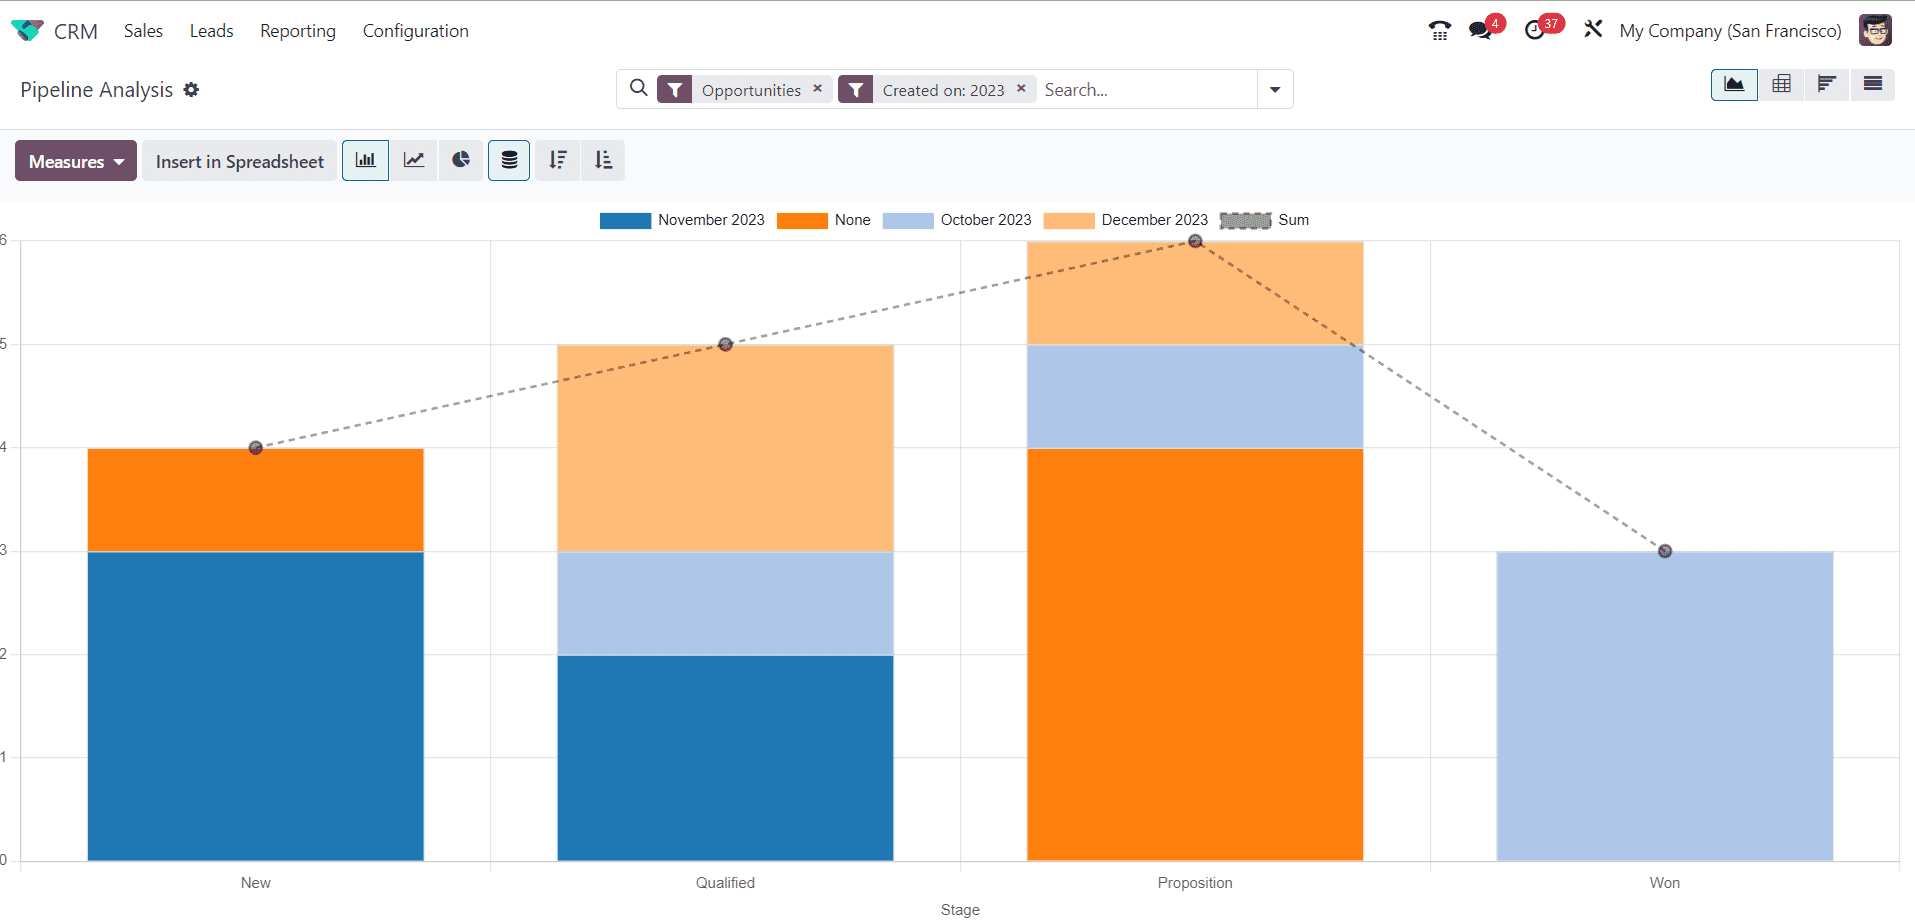
- Utilize Odoo CRM's reporting and analytics features to gain insights into the performance of your sales pipeline. This can help you identify bottlenecks and areas for improvement.
5. Collaboration and Communication:
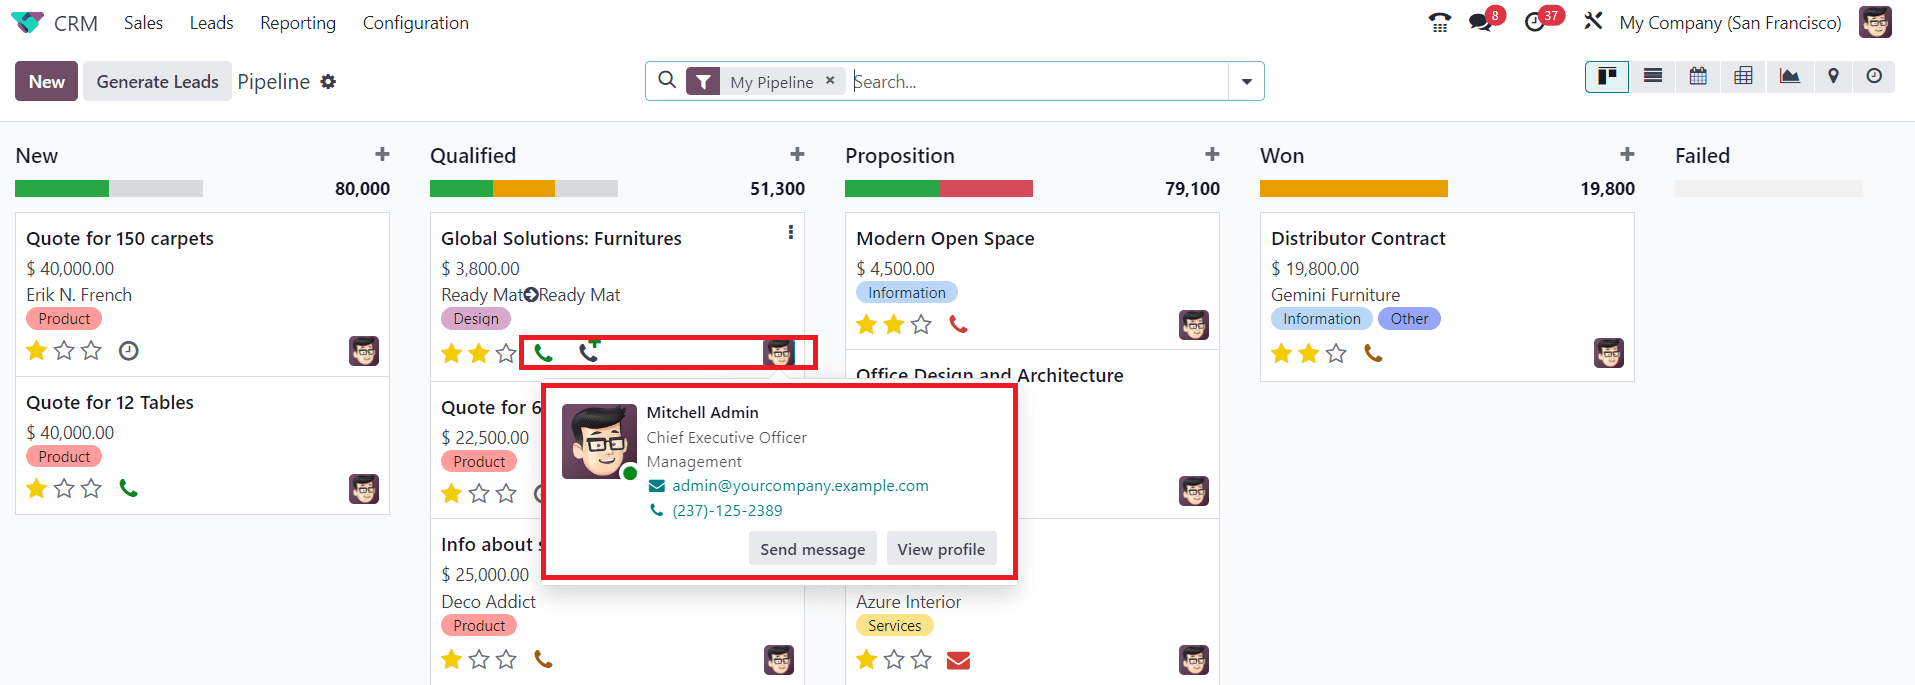
- Encourage collaboration within your team by using the communication features in Odoo CRM. You can log emails, calls, and other interactions related to a lead or opportunity directly within the system.
6. Color-Coding and Visibility:
- Odoo CRM allows you to assign colors to leads for easy visual identification.
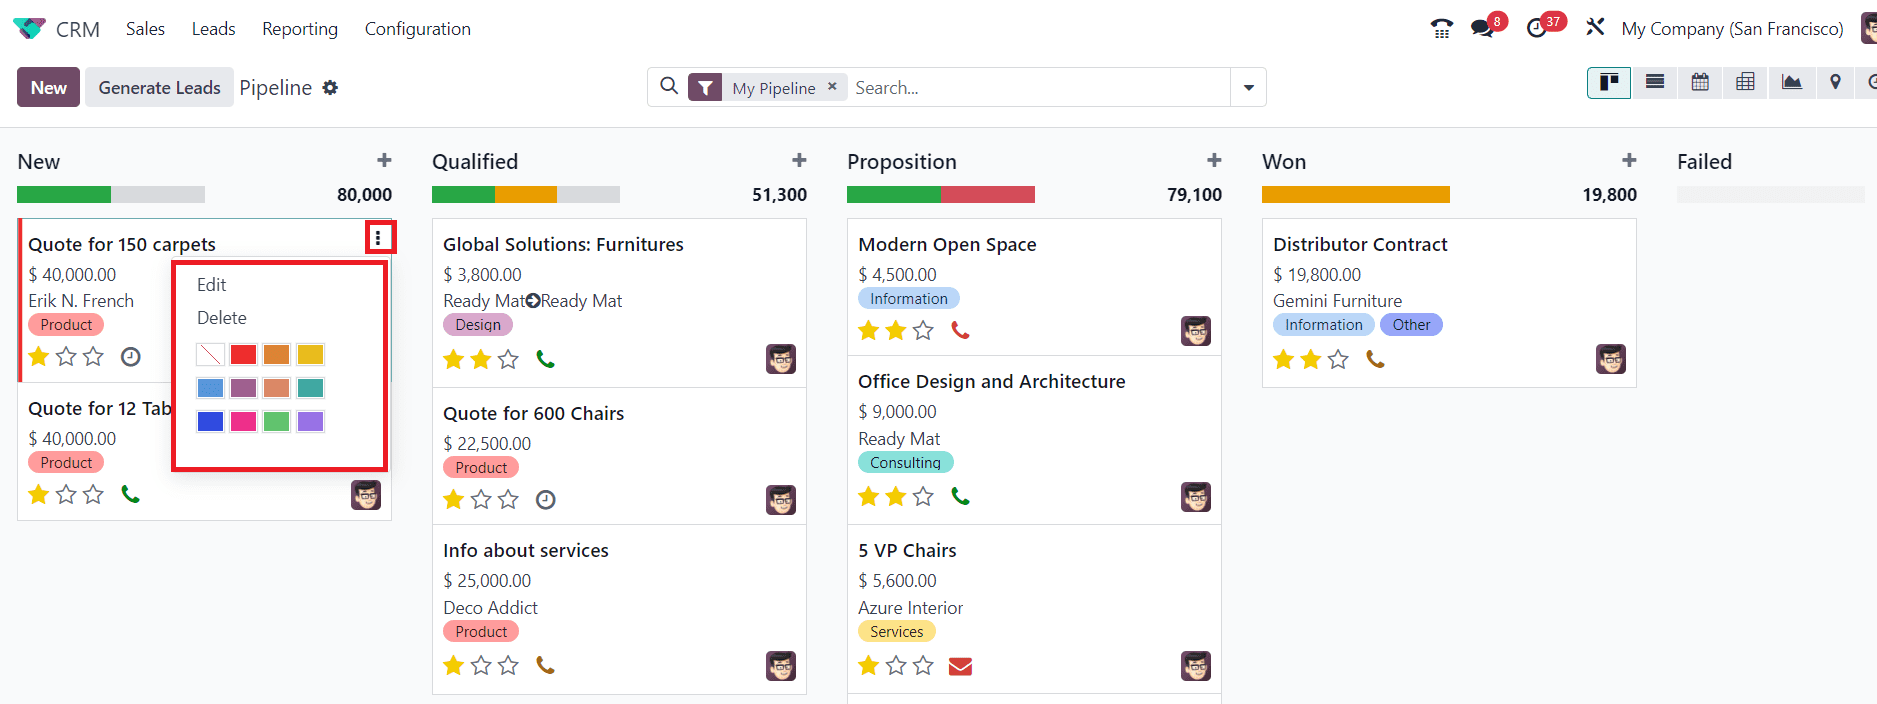
- You can set the visibility of stages, deciding which ones are visible for the sales team.
7. Assign Pipeline Tags:

- In Odoo CRM, tags are used to categorize and label records, such as leads, opportunities, or customers. Tags help you organize and classify your CRM data for better management and segmentation.
- To assign tags to a CRM record, like a lead or opportunity, open the record and look for the "Tags" field.
- Click on the field, and you can either select existing tags from a dropdown or create new tags on the fly.
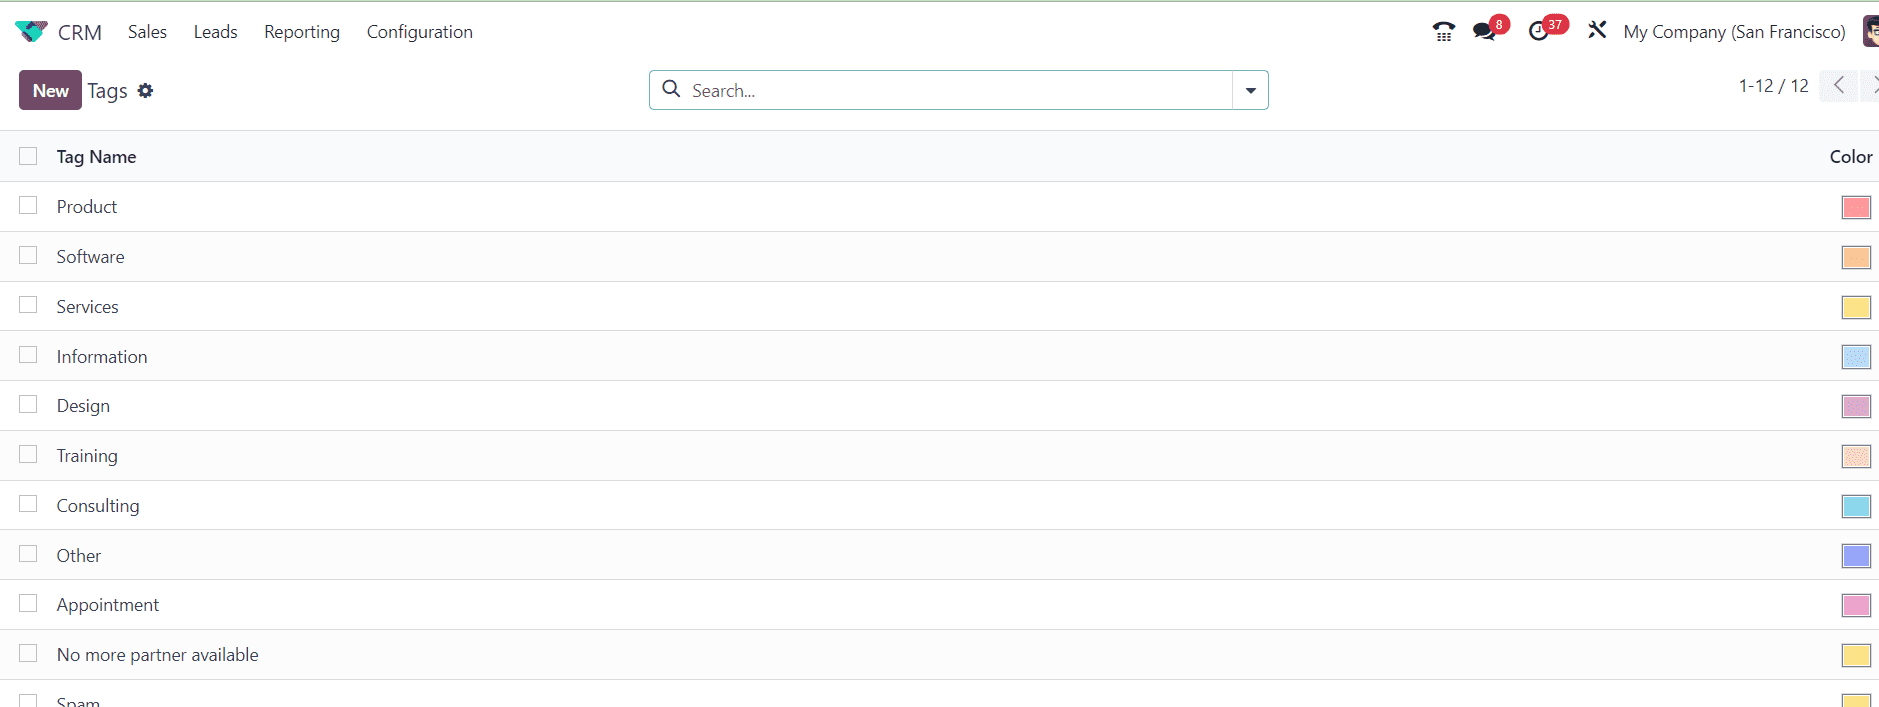
- To create new tags, you can go to the "Configuration" menu in Odoo and select the "Tags" section. Create and customize tags by giving them a name and color.
- Once you've assigned tags to your records, you can filter and search for records based on these tags. Use the "Search" or "Advanced Search" features to filter records by tags. You can select specific tags to narrow down your results.
8. Prioritize leads/opportunities:
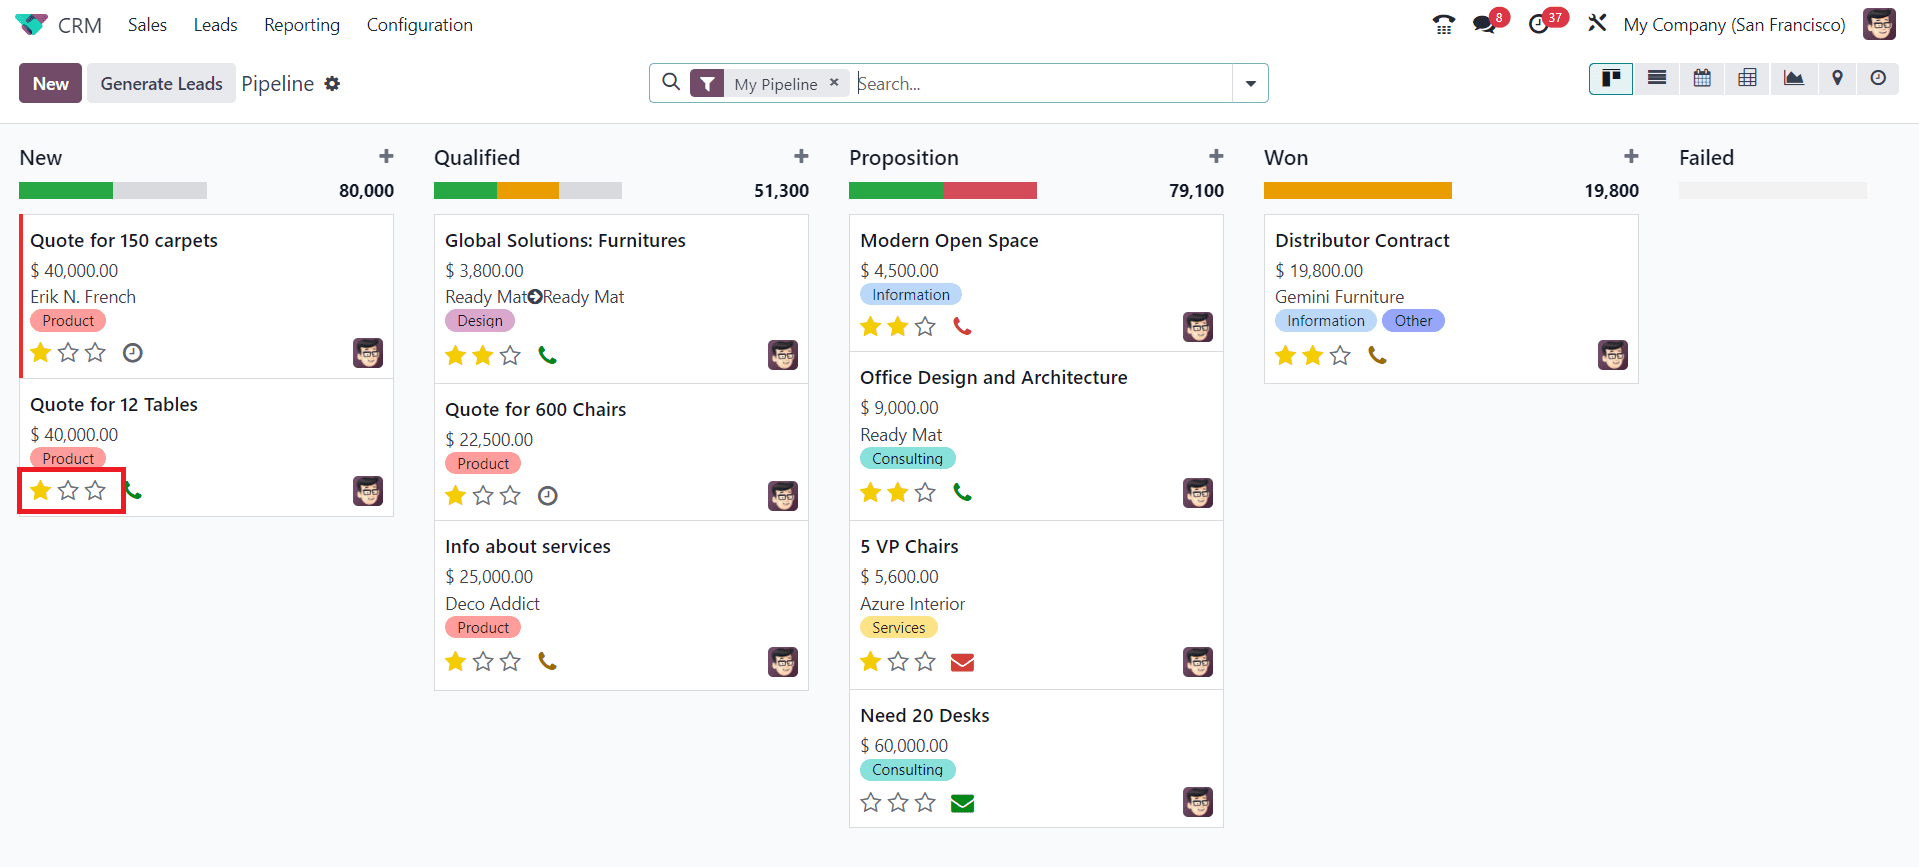
- Assigning stars or ratings to leads based on priorities in Odoo CRM can help your sales team quickly identify and focus on the most important opportunities.
- In the CRM pipeline, define your priority using the rating options. You can use star icons to set up ratings for leads, like "Low Priority," "Medium Priority," and "High Priority."
9. Calculate Expected Revenue:
- The "Expected Revenues" feature in the Odoo CRM pipeline is used to estimate the potential revenue associated with a lead, opportunity, or customer at various stages of the sales process. It helps you forecast your sales and revenue by associating a monetary value with each opportunity.
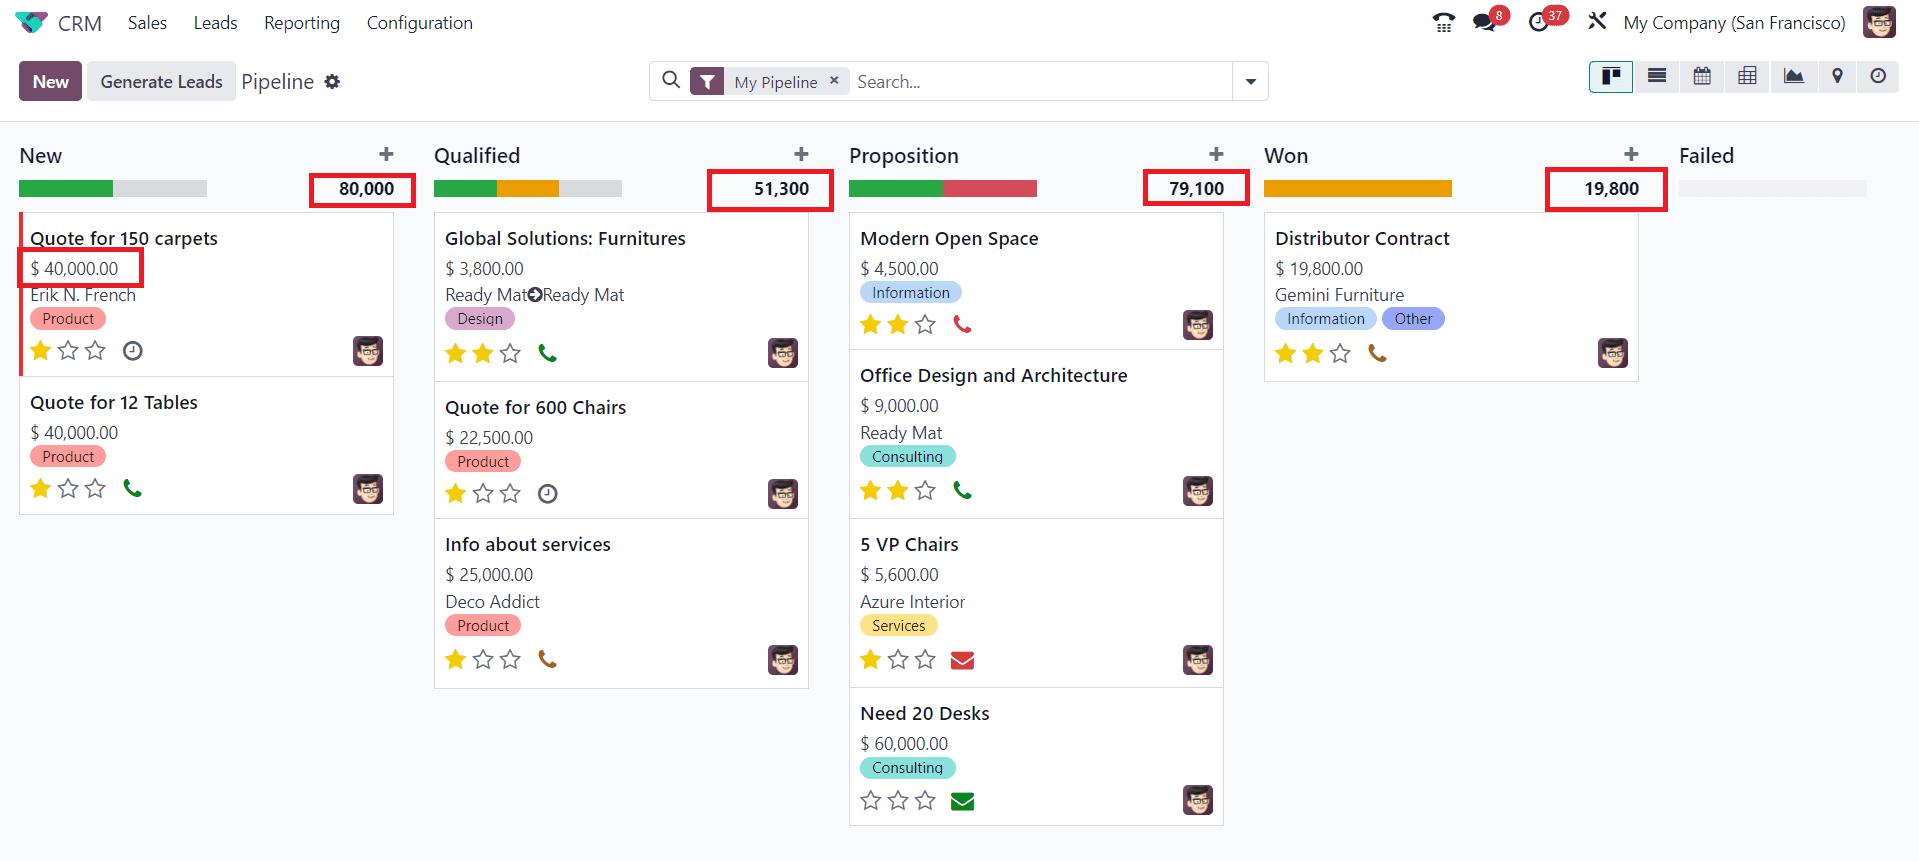
- In each lead or opportunity, you can assign an estimated monetary value that represents the expected revenue if the deal is successfully closed. This value can be based on factors like deal size, probability of closing, and historical data.
- The total expected revenue of the leads/opportunities of a particular stage can be seen on the top of the respective stage. By estimating the potential revenue associated with each opportunity, you can better prioritize and manage your sales efforts.
In conclusion, effective lead management is pivotal to a successful CRM strategy, and Odoo 17 CRM's lead management system, driven by stages and pipelines, provides a comprehensive solution. By understanding the basics, configuring stages and pipelines, nurturing leads, harnessing the power of analytics, integrating communication, encouraging collaboration, and automating processes, businesses can optimize their lead management efforts. Odoo 17 CRM equips organizations with the tools they need to scale their lead management as they grow, ultimately leading to increased efficiency and profitability. In the competitive landscape of today's business world, Odoo 17 CRM's lead management features are a game-changer.