Owl (Odoo Web Library) is a powerful JavaScript framework introduced in Odoo 18 to facilitate the creation of dynamic and interactive user interfaces. It adopts a component-based approach, enabling developers to design modular and reusable UI elements that integrate seamlessly with Odoo's frontend and backend systems. Owl components consist of JavaScript logic, XML templates for structure, and optional SCSS for styling, all managed efficiently through Odoo's asset pipeline. This framework enables the development of responsive and engaging user experiences while maintaining simplicity and compatibility within Odoo's ecosystem.
Owl is a fast and simple framework designed to create interactive web applications in Odoo. It uses a component-based structure, making it easy to build and reuse parts of the user interface. This enables developers to build complex features efficiently while maintaining clean and manageable code.
This example showcases how to develop a custom counter feature using an Odoo component and integrate it into the systray. It illustrates the process of defining an OWL component in JavaScript, utilizing the useState hook for state management, and dynamically updating the UI with the component's current value. The design is achieved through inline styles, and the functionality allows users to increment the counter value by clicking a button. By registering the component with the SystrayMenu, it becomes part of the system tray, demonstrating the adaptability and modular design of OWL components for enhancing Odoo’s user interface.
Javascript :
/** @odoo-module **/
import { registry } from "@web/core/registry";
import { Component, useState } from "@odoo/owl";
// Define the Counter component
export class Counter extends Component {
    static template = "my_module.Counter";  // The template that will represent this component
    setup() {
        this.state = useState({ value: 0 });  // Initialize counter state with value 0
    }
    // Increment method to increase the counter value
    increment() {
        this.state.value++;
    }
}
// Register the Counter component in the Systray menu
const systrayItem = {
    Component: Counter,  // Register the component in the systray
};
registry.category("systray").add("counter_systray", systrayItem, { sequence: 0 });
Xml file :
<?xml version="1.0" encoding="UTF-8"?>
<template xml:space="preserve">
    <t t-name="my_module.Counter">
        <div>
            <button
                class="btn"
                style="background-color: white; color: black; border: 1px solid #ccc;"
                t-on-click="increment">
                Counter: <t t-esc="state.value" />
            </button>
        </div>
    </t>
</template>
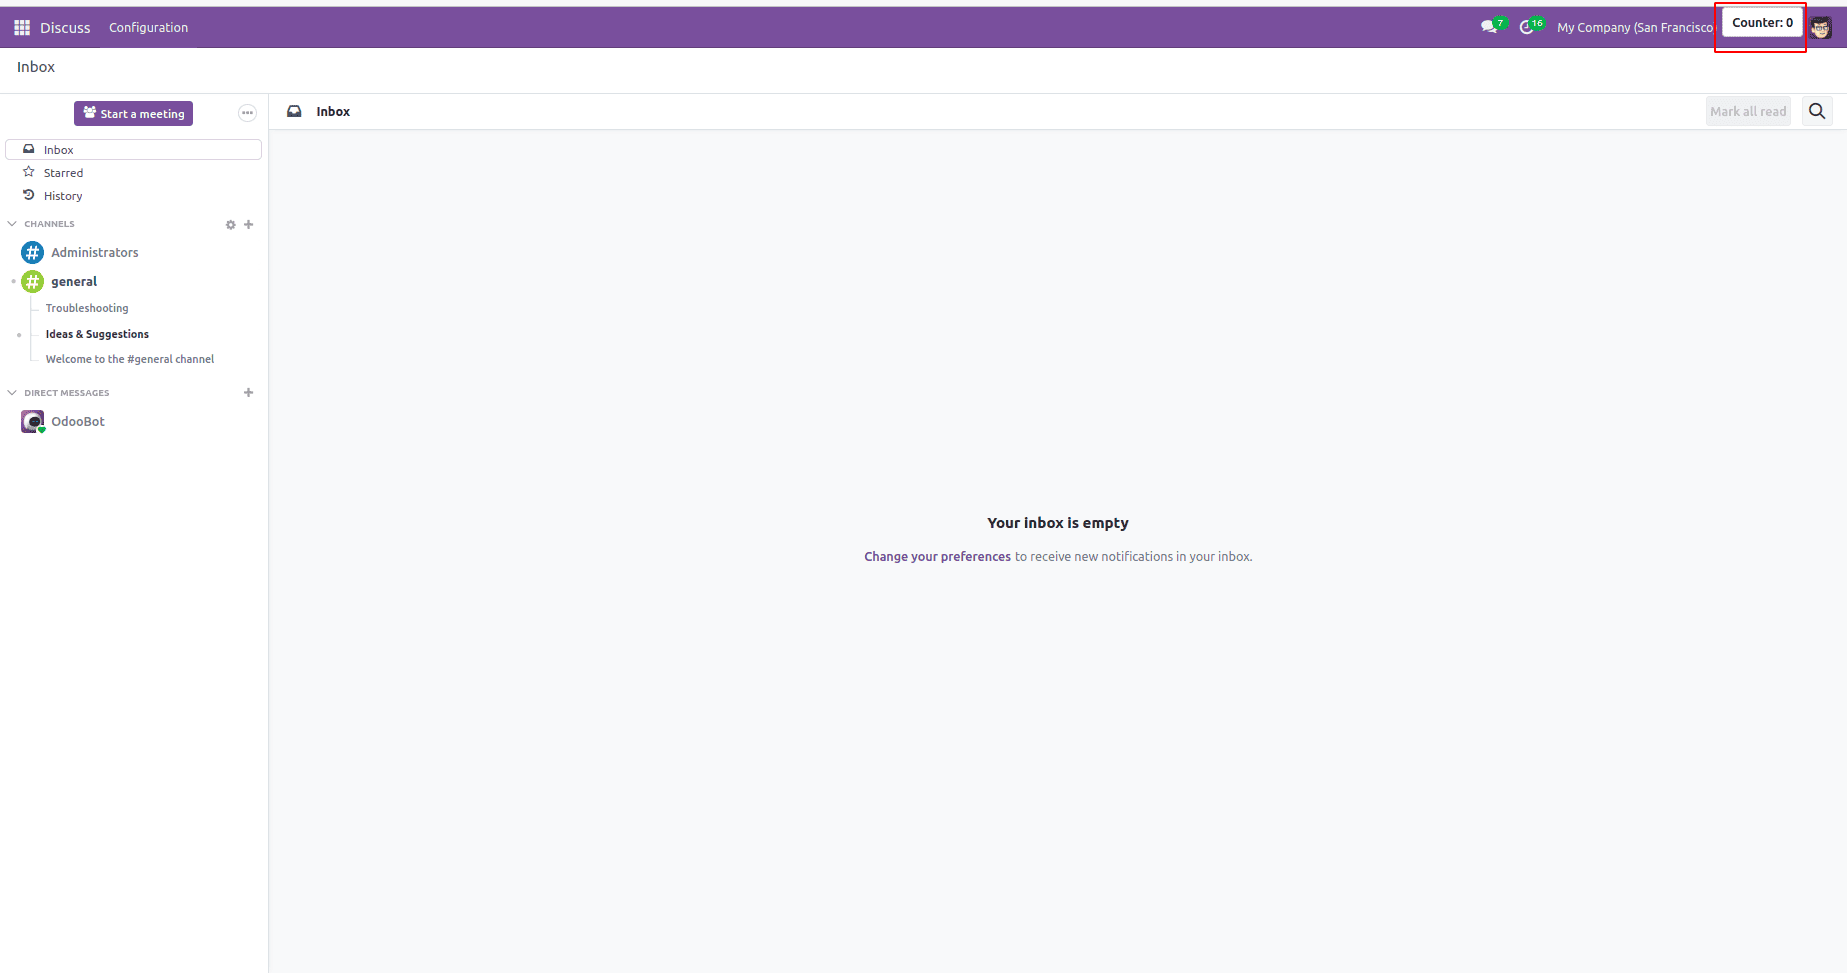
After installing the custom module with the provided JavaScript and XML files, a counter will appear in the systray menu, as depicted in the figure below.

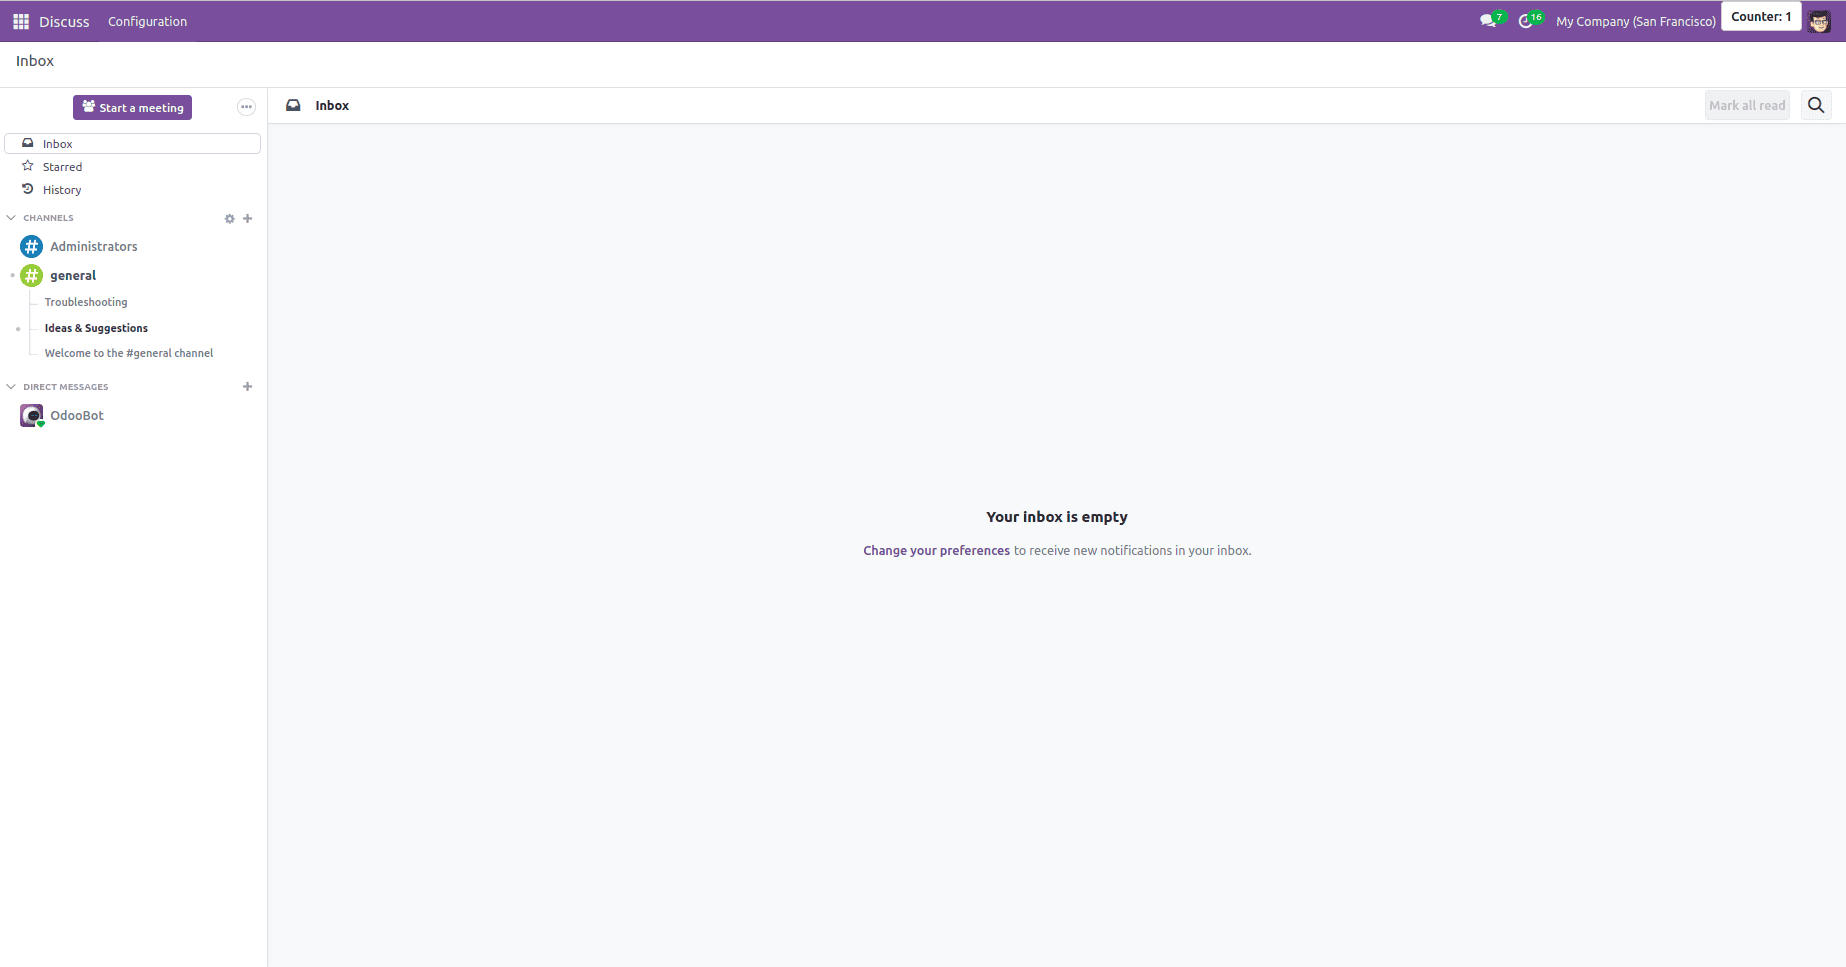
When the button is clicked, the counter increments, as demonstrated in the figure below.

ActionSwiper
This component enables actions to be triggered by swiping an element horizontally. It wraps a target element, allowing actions to be associated with it. The action is executed when the user swipes the element past a certain portion of its width and then releases it.
Location: @web/core/action_swiper/action_swiper
<ActionSwiper onLeftSwipe="Object" onRightSwipe="Object">
  <SomeElement/>
</ActionSwiper>
To use this component, simply wrap it around the target element, as demonstrated above. If you want to add swipe functionality to an existing element without modifying its template, wrap it inside the ActionSwiper. Additionally, you can customize its behavior by using props to control the swipeability, animations, and the minimum distance needed to trigger an action.
In this example, the onLeftSwipe and onRightSwipe props are used with the ActionSwiper component. Below are the available props for ActionSwiper:
* animationOnMove: A boolean that specifies whether the swipe should apply a translation effect.
* animationType: An optional animation, such as a bounce or forward effect, triggered after the swipe action is completed.
* onLeftSwipe: Enables the ActionSwiper to be swiped left.
* onRightSwipe: Enables the ActionSwiper to be swiped right.
* swipeDistanceRatio: An optional minimum width ratio required to trigger the action when swiped.
CheckBox
This component consists of a simple checkbox paired with a label. The checkbox and label are connected, allowing the checkbox to be toggled by clicking the label.
Location: @web/core/checkbox/checkbox
The available props for the CheckBox component are:
* value: A boolean that determines if the checkbox is checked (true) or unchecked (false).
* disabled: A boolean that indicates whether the checkbox is disabled (true) or enabled (false).
ColorList
The ColorList component enables color selection from a predefined set. By default, it displays the selected color and stays collapsed unless the canToggle prop is specified. Different props can alter its behavior, allowing the list to be permanently expanded or functioning as a toggle, showing available colors upon click until a selection is made.
Location: @web/core/colorlist/colorlist
The available props for the ColorList component are:
* canToggle: A boolean that determines if the color list can be expanded by clicking.
* colors: An array of colors to display in the component, each with a unique ID.
* forceExpanded: A boolean that forces the list to always be expanded (true).
* isExpanded: A boolean that specifies whether the list should be expanded by default (true).
* onColorSelected: A callback function triggered when a color is selected.
* selectedColor: A number indicating the ID of the currently selected color.
Dropdown
Dropdowns are versatile components designed to enhance user interaction by offering a range of features, such as:
* Toggle Functionality: The dropdown list opens and closes when clicked.
* Sibling Dropdown Management: Automatically handles adjacent dropdowns, ensuring only one stays open at a time, with others toggling on hover.
* Outside Click Closure: Closes the dropdown when a click occurs outside of it.
* Optional Auto-Close: Allows the list to close automatically after selecting an item, if desired.
* Action on Selection: Executes a specified function when an item is selected.
* Nested Dropdowns: Supports submenus at unlimited levels for complex navigation.
* Customizable Styling: Offers the flexibility to apply your own styles (Style It Yourself).
* Hotkey Configuration: Enables the use of customizable keyboard shortcuts to open, close, or select dropdown items.
* Keyboard Accessibility: Provides full keyboard navigation with support for keys like arrows, Tab, Shift+Tab, Home, End, Enter, and Escape.
* Dynamic Positioning: Repositions automatically during page scroll or resize for optimal visibility.
* Intelligent Direction: Adjusts opening direction automatically, including right-to-left layouts.
Location: @web/core/dropdown/dropdown and @web/core/dropdown/dropdown_item
To meet these requirements effectively, the Odoo framework offers two primary components: the Dropdown component, which handles the dropdown functionality, and the DropdownItem component, which represents individual items within the dropdown menu.
Xml file :
<Dropdown>
  <t t-set-slot="toggler">
    <!-- Content for the "toggler" slot, displayed within a button -->
    Click me to toggle the dropdown menu item!
  </t>
  <!-- Content for the "default" slot, displayed within a div -->
  <DropdownItem onSelected="selectItem1">Menu Item 1</DropdownItem>
  <DropdownItem onSelected="selectItem2">Menu Item 2</DropdownItem>
</Dropdown>
The available properties for the Dropdown component are as follows:
* startOpen: A boolean that initializes the dropdown in an open state when set to true (default is false).
* menuClass: A string for adding custom CSS classes to style the dropdown menu (e.g., <div class="dropdown-menu"/>).
* togglerClass: A string for applying additional CSS classes to the toggler (e.g., <button class="dropdown-toggle"/>).
* hotkey: A keyboard shortcut for toggling the dropdown.
* tooltip: Adds a tooltip to the toggler element.
* beforeOpen: A function executed just before the dropdown opens, allowing for asynchronous or custom pre-opening logic.
* manualOnly: A boolean that, when set to true, restricts toggling to manual button clicks (default is false).
* title: Sets the title attribute of the toggler element; the default is none.
* position: Determines the dropdown menu's opening position, using a valid useHook position value (default is bottom-start).
* toggler: When set to "parent", the <button class="dropdown-toggle"/> element is not rendered, and the toggling is controlled by the parent node. This is particularly useful for scenarios like pivot cells (default is undefined).
Notebook
The Notebook component provides a tabbed interface to display multiple pages. Tabs can be aligned horizontally at the top or vertically on the left side of the element.
It offers two ways to define pages:
* Using slots.
* Providing dedicated props.
The isDisabled attribute can be used to disable a page. This attribute can be applied directly to the slot node or specified in the page declaration when using props. Disabled pages have their corresponding tabs grayed out and made inactive.
Location: @web/core/notebook/notebook
The props available for the Notebook component include:
* anchors: (Type: object, Optional) Allows navigation to elements within tabs that are not currently visible.
* className: (Type: string, Optional) Adds a custom CSS class to the root of the component.
* defaultPage: (Type: string, Optional) Sets the default page ID to be displayed when the component initializes.
* icons: (Type: array, Optional) Provides a list of icons to be displayed on the tabs.
* orientation: (Type: string, Optional) Specifies the layout of the tabs, either horizontal or vertical.
* onPageUpdate: (Type: function, Optional) A callback function triggered when the active page changes.
* pages: (Type: array, Optional) Defines the list of pages to populate the Notebook, typically from a template.
Pager
The Pager component is a streamlined pagination control tool. Pages are defined using an offset and a limit, which represent the starting point and the number of items per page, respectively. It displays the current page range and the total item count in a format like "9-12 / 20." For instance, with an offset of 8, a limit of 4, and a total of 20 items, the range would be 9-12. The component includes "Previous" and "Next" buttons to navigate between pages.
<Pager offset="0" limit="80" total="50" onUpdate="doSomething" />
SelectMenu
This component is ideal when you need functionality beyond the standard select element. It allows you to customize the option template, enable search within the options, or organize them into subsections for better usability.
Location: @web/core/select_menu/select_menu
Below is an example syntax for SelectMenu owl component.
<SelectMenu
  choices="choices"
  groups="groups"
  value="'value_2'"
>
  Select an option!
  <t t-set-slot="choice" t-slot-scope="choice">
    <span class="customClass" t-esc="'?? ' + choice.data.label + ' ??'" />
  </t>
</SelectMenu>
TagsList
This component is designed to display a series of tags in rounded pill shapes. The tags can either show a static list of values or be editable, allowing users to remove items. Additionally, the itemsVisible prop can be used to limit the number of tags displayed. If the list exceeds this limit, a circle will appear next to the last tag, indicating the count of the hidden items.
Location: @web/core/tags_list/tags_list
A tag has the following attributes:
* colorIndex: An optional identifier for the tag's color.
* icon: An optional icon that appears before the text on the tag.
* id: A unique identifier for the tag.
* img: An optional image displayed in a circular shape before the text.
* onClick: An optional callback function that allows the parent element to handle actions when the tag is clicked.
* onDelete: An optional callback function that enables the removal of the tag from the list, which must be managed by the parent element.
* text: The string of text displayed on the tag.
In summary, Owl components in Odoo 18 offer a robust and flexible approach to creating dynamic and interactive user interfaces. They allow developers to easily customize components through features like customizable slots, props, and callback functions. This flexibility helps in building user interfaces that are both responsive and tailored to specific requirements. Owl's component-based design also makes it easier to maintain, scale, and integrate with other parts of Odoo. Ultimately, Owl components are a valuable tool for improving user experience and adding functionality to Odoo 18 applications.
To read more about An Overview of Owl Components in Odoo 17, refer to our blog An Overview of Owl Components in Odoo 17.