In Odoo, views play a vital role in presenting business objects within the user interface. Whether you're adding to existing features or building something new, business objects are integral. These objects are presented to users through different types of views, which Odoo dynamically creates based on XML definitions.
List or Tree View
The List or Tree View is intended to showcase multiple records within a single interface, organized in a list or tree format. Each row represents a database record, while the columns display the fields associated with those records.
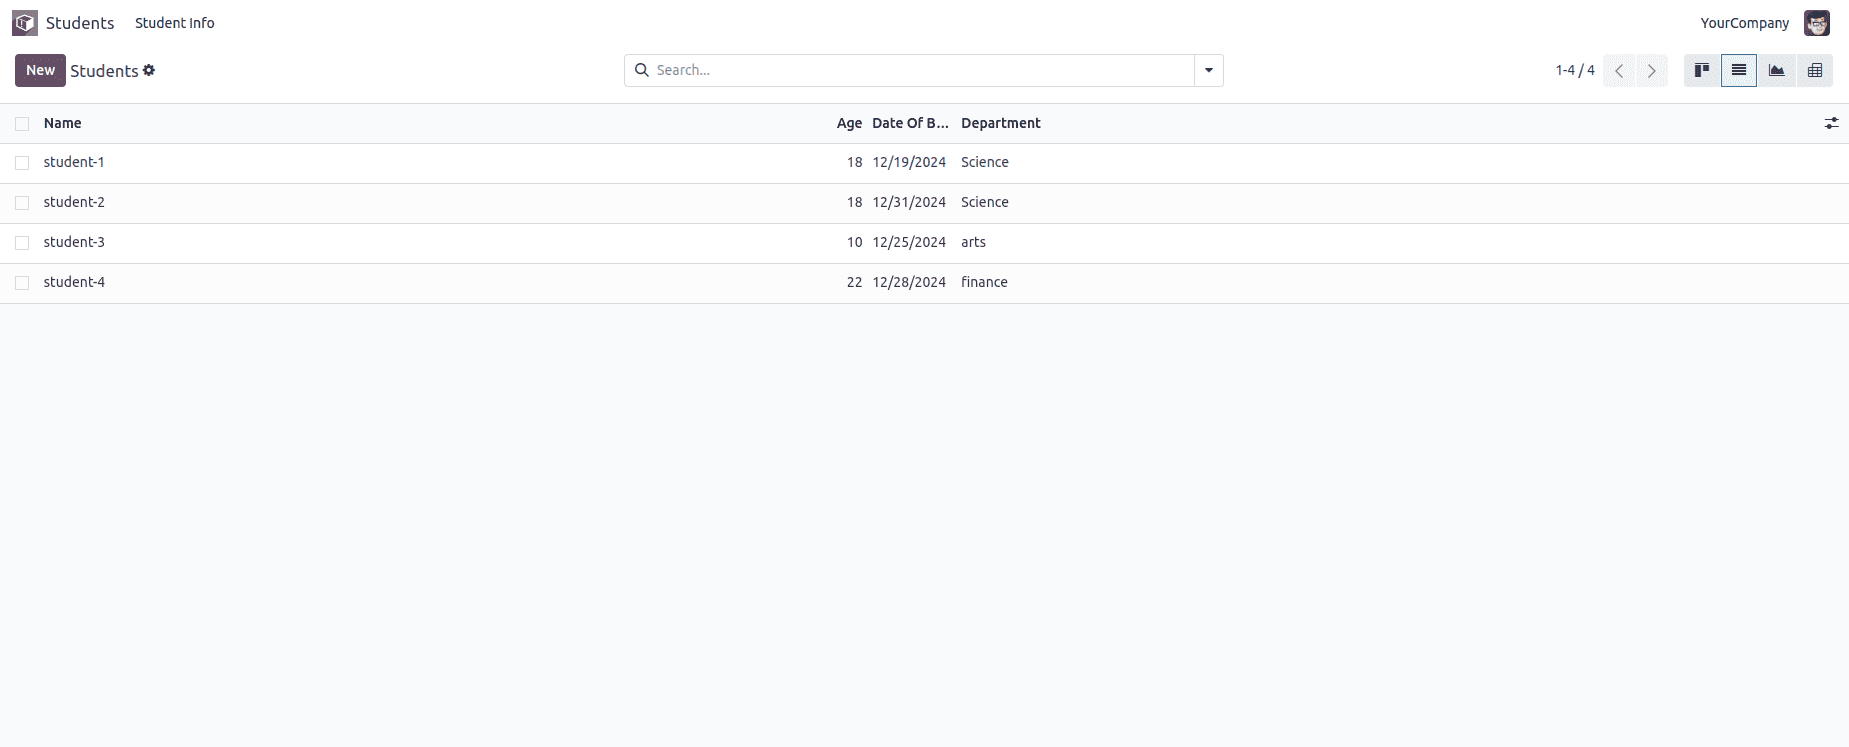
This view enables actions like sorting, filtering, and grouping. It is defined using the <list> tag as the root element. Below is an example of how to define a Tree View:
<record id="student_info_view_tree" model="ir.ui.view">
	<field name="name">student.info.view.tree</field>
	<field name="model">student.info</field>
	<field name="arch" type="xml">
	    <list>
		<field name="name"/>
		<field name="age"/>
		<field name="date_of_birth"/>
		<field name="department"/>
	    </list>
	</field>
</record>
Once the tree view record is created in the ir.ui.view model, the view mode must be set to 'tree' in the window action. This can be seen in the code block provided below the form view record.
Form View
The Form View is designed to present the details of an individual record, offering an in-depth display of the data it contains. It is defined using the <form> tag, which encompasses both structural and semantic elements.

<?xml version="1.0" encoding="UTF-8"?>
<odoo>
    <!-- Tree view of the model-->
    <record id="student_info_view_tree" model="ir.ui.view">
        <field name="name">student.info.view.tree</field>
        <field name="model">student.info</field>
        <field name="arch" type="xml">
            <list>
                <field name="name"/>
                <field name="age"/>
                <field name="date_of_birth"/>
                <field name="department"/>
            </list>
        </field>
    </record>
    <!-- Form view of the model-->
    <record id="student_info_view_form" model="ir.ui.view">
        <field name="name">student.info.view.form</field>
        <field name="model">student.info</field>
        <field name="arch" type="xml">
            <form string="Access Rights">
                <sheet>
                    <div class="oe_title">
                        <label for="name"/>
                        <h1>
                            <field name="name" placeholder="e.g. John Doe" required="1"/>
                        </h1>
                    </div>
                    <group>
                        <field name="age"/>
                        <field name="date_of_birth"/>
                        <field name="department"/>
                    </group>
                </sheet>
            </form>
        </field>
    </record>
    <!-- Action of the model-->
    <record id="ir_actions_act_window_students" model="ir.actions.act_window">
        <field name="name">Students</field>
        <field name="res_model">student.info</field>
        <field name="view_mode">kanban,list,graph,form,pivot</field>
    </record>
    <!-- Root menu of the model-->
    <menuitem
        id="student_info_root"
        name="Students"
        sequence="1"/>
    <!-- Student Info menu of the model-->
    <menuitem
            id="student_info_menu"
            name="Student Info"
            parent="student_info_root"
            action="ir_actions_act_window_students"
            sequence="0"/>
</odoo>
The code snippet above includes another record that defines a window action, outlining how users can interact with the student.info model within the Odoo interface. It specifies a window action for the student.info model in Odoo:
* Name: The action is labeled "Students."
* Model: It operates on the student.info model.
* View Mode: By default, it shows records in a tree (list) view, allowing users to switch to a form view for detailed information. When creating a view record for a model, it is essential to specify the appropriate view mode. For instance, use pivot for a Pivot view, graph for a Graph view, kanban for a Kanban view, activity for an Activity view, calendar for a Calendar view, and hierarchy for a Hierarchy view.
This action enables users to efficiently view and manage student records.
Pivot View
The Pivot View is a powerful tool for data analysis, enabling users to create and filter reports in different formats. It is especially useful for those who need to export reports, such as in XLSX format.
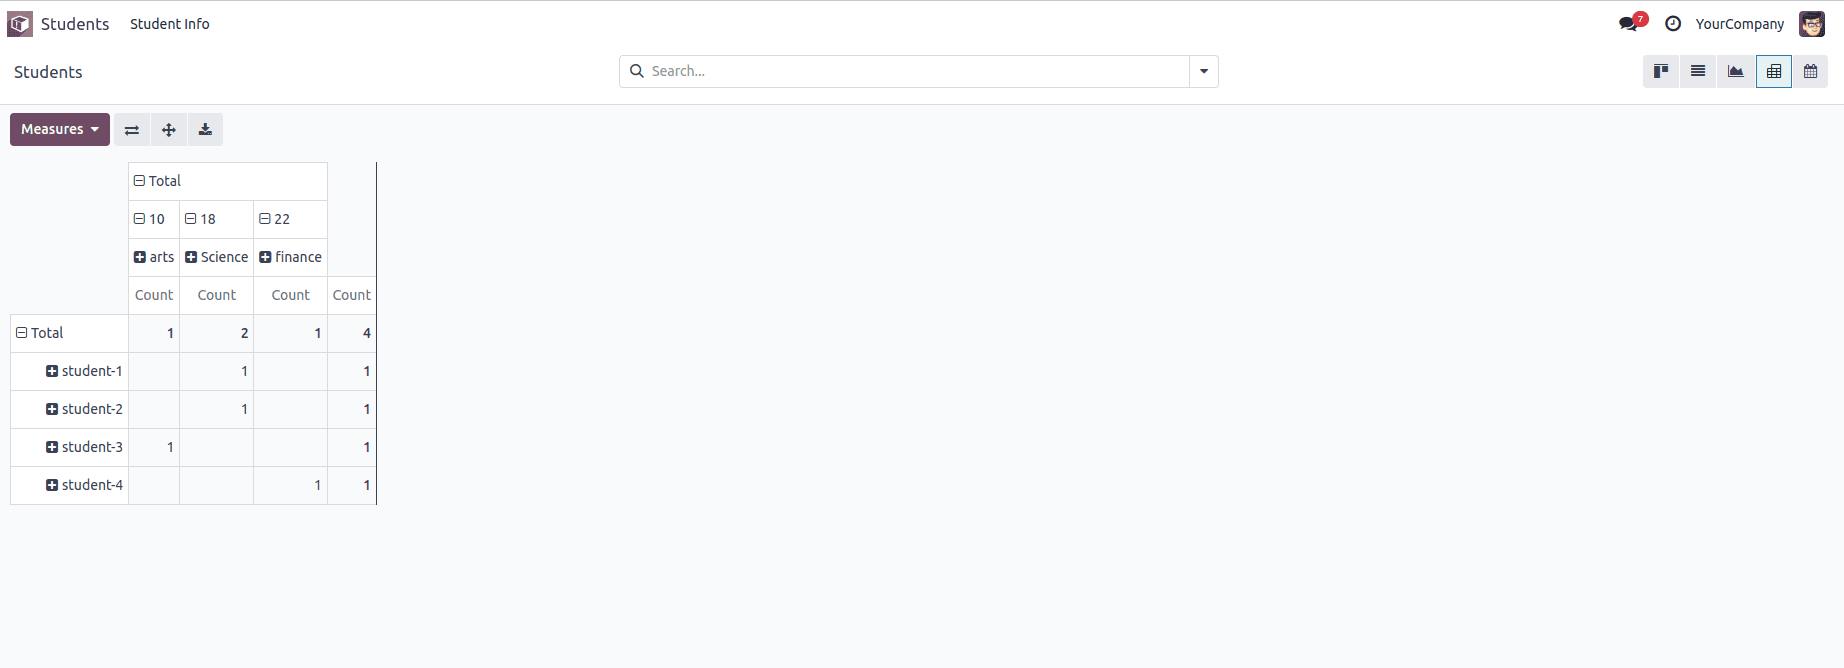
Pivot views are defined using the <pivot> tag, where the fields and their types are outlined. Data can be arranged into rows or columns to create a structured view.
<record id="student_info_view_pivot" model="ir.ui.view">
	<field name="name">student.info.view.pivot</field>
	<field name="model">student.info</field>
	<field name="arch" type="xml">
	    <pivot>
		<field name="name" type="row"/>
		<field name="age" type="col"/>
		<field name="department" type="col"/>
	    </pivot>
	</field>
</record>
Graph View
The Graph view provides a visual way to present data, enabling users to quickly understand information through bar charts, pie charts, and other graphical formats. It is defined using the <graph> tag, with attributes that define the graph type and the fields to be displayed.

Here is an example of a graph view that visualizes the number of students with birthdays on each date.
<record id="student_info_view_graph" model="ir.ui.view">
        <field name="name">student.info.view.graph</field>
        <field name="model">student.info</field>
        <field name="arch" type="xml">
            <graph string="student Graph" sample="1">
                <field name="name" type="col"/>
                <field name="date_of_birth" type="row"/>
                <field name="age" type="measure"/>
            </graph>
        </field>
</record>
Each field in the graph view can include a type attribute that determines how the data is grouped or measured:
* A field with type="row" indicates that each group will have its own row.
* A field with type="col" is utilized for grouping data by columns.
*A field with type="measure" is typically used for numerical data, such as integers or floats, representing values to be measured or aggregated in a graph.
This enables flexible and dynamic representation of data based on the requirements of the view.
Kanban View
The Kanban View displays records as cards that can be organized into columns for better visualization. This view is especially valuable for project management or situations where tasks or records need to be visually categorized and tracked.
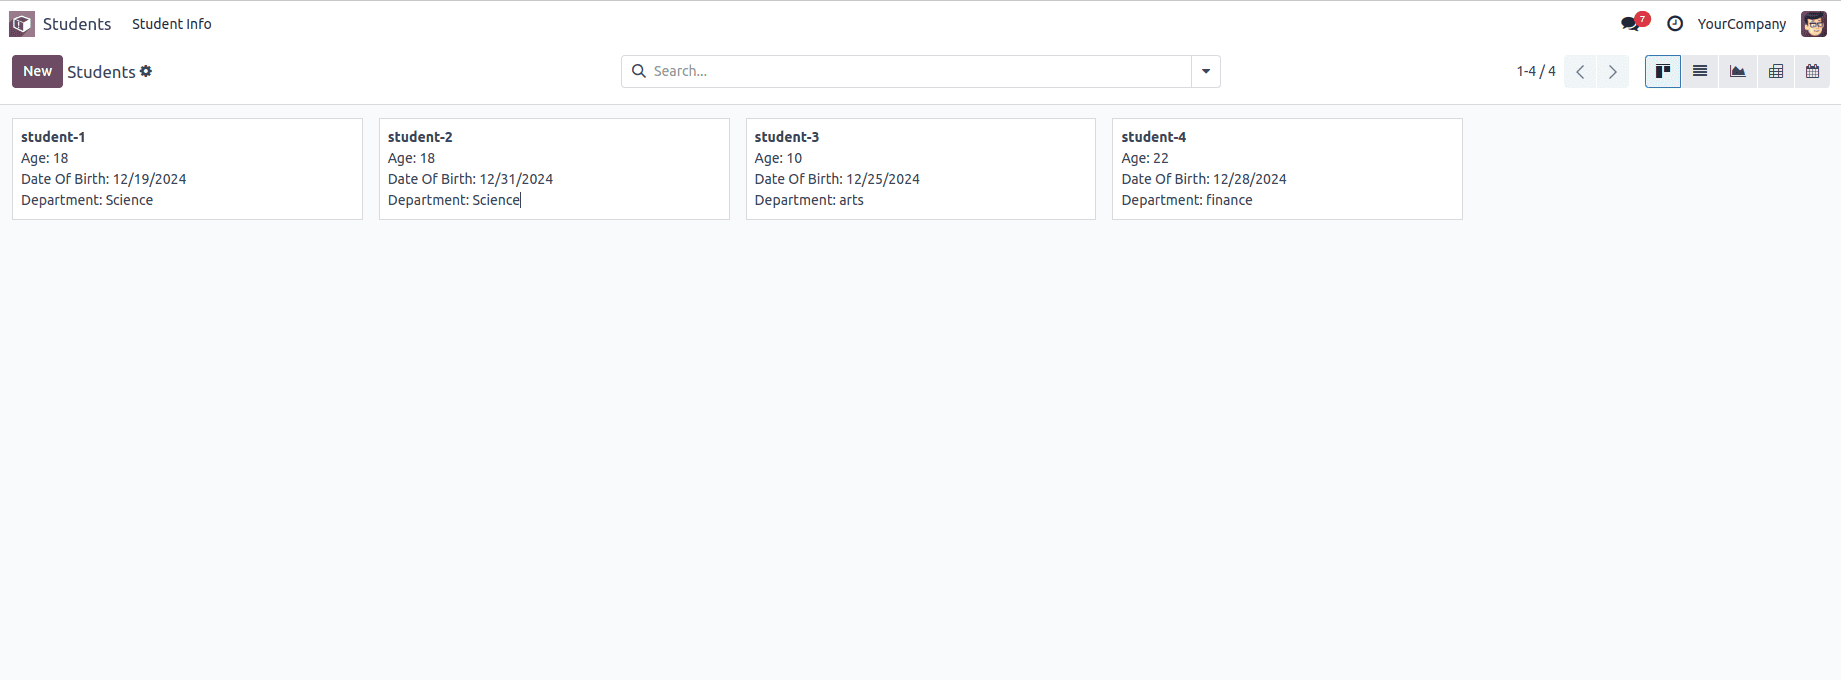
The view is defined using the <kanban> tag and includes a set of QWeb templates. The main template, usually called kanban-box, contains the fields and HTML classes that define the structure of the Kanban cards.
<record id="student_info_view_kanban" model="ir.ui.view">
        <field name="name">student.info.kanban</field>
        <field name="model">student.info</field>
        <field name="arch" type="xml">
            <kanban class="o_kanban_mobile">
                <templates>
                    <t t-name="card">
                        <div class="d-flex">
                            <field name="name" class="fw-bolder me-2 flex-shrink-0"/>
                        </div>
                        <div>Age:
                            <field name="age"/>
                        </div>
                        <div>Date Of Birth:
                            <field name="date_of_birth"/>
                        </div>
                        <div>Department:
                            <field name="department"/>
                        </div>
                    </t>
                </templates>
            </kanban>
        </field>
</record>
You can also use attributes such as default_group_by and default_order:
* default_group_by: This attribute is used to organize records into groups within the Kanban view.
* default_order: This attribute defines the default order in which the records are sorted.
Calendar View
The Calendar view is essential for organizations to track key dates and events. It is structured using the <calendar> tag, with attributes such as date_start, date_stop, and color to manage how the display appears:
Calendar views are essential for managing schedules and deadlines, allowing users to monitor important dates like enrollment periods and class timetables.
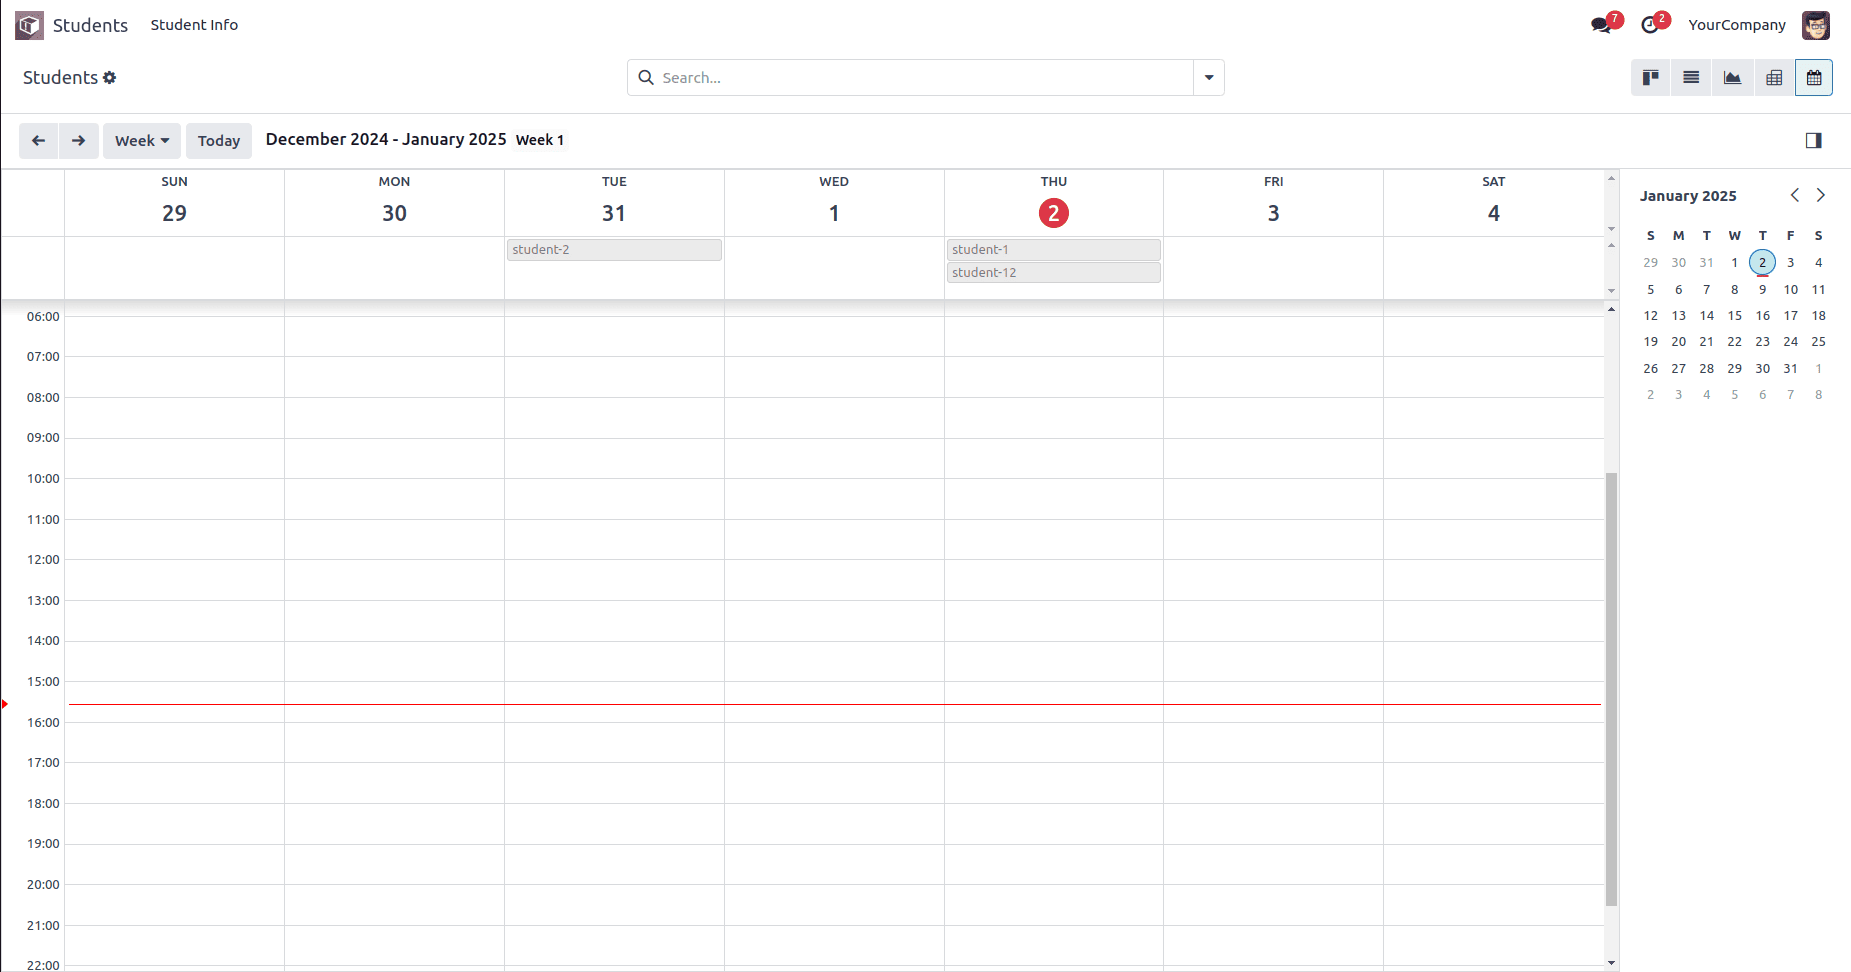
Here’s an example of a calendar view for managing Student Information:
<record id="student_info_view_calender" model="ir.ui.view">
        <field name="name">student.info.calendar</field>
        <field name="model">student.info</field>
        <field name="arch" type="xml">
            <calendar string="Leads Generation" create="0" date_start="date_of_birth">
                <field name="age"/>
                <field name="name"/>
                <field name="date_of_birth"/>
                <field name="department"/>
            </calendar>
        </field>
</record>
In the calendar view, we can see multiple attributes like date_start, date_end. Let’s explain one by one,
* date_start - It specifies the start date of the calendar event. When a date field from the model is provided in this attribute, it will be used as the event's starting date in the calendar view.
* date_stop - It defines the end date of the calendar event.
* date_delay: It acts as an alternative to the date_stop field.
* mode - The calendar view can be displayed on a daily, weekly, or monthly basis. It shows the default view mode of the calendar as soon as the page loads. The possible values for this attribute are Day, Week, or Month.
* color - This attribute assigns colors to different events based on a specified field (typically a many2one field).Records sharing the same value in this field will be displayed in the same color.
* event_open_popup - If this is enabled, the event will open in a popup. Specifically, when event_open_popup="true", the calendar view will open the event as a popup. Otherwise, events will open in a form view.
* quick_add - This field enables the creation of events instantly.
Activity View
Activity views are used to organize and schedule tasks related to records, enabling users to stay on top of their responsibilities and track progress.

Here’s how to set up an activity view for scheduling student tasks:
<record id="student_info_view_activity" model="ir.ui.view">
        <field name="name">student.info.view.activity</field>
        <field name="model">student.info</field>
        <field name="arch" type="xml">
            <activity string="Event">
                <templates>
                    <div t-name="activity-box">
                        <field name="create_uid" widget="many2one_avatar_user"/>
                        <div class="flex-grow-1">
                            <field name="name" string="Student Name" class="o_text_block o_text_bold"/>
                            <field name="date_of_birth"/>
                        </div>
                    </div>
                </templates>
            </activity>
        </field>
</record>
This view is defined within the <activity> tag, with the main element named activity-box. The fields within the <activity> tag can be specified to organize the content in a structured manner.
Hierarchical View
The Hierarchical View in Odoo 18 is designed to display records with a parent-child relationship in a tree structure. This view is perfect for organizing data that follows a hierarchical pattern, such as categories or organizational structures.
This view enables users to navigate course categories in a hierarchical layout, illustrating how each category is structured under its parent.
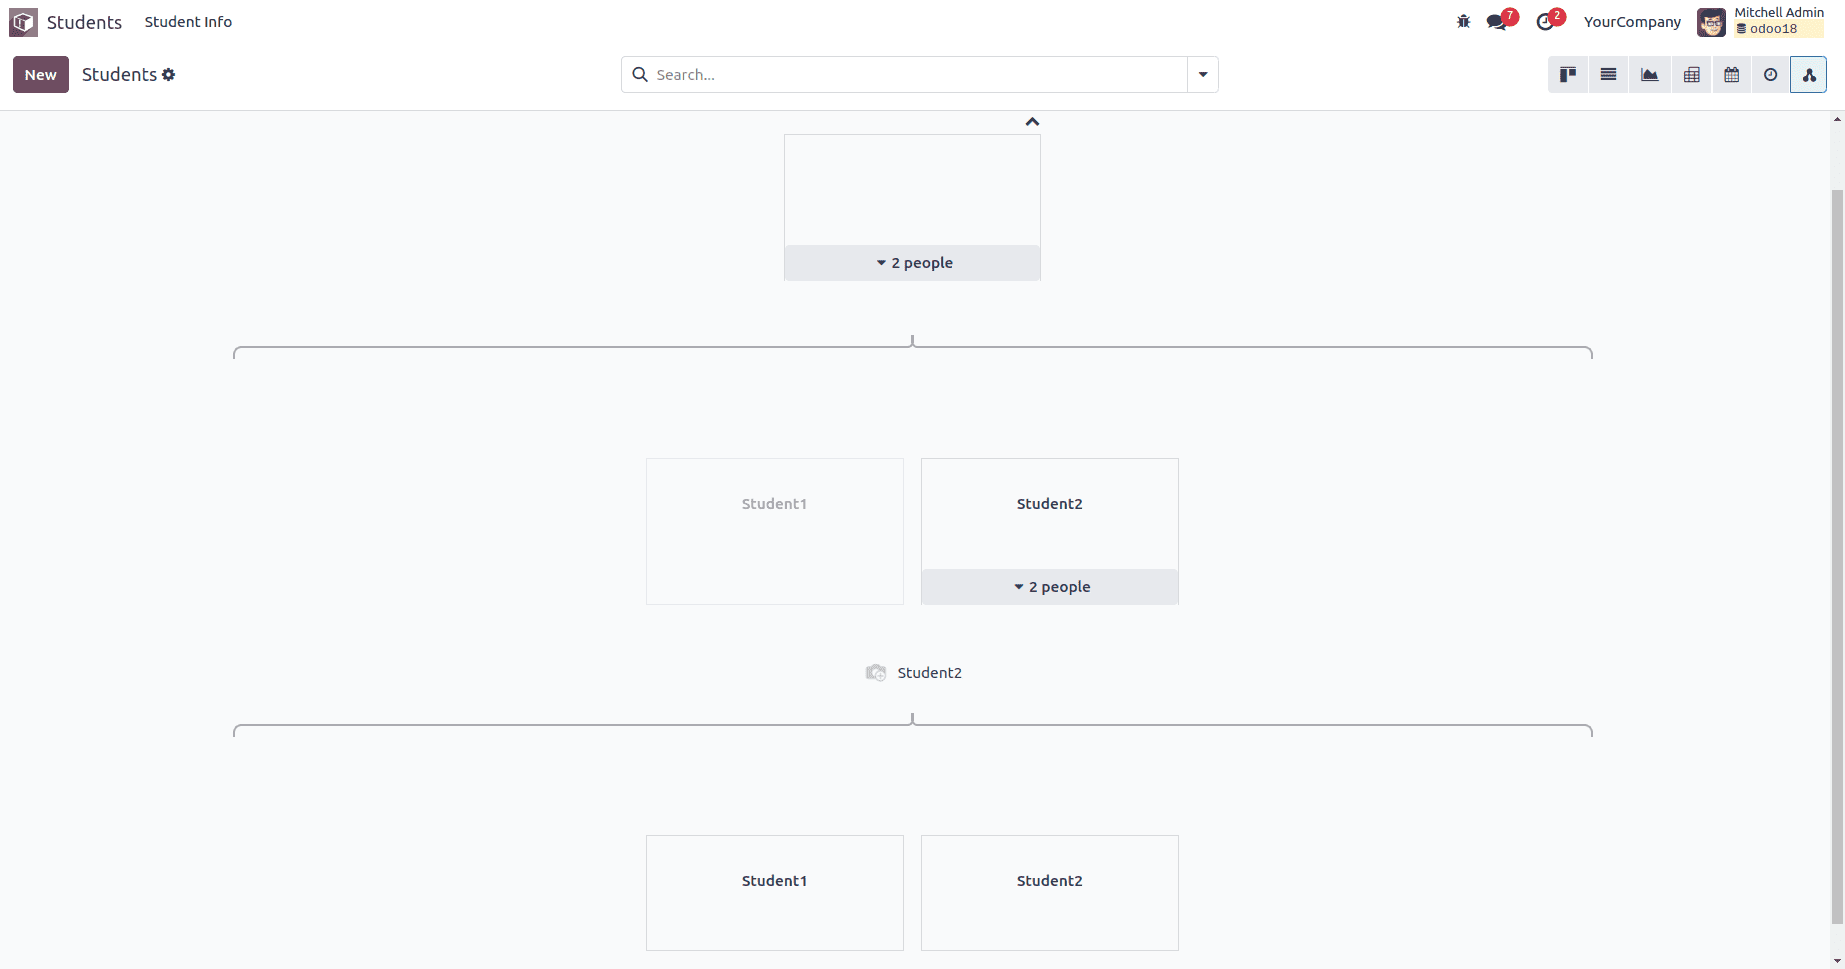
Here’s an example of how to create a Hierarchical view for the "student.info” model
<record id="student_info_view_hierarchy" model="ir.ui.view">
        <field name="name">student.info.view.hierarchy</field>
        <field name="model">student.info</field>
        <field name="arch" type="xml">
            <hierarchy child_field="child_ids" js_class="hr_employee_hierarchy"
                        draggable="1">
                <field name="name"/>
                <templates>
                    <t t-name="hierarchy-box">
                        <div t-attf-class="o_hierarchy_node_header d-flex justify-content-center pb-4"
                             t-att-title="parent_id">
                        </div>
                        <div class="o_hierarchy_node_body d-flex flex-column text-center">
                            <div class="w-100 position-relative">
                                <field class="fw-bold" name="name"/><br/>
                            </div>
                        </div>
                    </t>
                </templates>
            </hierarchy>
        </field>
</record>
The advanced hierarchical view feature in Odoo improves the functionality of different menu options, boosting the platform's effectiveness for business management.
Odoo's advanced hierarchical view feature greatly improves the organization and efficiency of menu functions, increasing the platform's overall effectiveness in managing business operations. It enables users to visualize and handle complex parent-child relationships within records, simplifying navigation and enhancing system usability.
Apart from the hierarchical view, Odoo also provides other specialized views, including the Cohort and Gantt views, which are only available in the Odoo Enterprise version. These views offer enhanced features for monitoring and managing data over time, supporting businesses in optimizing their operations.
* The Cohort view is perfect for examining data across defined time intervals, such as monitoring customer retention or tracking project development.
* The Gantt view provides a valuable tool for project management, enabling users to display tasks and timelines in a Gantt chart format
To read more about What are the View Types in Odoo 17, refer to our blog What are the View Types in Odoo 17.