The manufacturing module of Odoo offers a complete system of management for manufacturing operations and production of goods. Developing production orders, customizing procedures, and setting up work centers increases efficiency. The Bills of Materials generation process is encouraged by the Odoo Manufacturing Order Management system, which also contracts out manufacturing tasks. The maintenance, product lifecycle management, and quality modules are integrated by the Odoo 16 Manufacturing ERP, which offers rapid request tracking, quality alerts, and manufacturing component approval processes.
To produce a flawlessly finished product, a manufacturing order entails several activities. When setting up a production order in the Odoo production module, you may describe all these procedures as Work Orders. In medium-sized to big businesses, the production process is managed by integrating the activities of many work centers. With the aid of Odoo 16, it is able to allocate these work centers to each stage of manufacture and manage them.
You can access the Work Centres option under the Configuration menu to configure the work center for the Odoo Manufacturing module. Information about the name of the work center, its code, tag, alternative work centers, cost per hour, capacity, time efficiency, and OEE target will be shown alongside the presently specified list of work centers, as shown in the image below.

You can create a new Work Center by pressing the “NEW” button; this will open a configuration form, as shown below.
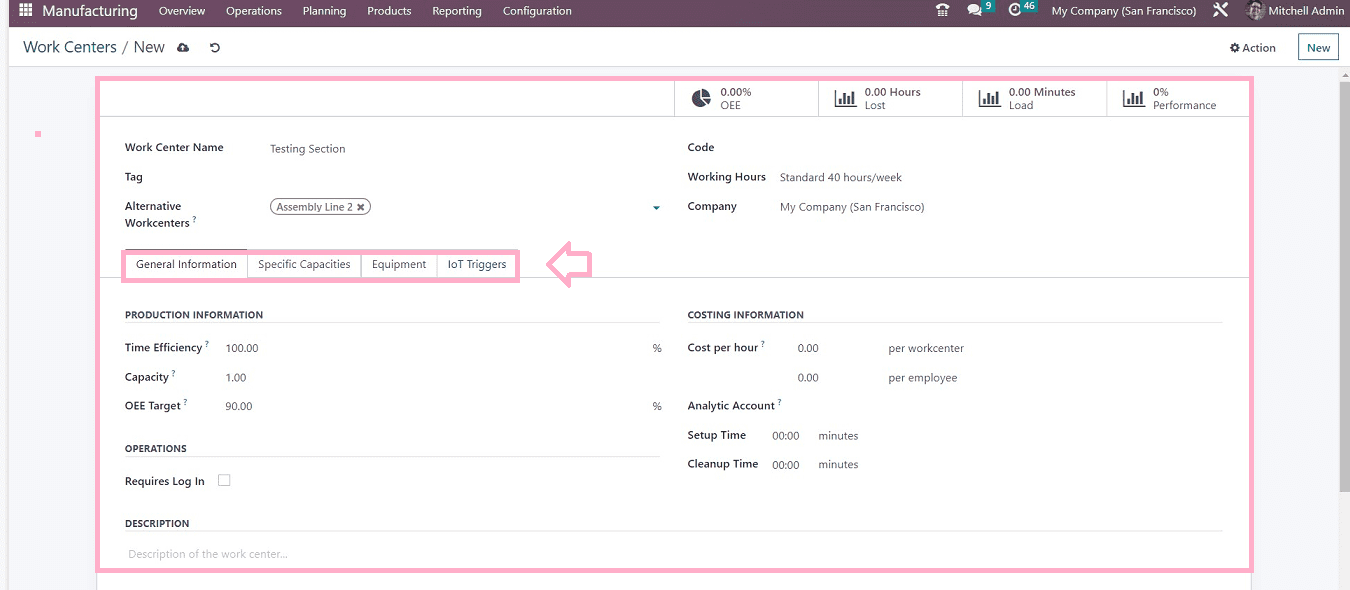
Enter an appropriate name for your workcenter in the “Workcentre Name” field. You can also add any relatable tags in the “Tags” section. An alternative work center name can be provided in the “Alternative Workcenter” field. The “Code” of the workcenter can be provided, and you can select a suitable “Working Hours” from the dropdown section and the “Company” name.
This form contains a few tab sections that include “General Information,” “Specific Capacities,” “Equipment,” and “IoT Triggers.”
General Information Tab
The “PRODUCTION INFORMATION,” “OPERATIONS,” and “COSTING INFORMATION” can be entered under the “General Information” tab. It comprises the OEE Target, Capacity, and Time Efficiency.
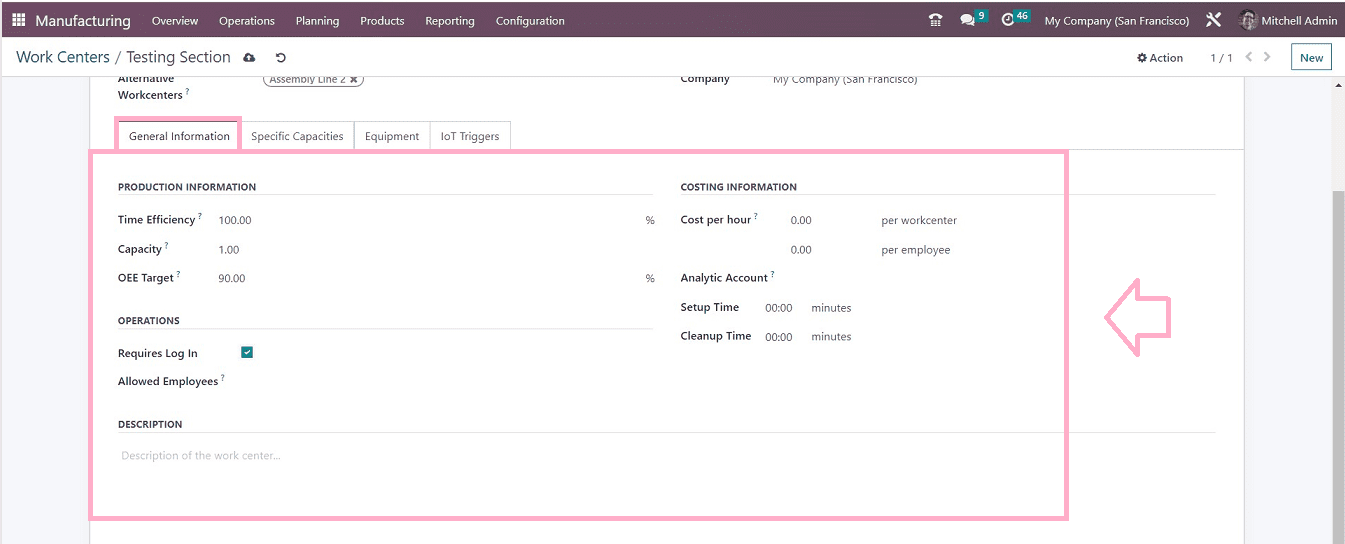
The projected time takes to complete each work order in this work center will be specified in the “Time Efficiency” field. The “Capacity” reveals the standard number of goods that can be produced concurrently in this work center. In the “OEE objective” field, you may see the overall effective efficiency objective expressed as a percentage.
If you only want to give access to certain employees to the work center, you can enable the “Requires Log-In” option under the “OPERATIONS” session. To define which workers are permitted to access the work center, you will receive a new field where you can choose the employee names inside the “Allowed Employees” field.
The “COSTING INFORMATION” session can be used to set the “Cost per hour” per each Workcentre as well as Employee. In the “Analytic Account” field, choose an appropriate account name from the dropdown list. Finally, the “DESCRIPTION” area can be utilized to edit any notes or descriptions regarding the Work centers.
Specific Capacities Tab
Under the “Specific Capacity” tab, you can specify the work center's capacity for a particular product. Clicking on the “Add a line” link will open an editing field, where you can add any products from the available dropdown list, as shown below.
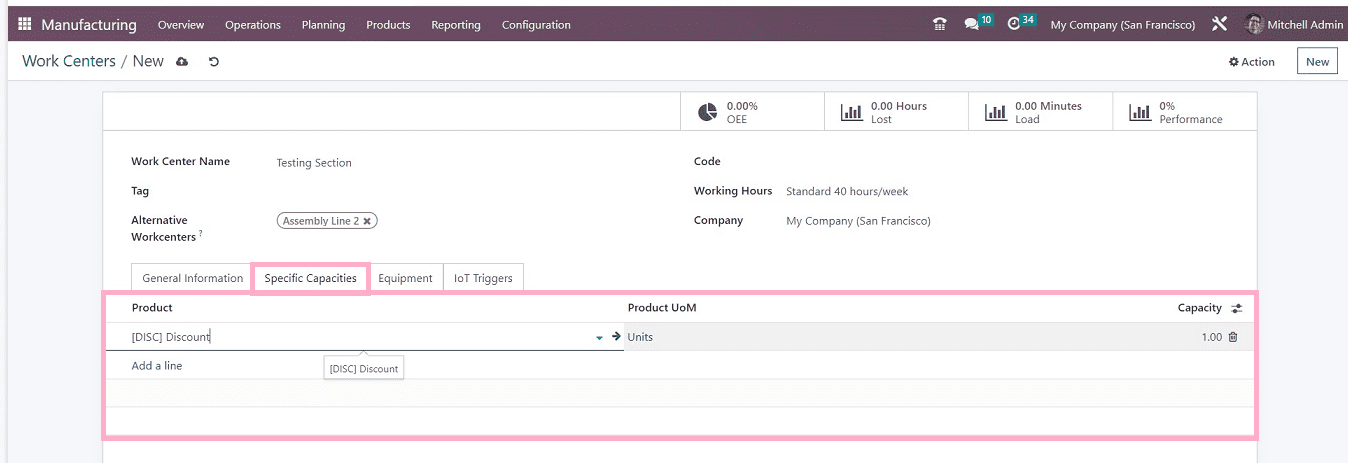
The "Purchased Unit of Measure" and "Capacity" can also be modified depending on the requirements.
Equipment Tab
Under the Equipment tab, you can get a list of the equipment this workstation uses. The Equipment Name, Technician, Equipment Category, Mean Time Between Failures(MTBF), Mean Time To Repair(MTTR), and Estimated Future Failure information for the equipment are all shown inside the tab.
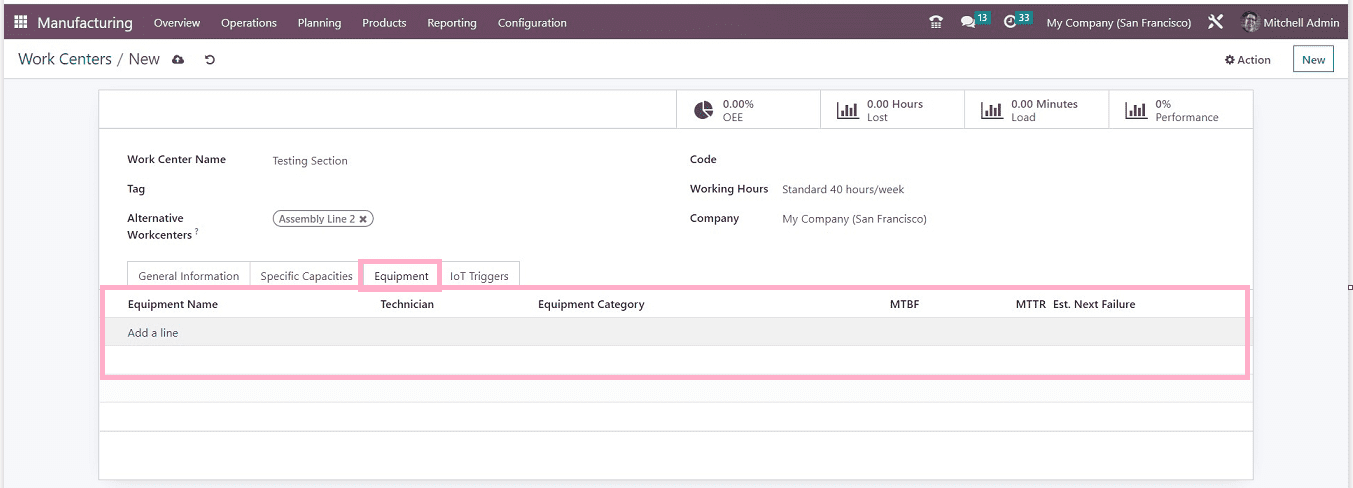
You can add new equipment data using the “Add a line” button and select from the displayed pop-up window.
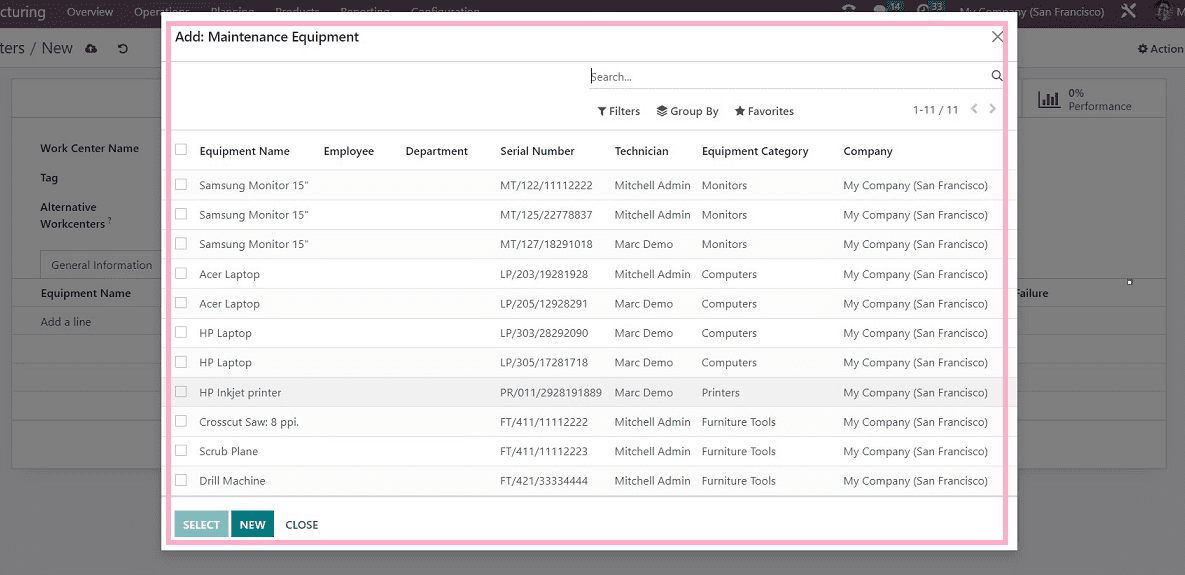
Now, your new Maintenance Equipment will be added inside the newly created Workcenter.

After choosing the maintenance product, you can edit the further maintenance details by clicking on the product column from the “Equipment” tab, and this will open another configuration form to edit the Product Descriptions, Maintenance details, and other Product Information inside the respective tab sections.
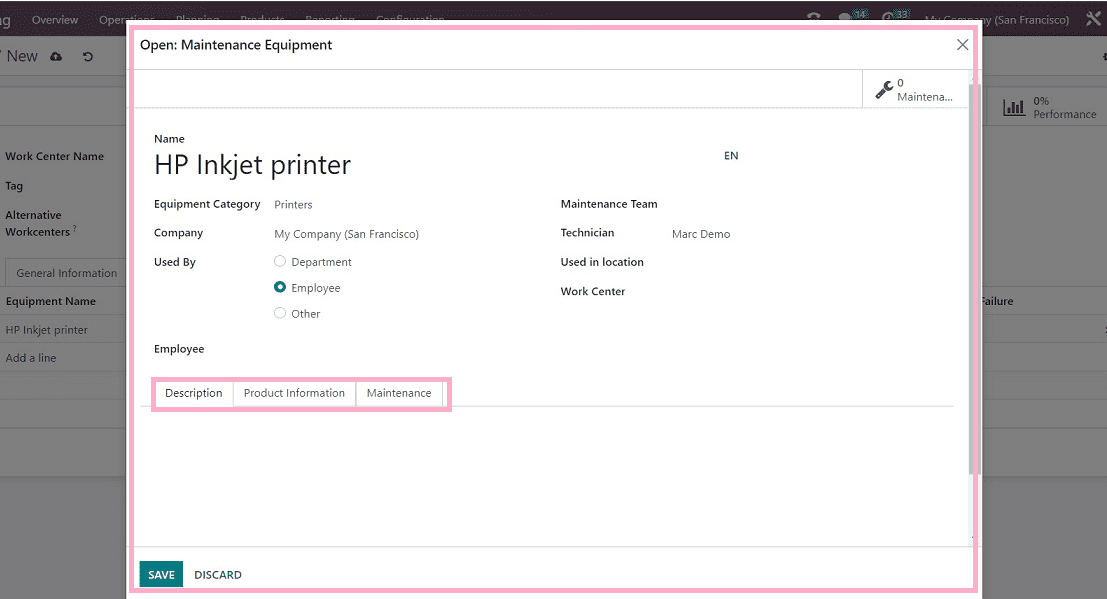
Return to the Workcenter Configuration form after saving the equipment information. Using the same technique, you can add several Maintenance pieces of equipment to a certain Work center.
IoT Triggers Tab
You can utilize IoT services and devices for work centers and manage them. In the “IoT Triggers” tab, it is possible to list the external devices that are going to be utilized or connected with the Work Center. The “Add a line” button allows you to provide the device ID, Key, and Action.

The IoT Device’s features can be edited in the configuration form that has to be accessed by clicking the "Internal Links" icon, as seen below.
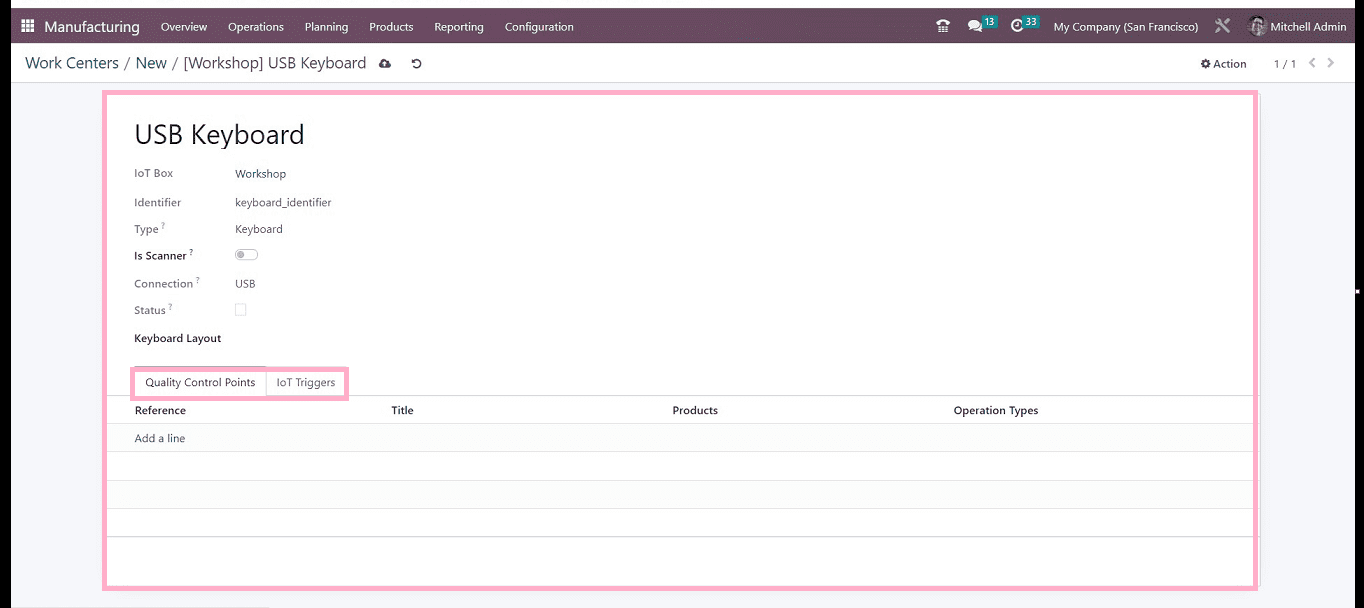
In this configuration form, you can customize the IoT triggers and quality control points. After making any necessary edits, return to the Work Centre Configuration form and save the information using the “Save” icon.
You can see some Smart buttons have appeared on the work center form view to help you keep an eye on operations planned for this work center, such as “Overall Equipment Effectiveness(OEE),” Productivity “Losses,” work center “Loads,” and work order “Performance.”
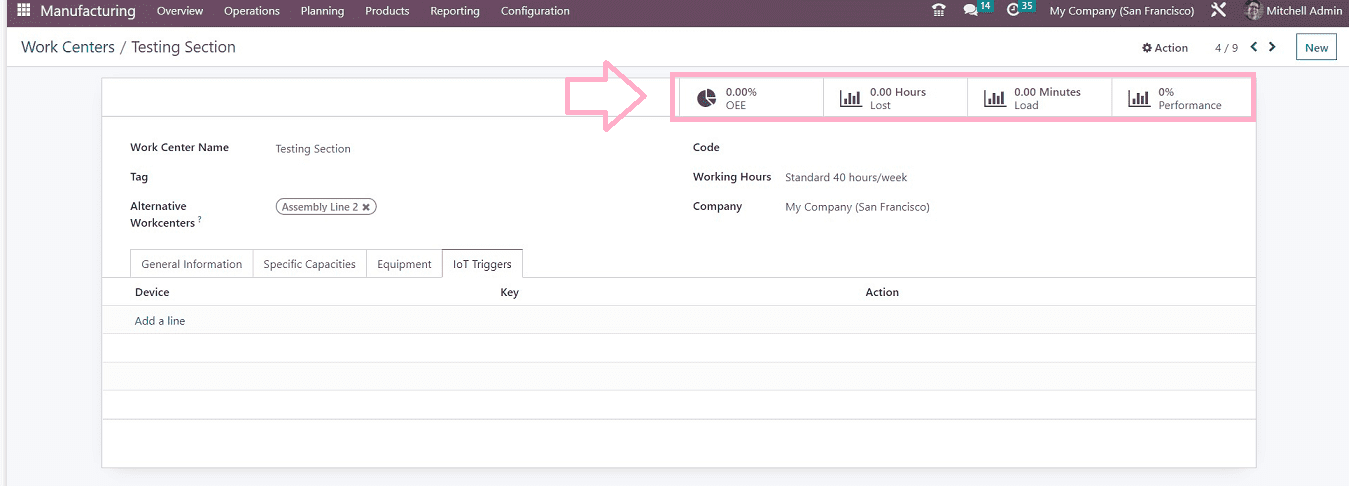
Overall Equipment Effectiveness(OEE) Smart Tab
The performance analysis report of the work center may be obtained via the Overall Equipment Effectiveness button and is based on the employees' cost, length, user, and loss factors. The dashboard window is currently empty since there is no OEE data available for this Work Centre at this time.
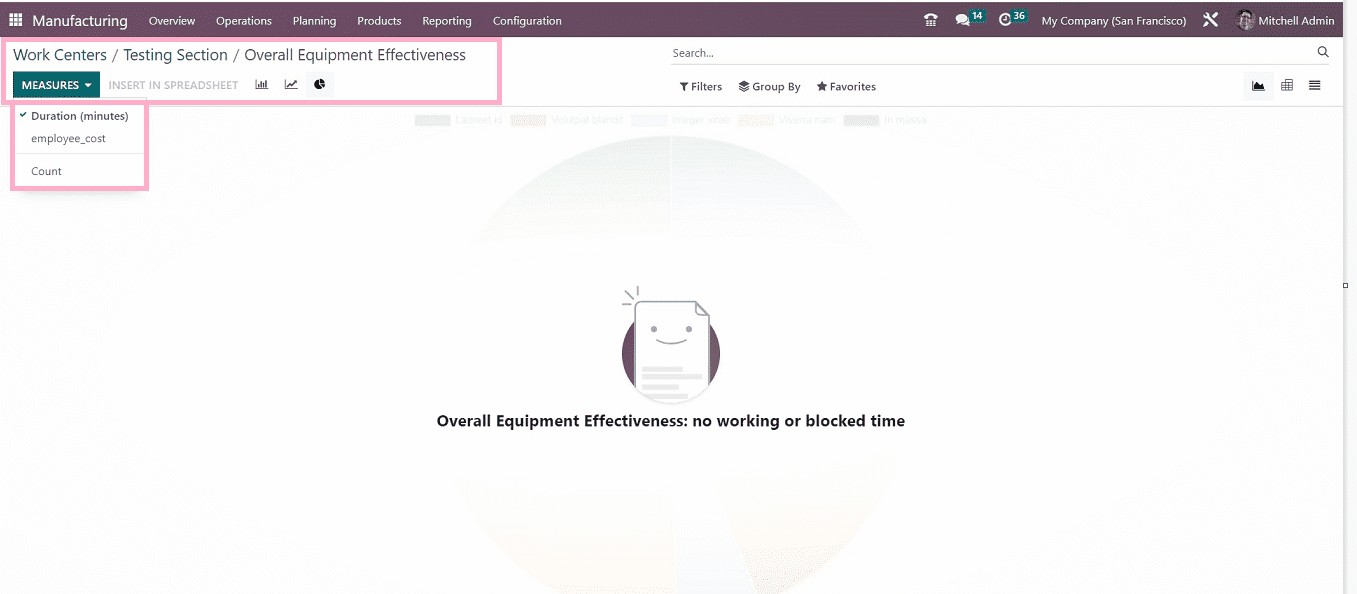
The default "Filters," "Group By," and "Favourites" choices are also accessible here. The "MEASURES" button allows you to change the dashboard's specifications.
Productivity “Losses Smart Tab
Using the “Losses” smart button, you may get the report of Productivity Loss owing to various factors, such as equipment failure and lower speed.
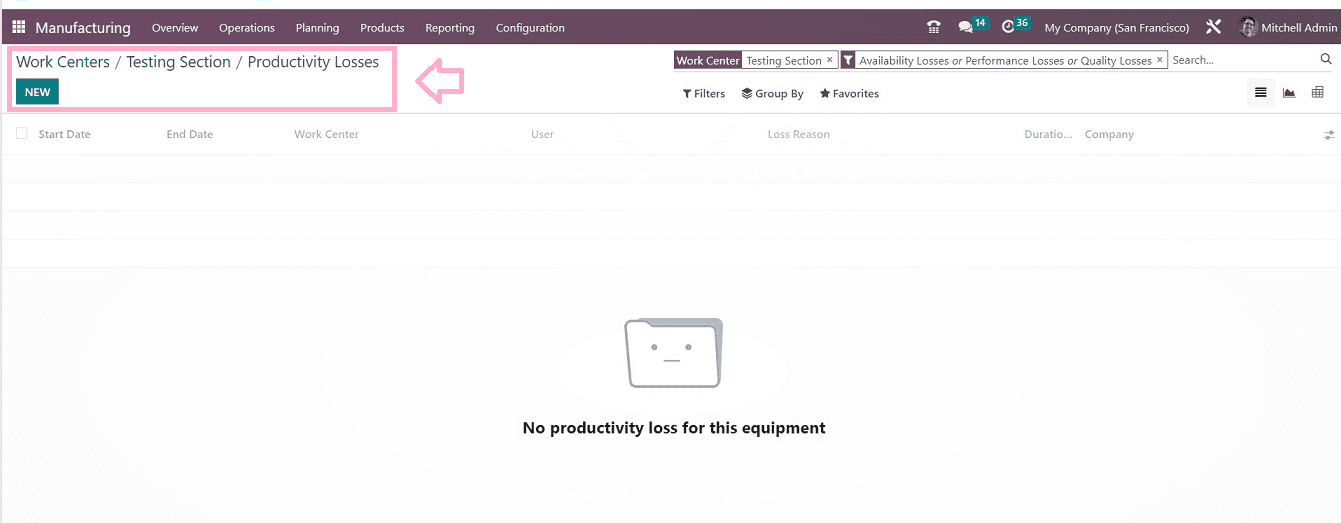
This “Productivity Losses” dashboard will give you an overview of the particular loss Start Date, End Date, Work Center, User, Loss Reason, Duration, Company, etc., as shown above.
Configuring New Productivity Losses: By selecting the "NEW" option, you can create a new Productivity Loss data. This will open a short configuration form like the one below.

The "Manufacturing Order" and "Work Centre" fields will be filled automatically when you choose or enter the proper "Work Order" in the specified field. The "Start Date" and "End Date" of the Productivity Loss can be entered in the relevant fields. The "Duration" and "Company" information can both be changed. The "Loss Reason" field can then be used to edit or choose the loss's reason from a list.
Work Centre Loads Smart tab
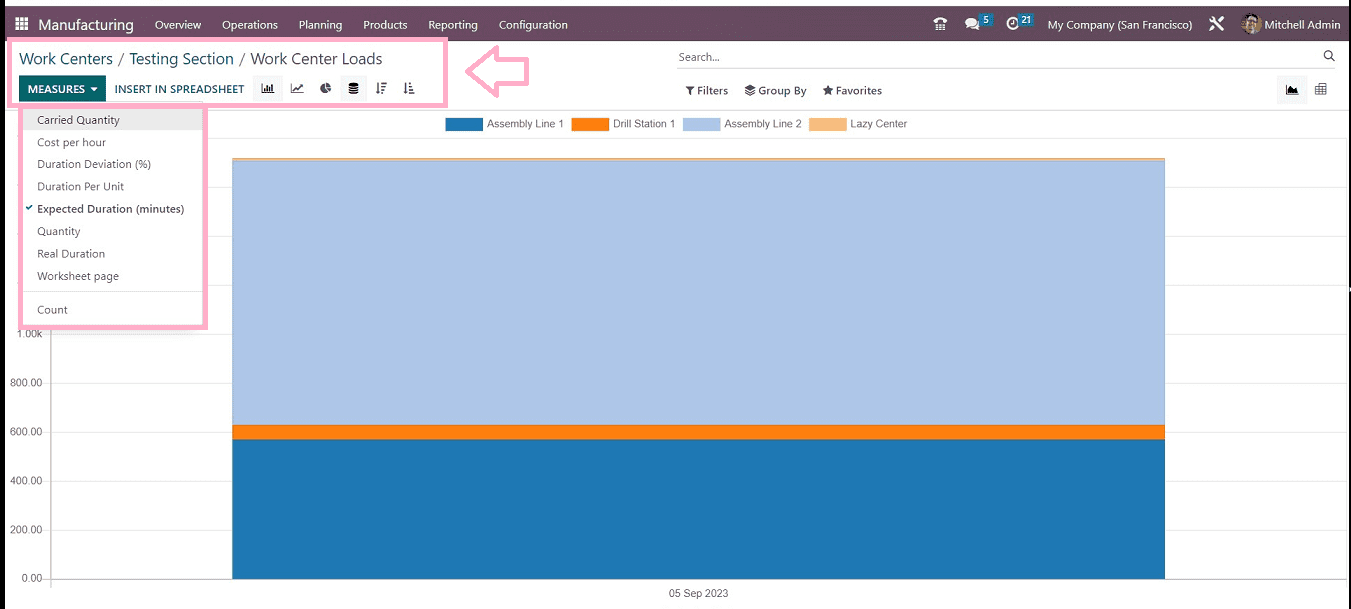
The Work Centre Loads provide information on the work order in real-time to the anticipated time ratio. The performance button will display an examination of the performance of the work orders allocated to this work center.
Performance Smart Tab
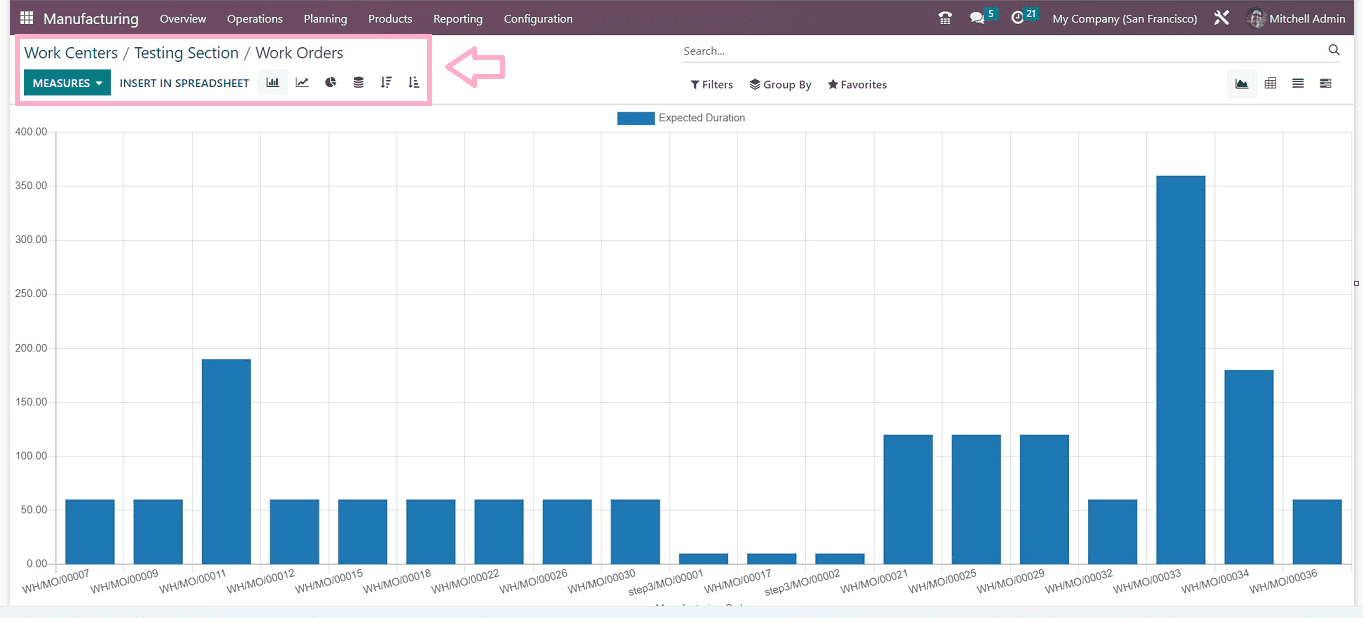
The “Performance” Smart Tab can be used to get an analysis of the Work CCenter Performance based on Work Orders. You can see the analysis reporting window after opening the “Performance” smart tab, as shown below.
The functionality offered by the Work Centre Configuration Process and the Smart button features offered by the Workcenter Configuration form have been covered in this blog. By guaranteeing optimal resource utilization and carefully planned operations, the Work Center facility in the Odoo16 Manufacturing Module helps in the manufacturing process and increases business productivity.