Invoicing can be a hectic task especially linked with accounting management. Keeping up the efficiency in invoicing management is necessary for preserving the institution's workflow and revenue
This blog will give you a short note on Invoicing with Odoo 15 Accounting module.
Invoicing is fully integrated with the Accounting module. Initial configurations and setting up of Invoicing can be done from the Accounting module. Invoices can be designed, created and managed from the accounting module. The feature is fully integrated with the modules for giving more accessibility to the users to manage the process quickly. Follow the link given below to know more about the initial configurations and design the invoices with the Odoo 15 Accounting module How to Manage Invoices Efficiently with Odoo 15
Customer invoices
To understand the process of customer invoice creation and management in detail, we have to go through an example situation.
Mitchel has revived a sales confirmation and has to create a customer invoice. Mitchell can create a new customer invoice from the Accounting module by clicking on Invoices under the customer tab from the dashboard of the Accounting module.
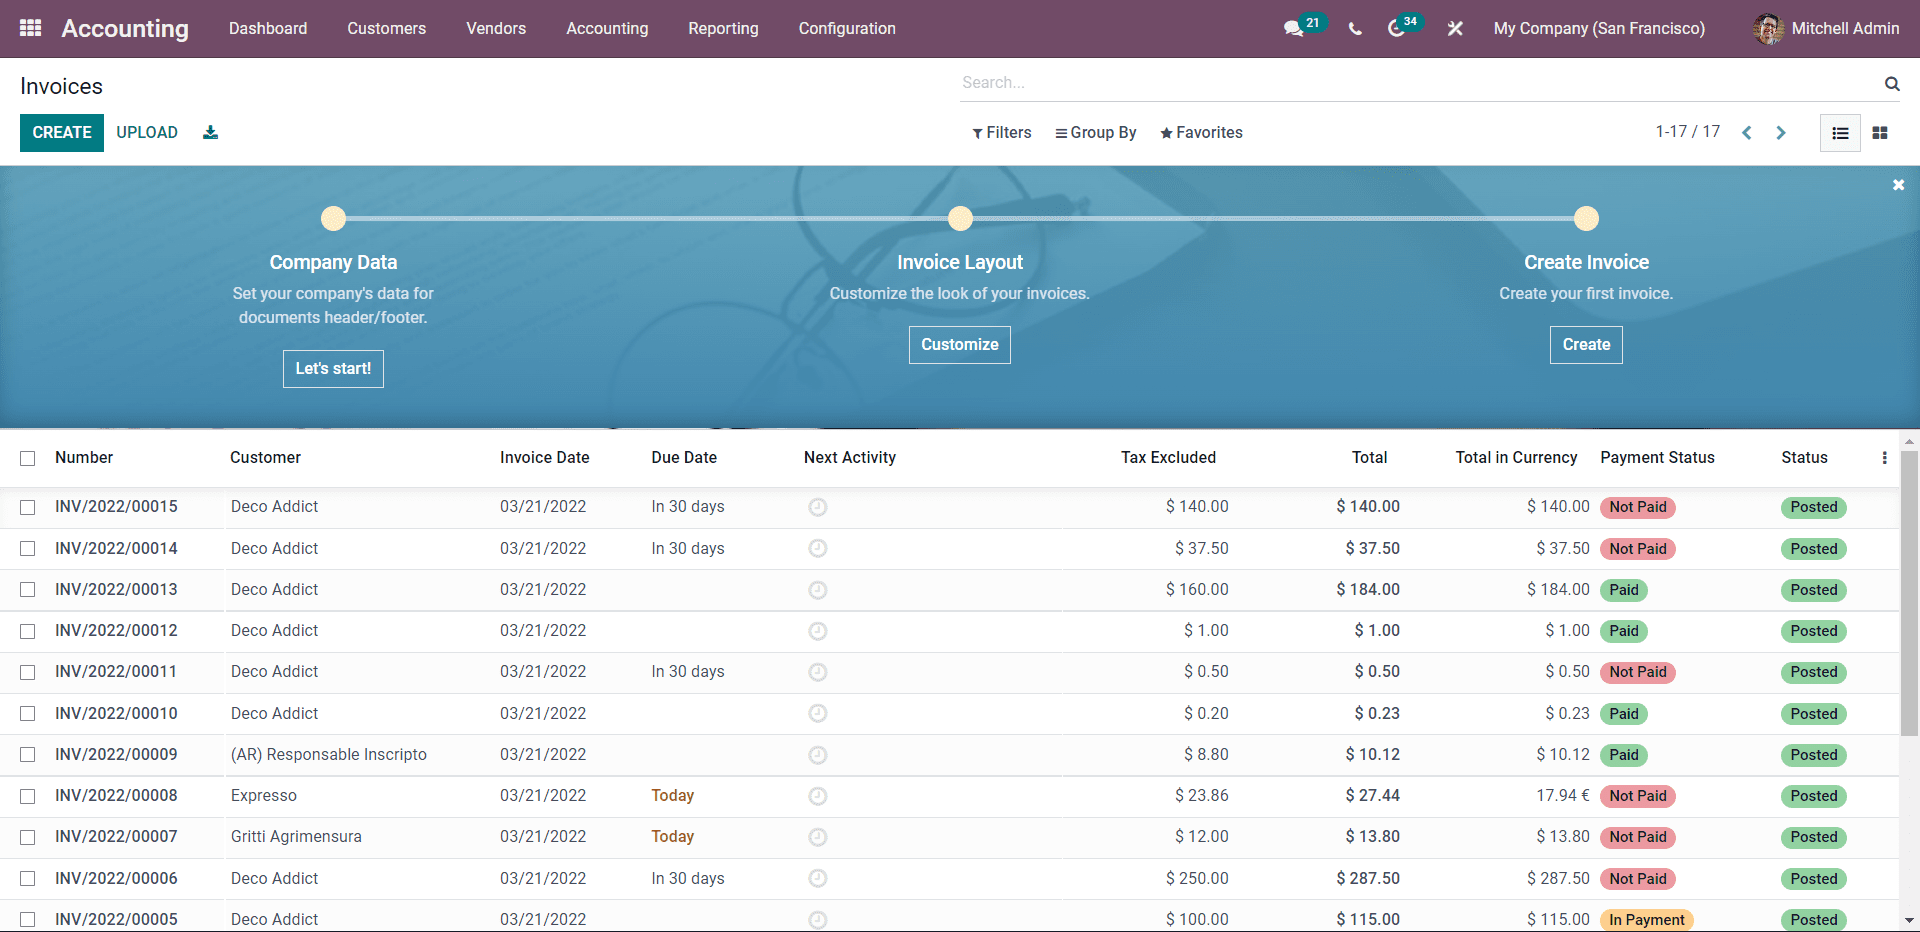
Clicking on the CREATE button will let Mitchell create a new customer invoice.
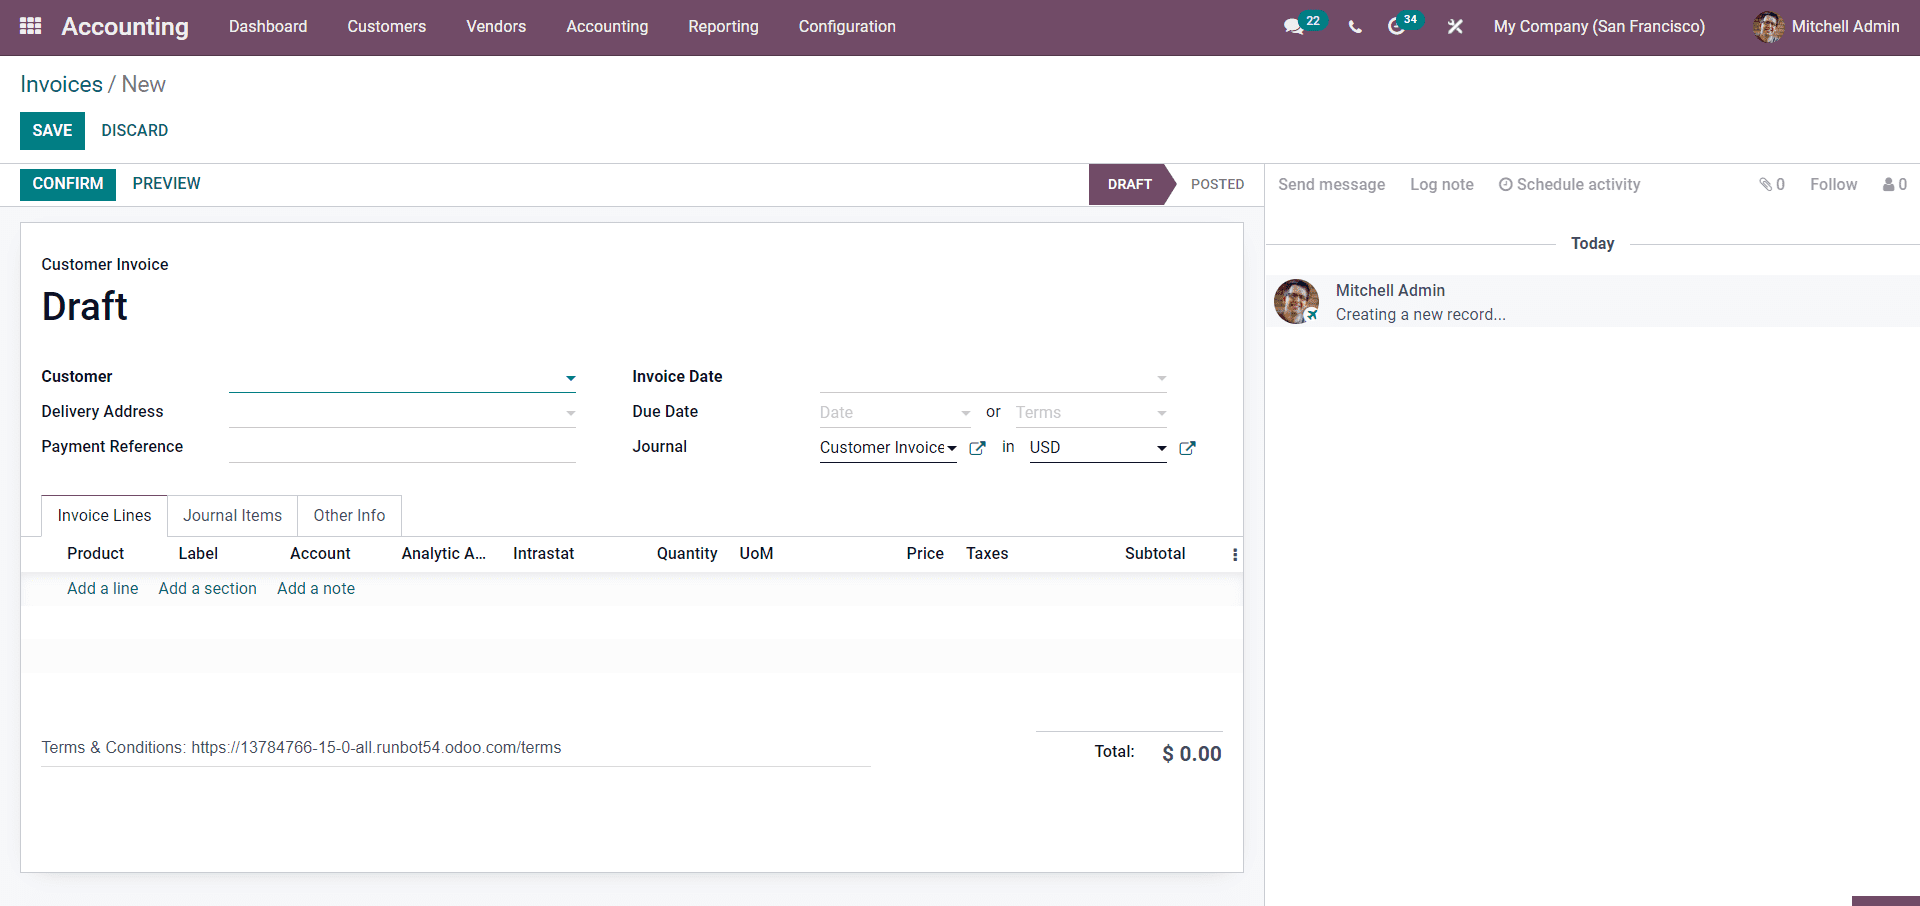
Mitchell has to type in all of the details in the customer invoice. To begin with, Mitchell must choose the customer from the Customer field. The delivery address and the other information relating to the customer will be filled in concerning the configurations.
Mitchell has to Enter the Invoice date Dues date and choose the journal from their respective fields. Note that Mitchell can easily track the invoice with the due dates to study the customer's payment pattern.
Under the Invoice line section, Mitchell can enter the Product by clicking on the Add a line button. Mitchell can choose from the products to add to the invoice, as shown in the image below.
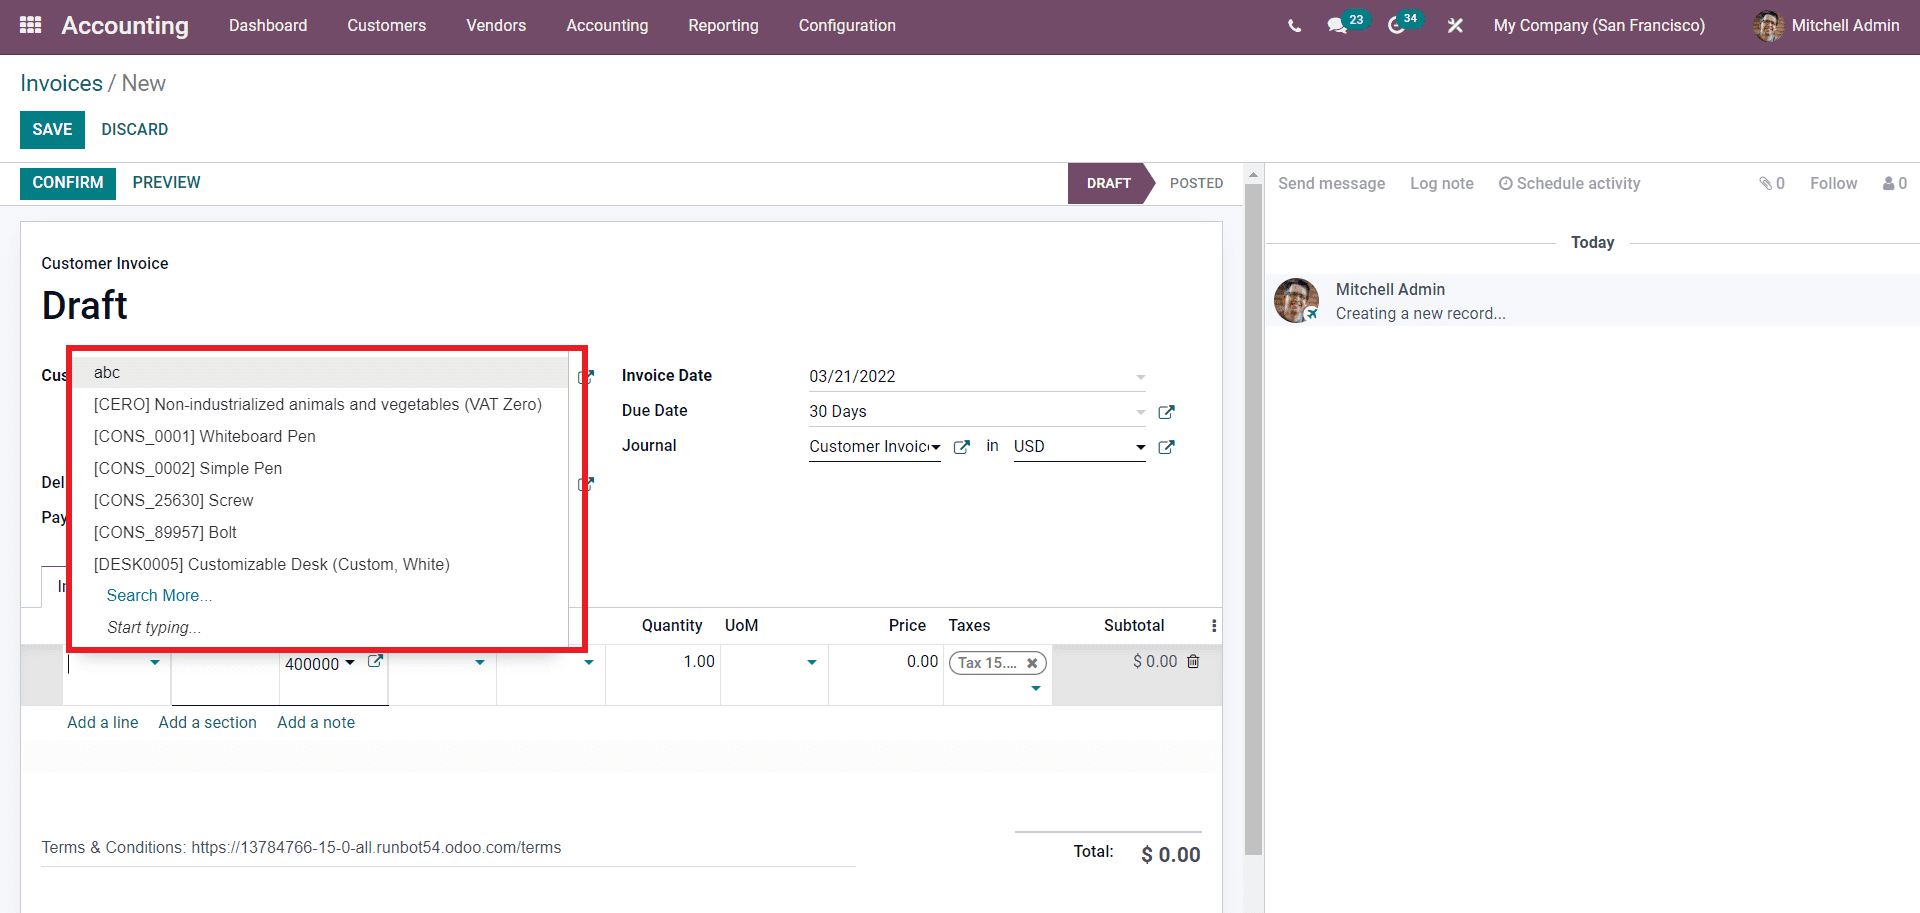
Mitchell can choose from the list to include in the invoice. All of the fields on the product will be auto-filled concerning the configurations on the selected product. As shown in the image below, clicking on the CONFIRM will let Mitchell move on to the next step in the process.
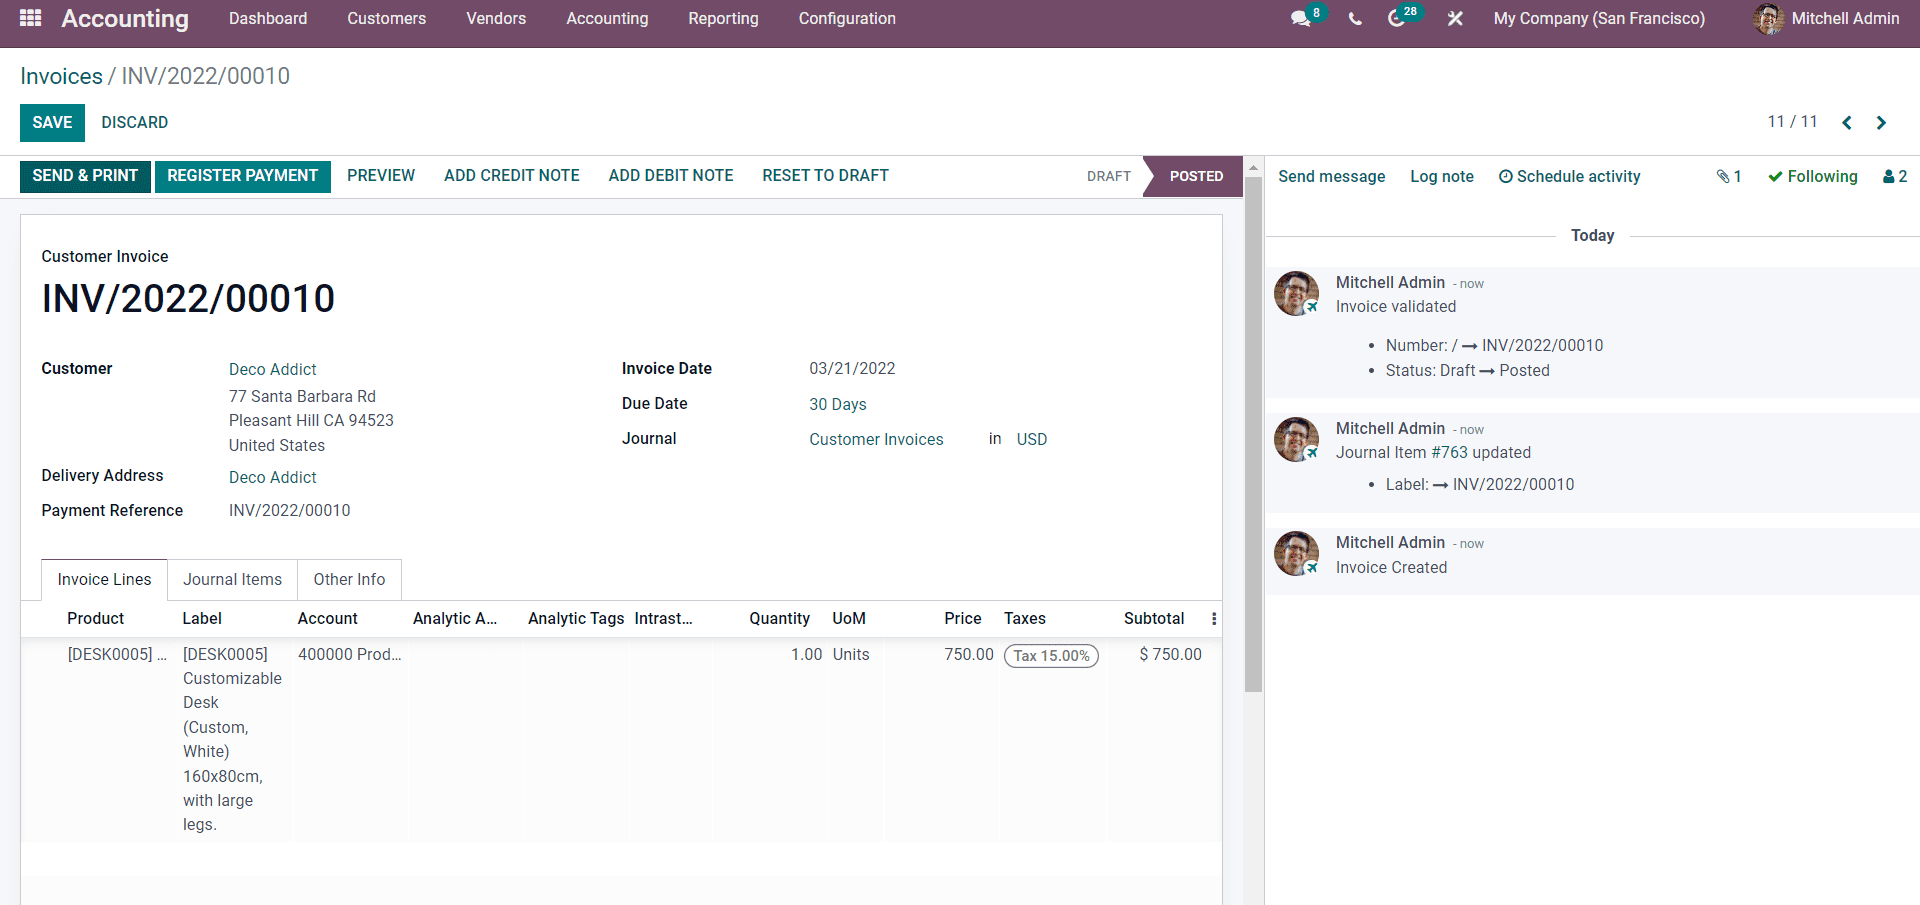
Mitchell can overview the invoice from here. After a checkup, Mitchell can click on the SEND & PRINT button for sending the invoice to the customer. After the payment confirmation from the customer, Mitchell can click on the REGISTER PAYMENT button to register the payment. A tab to configure the payment will open up.
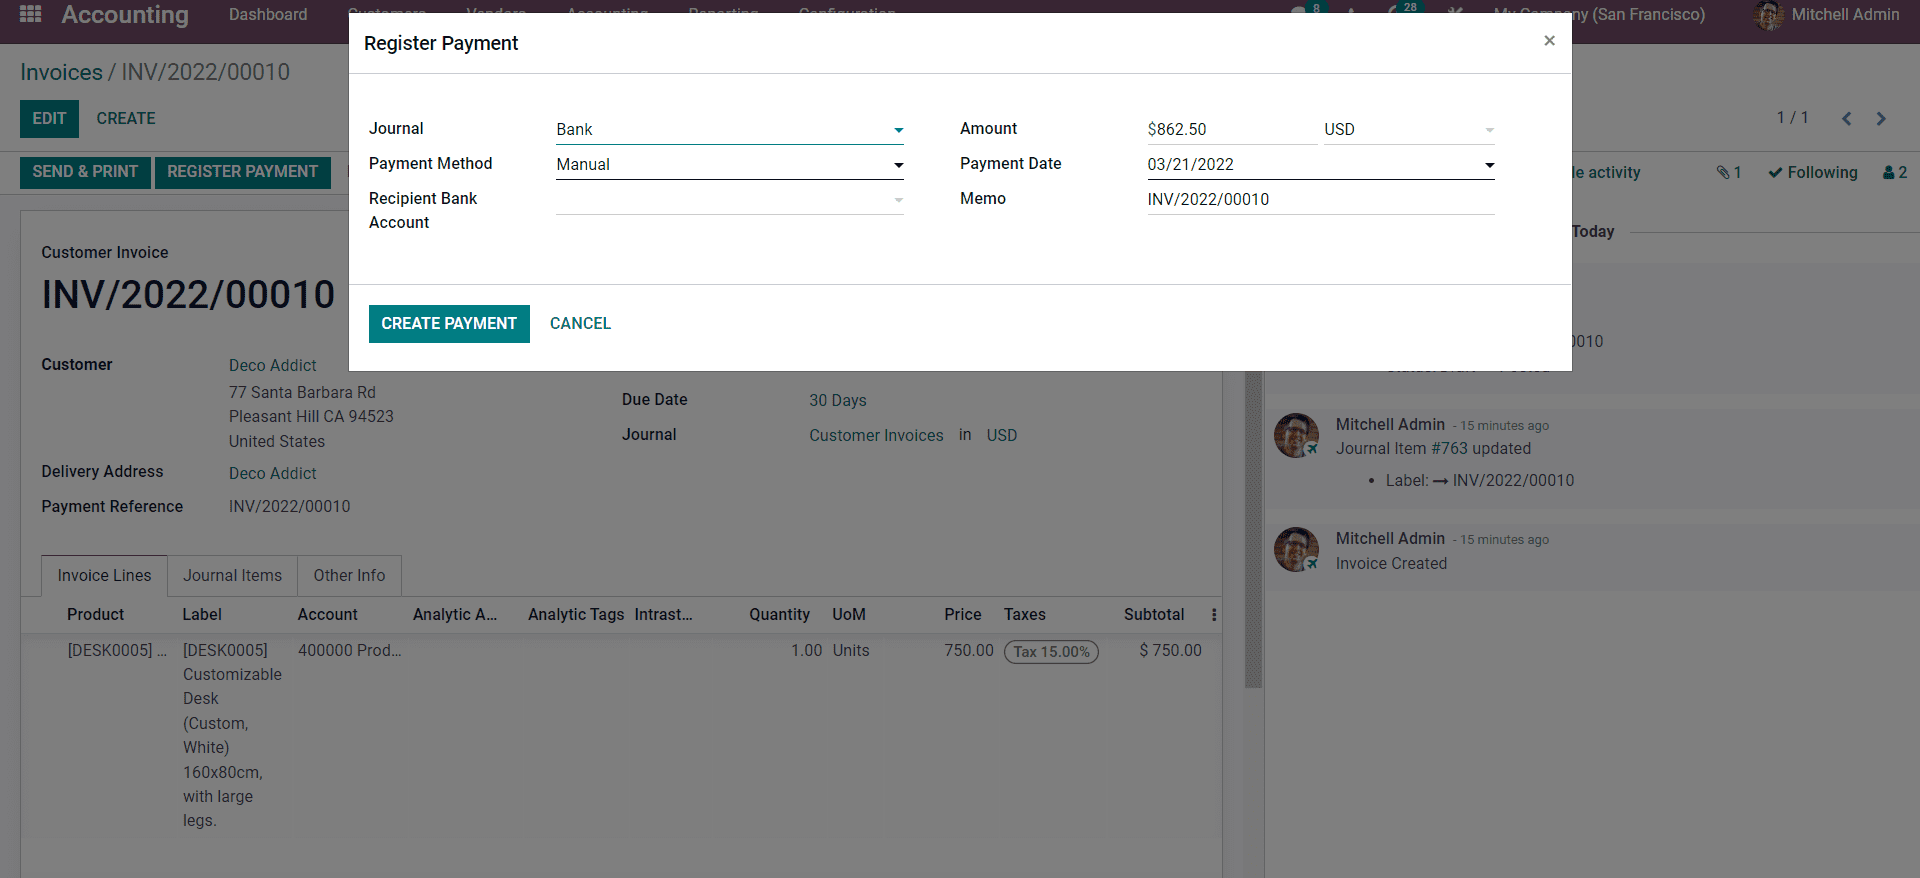
Mitchell can choose the Journal for recording the payment. Michel can choose the payment method from the Payment Method field. Clicking on the Recipient Bank Account will allow Mitchell to select the bank account. Mitchell can enter the payment amount from the Amount field and enter the Payment Date and the memo number for individual identification.
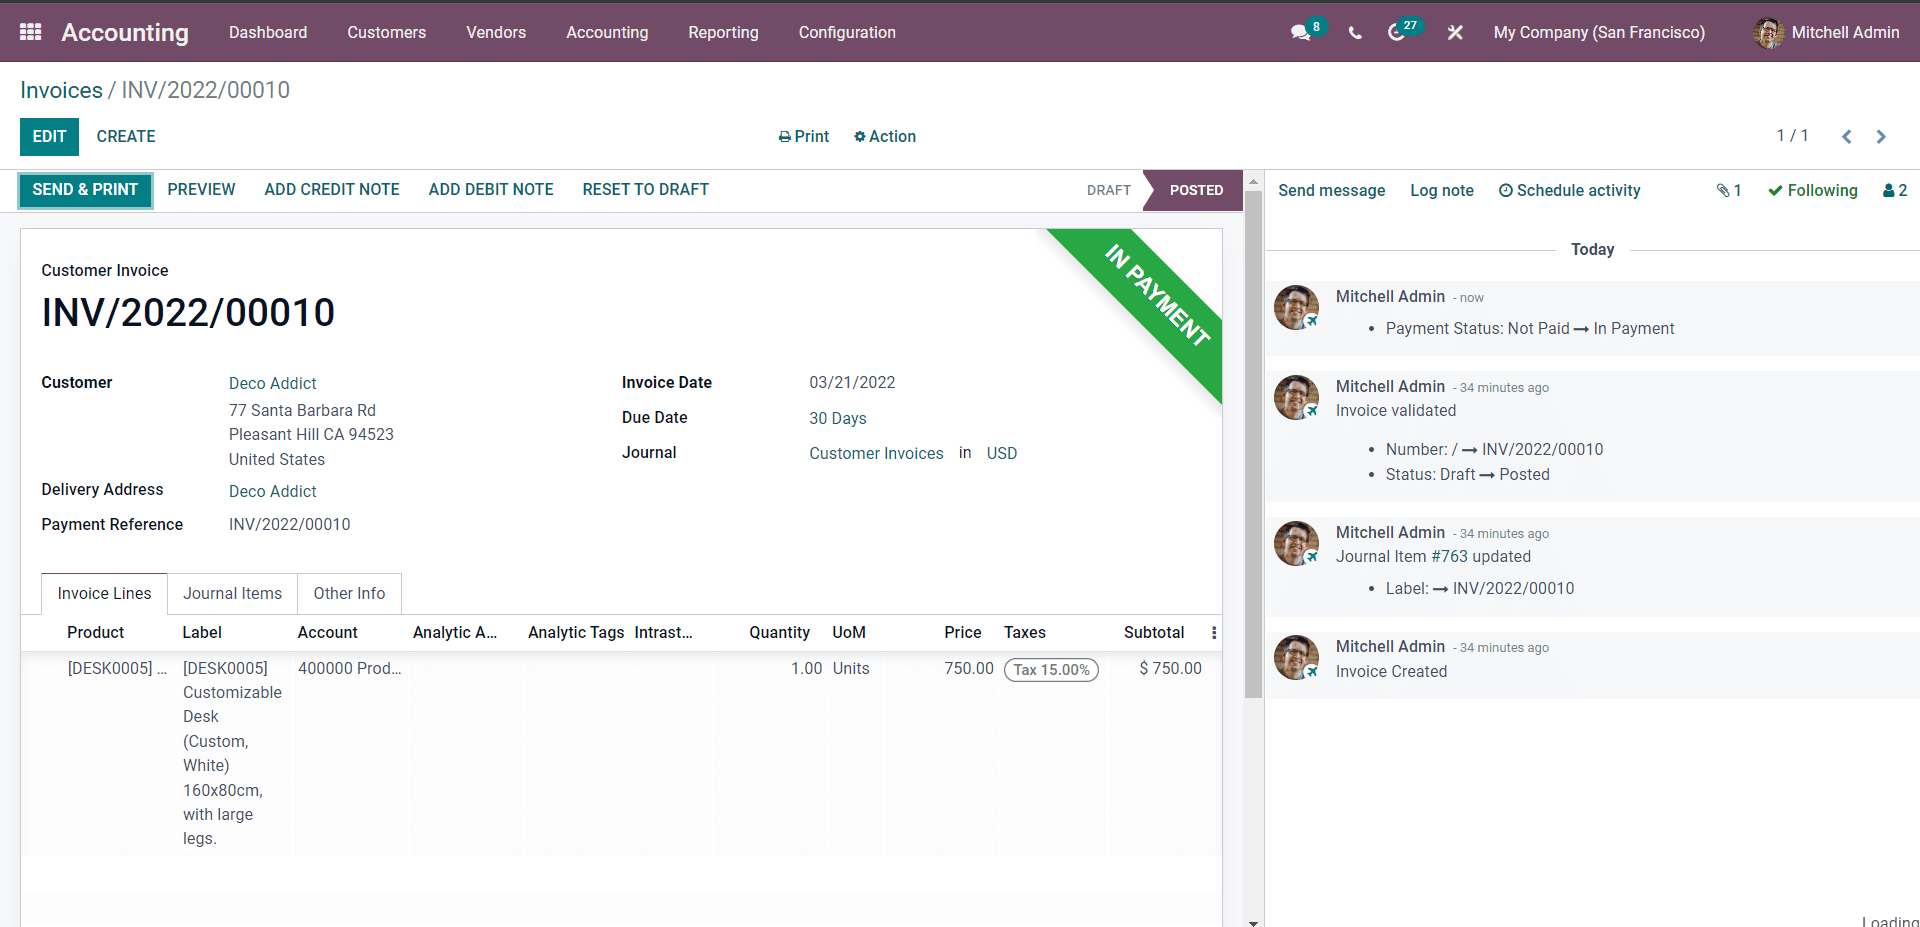
This is the most basic usage of the Invoicing features in the Accounting module. But Odoo doesn't limit it to the basic invoicing procedures. The features are designed to meet all of the demands that usually an invoice has to meet.
All of the advanced configurations on Invoicing in Odoo can be done from the modules configuration tab.
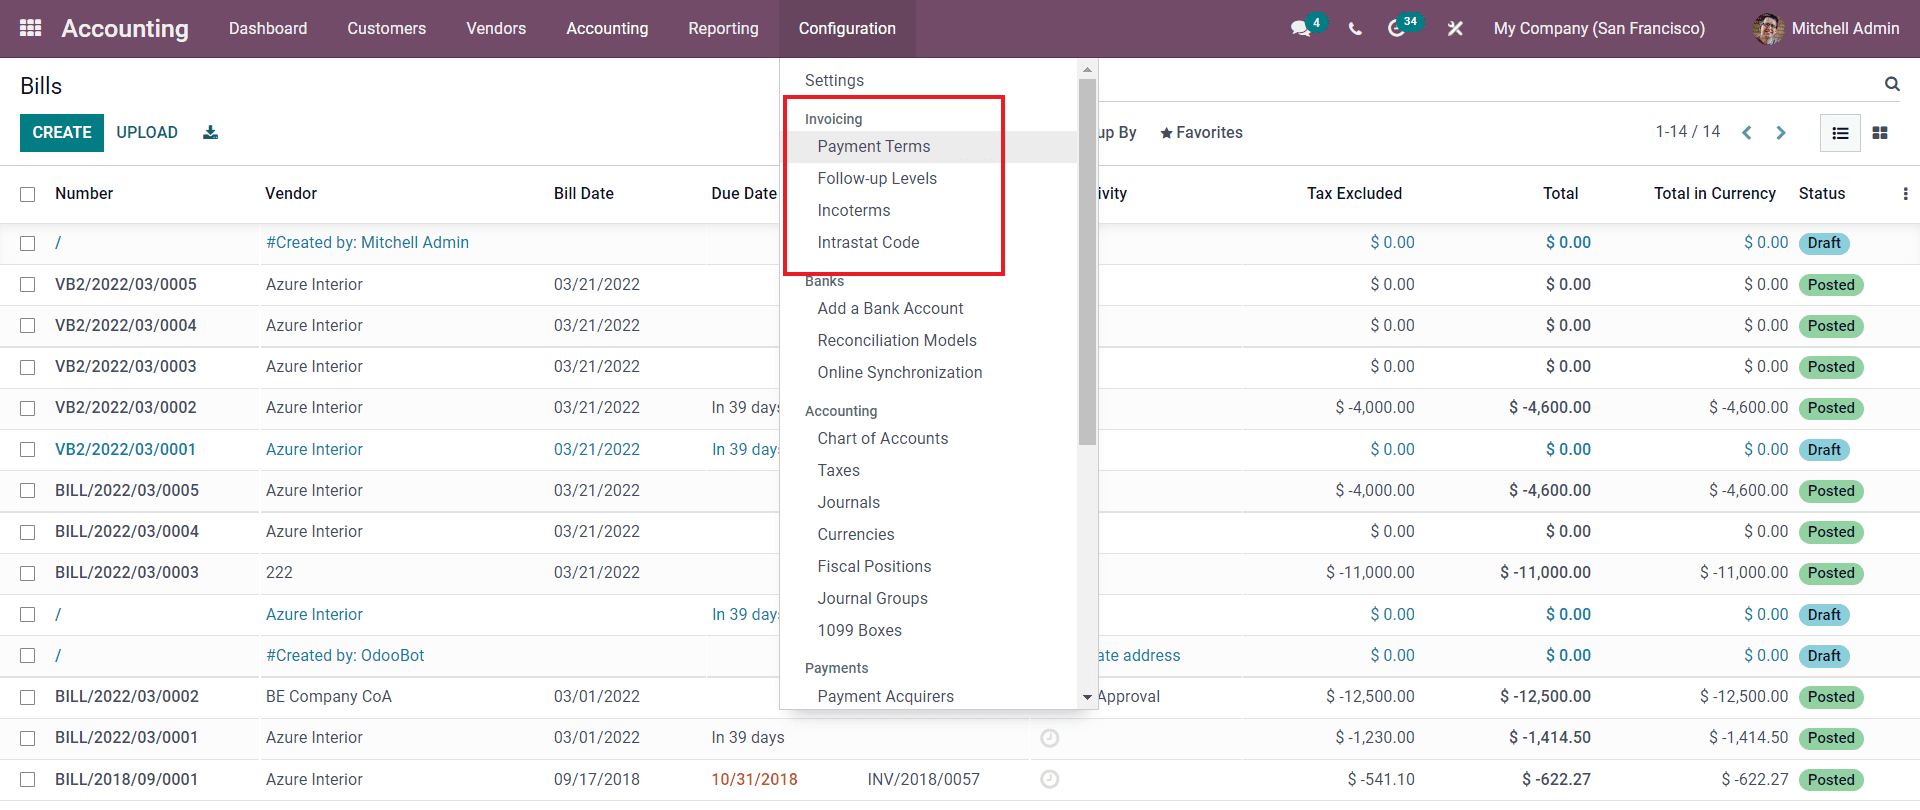
So as in the case of Mitchell, he can create and manage Payment terms, Follow up-levels, Incoterms and Intrastat code concerning the nature of his business management.
Payment terms
Payment terms are conditions that can be applied to the Invoices for receiving the payments. So let's take an example to know more about payment terms and how it works with Odoo invoicing. So let's assume the case of Mitchell, the company administrator. He recently landed on a good deal with one of his customers and agreed to buy the product.
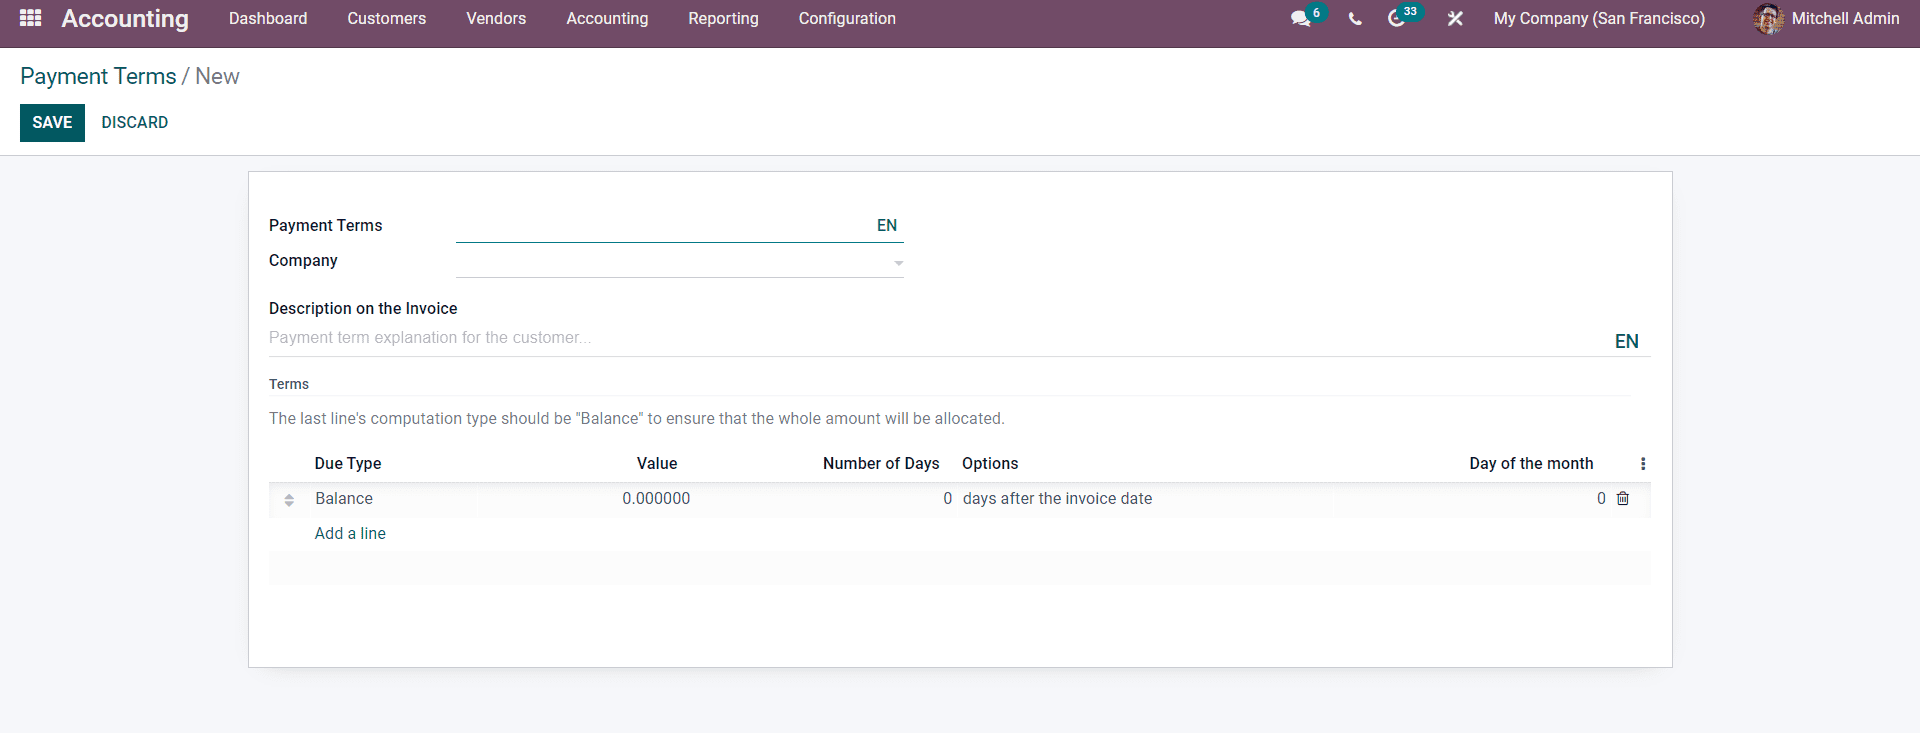
Mitchell has to invoice the customer, but to ensure that he receives the payment at suitable intervals, Mitchell has to include the payments terms in the Invoice so that Odoo can inform the customer of the due dates and collect the payments accordingly. Mitchell can create the Payment terms from the module. Mitchell can access Payment terms from the modules configuration tab.
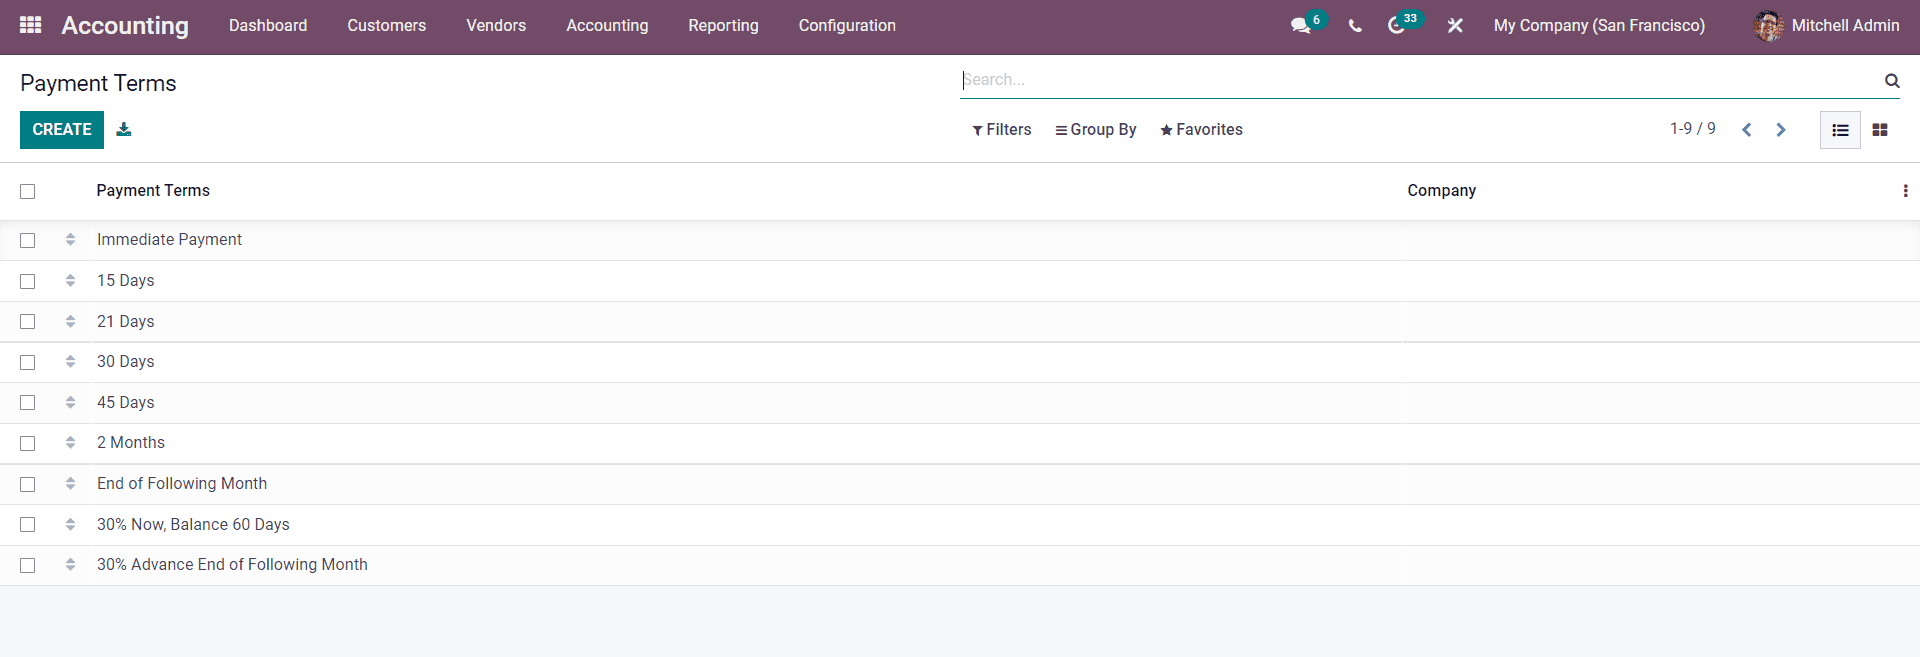
The image given above represents the Payment Terms page. Mitchell can manage all of the payment terms from this page. Clicking on the CREATE button will let him create the payment term.
For more info on the configurations and how the feature works with Odoo follow An
Insight into the Payment Terms and Follow Up Levels
Follow up Levels
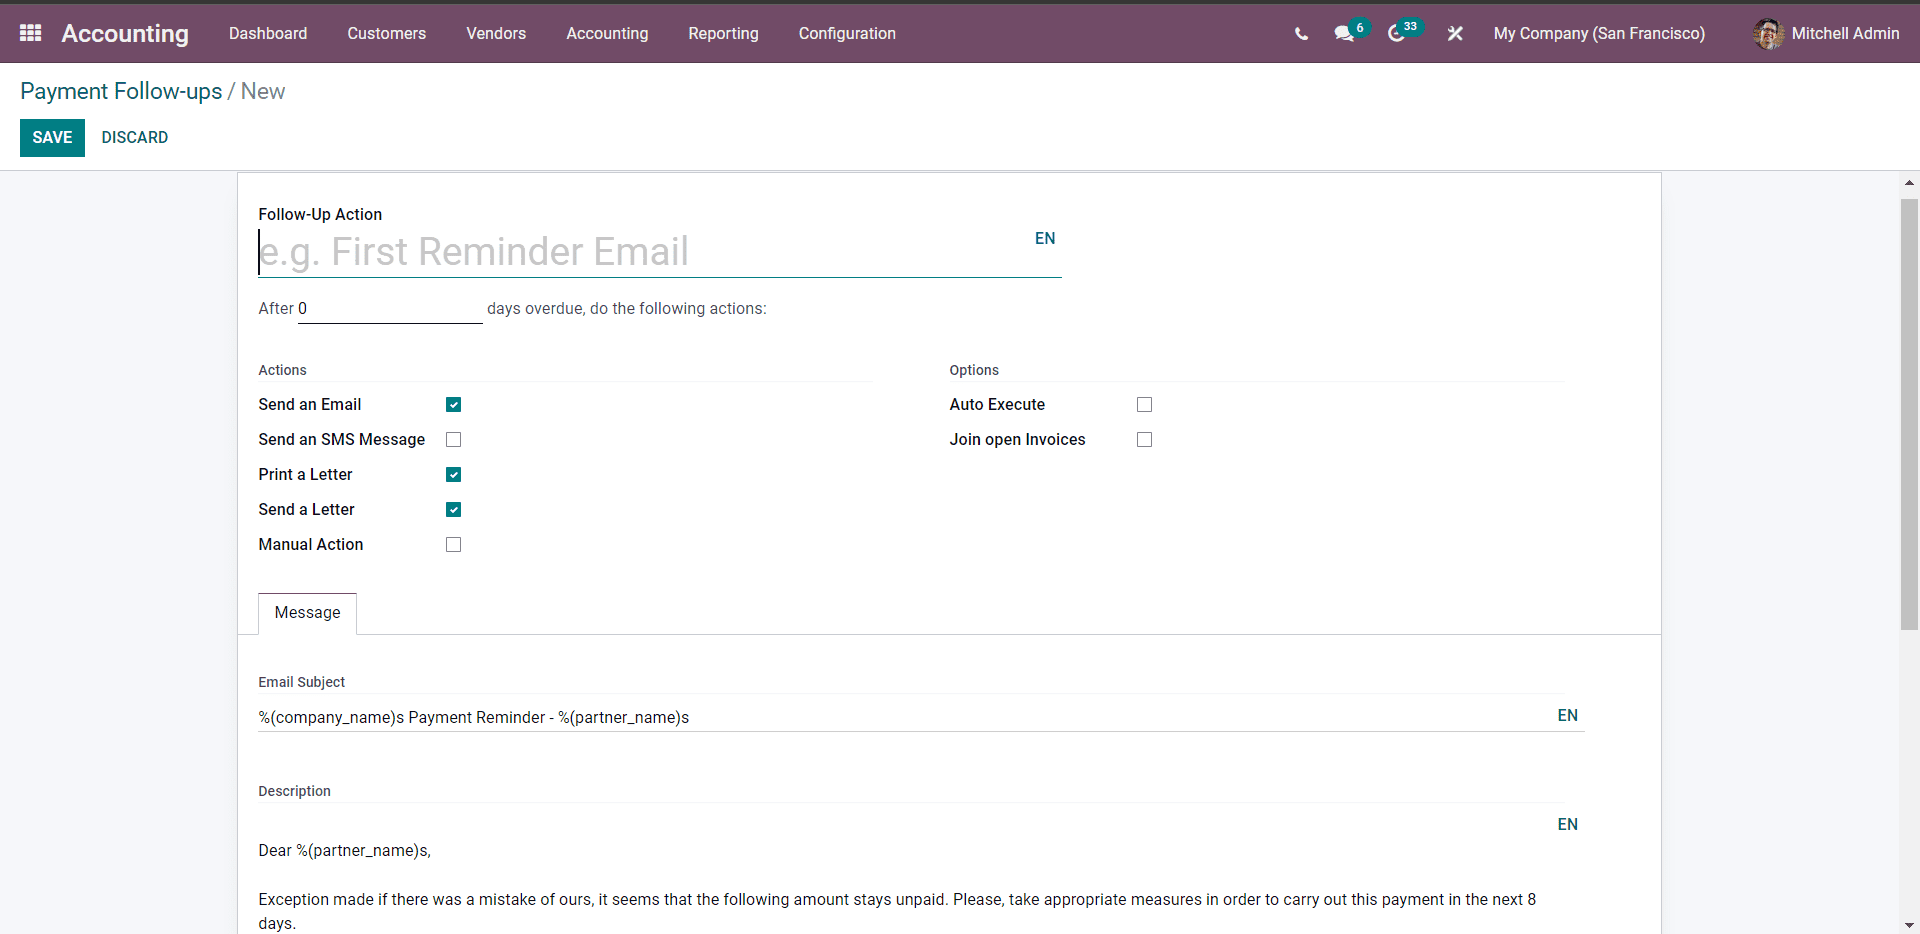
Follow up level play a massive role in revenue acquirement. Mitchell can use the Follow-up level to inform his customers of their payment dates. He can access the Follow-up levels from the configuration tab of the module.

Mitchell can press the CREATE button for creating a new follow up level. Pressing on the CREATE button will let Mitchell create a new Follow up level.
To know more about the configurations and how to use them with the invoices, follow the link An
Insight into the Payment Terms and Follow Up Levels
These features work hand in hand to generate maximum efficiency in invoice management. Mitchell can use all of these features combined to ensure maximum efficiency in Invoice management.
Ensuring proper cash flow in business is necessary for preserving the smooth workflow of the company. In this, Mitchell can automate the entire invoicing follow up process to ensure that he receives payment for the service or the product in time without delay.
All of the supporting features work hand in hand with Odoo invoicing to generate maximum user-friendliness. Ensuring sustainability in revenue acquirement is necessary for any institution. For a business institution, invoicing is considered the direct link between the customer and the company as the legal document for payment. Invoicing is an essential part of business management and managing them in the best way possible is necessary to ensure maximum stability. With the Odoo Invoice, you can easily manage and complete any amount of invoicing task efficiently and effortlessly, ensuring that you receive all of your payments at the right time. Follow our blogs on Invoices for more.