The development of leads based on country, size, and industry is known as Lead Mining. Most firms check out the best ways to build leads for the Sales team, and they convert them to buyers. The formulation of quality leads is necessary for business development. You can produce leads from scratch in the database using Lead mining. Within Odoo 16 CRM module, users can quickly generate lead mining requests for the essential area. Based on business or country relevance, you can set criteria easily. Lead mining is an efficient tool for developing dependable leads in a company.
This blog enables you to generate Lead Mining Requests in Odoo 16 CRM module.
Users can initiate leads and assign them to a sales team with the support of Odoo 16 CRM. It is possible to create pipelines, teams, quotations, and more from the CRM module. Now, let's see the creation of lead mining in the Odoo 16 CRM module.
How to Activate Lead Mining in Odoo 16 CRM?
Users need to activate the lead mining option from the Odoo 16 CRM module. For activation, choose the Settings menu inside the Configuration tab. We can access the Lead Mining option below the Lead Generation section in the Settings window, as depicted in the screenshot below.
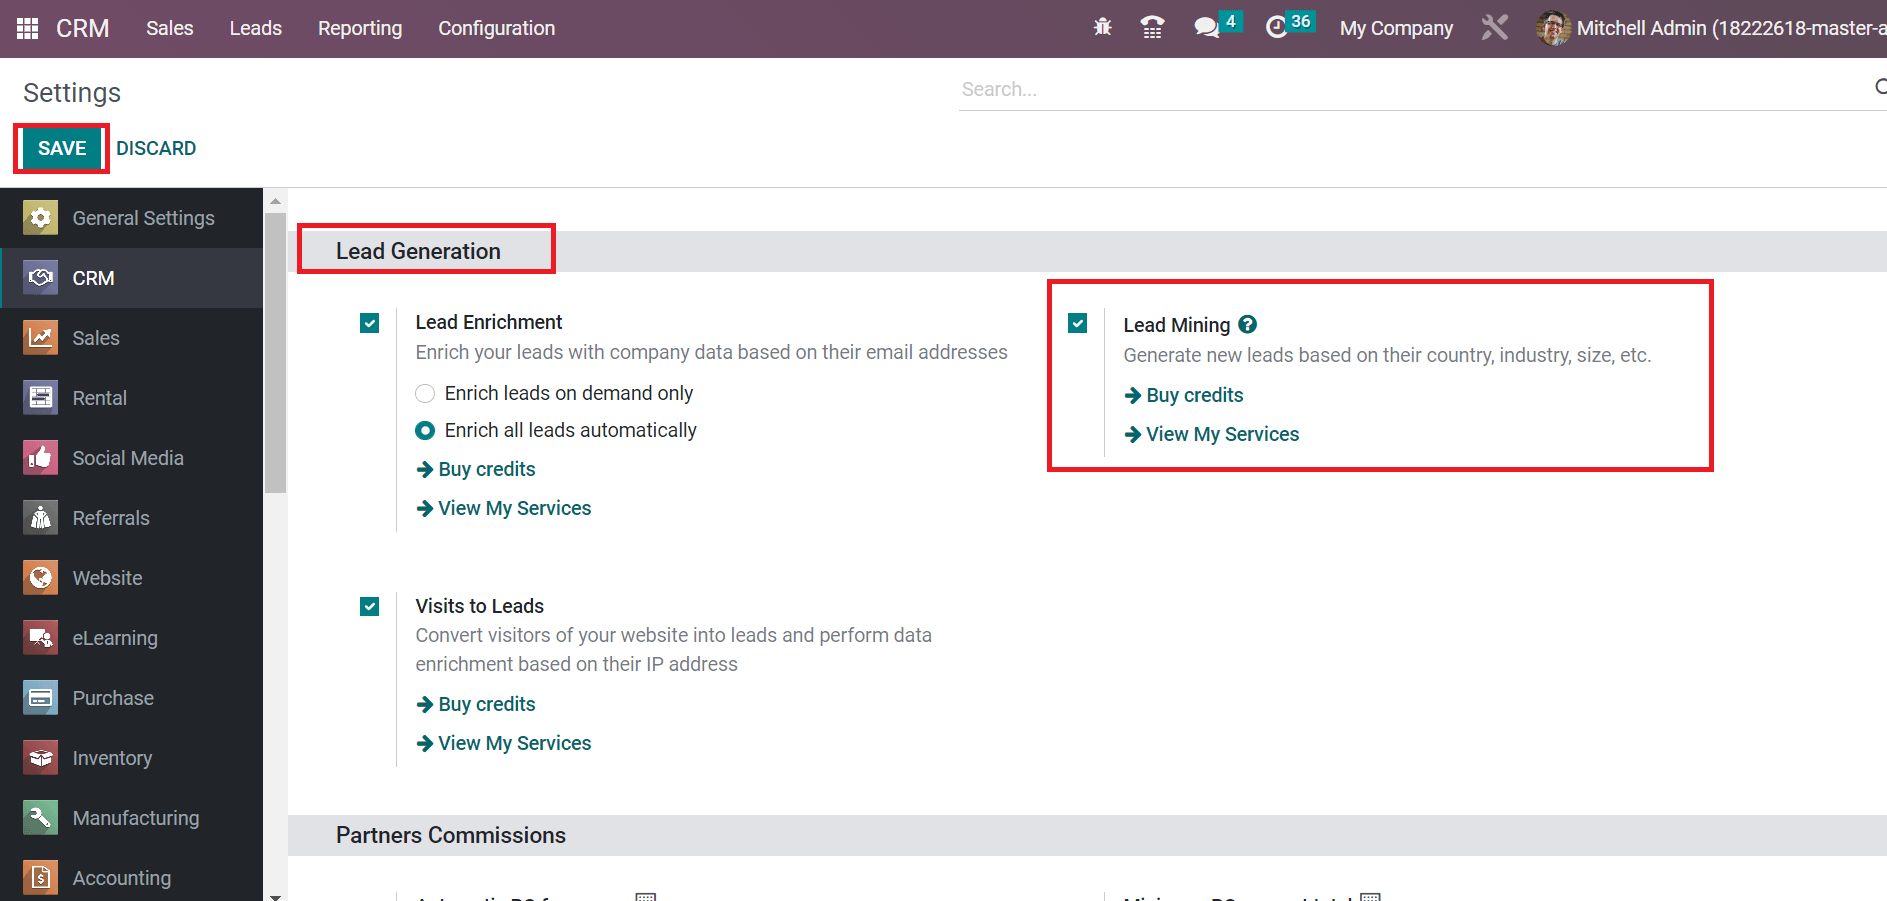
Users can develop new leads per industry, country, and size by enabling the Lead Mining option. Additionally, you can view services and buy credits using Lead Mining. After activating the feature, click the SAVE button, as noted in the above screenshot. Next, we can see the creation of lead mining requests within Odoo 16 CRM.
To Create a Lead Mining Request in Odoo 16 CRM
The company's growth boosts quickly using the lead mining feature in Odoo CRM. To create a lead mining request, select the Lead Mining Requests menu below the Lead Generation section of the Configuration tab. In the Lead Mining Requests window, you can see details including Request number, Status, Sales Team, Target, Tags, Number of Leads, etc. To develop a new lead mining request, select the CREATE button, as described in the screenshot below.
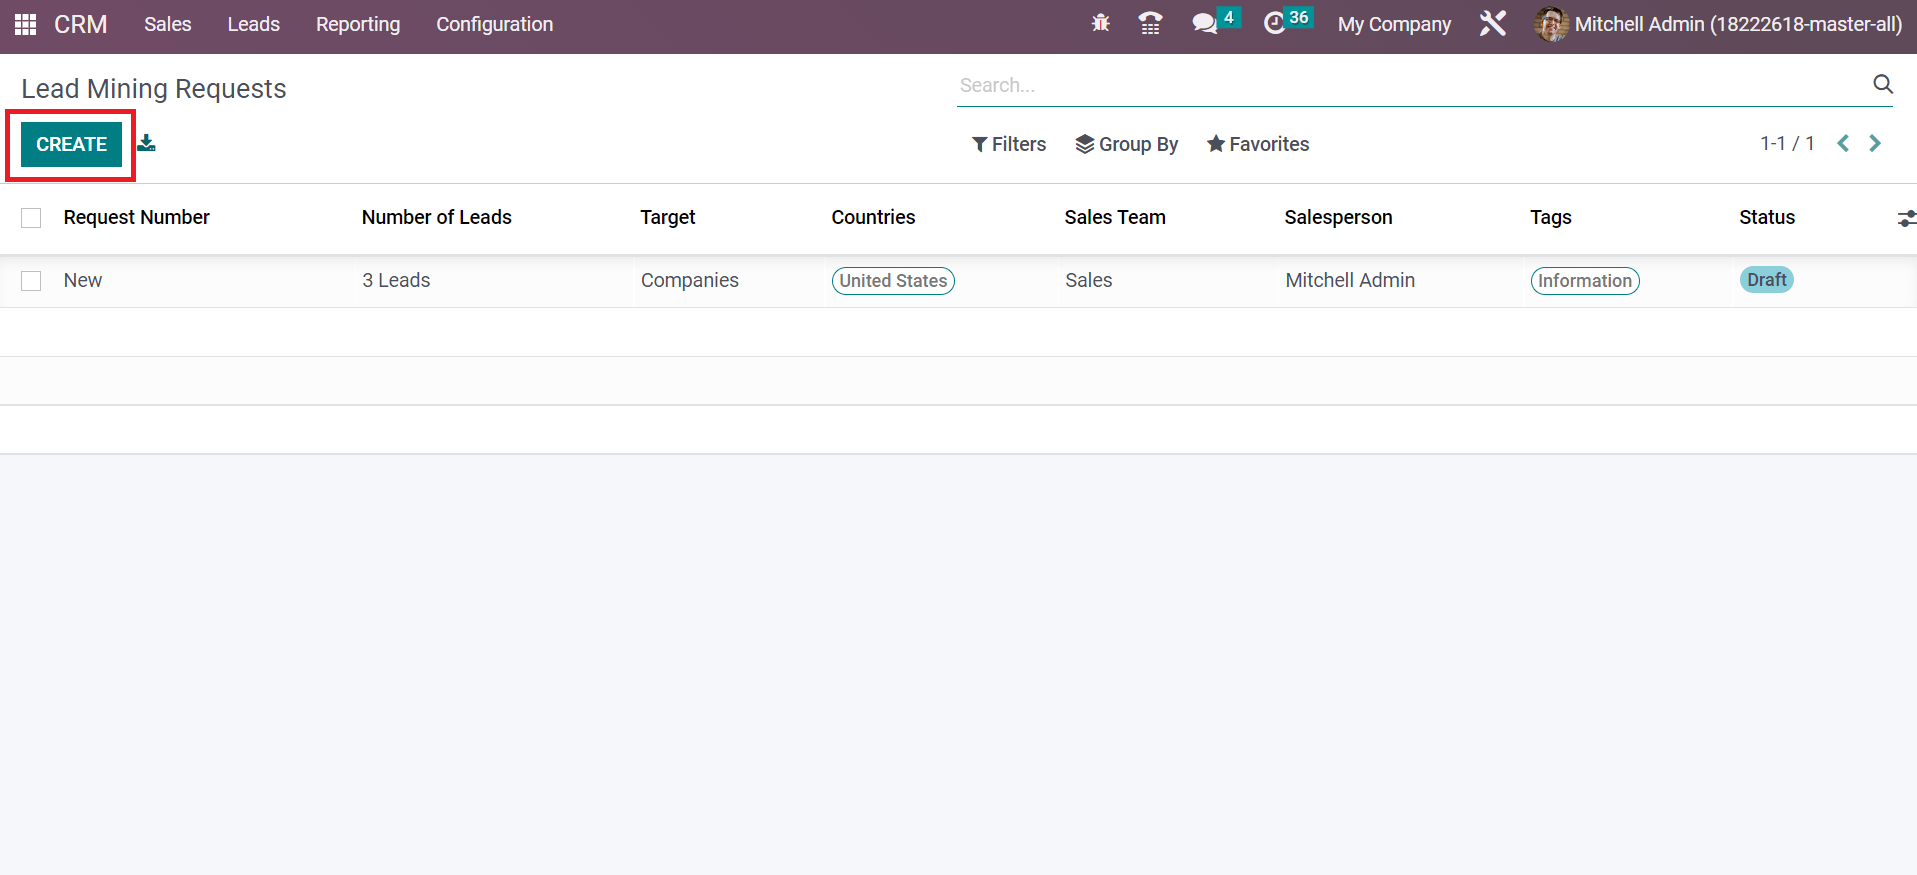
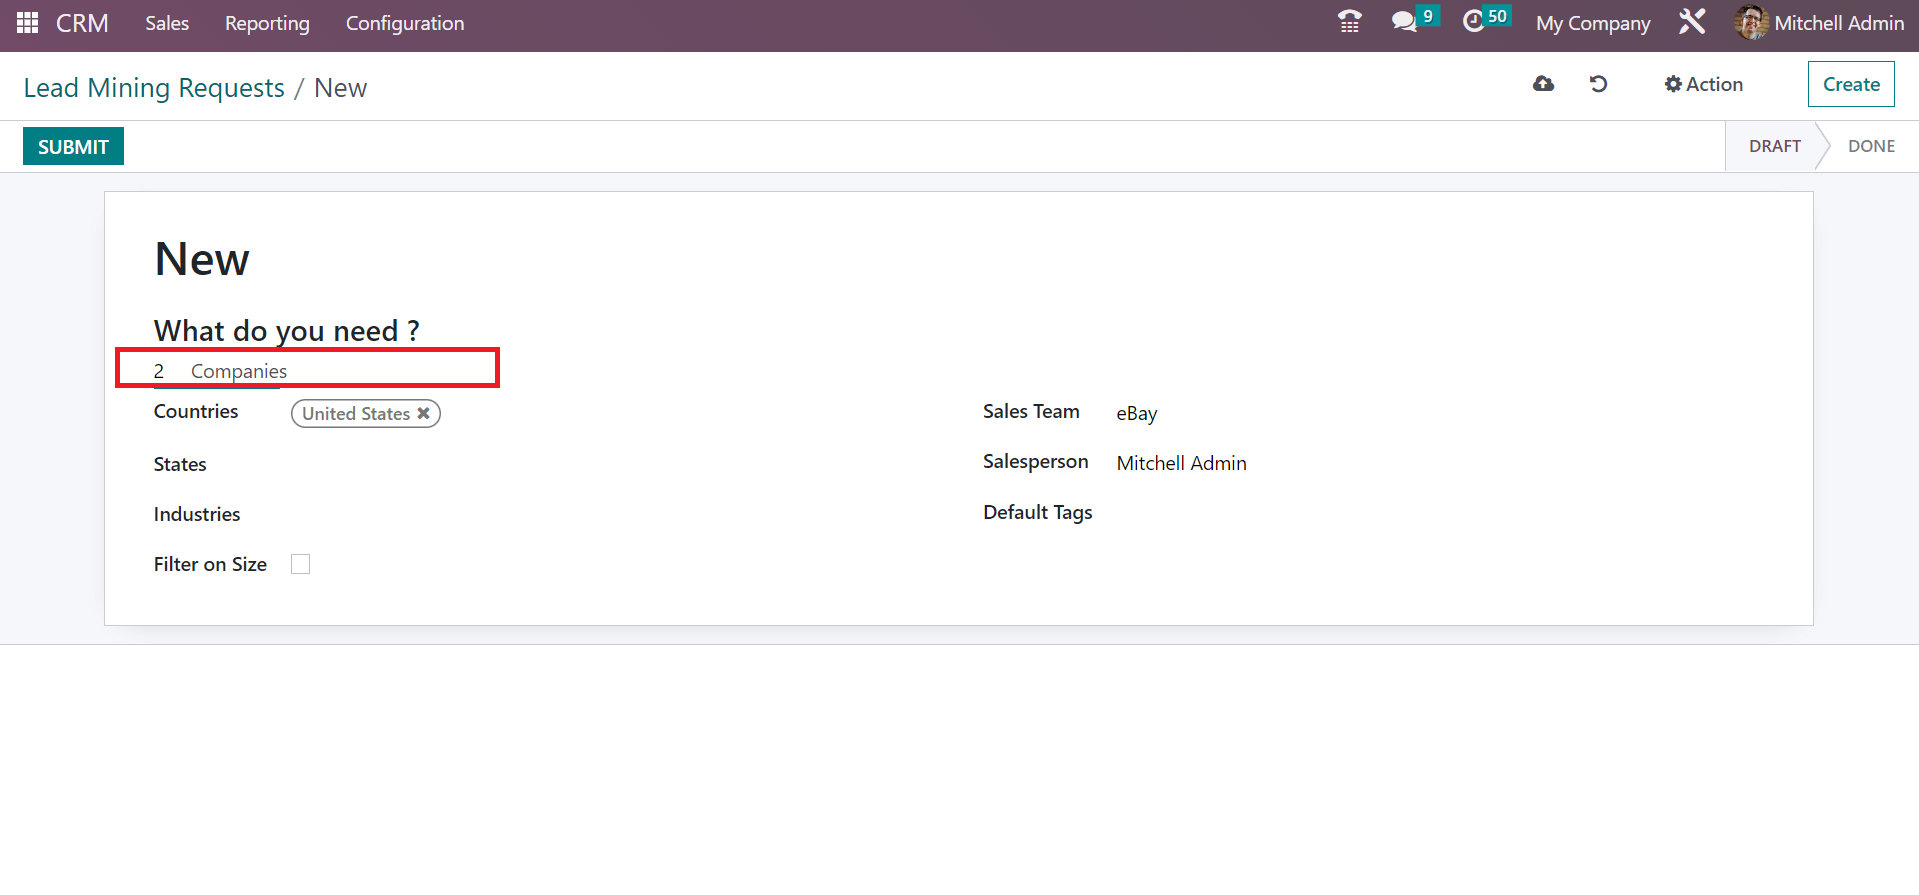
A new page arises before the user develops a lead mining request after choosing the CREATE icon. In the new Lead Mining Requests window, add several leads to be generated below the What do you need? Section. We added two leads to be generated, as marked in the screenshot below.
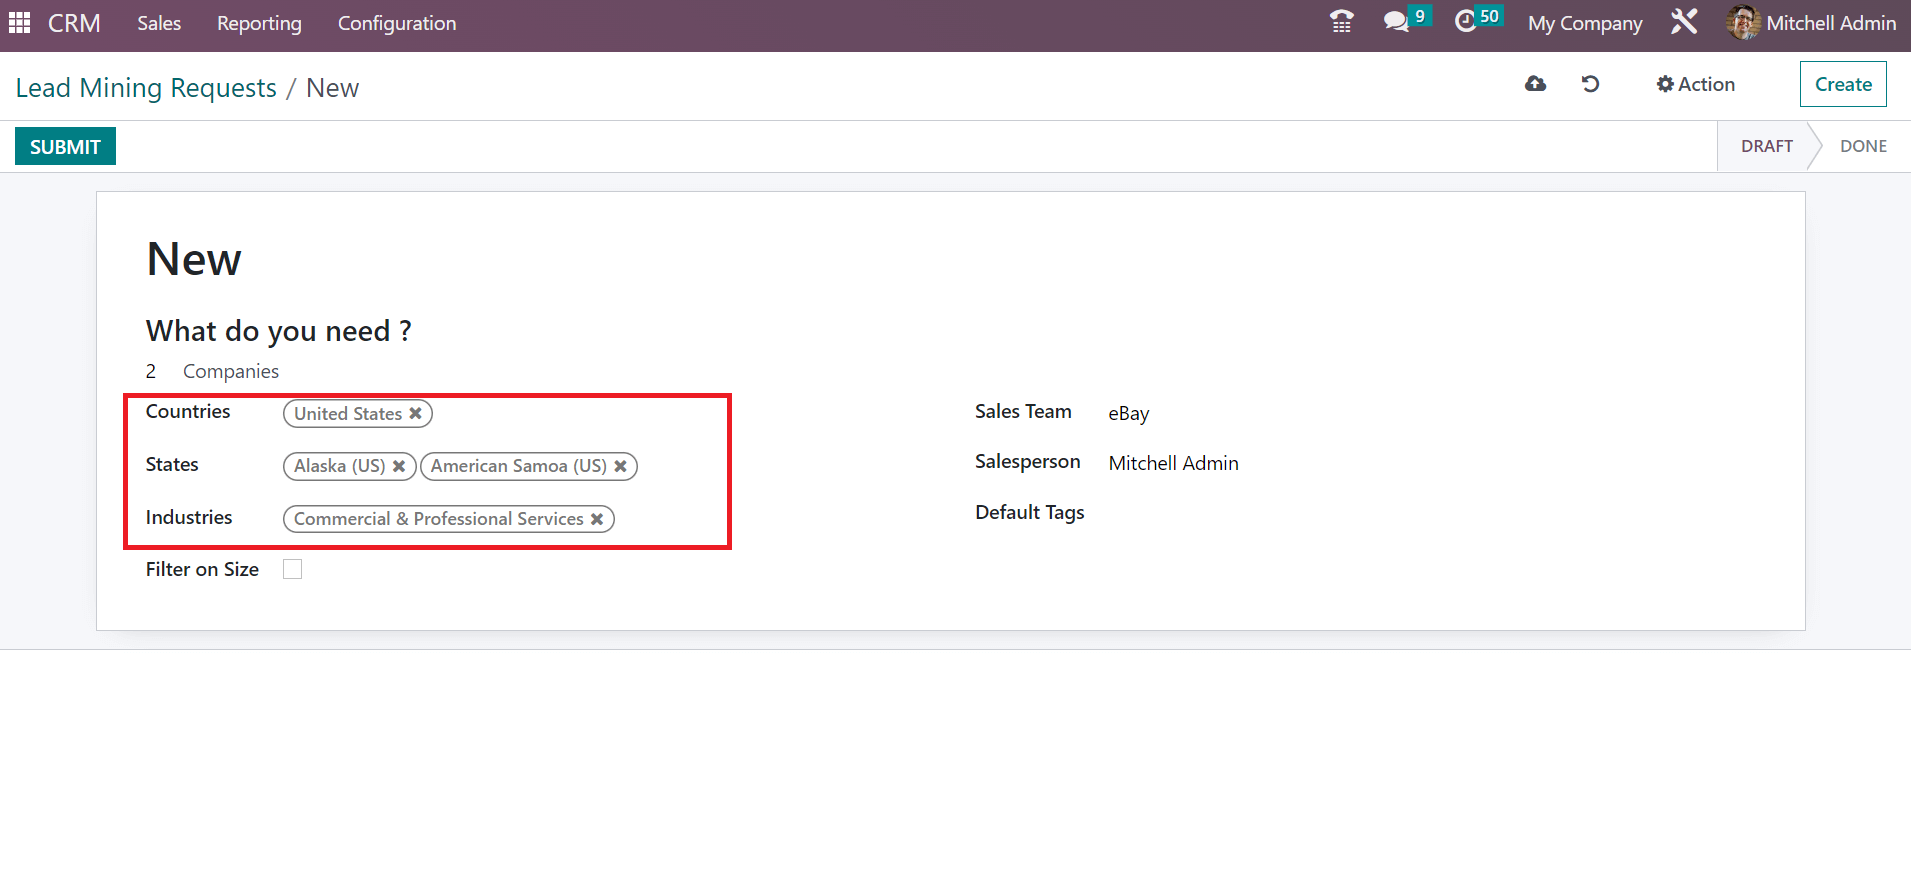
It is possible to pick up the target as Companies or Companies and their Contacts. First, let's see what happens after choosing a company as a target. After choosing the Companies option, select the Countries and states where your company is situated. Later, you can choose the necessary production of your company inside the Industries field, as depicted in the screenshot below.
Users can also filter the companies based on size inside the Filter on Size field. A Size option appears to you after enabling the Filter on Size field. Add the size of your company inside the Size field, as mentioned in the screenshot below.
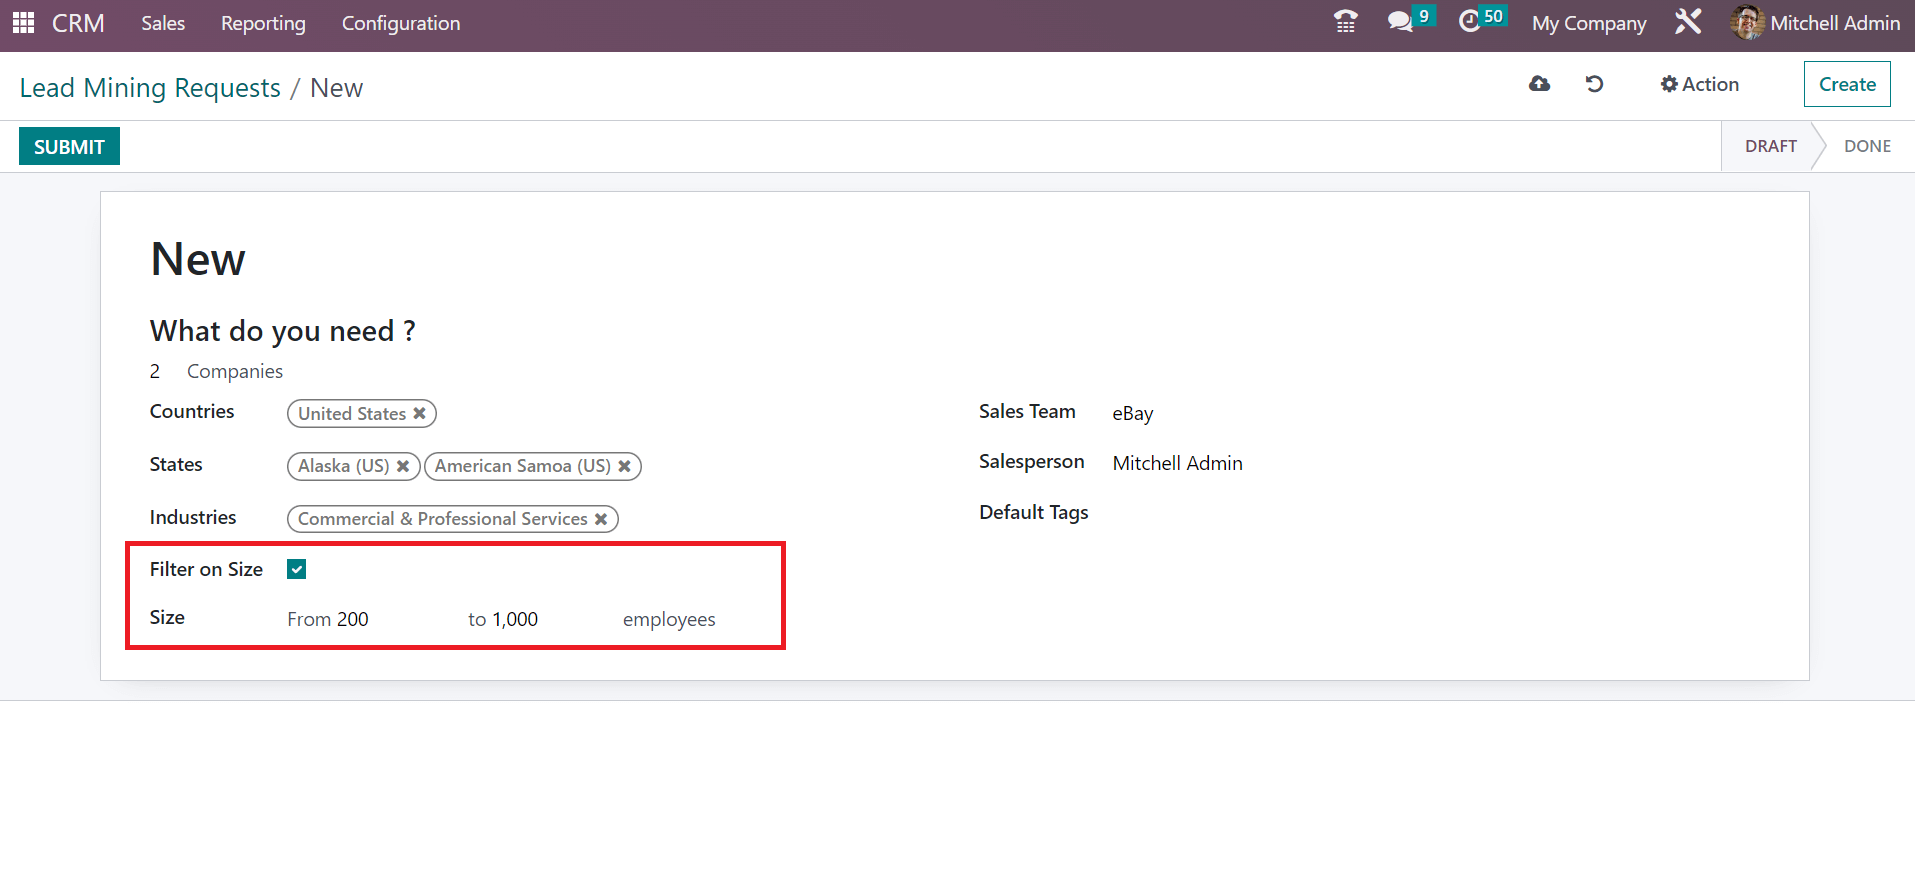
Here, we generate leads for companies of 200 and 1000 employees, as shown in the screenshot above. Next, we can apply lead information in the Lead Mining Requests window. Choose your Sales Team as Sales as specified in the screenshot below.
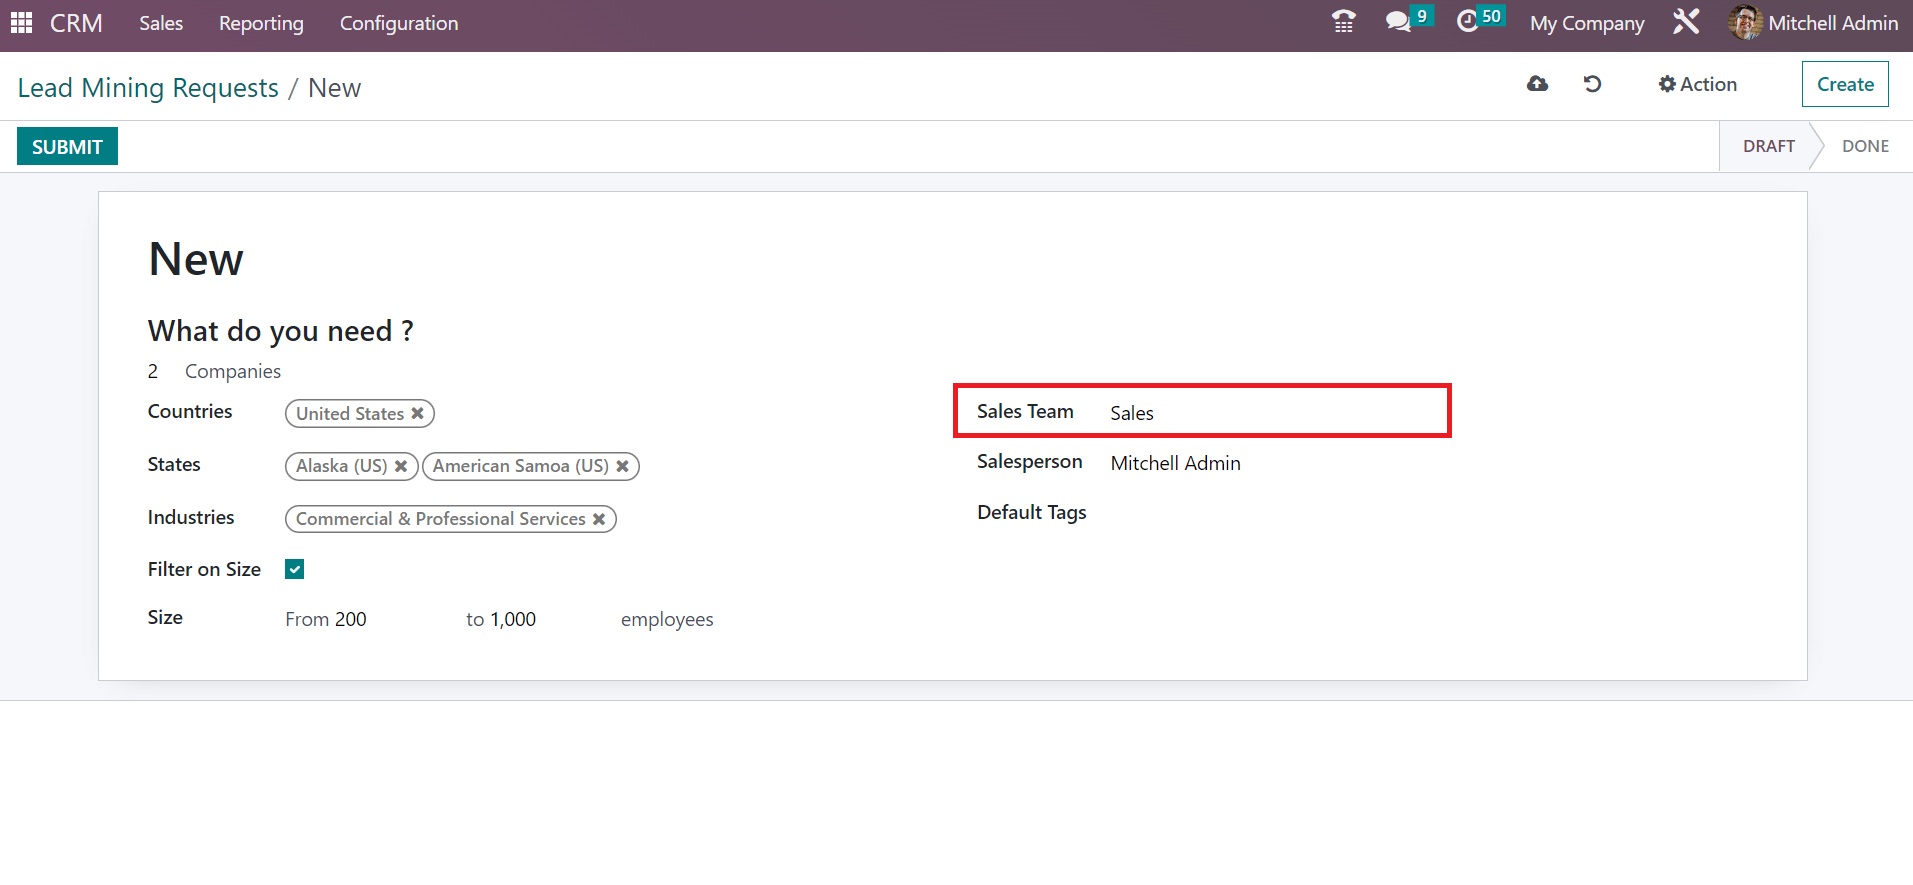
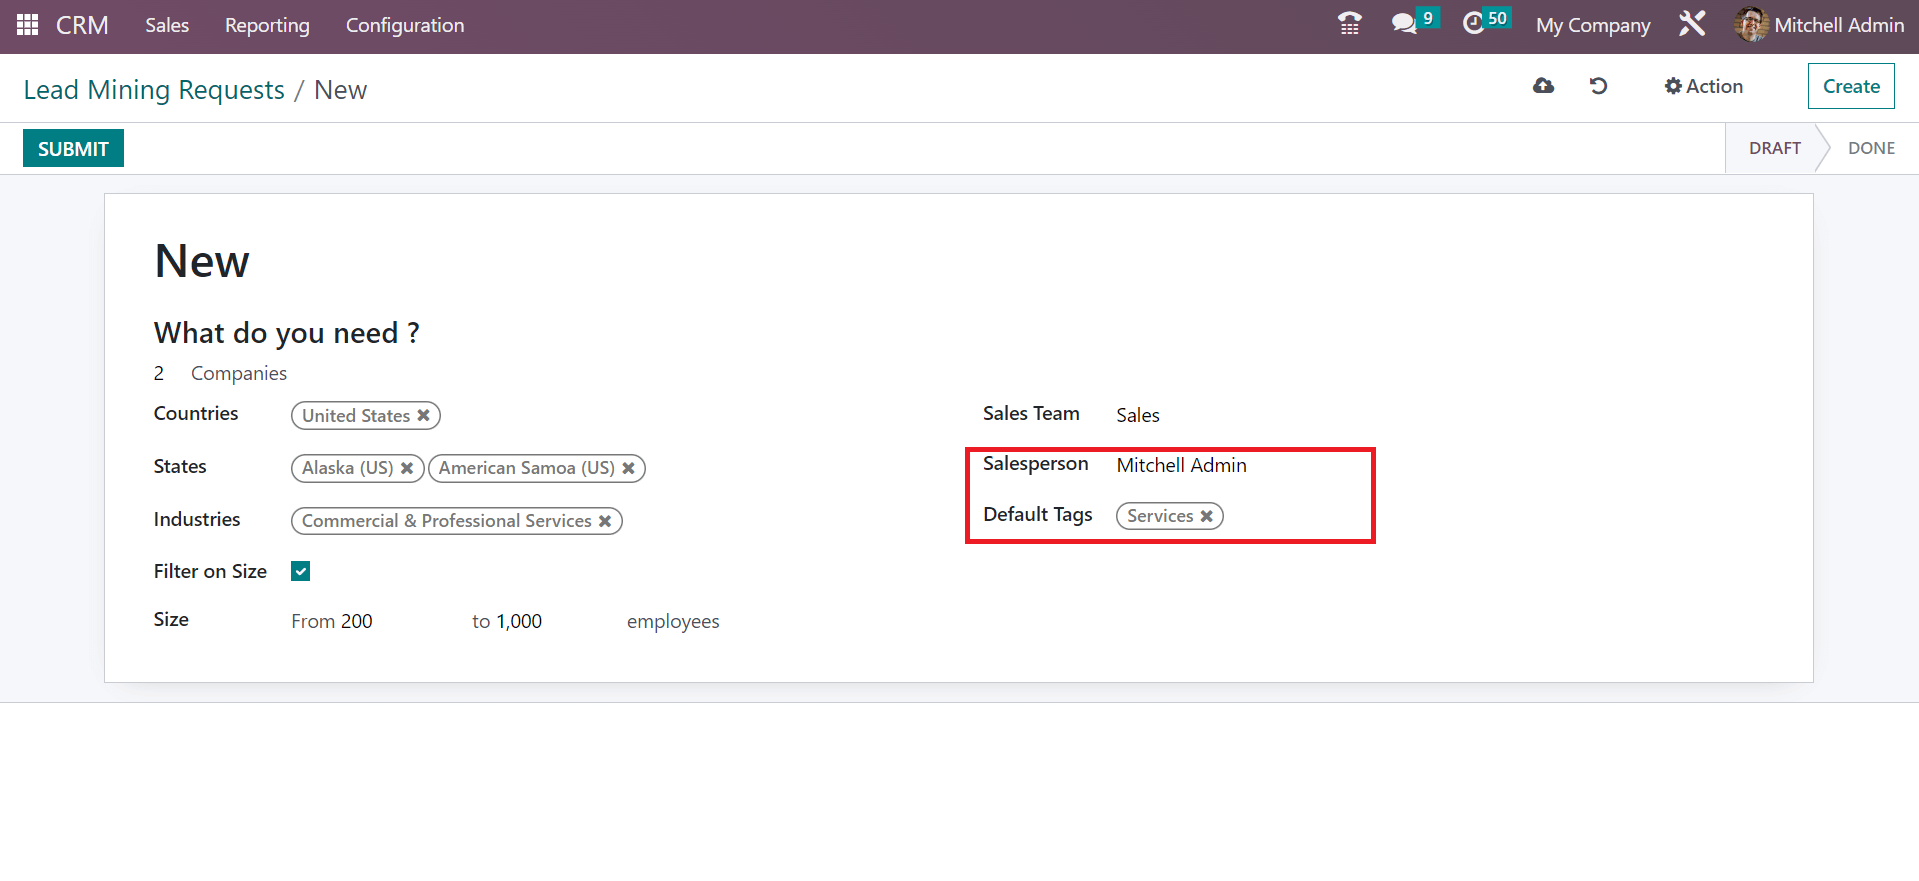
You can add the Salesperson and enter tags inside the Default Tags field.
Now, we can see what happens after selecting the target as Companies and their Contacts. By choosing Companies and their Contacts option, a new space opens at the end to apply for contact numbers, as marked in the screenshot below.
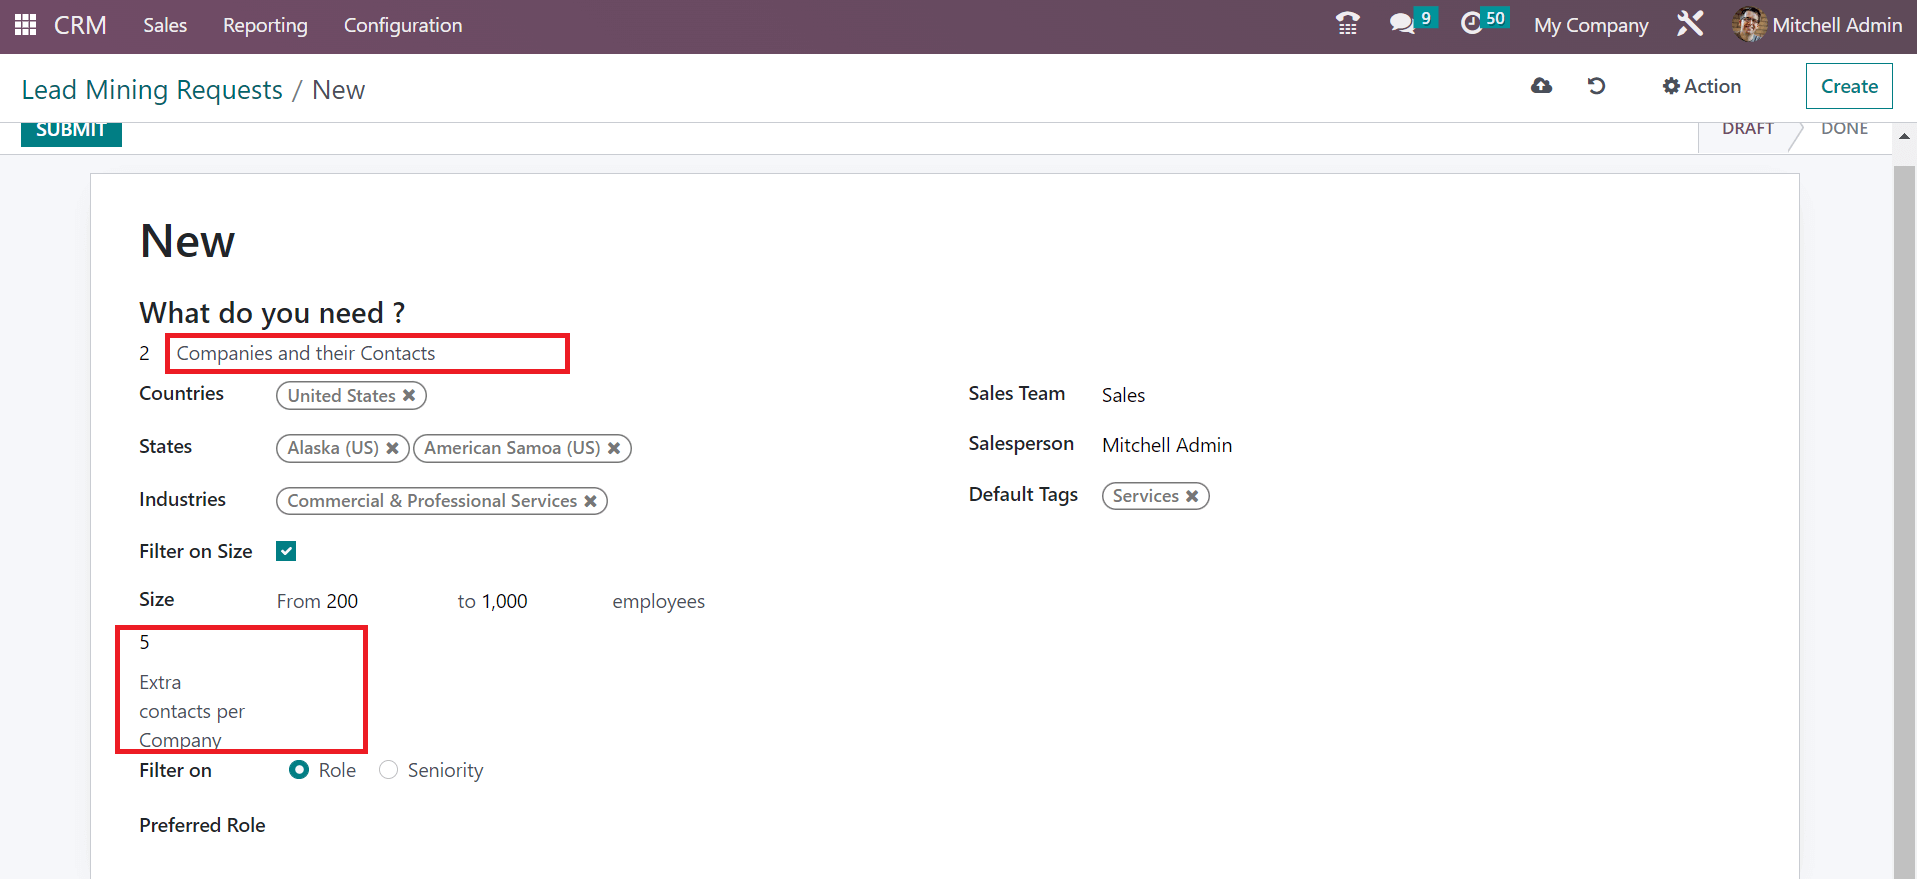
Here, we apply for five numbers inside the Extra contacts per Company field. Filtering the contacts in a company based on Role or Seniority, as defined in the screenshot below, is possible.
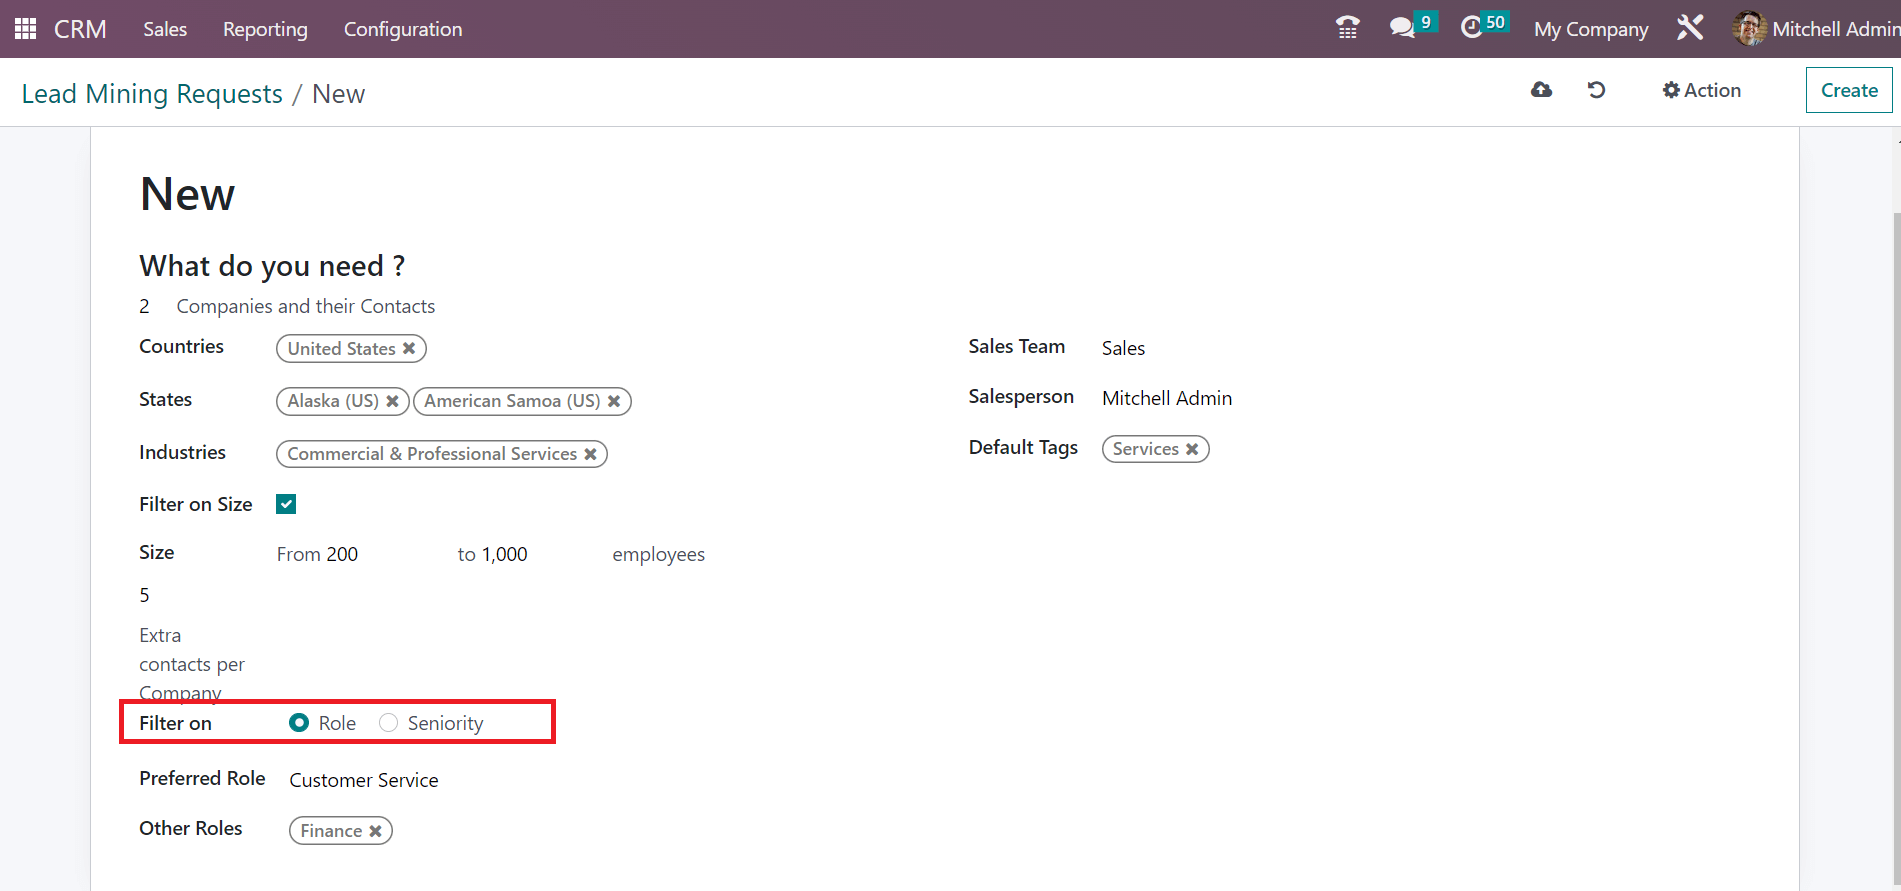
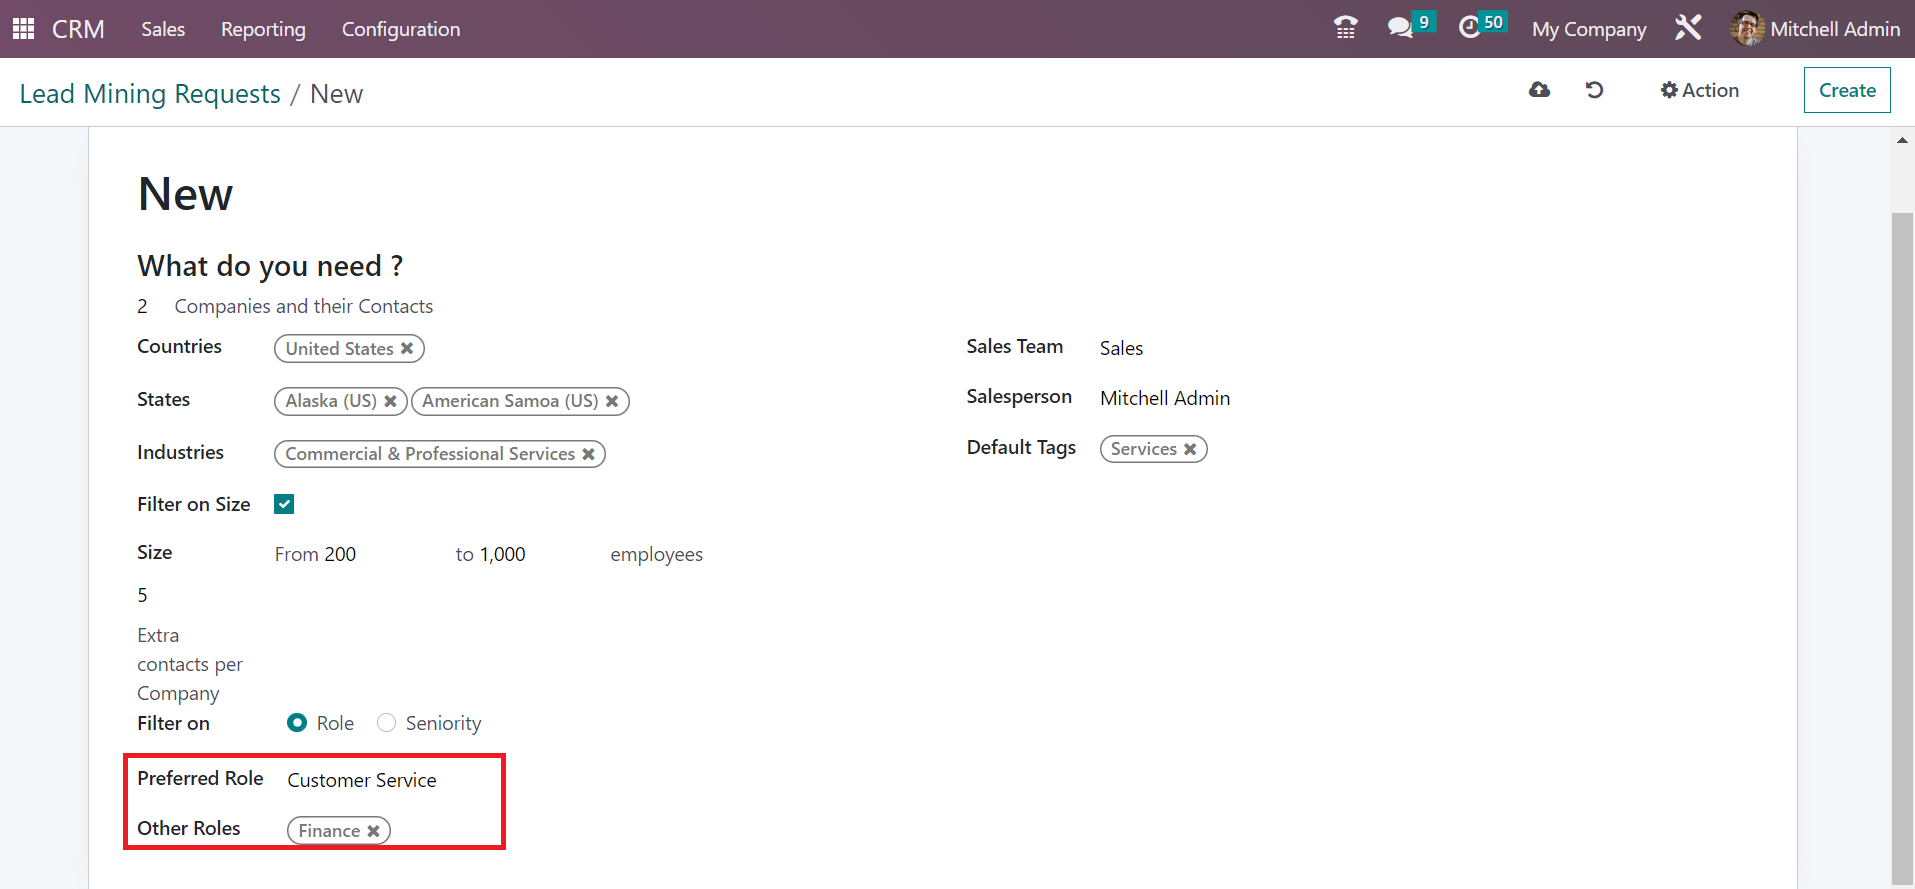
By selecting the Role option, a Preferred Role option appears before you. Users can pick up the Preferred Role and Other Roles in the new space, as demonstrated in the screenshot below.
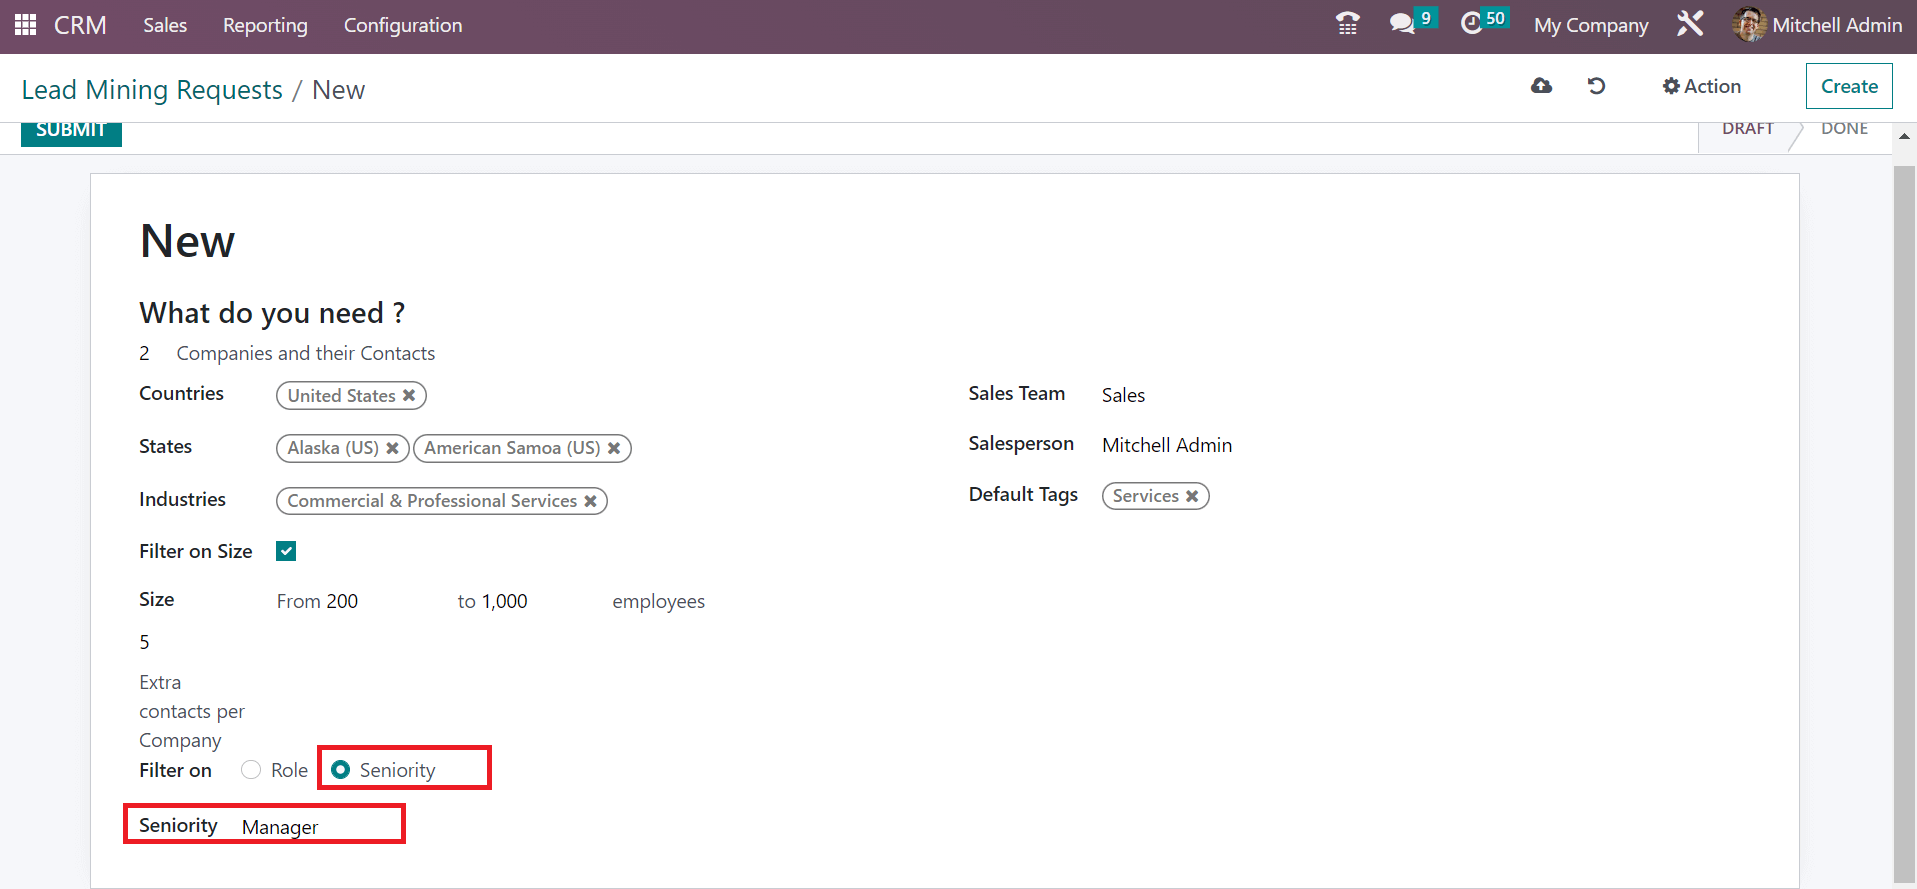
After selecting the Seniority option in the Filter on the field, a Seniority field appears before you, and choose the position of contact as indicated in the screenshot below.
We move forward with lead mining requests for companies. After adding the necessary data, all details are saved manually in the Odoo 16.
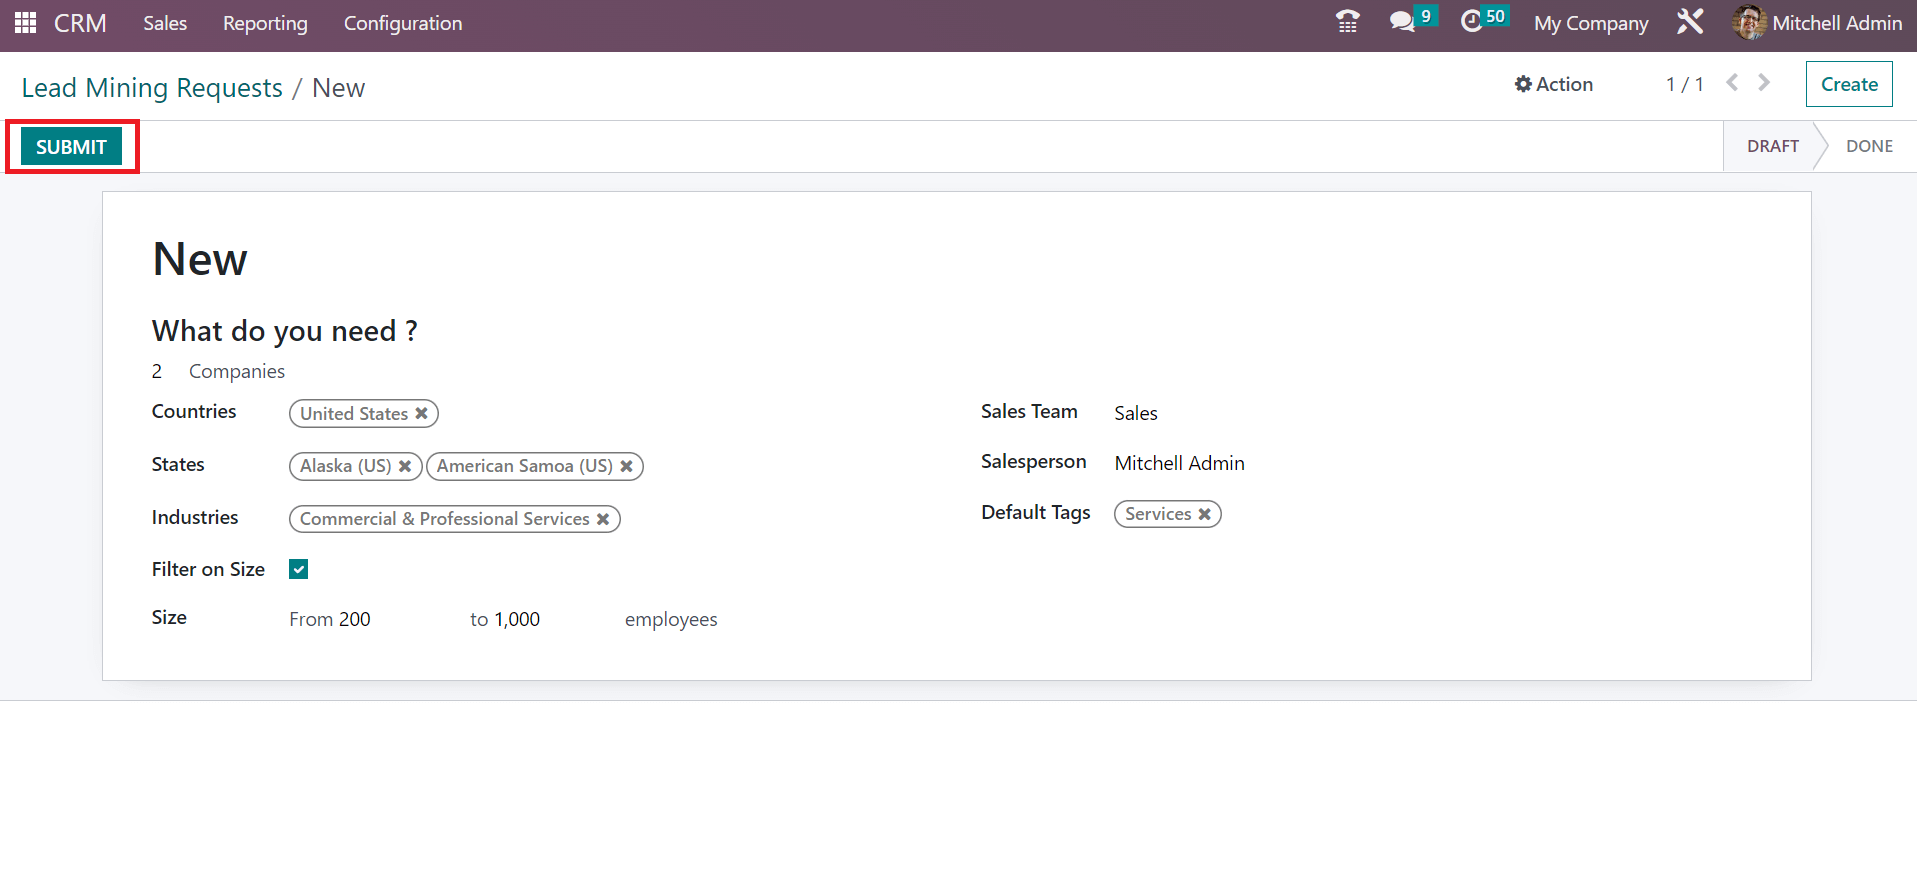
After saving the lead mining request, we can upload it by clicking on SUBMIT icon as in the screenshot above. You can view the created lead mining request in the main window.
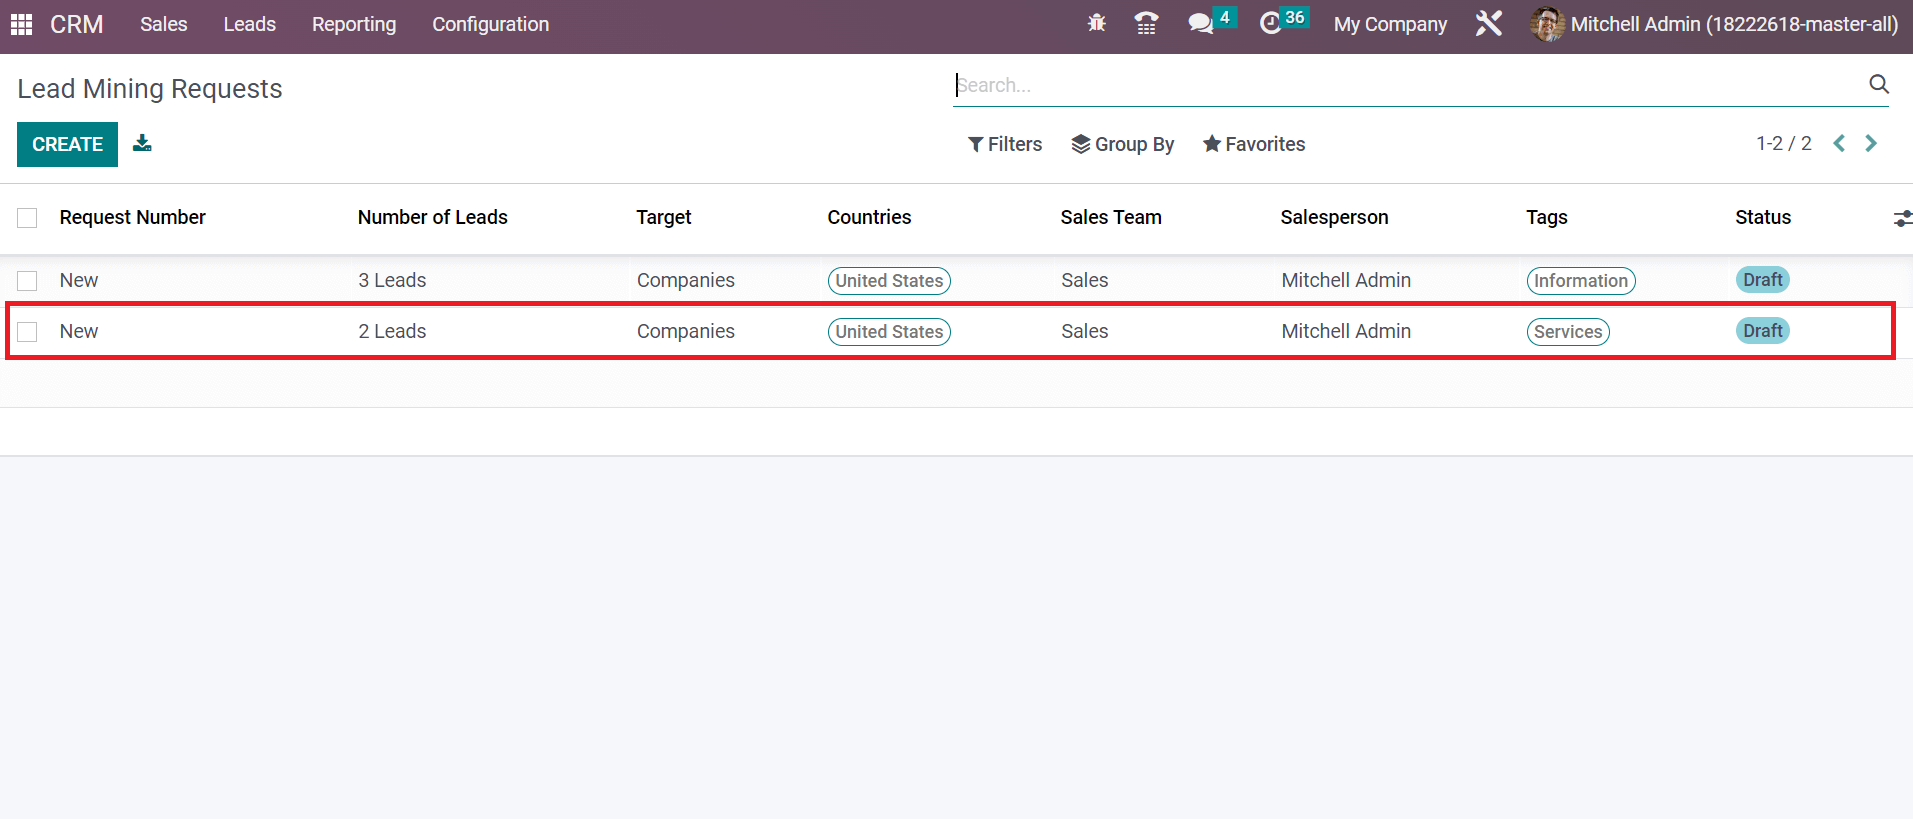
Hence, users can quickly generate a lead mining request within Odoo 16 CRM module.
To Analyze Leads in Odoo 16 CRM module.
We can evaluate leads generated in a company using the Reporting feature of the Odoo 16 Customer Relationship Management module. Click the Leads menu in Reporting tab, and you can quickly analyze leads in your company. The graph view of the Lead Analysis window shows the count on Y-axis and sales team data on a specific year on X-axis, as represented in the screenshot below.
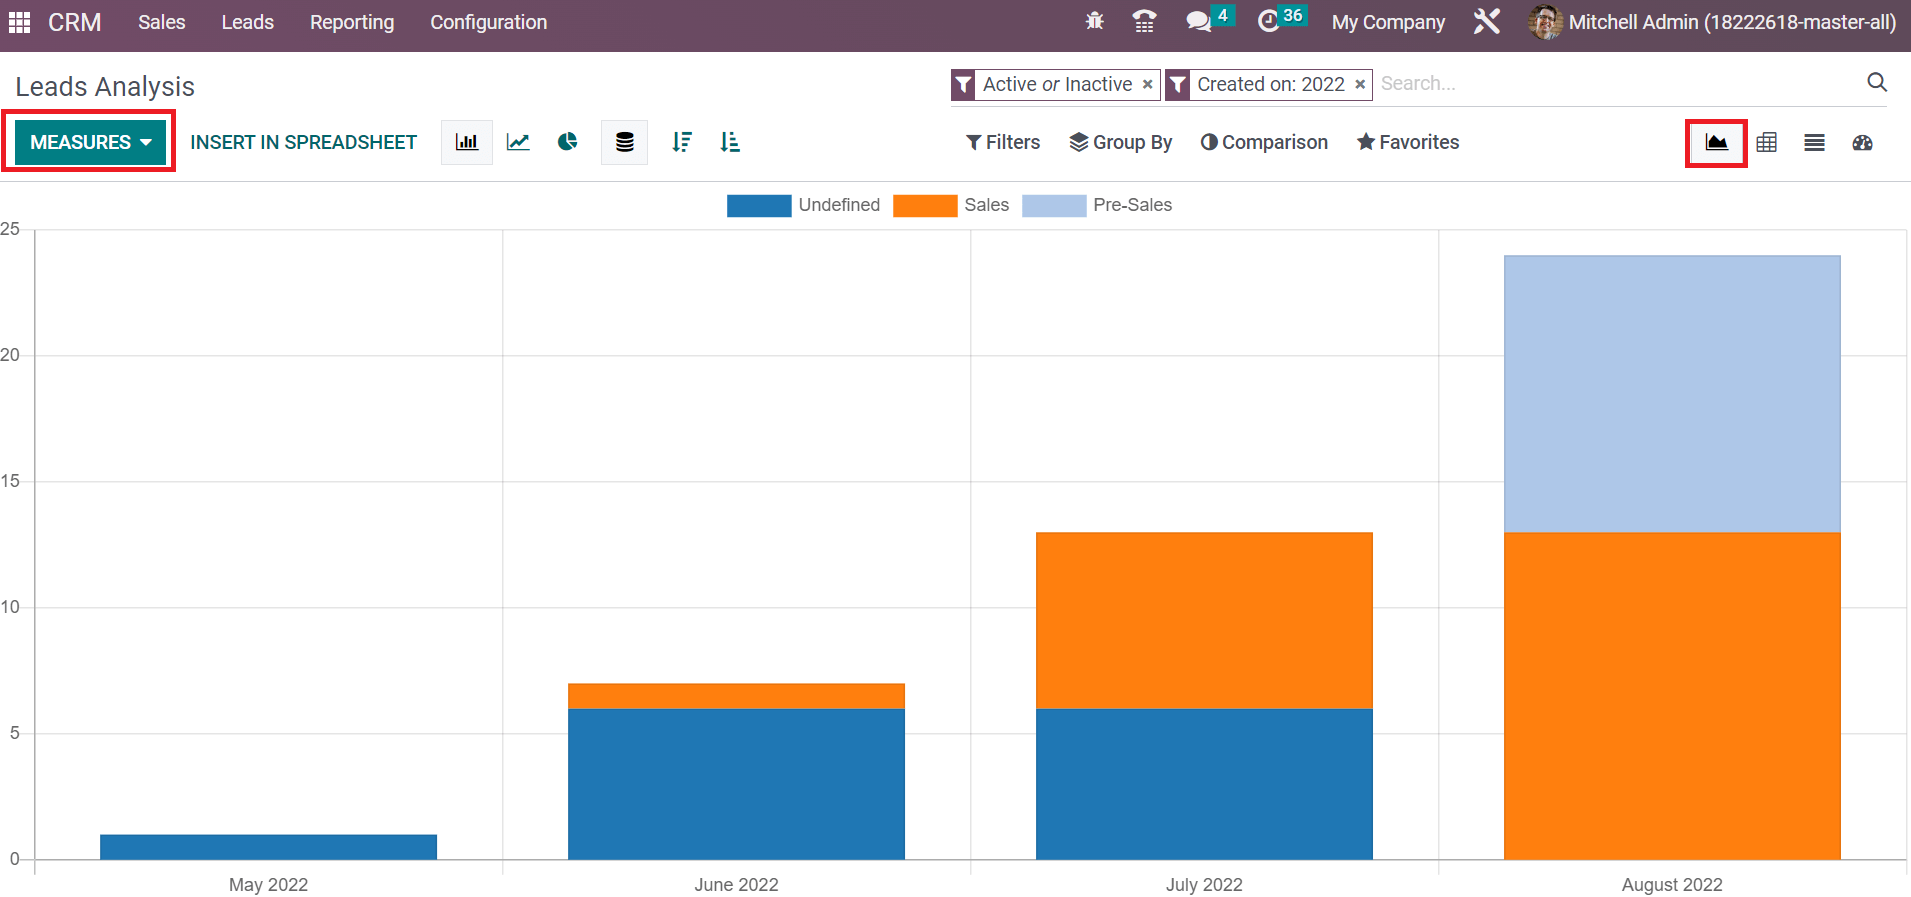
Using the MEASURES icon, we can add different measures to the graph, such as Expected Revenue, Days to Close, Prorated MRR, and more. You can view the count of Sales, Pre-sales, and Undefined in various colors on the graphical representation. We can apply filters to the graph with the help of the Filters option, as in the screenshot below.
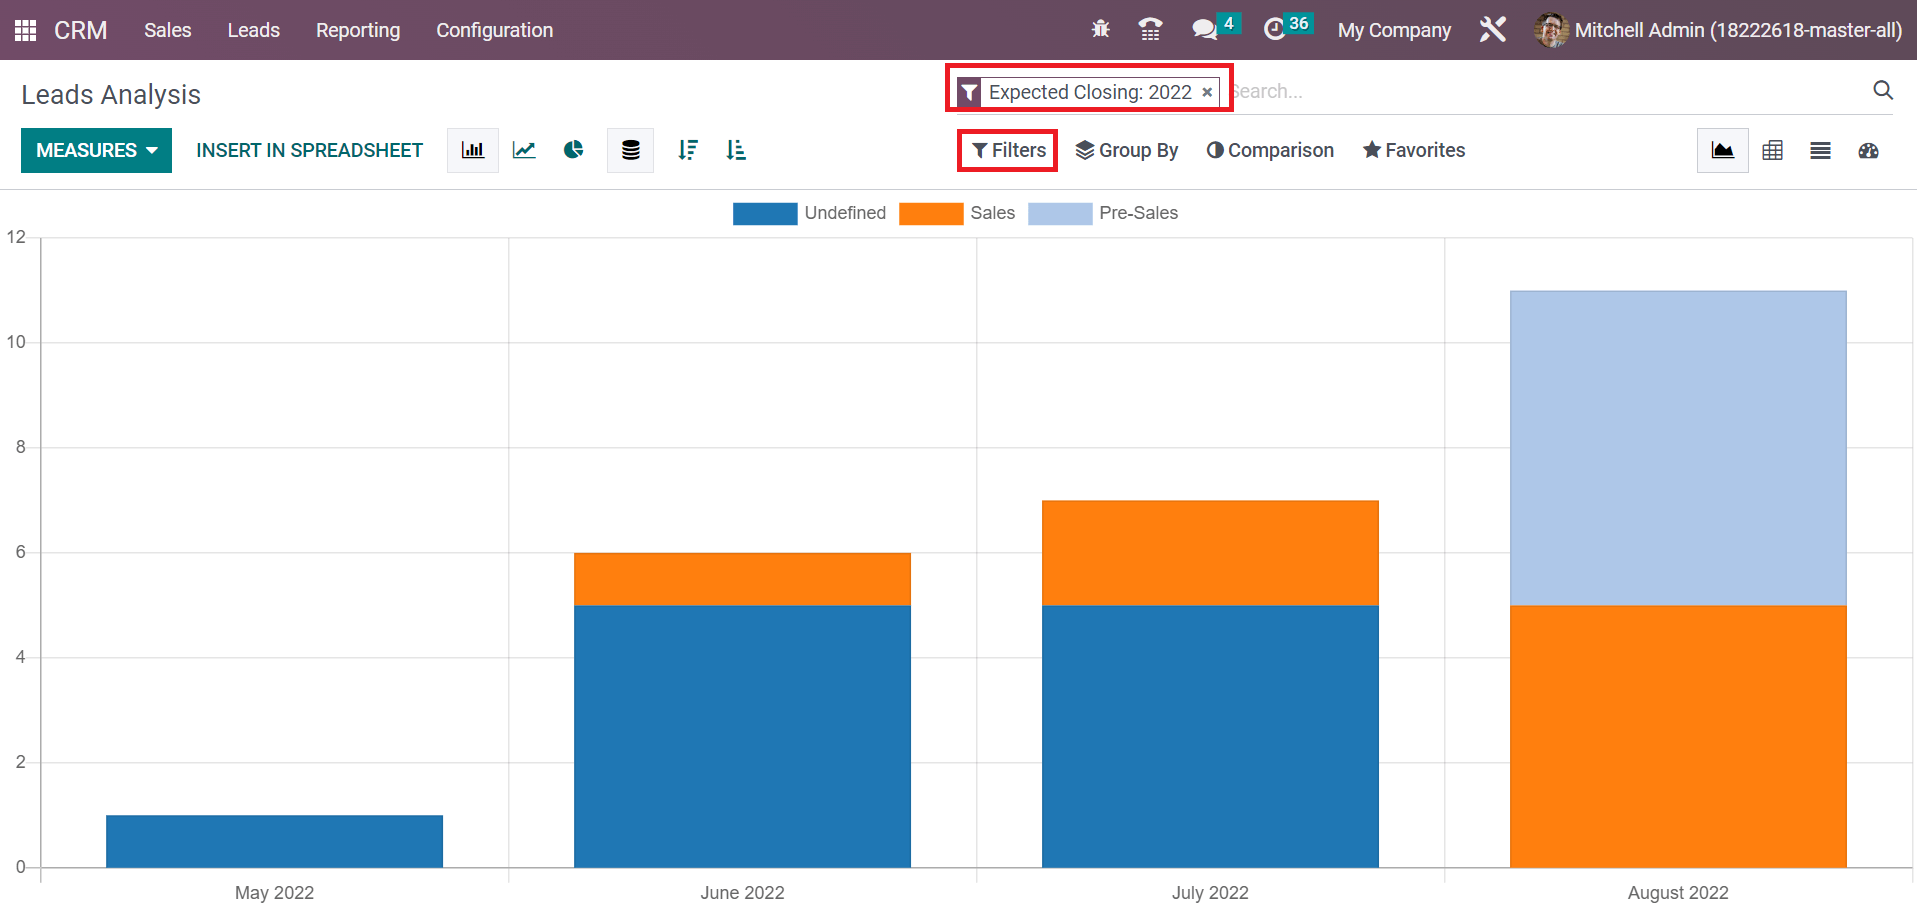
Here, we apply the Filter Expected Closing: 2022, and specific results are viewable before you in the graph. In the List view, you can access the details of each lead separately. We can see the information of each lead, such as Lead name, Type, Email, Stage, Salesteam, etc., as illustrated in the screenshot below.
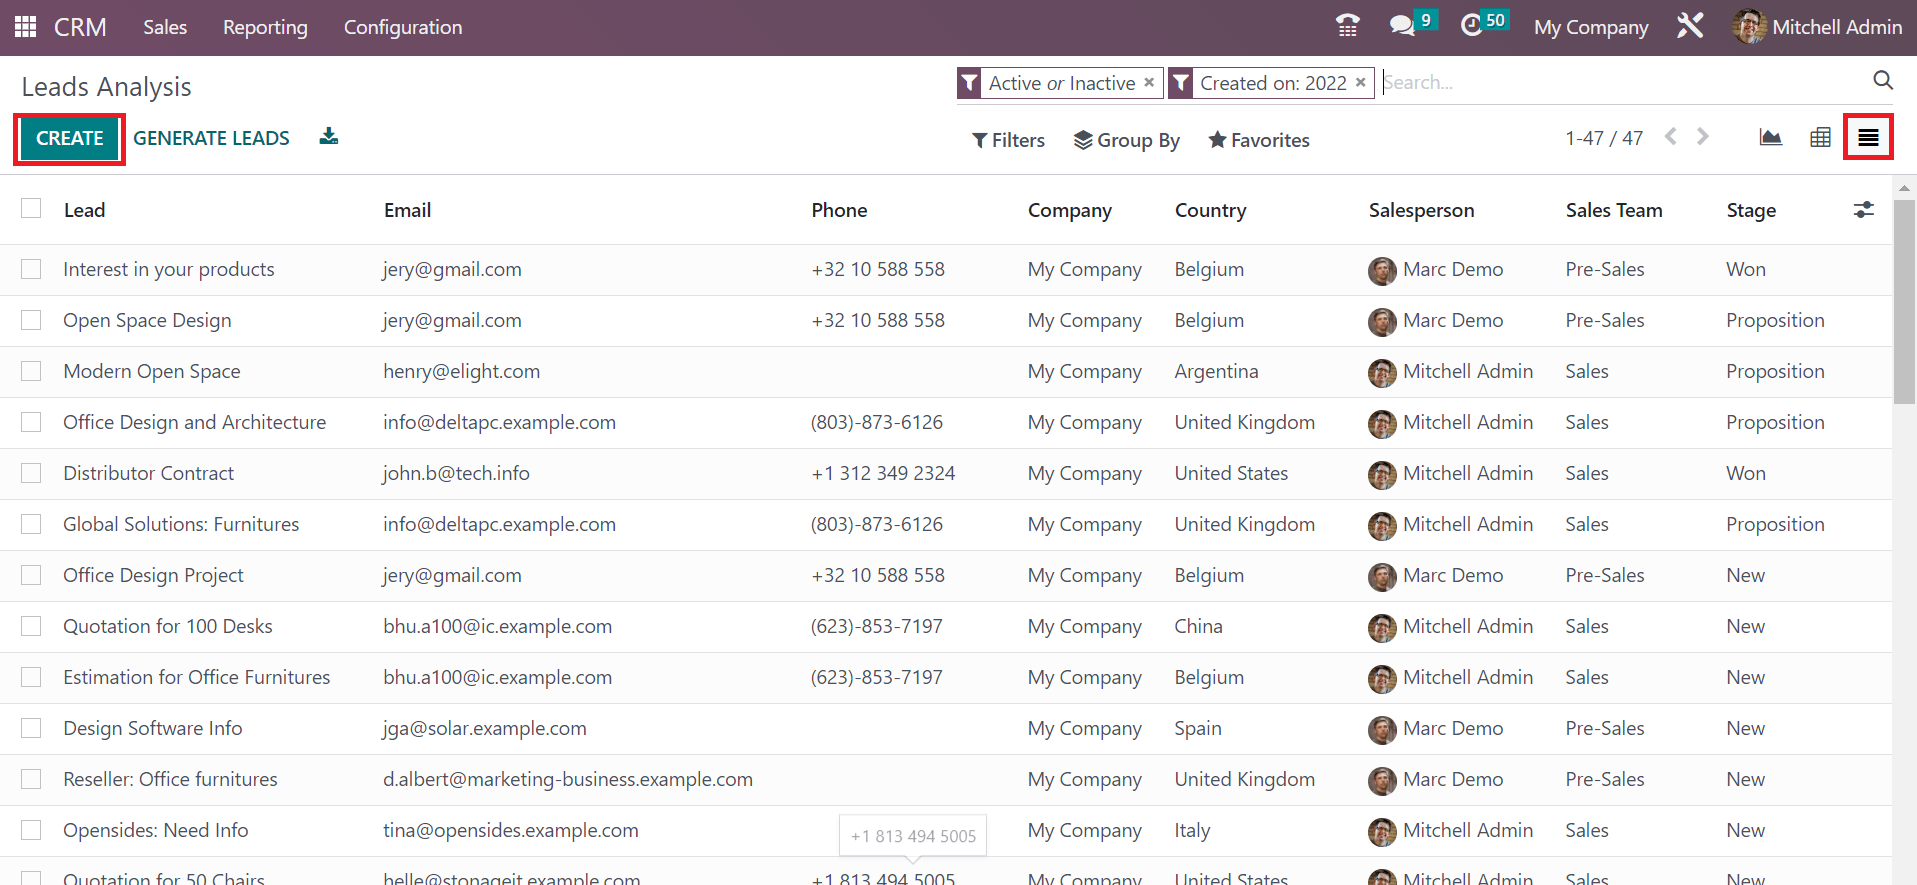 Users can also generate a lead by choosing the CREATE button in the Lead Analysis window.
Lead mining plays a vital role in a business for getting necessary customers. The sales team can maintain clear communication with customers or clients using the Odoo 16 CRM module, and professional efficiency can benefit your business with the help of the CRM application. Refer to the below link to know about the activity type set up in Odoo 16