Contact management of vendors, contractors, customers, and clients assists in the smooth functioning of a business. In some instances, most firms struggle to maintain an address with different individuals in the organization. Sometimes, we need to add more than one address for a company or individual. ERP software is required in these situations to manage multiple addresses. Within the Odoo 16 Contacts module, users can apply separate addresses for a contact. A firm can run that process within less time and quickly increase the venture's productivity.
This blog lets you understand the significance of configuring multiple addresses in the Odoo 16 Contacts module.
Various addresses related to delivery, invoice, private, and others are generated inside contact data using Odoo ERP. It is possible to maintain the city, country, phone, and mobile number of a specific individual inside the address. We can quickly reach a particular person by viewing their contact address, and the Odoo 16 Contacts module is helpful.
Develop a New Contact to Manage Multiple Addresses
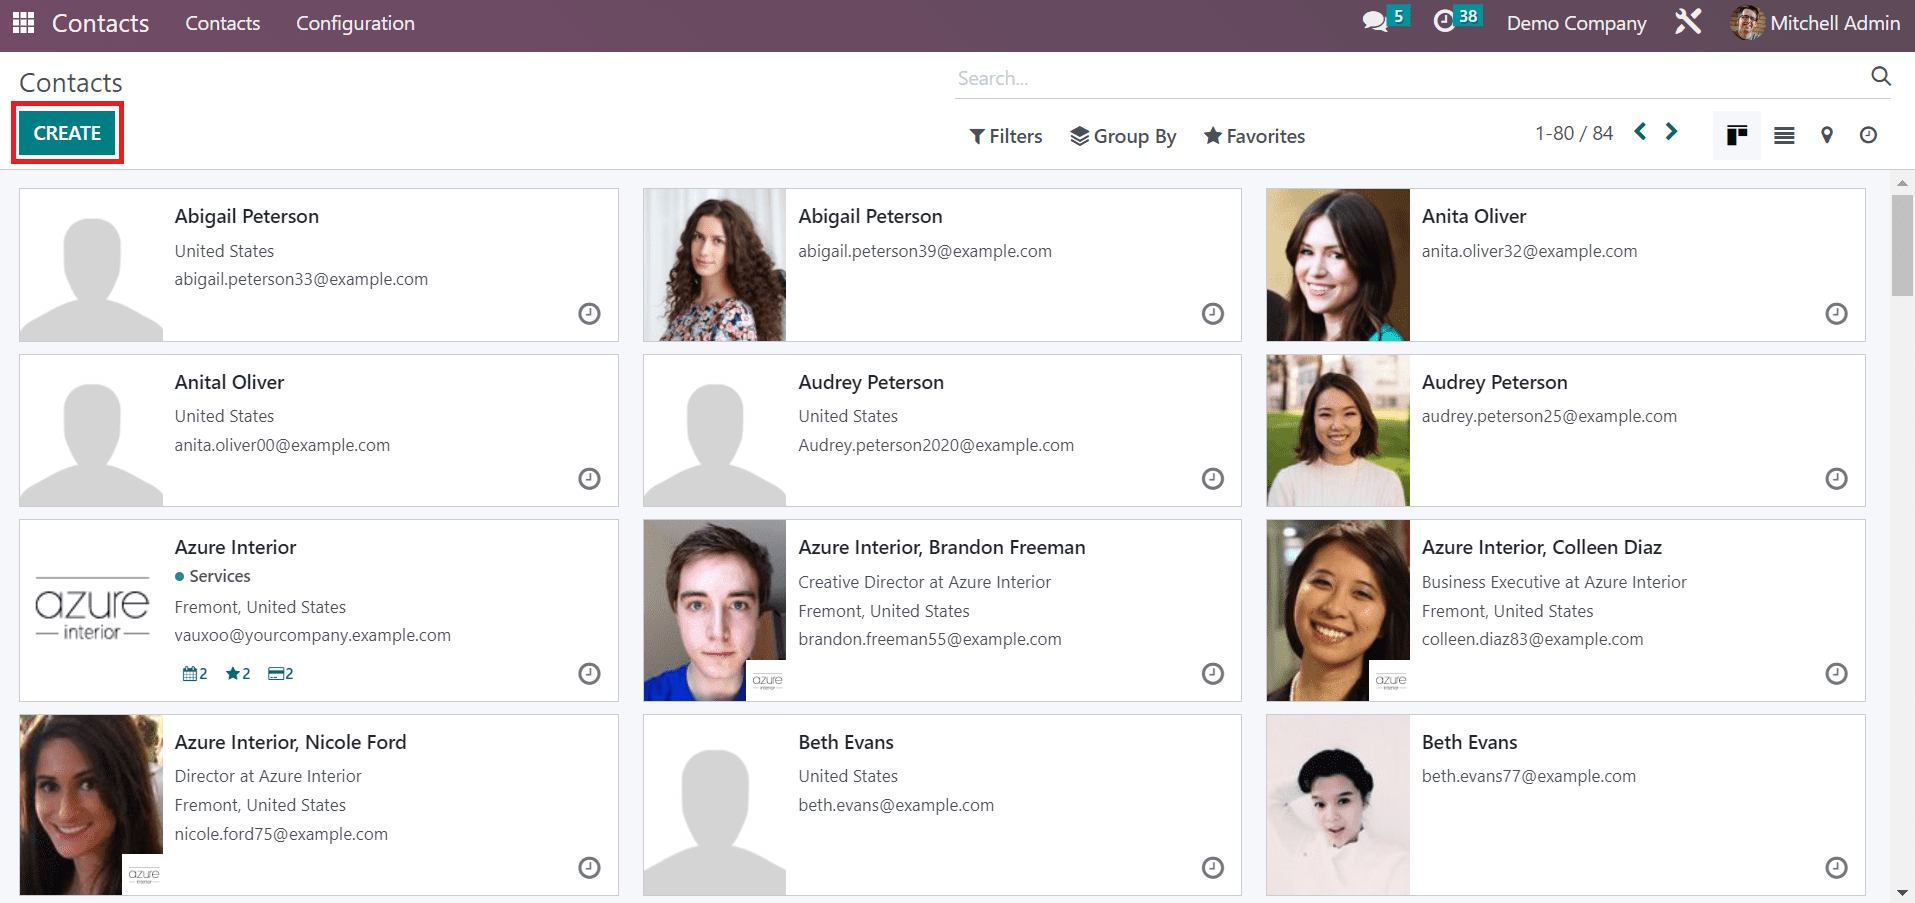
Before adding multiple addresses, we need to create new contact data from Odoo 16 Contacts module. Select the Contacts tab, and a list of all generated contact information is viewable. On the List view, the user can attain details including Name, City, Email, Company, Phone, Country, etc. Click the CREATE button in the Contacts window to produce a new contract, as demonstrated in the screenshot below.
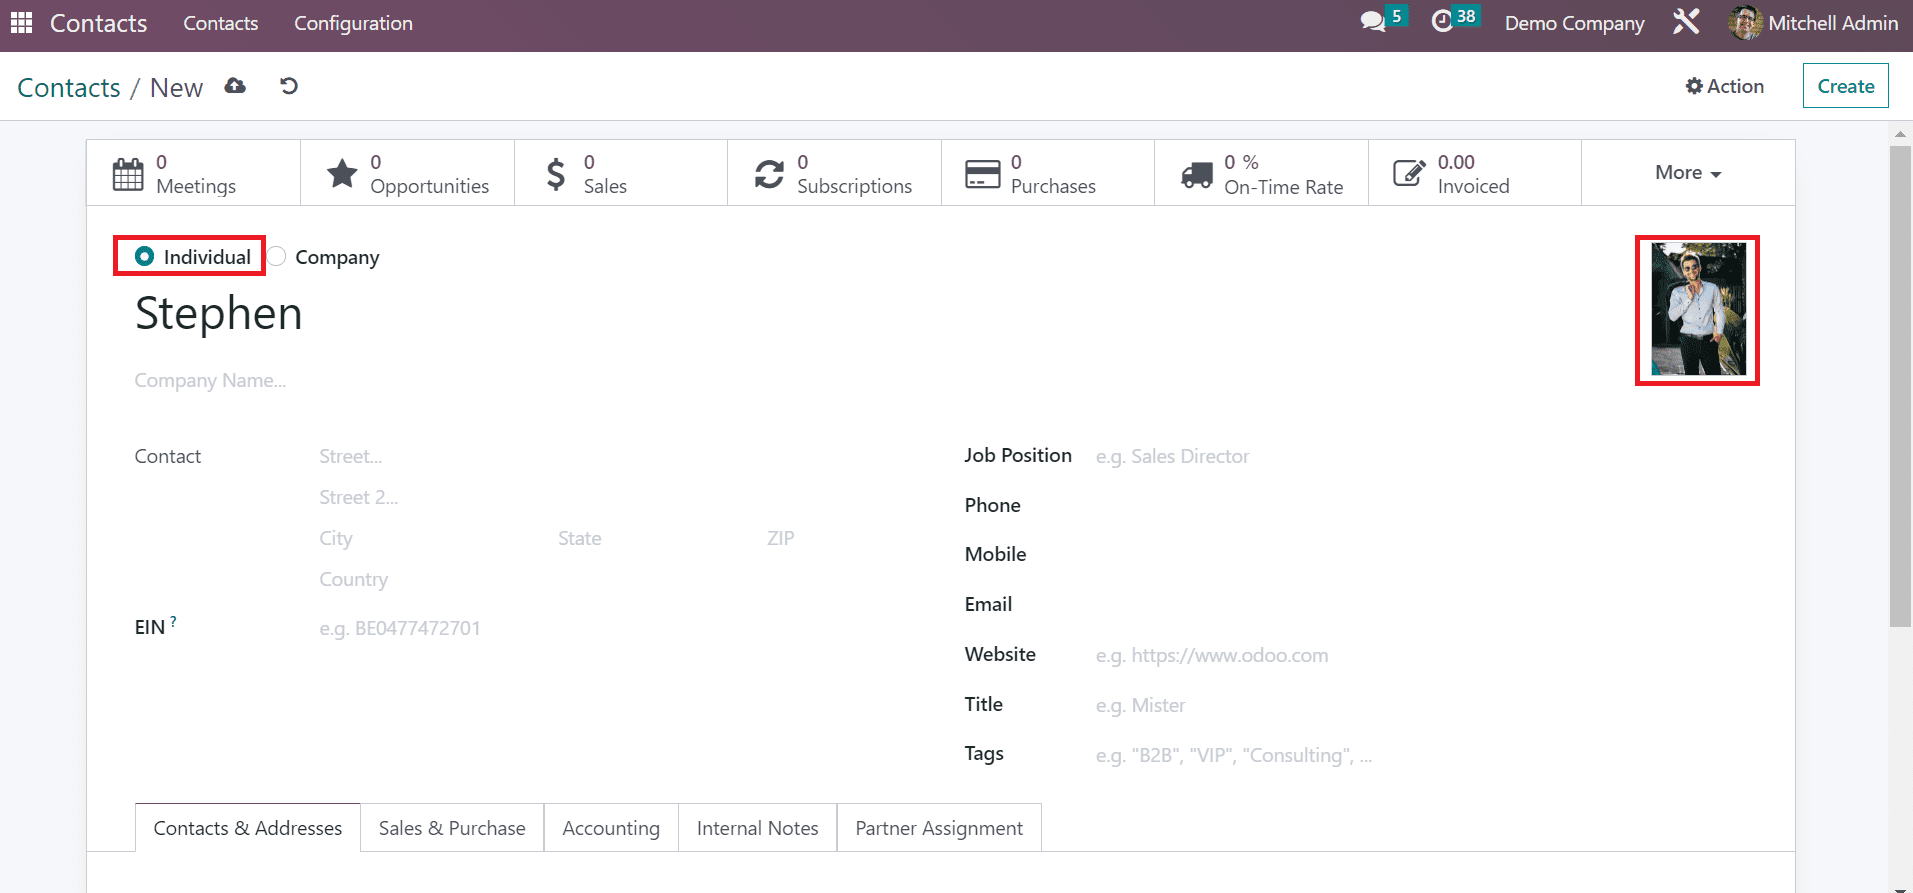
In the new Contacts window, choose the Individual option and enter the Contact Name. You can upload the image of a person on the right end of the window, as portrayed in the screenshot below.
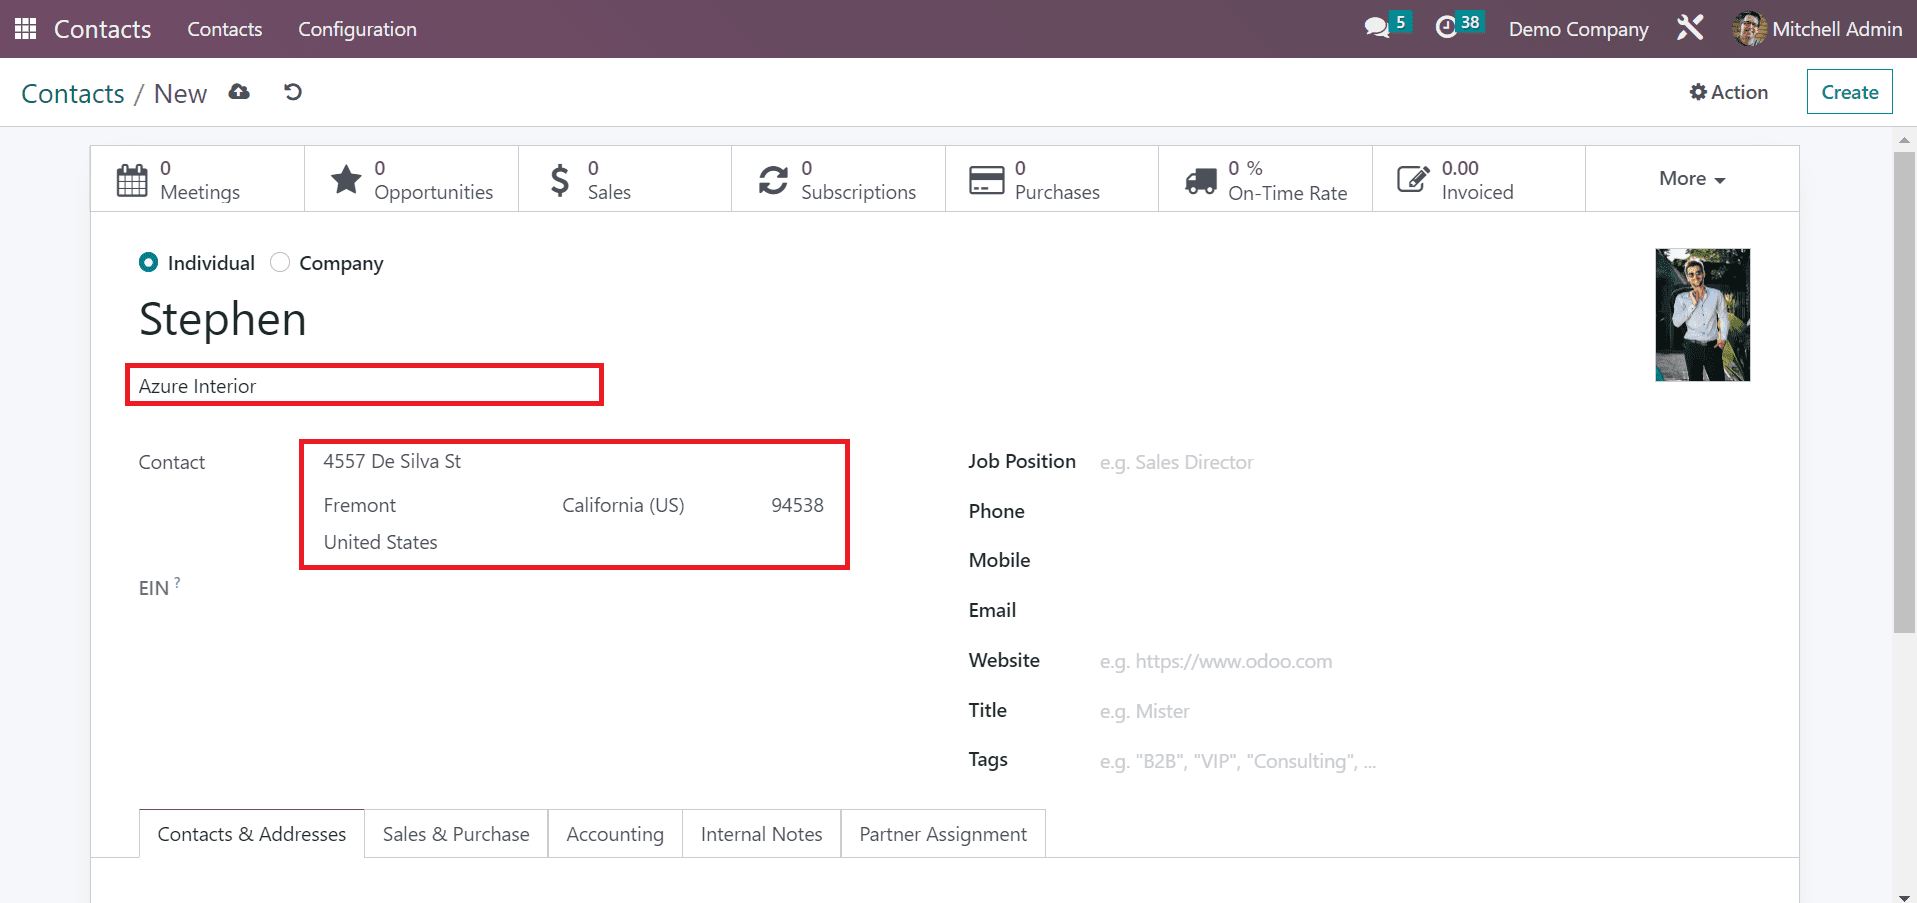
Users can select the title of the company from the Company field. After choosing the company, the address is manually visible below the Company name, as depicted in the screenshot below.
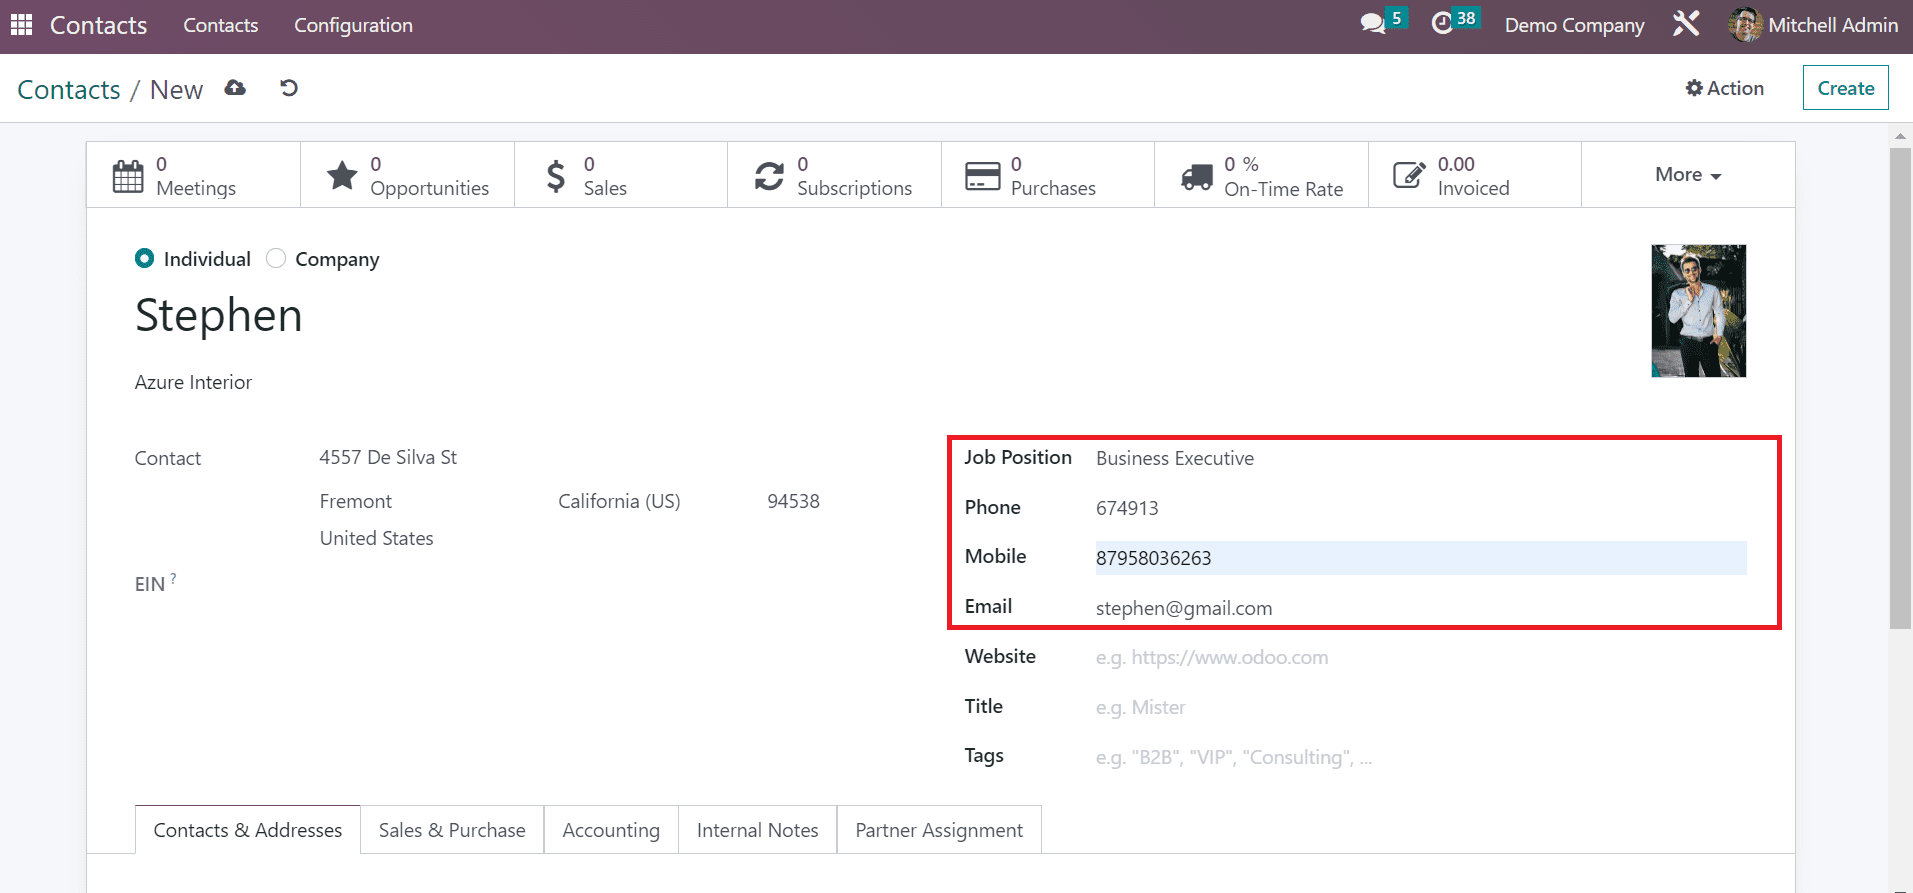
Add the job of a contact person in the Job Position field and apply the Phone or Mobile number. Later, specify the official email id of the individual inside the Email field as mentioned in the screenshot below.
You can also apply an abbreviation for the contact person inside the Title field. As marked in the screenshot below, we added the Title Mister for Stephen.
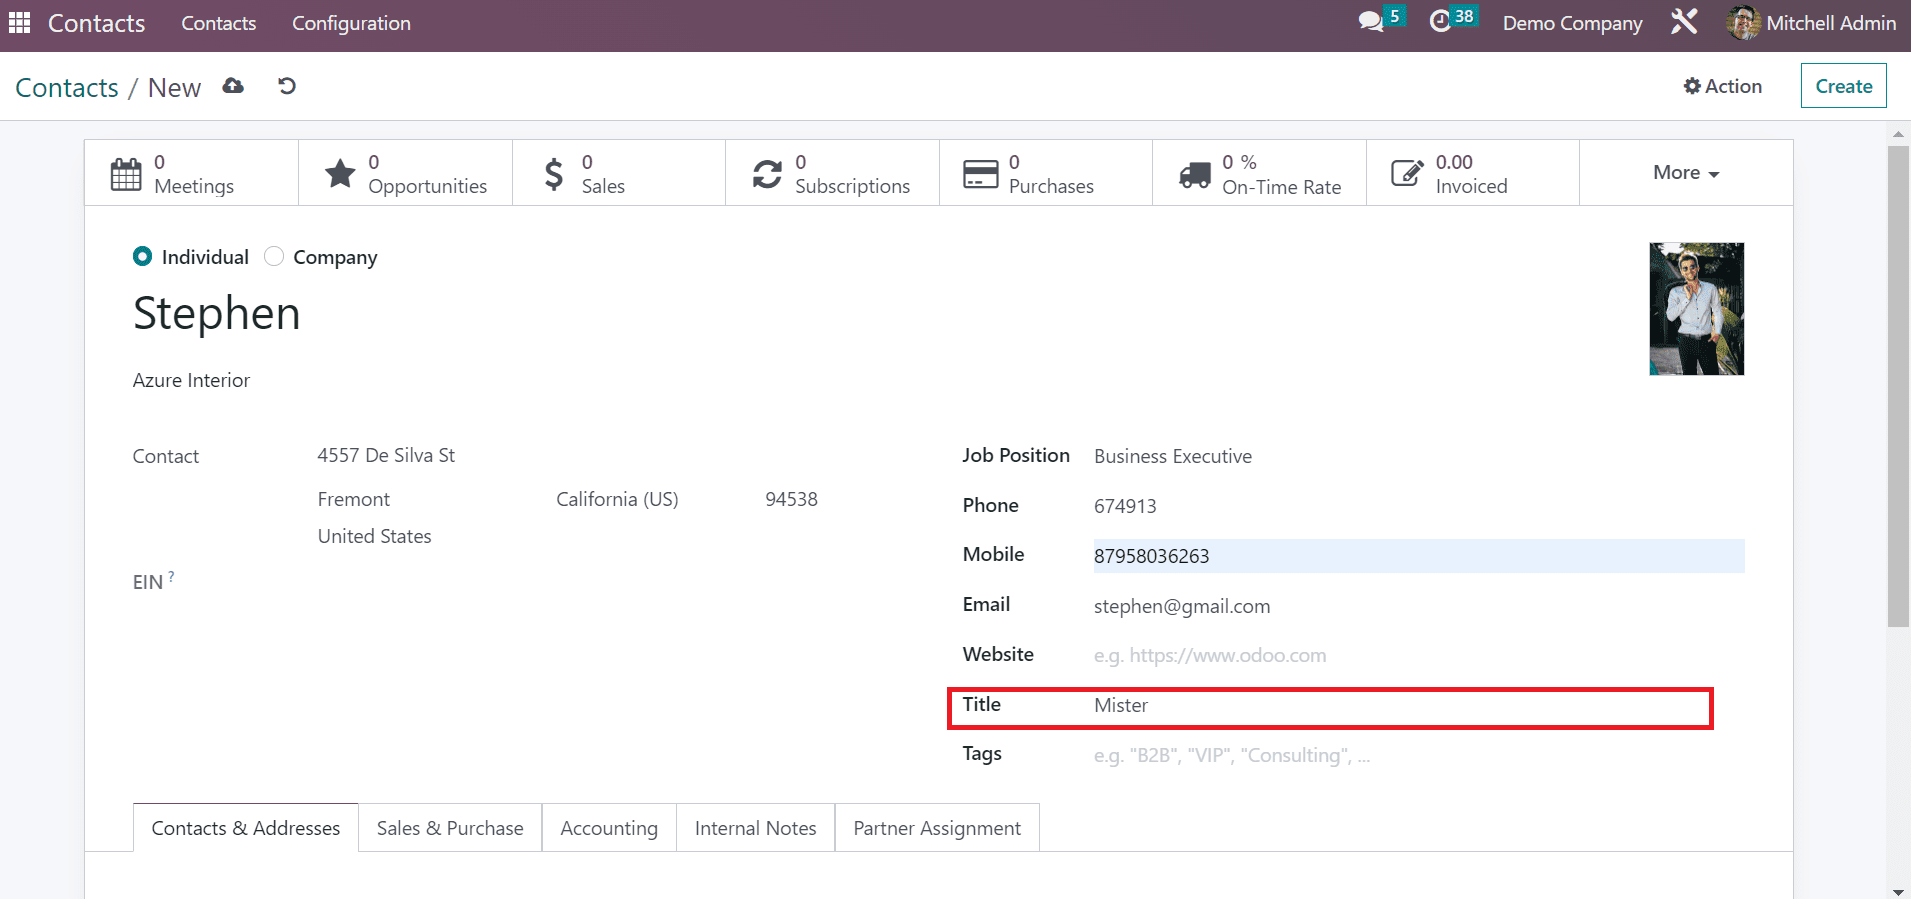
All these data are saved easily after applying the details of an individual. Next, we can view the steps of adding multiple addresses for contact.
How to Add Multiple Addresses for a Contact in Odoo 16?
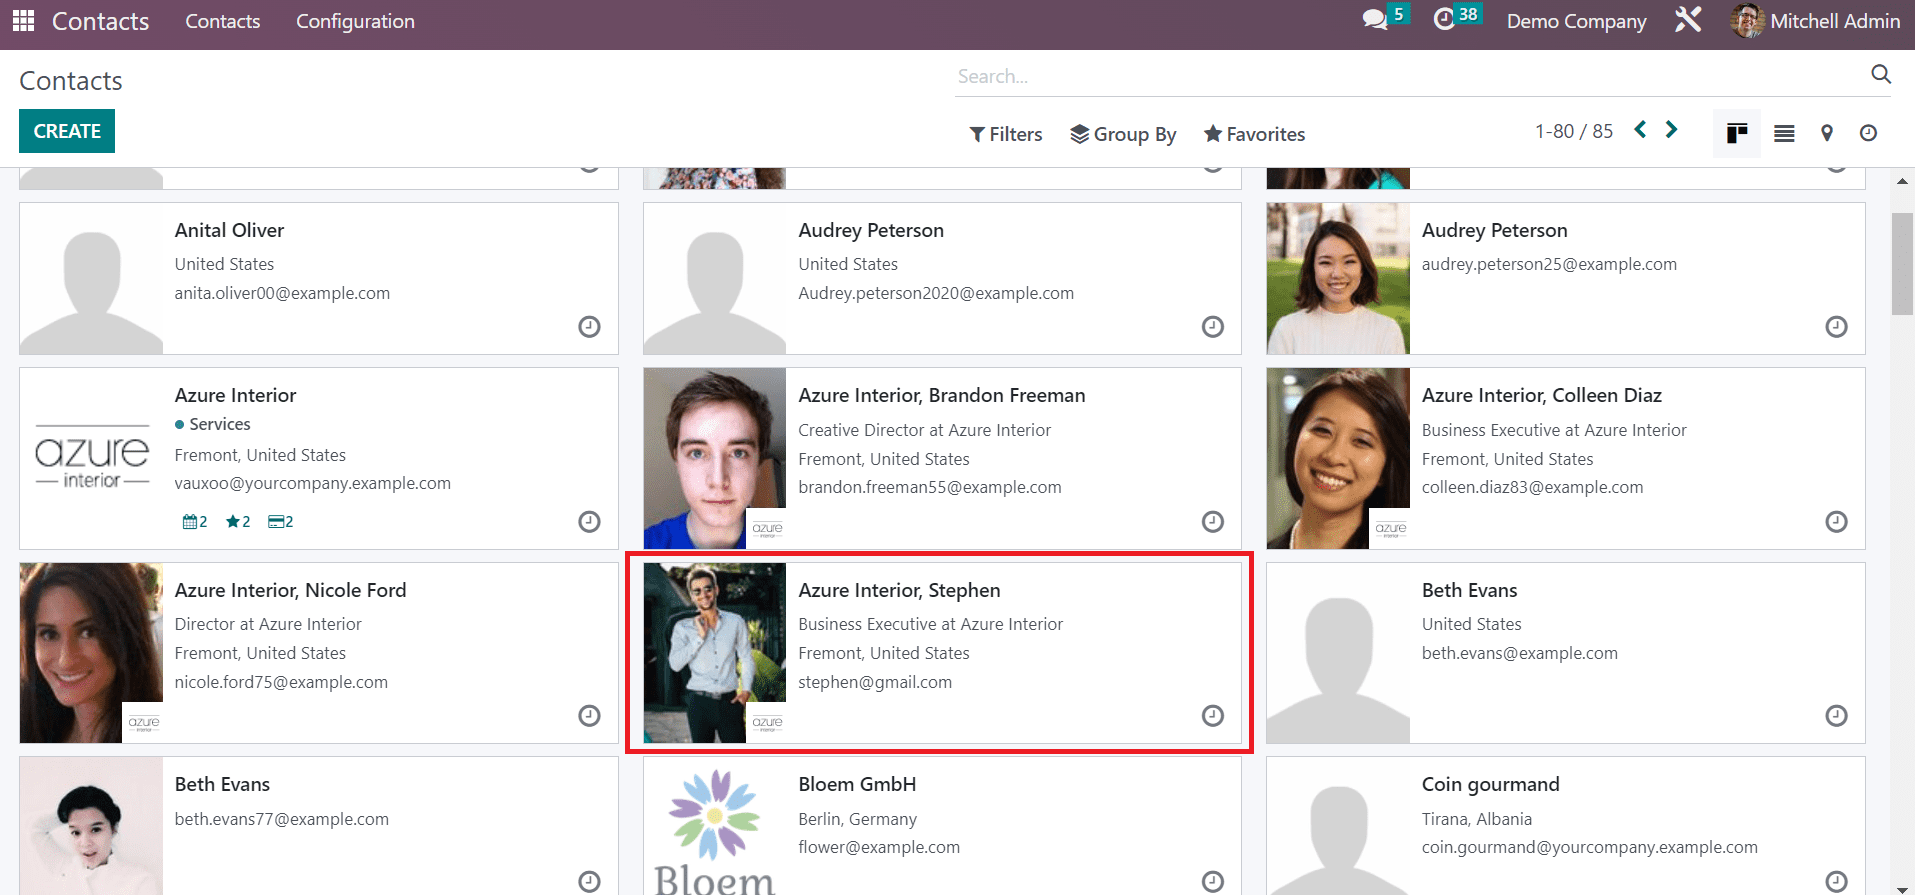
Choose your created contact from the Odoo 16 Contacts module. We selected the contact Stephen in the Odoo 16 Contacts dashboard, as indicated in the screenshot below.
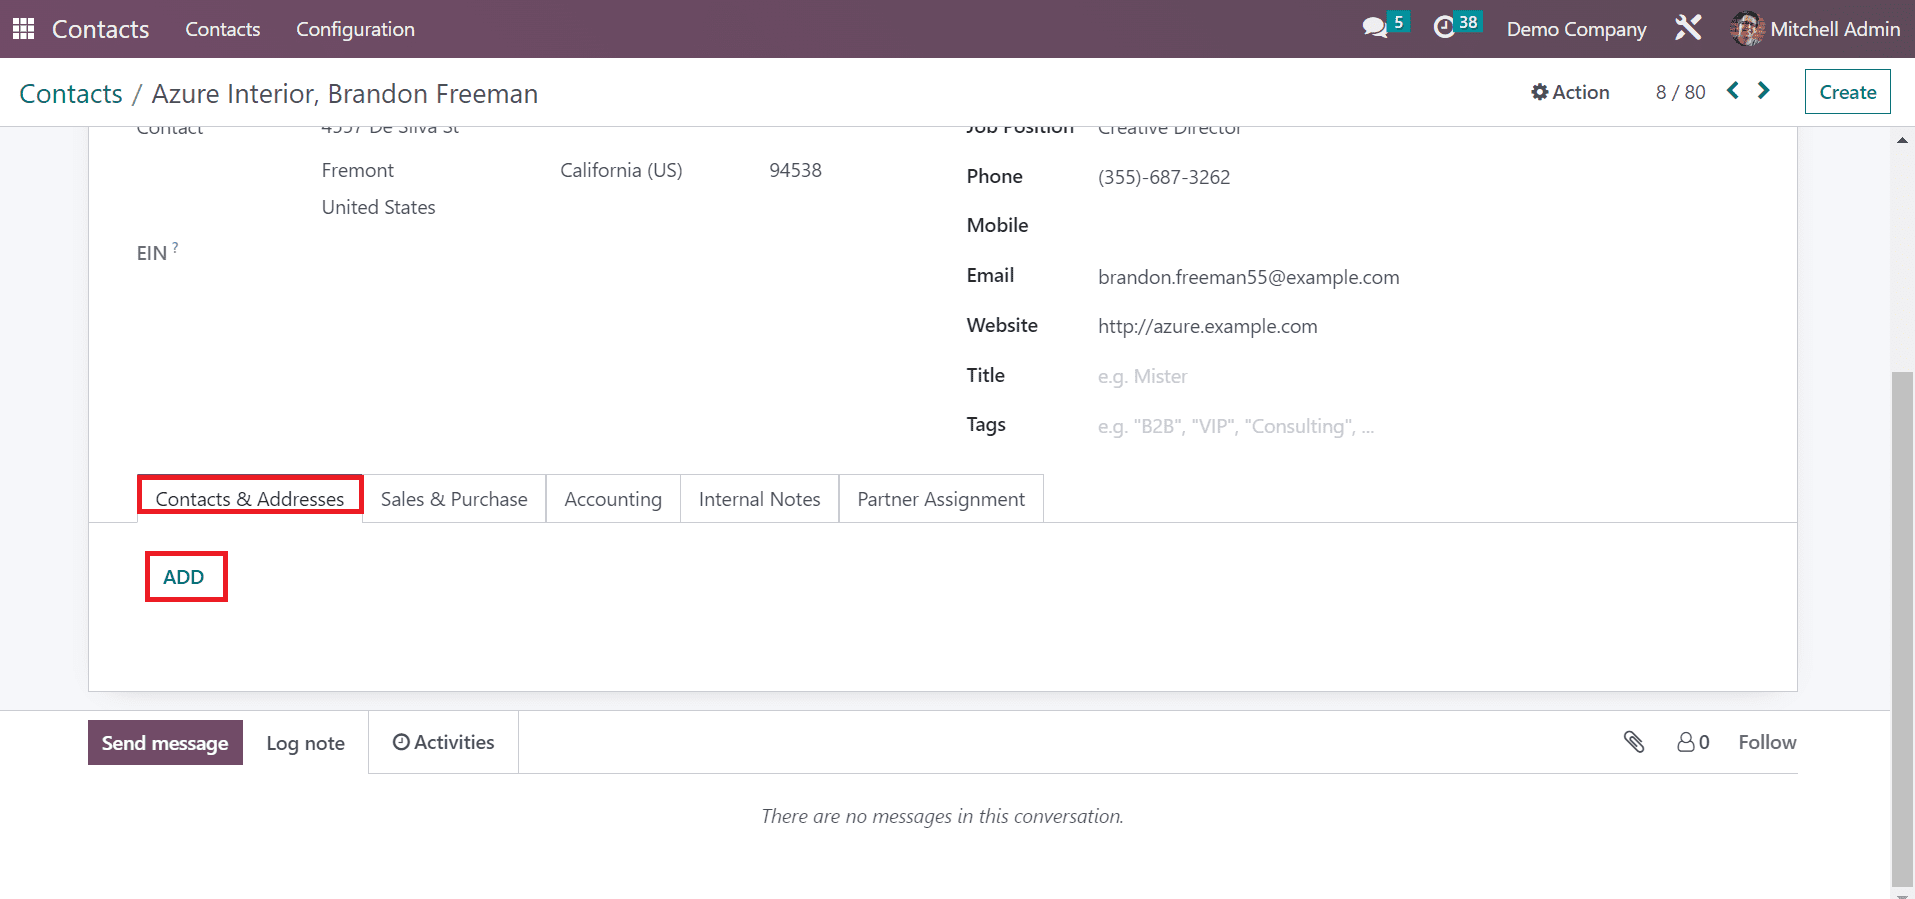
We can upload various addresses for a specific person in the Contacts window. To create an address, click the ADD icon below the Contacts & Addresses menu, as displayed in the screenshot below.
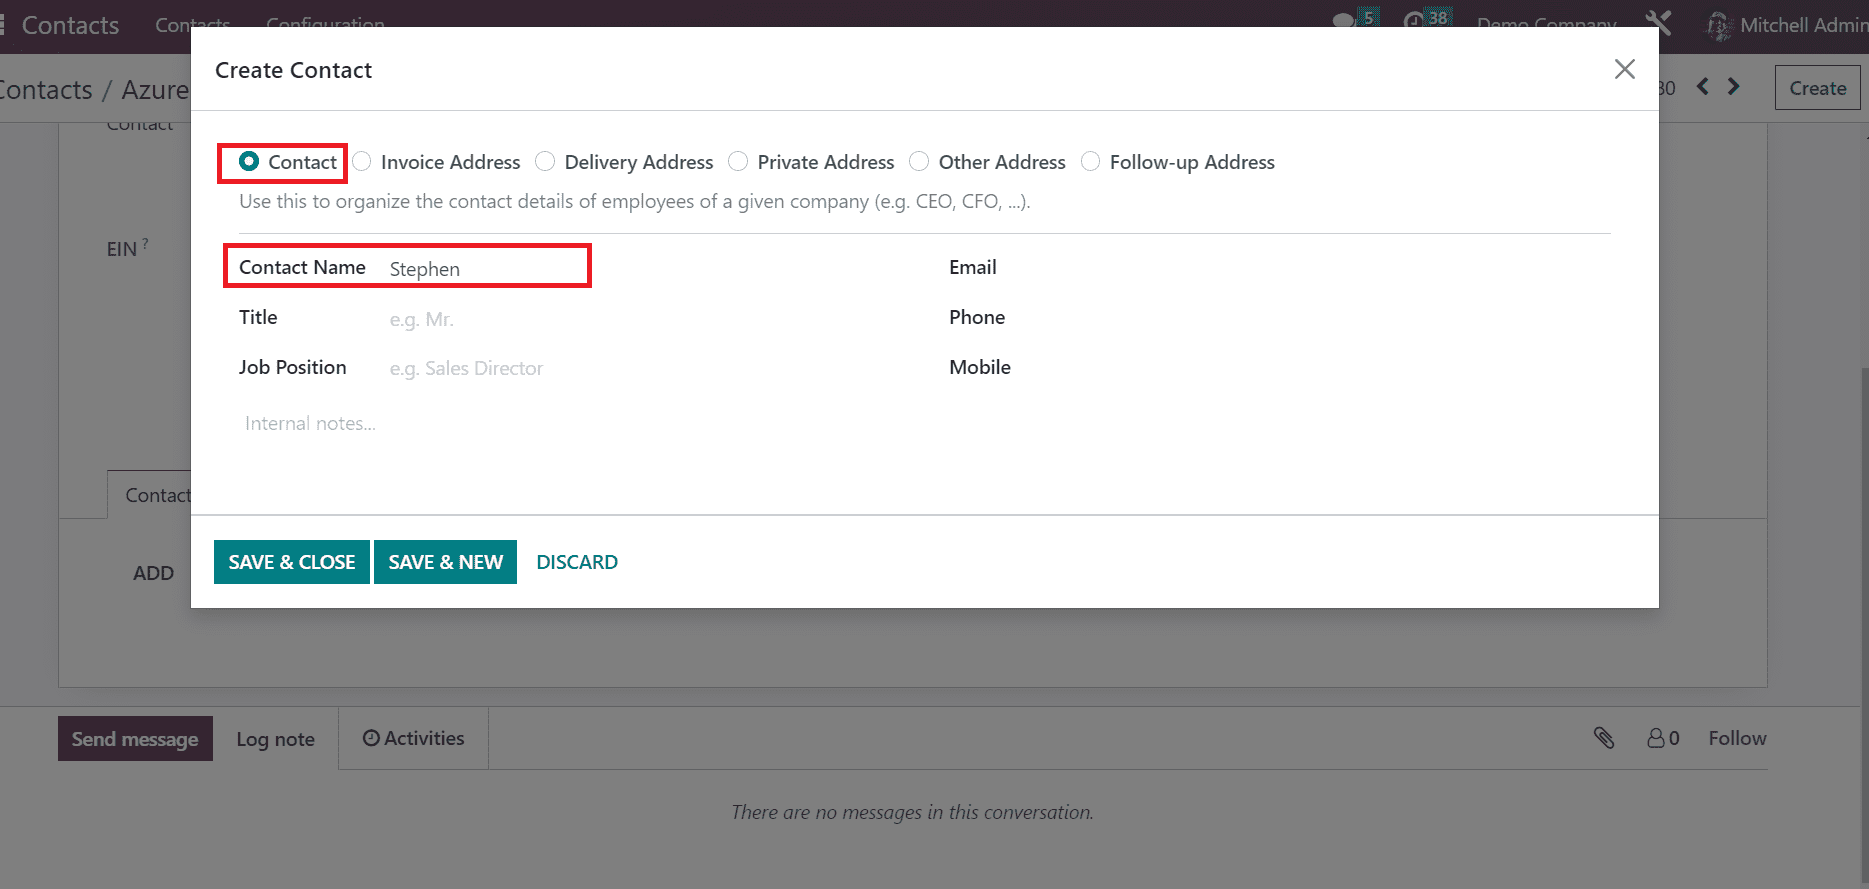
We can view a Create Contact window after clicking on the ADD button. Users can develop addresses in various ways, such as Contact, Delivery Address, Other Address, Invoice Address, and Private Addresses, as described in the screenshot below.
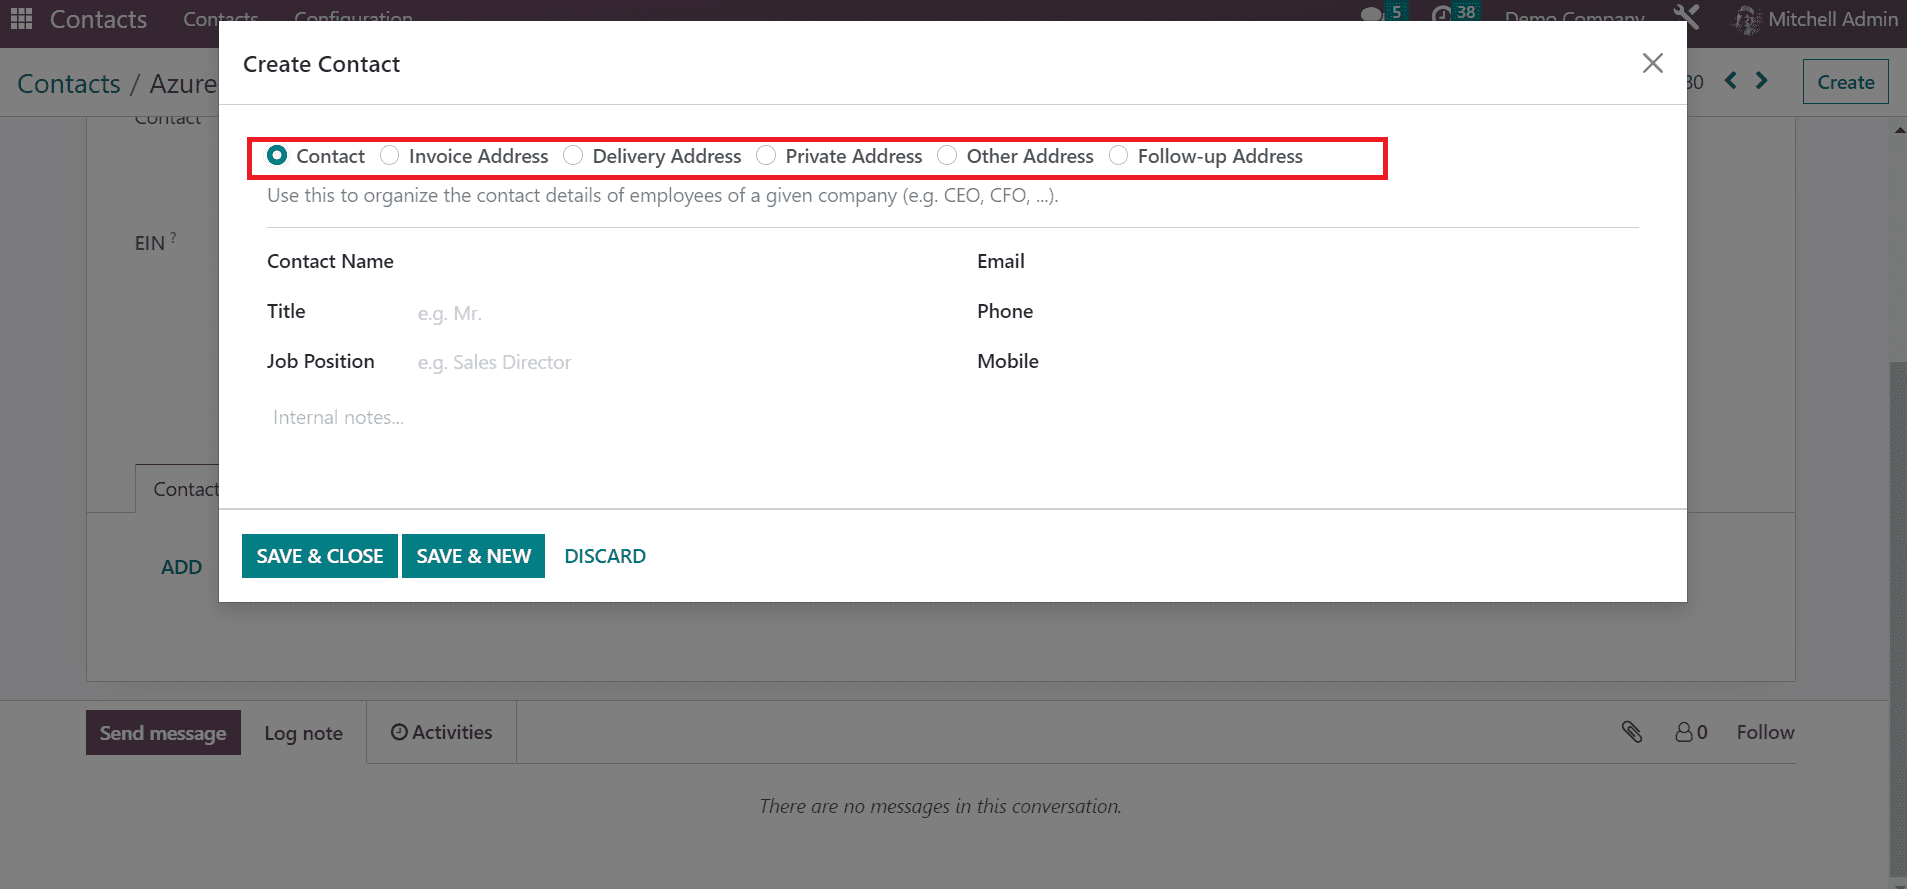
Now, let's configure each address separately. Firstly, we can develop a contact address by choosing the Contact option. It is easy to organize the contact details of employees of an organization using the Contact address. After clicking on the Contact option, enter the name in the Contact Name field, as presented in the screenshot below.
Specify the Title and Job Position of contact in the Create Contact window. Later, enter your Email, Mobile, and Phone number in the window, as illustrated in the screenshot below.
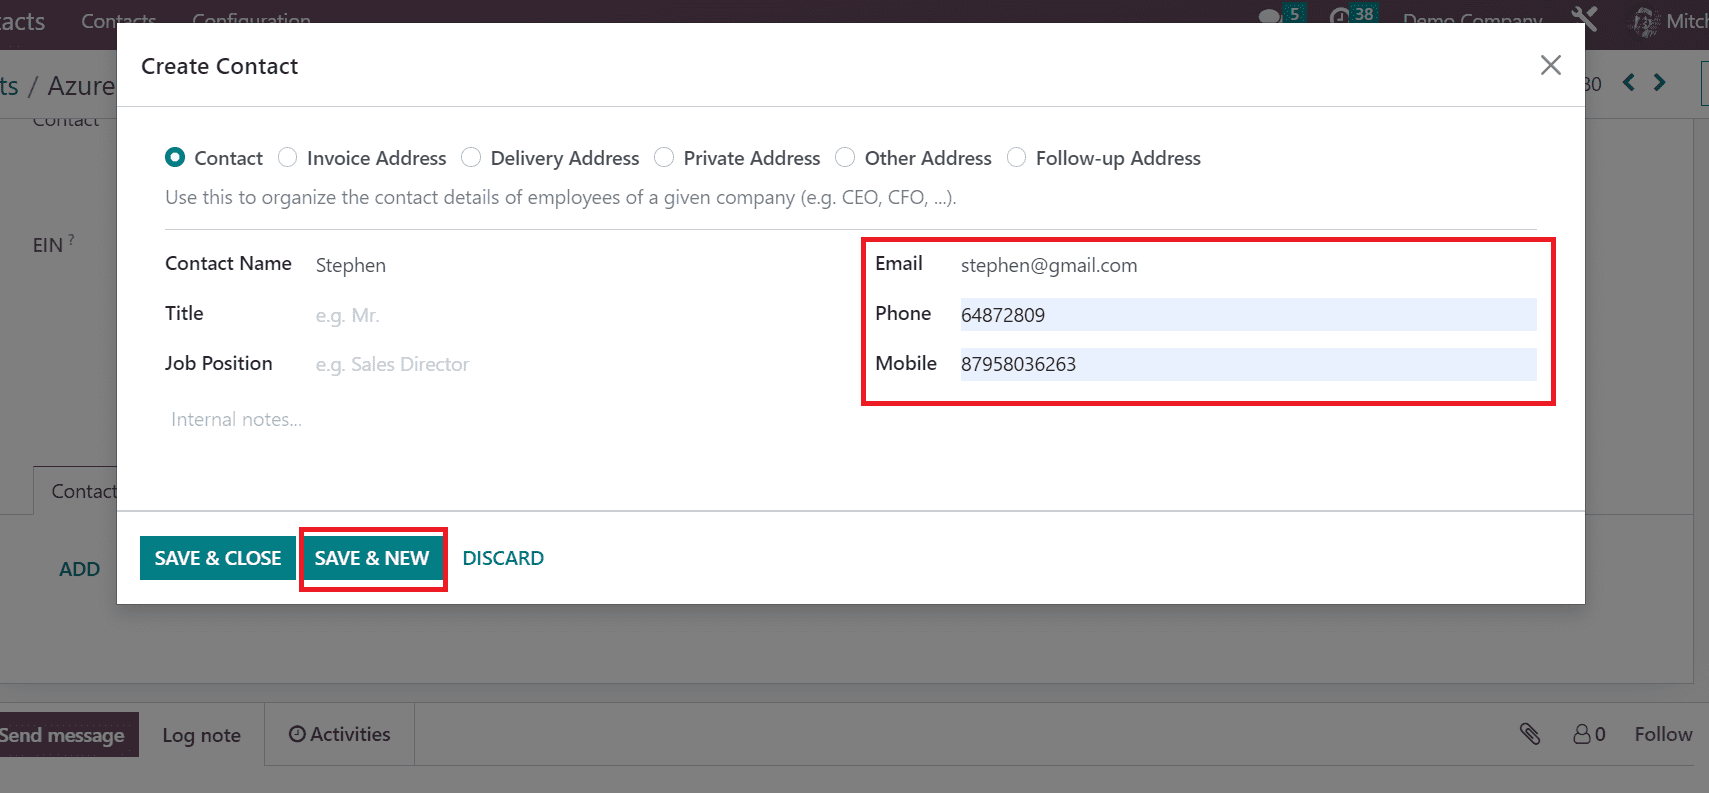
After applying the details, click the SAVE & NEW icon to add another address. Next, we are creating an invoice address that will be the address for all invoices. Choose the Invoice Adress option in the Create Contact window and enter the Contact Name.
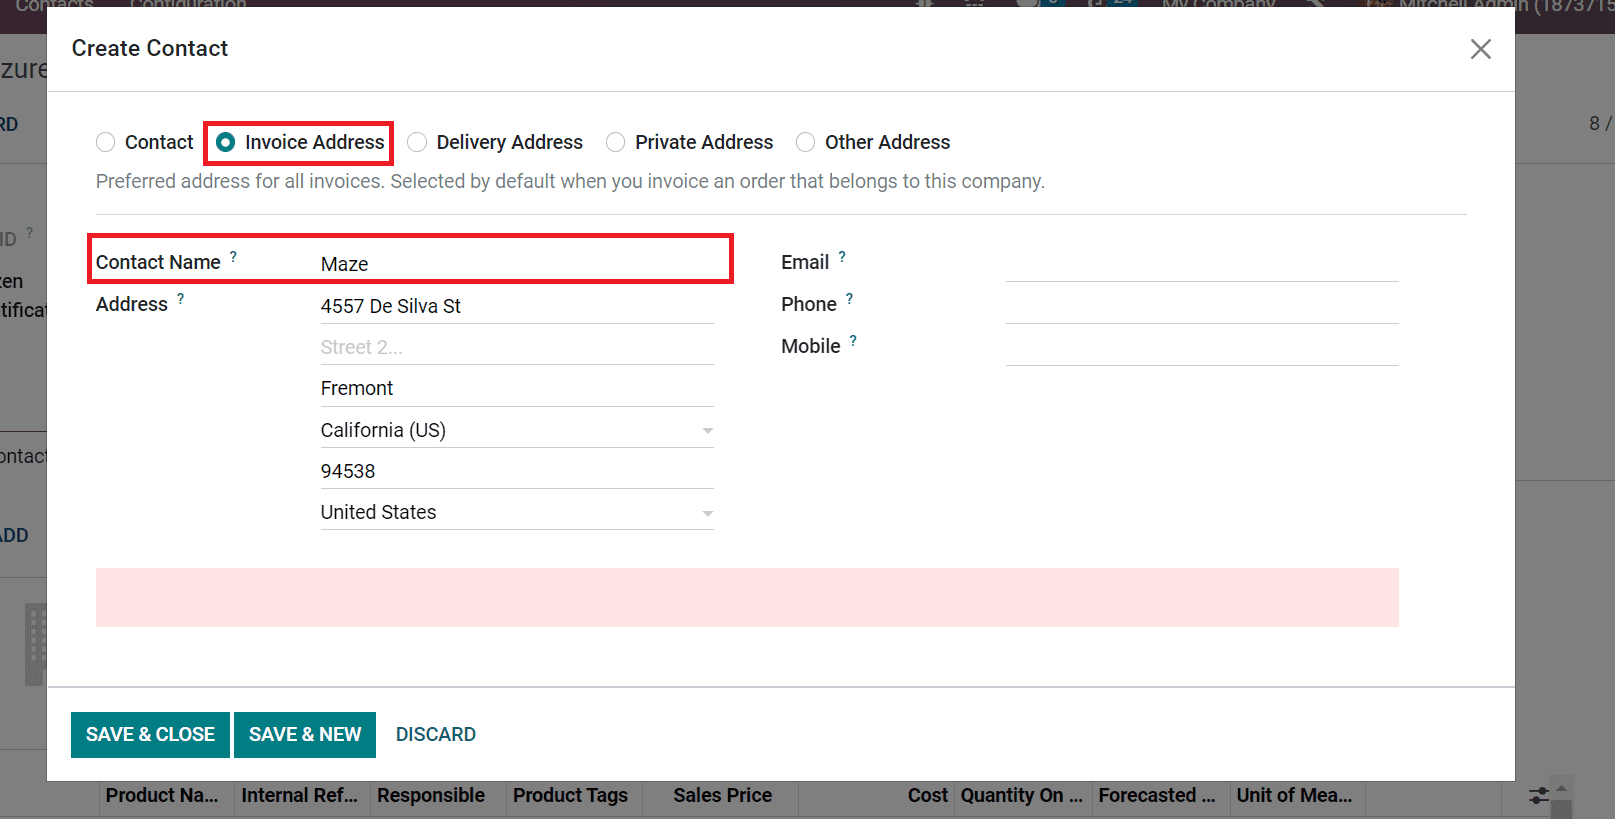
The invoice address is visible when you invoice an order belonging to a company. After applying the Contact name, enter the address concerning your contact. Moreover, a user needs to add the contact person's phone number and email.
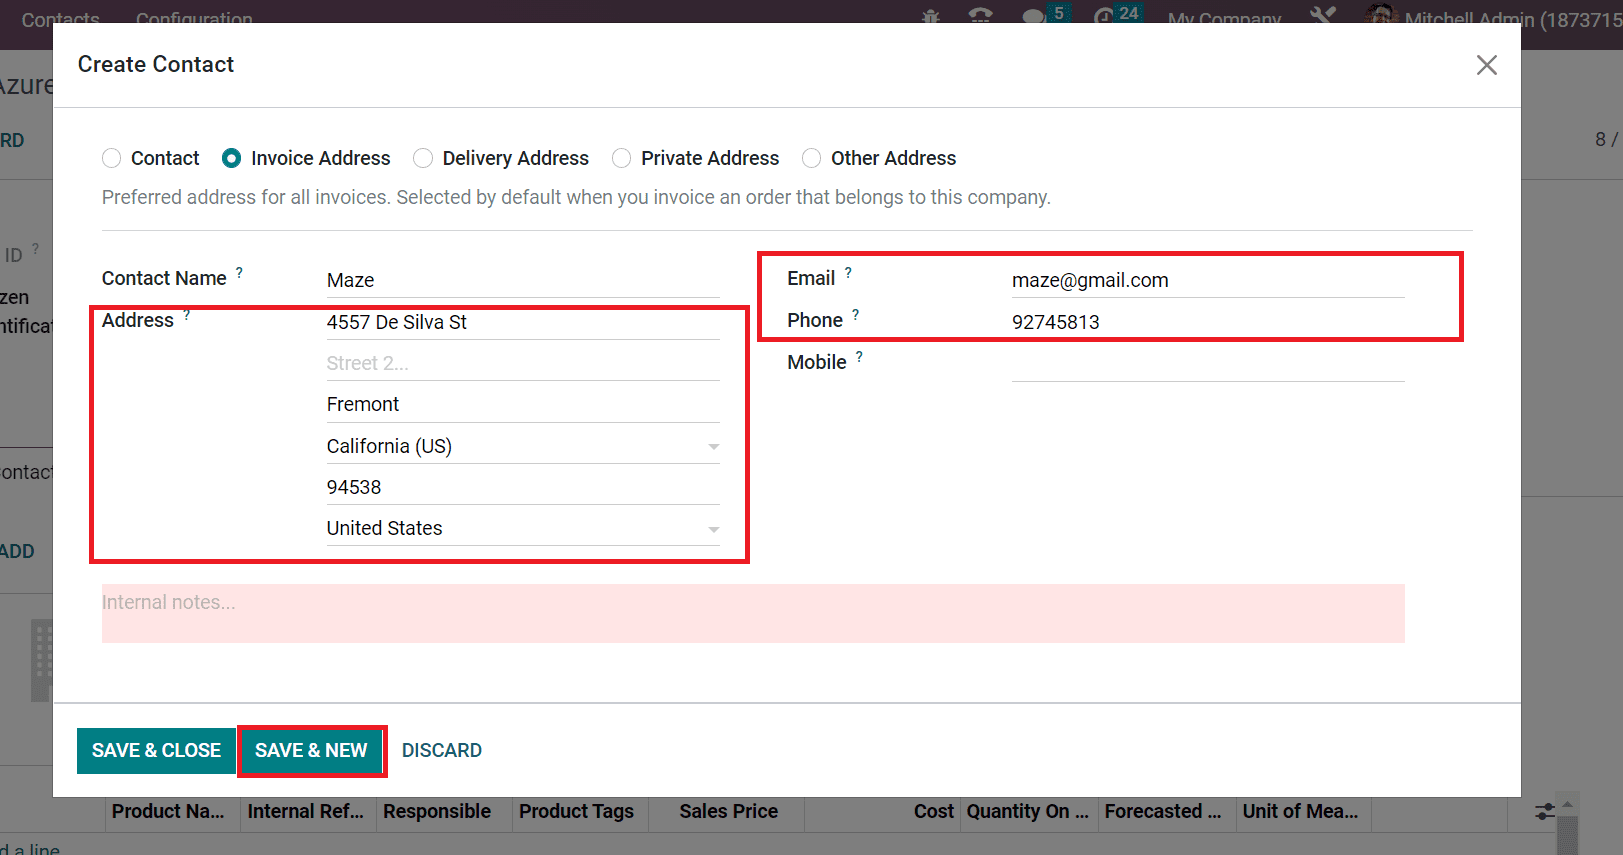
Select the SAVE & NEW button after entering all details related to the invoice address. Next, let's develop a Delivery Address for a specific contact. Click the Delivery Address option to make the preferred address of the contact person in all deliveries. The delivery address is set as default when you deliver an order concerning the company. Enter the Contact Name after choosing the Delivery Address option.
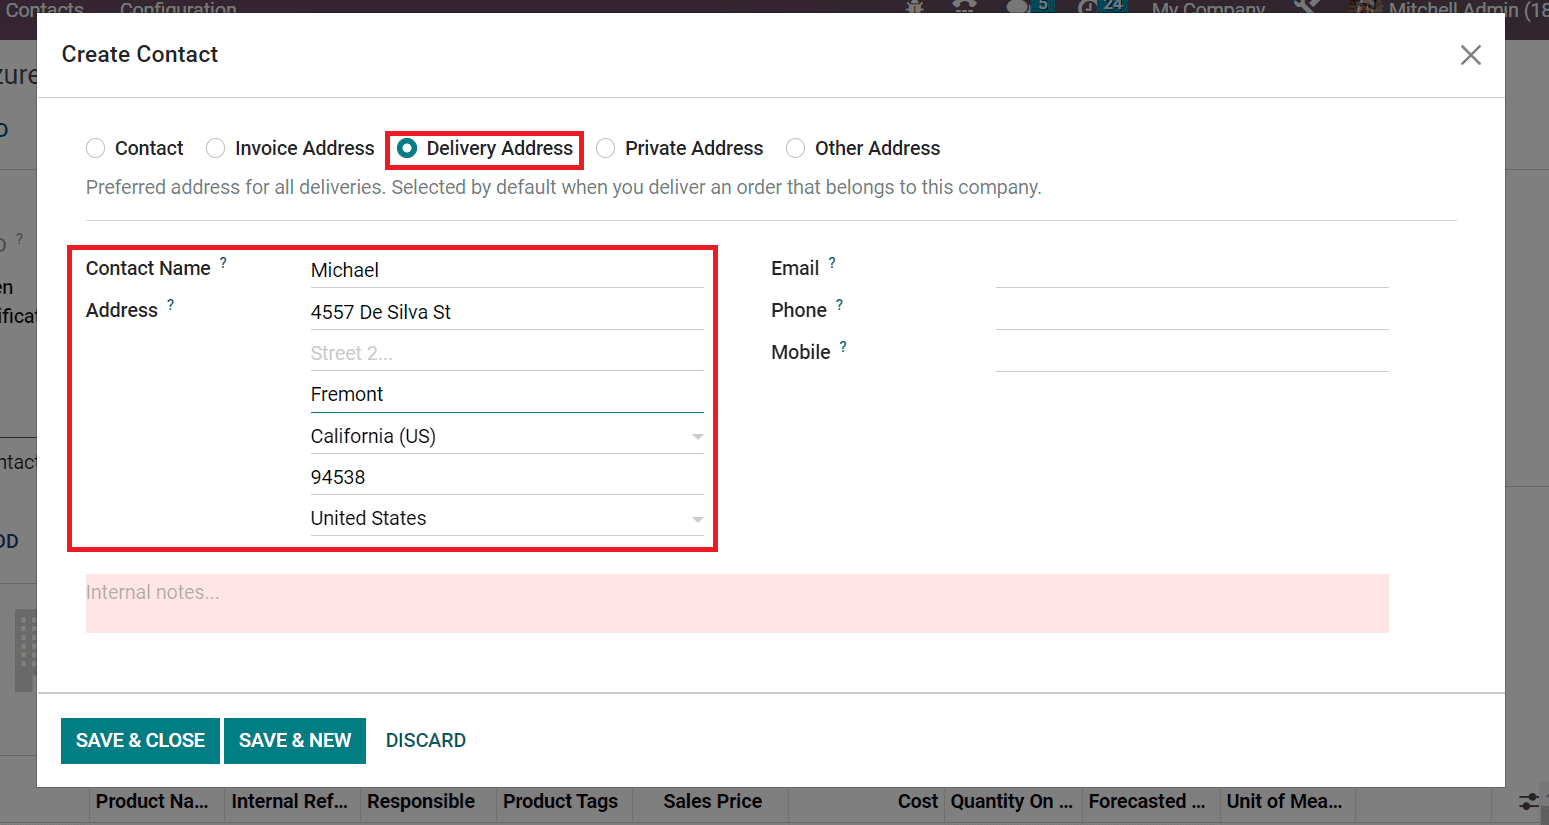
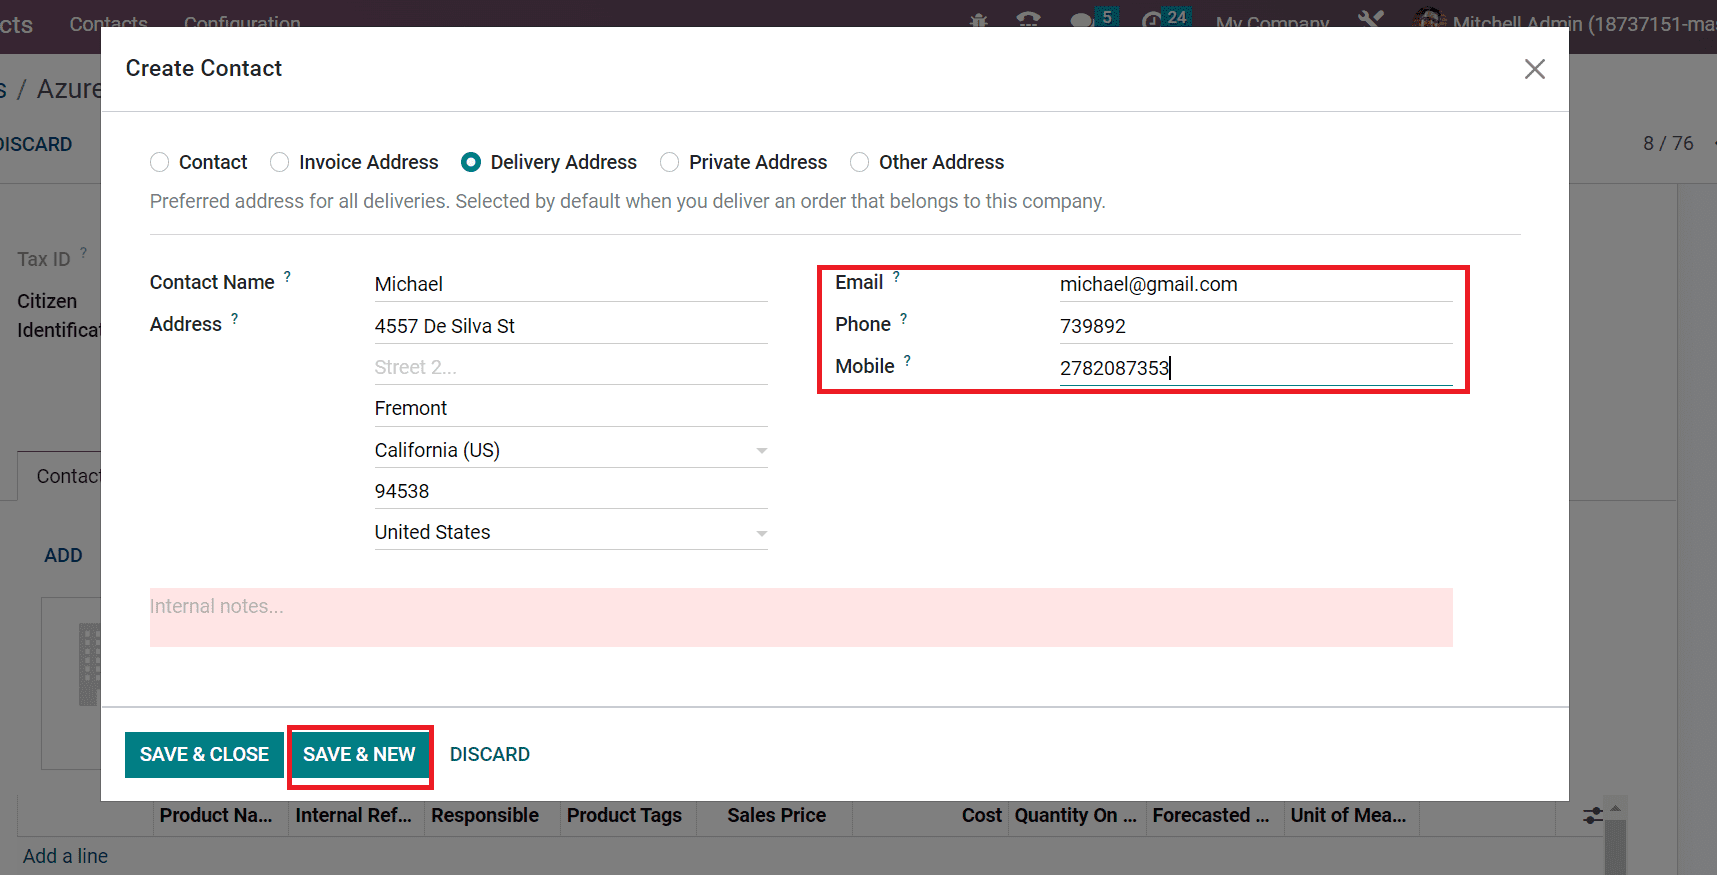
Users can also specify the delivery address inside the Address field, as shown in the above screenshot. Press the SAVE & NEW button after adding other details such as Email, Phone, and Mobile number.
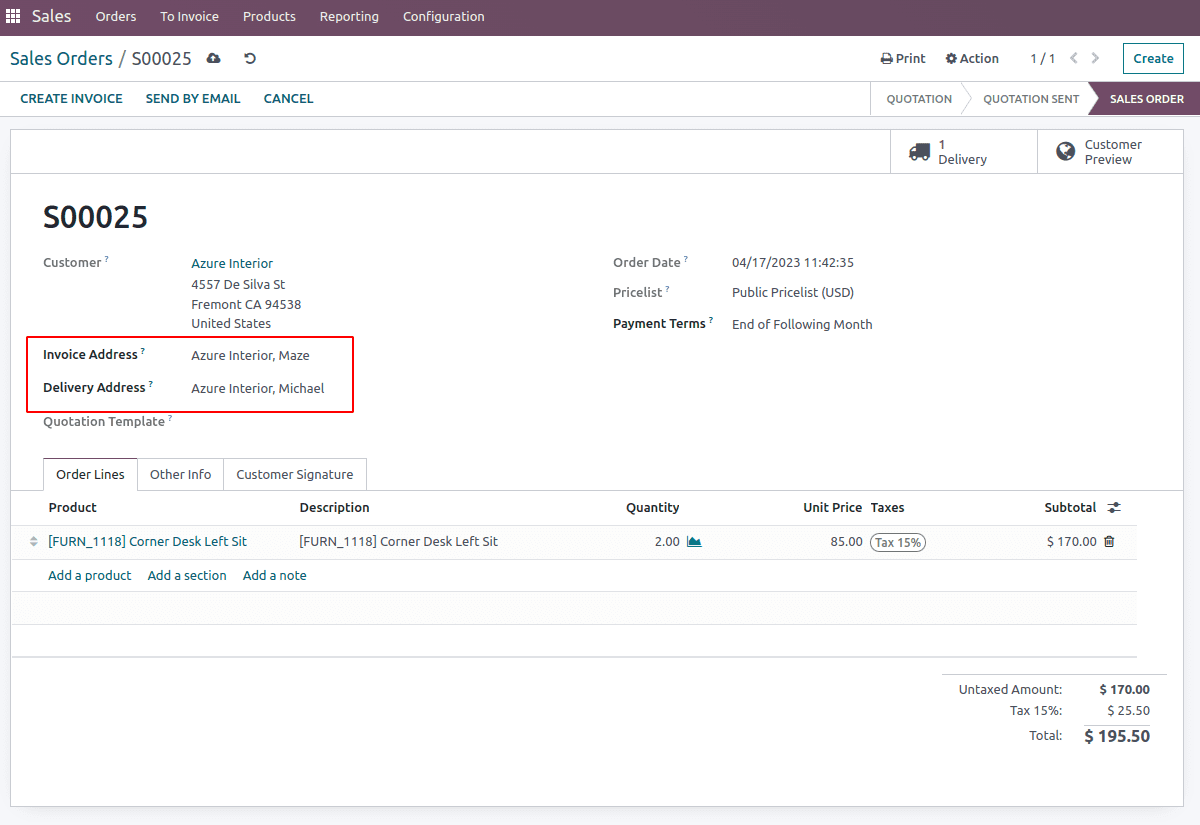
The invoice address and delivery address can be applied to a sale order. As two addresses ‘Maze’ (invoice address) and ‘Michael’ (delivery address) are added for the partner Azure Interior. Thus if any sale order is created for the partner, the invoice will be generated at the invoice address and delivery will be done at the delivery address.
Next, let's develop a private address for the contact that is only visible to authorized users. The private address consists of sensitive data regarding employee home addresses and more. Select the Private Address option in Create Contact window and add the Contact Name as presented in the screenshot below.
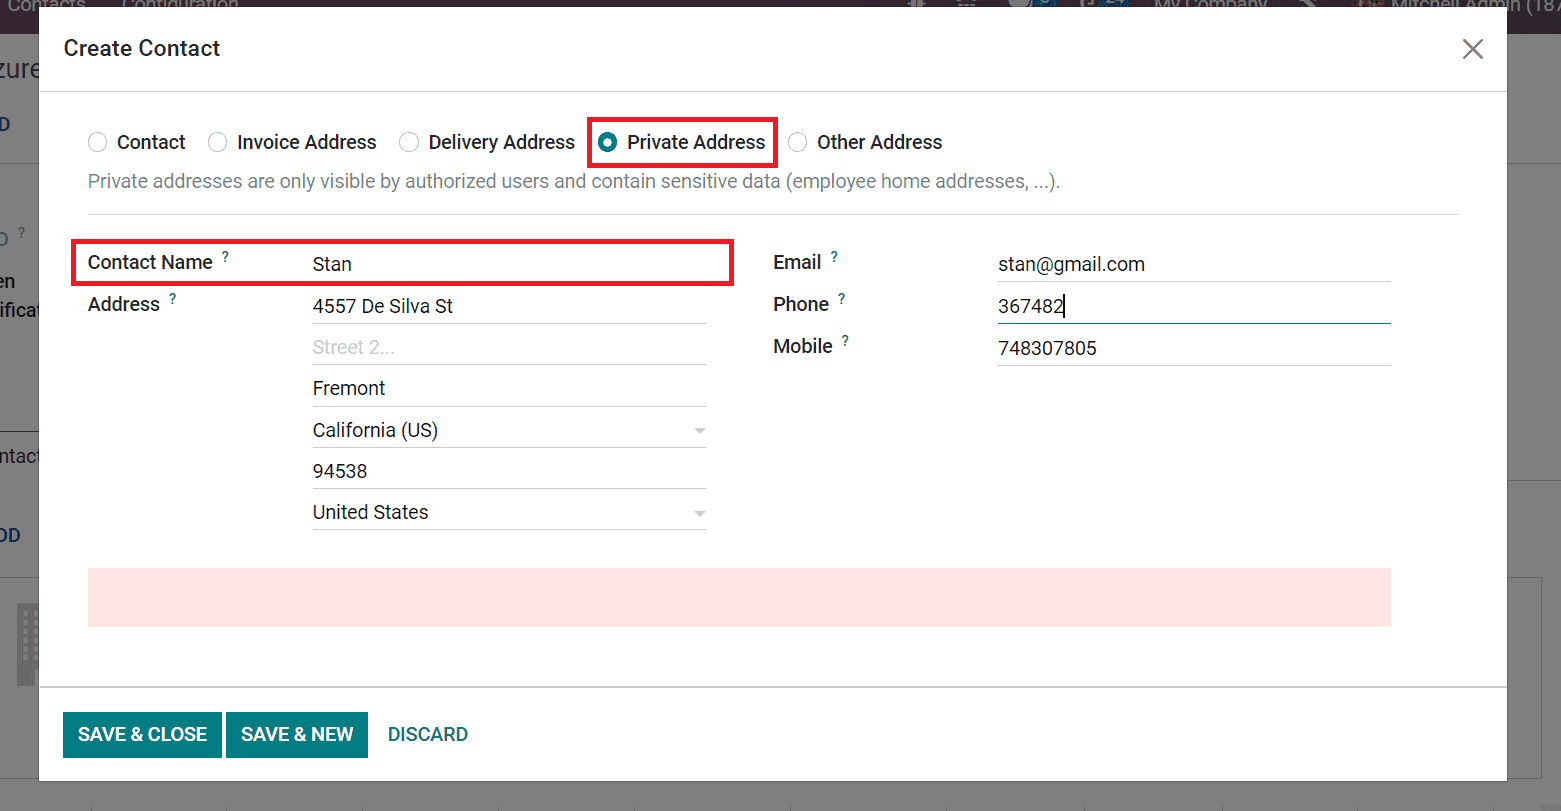
You must add the private address of the contact inside the Address field. Additionally, the user must enter the Mobile, Phone, and Email of added contact individuals.
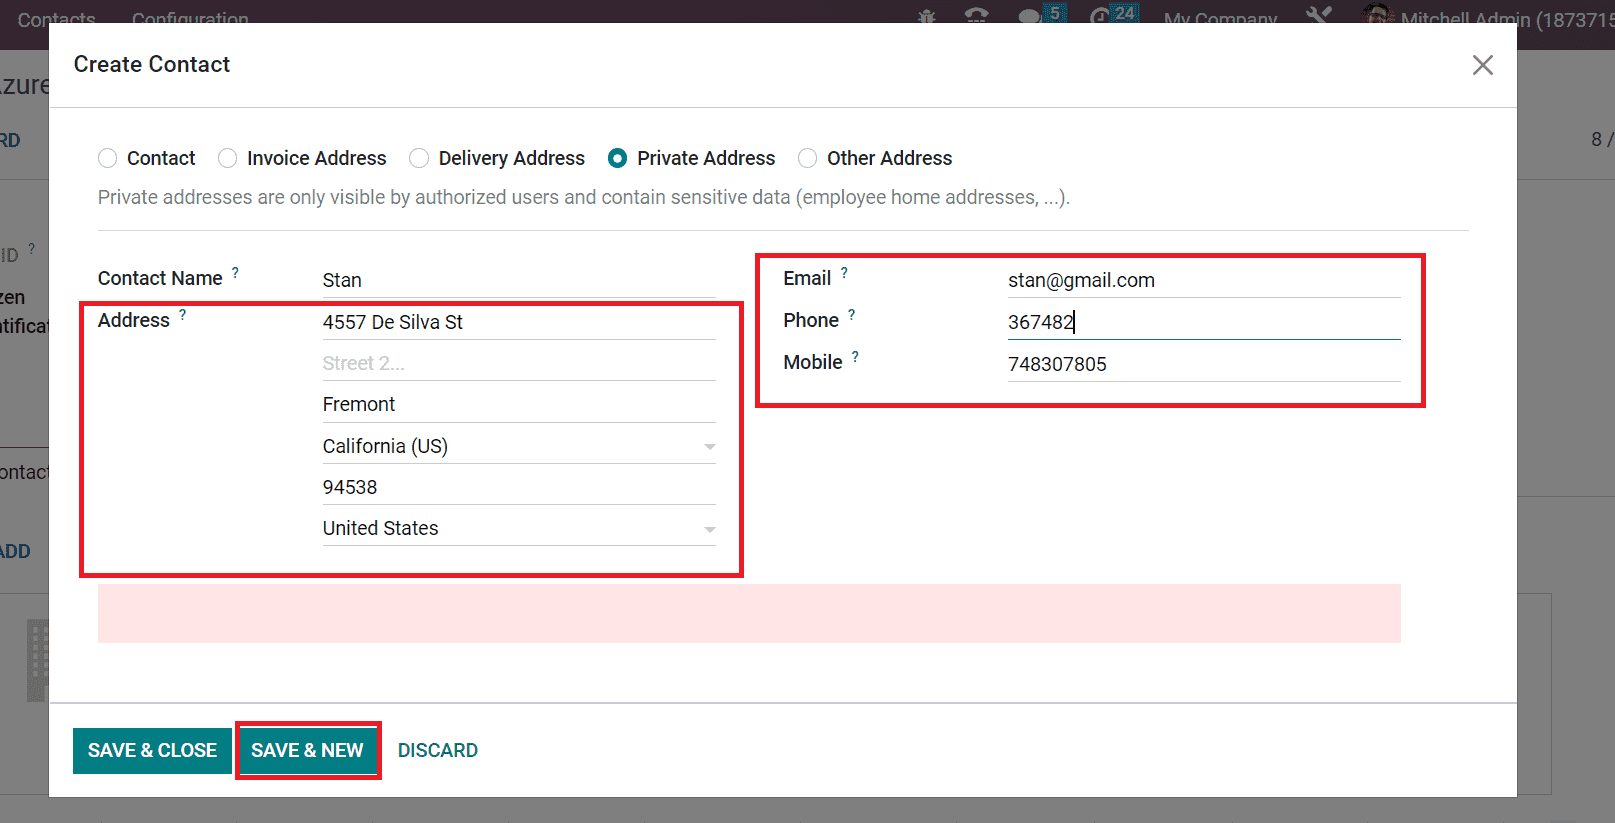
Choose the SAVE & NEW button after applying all the private address information. We can also create one more address by choosing the Other Address option. By selecting the Other Address option, the user can apply an additional address related to a company or individual. Select the Other Address option in the Create Contact window and specify your Contact Name.
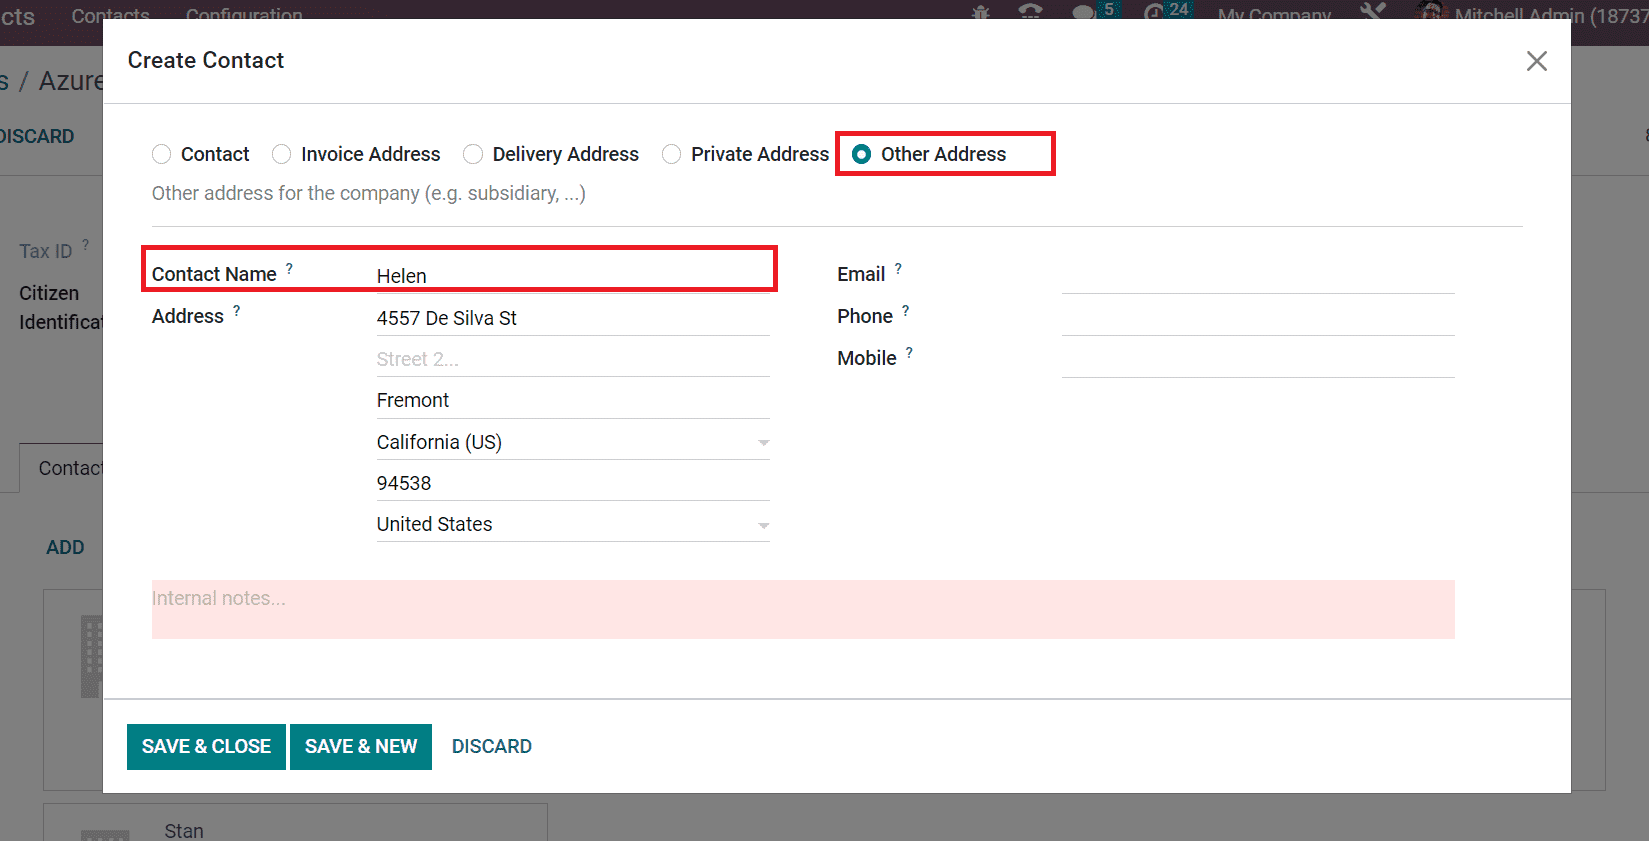
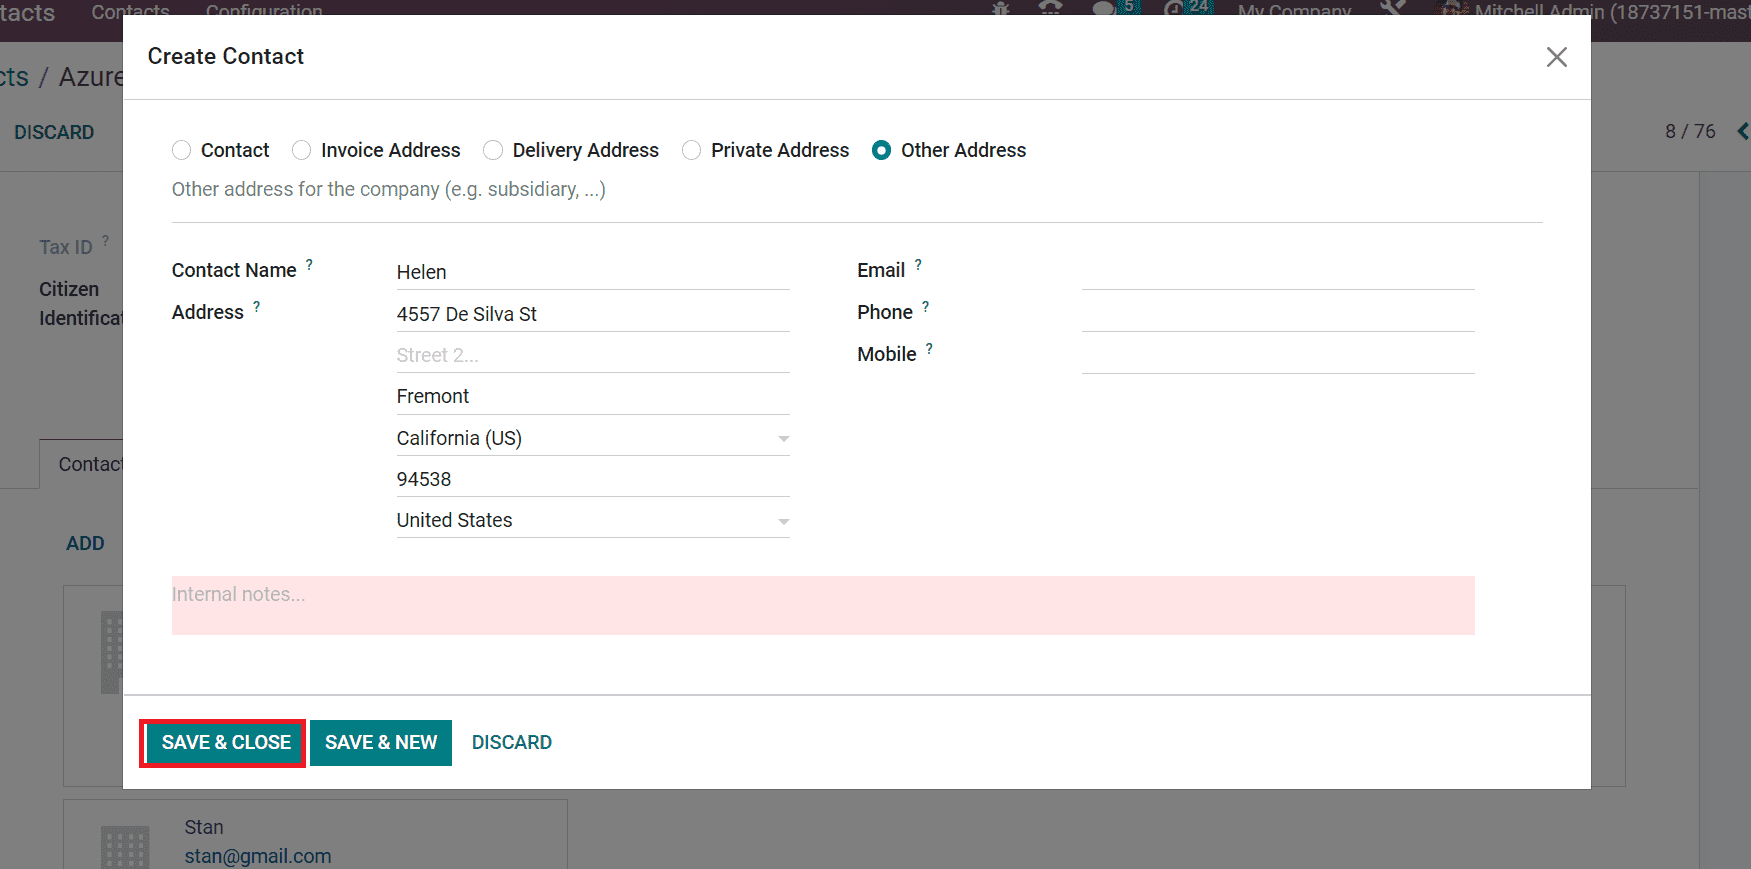
Enter the Contact person's address, email, phone, and mobile number after choosing the Other Address option. After adding all details, click the SAVE & CLOSE button, as indicated in the screenshot below.
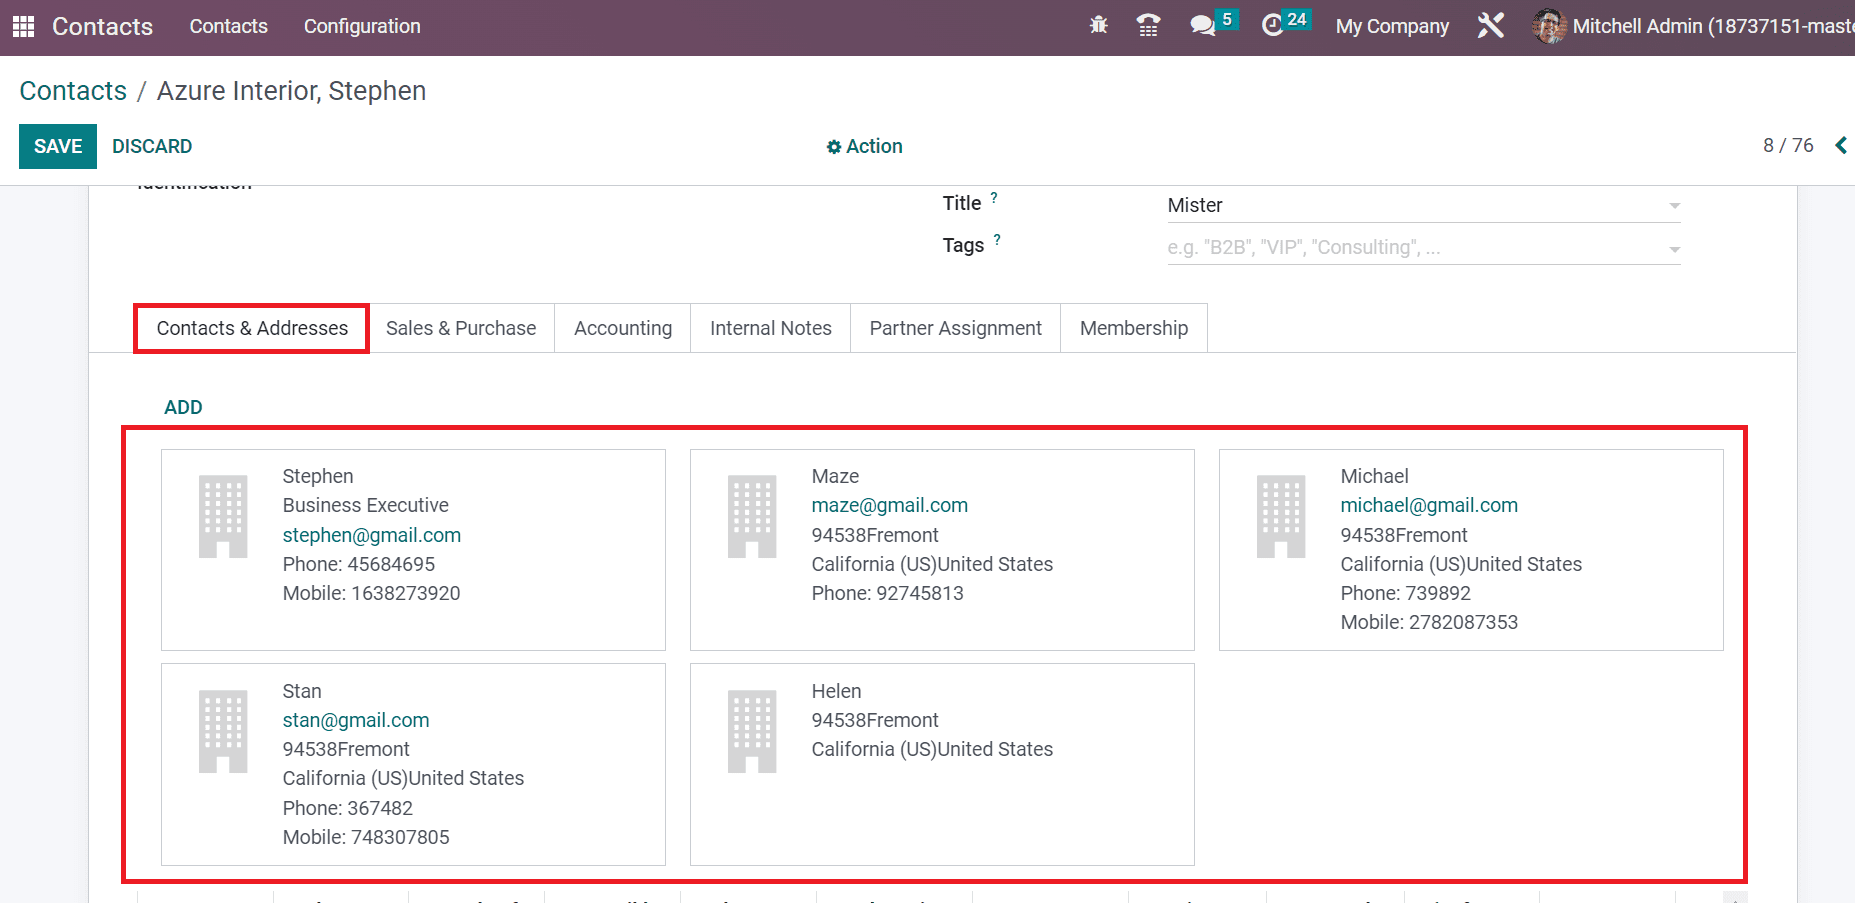
Now, we can access all created addresses inside the Contacts & Addresses tab in the Contacts window.
In Odoo 16, a new address type is introduced, which is the ‘Follow-up address’. This address allows you to send the payment follow-up reports to a different email address. This feature can be particularly useful when you have multiple email addresses associated with your company and need to maintain consistency in your communication with customers. For instance, you may have a generic email address for general inquiries and a separate address for invoicing or shipping-related matters.