Fleet is a group of vehicles operating under the control of the same ownership. It can be either cars, buses, trucks or delivery vehicles. Fleet Management manages all the fleet and information regarding the company's fleet. This process helps to reduce costs, and also improve the efficiency of the company. With efficient fleet management, the complete lifecycle of vehicles is controlled and an evident increase in productivity is seen. To carry out fleet management companies appoint a fleet manager. In order to make fleet manager's work easier, fleet management softwares are used.
Odoo ERP is a complete solution when it comes to fleet management. By including a module fully reserved for fleet, Odoo helps in managing your business fleet productively. Fleet Management in Odoo 14 improves the management of vehicles, contracts, services, maintenance and repair, budget, and forecasting. With in-depth. descriptions the work of fleet managers becomes effortless. A track of everything related to companies' vehicles including vehicle services and contracts is readily available on a single click. A clear overview of all the cost that has been spent on vehicles for services and contracts can be viewed and a comparison with costs can be done in Odoo Fleet Management system.
In this blog, we shall look at how to manage your company's fleet using the Odoo Fleet Management module.
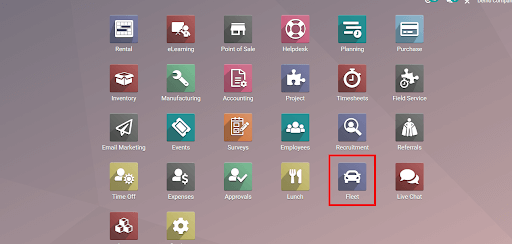
On clicking on the Fleet module on Ooo 14 a dashboard with various stages of operation appears. All the vehicles are seen under different categories such as New Request, To Order, Ordered, Registered, Downgraded, Reserve and Waiting List. You can also create a new section according to the company's needs.
Vehicles
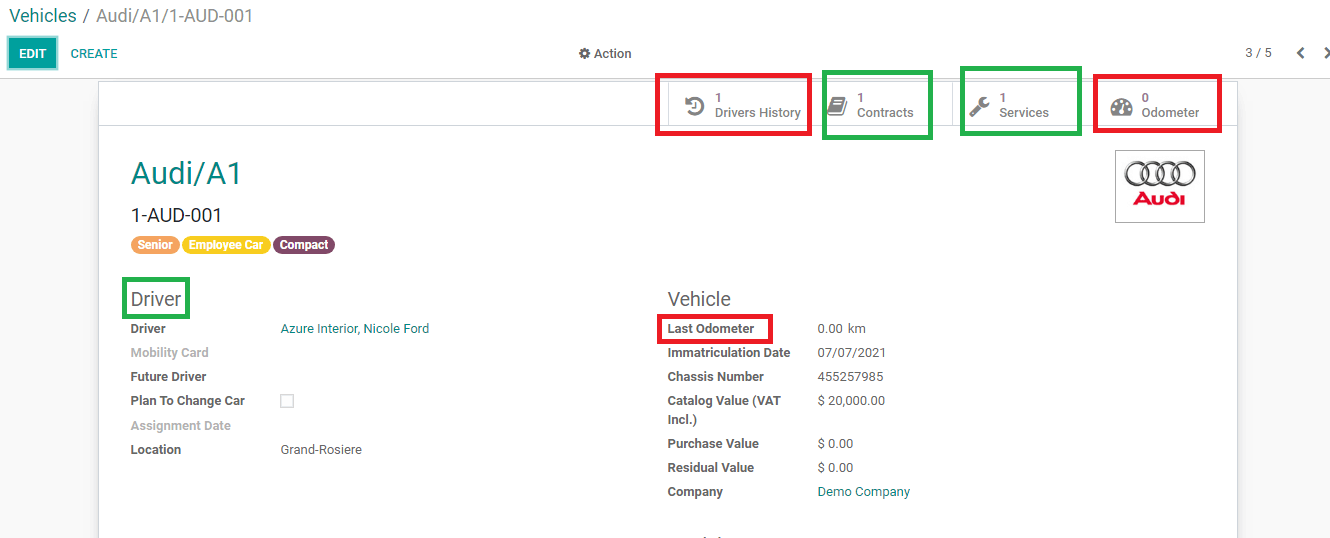
By selecting any vehicle you need, details of the vehicle are displayed. You can edit the details to add new updates of the vehicle.
Under the name of vehicle tags related to vehicle is displayed. Details regarding the driver can be checked. The driver's details such as name and his driving history can be viewed here. Under the Contracts tab, the contract of the selected vehicle is shown. Which includes the name of the contractor, starting date of the contract, expiration date, vendor details, current driver, recurring cost, recurring cost frequency, and status of the contract.
Under Services, service logs related to the vehicle are shown. A detailed description of the services of selected vehicles can be found here. Odometer logs are displayed on the Odometer tab. Also, the last odometer reading of the vehicle is displayed on the screen. You can also assign a future driver to the vehicle. And if the company is planning to change the vehicle you can also mention it there simply by clicking on the check box.
Details regarding the vehicles can be viewed at once. Immatriculation Date of the vehicle, Chassis Number, Catalog Value including VAT, Purchase Value, Residual Value, and vehicle's Company is shown.
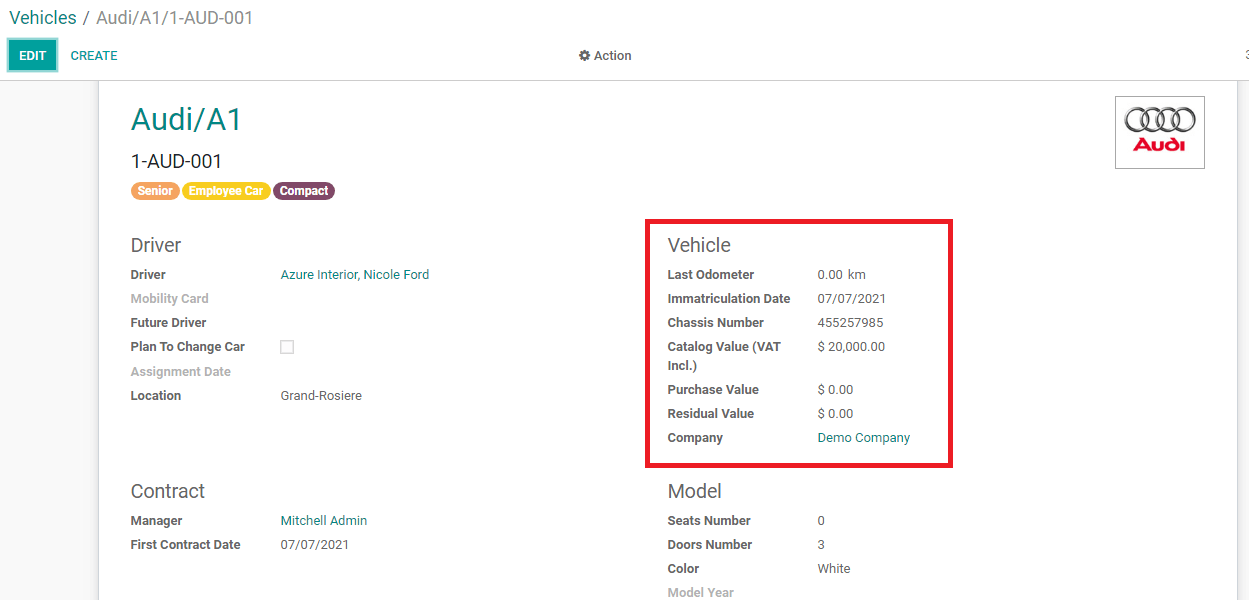
Below the Contract details of the contract manager and the first contract, the date is displayed. The details concerning the Model of the vehicle, Number of Seats, Number of Doors, Color of the vehicle, and Model Year can be seen.
Details of the engine such as Fuel Type, Emission of CO2, Horsepower, Horsepower Taxation, and Power of the vehicle are shown.
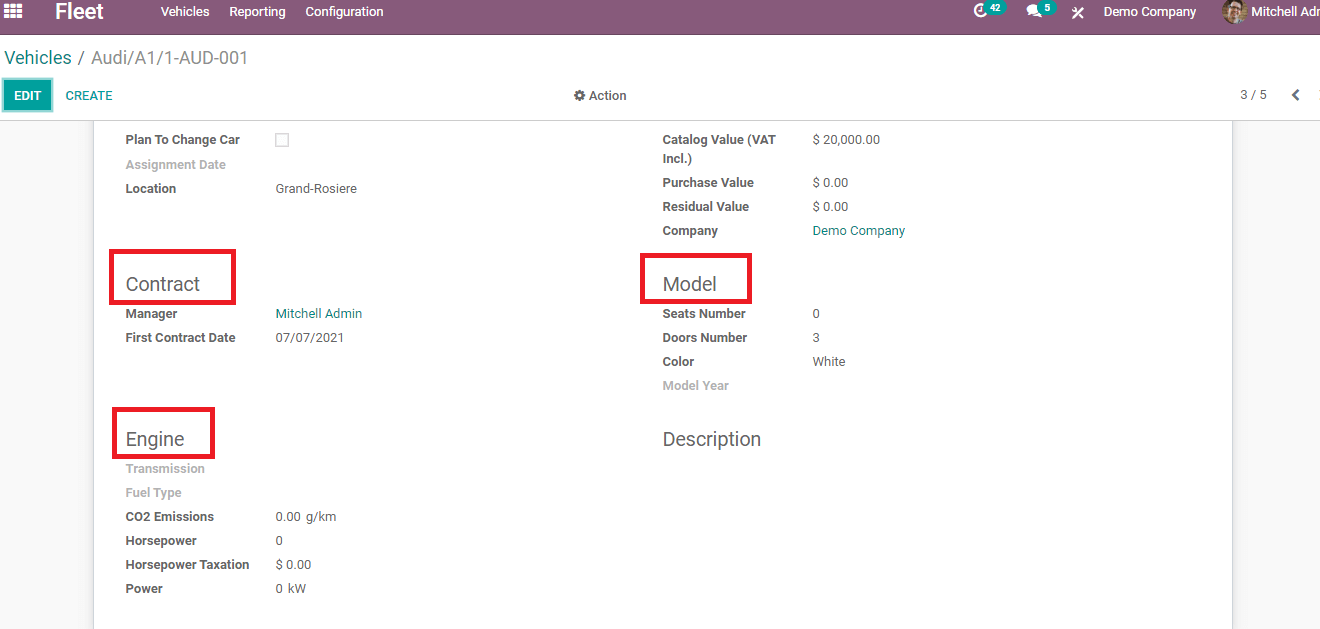
With the edit option, you can always edit and make necessary changes or add new details to the database of the vehicle.
How to add New Vehicle?
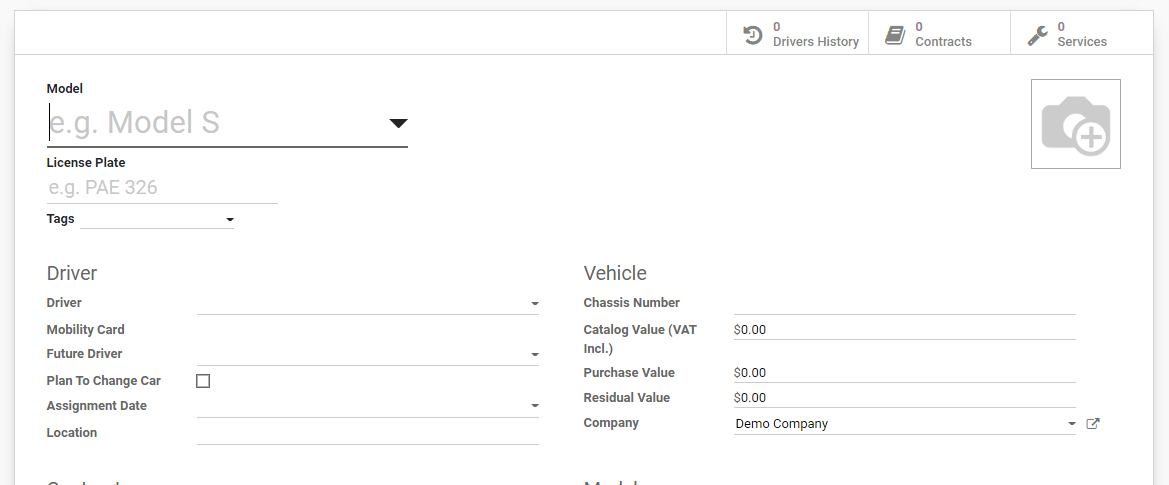
By clicking on the CREATE button a form page will appear. Here you can add the model name of the new vehicle and License Plate. Tags related to the vehicle can be specified. Details of driver, like name, mobility card, future driver, assignment date and location can be added. Vehicle details which include chassis number, catalog value including VAT, purchase value and residual value details can be added. Name of the contract manager and first date of contract can be put in. Vehicle model and model year should be specified under vehicles. Any extra details that have to be said about the vehicle can be added in the description section. A picture of the vehicle can also be added.
Contracts
By clicking on the contracts the list of contracts under each vehicle appears. A detailed description of the contract can be seen. Name of the contractor, Contract starting date, Contract expiring date, name of the vehicle, vendor, current driver, recurring cost, recurring cost frequency, and status of the contract is shown. You can also take an action on contracts from this list. They can either export, archive, unarchive or delete the contract.

How to Create New Contract
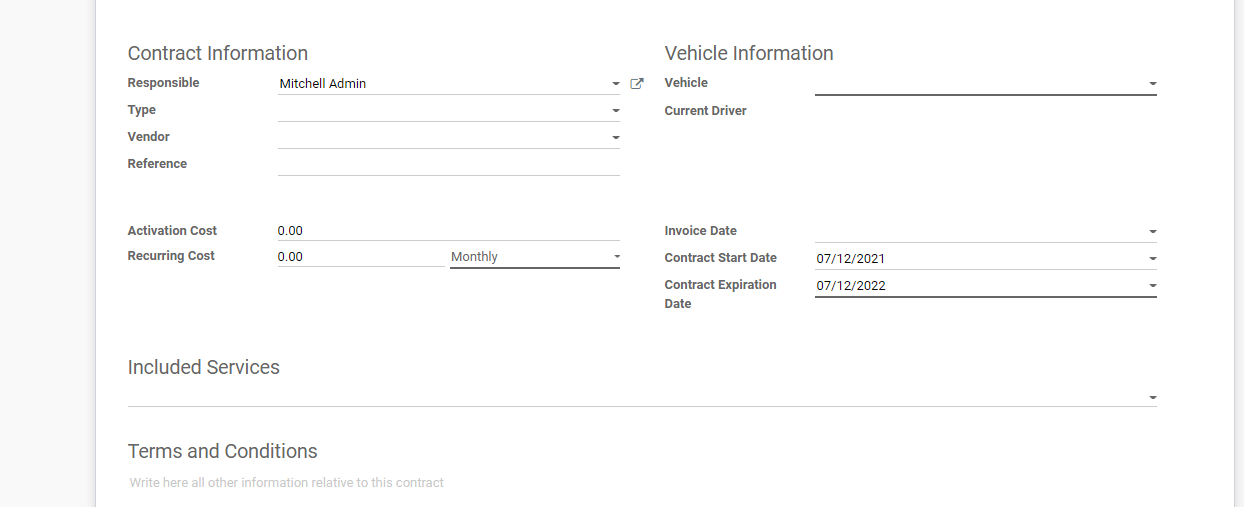
By clicking on the CREATE button from the Contract tab, a form where you should fill in the contact details will appear. Major contract information like name of the Responsible, Type of contracts such as Omnium, Leasing or Repairing, Vendor name, and References if any should be given. Under Vehicle Information, you have to select the Vehicle and the Current Driver. Next Activation Cost, Recurring Cost, and Recurrent Frequency should be added. Then relevant dates such as the Invoice Date, Contract Starting Date, and Expiring Date has to be filled. Services that are included with the contract can also be mentioned here. All other information related to the contracts must be added in the Terms and Conditions section.
Services
Under the Services tab, all the services with date, type, vehicle, name of the driver, vendor, notes regarding the service and vehicle, cost, and stage of the service are displayed. All the services shown at once help the managers to quickly examine each service.

How to Create New Service
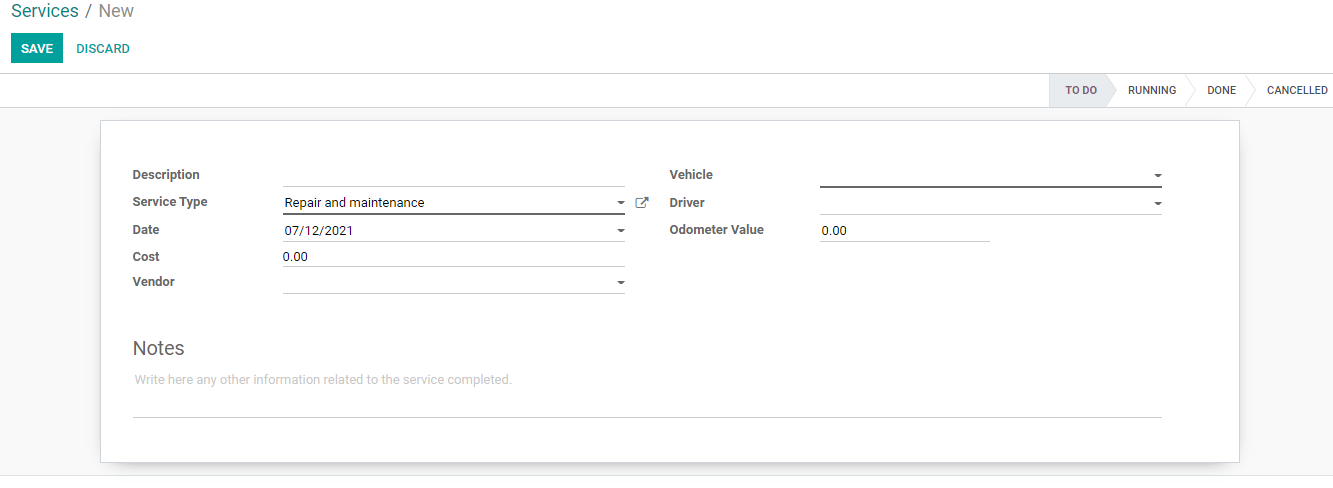
After clicking on the CREATE button, a form page will appear. Here a description of the service intended should be added. You can select the type of service and the date for service. Then cost and vendor details must be added. You then need to select the vehicle for service and its driver. The odometer value should also be added. Under notes, further information related to the completed service can be added. The stage at which service is can opt from the above bar.
Odometers
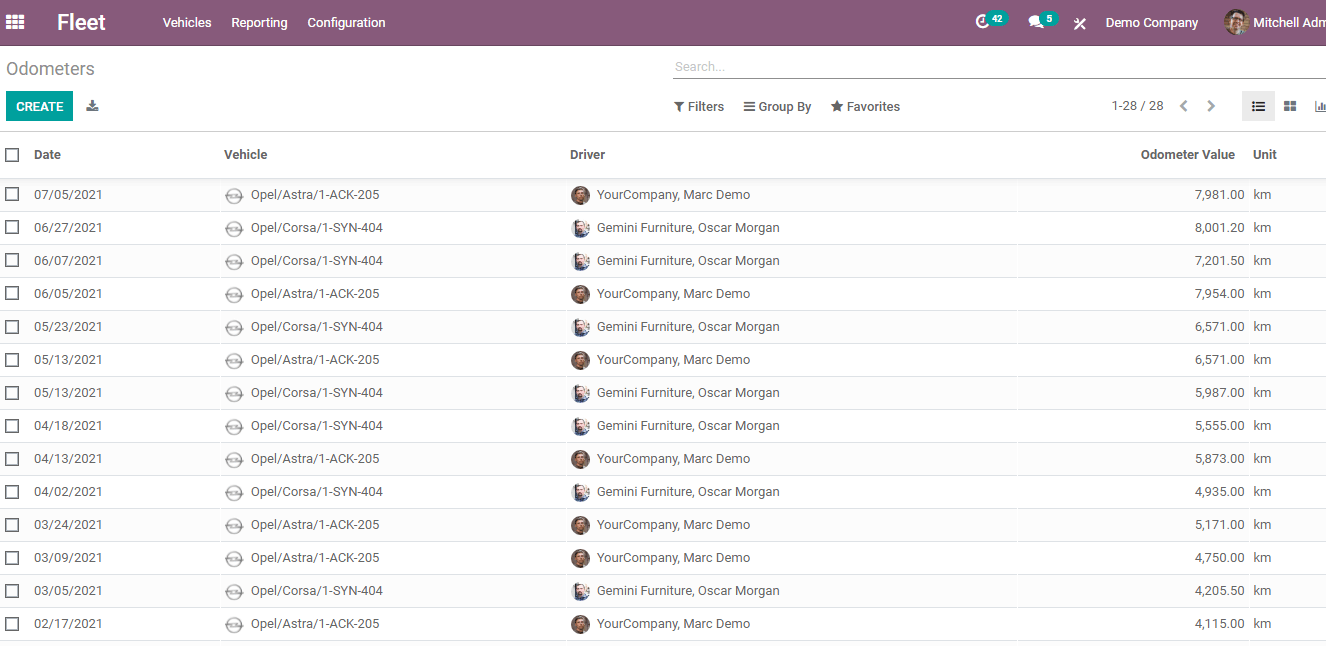
Under Odometers, you can view the odometer value of each vehicle according to the date and name of the driver of the vehicle. This will help you to track the vehicle's maintenance and foresee services.
How to Record New Odometer Value
A page with details to be added will appear after clicking on the CREATE button. Here you need to add the date, name of the vehicle, driver details, and odometer value.

How to Add New Manufacturers
Under the configuration tab, the manufacturer's option is available, clicking on it a list of manufacturers is depicted. You can also add any other manufacturer to the list. The number of models under each manufacturer is visible.
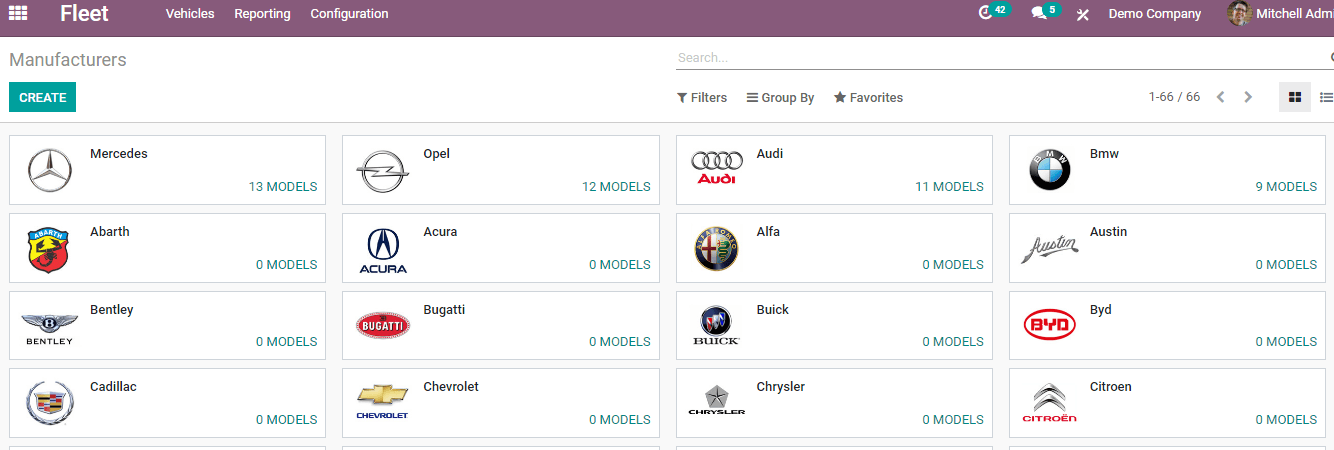
By clicking on the CREATE button you can add the name of the manufacturer and also can add a photograph.

How to Add a New Model?
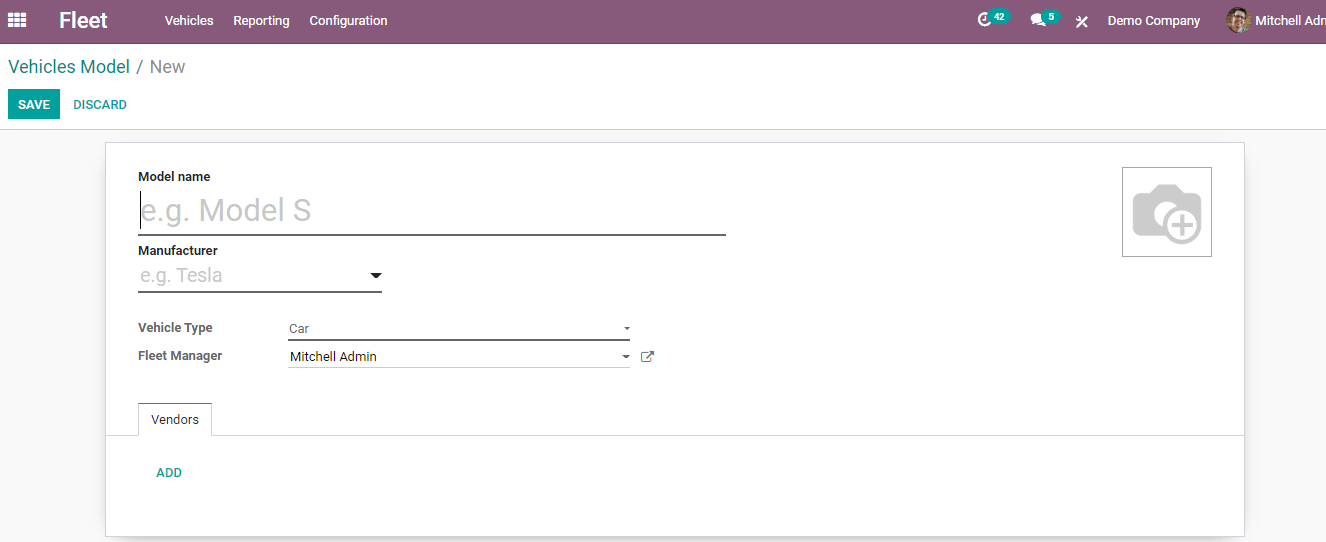
From the configuration tab, you need to select the Vehicle Model option. A list of Manufacturers with their models and vehicle type will appear. By clicking on the CREATE button you can add a Model name, Manufacturer, Vehicle type, name of the Fleet manager, and Vendor. You can also add a photograph of the vehicle.
Cost Analysis
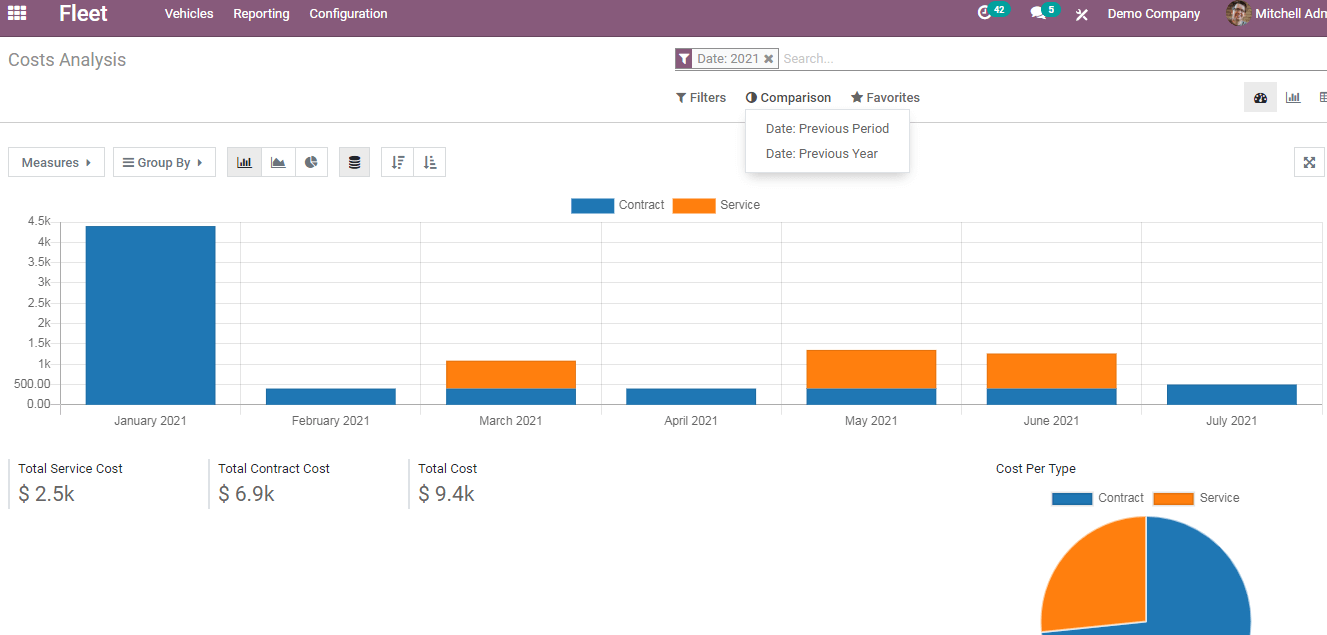
From the Reporting tab, you can select Cost and a complete analysis of the cost that occurred on contract and service can be viewed. Total service cost, total contract cost, and total cost of the activities are separately displayed. You can analyze and take relevant measurements regarding the costs by looking at the analysis. You can also compare costs with different periods or years.
The Fleet management module of Odoo 14 helps to maintain your company's fleet in every aspect. Even the vehicles that the company provides the employees can also be added and monitored in this system. The workload of the Fleet Manager is reduced and his/her work is made much easier with Odoo's Fleet Management module.