In a business, it is necessary that you provide your customers with good quality products. In order to offer good quality products, the business has to conduct several quality checks, prior to bringing final. The products must be evaluated in different stages so as to assure its standard compliance. This concept is more relevant to the manufacturing business, as the industry is involved in the production process. Utilizing Odoo, one can set quality check at different stages in different ways. The quality module can also be utilized for checking on when the items were received.
Let’s see the Quality module in Odoo.
Install Quality module
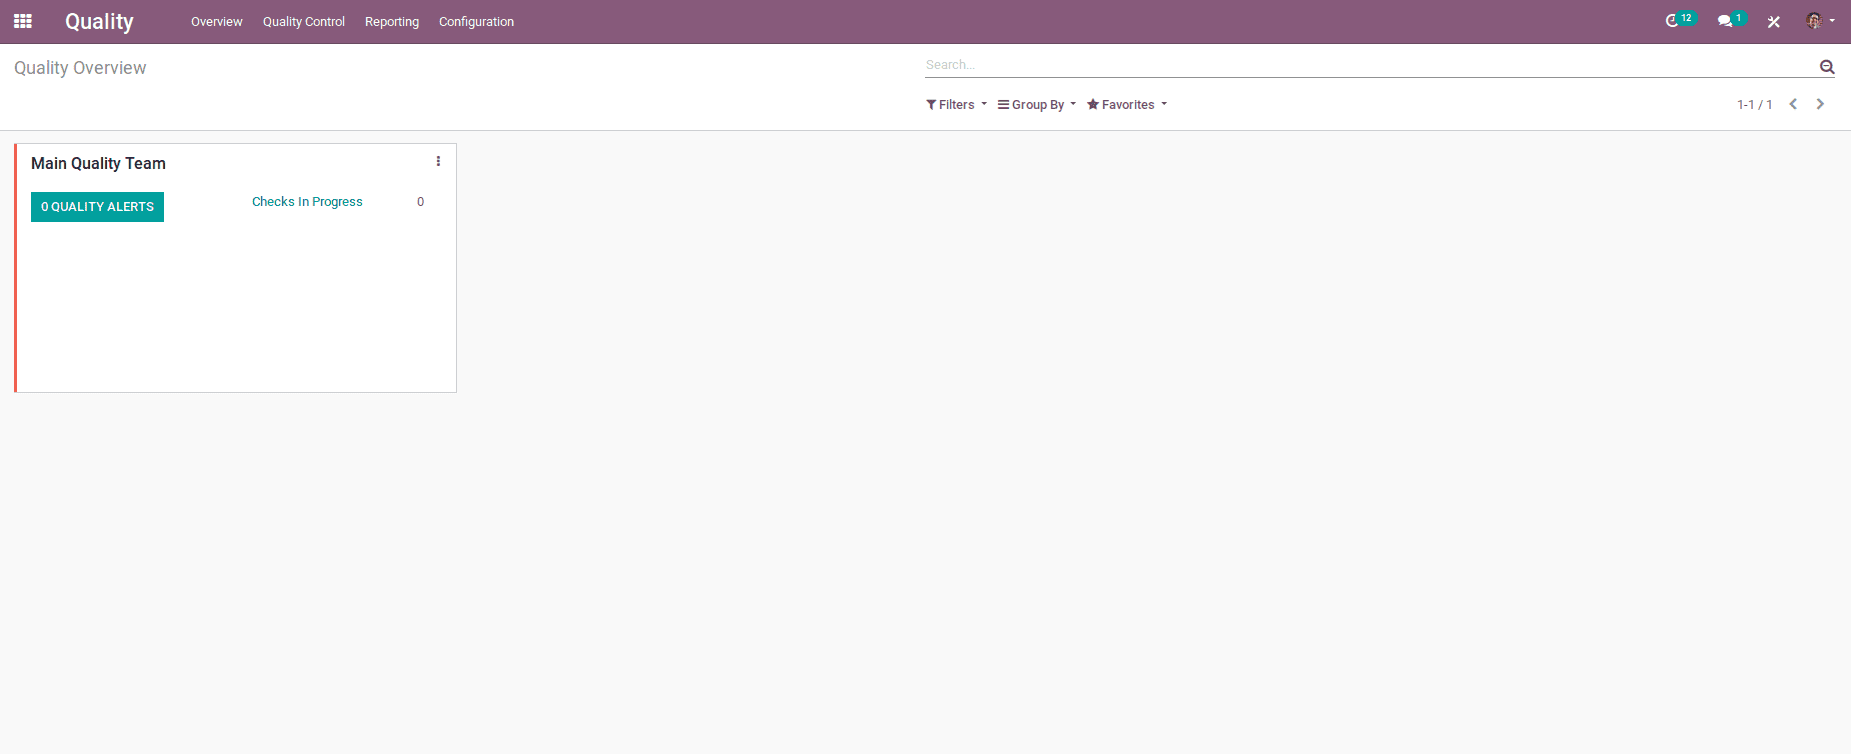
The first view of the quality module is a Quality Overview, it is a kanban view of the Quality Teams.

If a company has multiple teams in quality check, Odoo allows creating multiple quality teams.
In order to create a Quality Team, go to
Quality -> Configuration -> Quality Teams -> Create
Here, you would find two fields -Name and Email Alias. Upon entering them, click on the SAVE button to mark changes.
Now, one can see 2 Quality Teams in the Overview.
From the Overview, the user can analyze the overall status and the work progress of each quality team.
Quality Control Points
Let’s set up the quality checkpoints now. Under quality control points, the user can define when the product has to be checked, how it should be checked and what to be checked. In order to set control points, go to
Quality -> Quality Control -> Control Points
Under control points, one can see different products that are already set with control points. In order to create new control points, click on the CREATE Button.
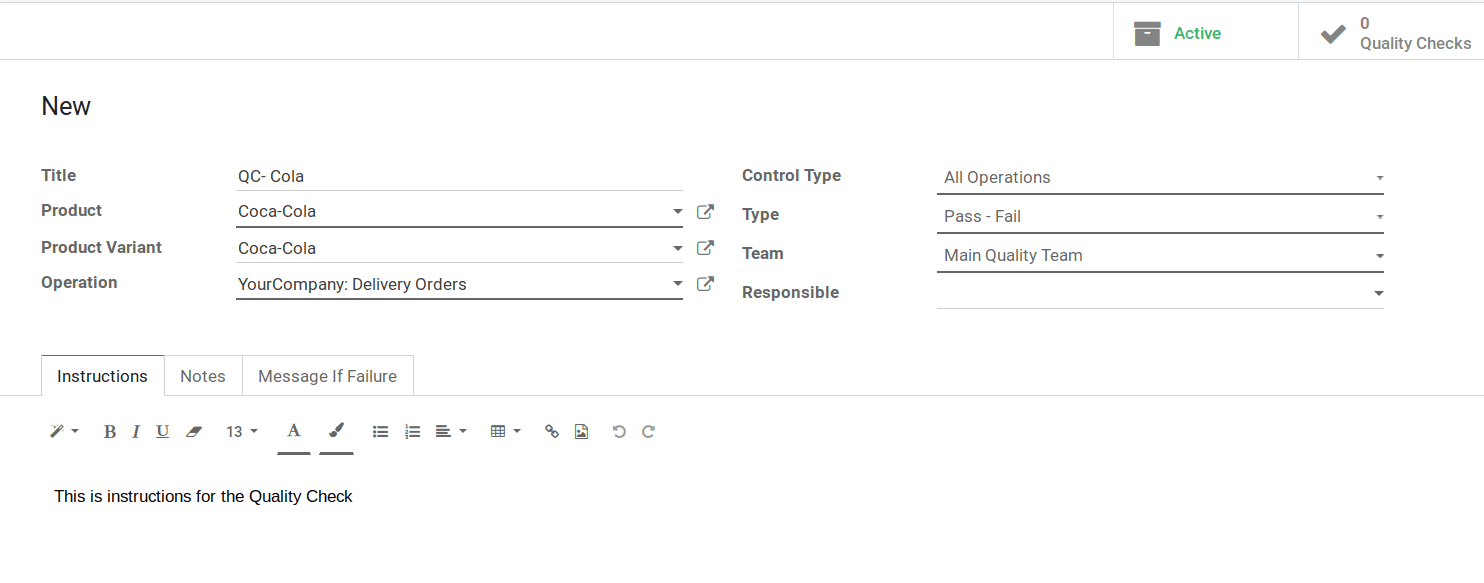
The above is the create form of the control points. The form includes:
Title: Title for the control point.
Product: Choose the product for which quality has to be checked.
Product Variant: If the product has multiple variants, choose one variant.
Operation: Operation denotes to the time of quality check.
There are mainly 3 types of operations.
i) Receipts: When a product receive to business (which means receives purchase order)
ii) Delivery Orders: At the time of delivering a product ( which means delivery of a sales order)
iii) Manufacturing: Quality check at the time of manufacturing.
NOTE: If a user is involved with multi-companies, it is embedded with 3 different other options as displayed in the picture.
Control Type: This field defines the interval of the quality check. There are three options under this:
i) All Operations: Quality check for every operation.
ii) Randomly: One can set to check quality at randomly. When choosing randomly, there will be shown another field Control Frequency. The quality check can be generated on the basis of this Control Frequency.

iii) Periodically: Quality check can be done periodically. Here we have 3 options to set an interval: Day, Week and Month.

Type: Quality will be checked on the basis of the selected type. There are two options:
i) Pass - Fail: This option has 2 buttons at Quality Check. Quality team can click either the pass button or fail button based on the quality of the product.
ii) Measure: Quality team can set a standard measure for the product in any unit, also can set a range. Upon the action, the product within that range will be validated.
Team: Assign a quality check team.
Responsible: Select a user as a responsible person for the quality check.
Let us go through an example.

Here configured a quality control for Coca-Cola at the time of delivery. Just added some instructions to understand.
Create a sales order for the corresponding item. Click on the Delivery button.
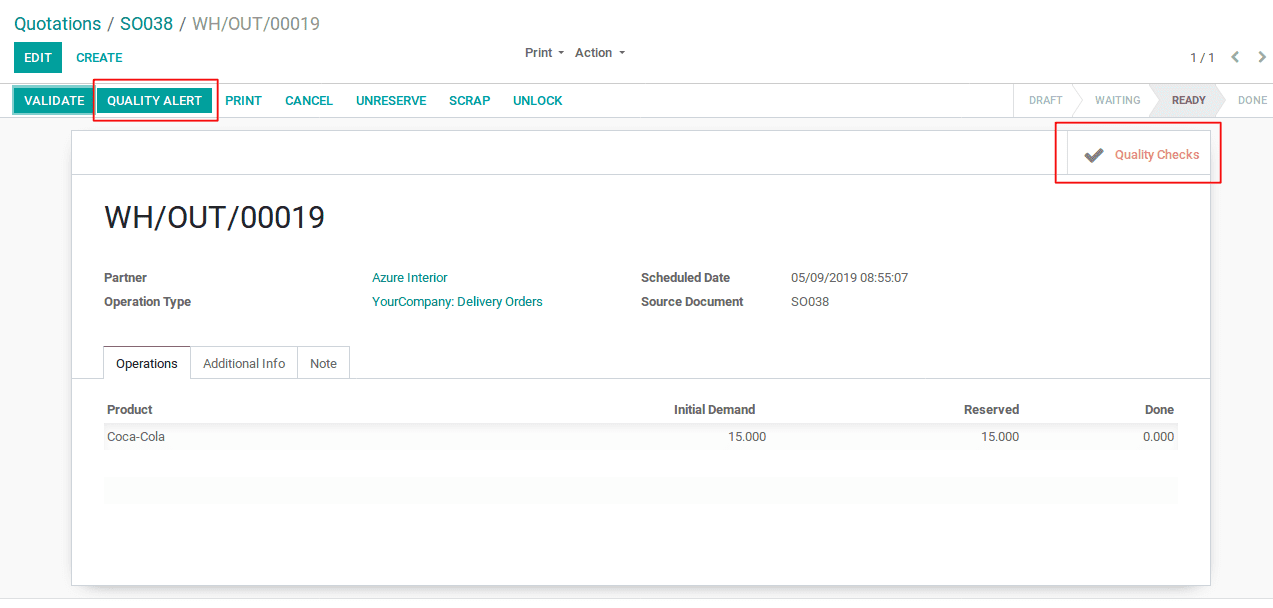
Now in the delivery stage, one can see Quality Checks Button as Active. Click Quality Checks.
A window will pop-up with product name and instructions as mentioned earlier. Also, there comes 2 button Pass and Fail.
The status of this quality check will avail in Quality Check Smart Button in the delivery order.

Or
Quality -> Quality Controls -> Quality Checks
All Quality Checks will be shown here with the Status.
If a product happens to notice with damage or mistake, mark it as failed. Upon the action, Quality Alert button will be activated. Quality Alert directly notifies the Quality Team. And Quality Check smart Button transforms into red color.

One can also set them from Quality module.
Quality -> Quality Control -> Quality Alert
Let us see how to create a Quality Alert for Quality Team.
If a product has Lot Number/Serial Number, set them in Lot. A user can add or create tags for understanding the quality issues.
Root Cause: The reason for the occuring quality issue.
Priority: Quality Alert will be shown on the basis of priority. Alert of high priority will be shown first.
Description: Mention any description about quality issues.
Corrective Actions: Under Corrective Actions, set actions for correcting quality issues.
Preventive Actions: Preventive Actions is to take precautions against the type of quality problems.
These 3 notes display on the Quality Alerts. The Quality Team can refer to these notes and take actions based on these descriptions.
Created Quality Alerts will be shown in the overview of each Quality Team.
Quality Alerts will be shown in different stages based on the current status of the alert.
