Jobs that are performed outside the company, or out in the field are known as Field services. Field service workers are mainly workers who are specialized in delivering skills. But nowadays field service is not bound inside technicians. A large scale of employees now come under field servicing such as salespersons, inspectors, healthcare workers, laborers, etc. As technology and time have changed and a massive change happened with field service, proper care has to be given to this section of the company.
Field Service workers are the new opportunity of the company, thus efficient management is required. A good Field Service management takes care of all the work related to them. They incorporate all the work of field employees starting from assigning the work, collecting data, scheduling work, and invoicing.
Odoo ERP helps to run your business effectively and efficiently by providing the right tools. Odoo 14’s Field service module focuses on increasing productivity and visibility. As it is fully automated and does not require more human labour to manage, Odoo’s Field Service Management is much easier to function than doing the process manually. Miscommunications are the main problem when it comes to field service management. With the Odoo 14Field Service Management tool this problem can be eliminated. They are designed to trace the components of tasks assigned.
Let us look deeper into the operations of the Field Service module of Odoo 14 and check out the features it has to offer.
Field Service Module
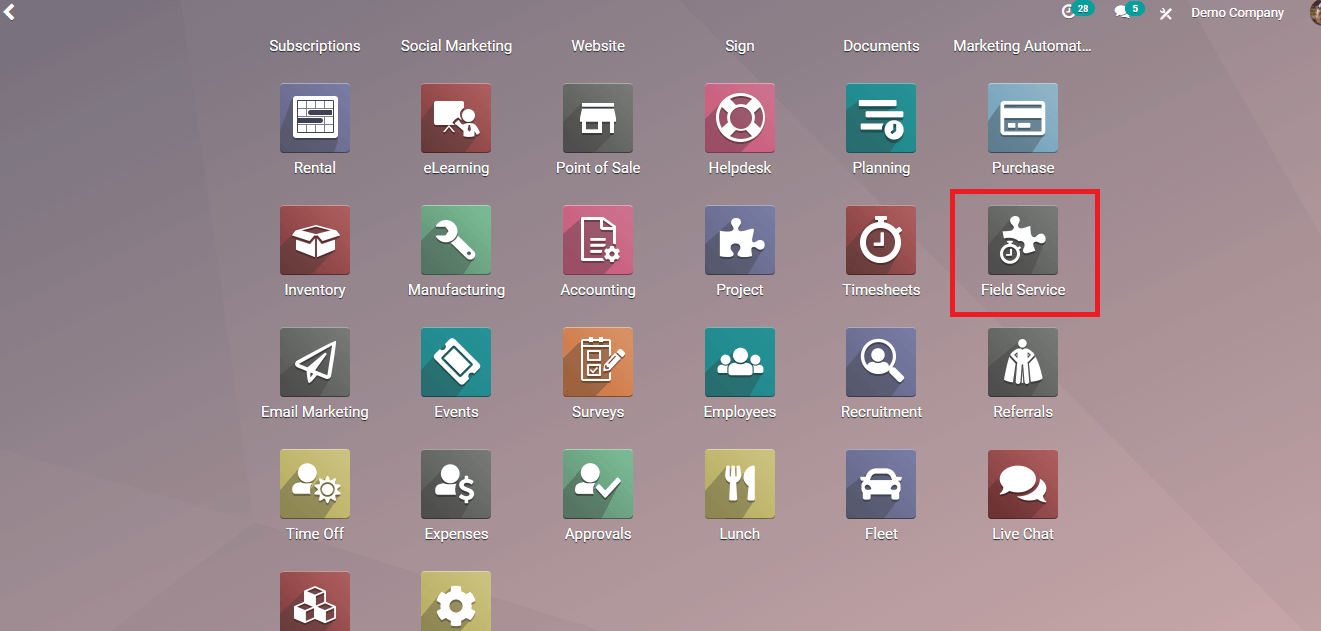
You can get the Field Service module by installing it from the applications. You can have a glance at the operations dealing with field services. Details of your tasks are displayed and you can control the functioning of the fields. The main feature of this module is that you can integrate the functions with other modules to make your work easier and efficient.
My Tasks
You can view the descriptions of the tasks by looking at the task menu displayed. Tasks are grouped according to their dates for your convenience. You can select your tasks to know more about the assigned task. By applying filters you can get tasks that you wish to see.
You can generate a new task by clicking on the CREATE button.

Tasks can be viewed in Kanban, Map, Calendar, List, or in Gantt.
All Tasks
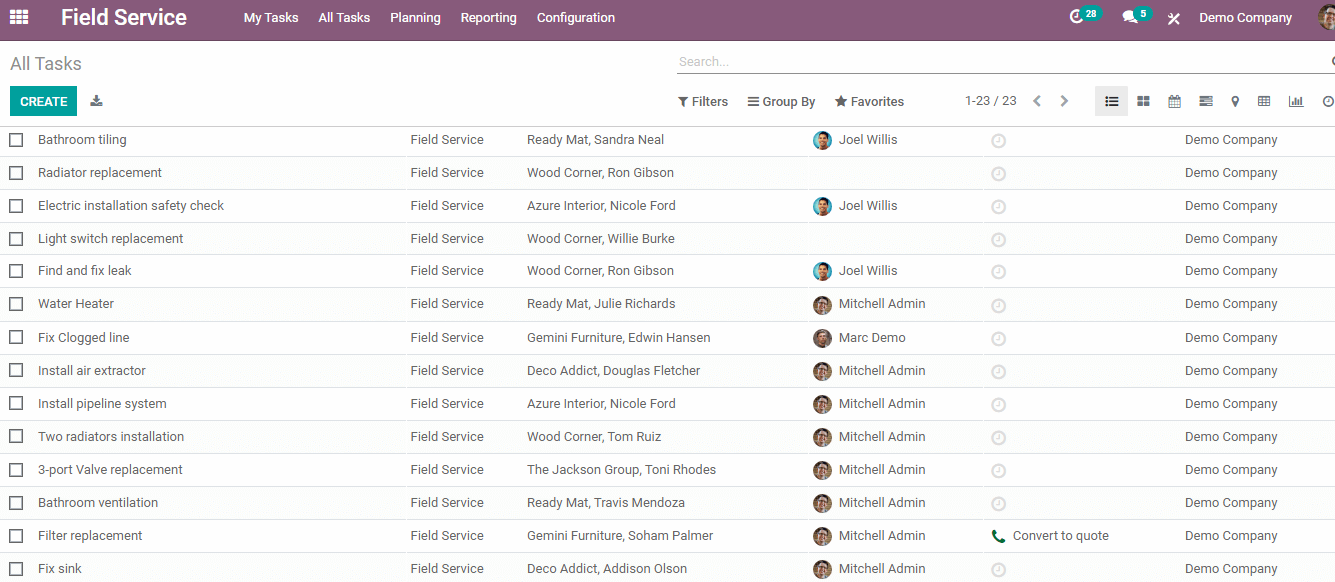
From the All Tasks tab, you will be directed to every task on the company’s list. Here you can view all the tasks at once. Title of the task, name of the Project, Customer details, to whom a task is assigned to, Next Activity, and Company name are displayed. By clicking on the desired task full details will be displayed on your screen.
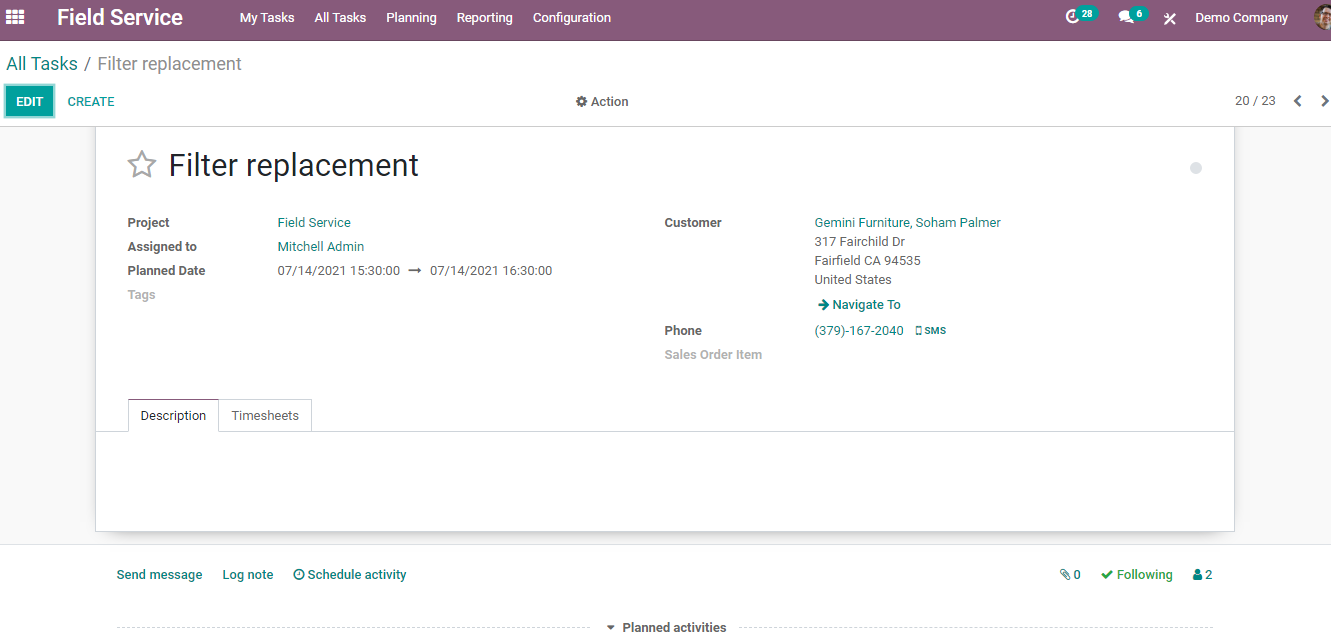
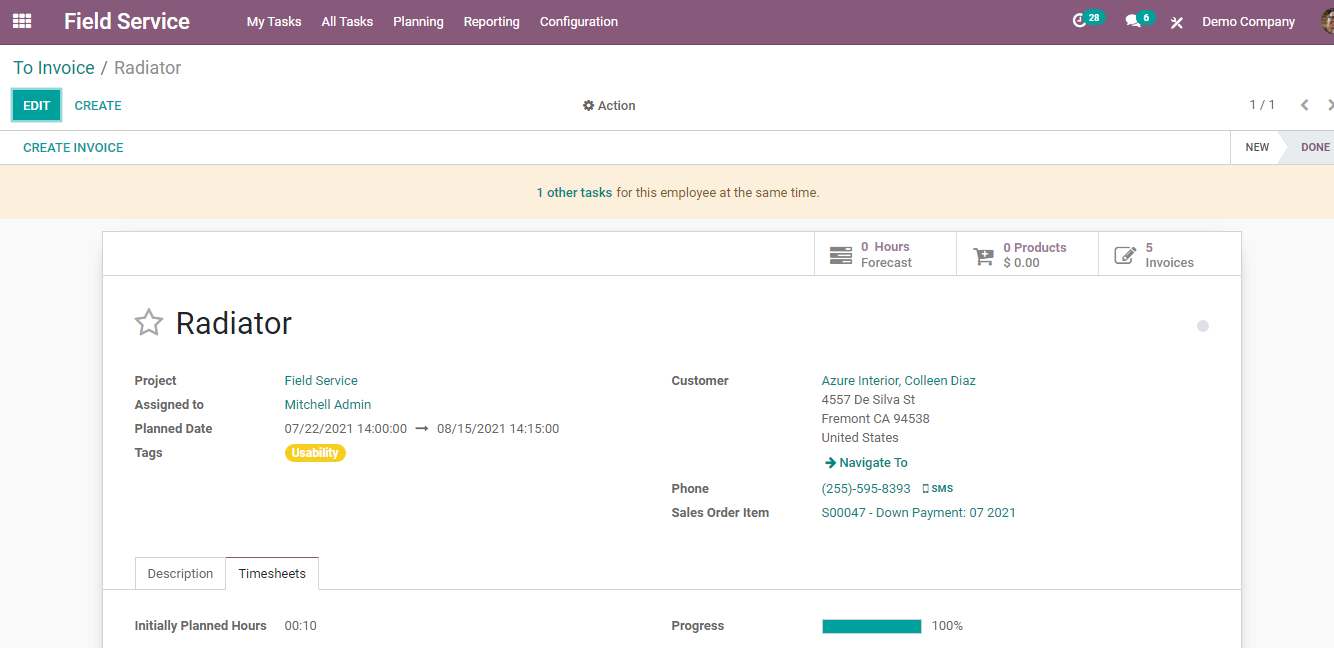
By selecting the required task you can view details such as Name of the task, Project, to whom it is Assigned, Planned Date and time, Tags if any, Name and address of the customer, Navigation, Phone number of the customer, and Sales Order Item. You can also add a log note below the task and every log note and the activities that have happened related to this particular task can be seen by looking at the log notes. A brief description of the task is accessible in the Description box. Timesheets contain the Initially Planned Hours count and Progress percentage of the task. You can check the total Hours Spent on the task. You can edit the task by clicking on the EDIT button and develop a new task with the create button. You can also take actions such as Archive, Duplicate, Delete, Share, View Planning or Create Invoice by clicking on the Action option.
To Schedule
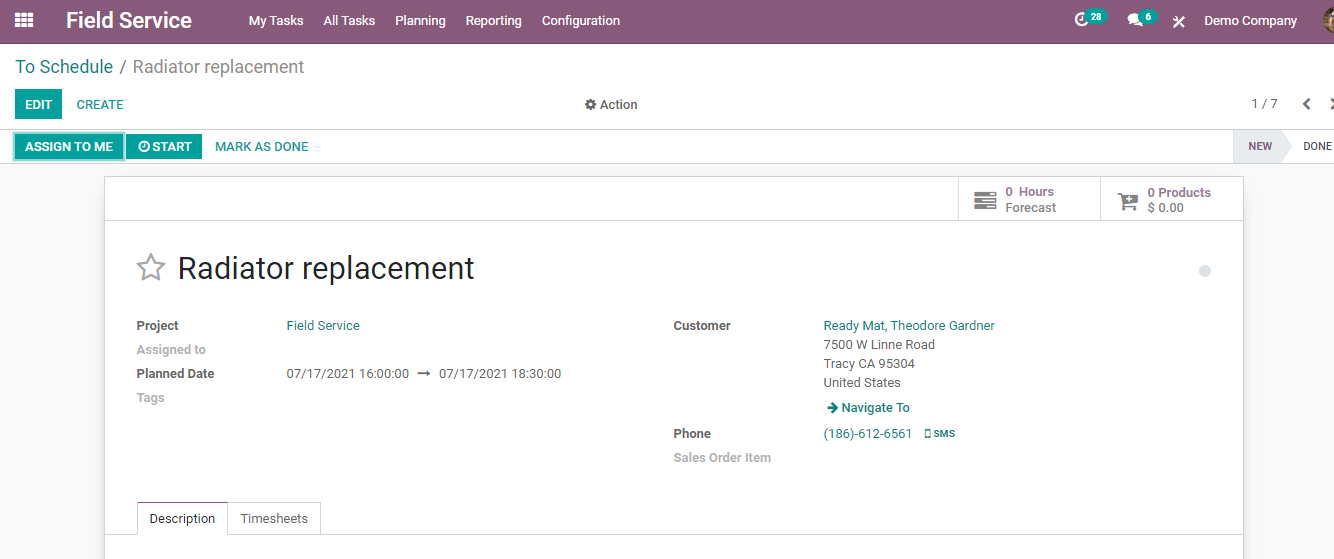
From the All Tasks tab you can select the To Schedule option. Here you can see the list of tasks. You can select a task you need to schedule from the list. For your convenience, you can view the list as Kanban, Map, Calendar, Gantt, Pivot, or Graph.

After selecting the desired task to schedule you will see the complete description of the task. You can give the particular task to yourself by selecting the ASSIGN TO ME button. Through this feature, you can or any employee can get into the To Schedule option and assign the task by looking at the description of each task. To assist you the address of the customer and navigation option can be used. You can click on the START button when the task starts and the time will start recording and can press MARK AS DONE when you complete the task. Through this time analysis of the particular task and also the time spent by the employee on the task can be calculated. You can make changes in the task by selecting the EDIT button and generate a new task by clicking on the CREATE button.
To Invoice
You can create invoices for your time and material from here to your customers once your interventions are completed. By selecting the CREATE button you can add a new task and enter the details of the task. You can either assign the task to yourself by clicking on the ASSIGN TO ME button or you can assign other employees by adding he/ she at the Assigned To option. You need to enter the time period in which the task has to be completed at the Planned Date option. By selecting the Customer, customer details with their phone number will appear. Then you have to choose the Sales Order Item.
At the Timesheet, you can add the Initially PlannedHour and set the time. After you start the task you can click on the START button and the stopwatch will start to run. You can either press PAUSE or STOP as per your requirement. The Progresspercentage will be shown according to the time you have worked. After completing the task you may click MARK AS DONE. Then you can select the CREATE INVOICE button. There you can select either Regular Invoiceor Down Payment (percentage) or DownPayment Fixed Amount. You can generate your invoice by clicking on the CREATE INVOICE button.
Planning
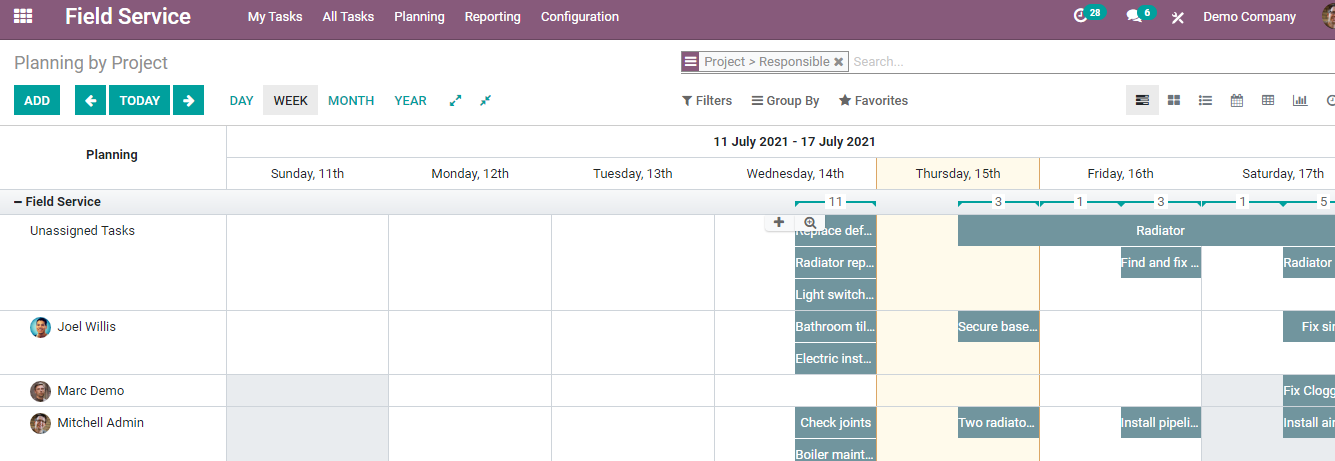
Planning can be checked using two criteria, Planning by User and Planning by Project. In Planning by User you can view the field service plans and their date under each user. You can add a new plan for users by clicking on the ADD button. The total number of plans that occur each day is depicted at the bottom of each day.
Reporting
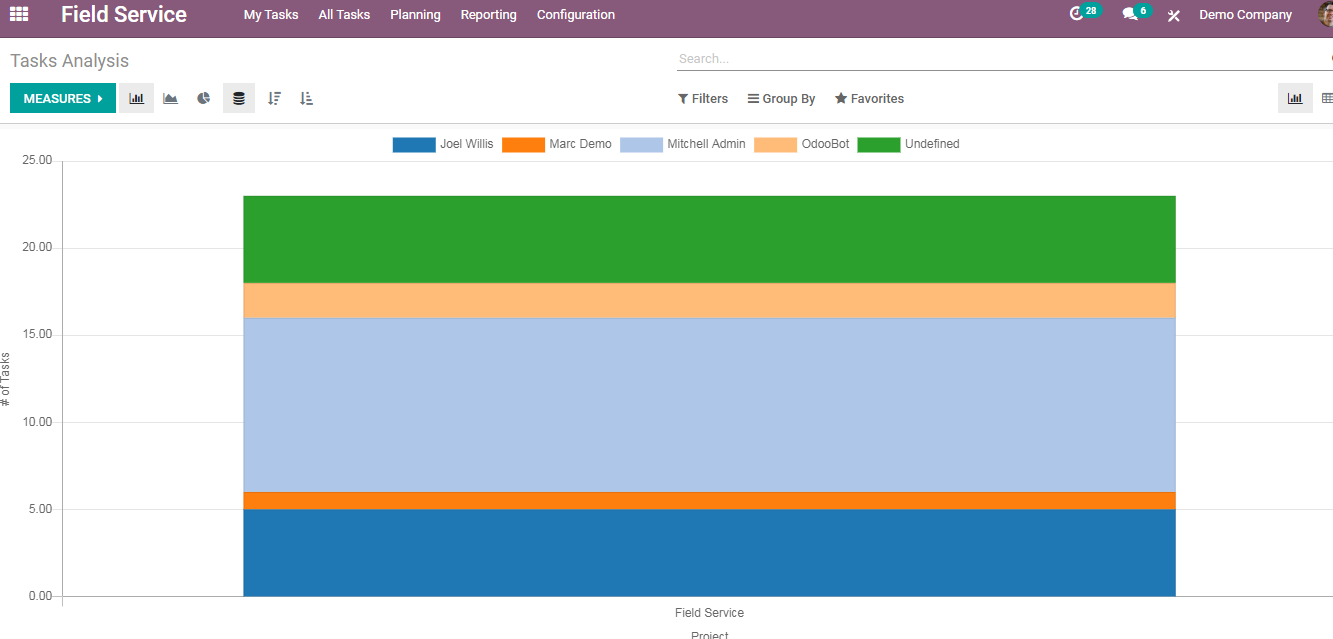
A detailed analytical report of the tasks can be viewed by clicking on the Reporting tab. You can view these reports in ascending or descending order in Stacked, Bar Graph, Pie Chart, or Line Chart.
Odoo 14 Field Service module comes up with a handful of features. They make the work of field workers much easier and are very user-friendly. Communication is an effective way is the key to field services, and Odoo ERP guarantees it. Irrespective of the size of your company, you can benefit from using the Field Service module to organize your business. All field-based activities of the company are now easy to maintain with Odoo 14 Field Service application.