Leads are potential customers interested in a company's products or services. ERP software like the Odoo 17 CRM module can quickly assign leads based on business principles, establishing leads on a sales team and promoting growth. Lead creation is crucial for businesses relying on sales, as without leads, sales representatives struggle to locate new clients. CRM systems can handle tasks such as lead analysis, language installation, recurring revenue tracking, lead detection, link opportunity generation, lost reason, and lead merging. They can also enable the installation of additional languages, link events, close comments, merge leads, display recurring income totals, track resellers, and recognize similar leads based on phone numbers.
The article will help you comprehend the ideas of leads, lead assignments, and lead management in the Odoo 17 CRM Module. We can also look up the new features provided inside the Lead Management process. To start with the process, you have to activate the feature from the “Settings” window of the “Configuration” menu.
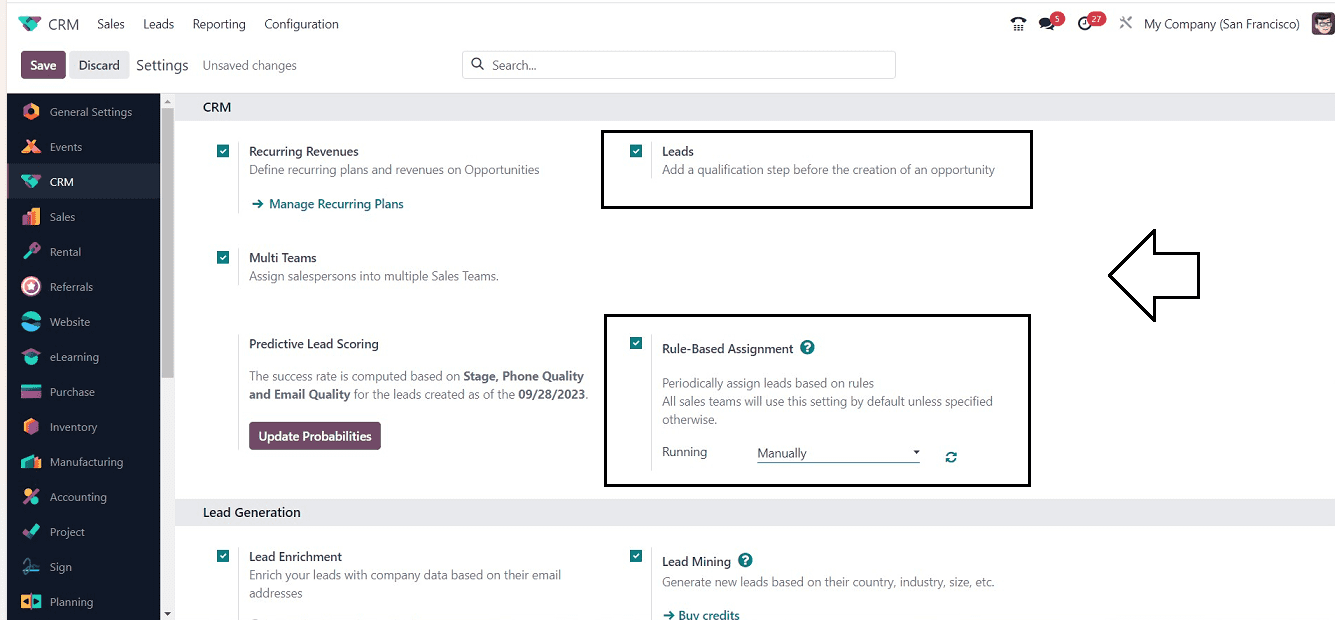
Configuring Leads
Just enable the “Leads” option from the “CRM” tab and enable the “Rule-based Assignment” setting to allocate leads on a regular basis according to the rules. Leads can be used automatically by all sales teams, either “Manually” or “Repeatedly.” The Running field's Manual selection enables the sales staff to be automatically assigned leads.
Users can opt for the "Repeatedly" option in the "Running" field beneath the "Rule-Based Assignment" option to repeat the lead-based rules procedure and specify the repetition time in days, minutes, weeks, or hours, as shown in the picture below.
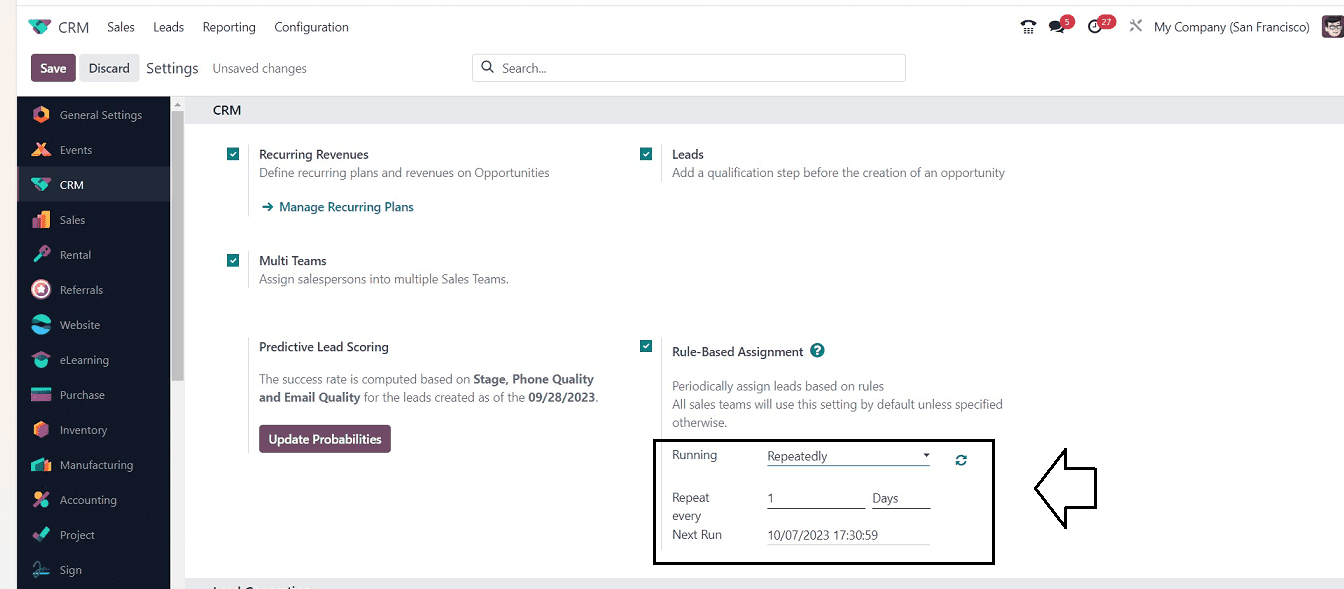
If you select the “Running” field as “Repeatedly,” then you can set the frequency of the repetition inside the “Repeat every” field and apply the next repetition date in the “Next Run” field, Here, I have configured the Running as manual running for rule-based lead assignment. Finally, click the “Save” button to activate the Leads specifics inside your Odoo 17 CRM module.
Create a Sales Team and Assign Leads
A salesman can control company leads, which necessitates the formation of a sales team and the setting of guidelines for their development. So, we have to create a new team from the “Teams” window, found in the “Configuration” menu. The window presents a list of all teams that have been formed in a firm, including the Company, Team Leader, Sales Team, and Alias, and provides comprehensive information about each team.

You can just click on the “New” button to create a new Sales Team. Then, start filling out the configuration form illustrated in the screenshot below.
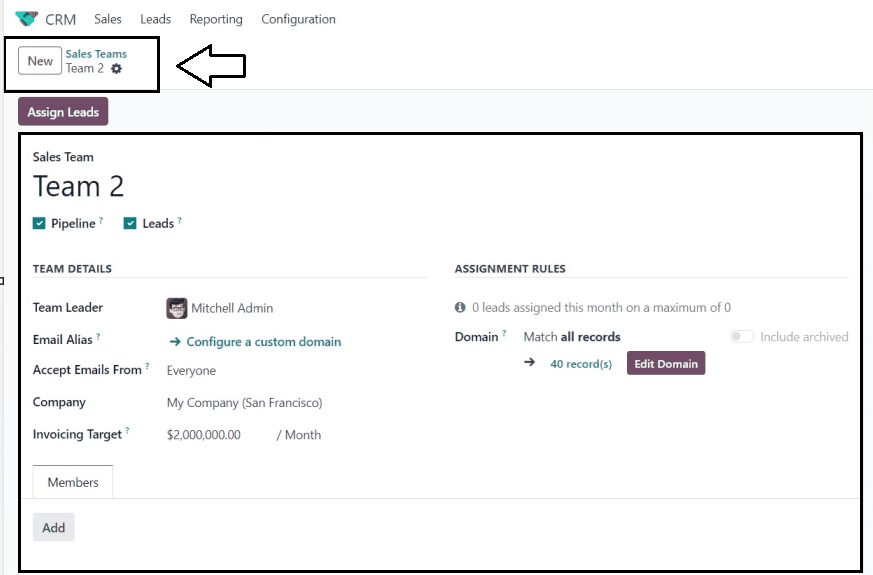
First of all, provide your team name in the “Sales Team” field. By turning on the “Pipeline” option, which makes it simple to qualify and filter inquiries as leads, the pre-sale procedure may be established. A team leader can be added by users in the “Team Leader” area. The "Accept Emails From" option lets you specify a policy for submitting document messages through mail gateways. Options include posting messages for everyone, followers only, authorized partners, or followers. Users can choose their company and specify a monthly revenue objective in the “Company” and “Invoicing Target” fields respectively.
Setting Assignment rules
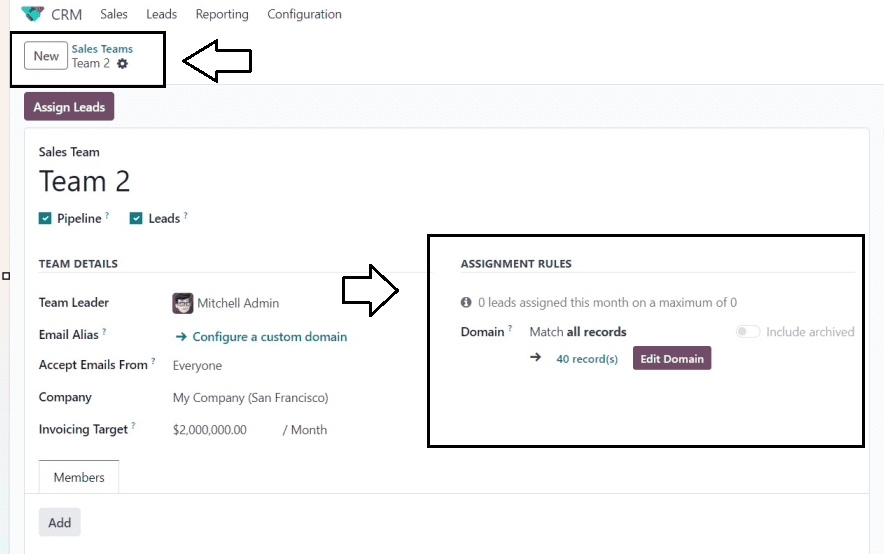
The "Edit Domain" button is located in the "Domain" field under the "ASSIGNMENT RULES" section, and it allows users to set assignment rules for a certain team.
The pop-up window below will appear when you click the "Edit Domain" button.
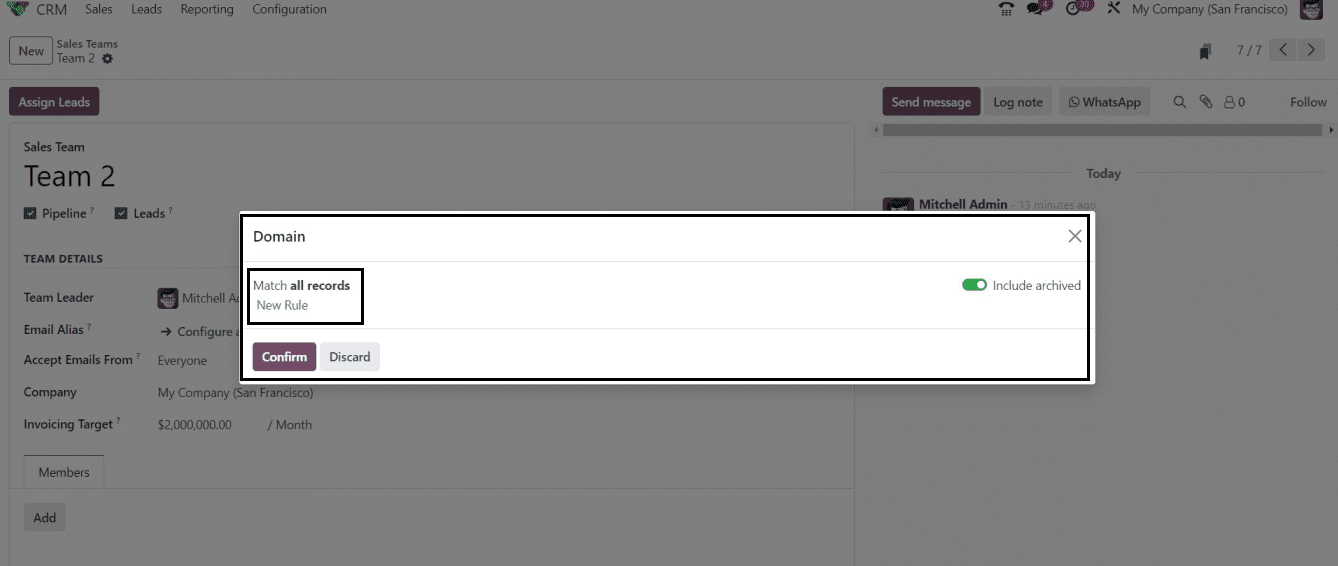
Odoo has upgraded the pop-up windows to be floating wizards, allowing you to move and reposition them wherever you choose on the window screen. And the Domain window has been upgraded. You can create new rules using the “New Rule” and also enable the “Include archived” button to include the archived records in the Domain section.
After selecting the "New Rule" button, a new pop-up will appear where you can set up the rules using filters based on different factors.
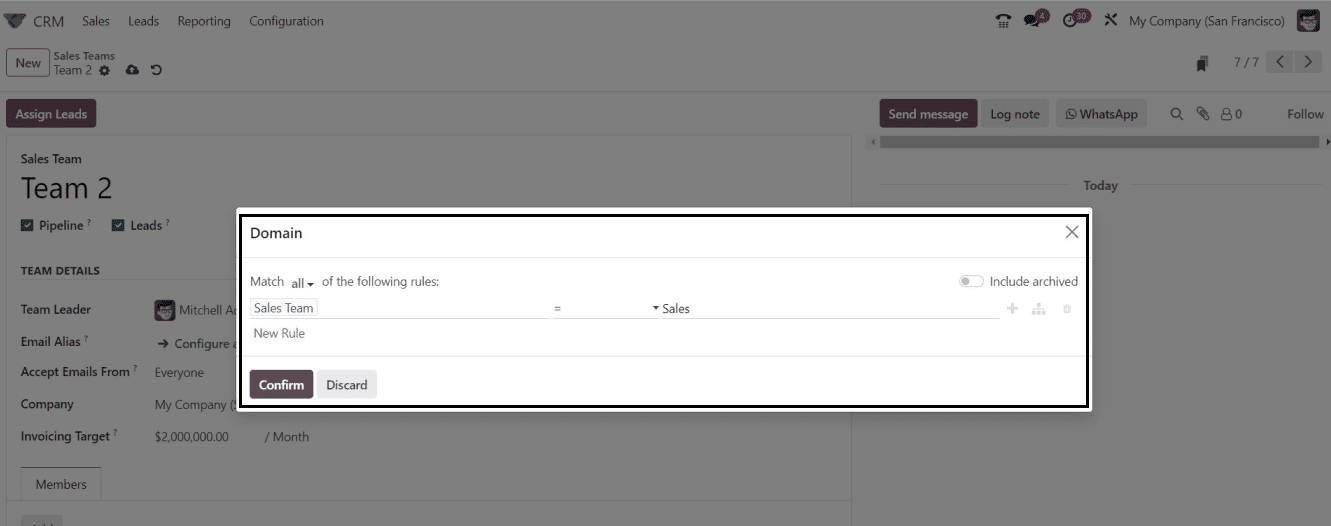
Simply choose a rule from the "Match all" area and then specify the filter or condition in the following fields, as seen in the screenshot above. The rules will also apply to the archived entries if the "Include archived" option is enabled.
Using the appropriate icons on the right side of the wizard, we can additionally add Extra Rules and Nodes to create complex filter rules. The "Delete Node" icon can be used to delete the nodes as well. To save the details after defining a filter, click the "Confirm" button. Here, I have added a simple rule based on the Sales team as depicted below.
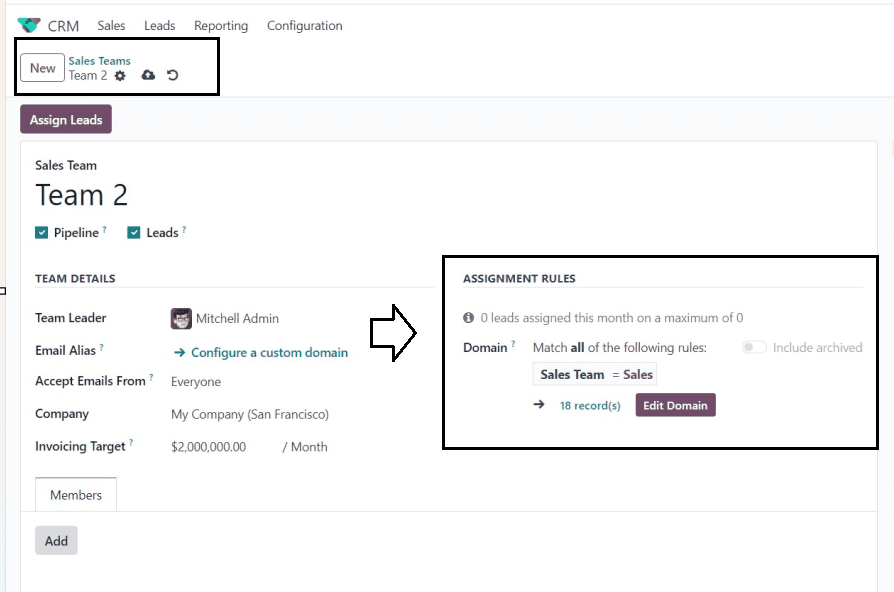
When you've finished setting up the Assignment rules, don't forget to save your data. The sales crew will then need to be expanded. The "Add" button located on the "Members" page may be used to add many sales team members. When clicked, the "Add" button will launch the wizard as depicted below.
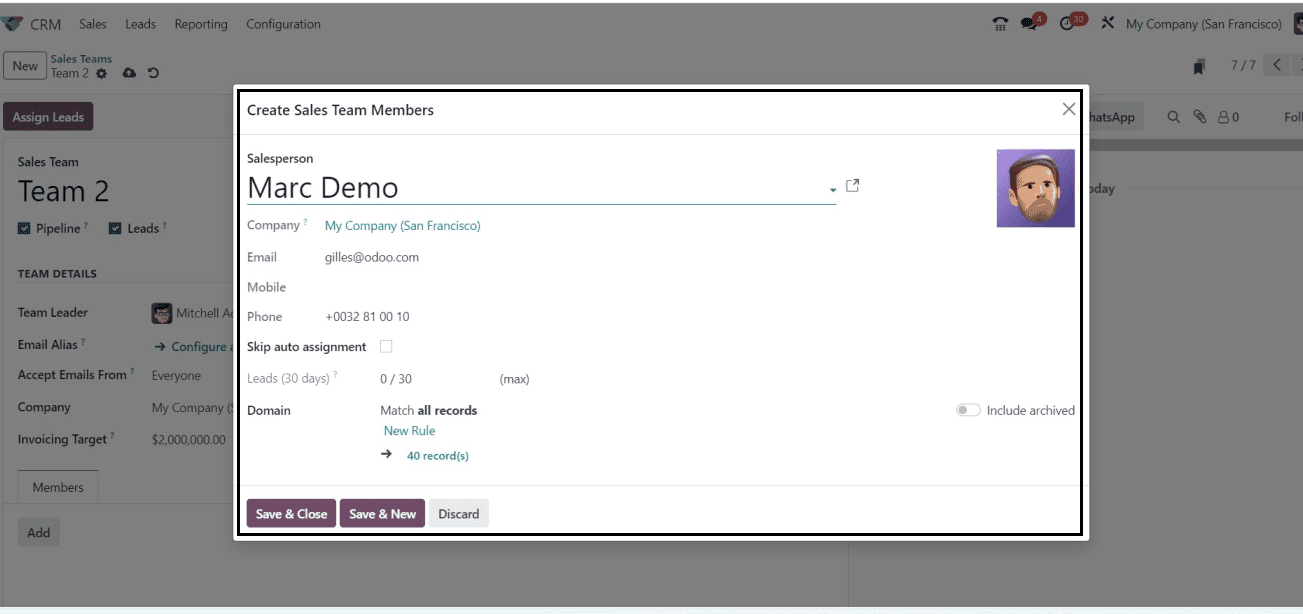
In its 17th version of the CRM software, Odoo modified this form view. To add leads to a member's sales records, enter the name of your salesperson and your company in the "Salesperson" and "Company" columns, respectively. The other information was automatically filled up when you updated an existing employee's name in the “Salesperson” field, such as “Company,” “Email,” “Mobile,” “Phone,” etc. Here, We have selected “Marc Demo” as the salesperson.
Now, we can disable the “Skip auto-assignment” button to stop the automatic assignment of sales team members. Also, we are able to apply leads for a member within 30 days by using the “Leads(30 days)” field. To add a filter to match items, click the "New Rule" icon in the "Domain" field. As we've just covered in the prior filter setting procedure, this step is also quite simple. When you click the “New Rules” button, the new fields for setting filters will be displayed as illustrated below.
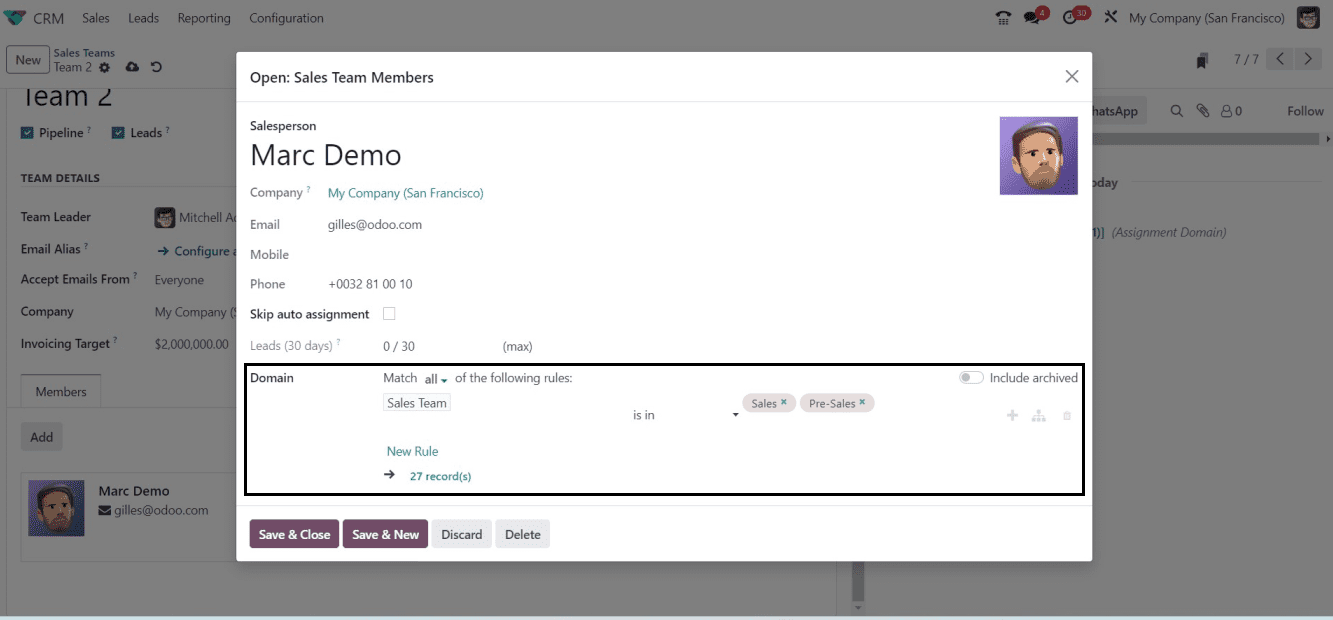
You can set the required conditions inside the “Domain” field. Choose a rule from the "Match all" section and enter the filter or condition in the fields to build a filter. Then, use the icons on the right corner of the form to add Extra Rules and Nodes and Delete the Nodes. After completing the process, press the “Save & Close” button. Immediately after this step, the new member will be added to the "Members" tab, as shown below.
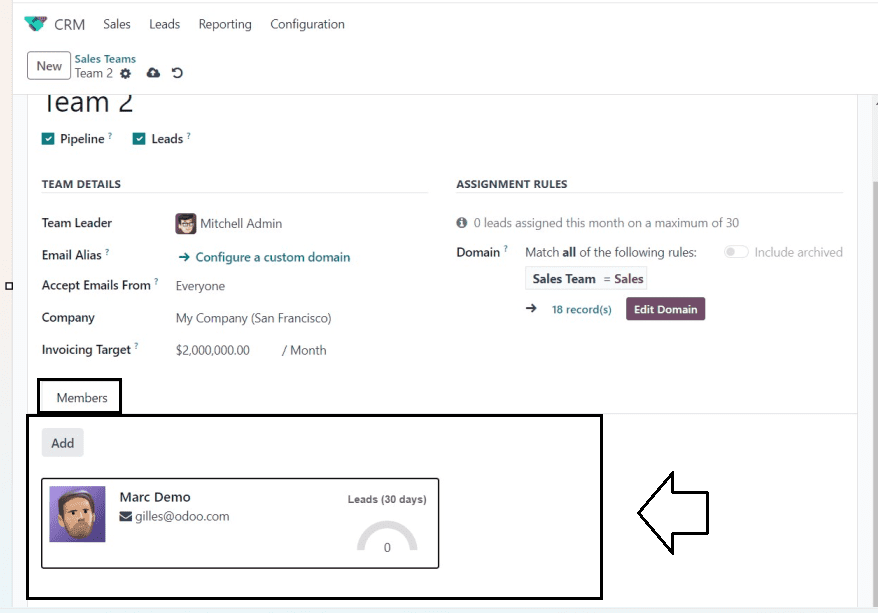
Using the same approach, you can include multiple teammates in a team. Then, the Odoo 17 CRM Application will manually save information about your sales team immediately after taping the “save” icon. Now, we can assign leads to a specific team member and website by selecting the “Assign Leads” button placed at the top left corner of the configuration form.
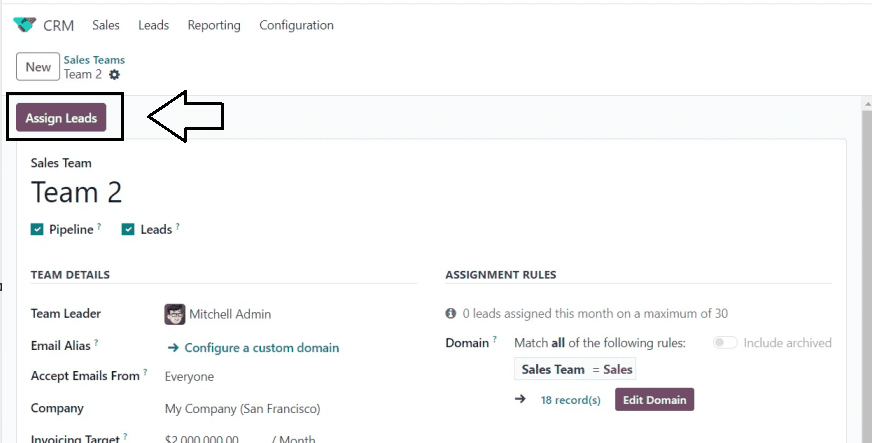
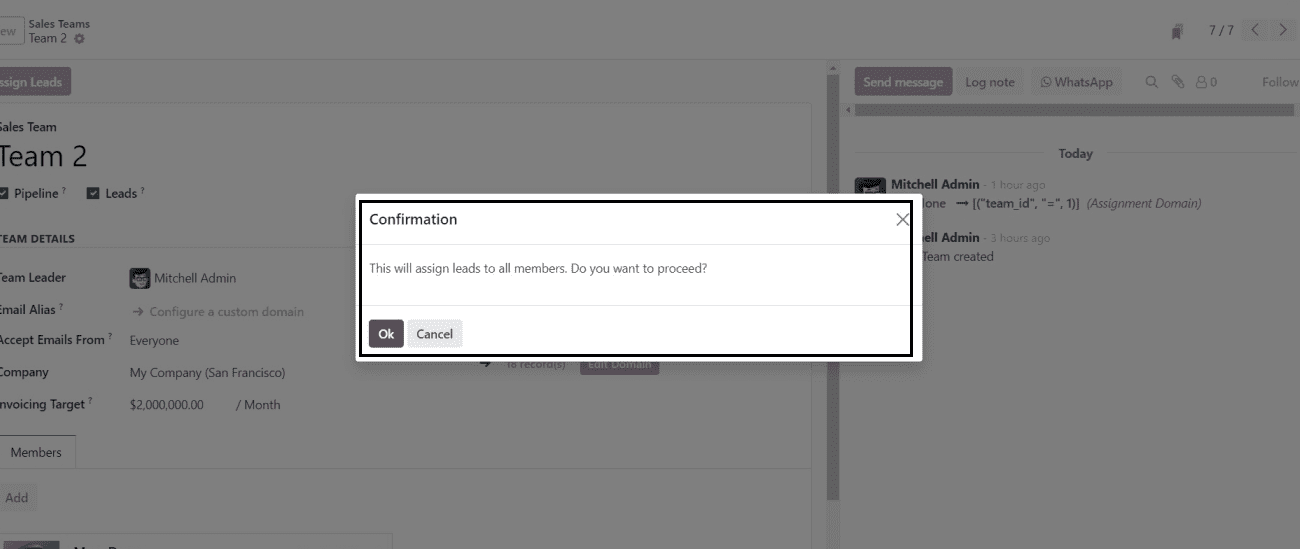
When you click the "Assign Leads" button, a new dialogue box will appear where you may decide whether to continue the procedure.
The leads will be allocated to the team members and sales staff. You can see this from the “Leads” window by grouping the data based on “Sales Team,” as shown below.

The functional overview of the Lead assignment for a Sales Team inside the Odoo 17 CRM Module was covered in this blog session. Despite slight changes to the overall interface modifications and minor improvements, the core functioning of the application hasn't changed significantly.
To read more about periodically assigning leads based on rules in Odoo 16 CRM, refer to our blog How to Periodically Assign Leads Based on Rules in Odoo 16 CRM