Website content translators are essential for global websites to ensure their success and effectiveness. They accurately translate content into multiple languages, catering to diverse linguistic preferences and cultural relevance. This localization enhances user engagement, fosters trust, and drives conversions. Additionally, content translators improve search engine optimization (SEO) by optimizing translated content for relevant keywords in each target language. They are, therefore, essential for companies trying to build a solid online presence and broaden their consumer base abroad.
Offering diverse content can expand your reach, boost sales, and demonstrate your commitment to inclusivity, thereby exceeding customer expectations in Odoo 17.
Installing Languages: A Step-by-step guide
The first step in translating your website is to add the necessary languages. Here's how to do it:
Navigate to Your Website Settings window from the Configuration menu and head to the Website Info tab area. Here, we can choose the required languages from the dropdown selection list available near the Languages option and repeat this step for each additional language.
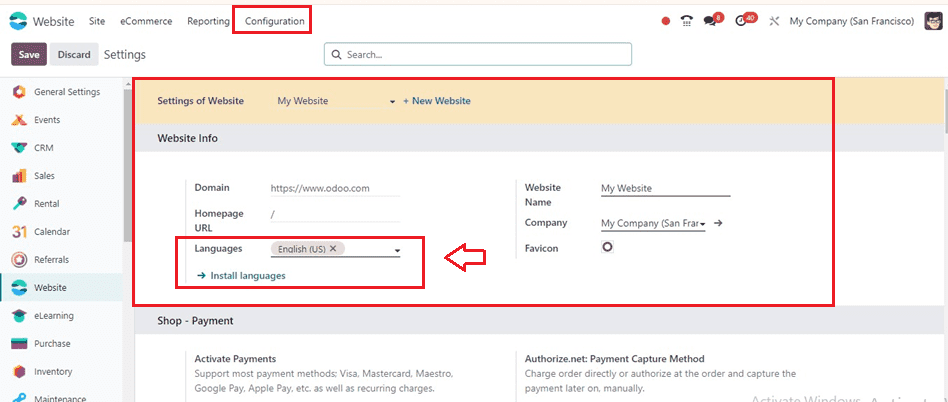
Then, click on the “Install Languages” button to install new languages into your website database. This will open a pop-up window, as shown below.
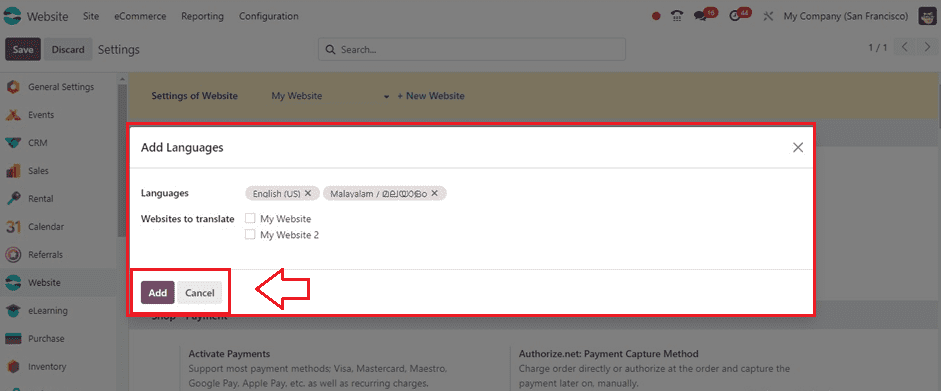
Inside this Add Languages window, we can add the relevant languages that we want to include in our website translation purposes inside the Languages field. Then, choose the Websites to translate as per the requirement. To complete the installation, save the modifications by selecting the "Add" option.
Setting Default Language
If a visitor's browser language isn't accessible, your website automatically switches to a predetermined language. To establish your default language, follow these steps: Go to Website ? Configuration ? Settings, then choose your preferred language from the "Default" field. Kindly note that this option is exclusively accessible with multilingual support enabled on your website.
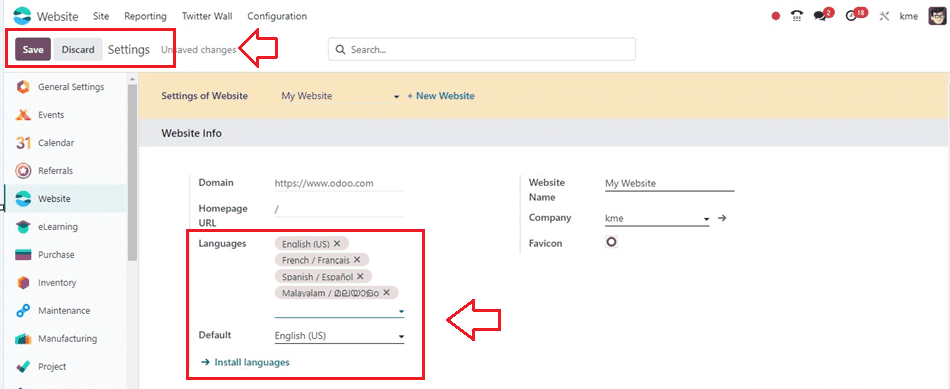
Save the language settings using the ‘Save’ button after choosing the required languages.
Translating Your Content
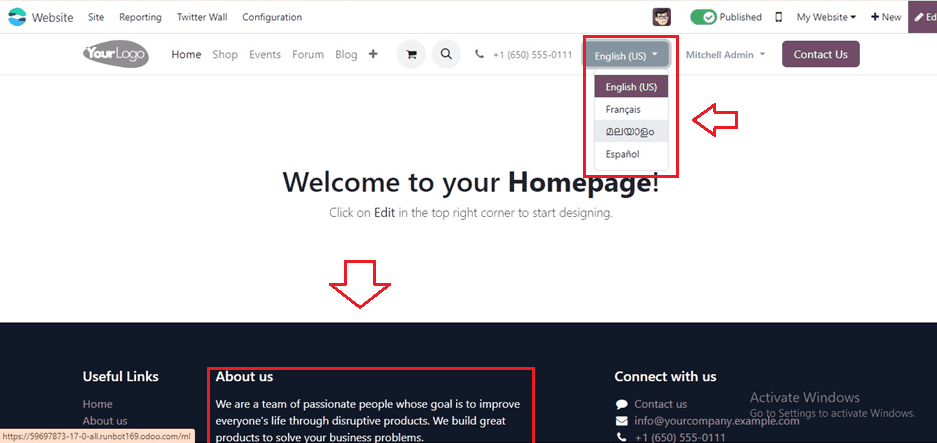
Once you've installed the desired languages, it's time to translate your website's content. Here's a quick rundown: Navigate to your website and select the desired language from the language menu of the webpage. Moreover, you are able to understand the passage that I am attempting to translate into a different language, as seen in the screenshot below.
Click the "Translate" button to activate the translation mode. In translation mode, already translated text appears in green, while the untranslated text is highlighted in yellow as shown below.
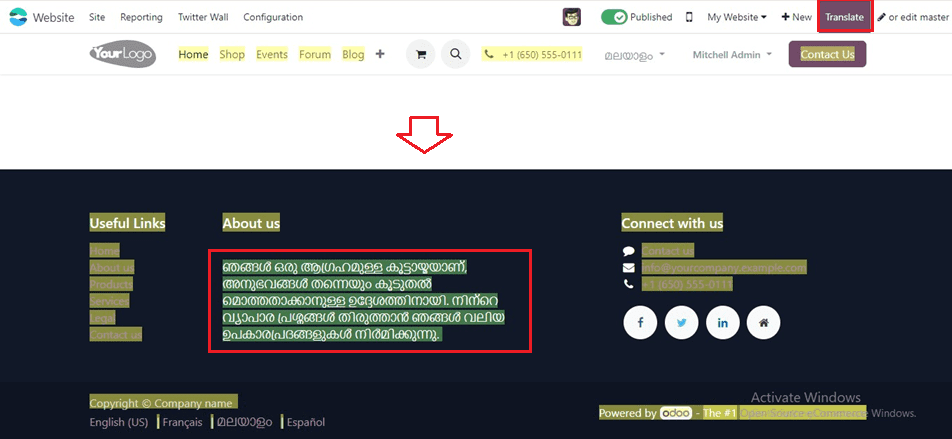
Replace the original text with the translation by clicking on the block, editing its contents, and saving your changes. Beyond translating individual elements manually, you can streamline the process further:
*Translate product-related items directly from the backend, such as product names and descriptions, by clicking the language code next to the text.
*Export and import translations to handle multiple items, such as product names and descriptions, simultaneously.
After editing the translation texts, save the data using the save icon provided inside the editing space located at the right side of the page.

Once the translation texts have been saved, they will be kept in our website database and will be readily available to the front-end user each time they visit this page.
Adding a Language Selector Menu
Include a language selection menu on your website to make it easier for people to move between languages. To begin, go to your website and select "Edit." Next, decide whatever block—such as the header section—you want to use for the language selector menu. Find the "Language selector" box under the "CUSTOMIZE" tab, and pick "Dropdown" or "Inline," as seen in the screenshot shown below.
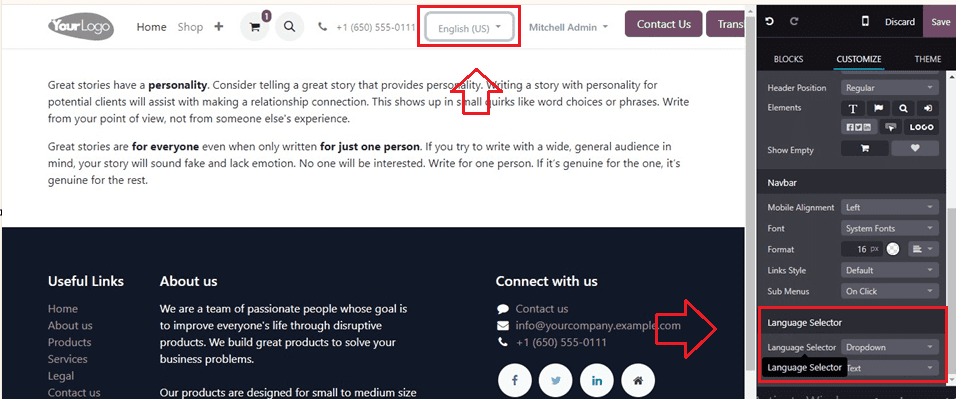
Finally, click on "Save" to implement your changes. This simple procedure guarantees smooth language navigation, improving user experience on your website.
We can quickly translate website content into multiple languages using the Odoo 17 website module by following these steps. This improves accessibility and audience engagement, encourages inclusion and customer satisfaction, and fosters international relationships and growth by accommodating global language preferences. To read more refer to How To Manage Odoo In Your Language?