Sales are a concern for many businesses. The process of selling is only complete with customer payment. Nowadays, customers have a choice of options for paying their bills. Just a few examples of payment methods include credit cards, bank transfers, cash on hand, and others. The consumer can use whatever thing we sell to them. As a result, a store or other comparable organization must accept a variety of payment options.
We can easily manage different payment types thanks to Odoo 16.
We made use of a variety of payment options in Odoo 16. Cash, Bank, Customer Accounts, and Payment Terminals are all forms of payment accepted at the point of sale.
Let's examine each of them separately.
Payment options may be established in the Odoo 16 POS module. Select payment methods under the configuration tab to achieve this.
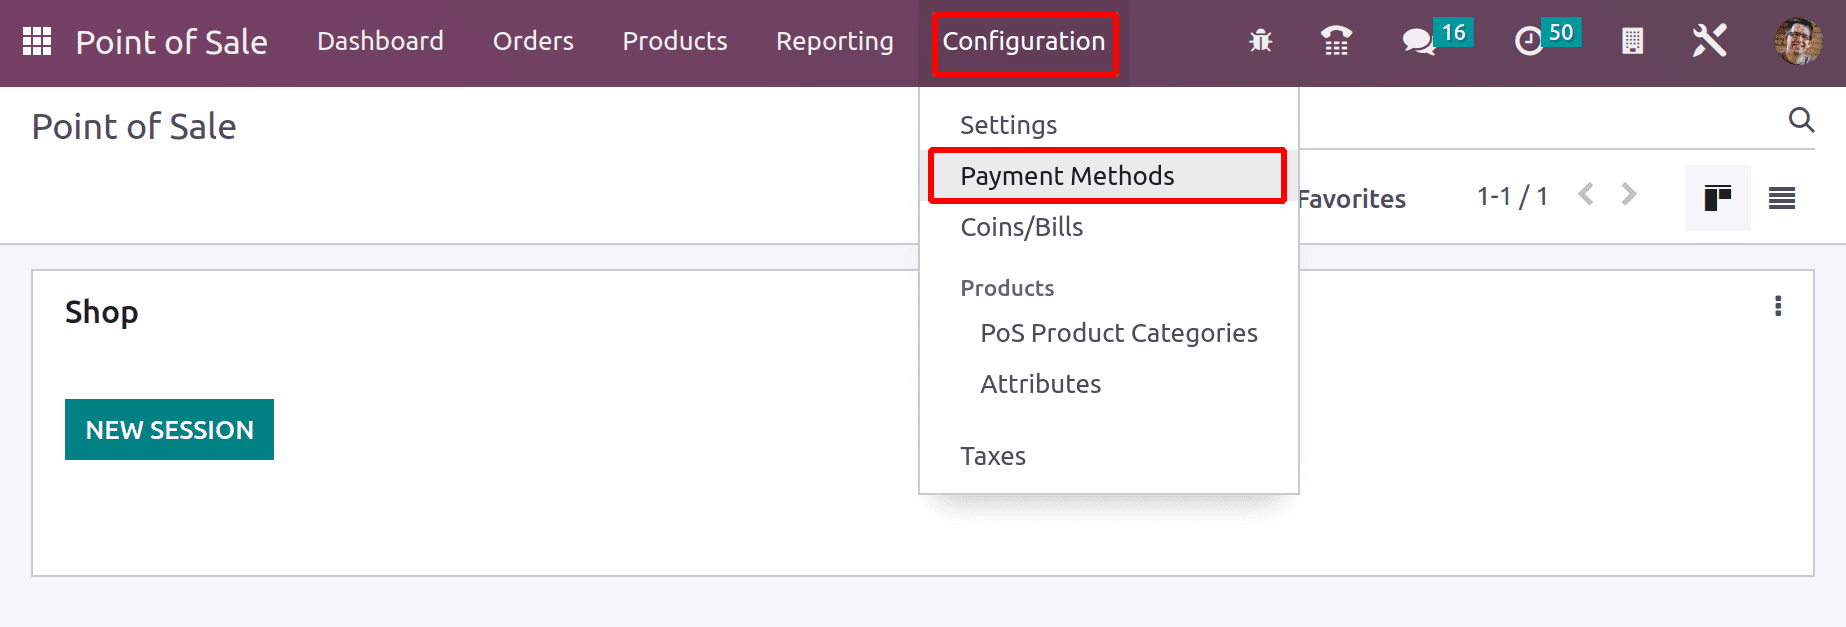
We may add new payment ways from there as well as view the payment methods that were produced. Let's go over each one individually.
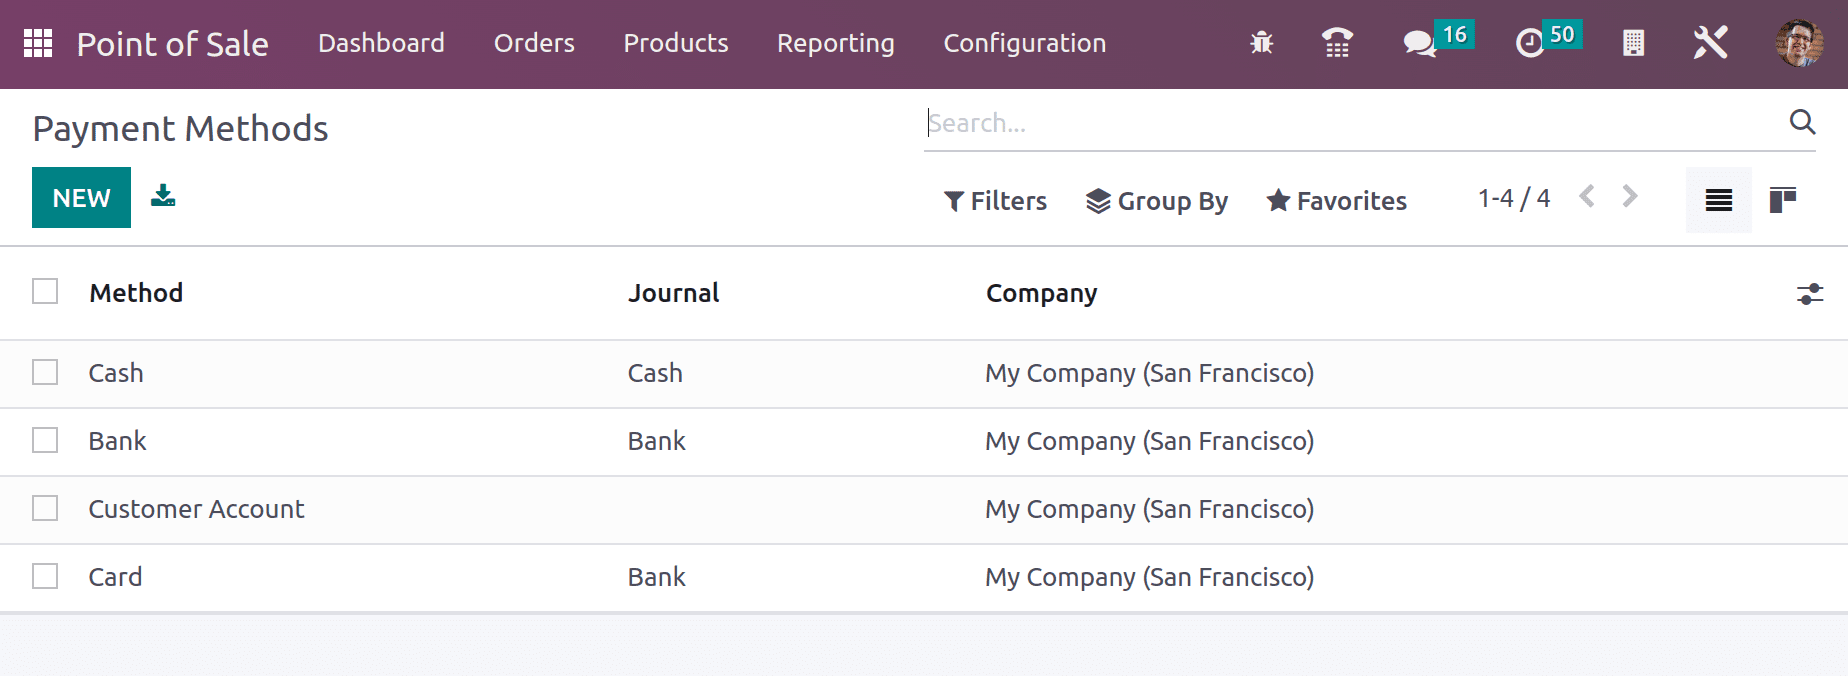
Cash Payment
Everyone has become used to and can easily use cash as payment. When selling a product, we can use the cash payment method, with the consumer providing liquid cash as payment. As seen in the screenshot below the payment method name is Cash. So open the payment method Cash.
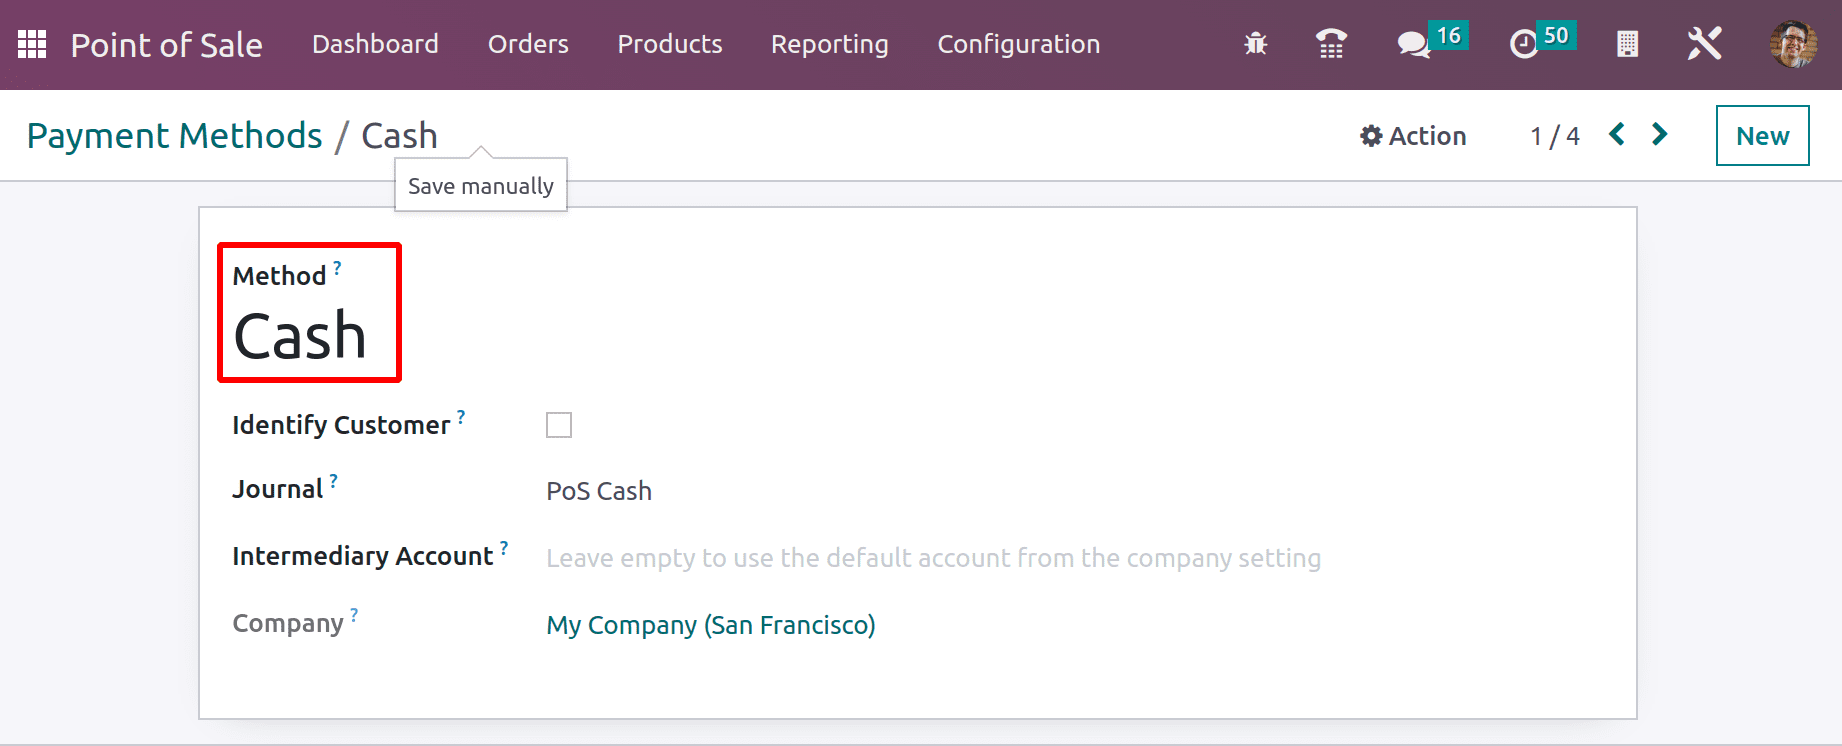
Since this name displays at the point of sale when choosing a payment option, users can see when it is opened that the method name is Cash. PoS Cash is the journal. Here, a company and an Intermediary Account can be stated.
An intermediary account is where the user can designate a specific account to keep track of the transaction information when utilizing this payment method. If this box is left blank, the company's default account will be utilized to record the payment information.
If the season requires that the user set a customer while using this payment method and divide the journal entries for each customer, the Identify Customer action can be activated. But on occasion, it can make the closing procedure take longer.
Bank Payment
Like cash, bank payments are also something we have become used to. It is possible to pay them through a bank transfer for the amount that was billed. A transfer of funds is possible from the customer's account to the business's account. This page displays the most recent bank payment method that was generated. Let's look at it.
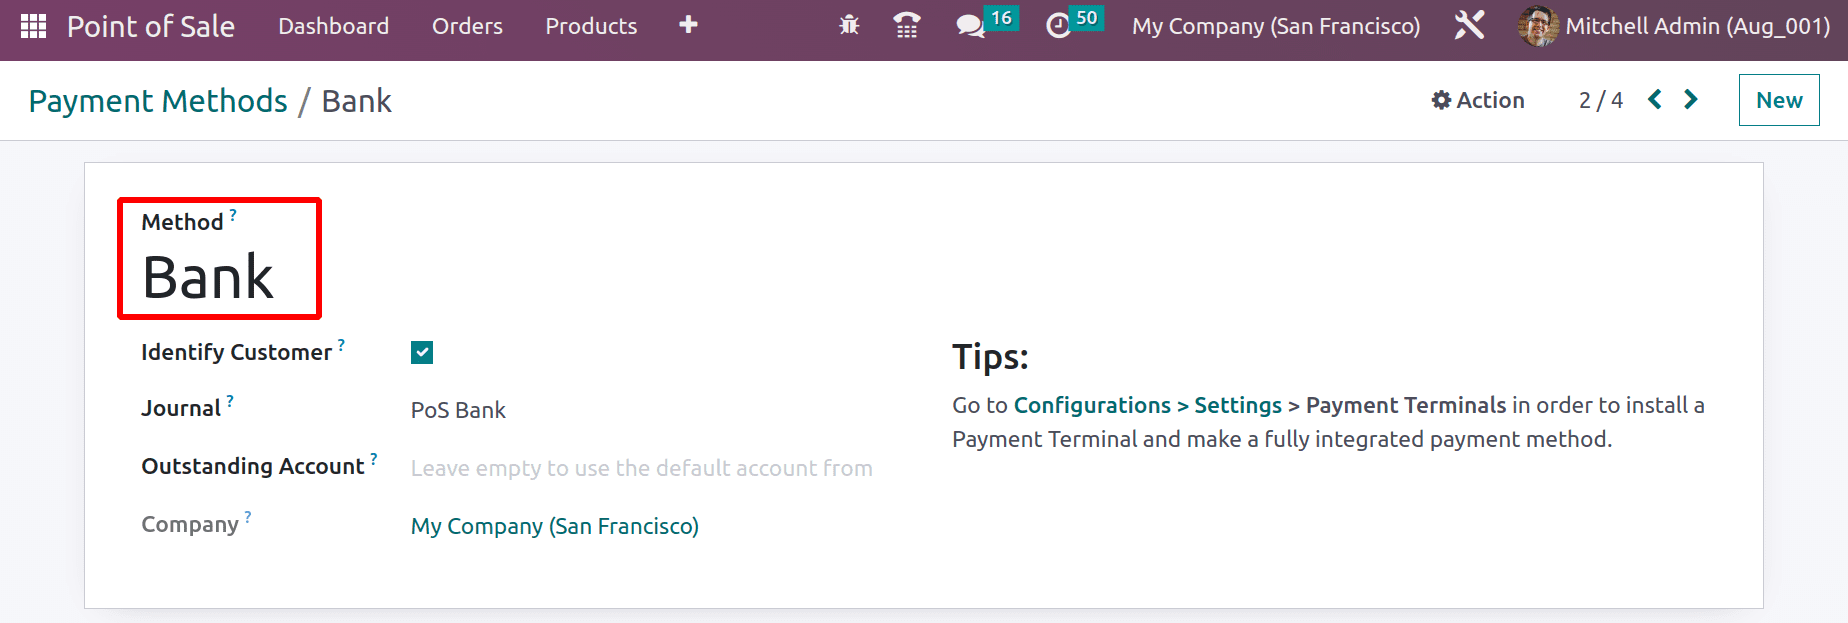
Here, the method name is "Bank" and the journal used is "PoS Bank".
Both an Outstanding Account and an Intermediary Account may be set up here. Mention the name of the company. In the event of a bank, it is possible to install payment terminals here.
Customer Account
The following payment option is a customer account. It works in a manner identical to a credit card. Our customers can purchase items from us, and if they choose the customer account option, all transactions will be logged in the Receivable account, with the option for the customer to pay for everything at once.
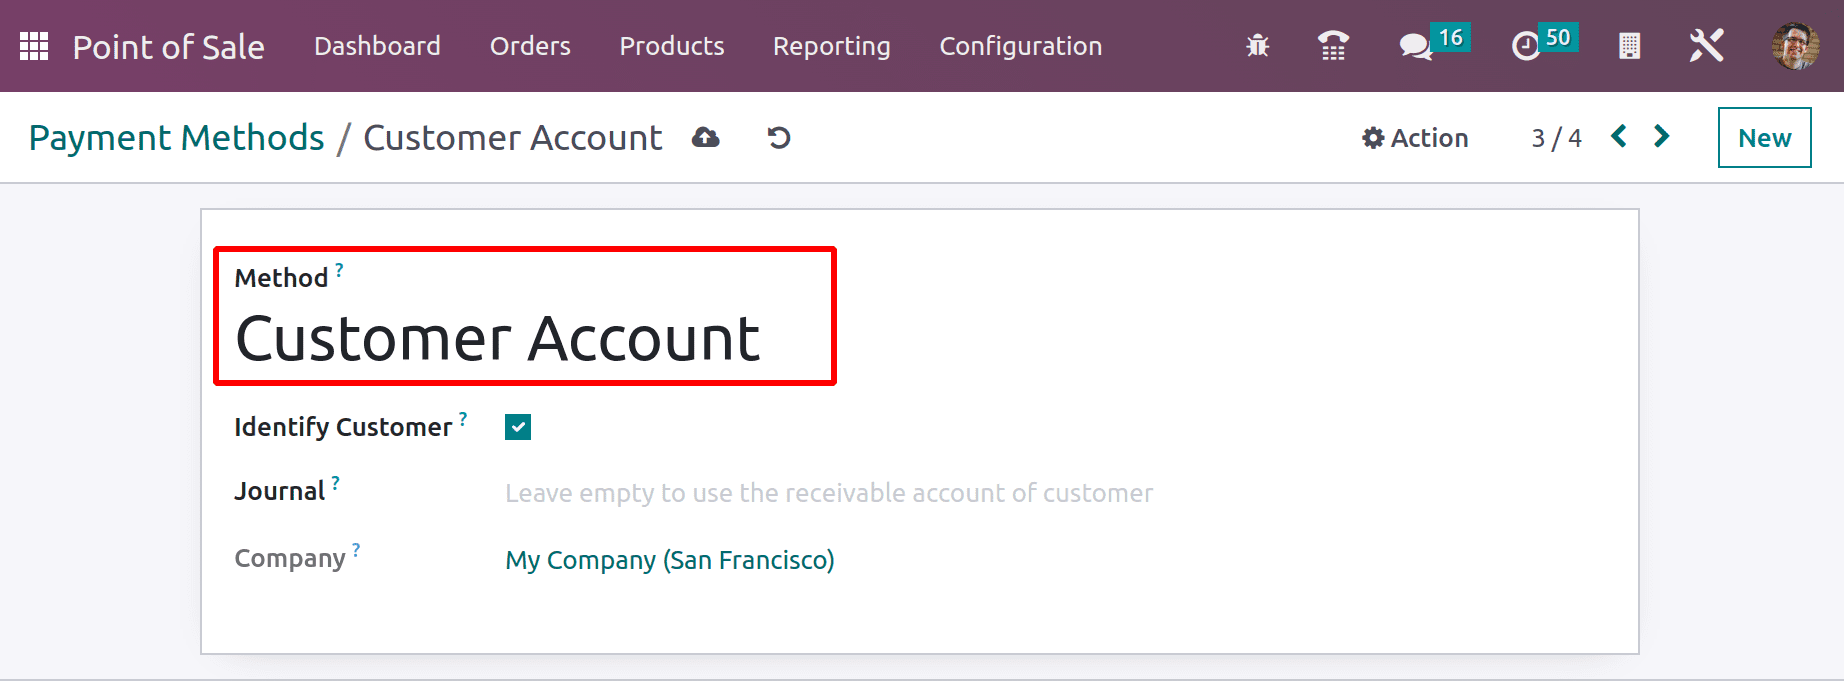
The technique is called Customer Account, and the company is added here. Because doing so causes us to set a client because developing a client is necessary for this technique, we activate the Identify Customer field.
We must leave the journal field empty since we want to record the transaction data in the Receivable account.
Once you've finished configuring everything, save it.
Payment Terminal
Payment through a Payment Terminal is the final accepted payment option in Odoo 16 Point of Sale. So Payment terminals can be used during transactions. Before using it, we must first configure it. To do this, choose settings under the Configuration tab. Here, you may find certain payment terminals that support payment terminals, like Adyen, Vantiv, Six, and others. Enable them and save the new configuration.
After that, create a new payment method that utilizes this payment terminal.
Give the process a name and the journal a bank. Then, information like Outstanding Account, Intermediary Account, Company, etc., can be added.
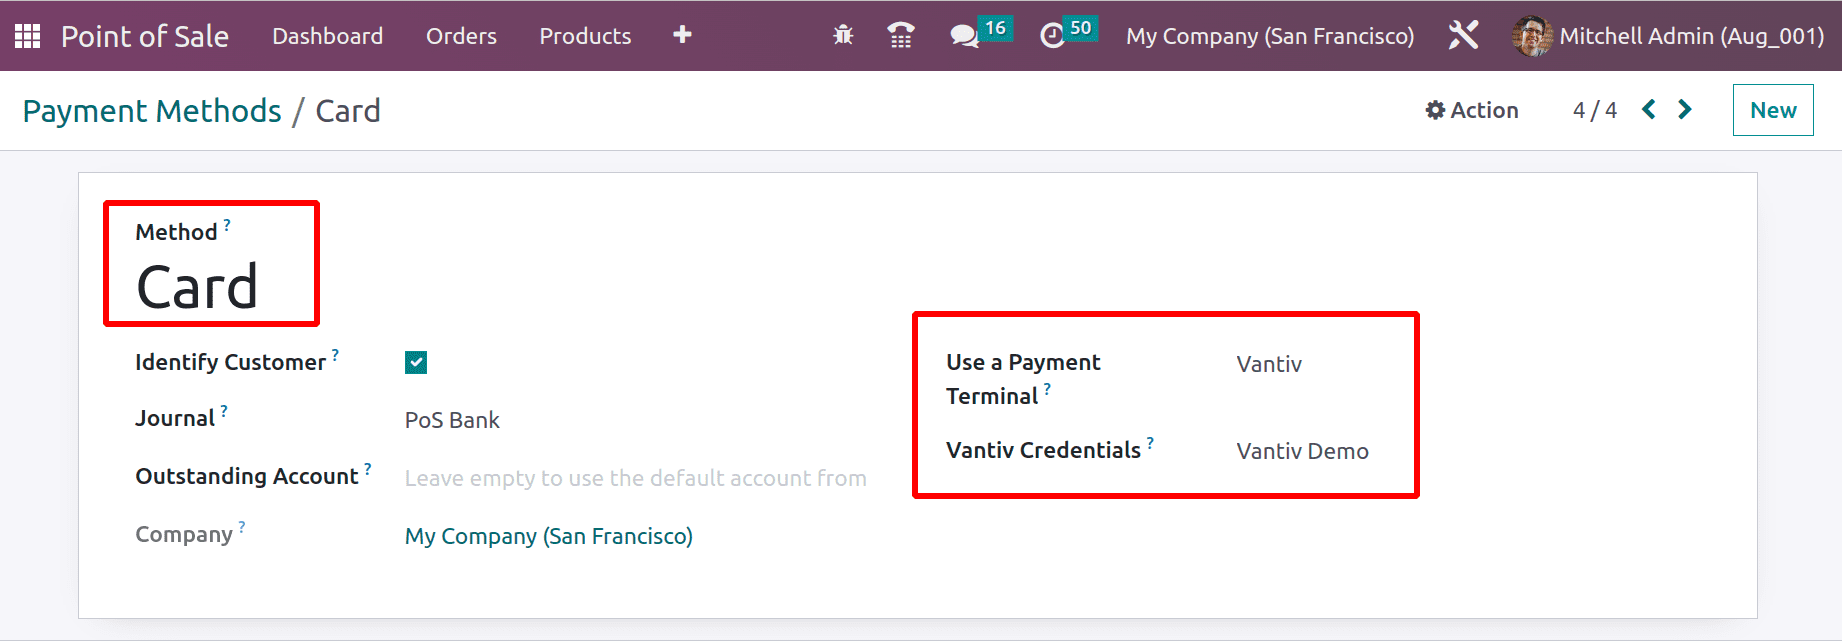
Here, the method name added is Card. You can choose a credential and add a payment terminal here. Now here, the user chooses the terminal Vantiv. So according to that, the Vantiv Credential is also chosen.
Simply save the page after making your changes.
Now, let's check how these configured payment methods are used inside the PoS Session.
So, we designed every payment terminal. Adding payment methods to the point-of-sale session is the first step in the process. To achieve this, open the Configuration tab and pick Settings from the drop-down menu.
There, we can observe the active point-of-sale sessions. The user only needs to click the plus button to set up a new session.
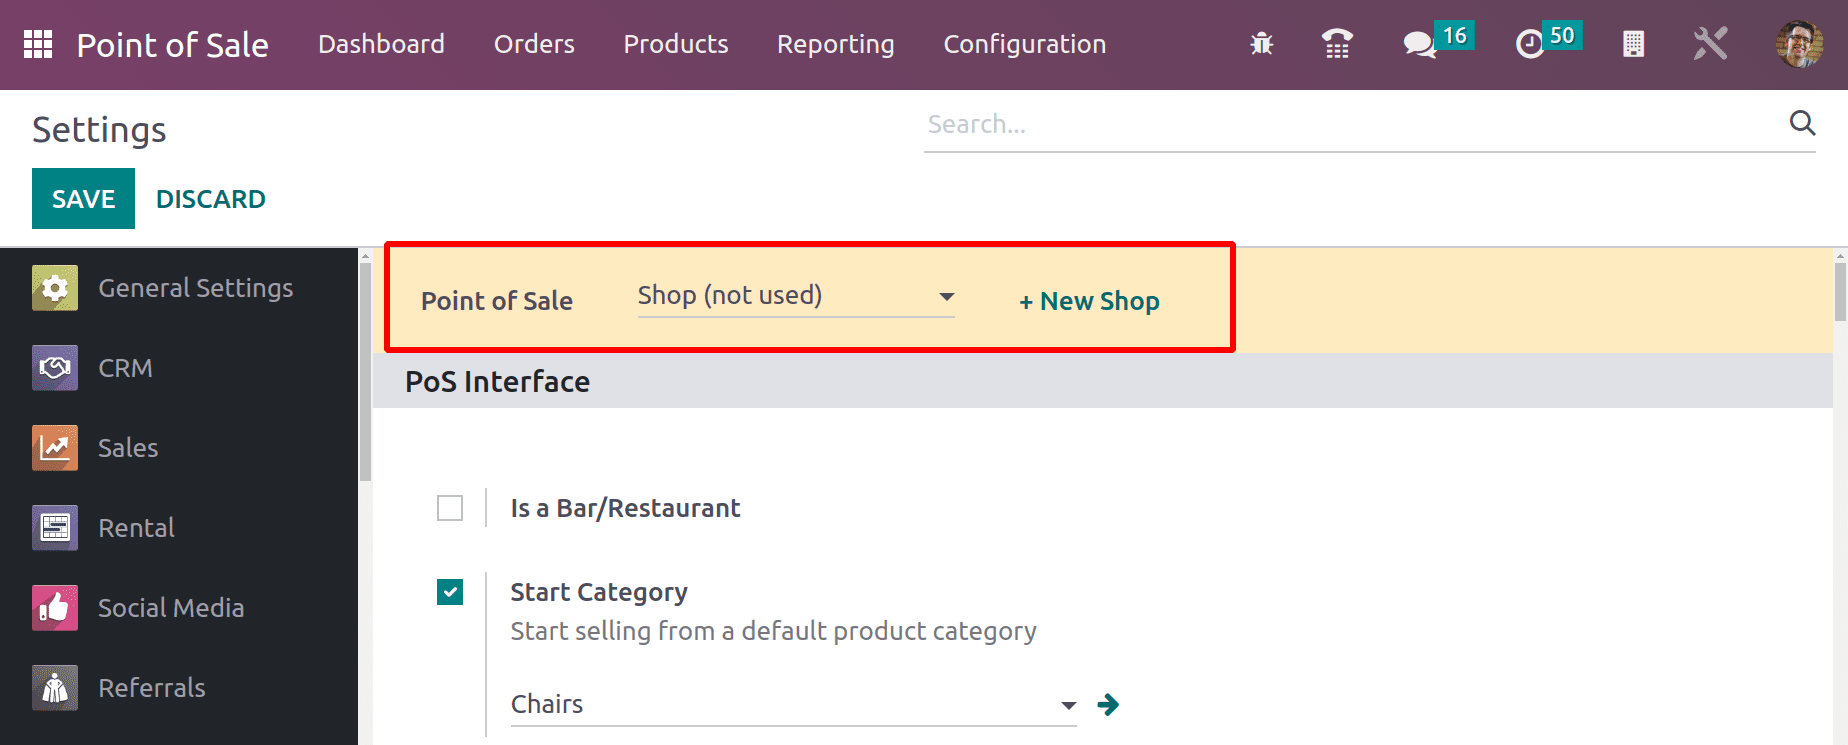
An area where payment methods can be added for the current session can be seen when the user scrolls down the Settings page. There is a Payment Methods option available here under the Payment section. Add each of the payment methods that have been configured there. Save the settings page after that.
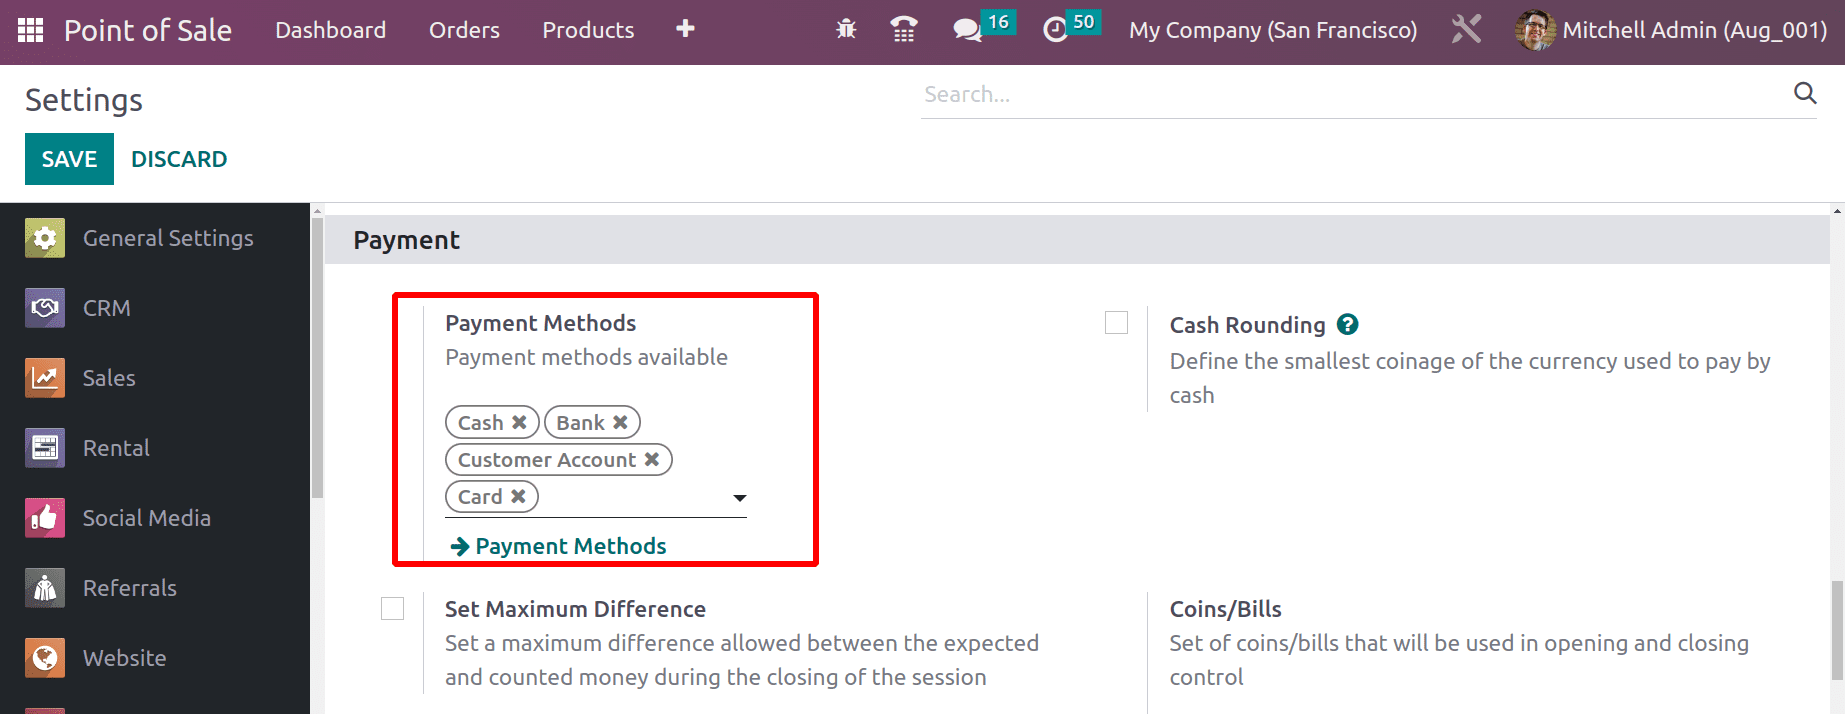
Start a session and let's go. Four payment methods have already been established. We can use each one when paying sales orders. Open the session Shop from the dashboard.

The user has now joined the session. A little window asks you to fund the session's opening balance when a new one is launched. The amount we hold in a session is known as the opening balance, which may be a balance from a prior session.
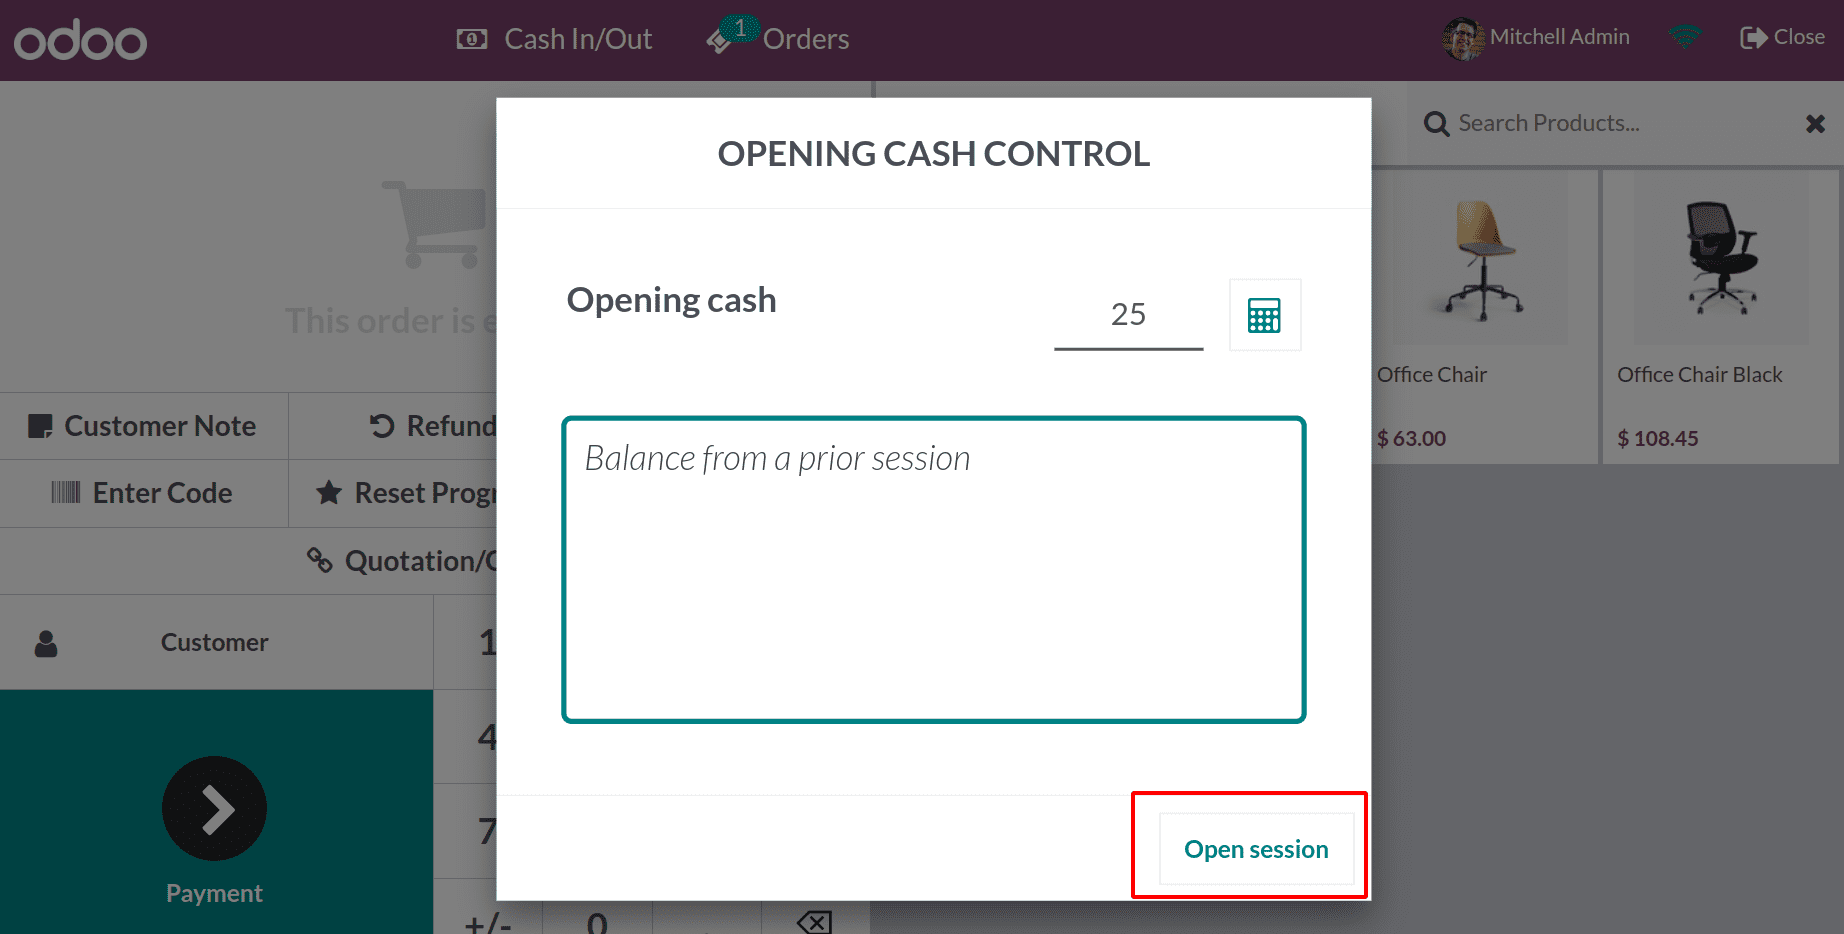
An amount of 25$ is added as the opening balance with a description of “Balance from a prior session.”
We increase the opening balance and start our session.
Let's examine the Cash In/Out option and examine its use. Select that choice.
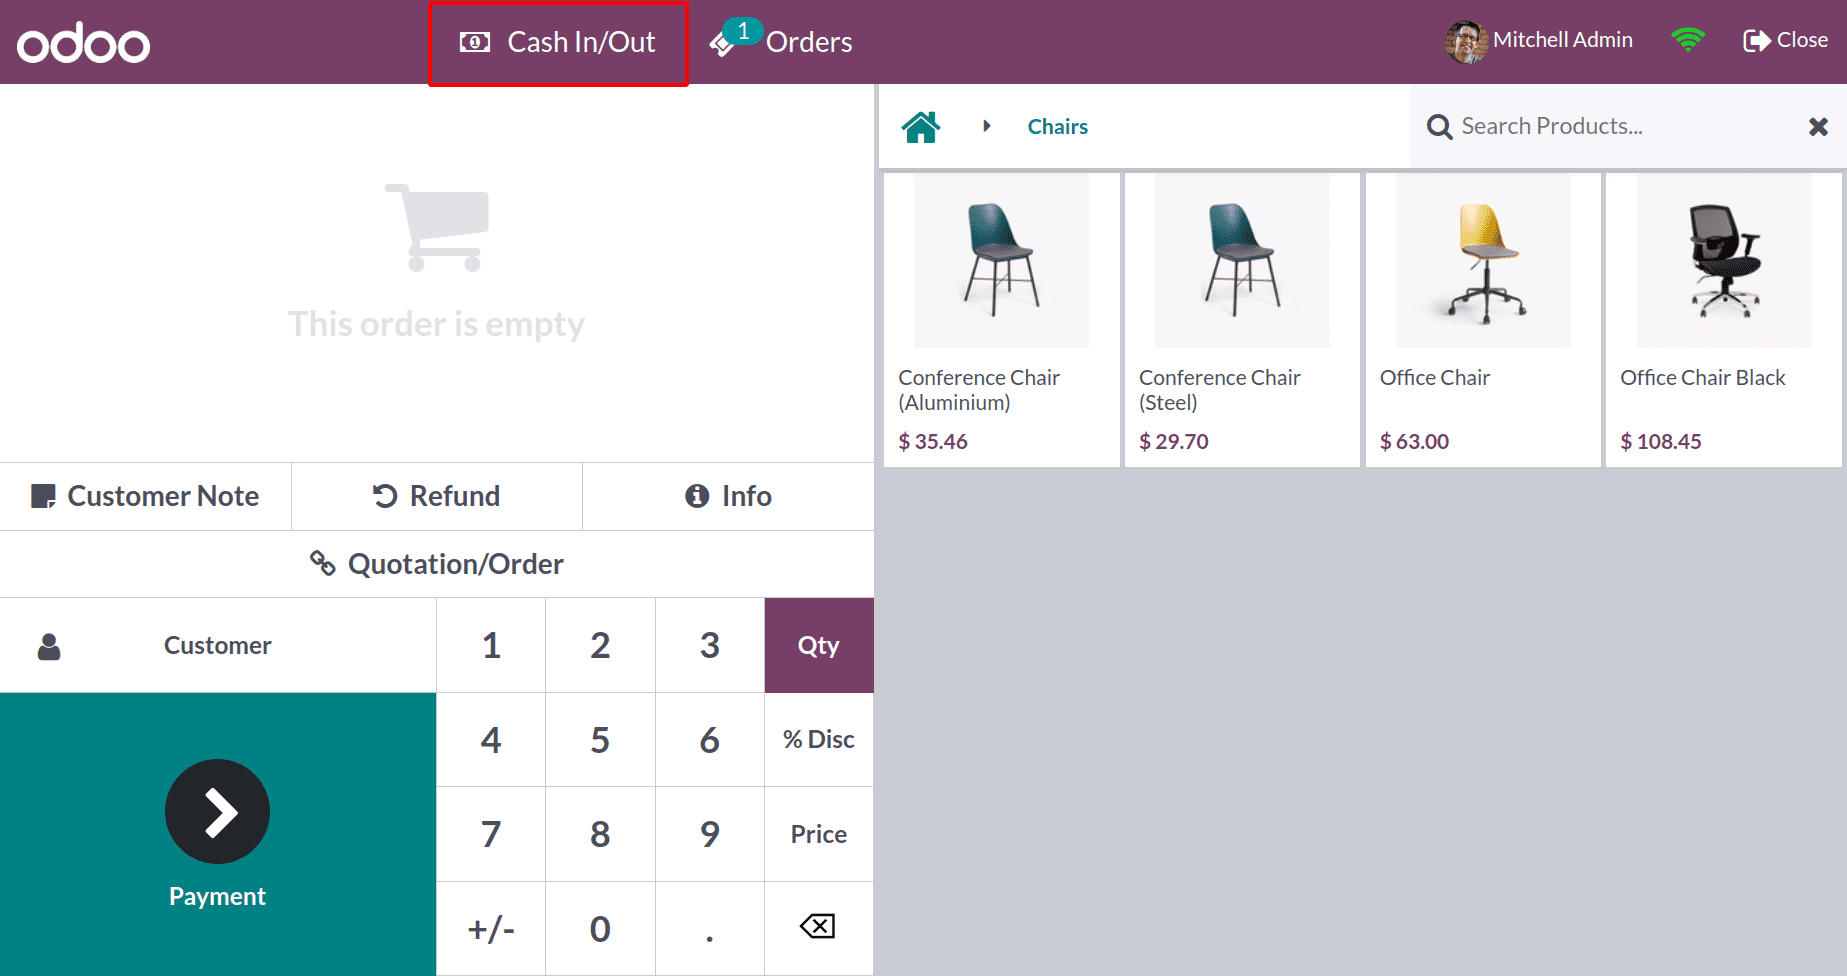
A shop employs numerous people. There may be opportunities to temporarily grab money from the cash register and return it before nightfall because they might have continuous needs like lunchtime transportation.
For such circumstances, we can use the Cash In / Out option.
Let's say a worker takes $25 out of the cash register to pay for his Lunch.
Therefore, choose Cash Out since the money will be taken from the counter. Include both the sum and the justification. Because the amount is taken out of the company account, a negative sign is automatically appended along with the amount.
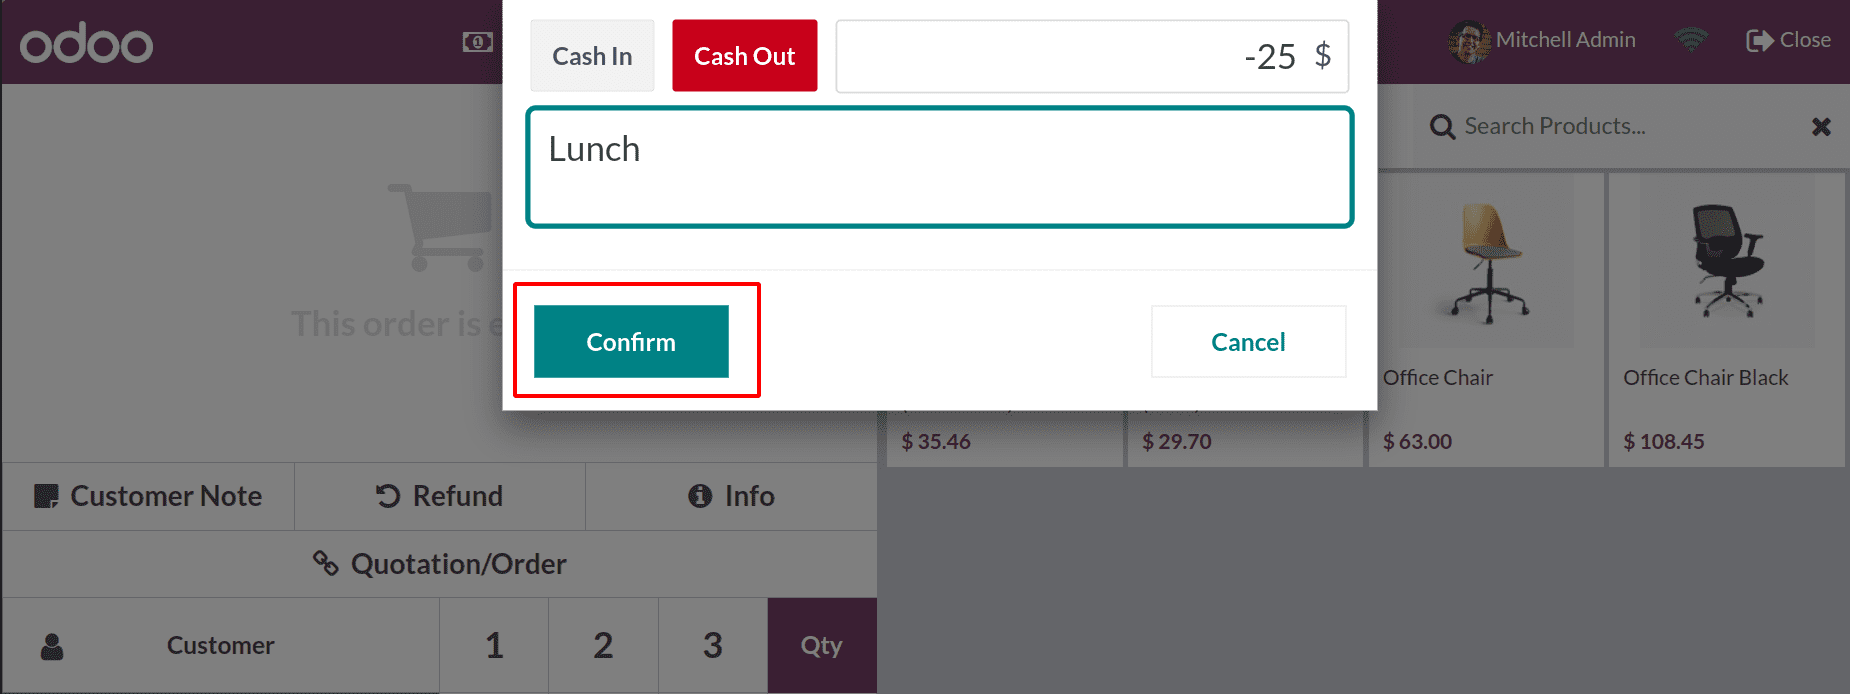
He eventually returns the cash. Select Cash In / Out one more to accomplish this. Once more, the tiny window appears. Select the Cash In option from there. Include both the amount and the reason. It is verified.

Then, let's check how the customer pays for their orders in this session.
For the client Addison Olson, users placed a selling order for an office chair with just one quantity totaling $63. By hitting the payment button, let's proceed to the payment counter.
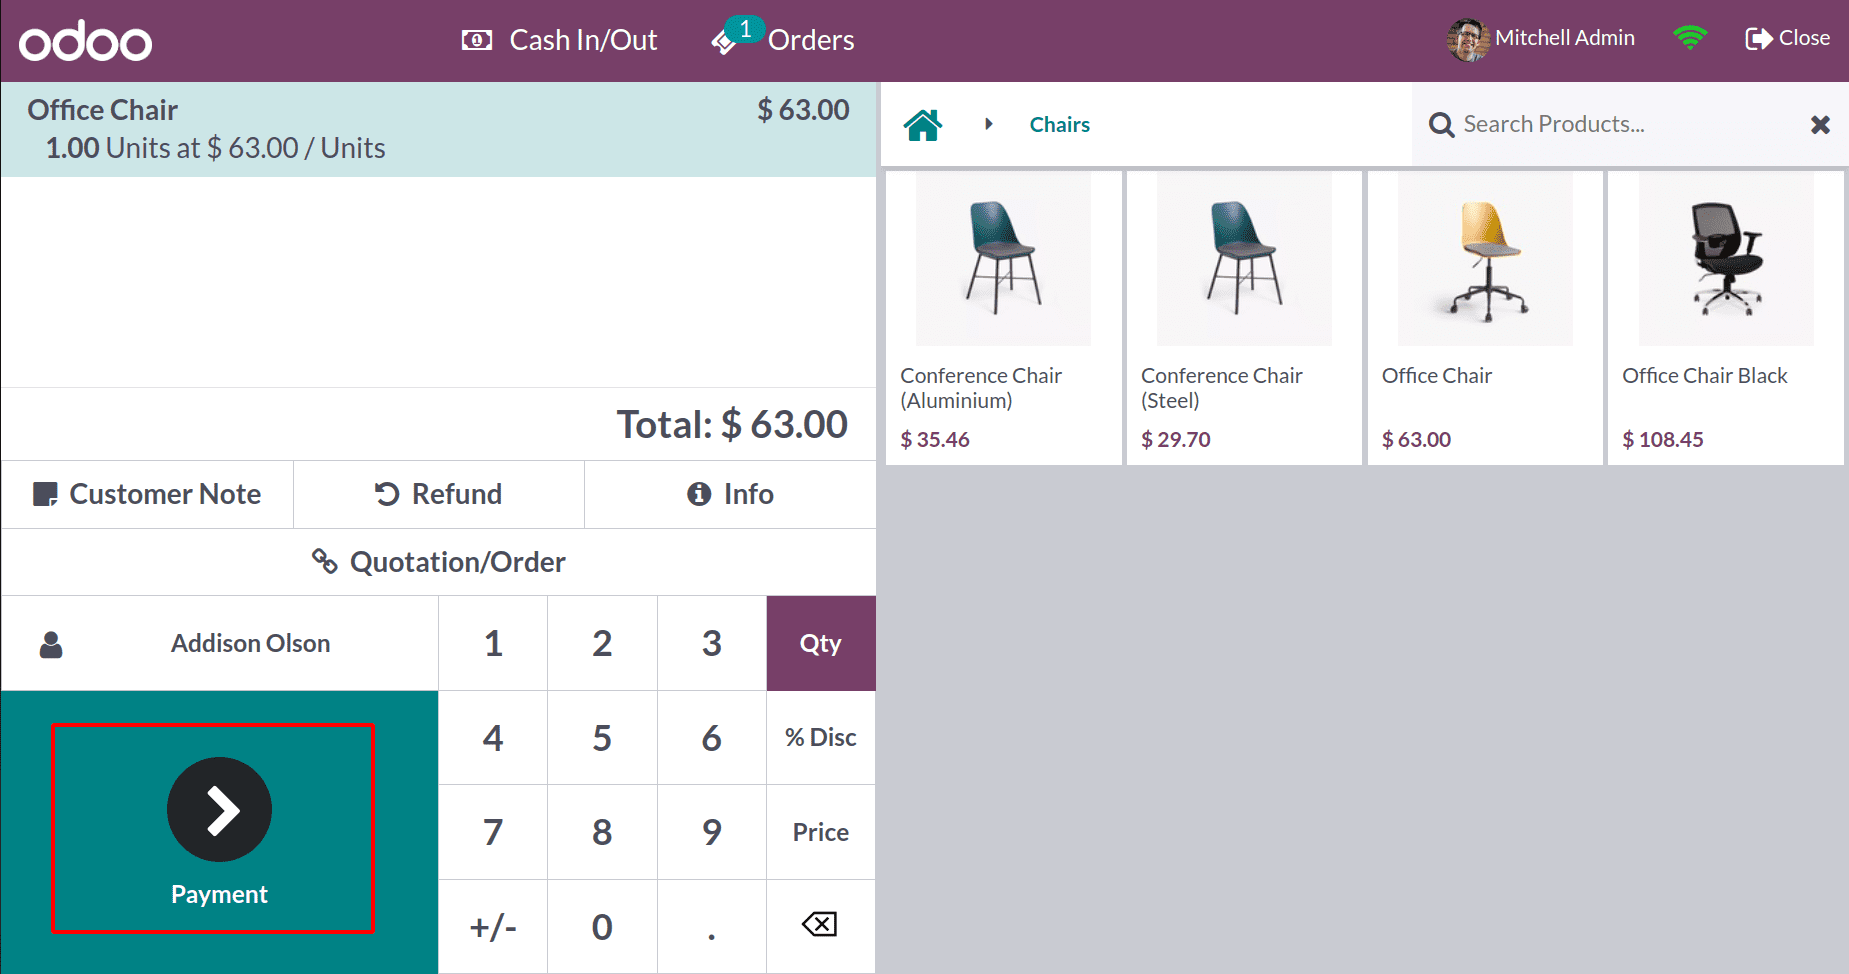
After that, we can choose our payment alternatives.
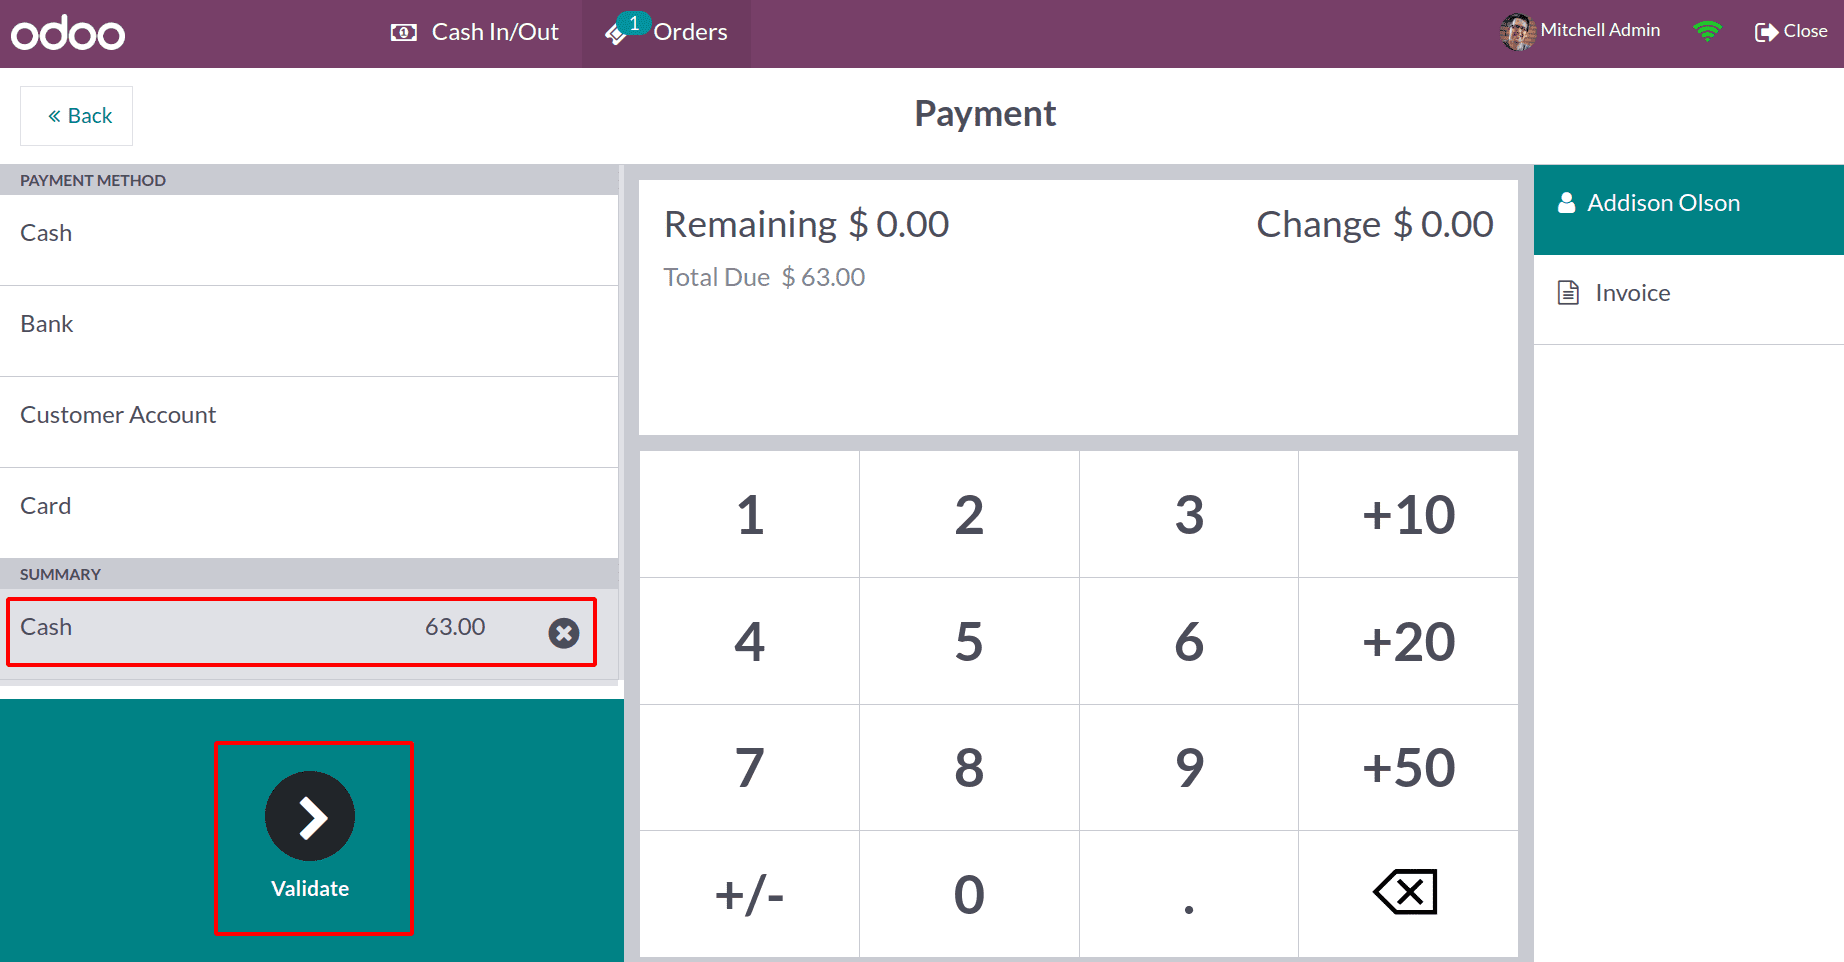
We constructed four techniques before displaying them. Given that he made the payment in cash, our customer chose the Cash option. In the image shown above, the exact amount paid in cash is visible, verifying the order. You can create an invoice there as well. Now that we're not creating an invoice, let's confirm the payment. A receipt will then show up. There are two options at hand. One is used to mail, while the other is used to print the ticket.
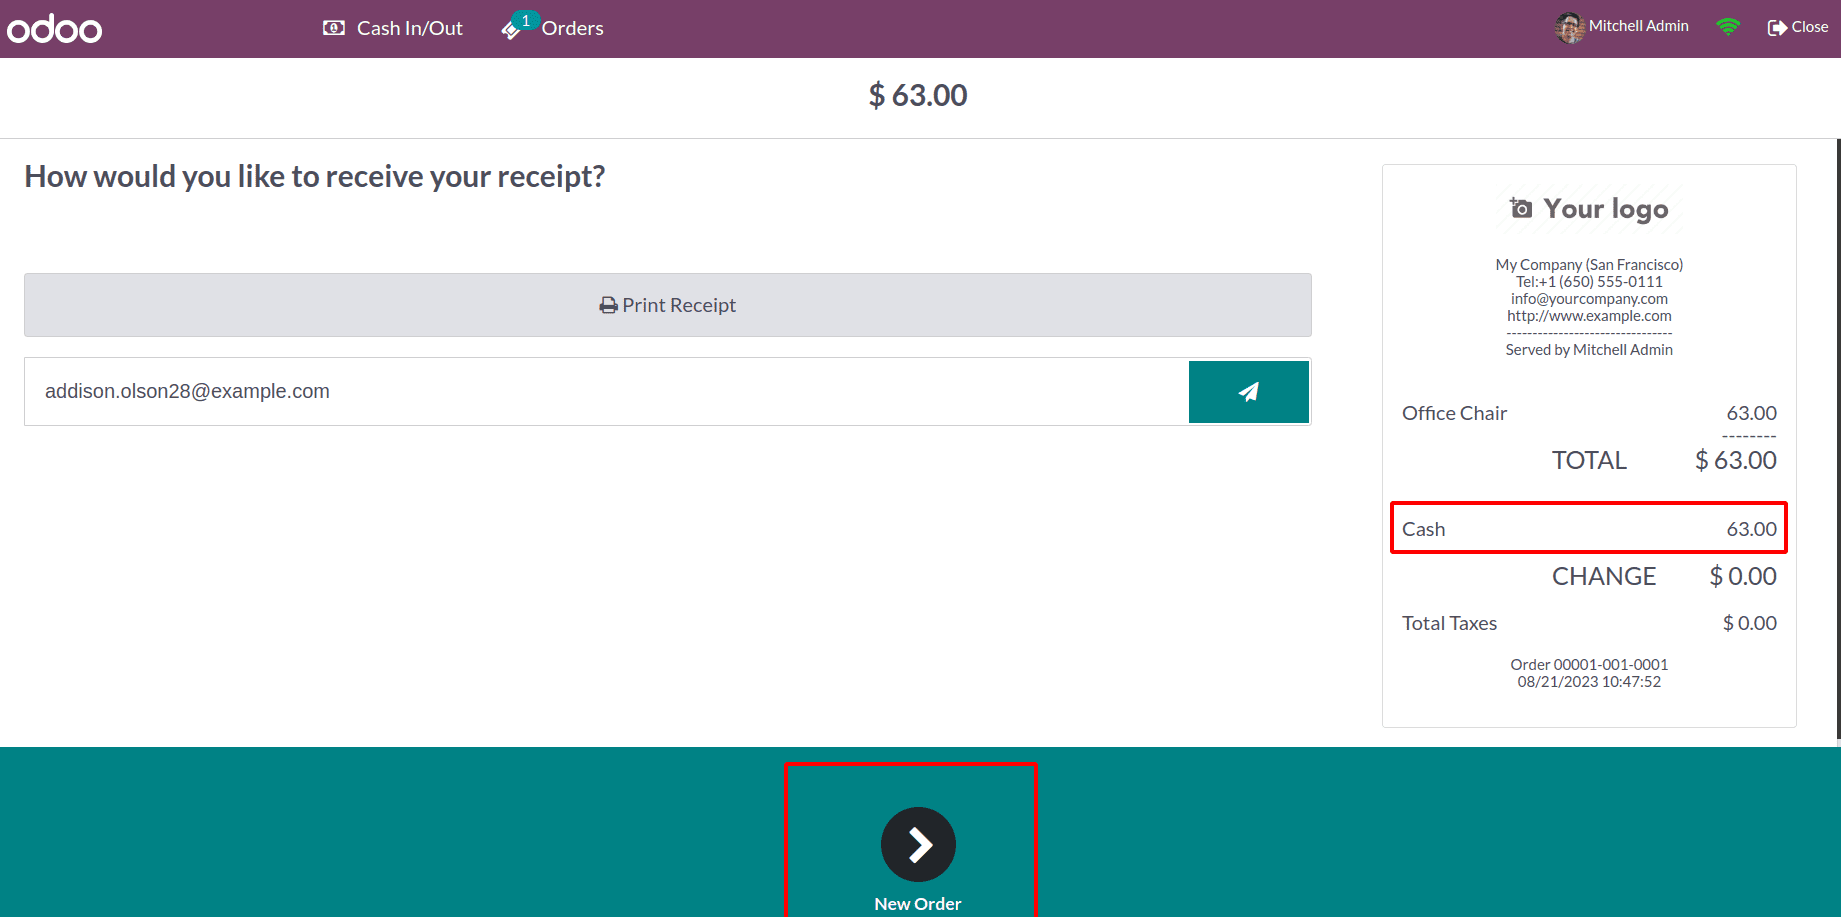
By selecting the New Order button after the current order has been finished, we can proceed to the following one.
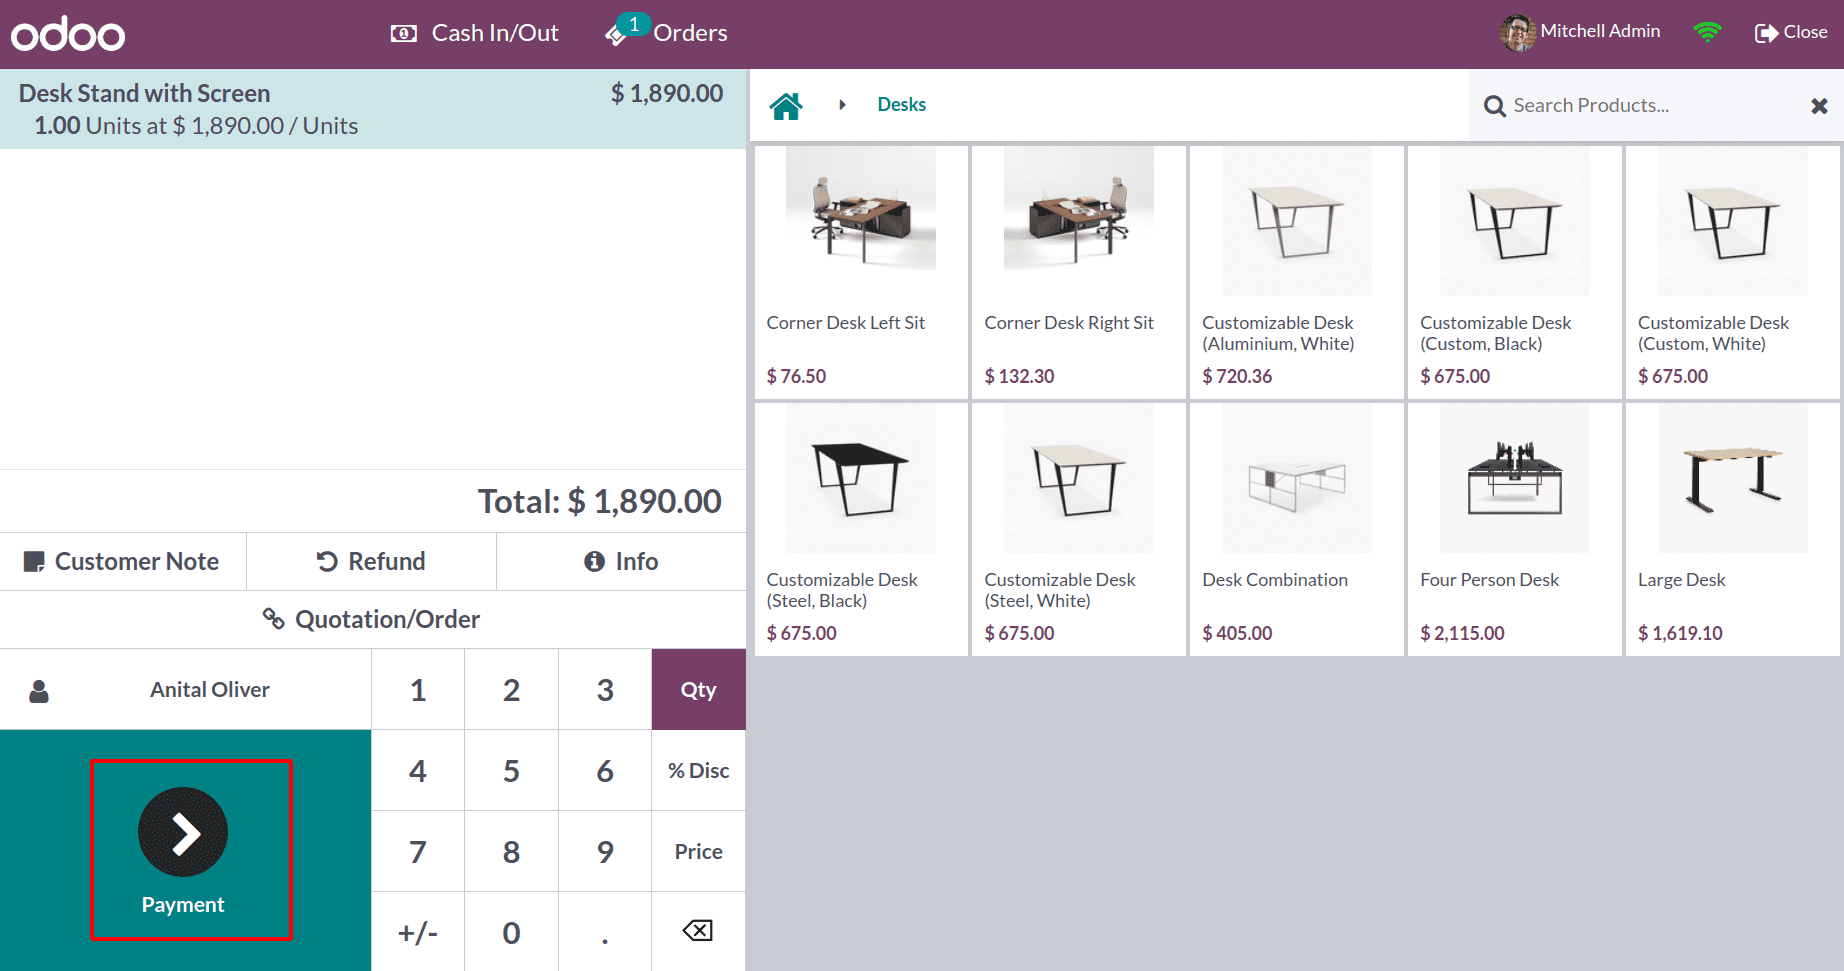
Now, let's see how we can apply the Bank's method. After that, we will be able to create a new order for a different client. Our second client, Anital Oliver, received one of our Desk Stands with a Screen from us. Click the Payment button.
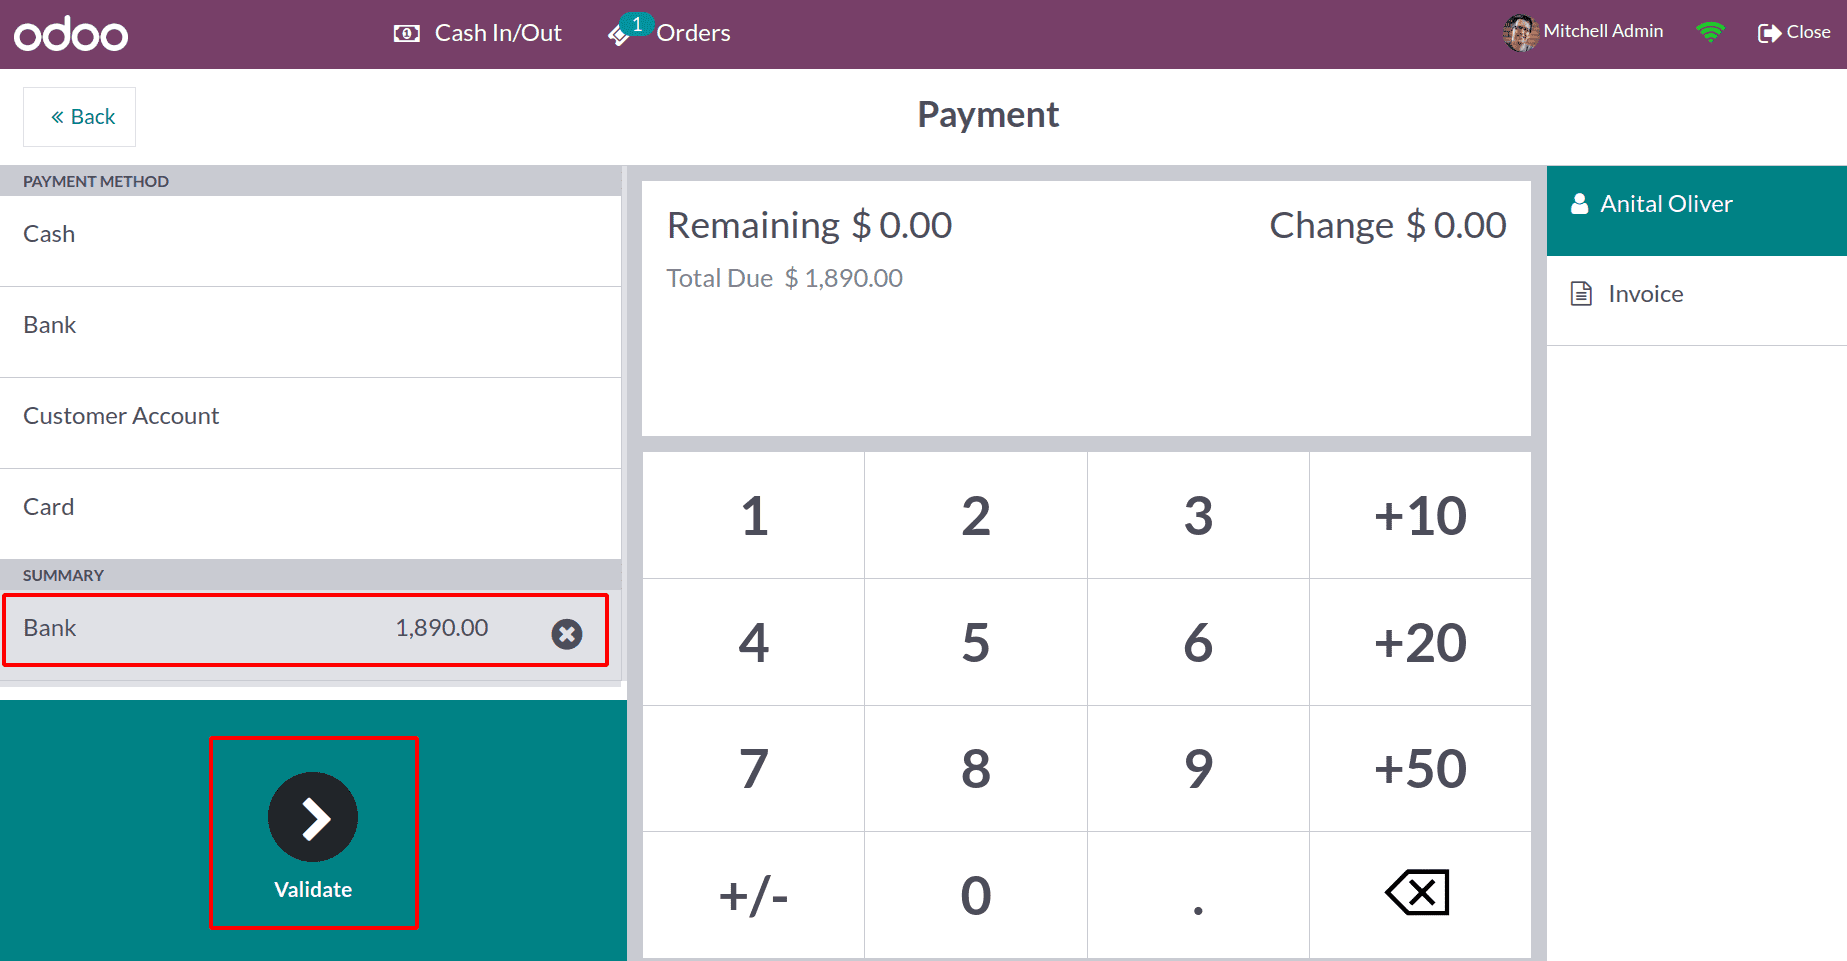
Select a bank from the list of available payment options. Currently, a bank transfer is being used to pay the total amount. After that, the payment will be verified.
Now the receipt is shown. Details include the payment type, the amount paid, the number of products, etc.
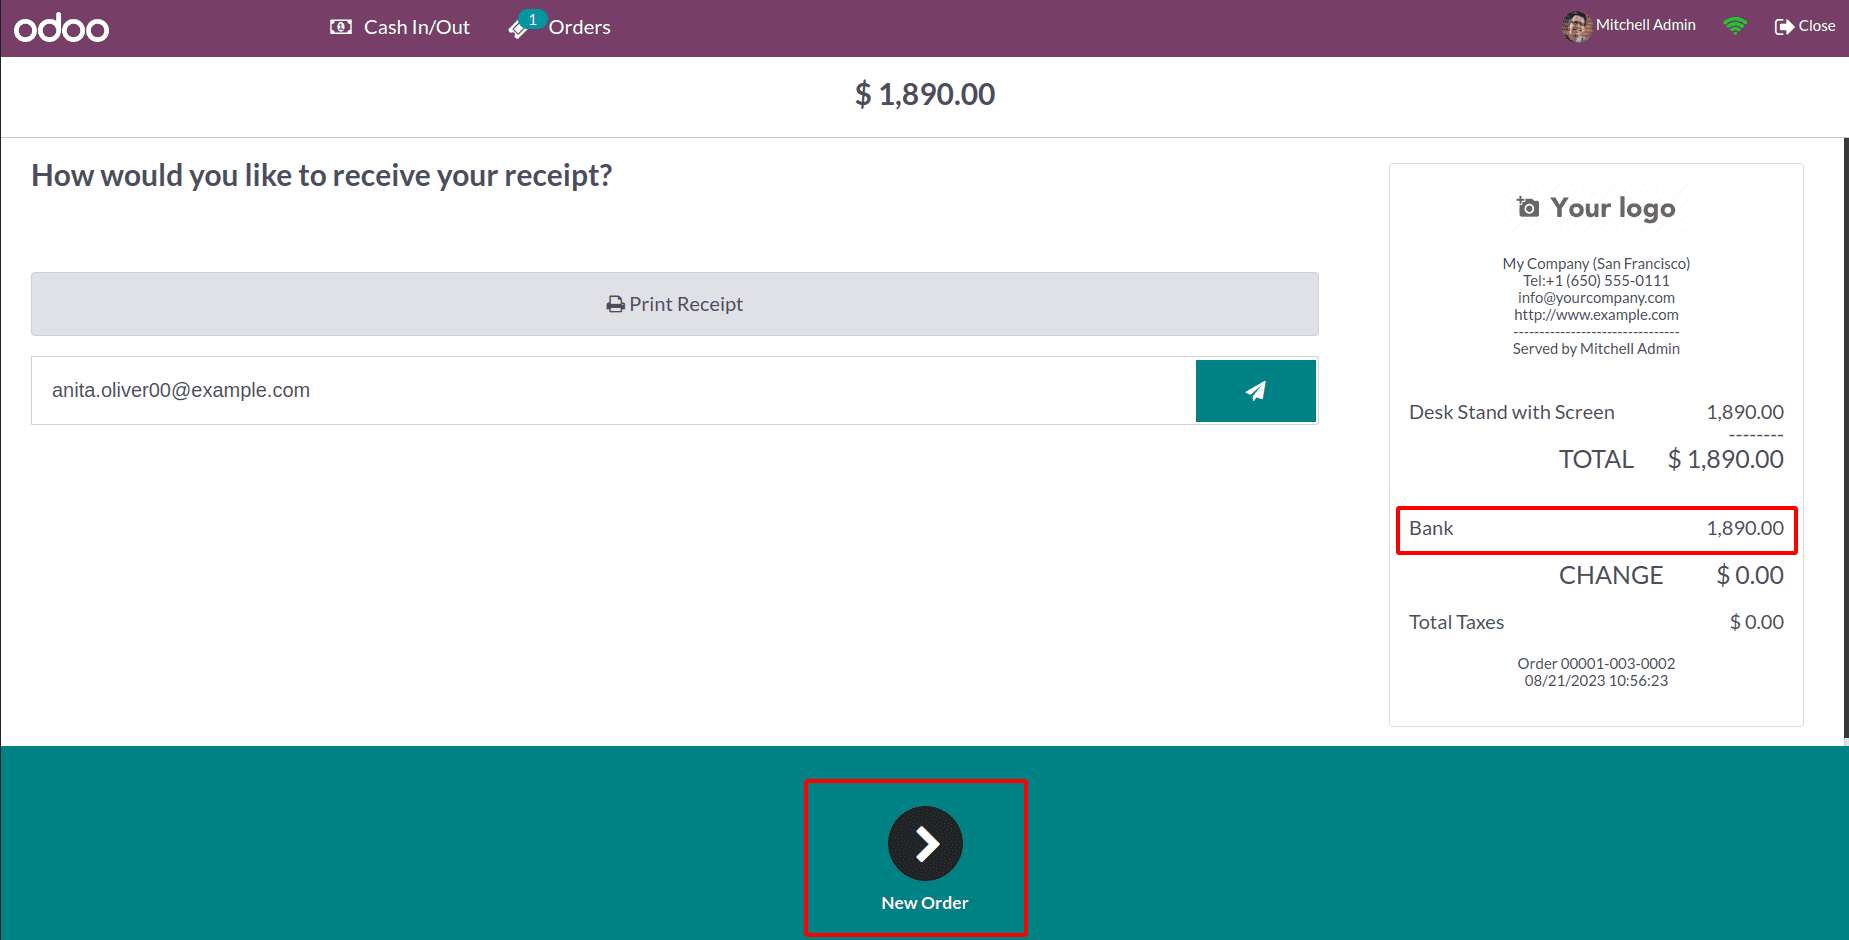
By selecting the new order button, we will then go on to the following order.
Select the third customer to view the payment method Customer Account. James has been selected as our third customer, and ten storage box amounts worth a total of 142.20 dollars have been sold.
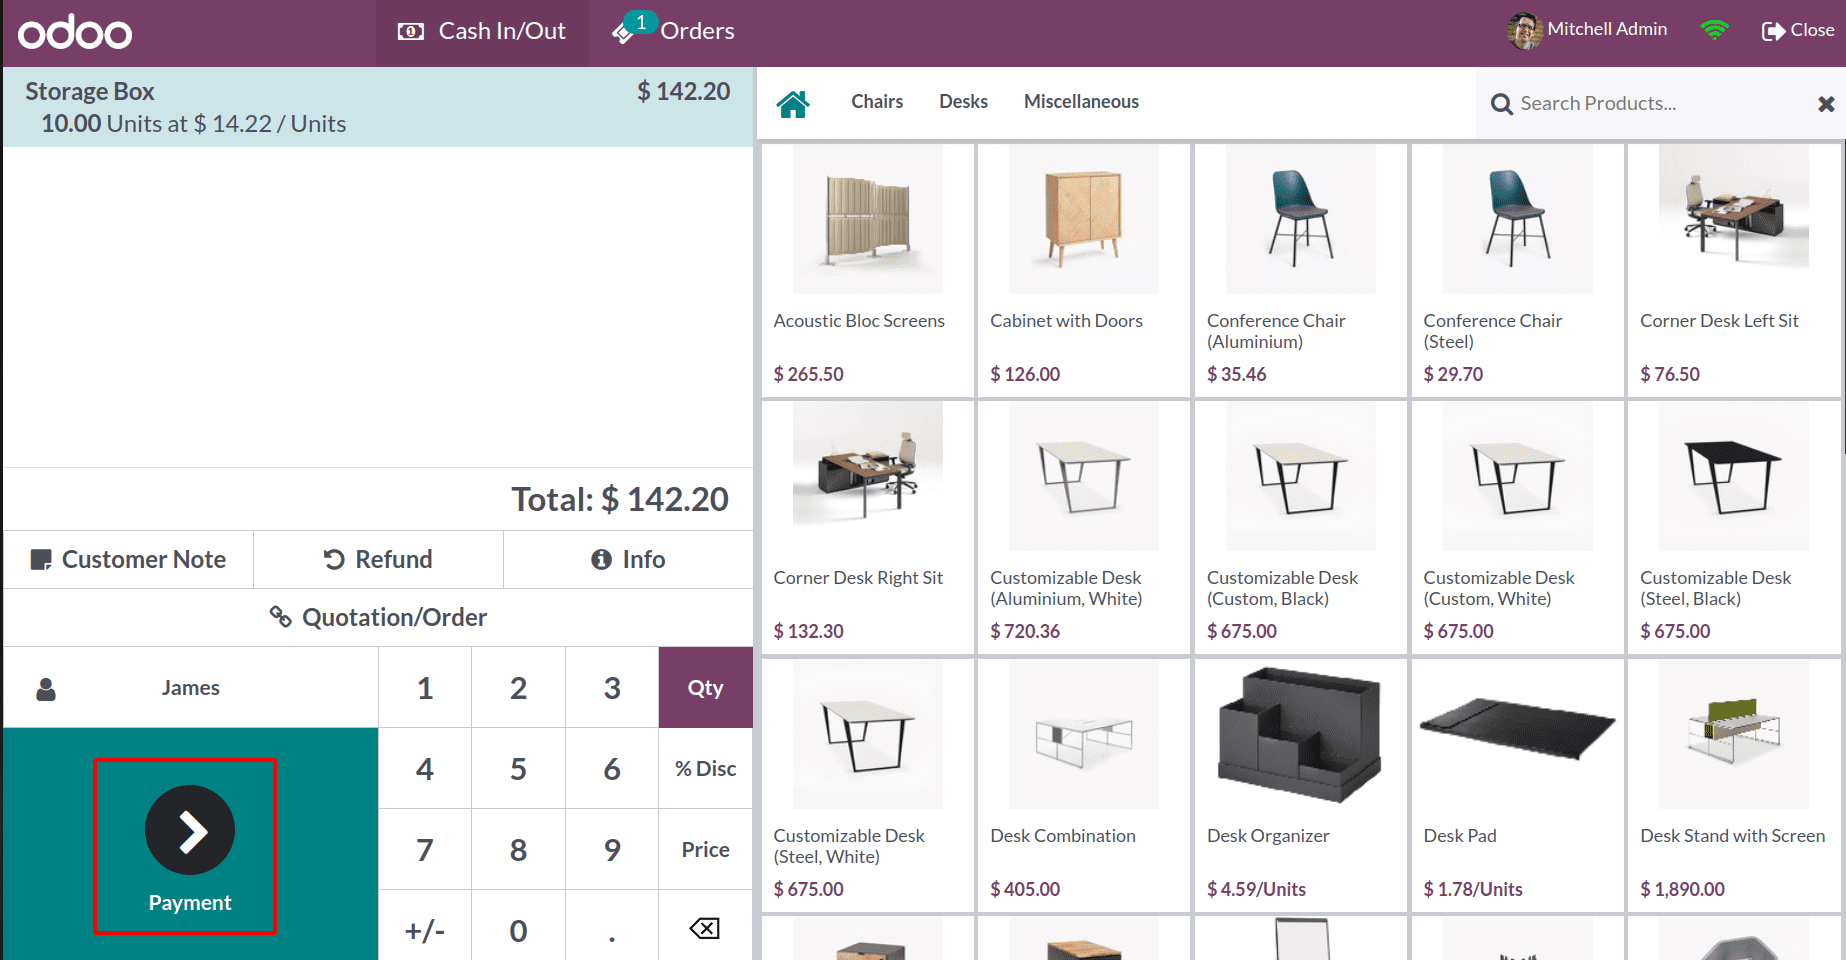
Let's proceed with a payment and select the customer account as the payment method. As was previously said, the client utilized this substitute, which is comparable to a credit card, as opposed to paying with cash.
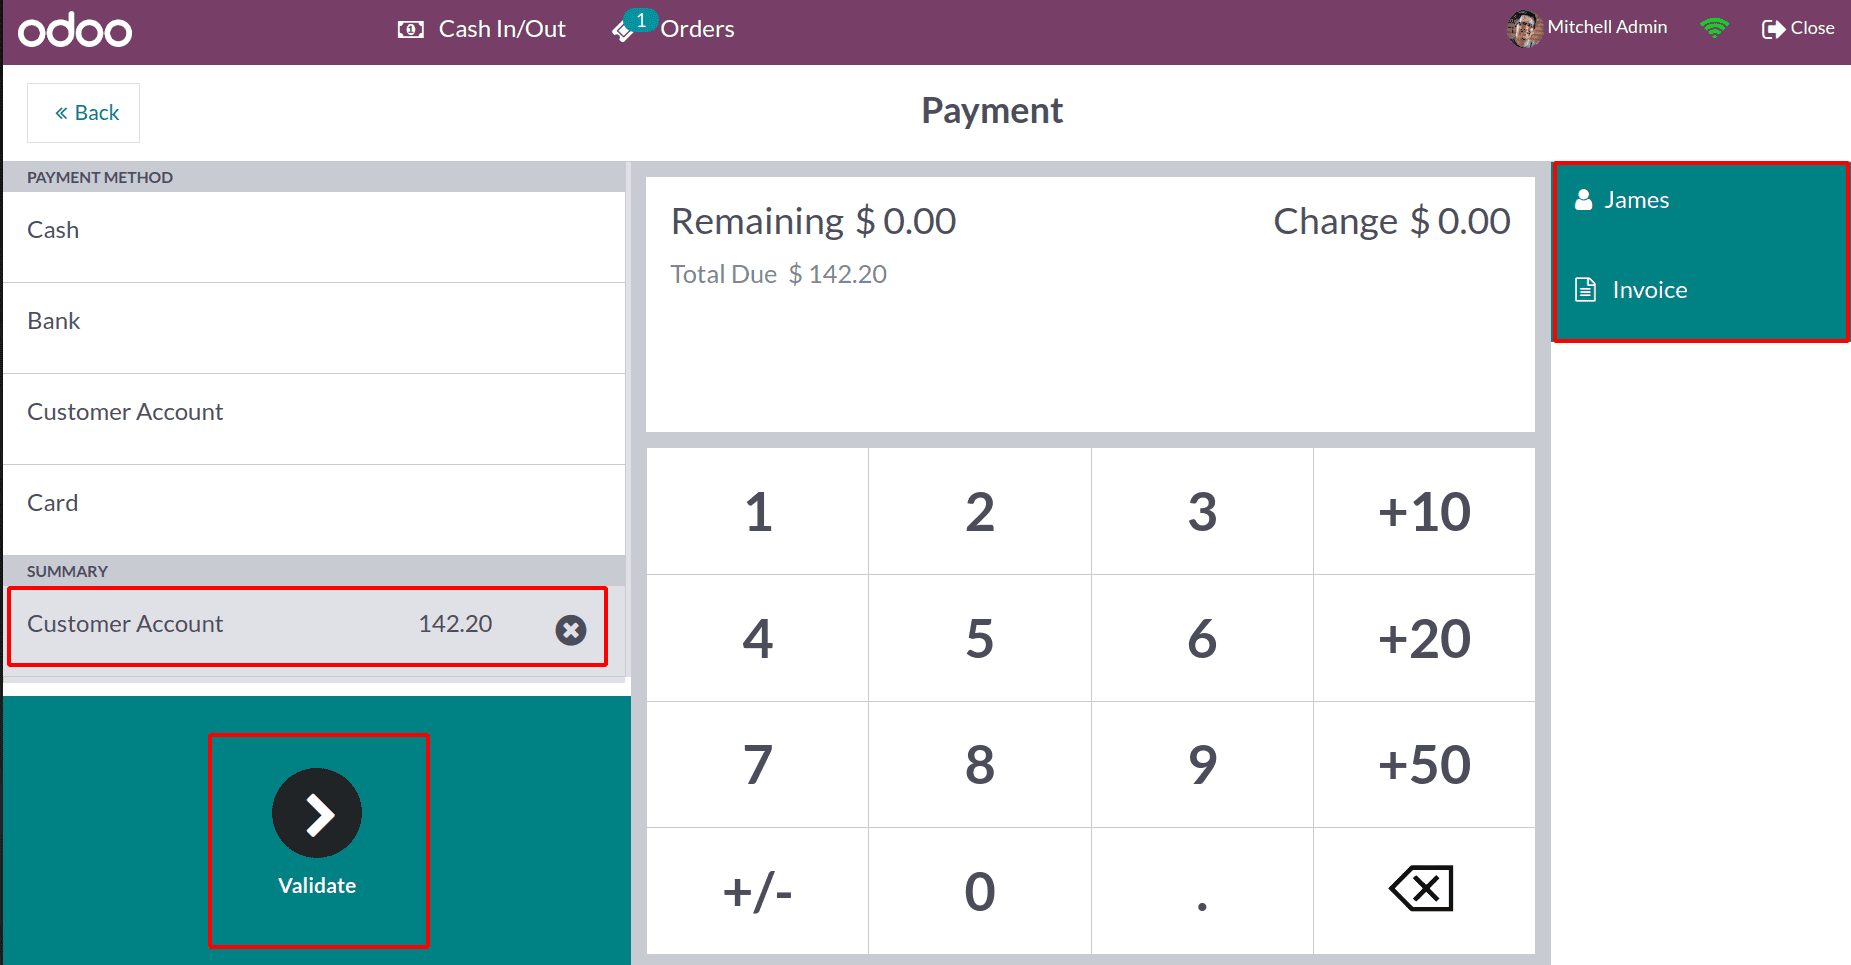
Let's create an invoice straight away. Click on Validate after selecting Invoice from the list. As a result, a receipt is produced, and a back-end invoice is produced. The receipt showed the payment was made using a customer account.
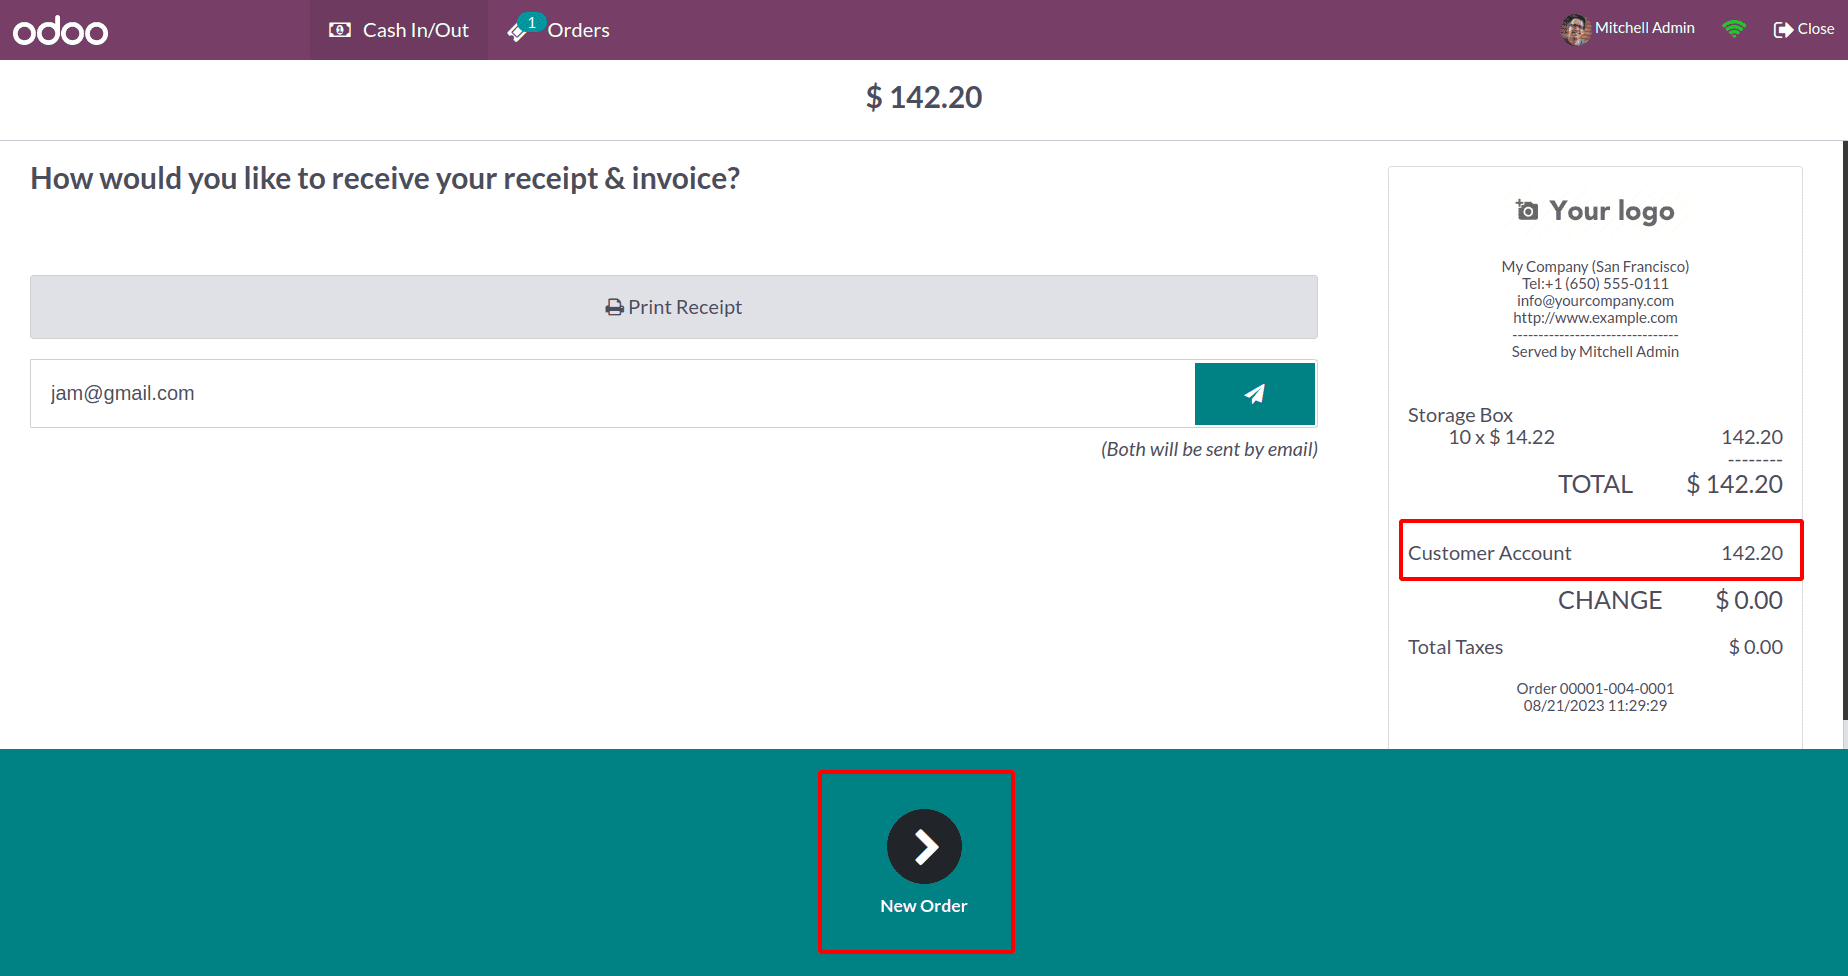
To change to a new order, click the New Order button. Let's choose another customer to use the Payment Terminal's fourth payment option. New client Beth Evans, has been selected. He made his selections, added up the cost, and then clicked the Payment button to finish the purchase.
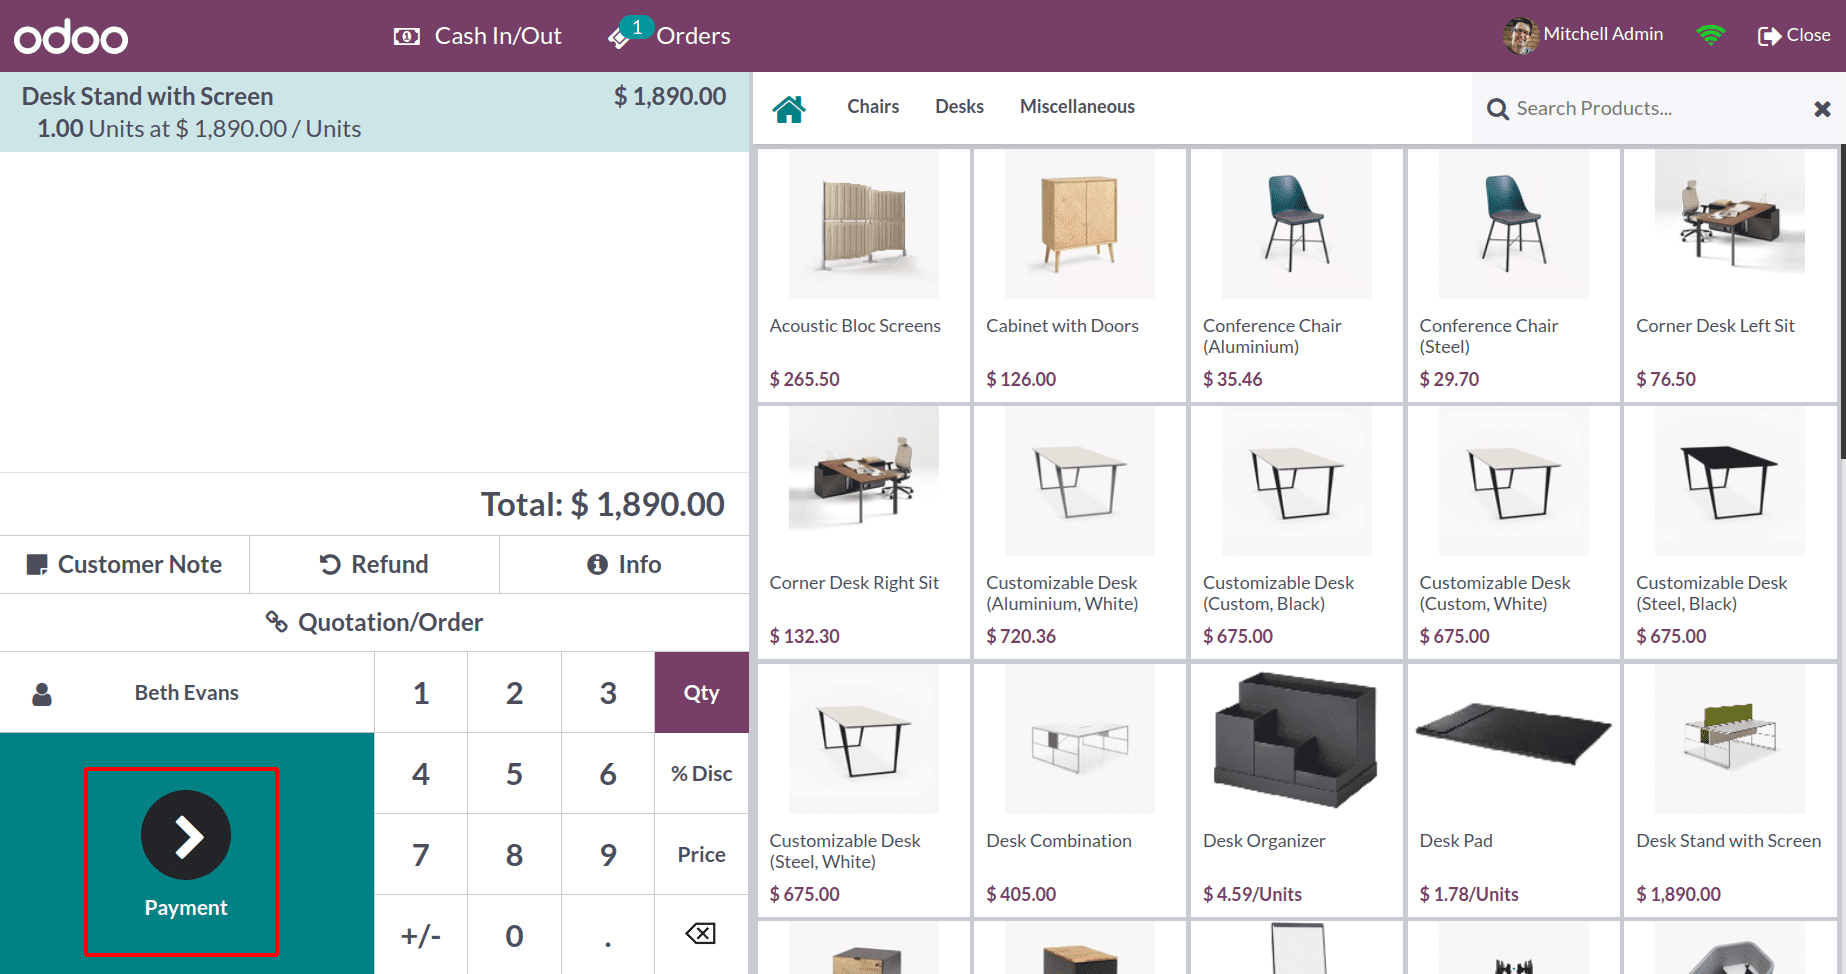
Choose the Card as the payment option. It is then waiting for a payment terminal, as we can see.
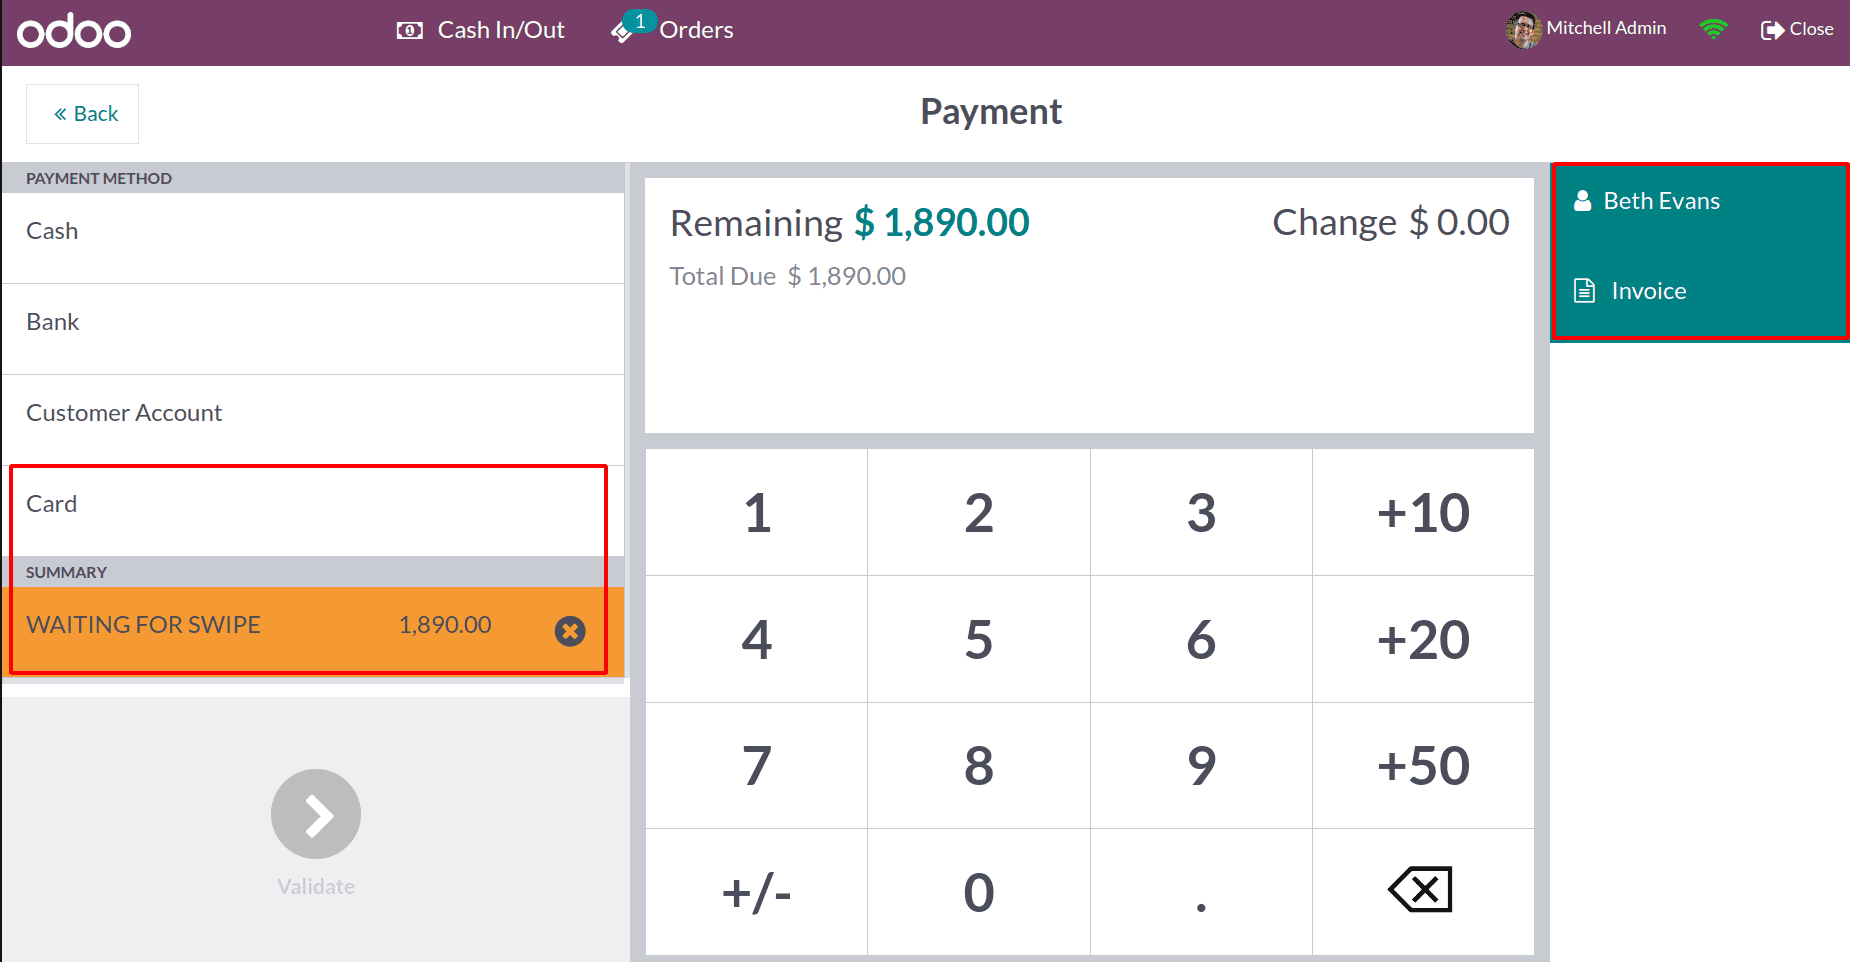
We had to swipe the card as usual because we used the method Card. For this order, we can also create an invoice.
A terminal must be used in order to use this kind of payment.
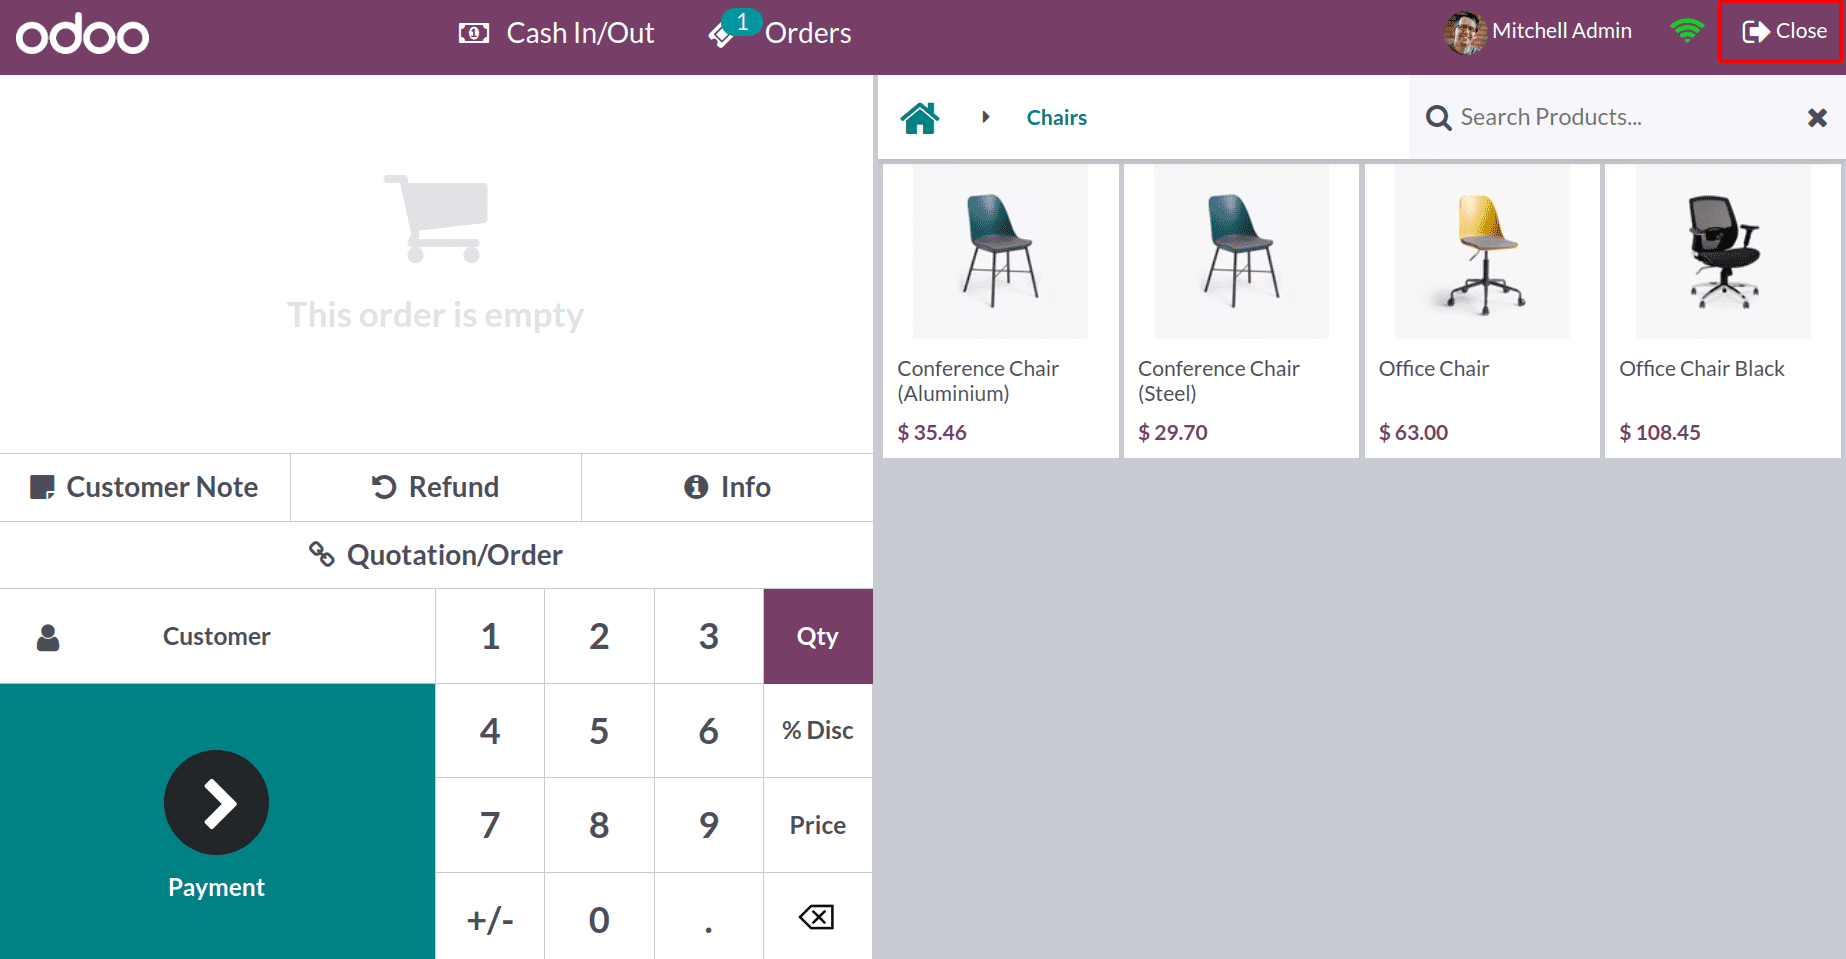
Once all orders have been processed, we can call the session to a close. To accomplish this, select the Close option on the right side of the screen.
A fresh window then appears. We then receive the complete order information, including the start and end hours. From the closure control panel, we gather the total orders, payments, and cash-in, and cash-out information.
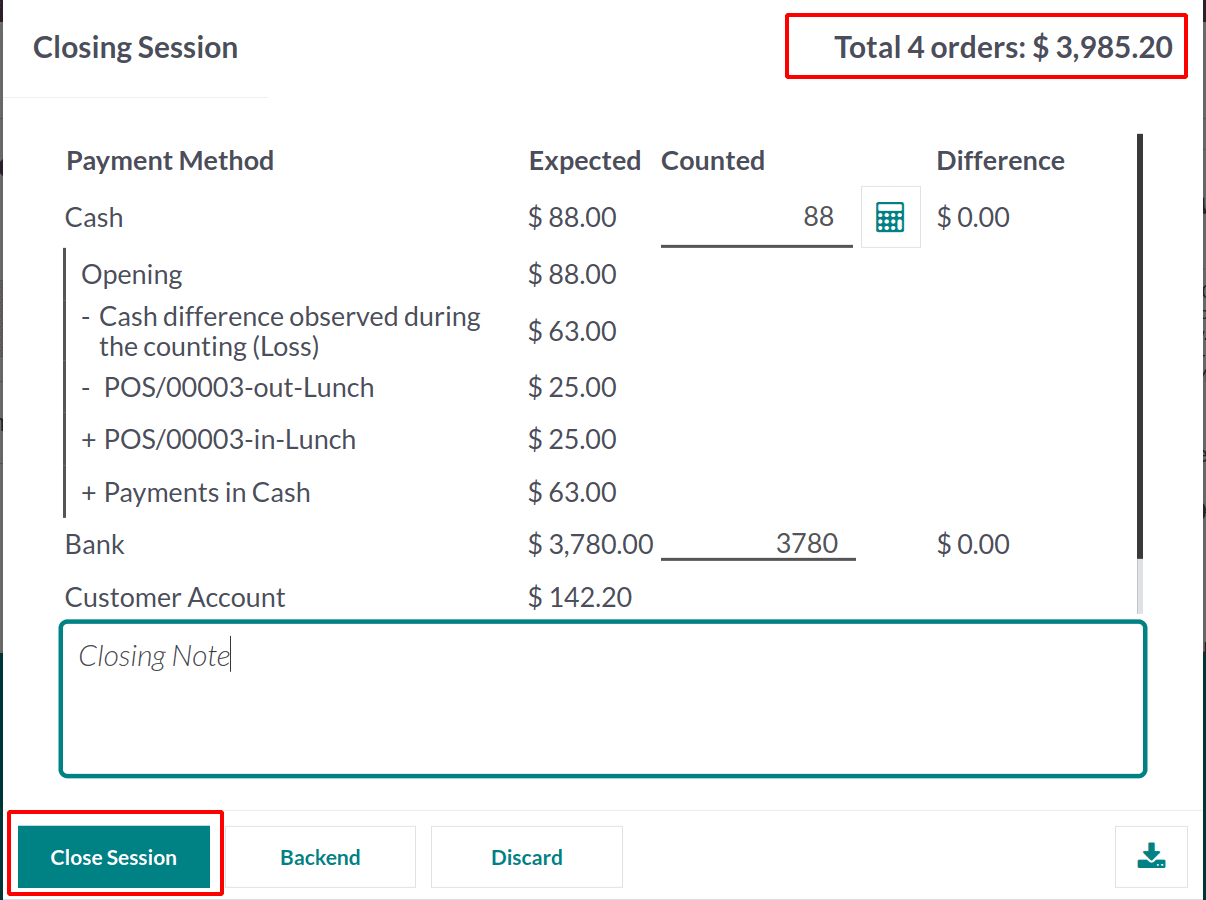
Each payment method's total is shown separately in this area. Enter the total that was counted in the cash column. You can also include any notes you like.
After that, we may decide whether to end the session or continue to the backend. To choose one of these choices, scroll down to the bottom of the page. There are three options on the table. Discard, Backend, and end the session. Once all orders have been cleared, we can call the session to an end.
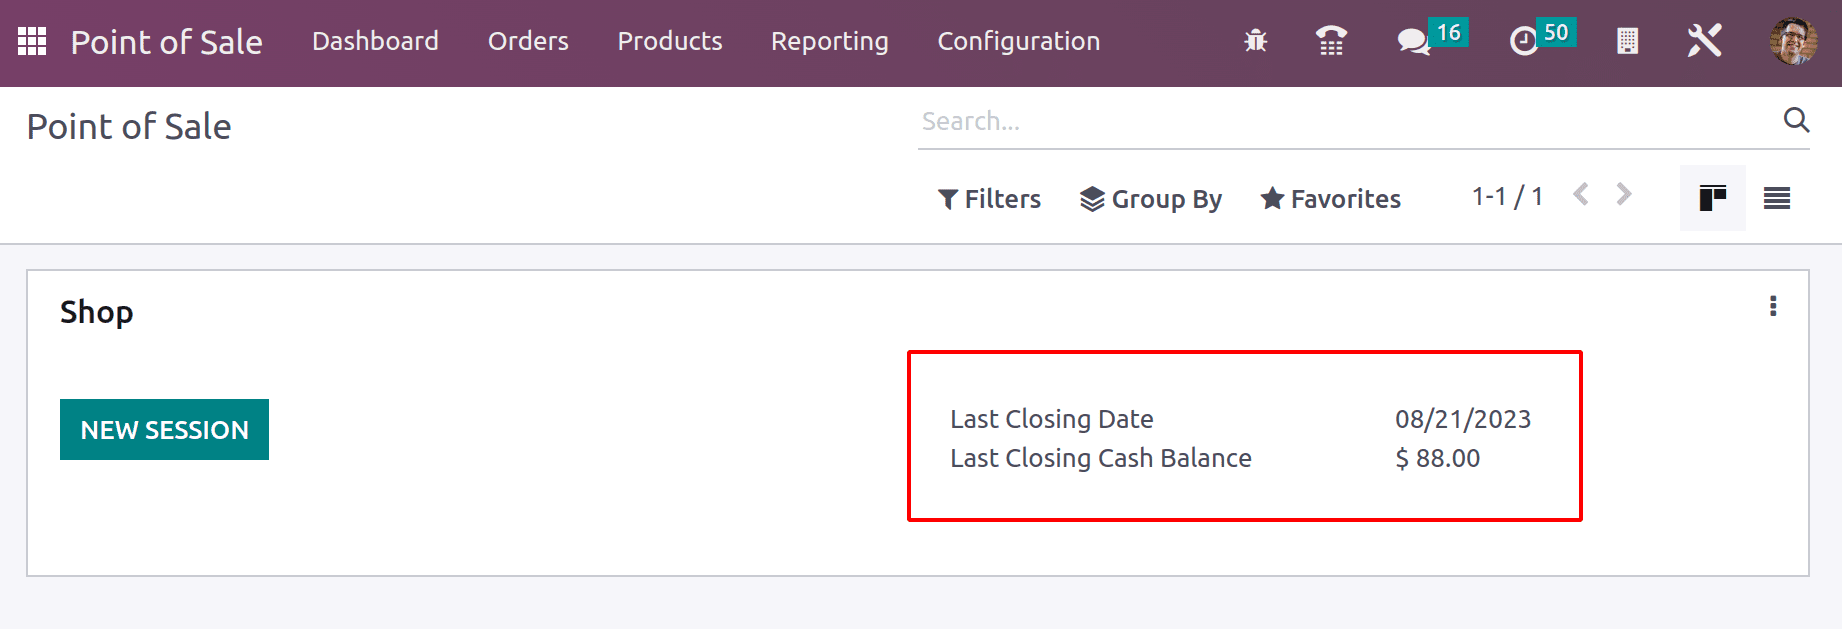
Immediately after the closing session, we head back to the front end. We may watch the Shop session there. There are also the Last Closing Date and the Last Closing Cash Balance.
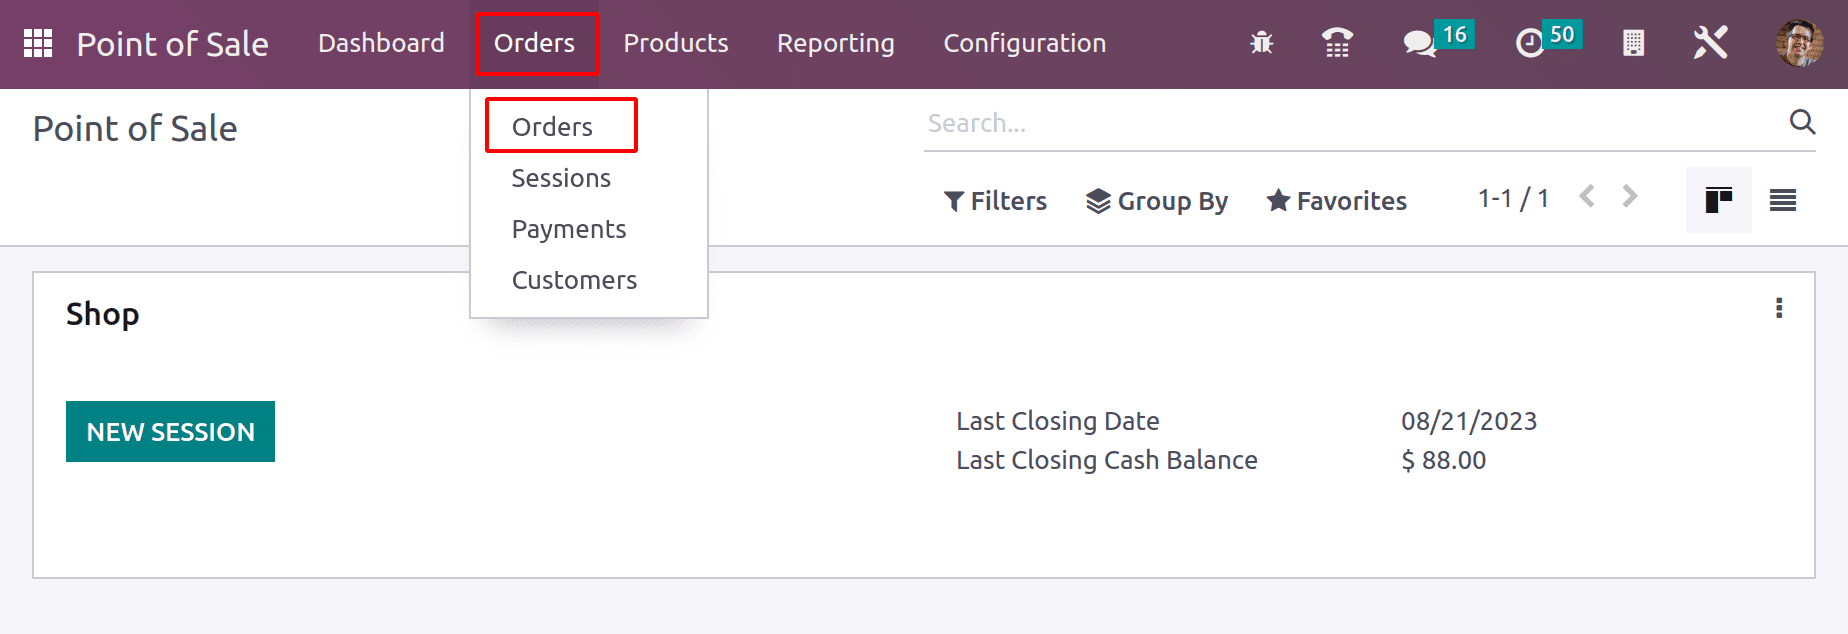
We can view every order created, every order completed, every payment made, and every customer from the Orders page.
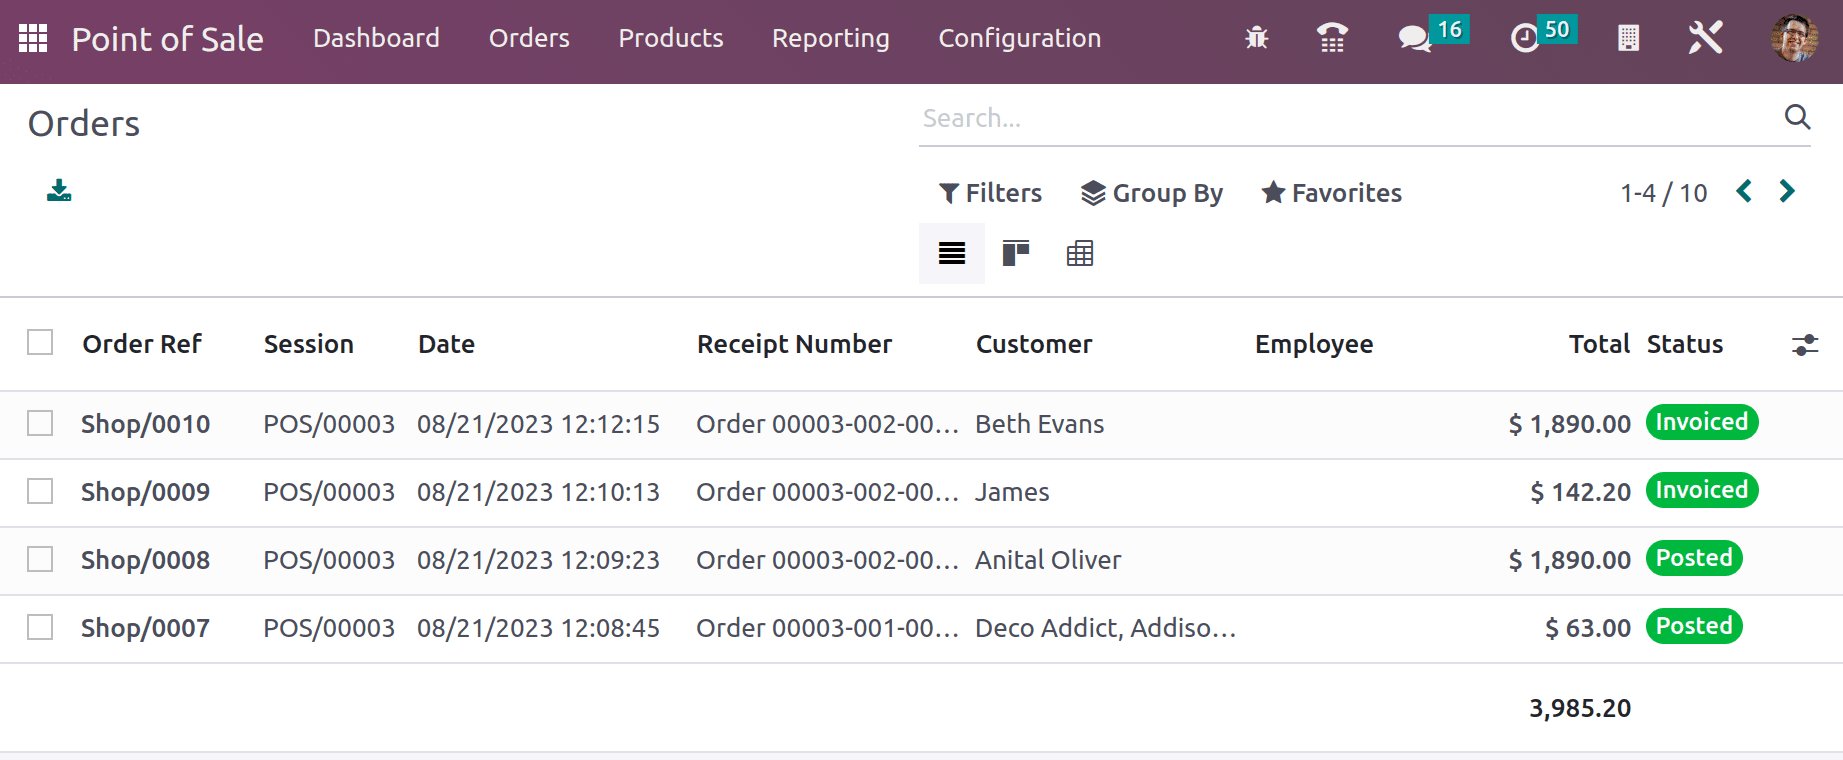
The orders tab allows us to view the orders we've already created as well as the overall cost. Includes information about the customer, employee, status, date, order number, and POS session. Due to the fact that we only created invoices for two orders, when I checked the status of the orders created, two of them were in the Invoiced stage and two were in the Posted stage.
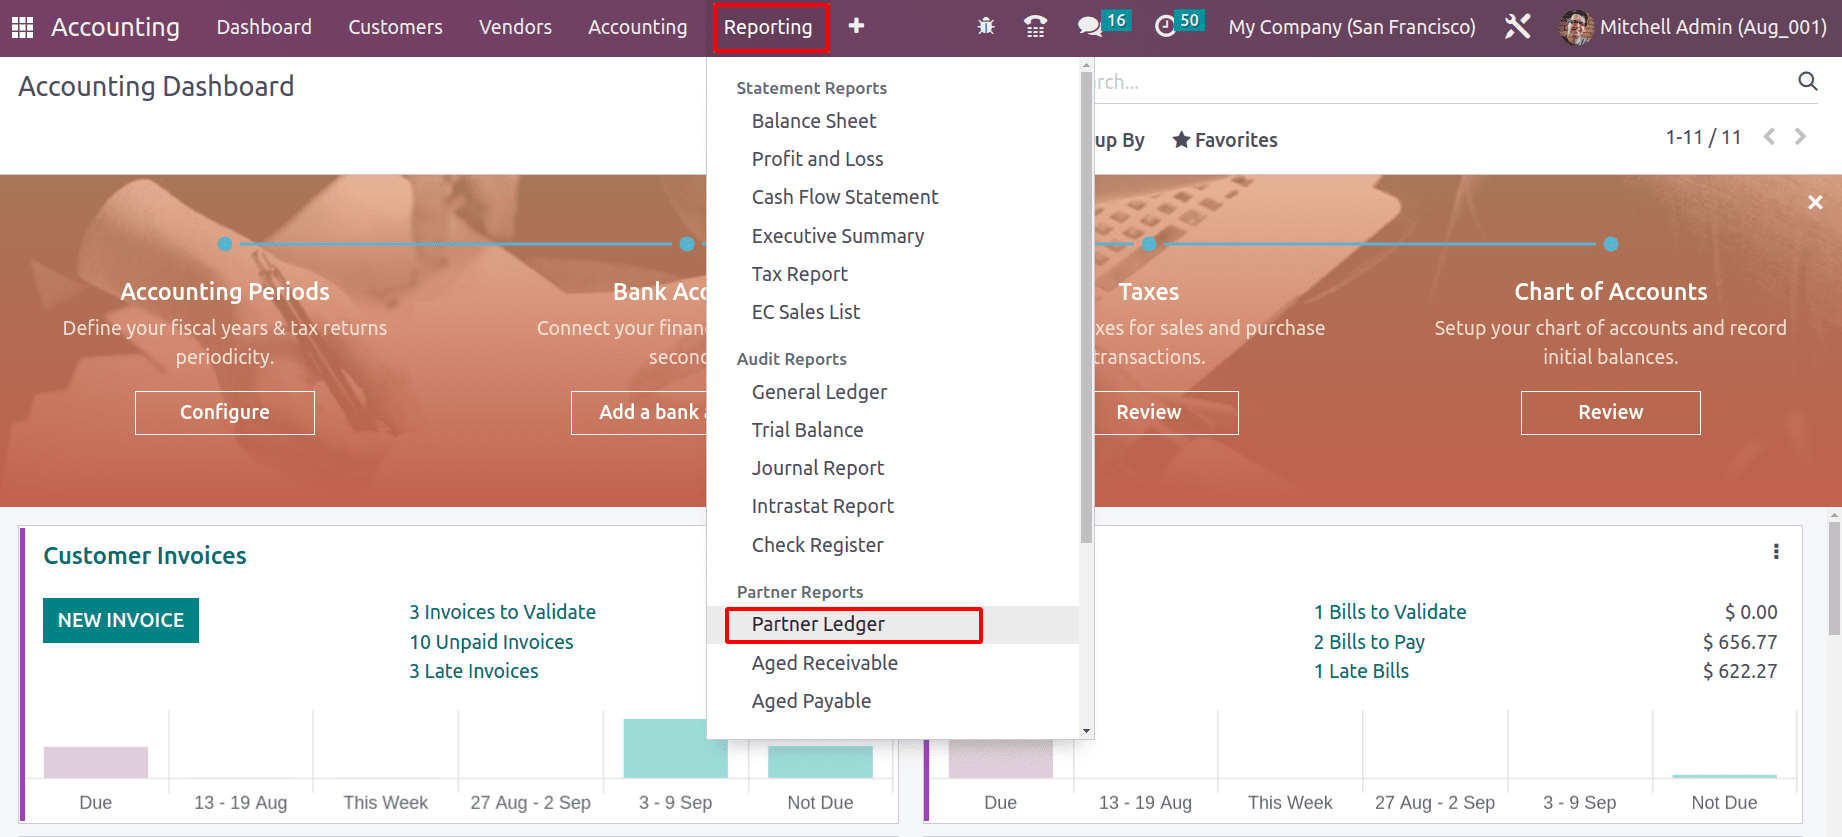
This customer, James, used the Customer Account payment method to make a payment. We clarified that since the user hasn't paid the balance, the situation is comparable to that of a credit card, and the transaction can be seen in the Partner Ledger.
In order to choose Partner Ledger from the drop-down list, go to the Accounting module, pick the Reporting tab, and then click OK.
This entry is debited for 142.20. It is clear that a balance of $999 is still owed.

The client can pay this sum, set up, restart the session, and choose a certain client from a list. It is clear that there is a balance owing. James, the consumer, owes 142.20 in total.
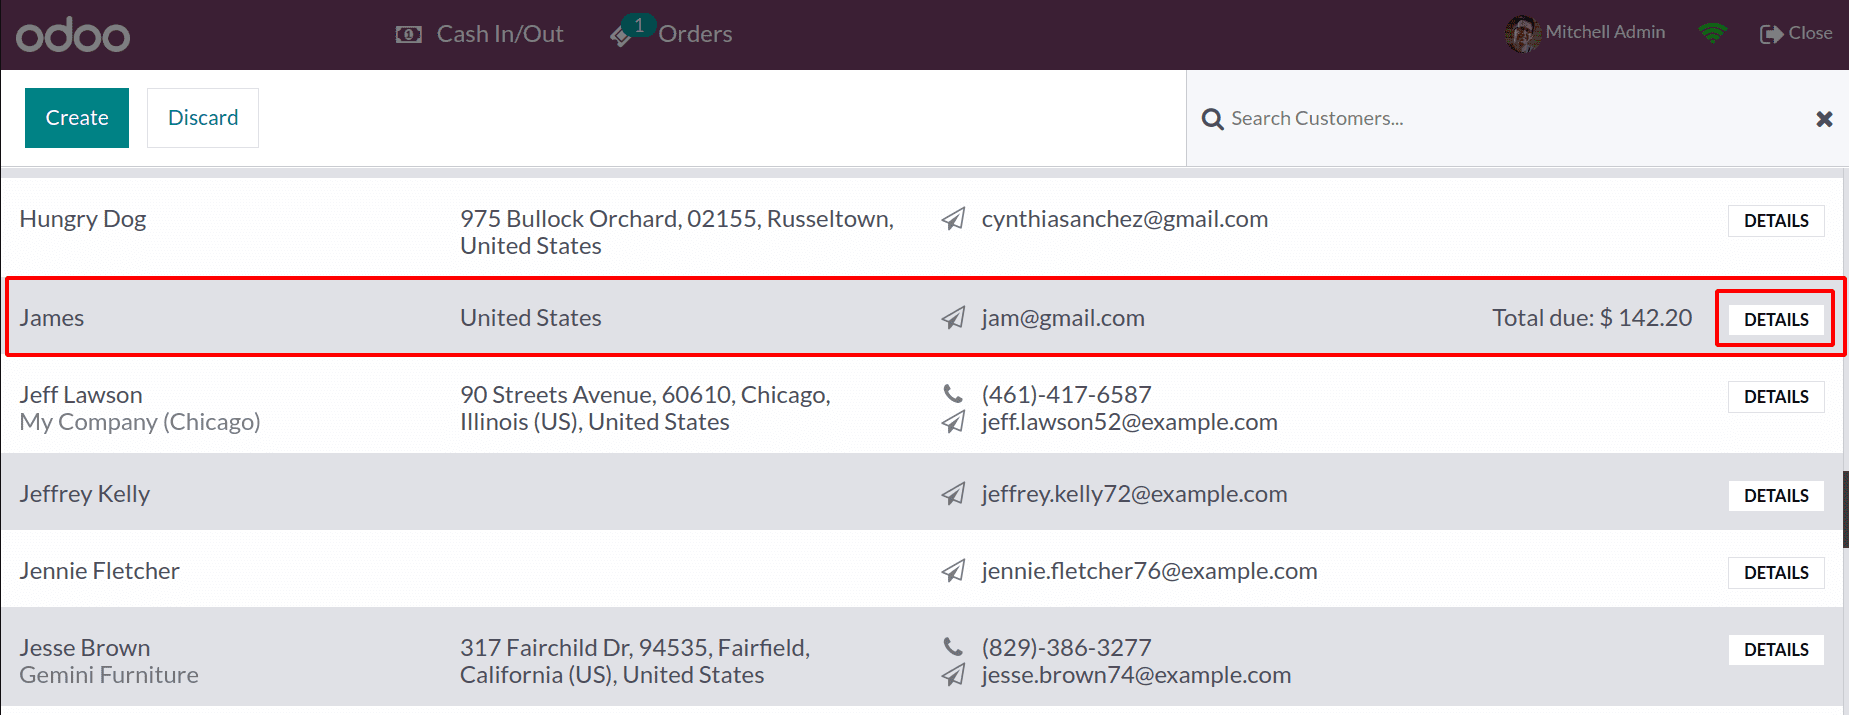
From there, we'll be able to settle the balance. Click the "DETAILS" button next to the total due. A tiny window starts to appear, which includes all the details of the customer. There is a button to ‘Settle due account’; click on it to settle the due amount.
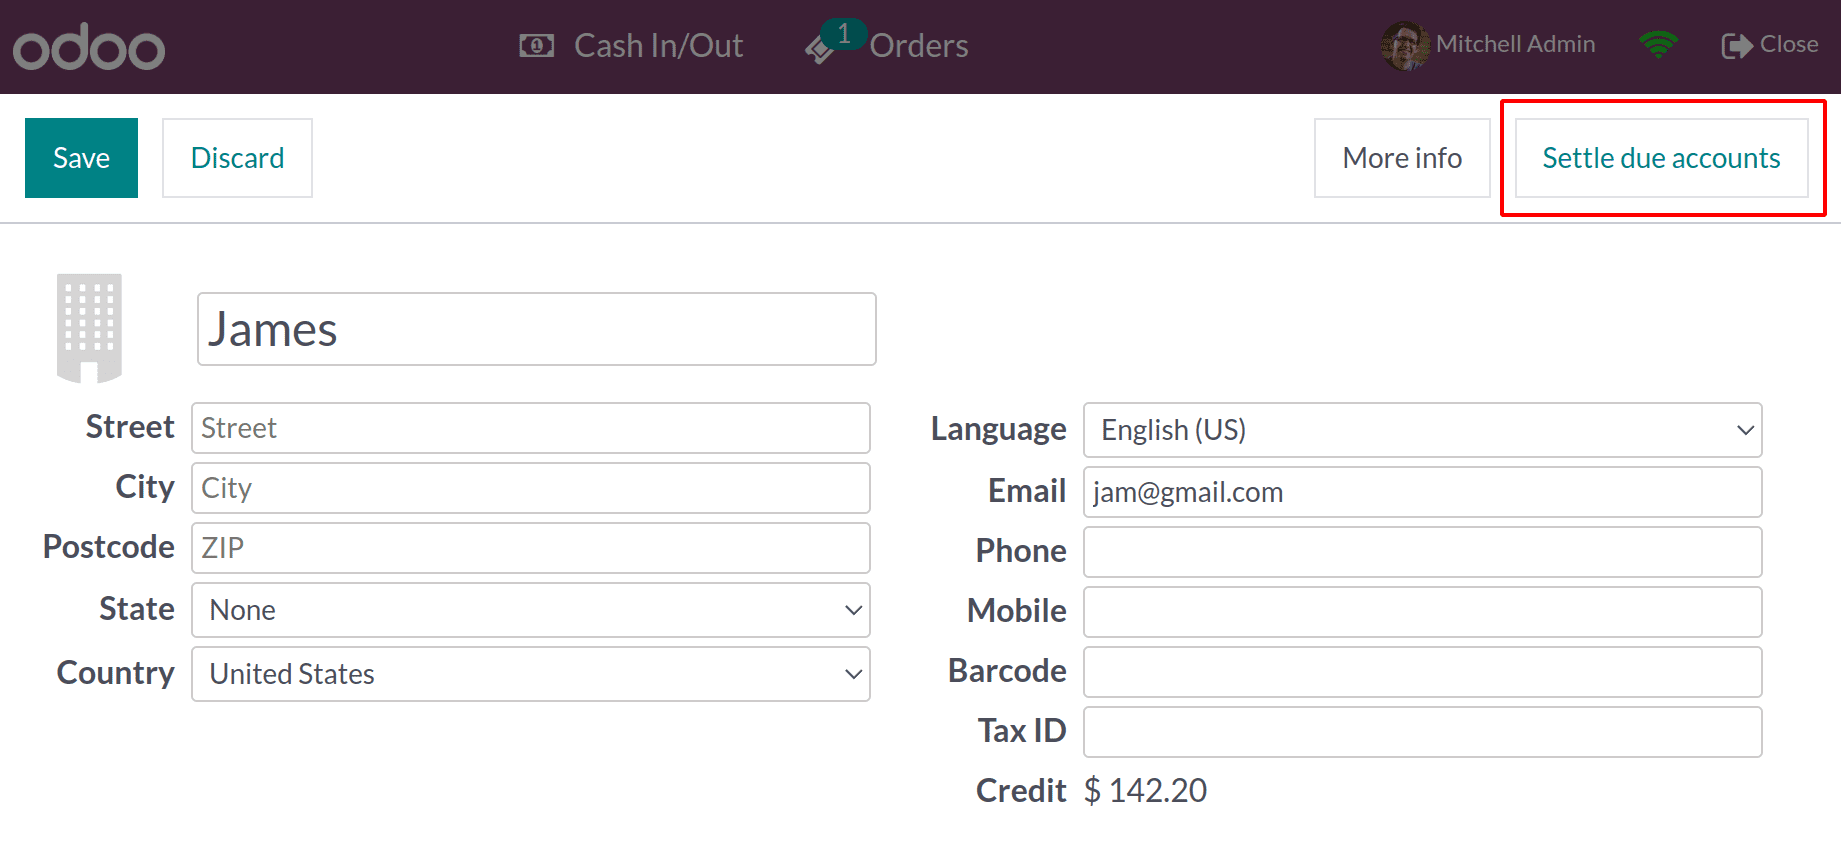
The choice of payment type comes next.
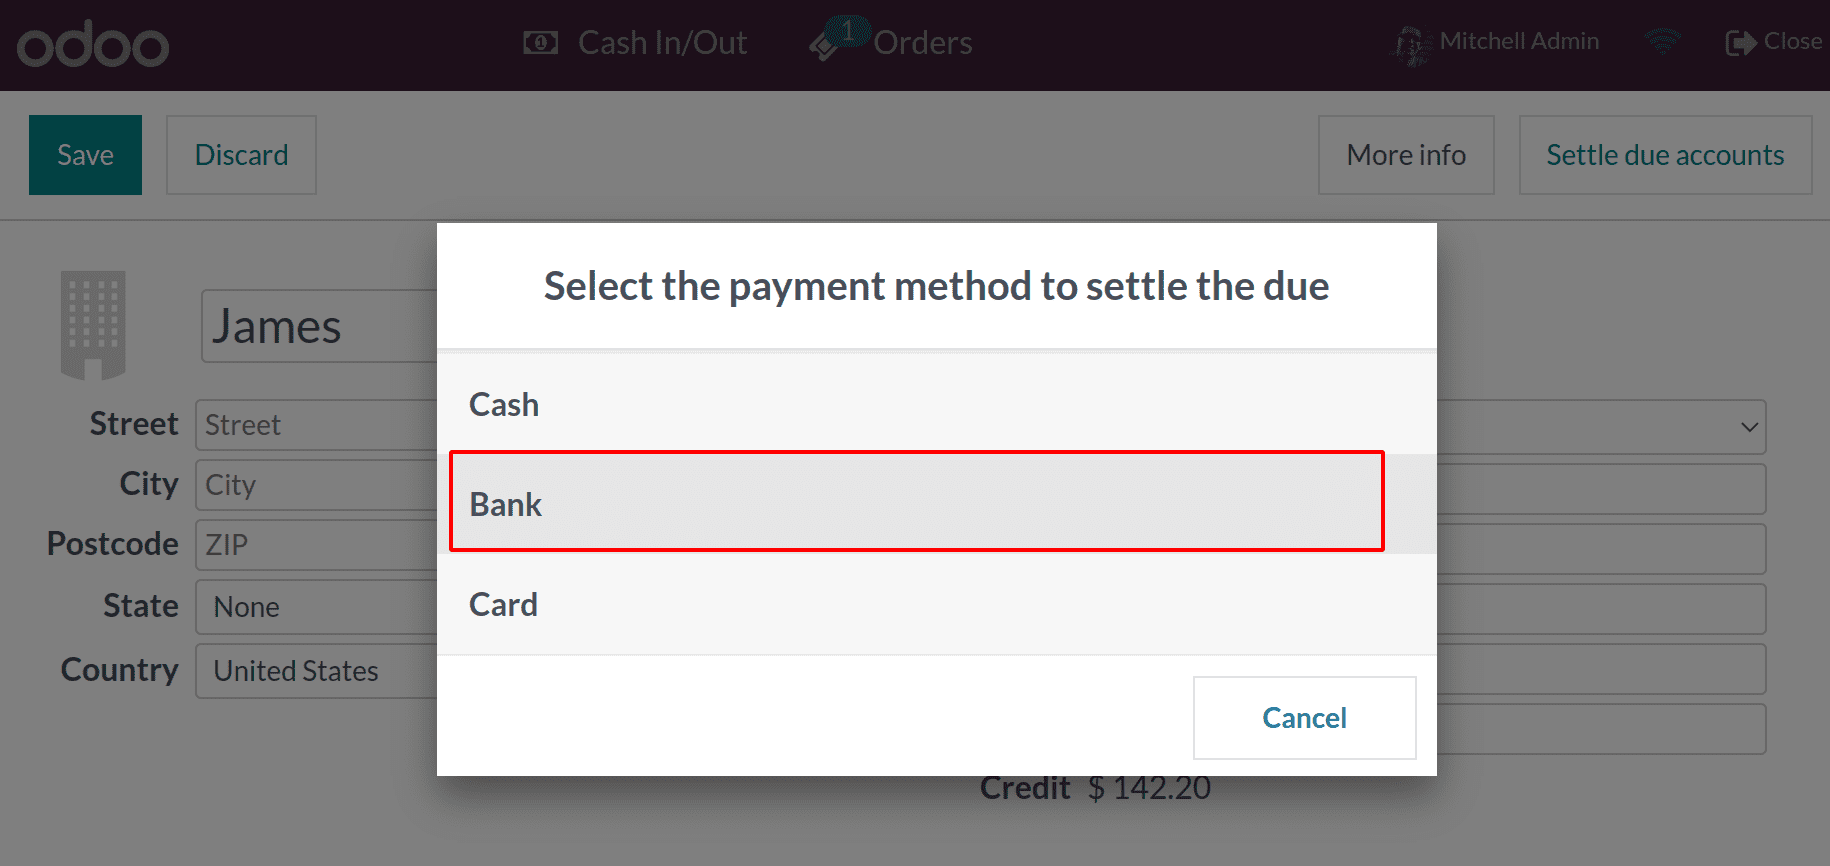
Then, as we already mentioned, there is a further window. After that, the payment will be verified.
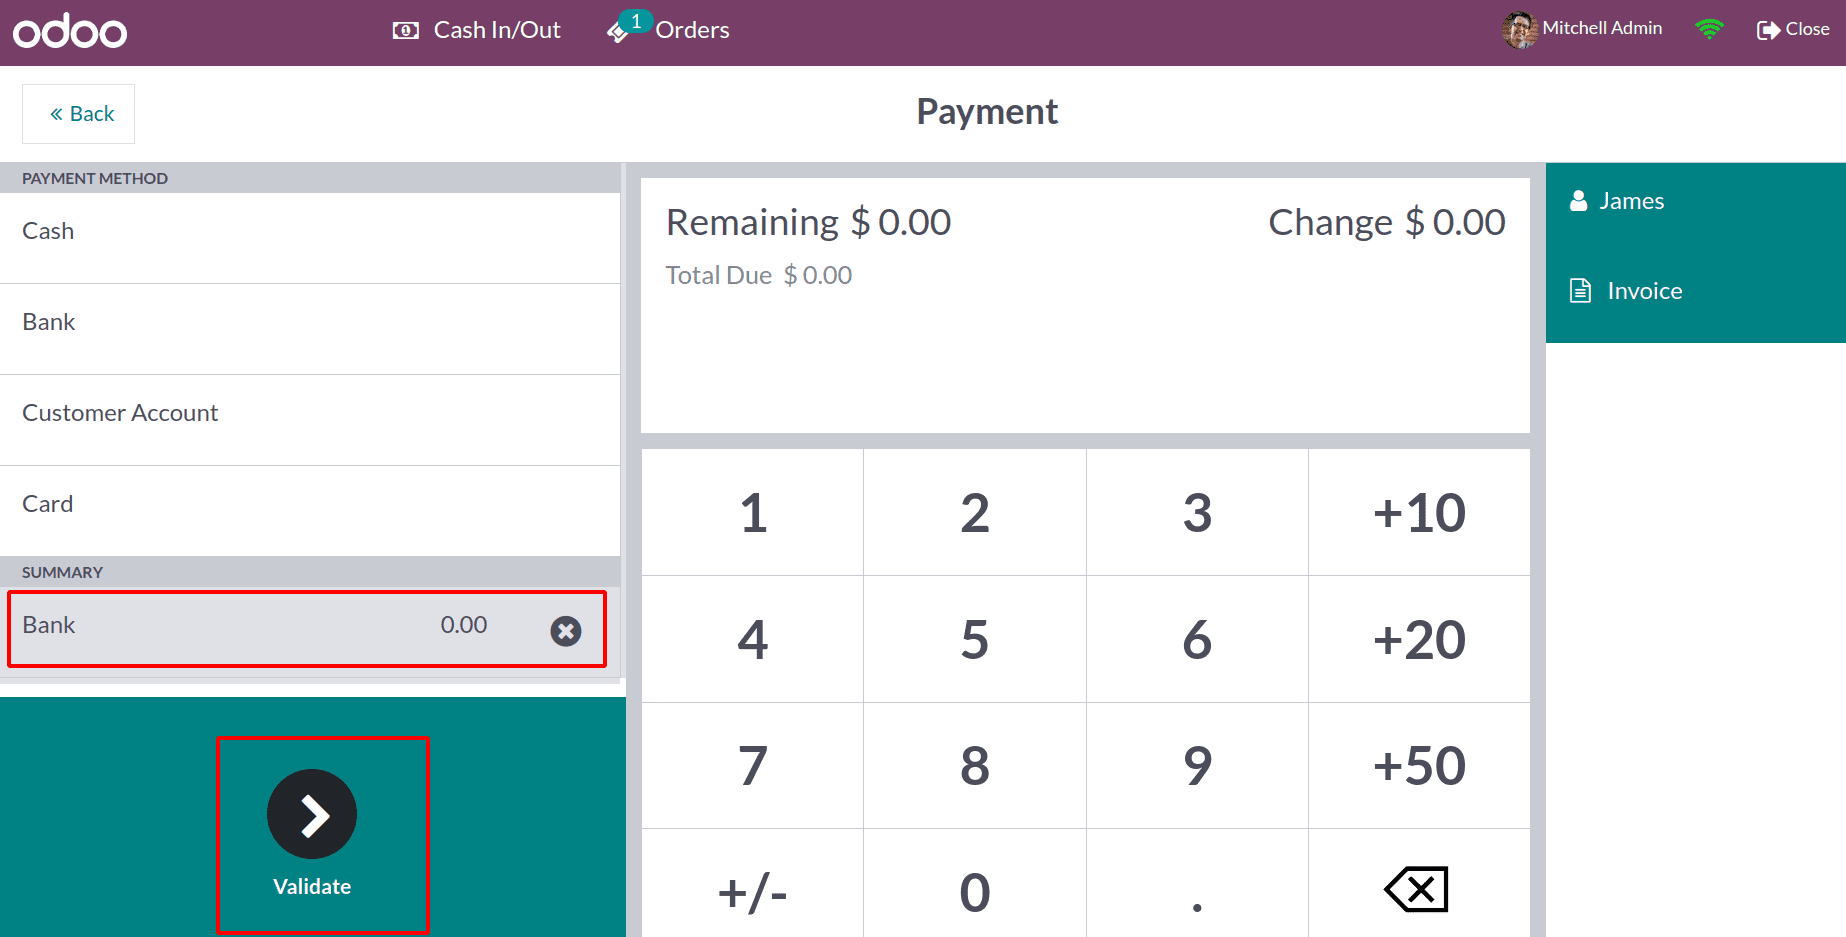
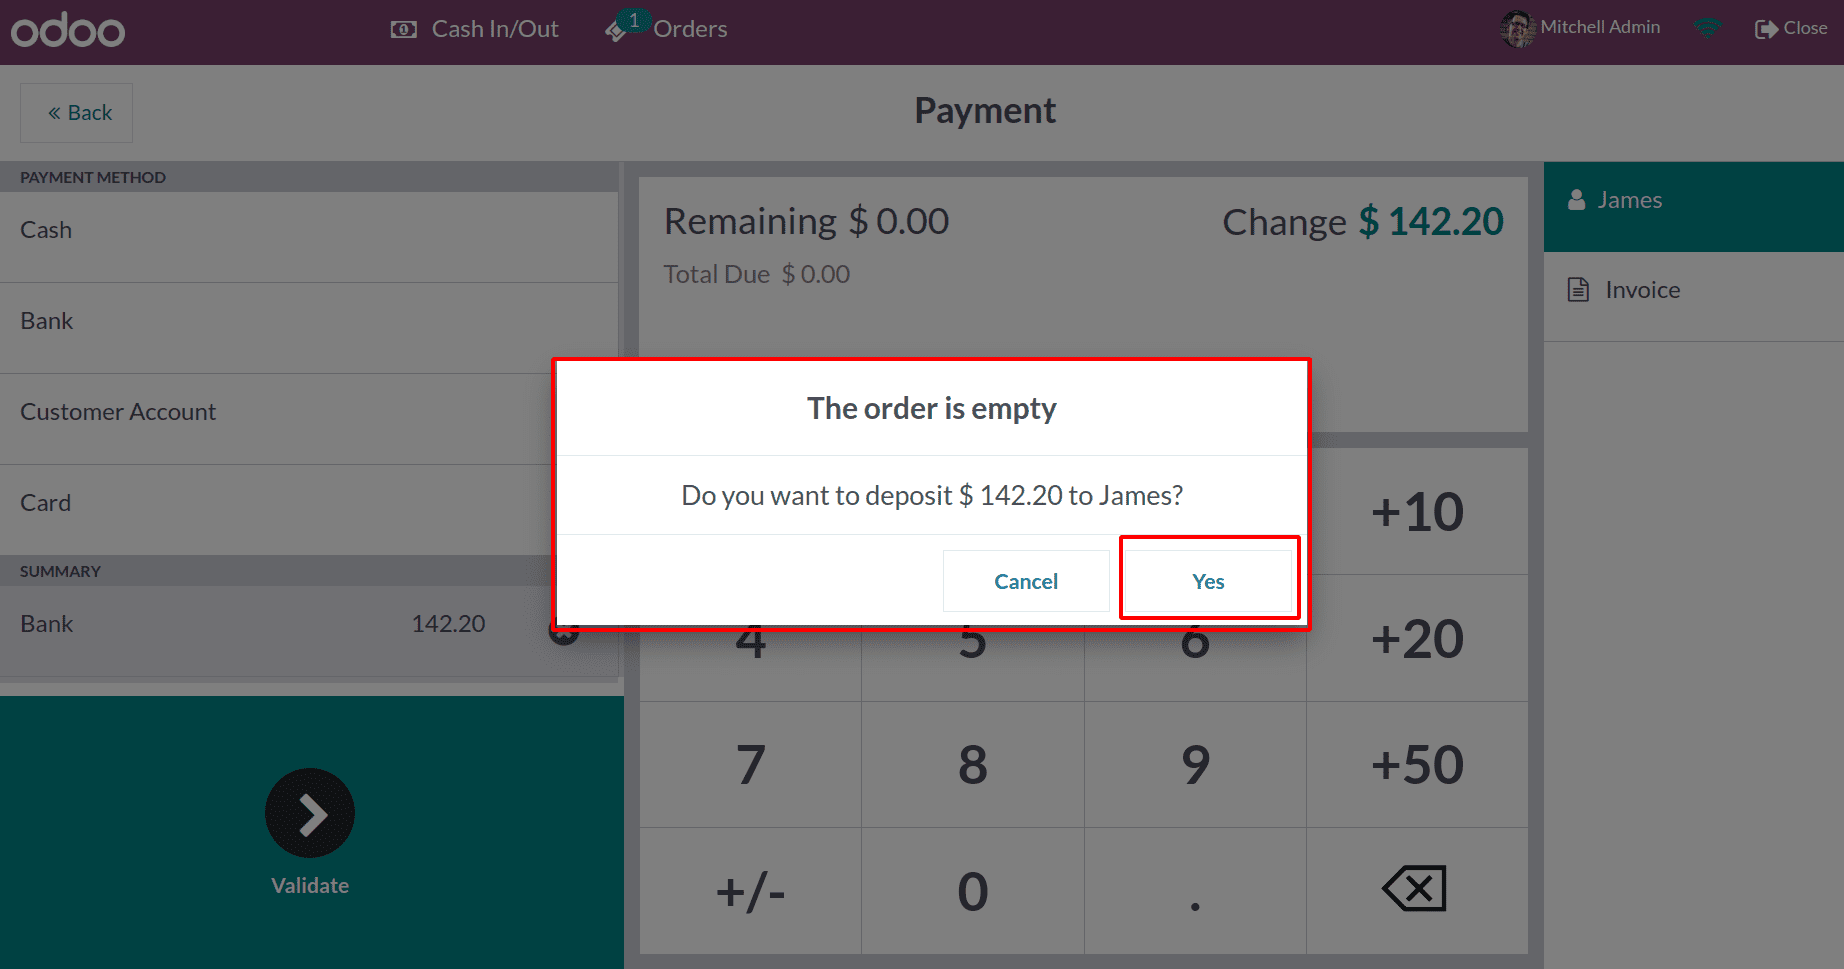
Validation will result in a pop-up notification. No products are added by us. Since the order is unfilled, payment will definitely be made. The ideal response is yes.
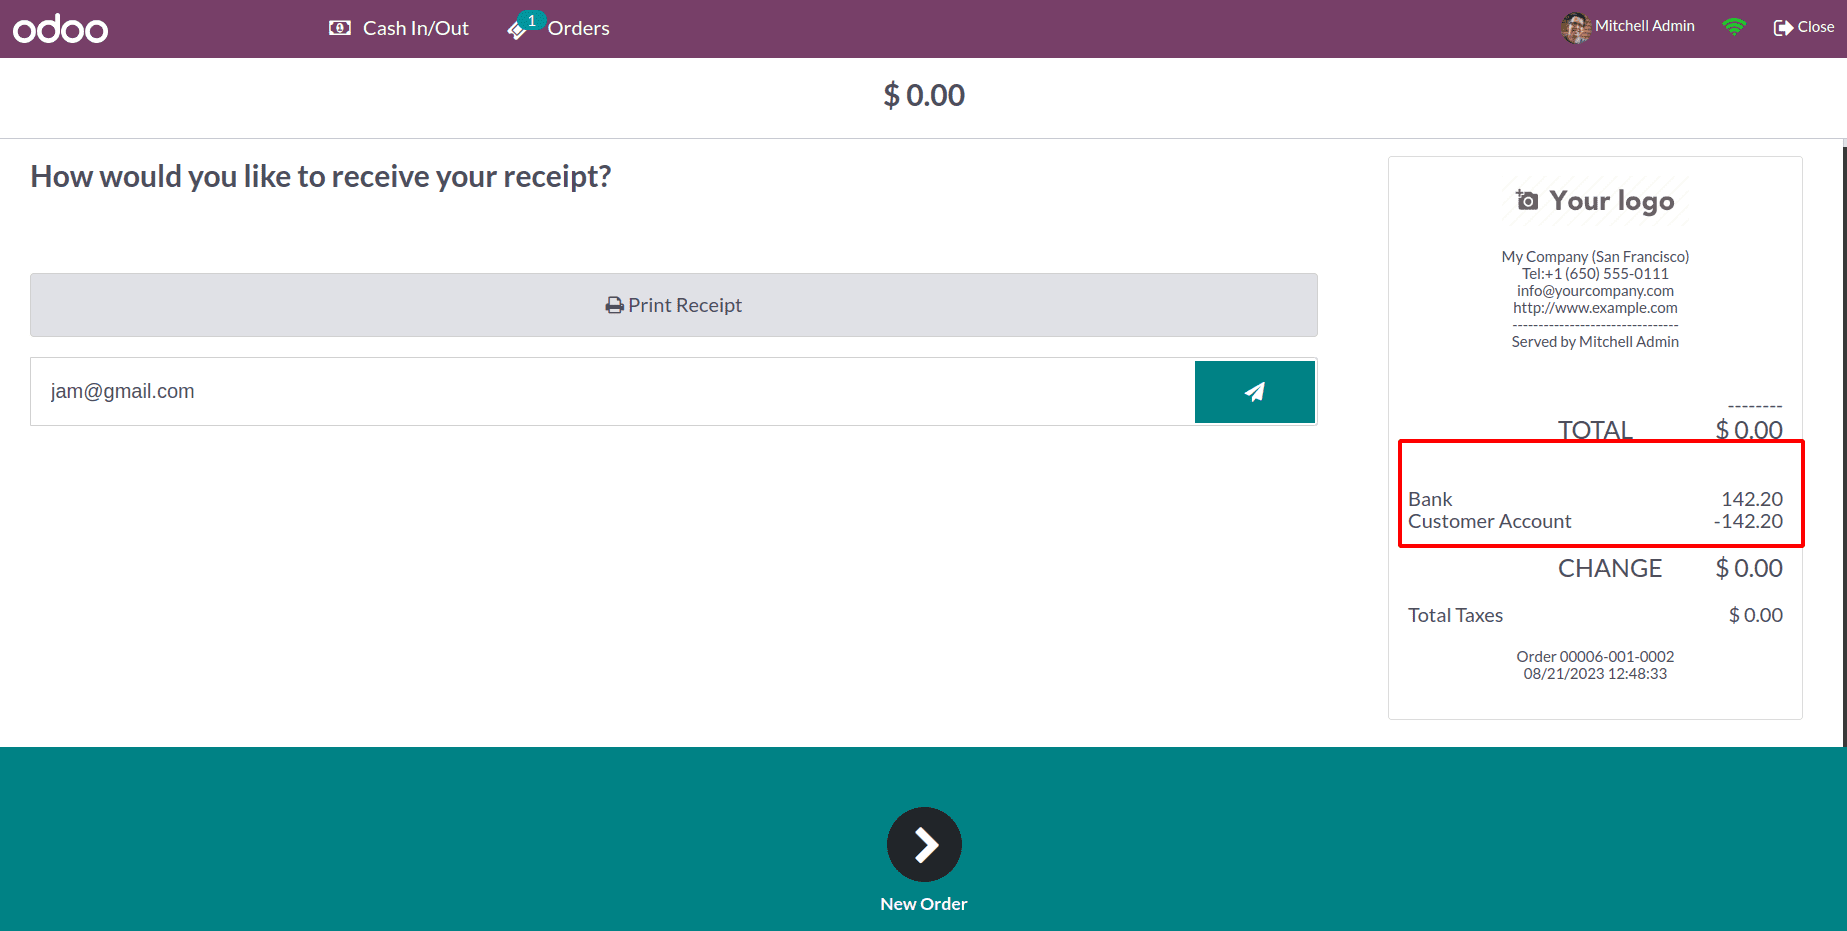
The receipt shows that the pending amount has been paid through the Bank now.
Now, let's examine the partner ledger. To do this, choose the partner ledger under the reporting tab of the accounting module. Pick our client from there.
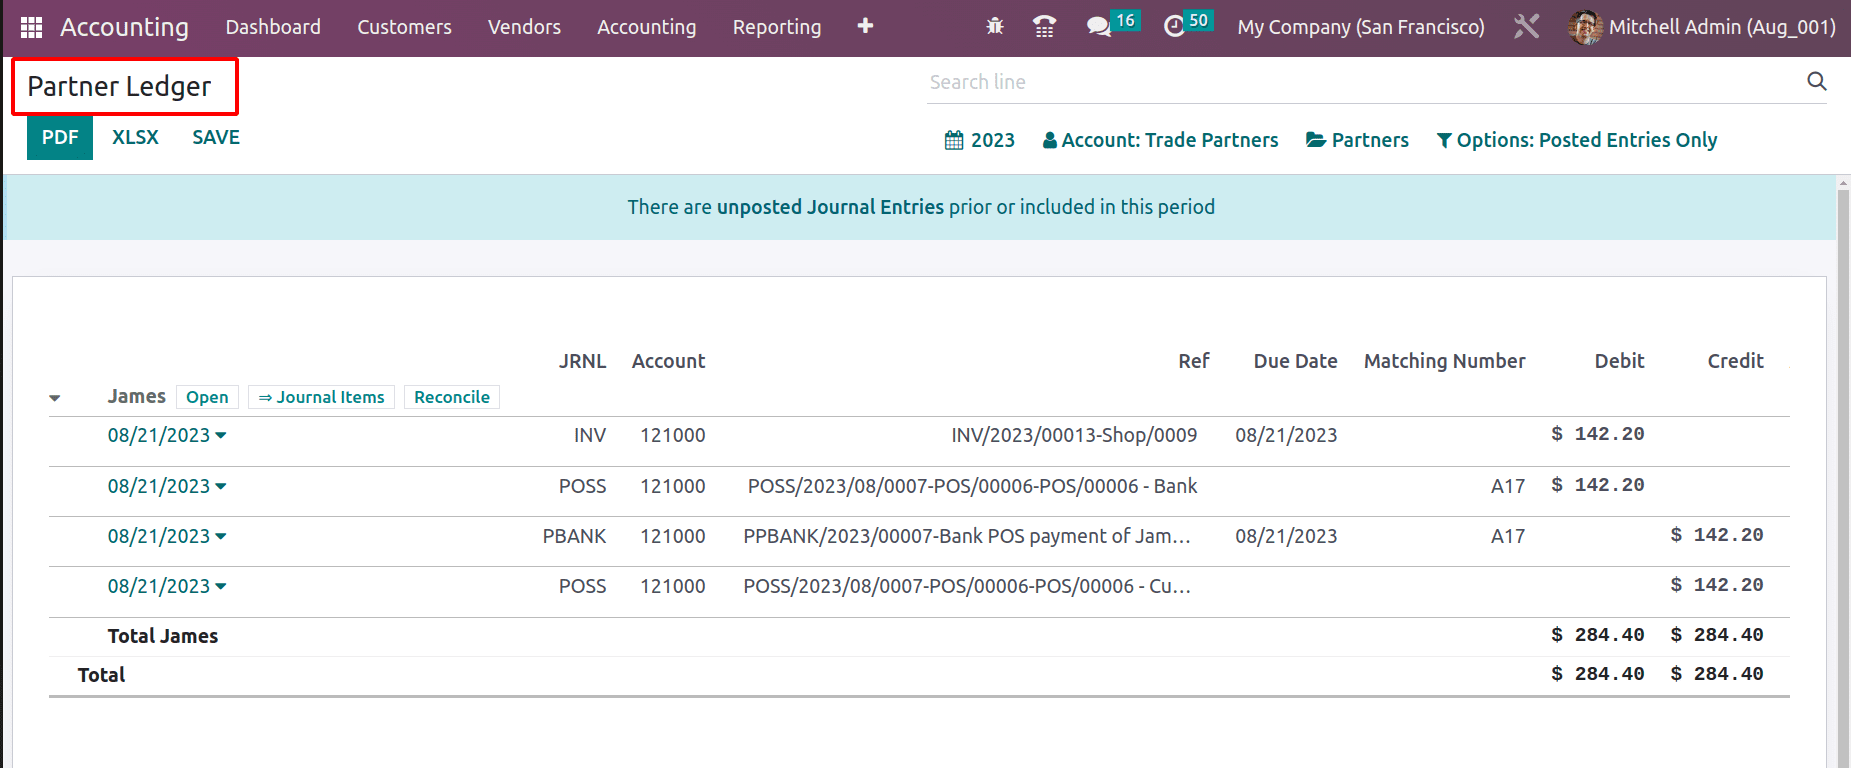
Now that the amount debited and credited are equal, the ledger is in balance, as we can see.
To sum it up, that's all there is to know about payment methods. This blog post looked at several payment methods and how they operate during Odoo 16 Point of Sale transactions.
To read more about making down payments with Odoo 16 POS, refer to our blog How to Make Down Payments with Odoo 16 POS App