Odoo 17 simplifies the complex task of managing employee lunches by offering a comprehensive Lunch module. This module streamlines lunch orders, manages vendors, and tracks expenses all in one place. It enhances the efficiency of lunch operations from ordering to delivery, handling daily orders, managing employee preferences, and overseeing vendor contracts. The user-friendly platform makes lunch management easier and more organized for both employees and administrators.
This article dives into the standout features and capabilities of the Odoo 17 Lunch Application.
My Lunch Menu
The My Lunch menu consists some menu options include; New Order, My Order History, and My Account History.
New Order
The Lunch module’s Order Your Lunch dashboard allows users to make lunch orders directly from the platform. The screenshot below shows how users can check their workcenter, name, and account balance.
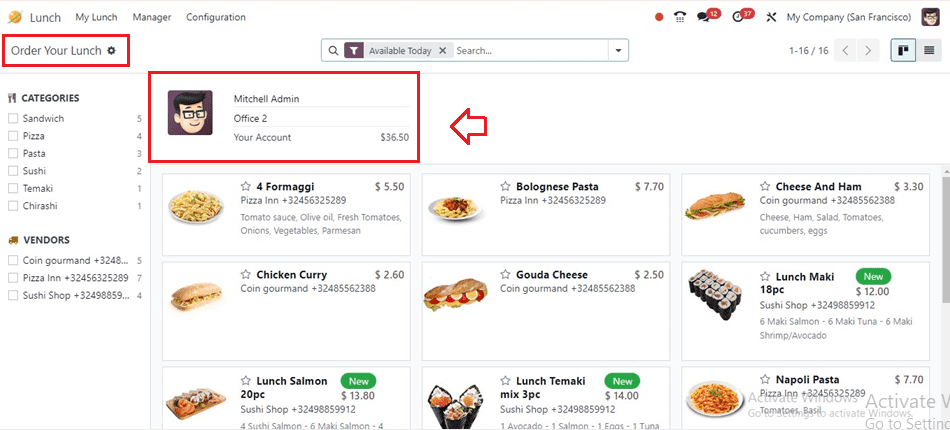
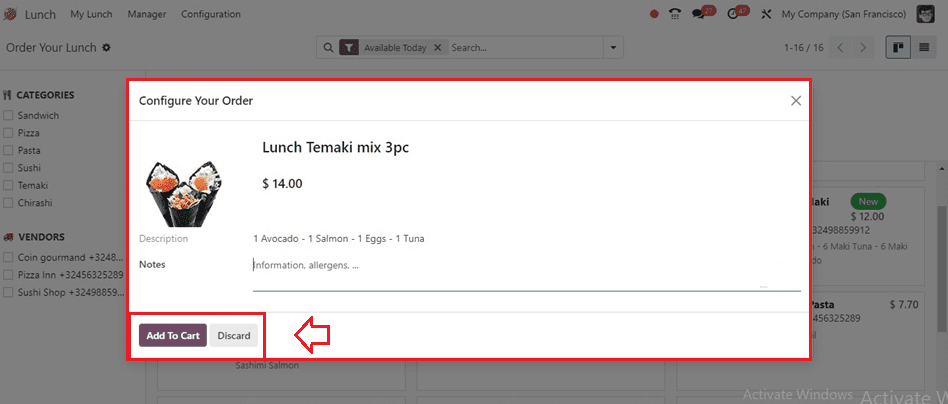
Food options can be selected from categories and specific vendors, and select the correct information from the drop-down menu. A confirmation pop-up window appears, allowing users to specify extras and descriptions for the food. The Add To Cart button is then used to add the food to the cart.
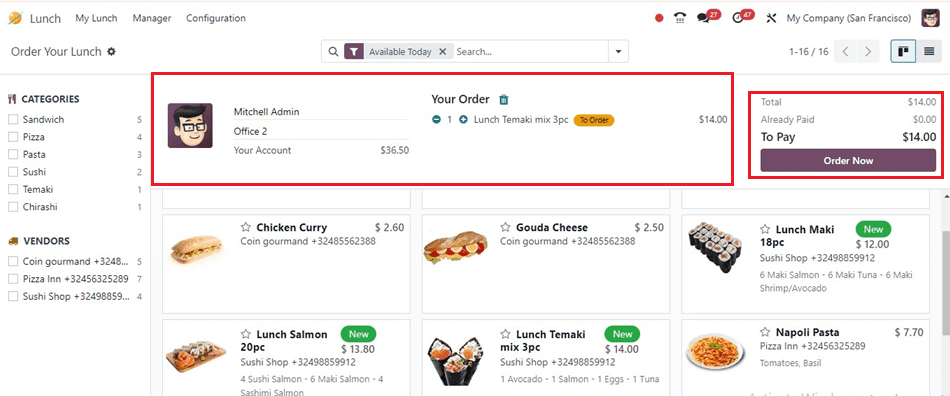
Then, the user can view the quantity being added in the Your Order menu. The total amount is displayed, and the order is placed by selecting the Order Now button.
Once the order is placed, users will see an Ordered label next to their order, and the amount of food ordered will be decreased from their account. Users can configure a message to be sent to users after delivering the order in the Settings option. The menu option allows users to select the desired message to be sent to users after the order is delivered. The Lunch module also supports WhatsApp for ordering.
My Order History Menu
End users can access the My Orders History dashboard from the My Lunch menu to view all the details about their past orders, including the order date, vendor, product, extras, remarks, user, lunch location, price, status, and company.
Clicking the Reorder button will help us to quickly order the same meal product once again. The Send Notification button notifies the seller, and there is a Cancel button for orders that need to be canceled.

My Account History
Choose My Account History from the My Lunch menu to view the Lunch order amount transactions of your specific lunch account or wallet. There will be a display of the Order Date, Description and Amount details as shown below.

Managers Menu
The Managers menu in the Odoo 17 Lunch module is a section designed for managers responsible for overseeing and managing lunch orders within an organization. It offers tools and options for coordinating lunch services, tracking orders, and managing vendors.
Today's Order, Control Vendors, Control Accounts, and Cash Moves are among the submenus that are available on the menu.
Today’s Order
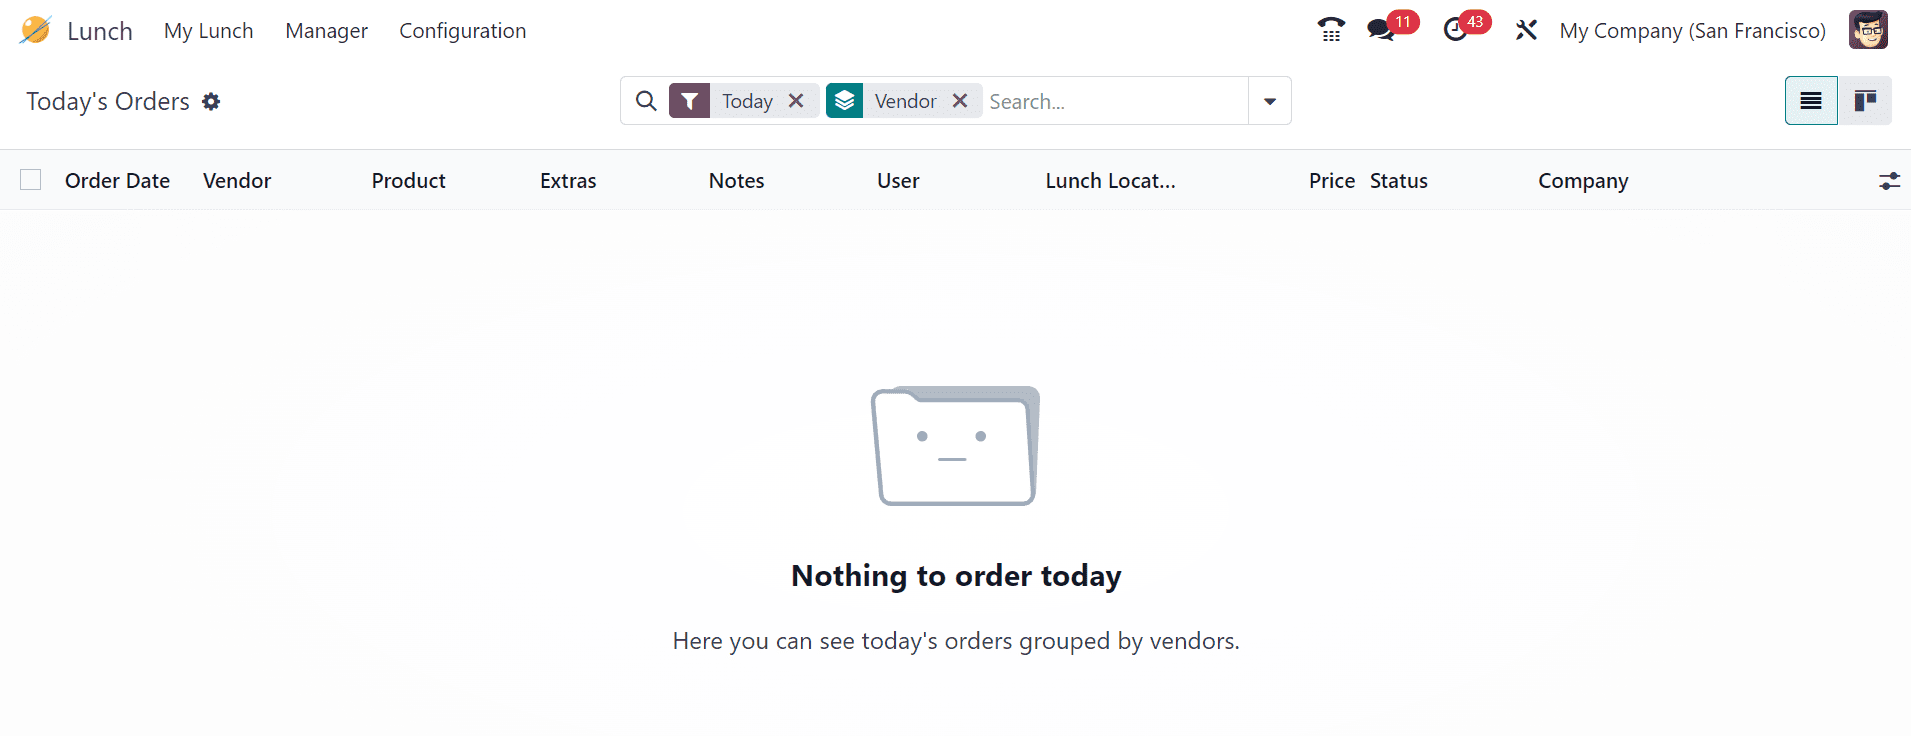
By choosing the Today's Order option from the Manager menu, you may examine all of the food orders placed for the current day.
The details including Order date, Vendor, Product, Extras, Notes, Price and every other details of the meal order on that particular day will be visible to you as illustrated in the screenshot below.
Control Vendors Menu
By using the Manages tab's Control Vendors option, you may see the specifics of orders made with various suppliers. It is possible to examine each vendor's orders independently.
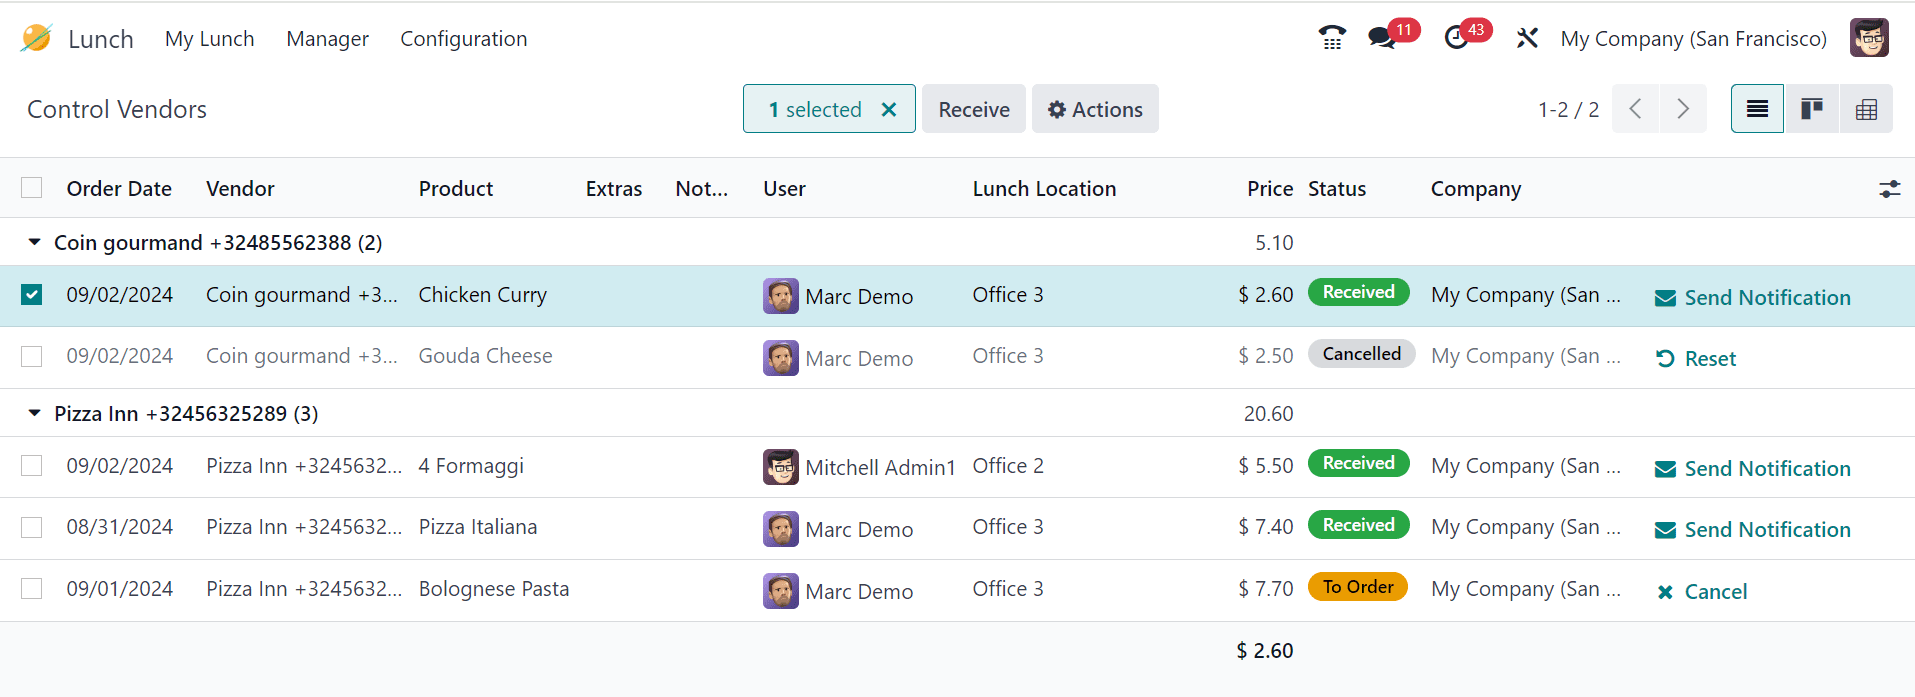
To configure new vendor details, access the Configuration menu, choose the Vendors option and Choose any vendor by clicking on the drop-down menu. If the vendor is not already in the system, create a new vendor details in the vendor configuration form.
Control Accounts
Choosing the Control Accounts option from the Manager page will allow you to get a detailed description of the orders placed from various user accounts.
This dashboard provides detailed employee account balances, tracking financial activity related to lunch orders. It helps maintain accurate records, ensures proper accounting, and provides clear visibility for both employees and managers.

Cash Moves
Effective monitoring and management of cash transactions is possible for managers thanks to Odoo 17 Lunch's Cash Moves window. Each transaction's specifics, including the Date, User, Description, and Amount, are shown on the site.

Managers can manually input and record cash transactions as needed by clicking the New button.

User Name, Date, Amount ans Description can be edited to configure new Cash Moves details.
Configuration Menu
The Configurations menu consists Settings, Vendors, Locations, Products, Product Categories, and Alerts options.
Settings
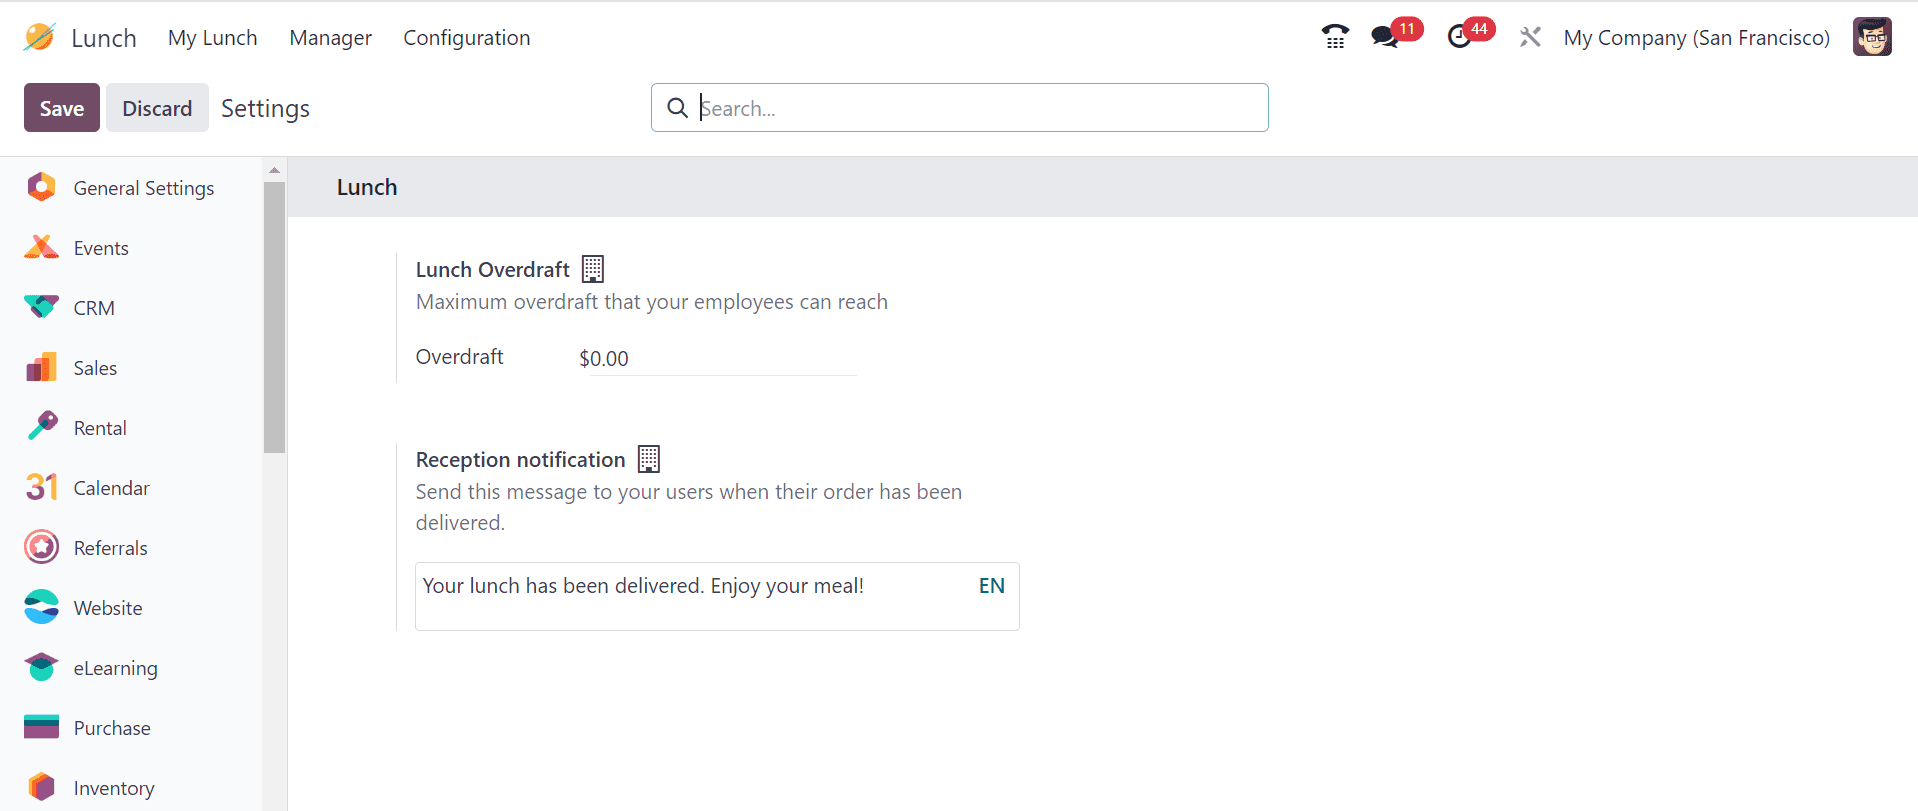
The Settings menu allows users to set a maximum Lunch Overdraft limit for employees, allowing them to manage spending within predetermined limits. Additionally, the platform allows for the configuration of a Reception Notification, which sends an alert to users when their lunch orders are delivered, enhancing the overall lunch service experience. This ensures employees are informed about their meals, contributing to a smoother and more efficient lunch service.
Vendors
The Vendors tab in the Configuration tab displays a list of vendors with their details, including Name, Location, Contact, Address, and Email address in separate Kanban cards as shown below.

Users can select a vendor to view more information or make changes. To add more vendors, click the New button.
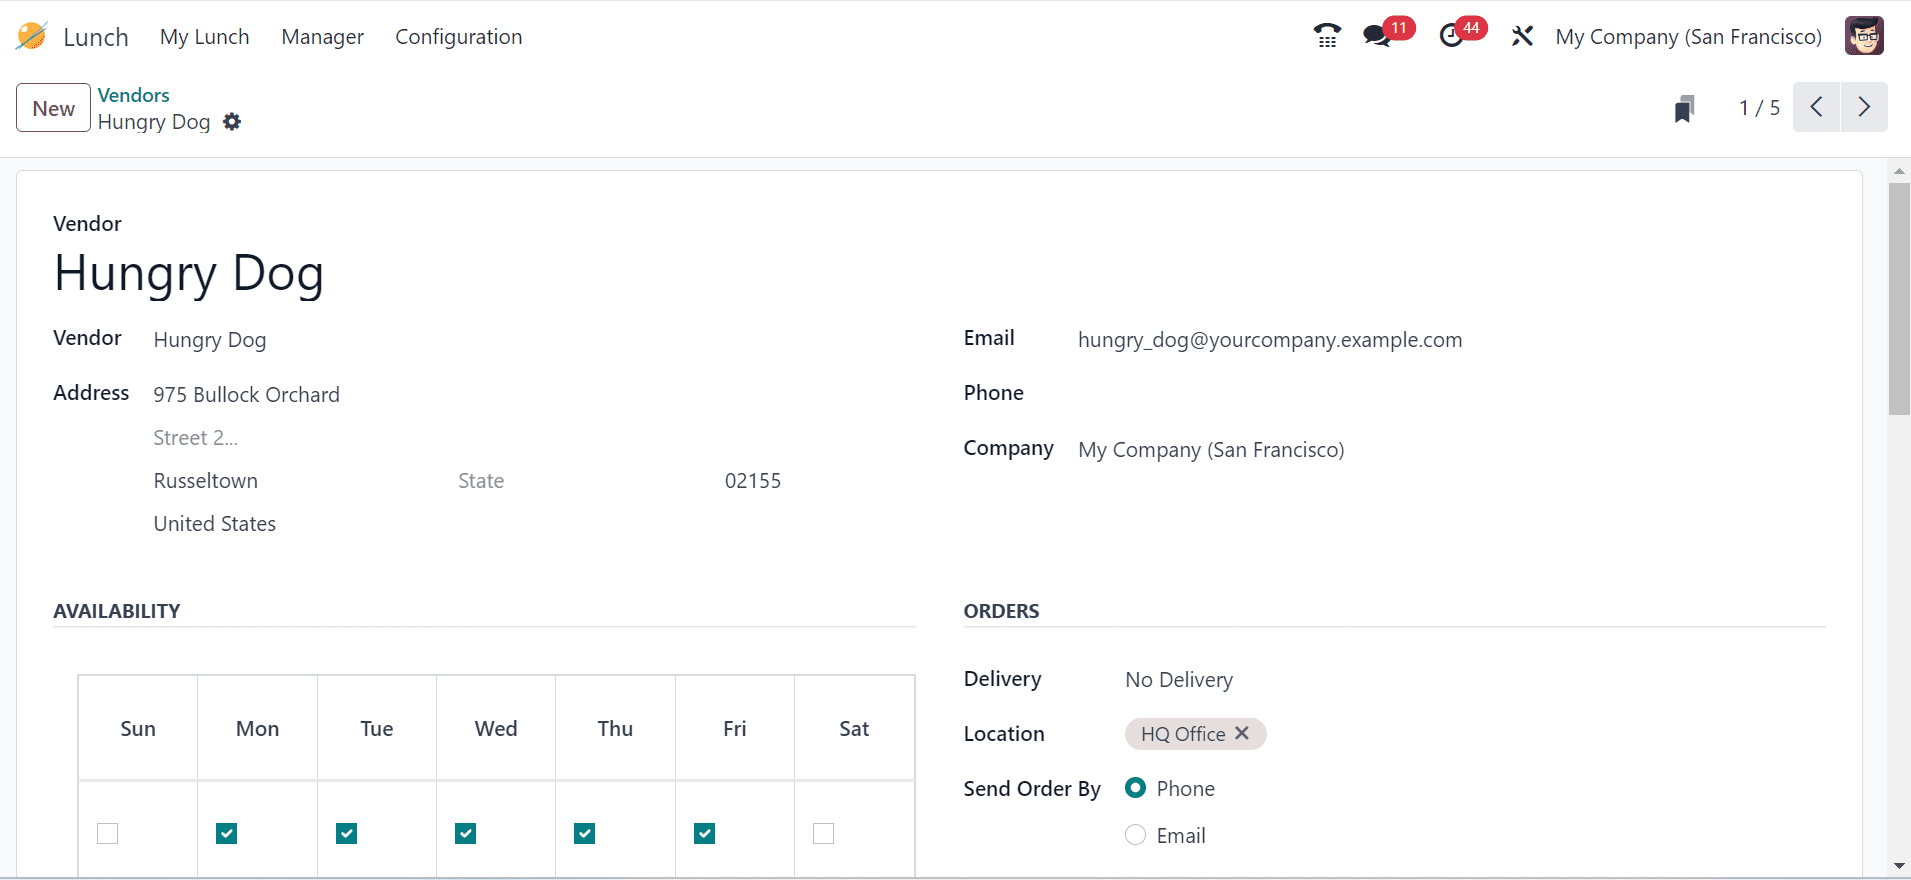
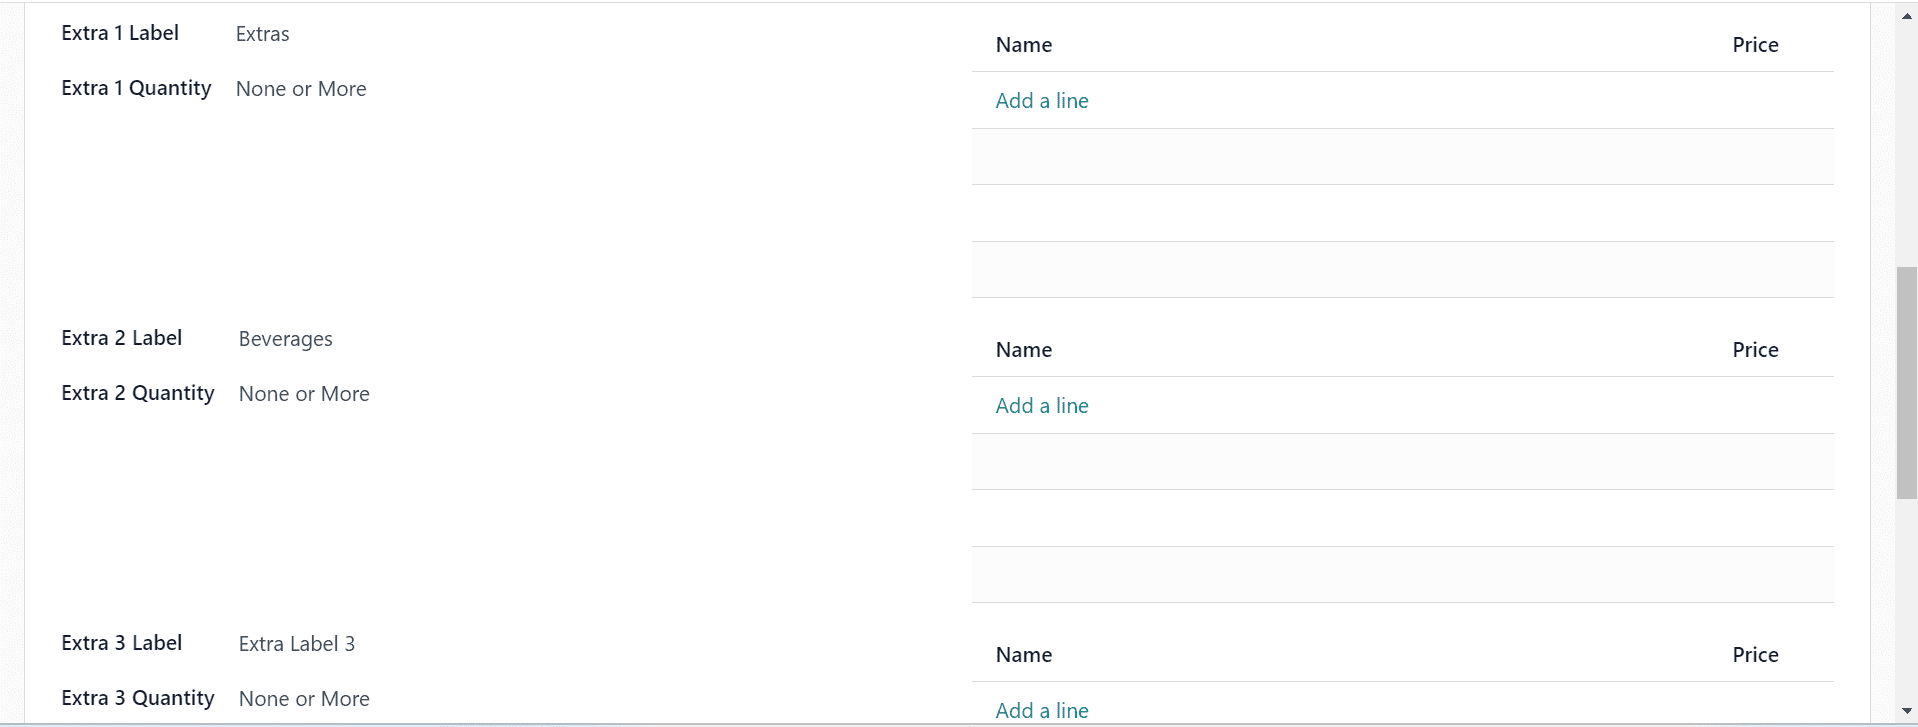
The form view for Odoo 17 lunch allows users to enter vendor information, including Address, Email, Phone, Company, and Responsible. It also allows for AVAILABILITY, and ORDERS. Additional labels can be added using the relevant fields as shown below.
Location
Odoo allows you to set up locations where workers must receive their meal orders.this can be done with the Configuration menu by choosing the Location option. The locations are listed on the screen with their Location Name, Address and Company. You may alter the Location's name and address as needed by choosing them.

A new row will show up when you pick the New button. As shown below, enter the relevant information and click on the "Save" button to save the new location.

Products
From the Configuration tab, choose the Products option to examine and manage the food products that are accessible in the lunch management system. This displays a list of products, including Categories, Vendors, Company, Descriptions etc.
We can use this window as a product catalog to save and manage the meal products of your lunch management system.
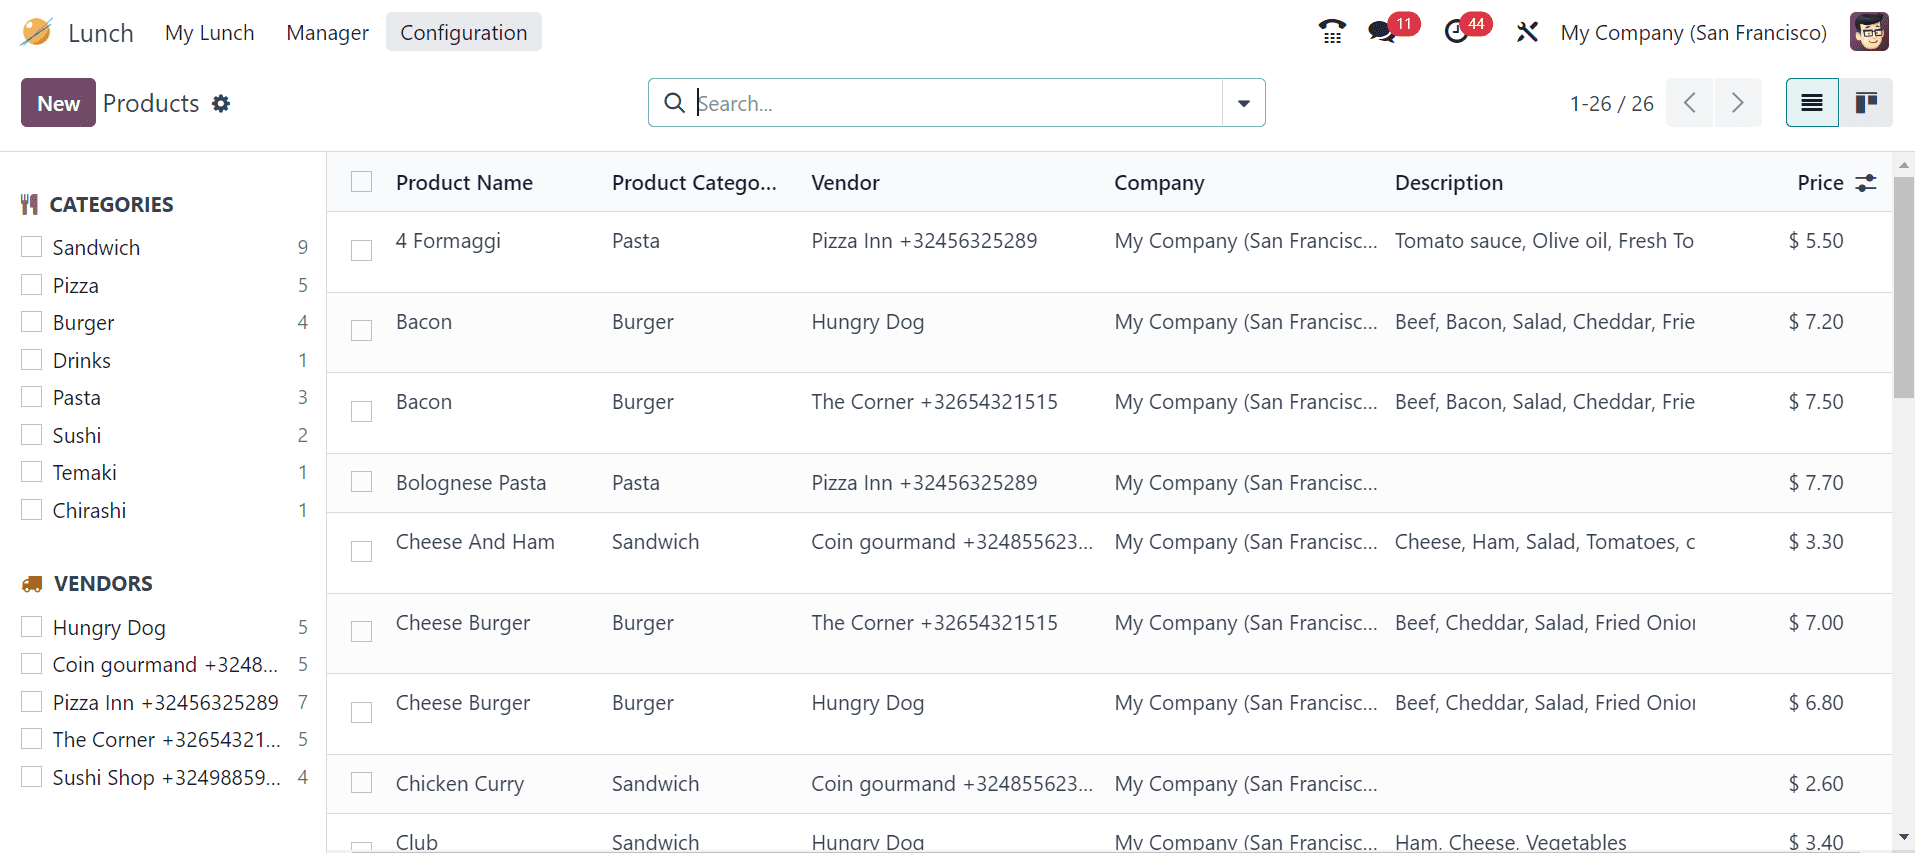
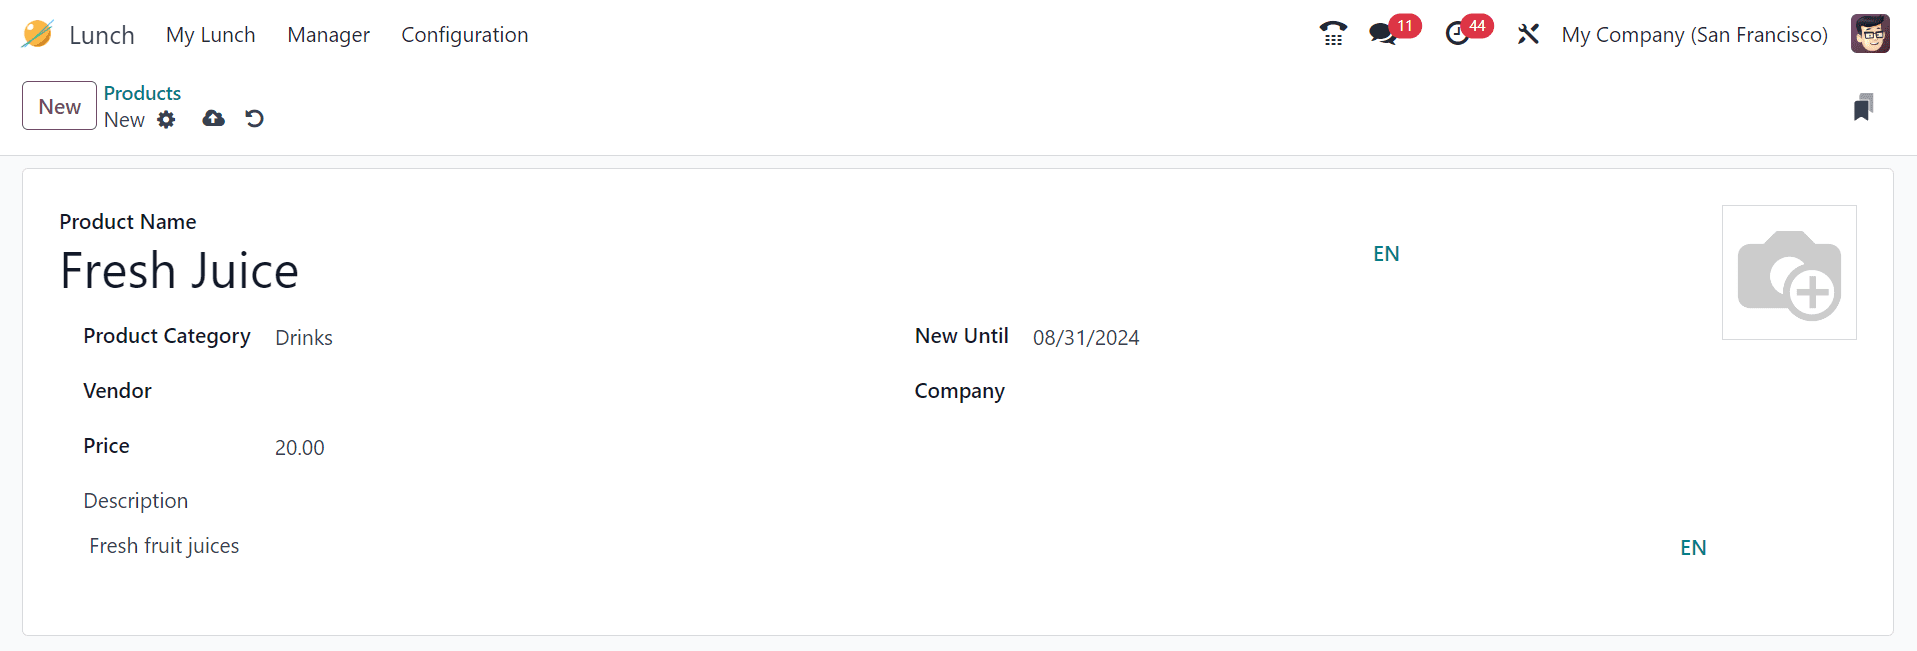
To add a new product, click the New button and enter product details like Product Name, Category, Vendor, Price, validity at New Until, and Company name as depicted below.
Product Category
Product categories are a useful feature for easier ordering. Click the Product Categories option to examine and configure multiple product categories. The list displays the categories and the company name.
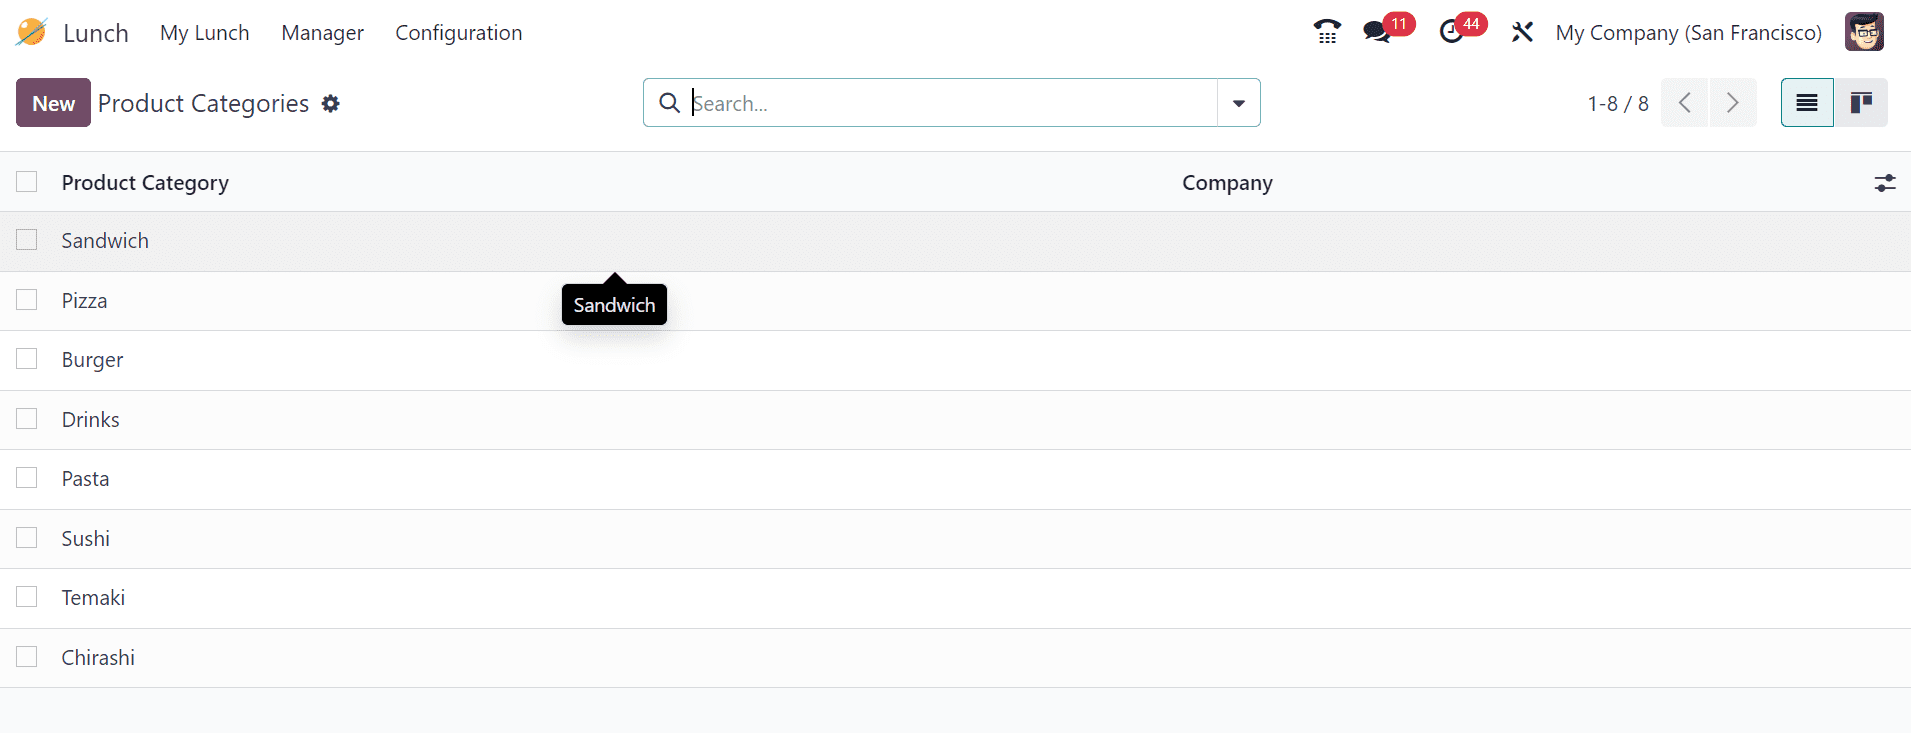
To add a new category simply click on the New button. Then, enter the Product Category name, select the Company, and save the category. The category will be displayed in the list.

Alerts
The Odoo Lunch module allows users to create lunch alerts to remind employees of provided messages. To configure these alerts, select the Alerts option from the Configuration tab. The list of existing alerts with their Alert Name, Display message and Active Status will be displayed as shown below.

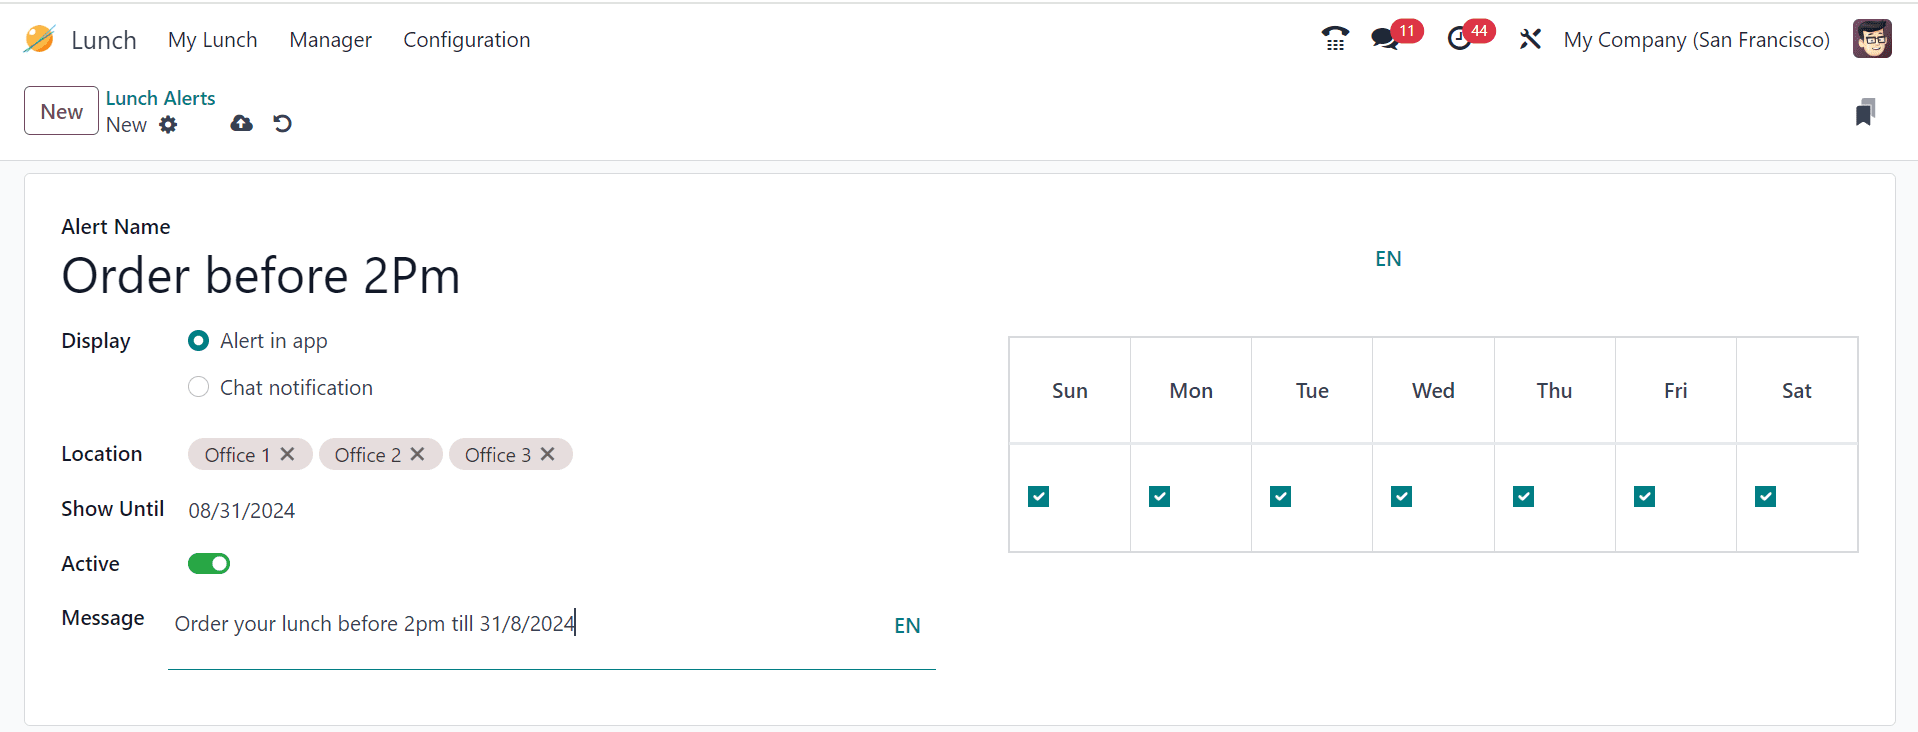
To create new alerts, click the New button and enter details such as Alert Name, Display type, Location, Show Until date, Active status, regulated Message, and Days to follow. The alert will be activated when the user saves the settings.
You can make your employee lunch management process more effective, automated, and employee-friendly by making use of Odoo 17's extensive capabilities. Odoo 17 offers all the capabilities required to manage orders, schedule breaks, and analyze expenses in an efficient manner.