AvaTax is a third-party program that assists businesses in setting up sales tax on invoices based on a specific area. It guarantees that a business can compute shipping rates, taxes applicable to a product, and more. The AvaTax application simplifies the process of automating tax calculations. ERP software implementation leads to rapid improvements in business development. Odoo 17 helps you run your business's AvaTax department more effectively. The Odoo 17 Accounting module has the AvaTax feature, which allows users to configure sales tax.
AvaTax provides support to businesses that need to concentrate on tax compliance and sales automation. Users can obtain up-to-date tax data and perform precise calculations with the software. Let's examine a few benefits of utilizing AvaTax in business.
We can get in touch with AvaTax specialists by phone or online to get our questions answered. With the assistance of a customer community, users receive the advice they need to use products as efficiently as possible. Within the AvaTax application, customer service is available at all times.
Every tax transaction made by a corporation is precisely cleared of errors by AvaTax. Data visibility and accessibility are created with the use of an address verification system. Taxation is less difficult and payments can be summarised in a single schedule.
Tax jurisdiction provides greater accuracy and is determined by locating the business. Once an address has been verified by the software, the final rate is automatically calculated. Users can access a comprehensive overview of all transaction actions within a designated timeframe.
Numerous programs, including Microsoft Dynamics, Intacct, Netsuite, Magento, and others, are connected with AvaTax. To handle tax rates within a corporation, it is also integrated with POS and ERP systems.
AvaTax is the tax computation supplier integrated with Odoo 17. To compute taxes automatically, users need to set the necessary credentials. on Odoo 17, you can see the AvaTax option beneath the Taxes section by selecting the Settings menu on the Configuration tab. This will allow you to handle AvaTax. By choosing the How to Get Credentials? option, as seen in the screenshot below, users can generate new credentials.
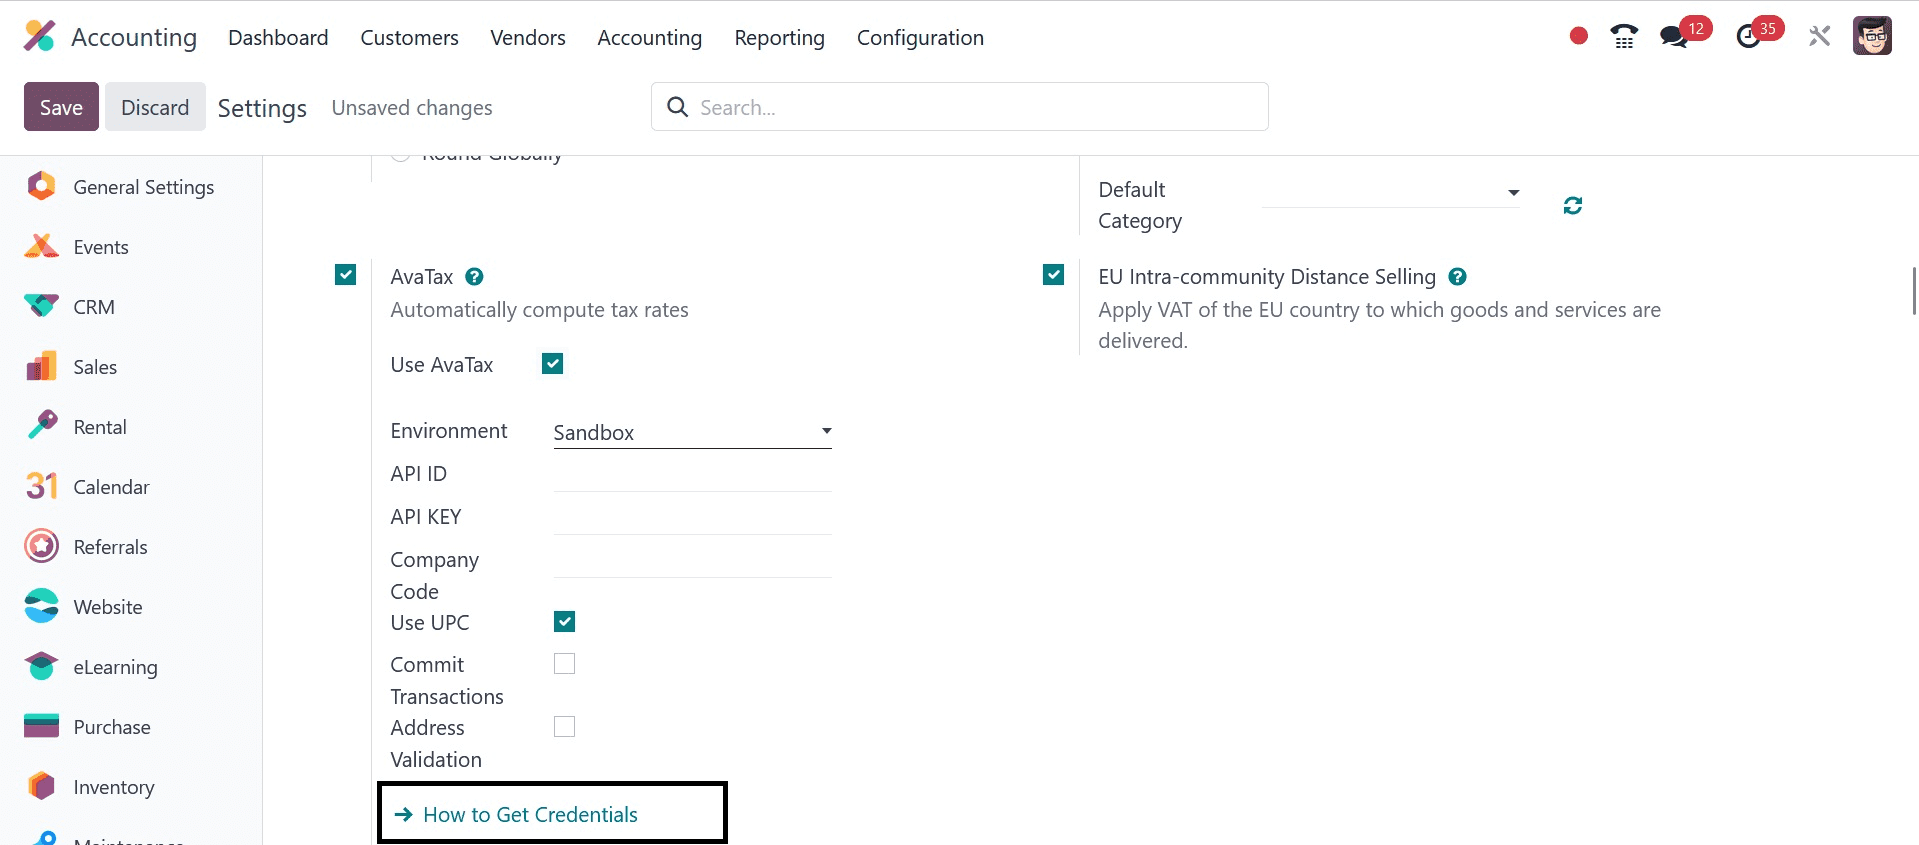
Once you select the How to Get Credentials option, the official Avalara page will be displayed to you. The user has to obtain the required credentials and register for a new account in AvaTax. Apply the credentials to the API ID and API Key below the AvaTax field as shown in the screenshot below after gaining access to the credentials.
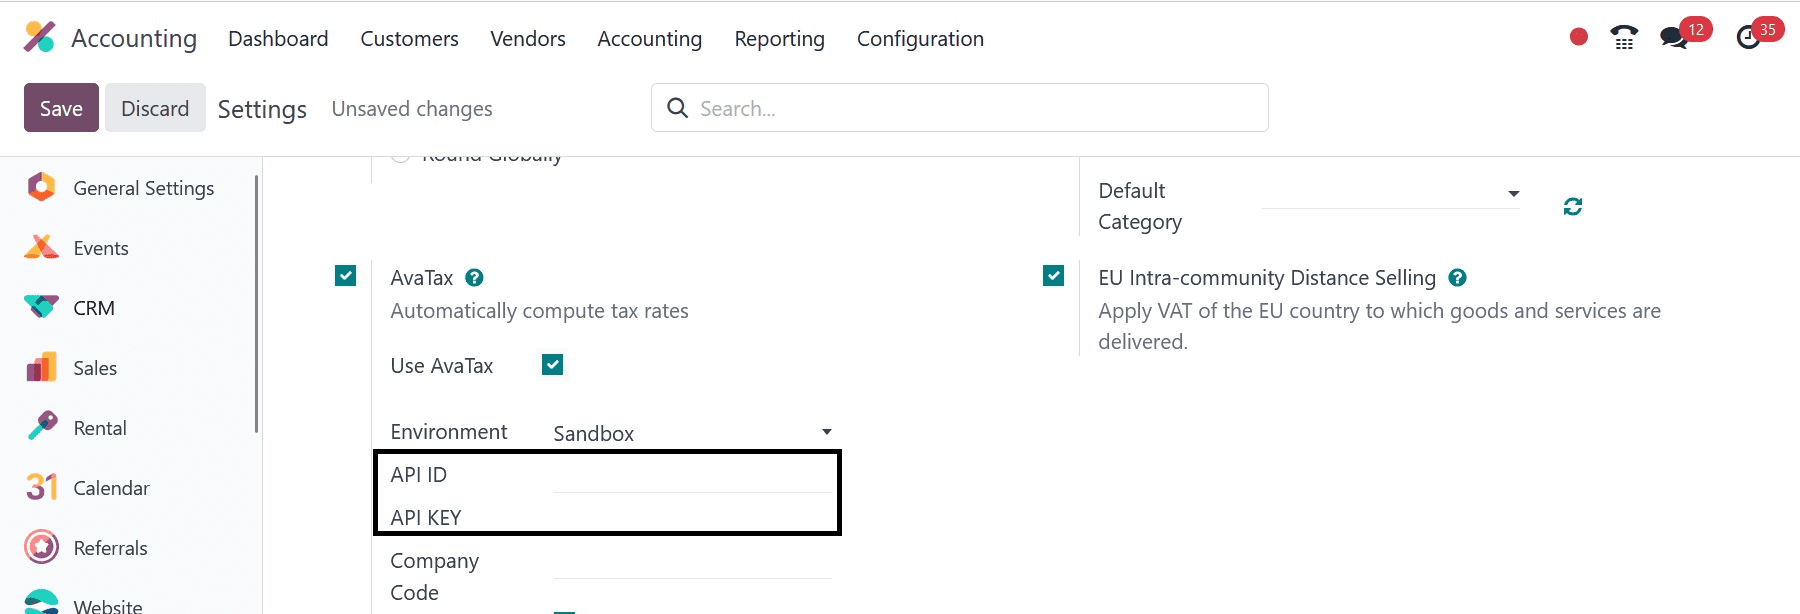
We can use Odoo 16 to activate the AvaTax feature after entering the credentials. With AvaTax, users can compute tax automatically. As shown in the screenshot below, we can also set AvaTax's Environment to both Sandbox and Production.
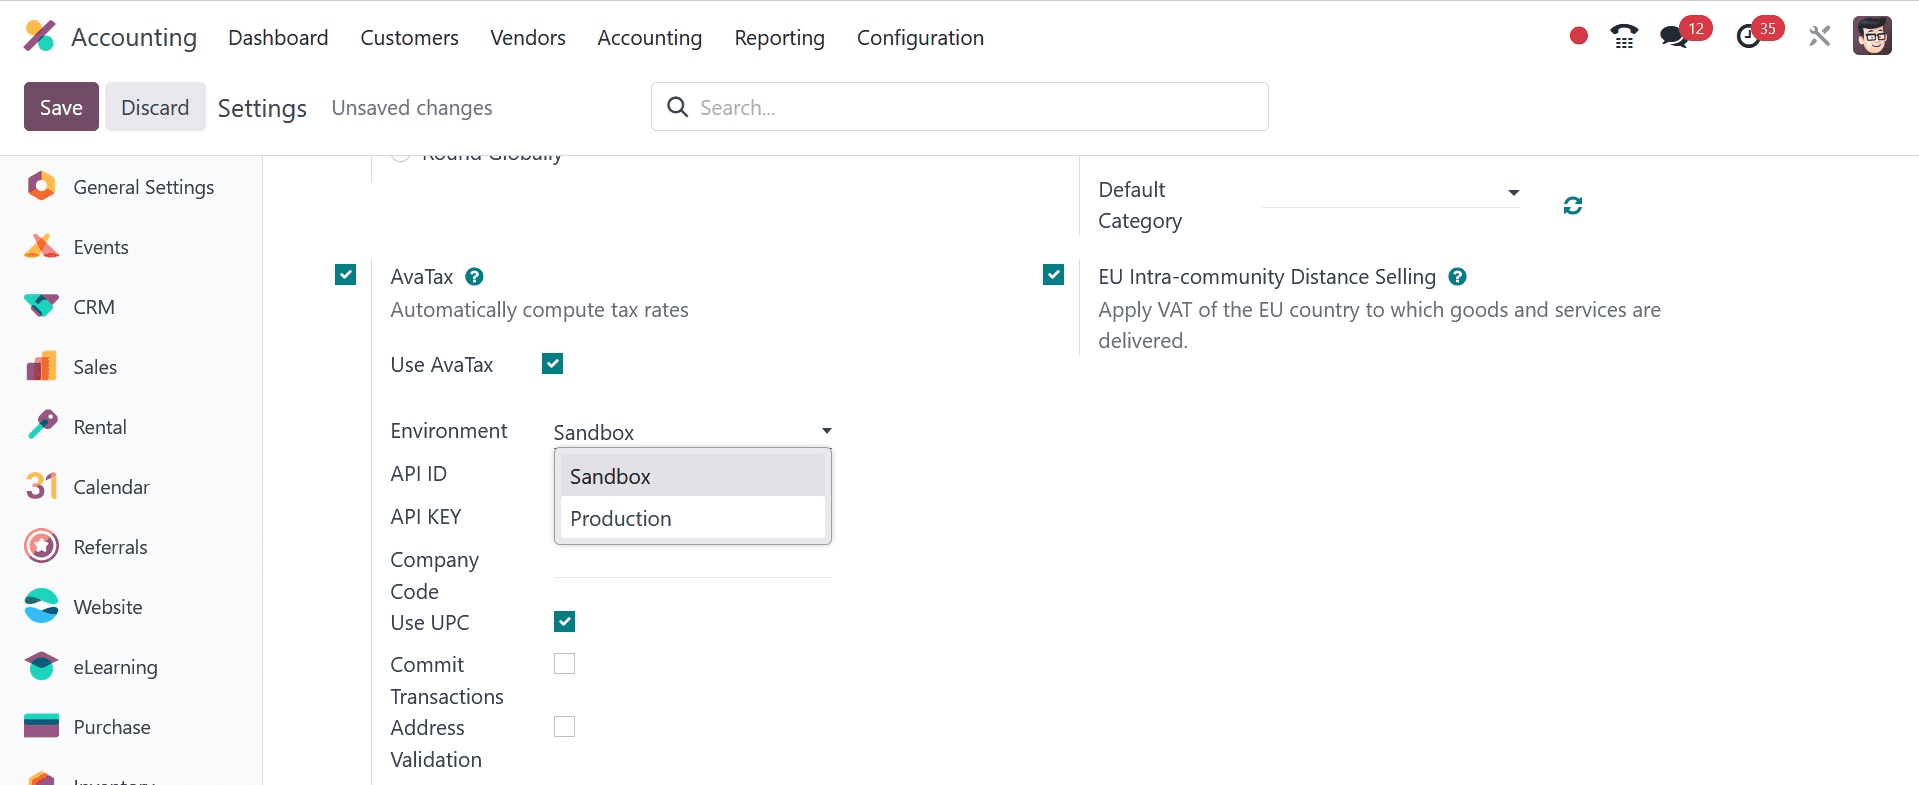
As a result, creating credentials and activating the AvaTax feature is simple.
Under the Fiscal Positions, users can configure tax mapping for AvaTax. On the Configuration tab, select the Fiscal Positions option located beneath the Accounting section. Information about each fiscal position and organization is displayed in the Fiscal Position pane. Click the NEW icon in the Fiscal Position window, as shown in the screenshot below, to create a new fiscal position.

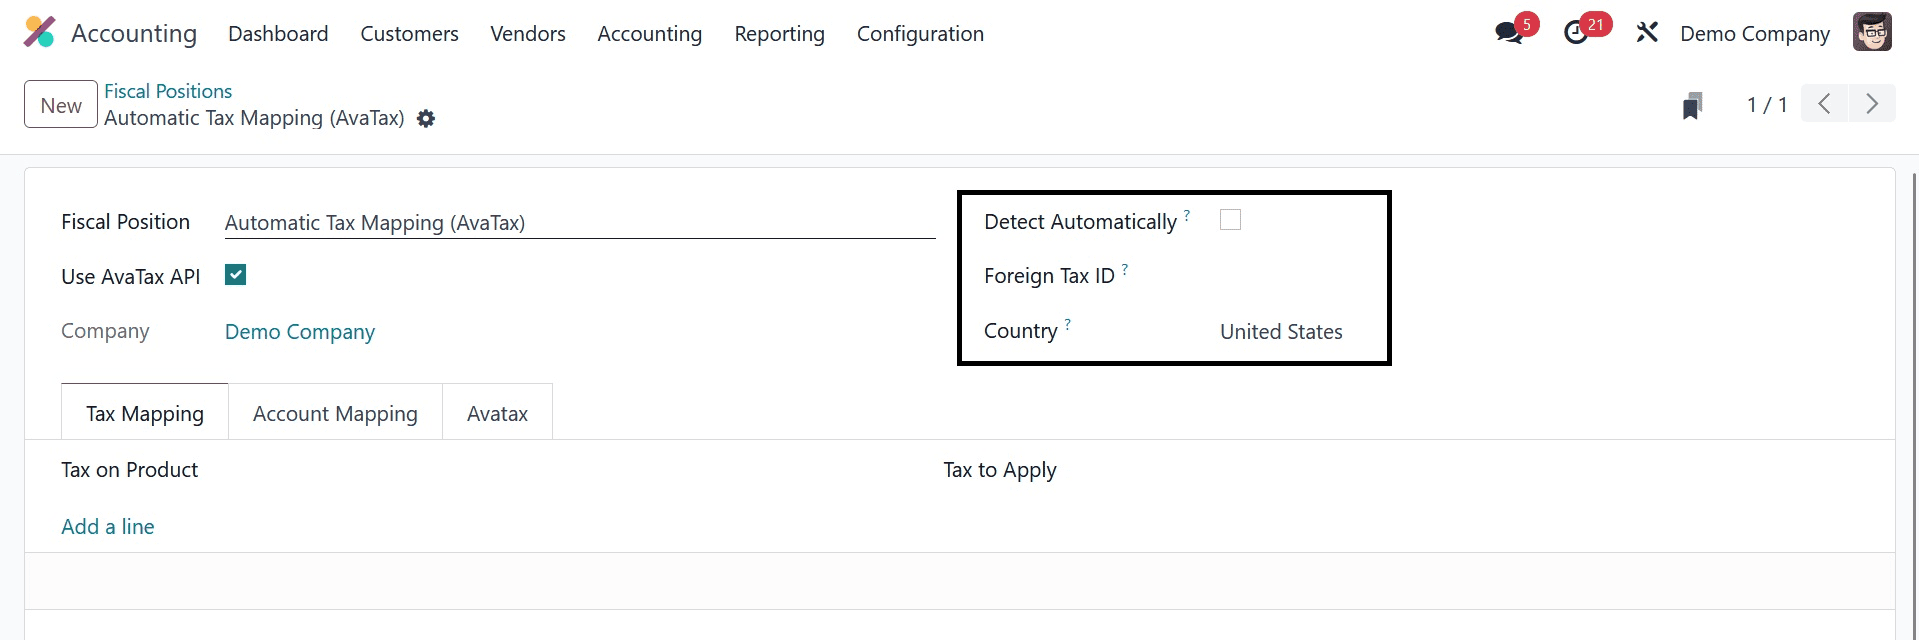
Select Automatic Tax Mapping (AvaTax) as the Fiscal Position name in the new window. As seen in the screenshot below, we may launch AvaTax API by turning on the Use Avatax API field in the Fiscal Positions panel.
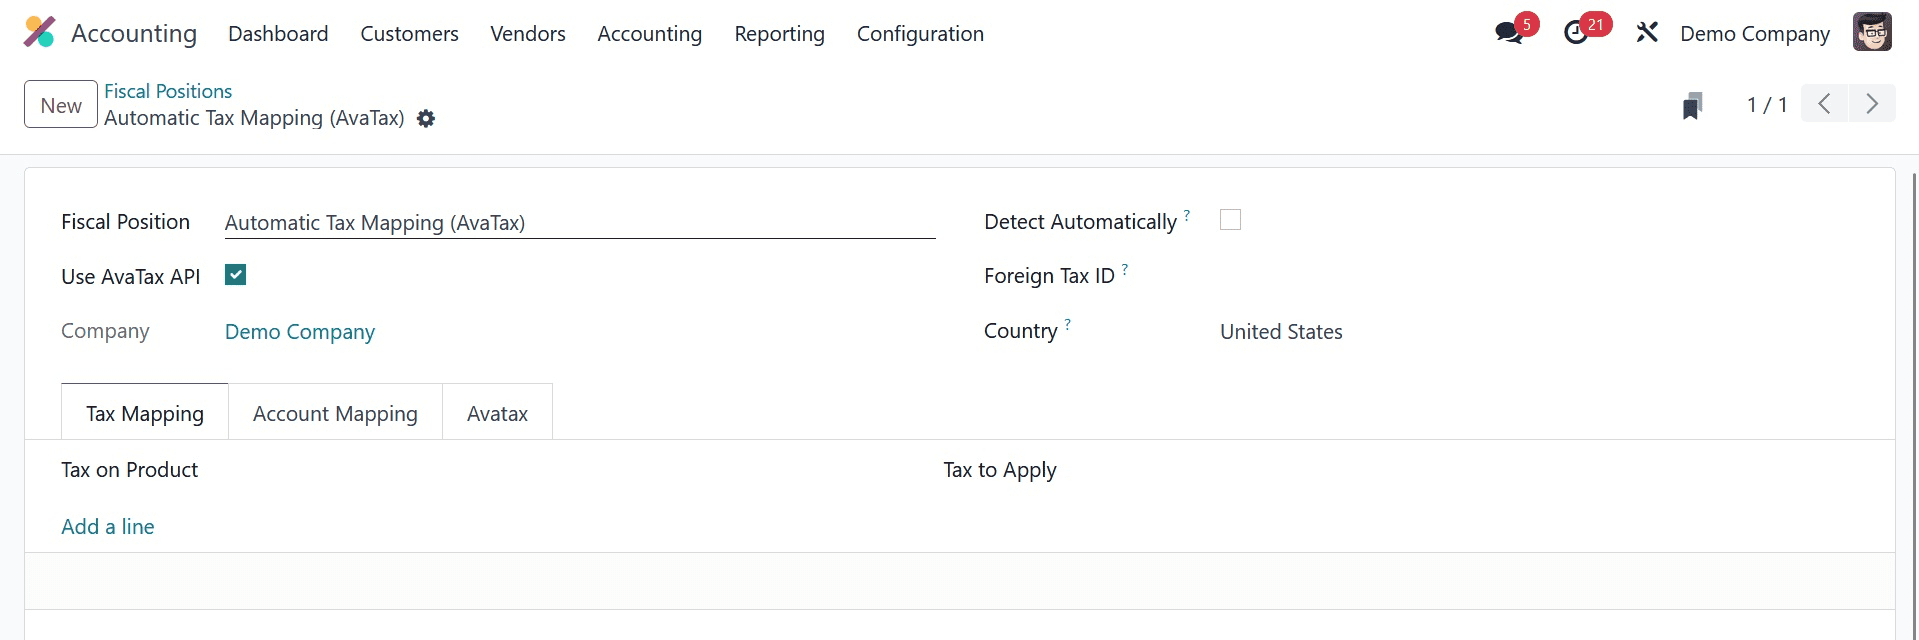
Enable the Detect Automatically field to automatically detect the fiscal position. To the fiscal position, the user can also designate the Foreign TAX ID and Country.
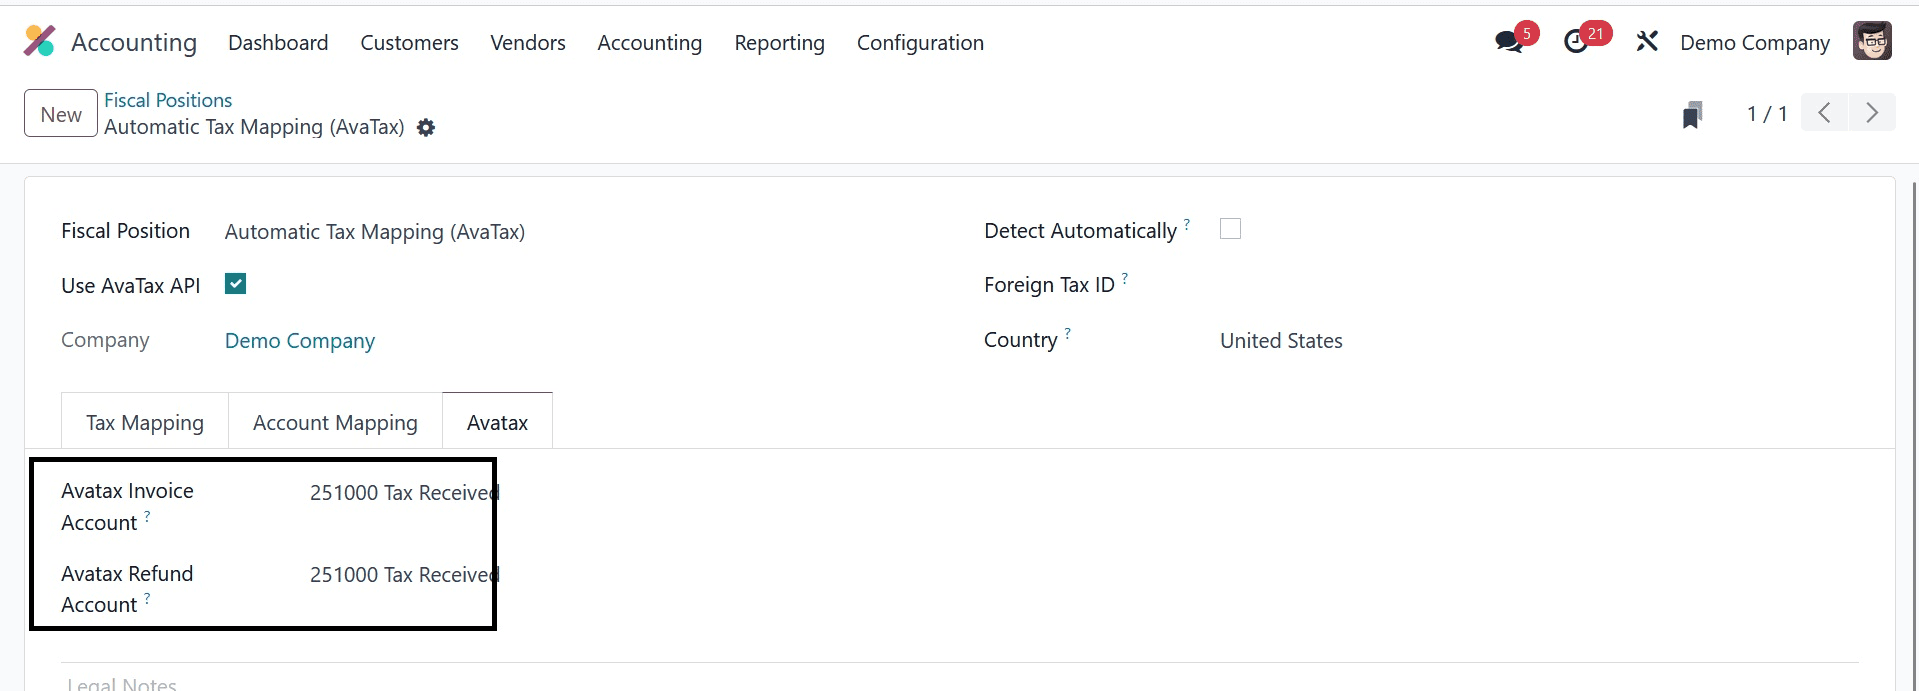
We may manage the AvaTax details in the Fiscal Positions window by navigating to the AvaTax tab below. In the AvaTax Invoice Account column, select the account that is used for AvaTax Taxes. Additionally, select the account in the AvaTax Refund Account field—as shown in the screenshot below—for an AvaTax tax refund.
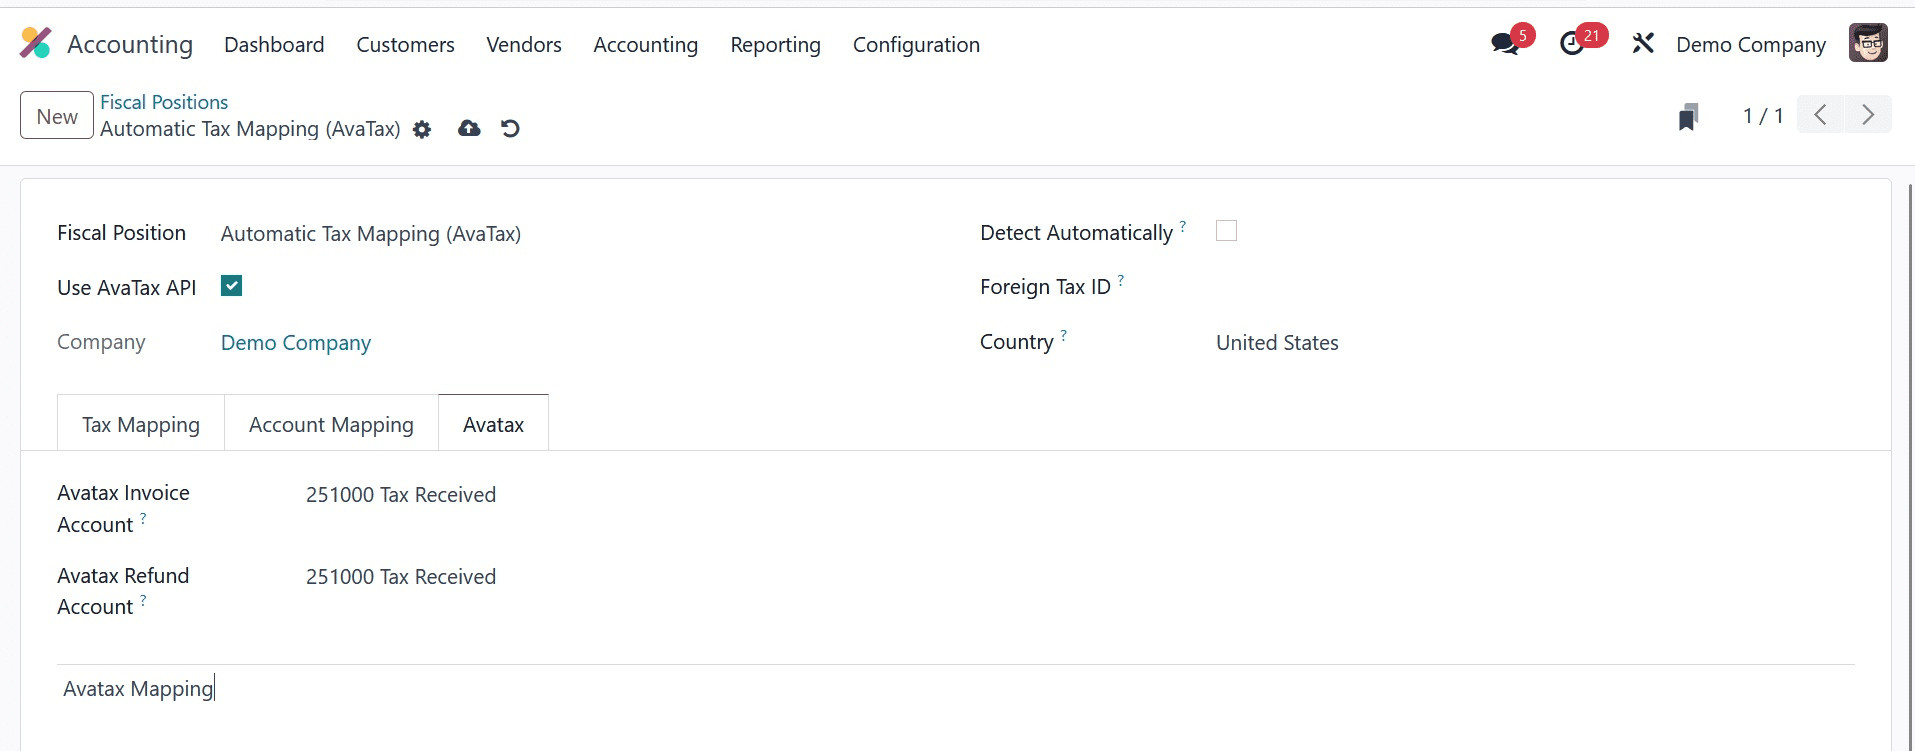
The user has the option to discuss the AvaTax legal notes at the end of the tab. The screenshot below cites the printing of these legal comments on invoices.
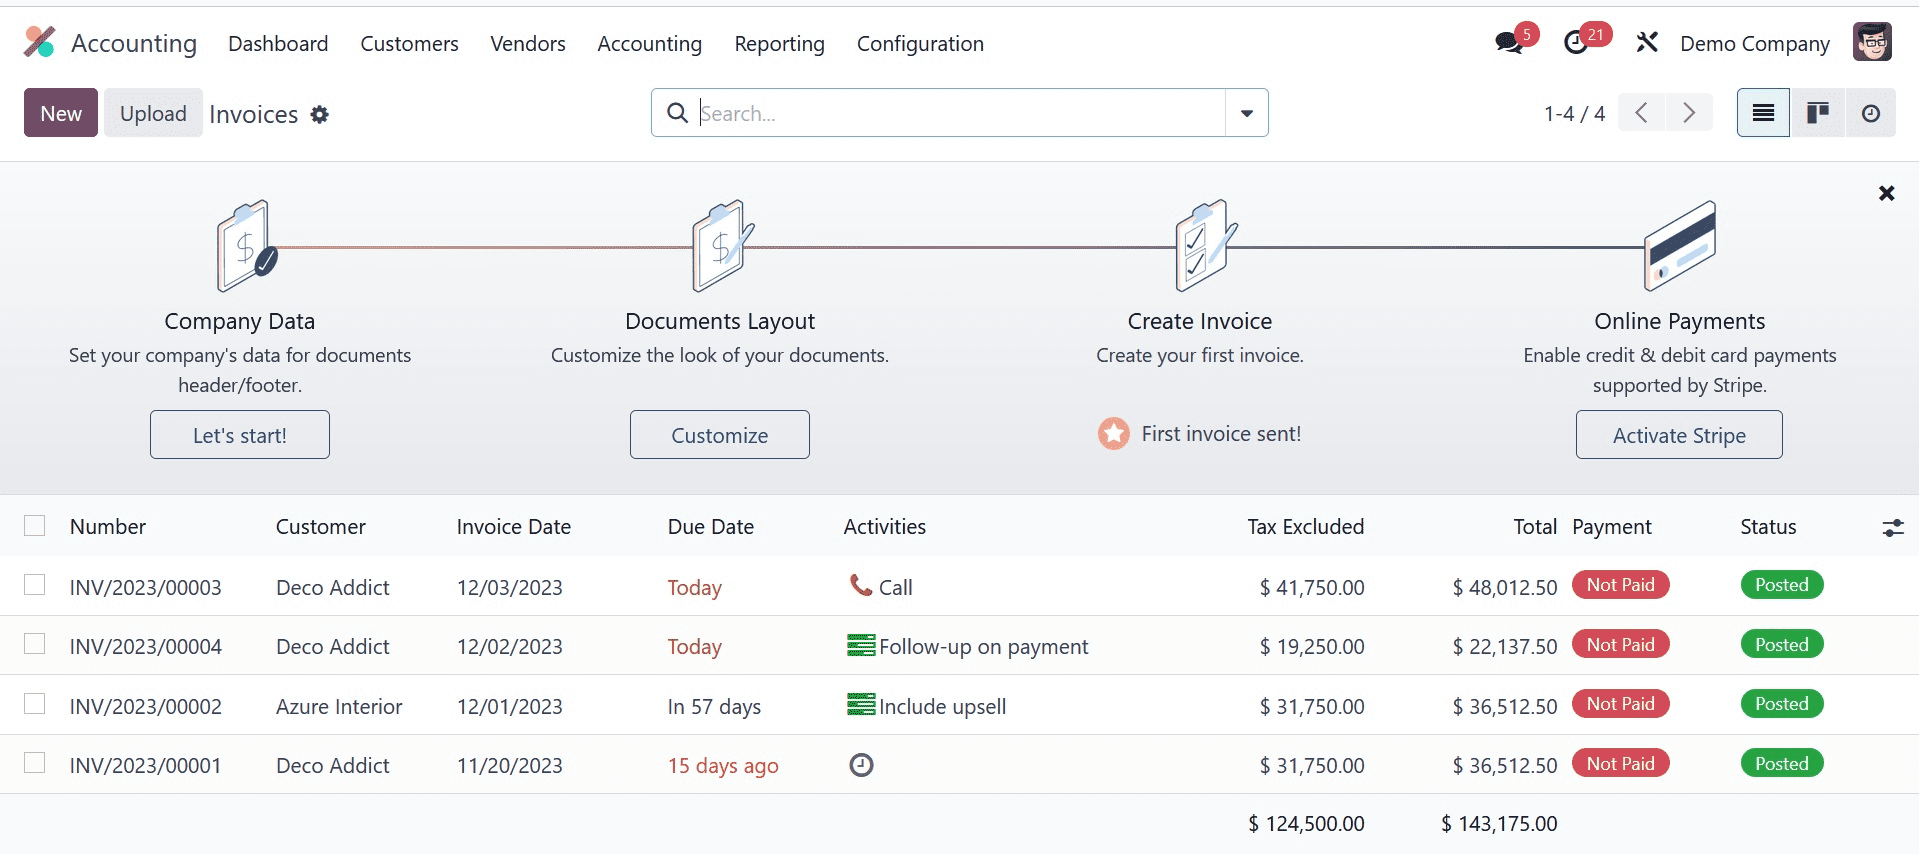
After entering the required information for Automatic Tax Mapping for AvaTax, click the Save manually icon. Let's examine the tax computation in Odoo 17 Accounting now that an invoice has been created. A list of all created invoices is available to the user by selecting the Invoices menu under the Customers tab. To begin a new invoice, select the NEW icon in the Invoices pane, as seen in the screenshot below.
Enter Anita Oliver as the Customer and Delivery Address in the new window. Afterward, as seen in the screenshot below, you may select the product by selecting Add a Line option beneath the Invoices tab.
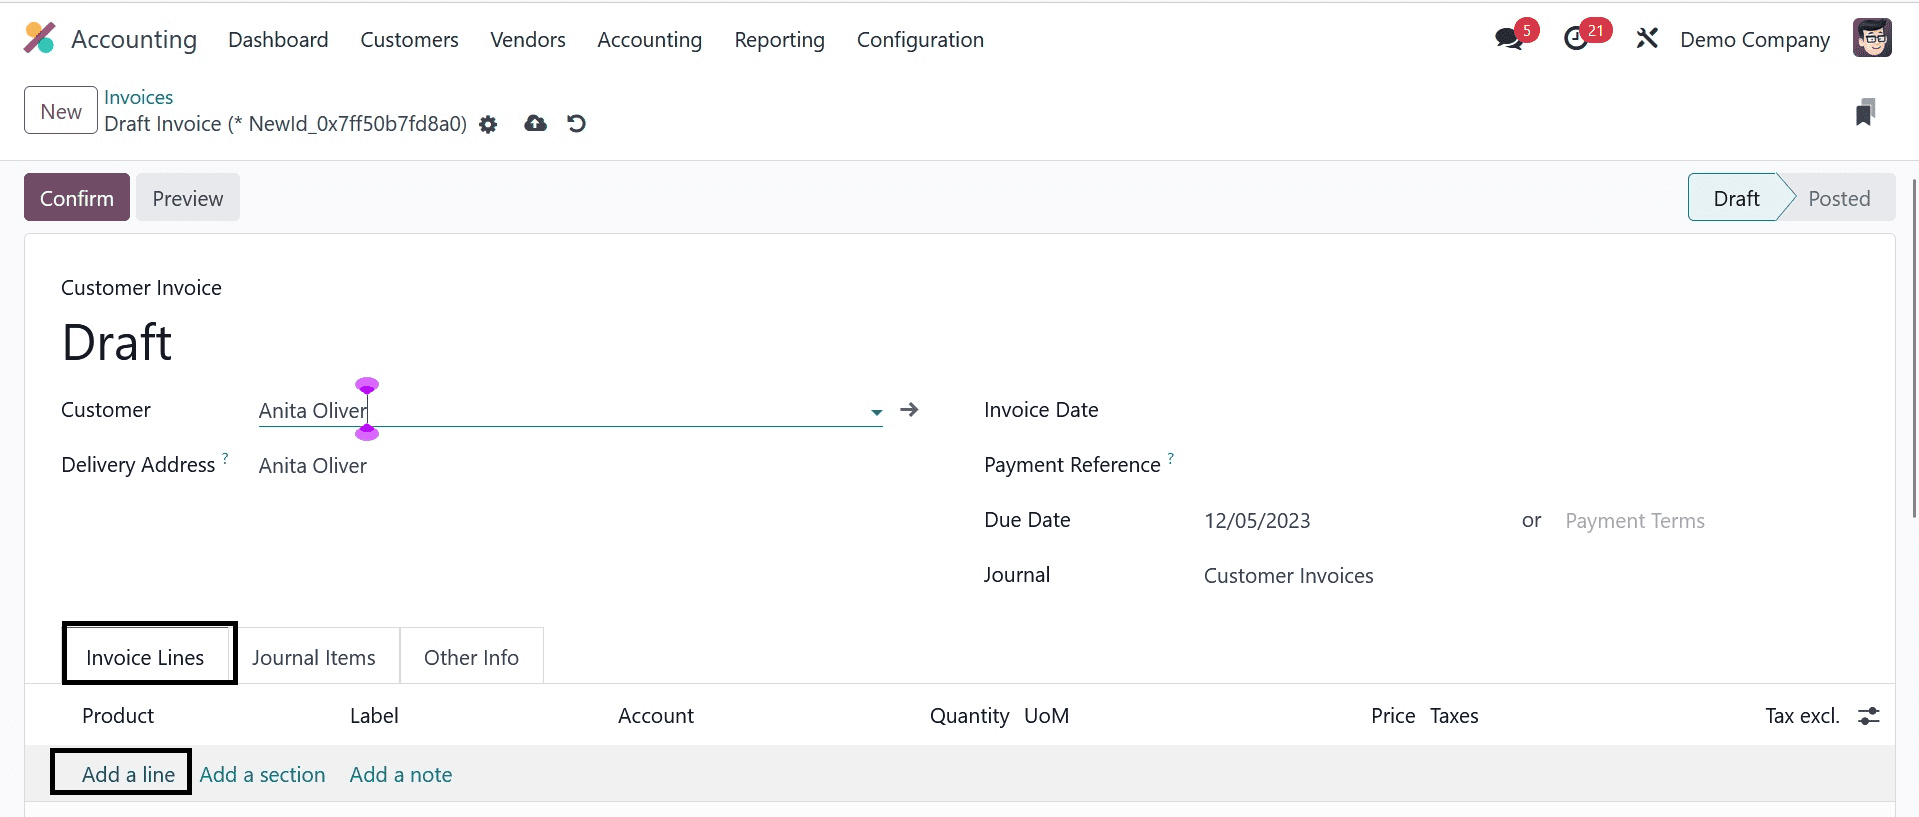
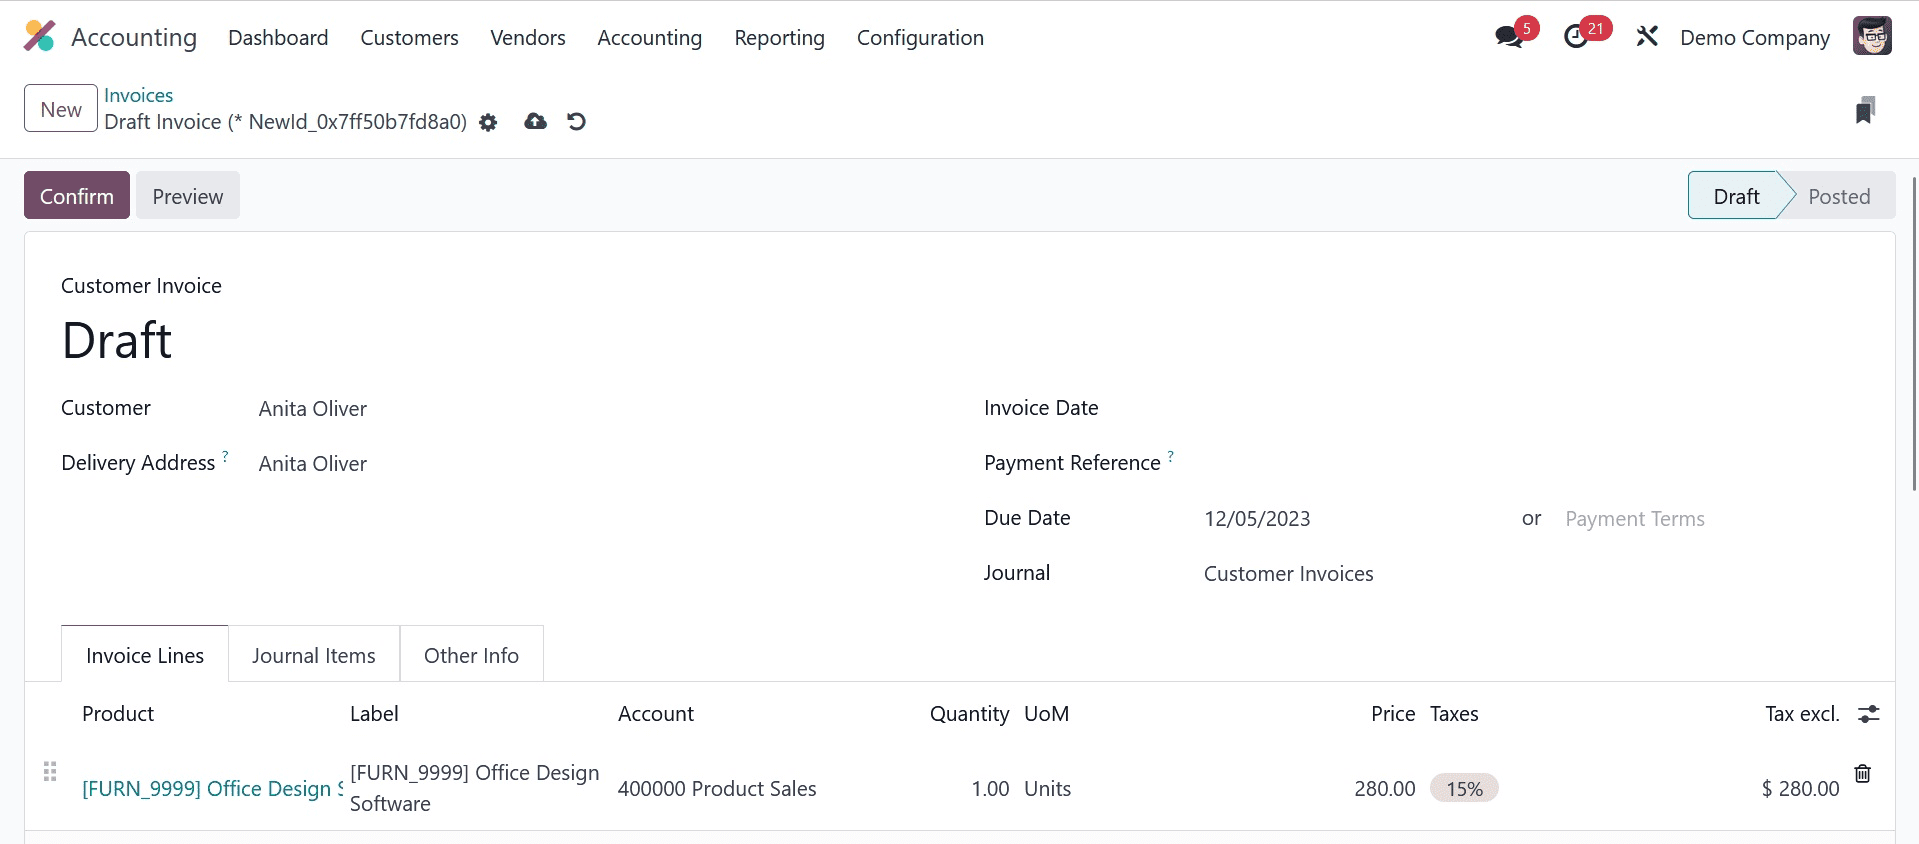
Select your product from the list underneath the Invoice Lines tab after selecting Add a line. As shown in the screenshot below, we choose the Simple Product Pen inside the invoice lines.
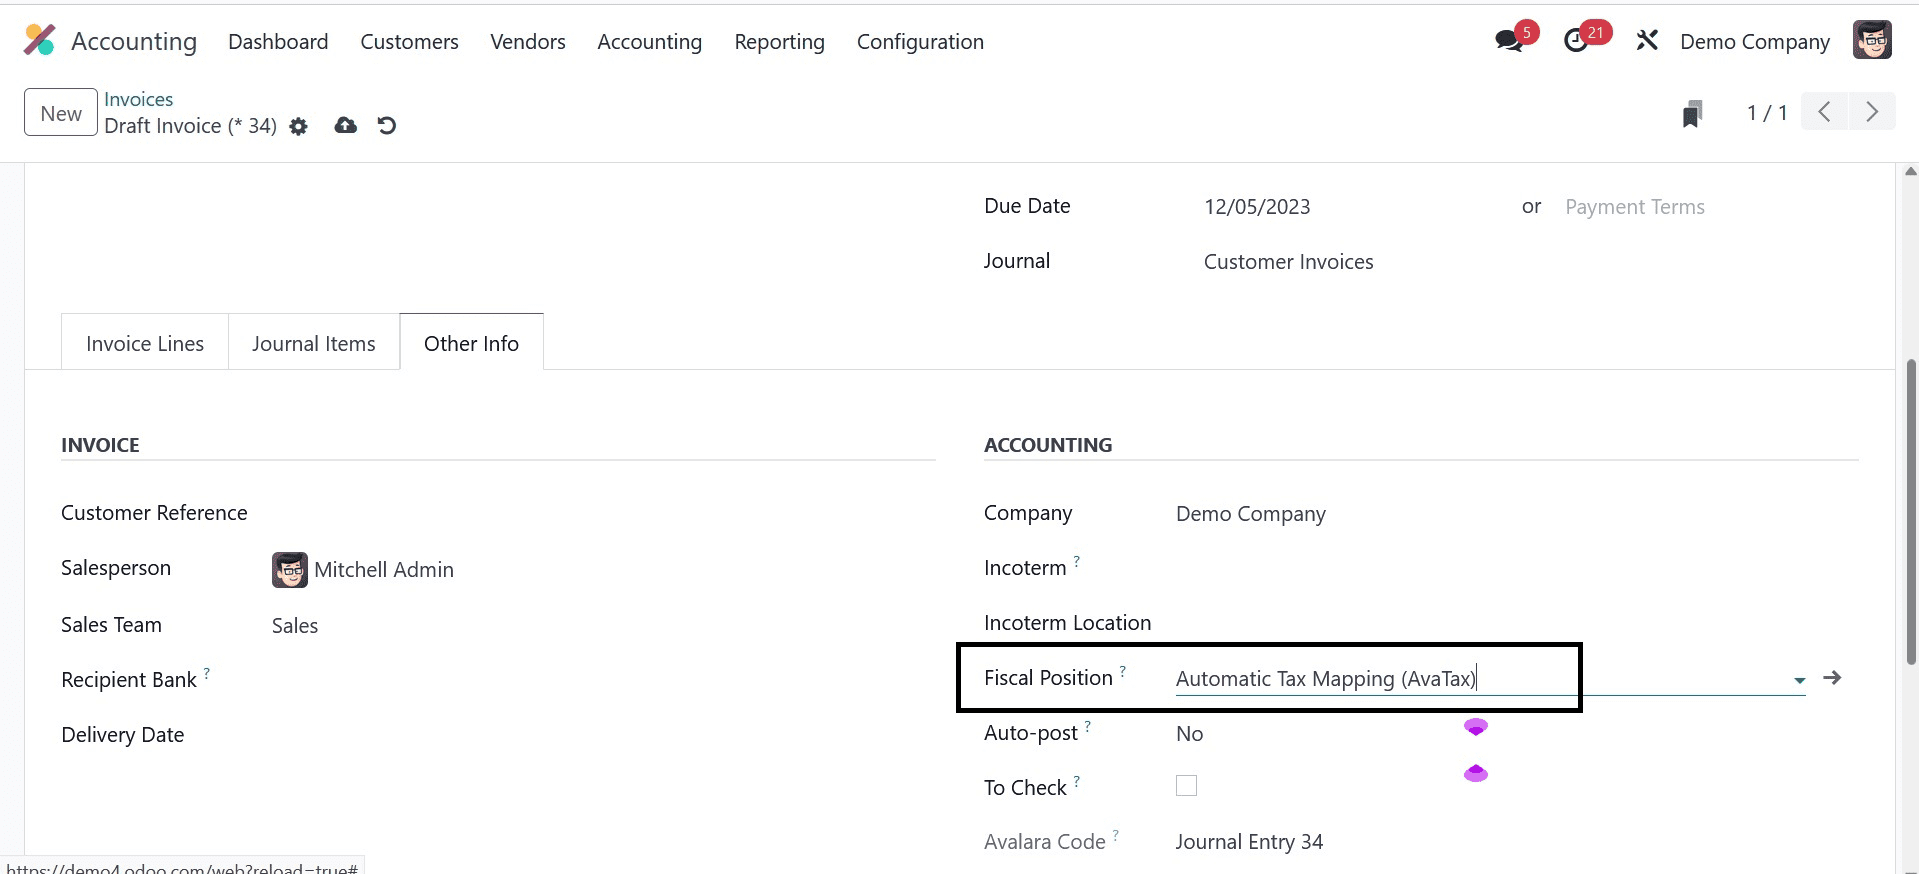
You can control the financial situation by clicking on the Other Info tab. It is used to modify taxes and accounts for particular clients or order invoices. As seen in the screenshot below, select your developed Fiscal Position Automatic Tax Mapping (AvaTax) under the Other Details tab.
In the Invoices box shown in the above screenshot, after entering the required information, click the SAVE icon. By selecting the COMPUTE TAXES USING AVATAX option in the Draught Invoice window, we may compute taxes automatically.
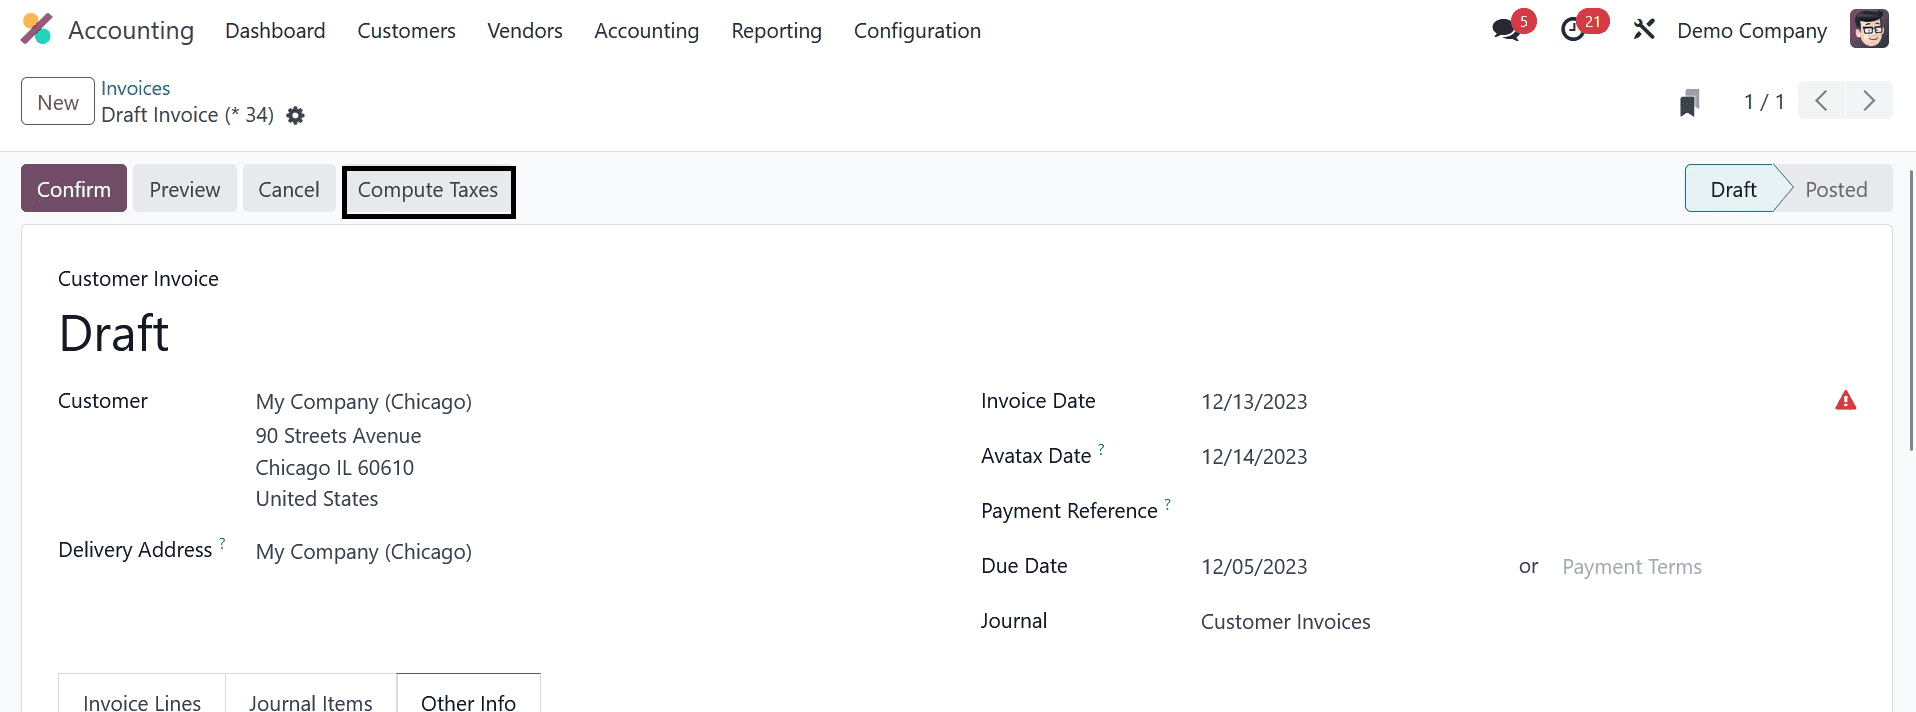
In the Invoices box shown in the above screenshot, after entering the required information, click the SAVE icon. By selecting the COMPUTE TAXES option in the Draught Invoice window, we may compute taxes automatically. After that, taxes are manually computed inside an invoice with the AvaTax program.
How to Set AvaTax Category on Product Data in Odoo 17 Accounting
Within Odoo 17, an Avatax connection is available for both sales and invoice orders, including the AvaTax fiscal position. A product category is a particular type of good or service. Within the Product Category, users can designate an AvaTax Category. To do this, select Product Categories from the Configuration tab's Management section. As seen in the screenshot below, the new window displays a list of all generated Product Categories.
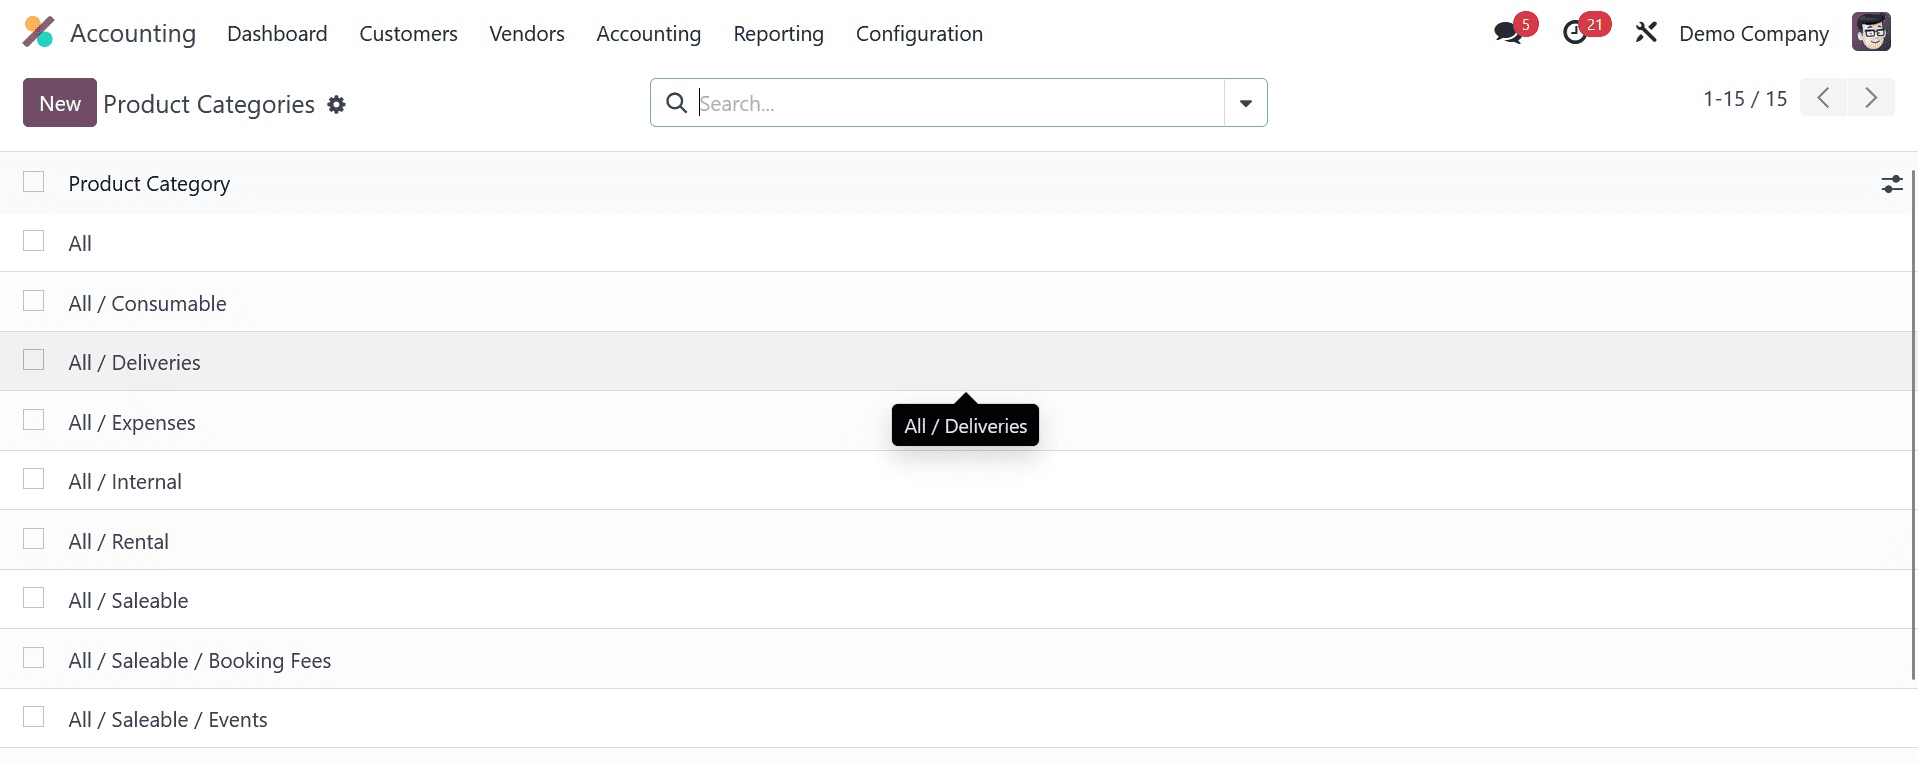
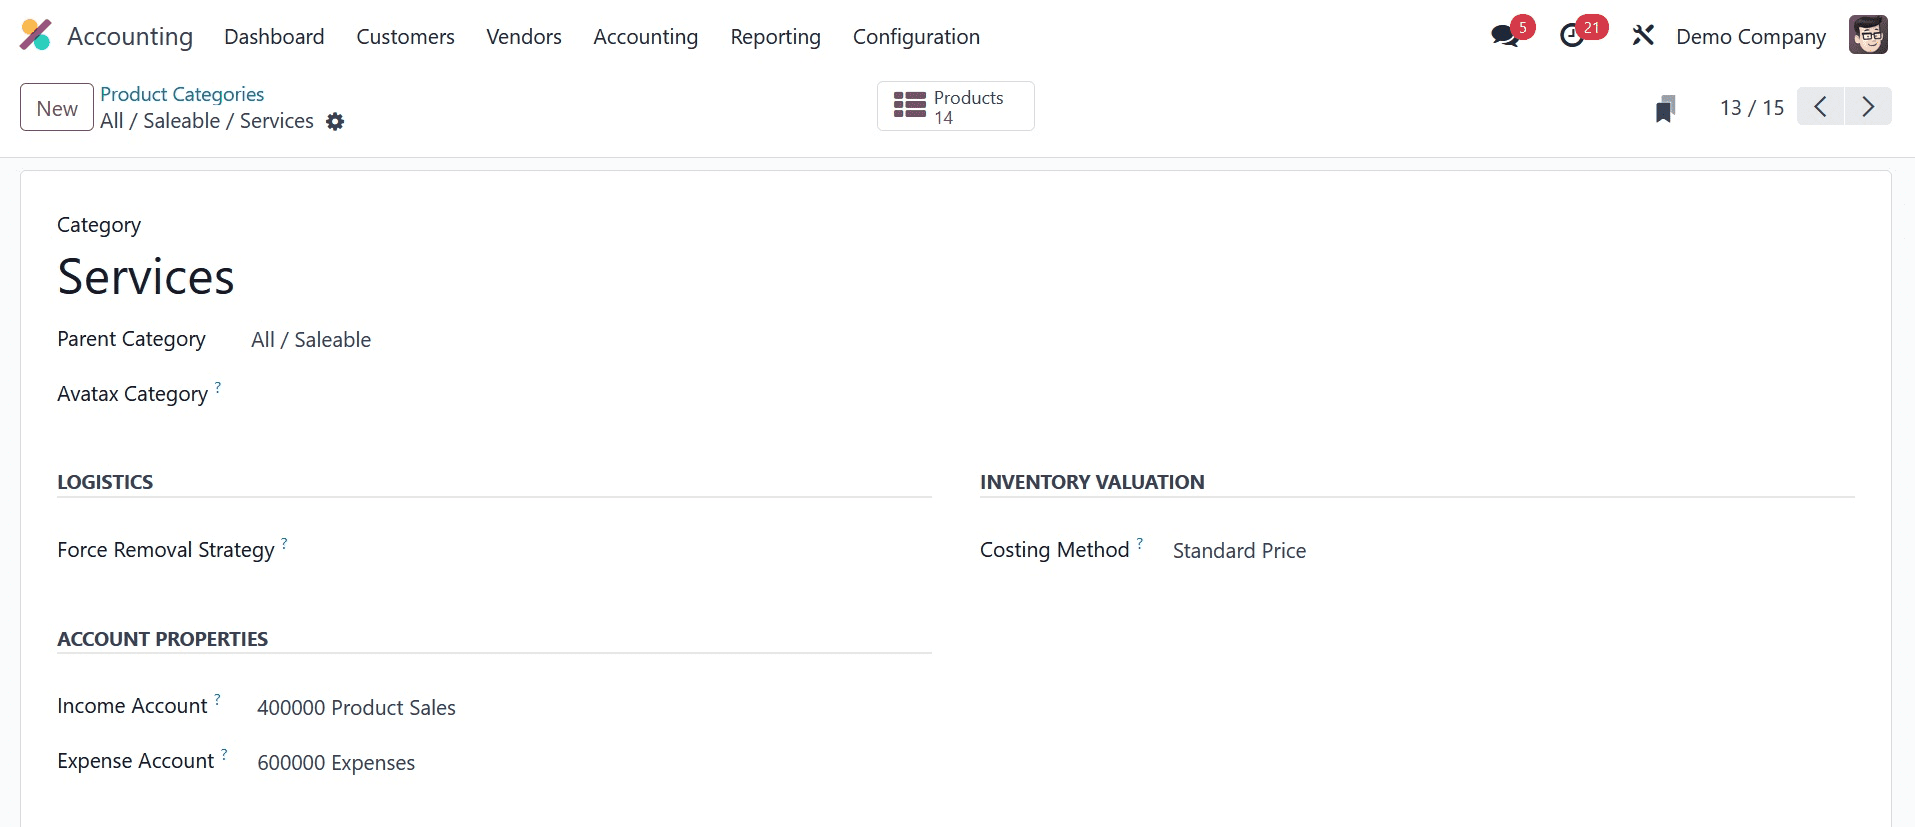
To create a new category, click the NEW button located in the Product Categories section. Select your Parent Category from the list in the screenshot below, then apply the Category name Services in the new window.
Select the required AvaTax category in the Avatax Category field, then click the Save manually button, as seen in the screenshot below.
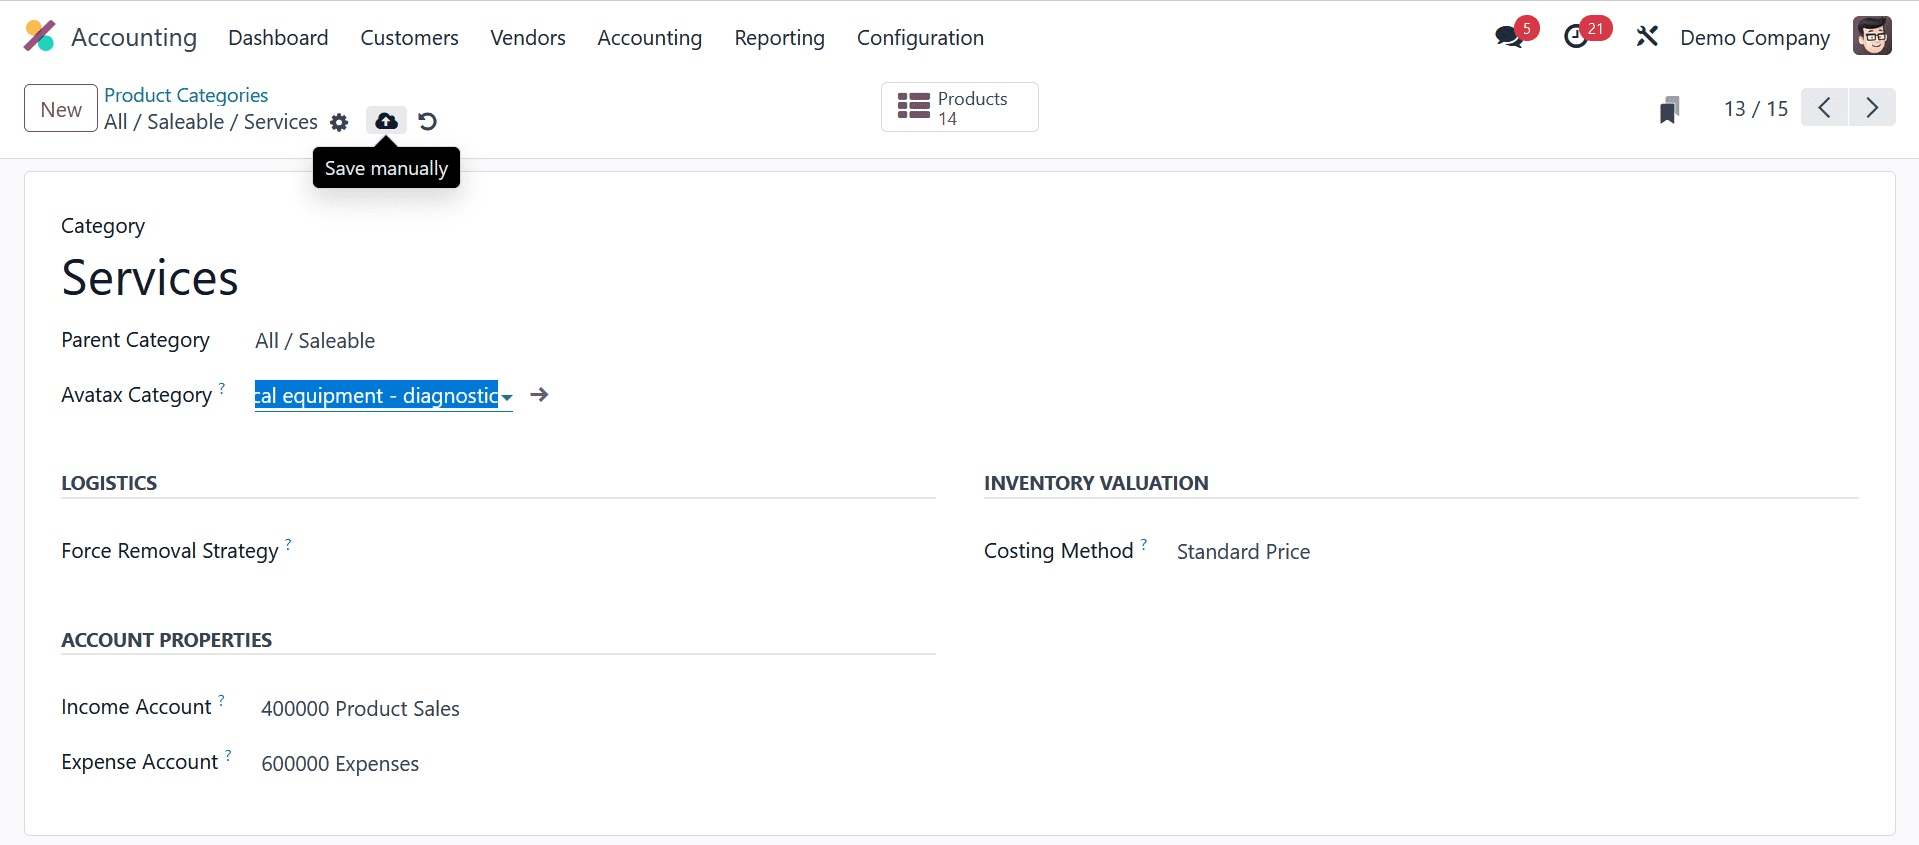
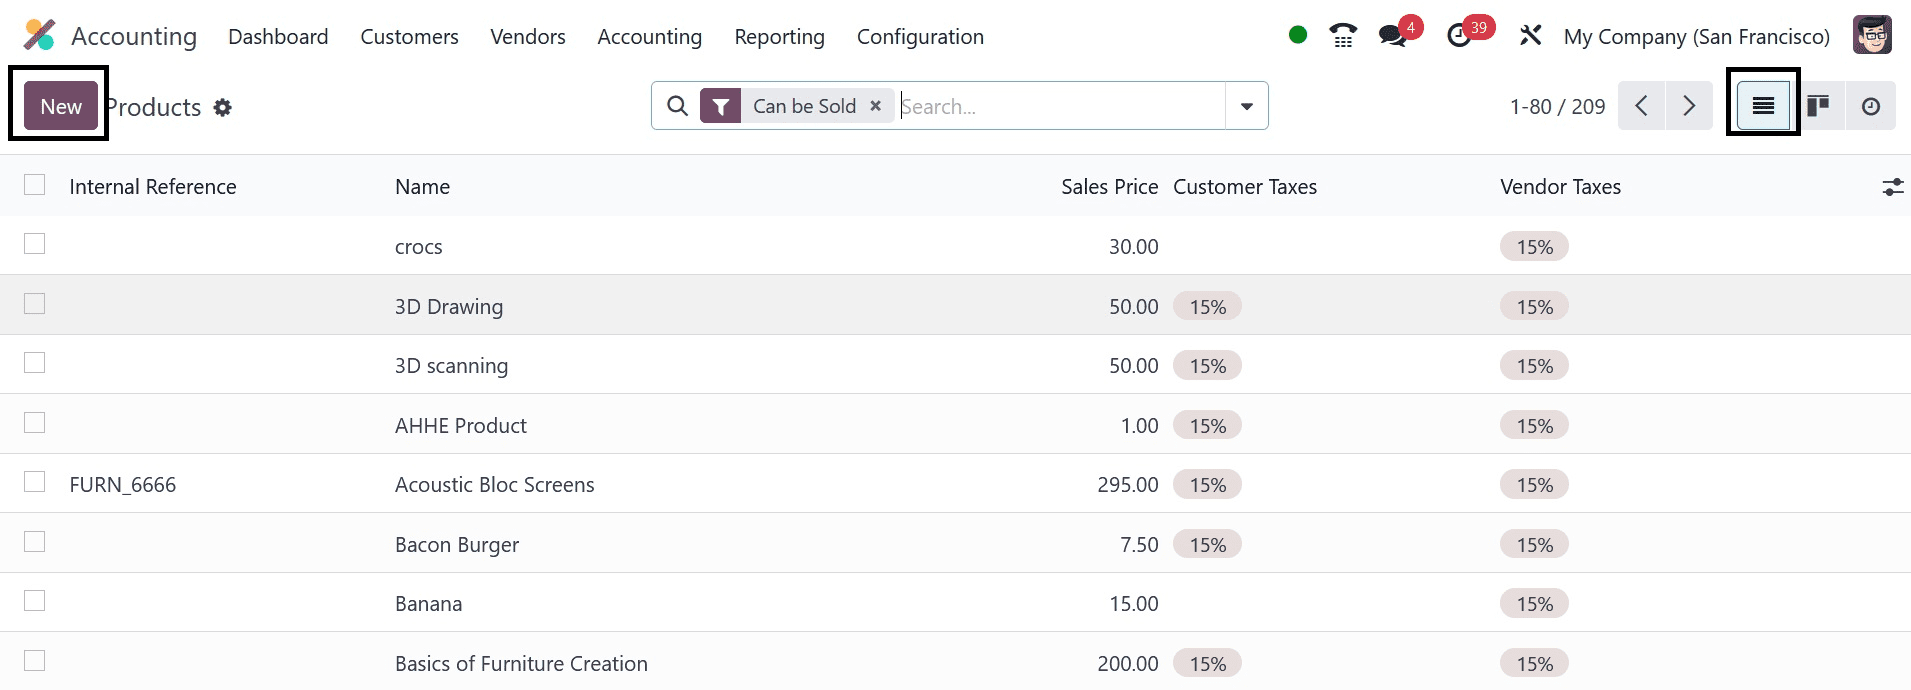
Therefore, it is simple to set an AvaTax Category on a Product Category in Odoo 17 Accounting. In a similar vein, the Odoo 17 allows the user to designate the AvaTax Category for a particular product. The user can view all product data by selecting the Products menu from the Customers tab. Each item's characteristics, including its name, internal reference, vendor taxes, sales price, and more, are available for viewing. In the Products box, click the NEW button to generate a new product, as seen in the screenshot below.
Click the star symbol to designate this page as the previous one. Put the Product Name: LED Lamp on the new page. Under the General Information tab, users can modify basic product information.
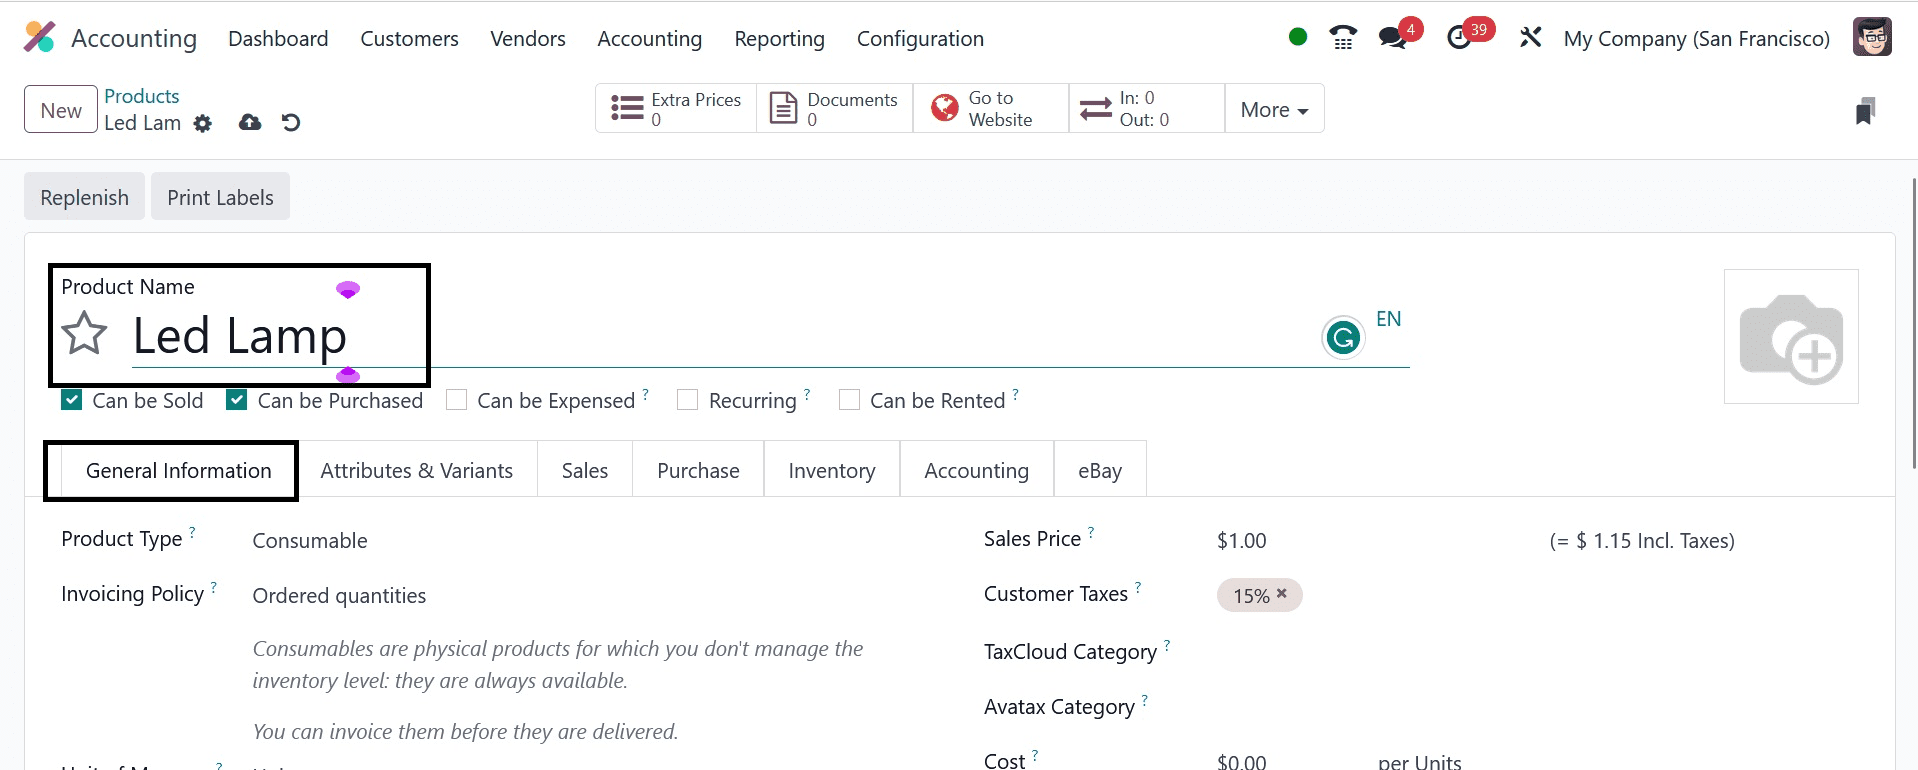
Subsequently, submit the product image on the right side of the product window. As seen in the figure below, users can specify the Avatax category inside the AvaTax Category field located beneath the General Information tab.
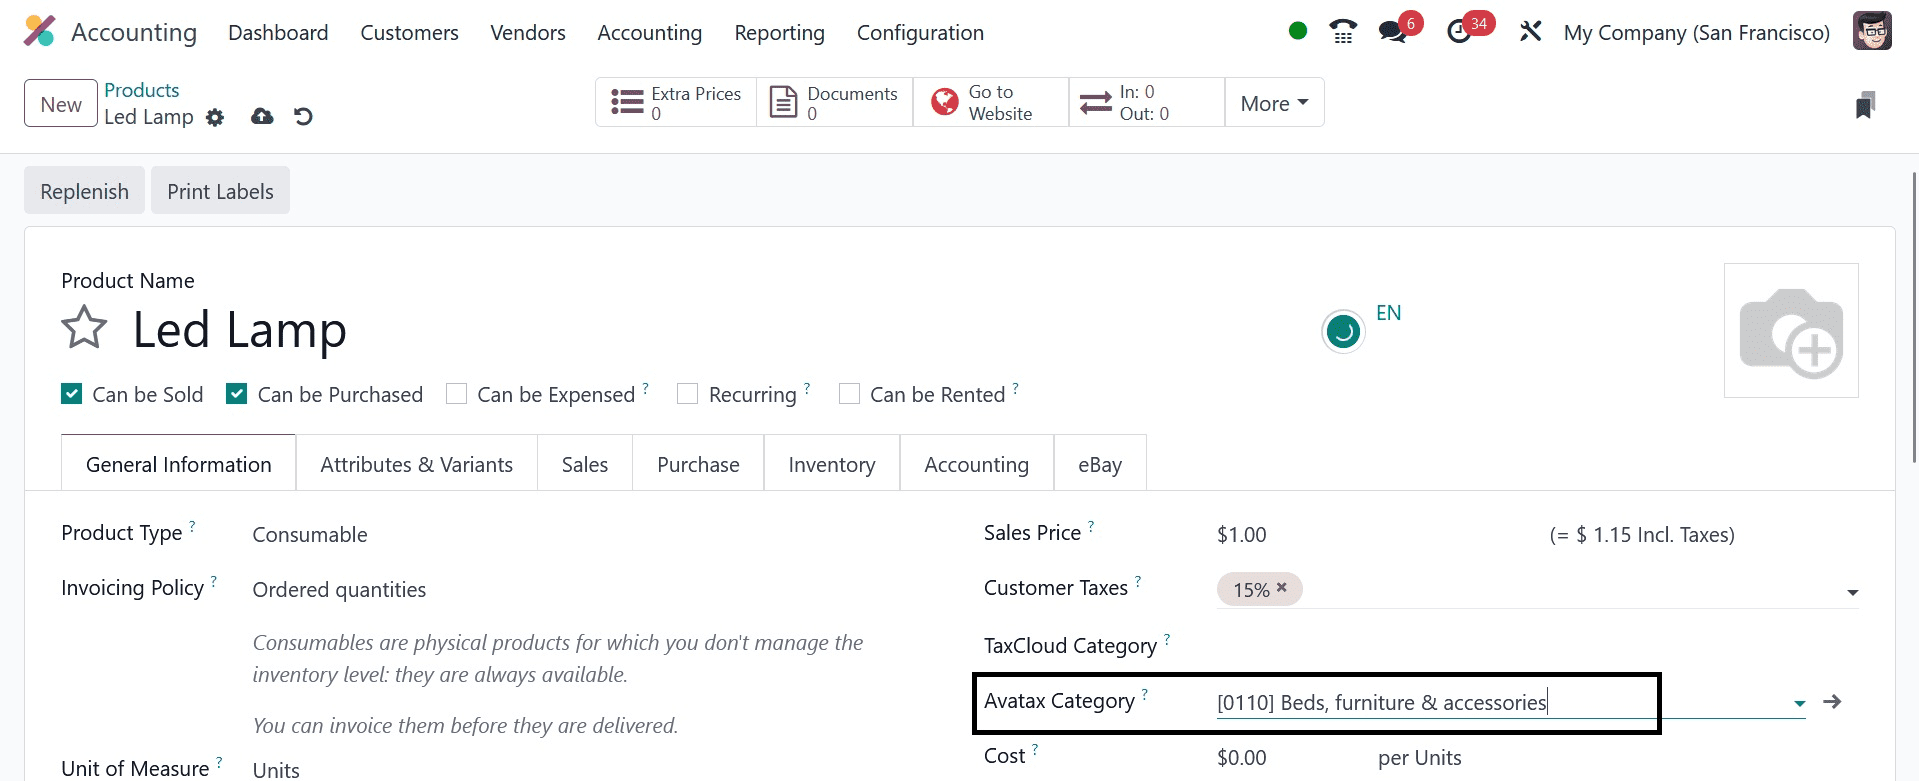
It is therefore possible to add an Avatax Category to product data within the Odoo 17 Accounting module.
The Odoo 17 Accounting module's AvaTax application makes it simple to calculate taxes automatically. Using Odoo EP software allows businesses to swiftly configure their taxes.