Maintaining up-to-date and detailed financial records is critical for running a successful organization. Having accurate records lets us know whether the company is making a profit or not. Accounting helps organizations to have a structured system for recording all the financial transactions and analyze the income, expenses, assets, and liabilities. This financial data helps to have a clear picture of the company's overall financial health and make good decisions to maintain or improve it.
In Odoo 17, the Chart of Accounts is the list of all the accounts that are used to record the financial transaction, it typically follows a hierarchical structure with accounts organized into categories and subcategories.
All the accounting entries are recorded in the accounting journals. With the proper use of the Journals, businesses can maintain their financial records accurately and organize their accounting records. In Odoo, we have the taxes to manage the taxation element of business operations.
Importing a Chart of Accounts, Journals, and Taxes can be incredibly useful for businesses looking to streamline their data entry processes or migrate data from another system. Importing data allows us to add multiple data records quickly and efficiently, saving time compared to manual entry.
In this blog, We will be discussing how Chart of Accounts, Journals, and Taxes can be imported into the Odoo 17 database.
Importing Chart of Account in Odoo 17
Chart of Accounts is a list of all the accounts that are used to record financial transactions in an organization’s general ledger. It typically follows a hierarchical structure with accounts organized into categories and subcategories.
In order to import the Chart of Accounts, we can first download the Chart of Accounts import template. After downloading, the template can be modified and edited before uploading it into the Odoo database.
To download the required template, first, we have to navigate to the Accounting app ? Configuration ? Chart of accounts. Select a Chart of Accounts record and click on the Actions button to reveal the Export option.
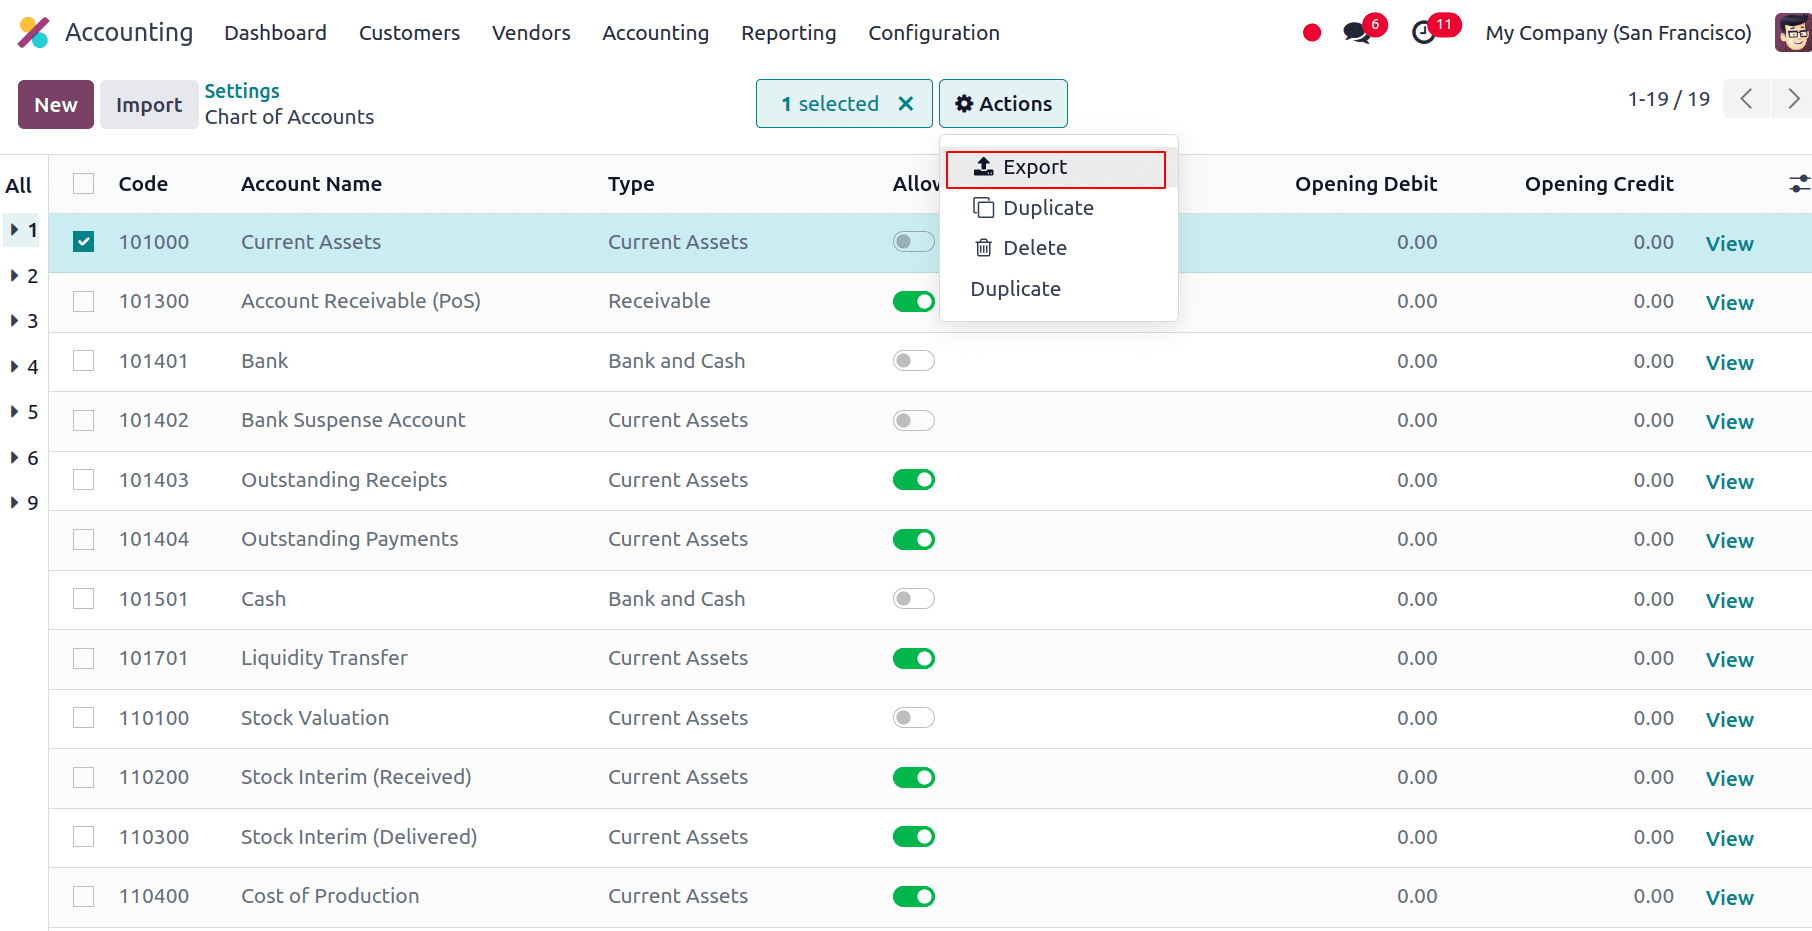
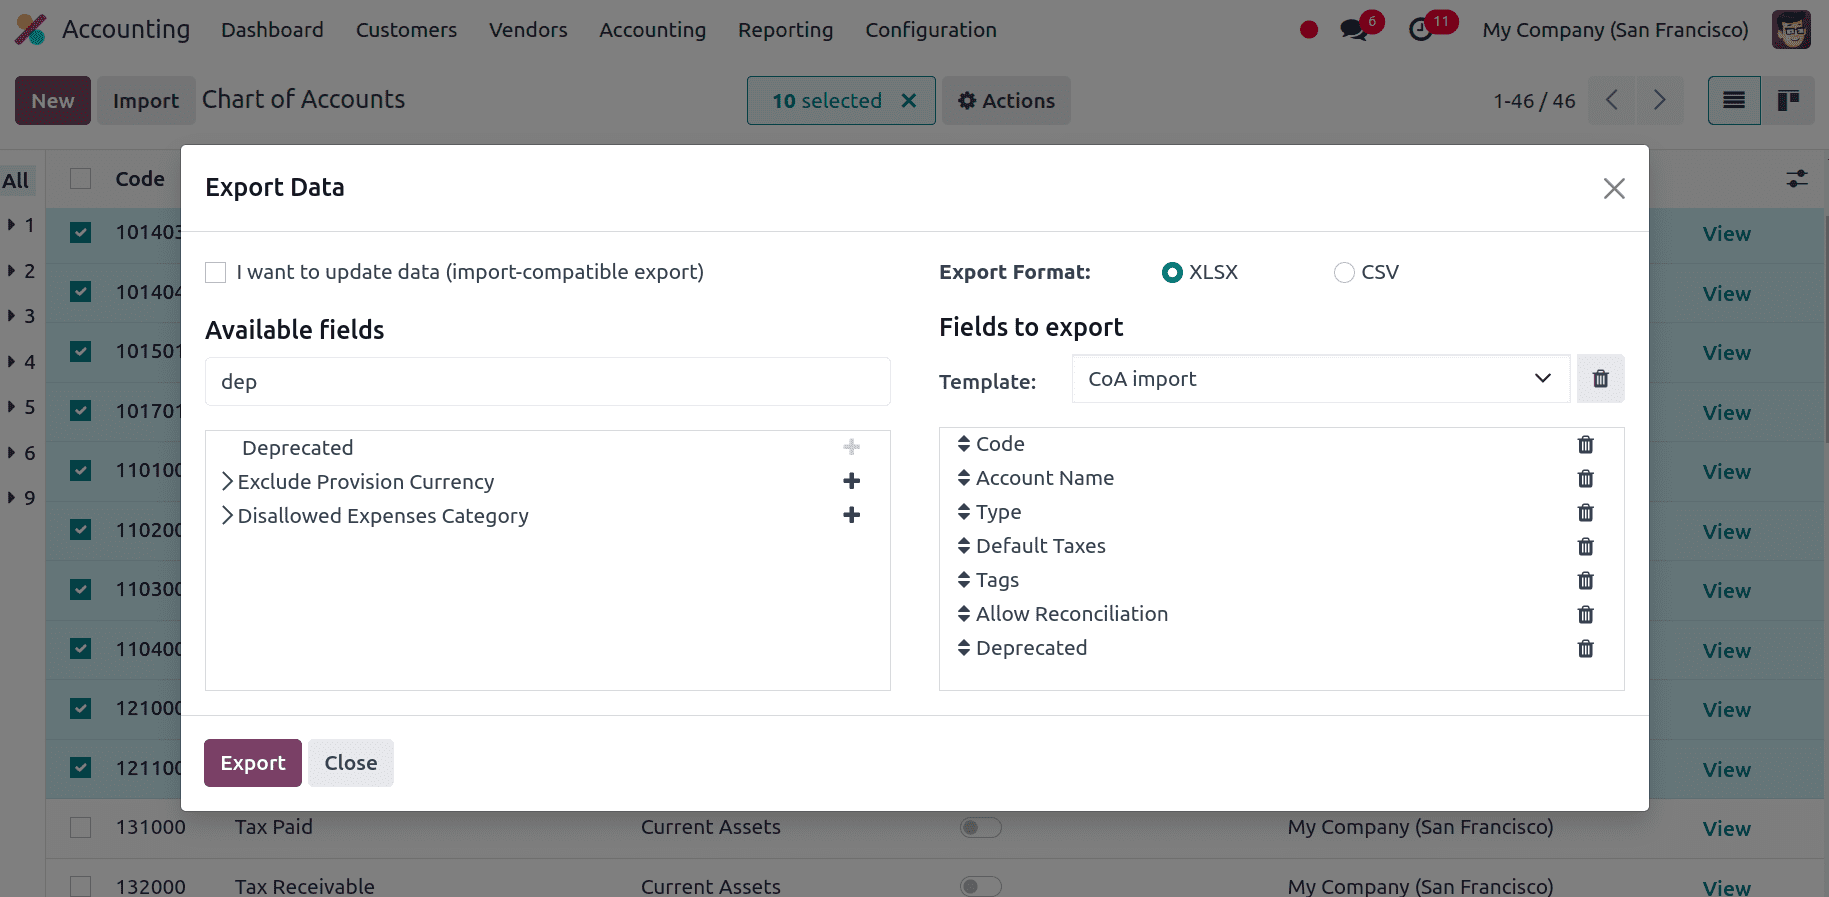
Click on Export and a new window appears with Available fields on the left and Fields to export on the right. From the available fields, we can add the fields that we want to export to the export section by clicking on the + icon. A name can be provided for the template to save the template in that name, and we can use this template if we are exporting the data multiple times.
An option called, I want to update data (import-compatible export) is also available. If we check that option, only the fields that can be imported will be shown. If we want to update any existing data, we can add an external ID field to the file, we are exporting to identify the existing data that needs to be updated. When we import the data odoo maps the field with the unique ID provided. When the box is left unchecked, all of the fields are displayed, not only the ones that can be imported, giving you a lot more field options.
While exporting, we can export in two formats: .csv and .xlsx. The > (right arrow) icon can be clicked to display more sub-field options for each field, and the search bar can be used to find specific fields we require. We can also drag the fields to arrange them in the order we want in the exported file, and we can use the trash icon to delete unnecessary fields.
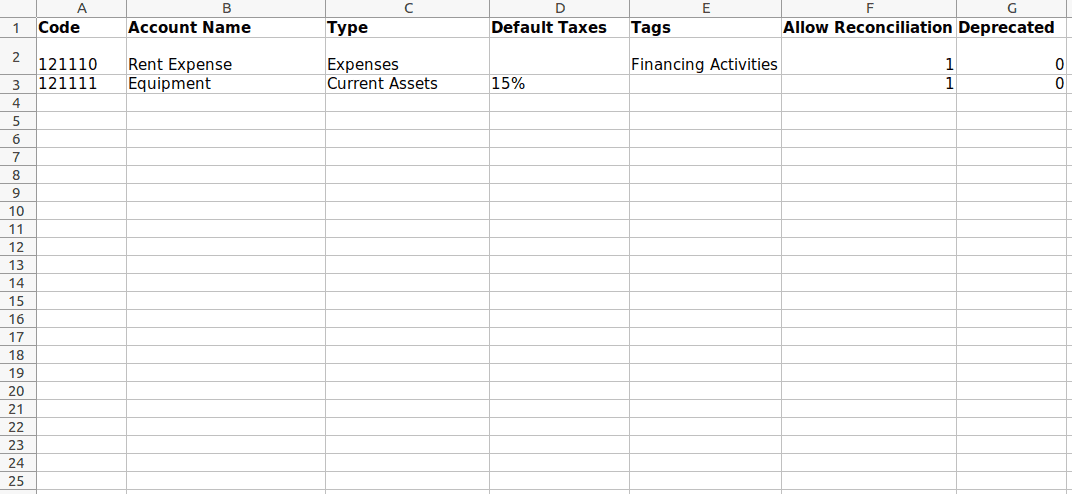
We can add the following field to export:
* Code: In this field, we can provide the unique code that is assigned to each account for identification purposes.
* Account name: Name of the account that helps to identify the purpose or nature of the account.
* Type: Types of the account such as Asset, Liability, Expenses, Revenue, or Equity.
* Default taxes: Specifies whether any default taxes need to be applied to the account transactions.
* Tags: Tags are for categorization and filtering purposes of the account.
* Allow Reconciliation: In this field, we can indicate whether the account is reconcilable or not. It is a boolean field, we can give 1 if it is reconcilable and else 0.
* Deprecated: This is also a boolean field where we can provide the value 1 if the account needs to be kept inactive and 0 otherwise.
After adding all the fields to export, we can click on the Export button to export the template. And customize the template according to the need.
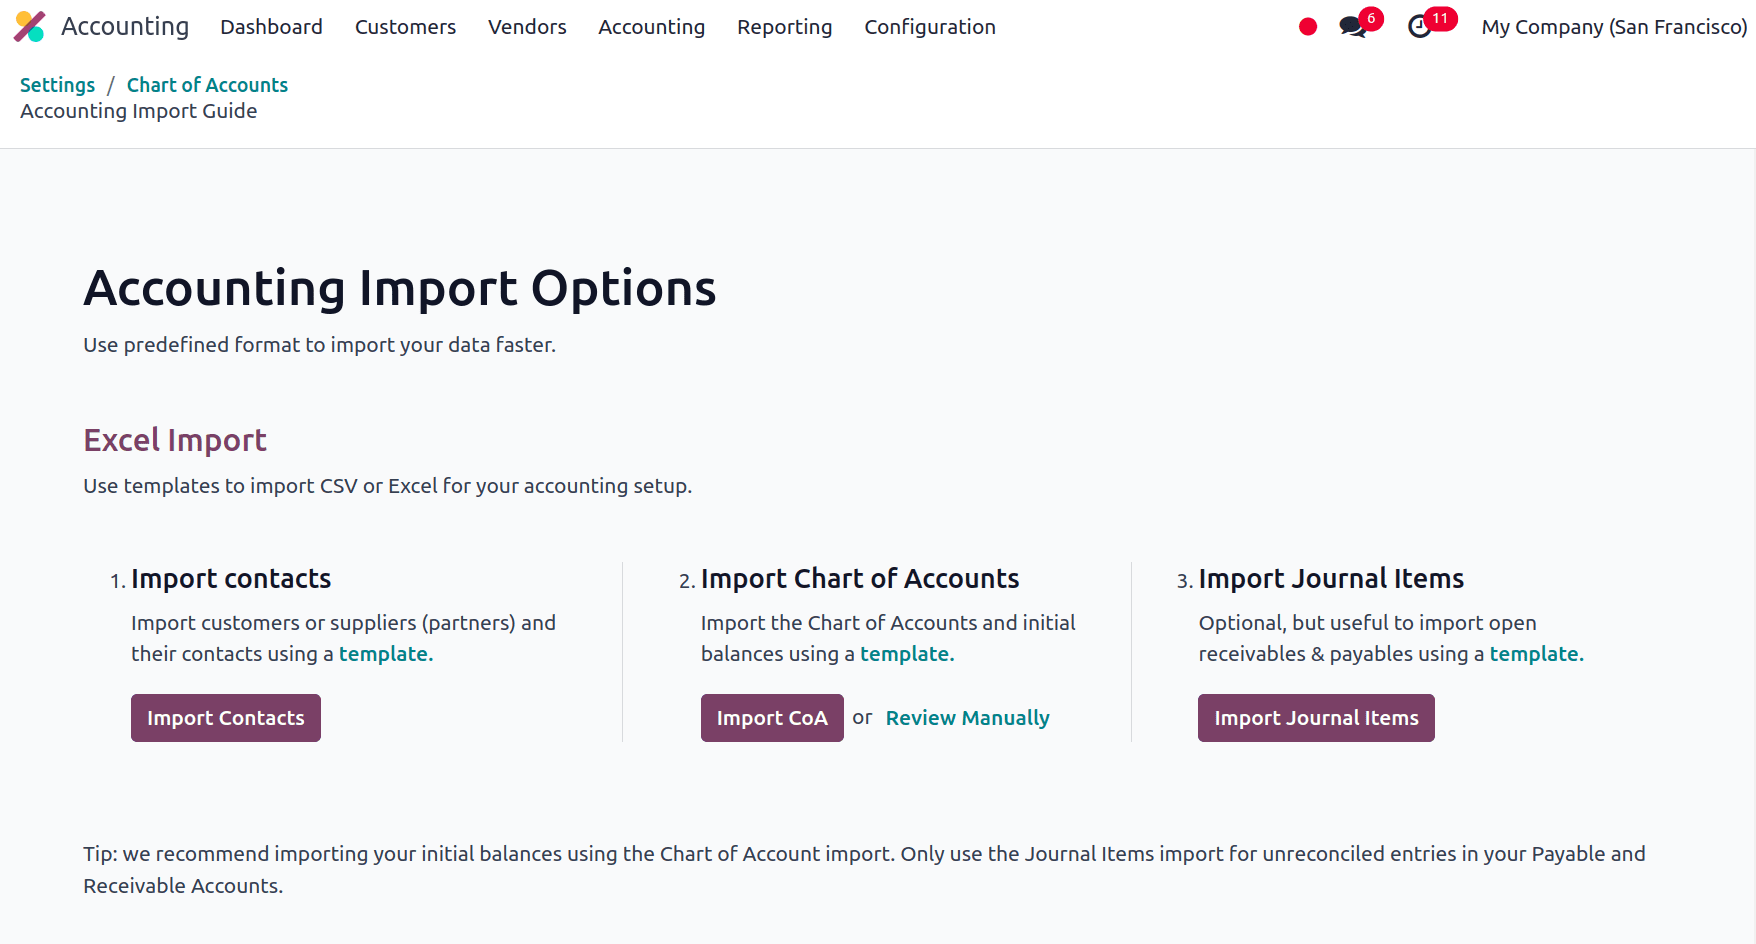
After customizing the CoA template spreadsheet we can go back to the CoA page and select the Import button at the upper left corner.
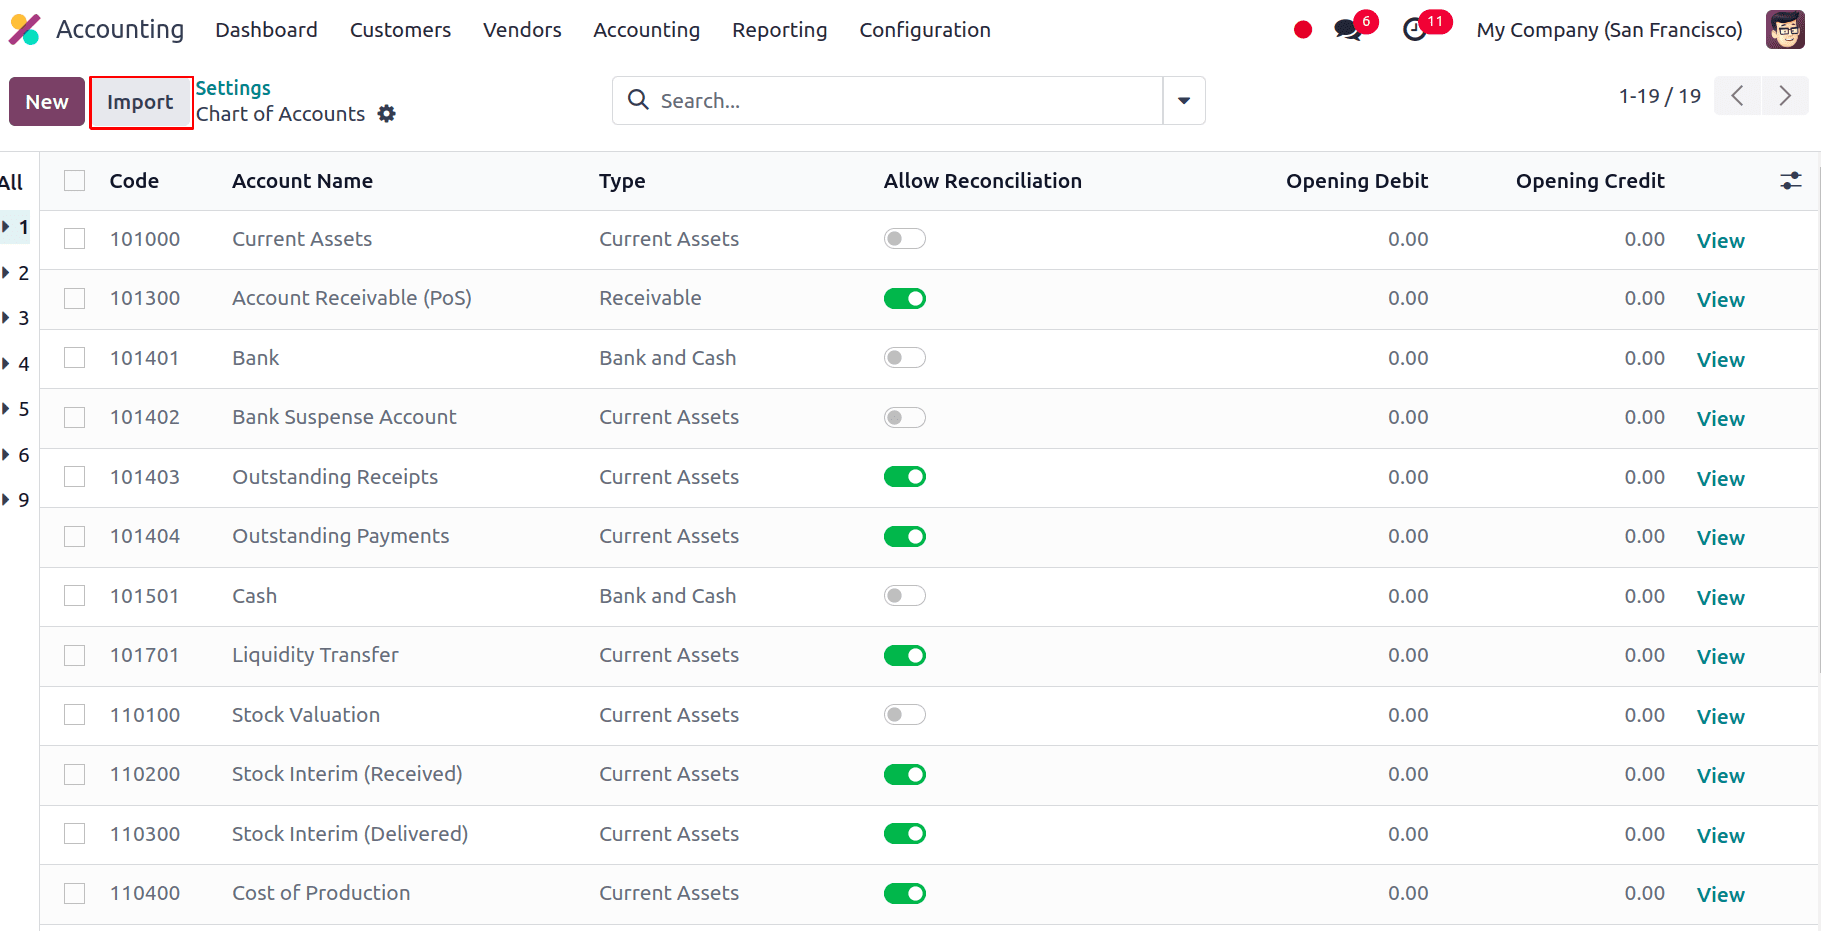
Here, we have the option to Import CoA. Click on that.
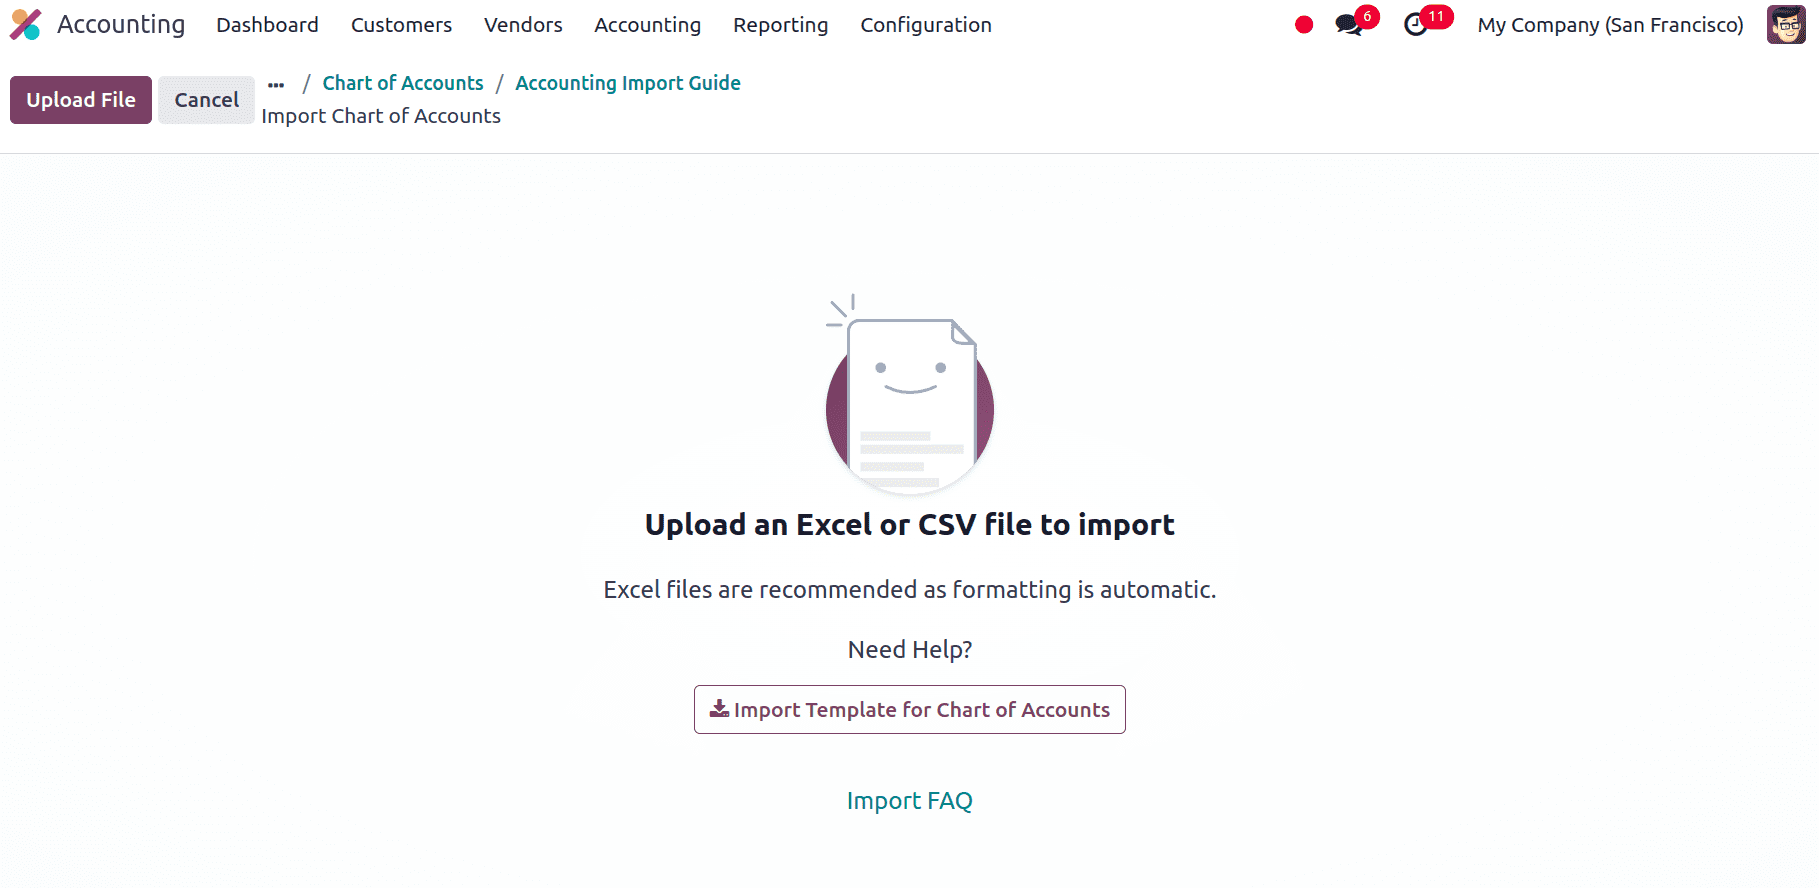
A new window appears where we have an option called Upload File to upload the file from our system at the top left.
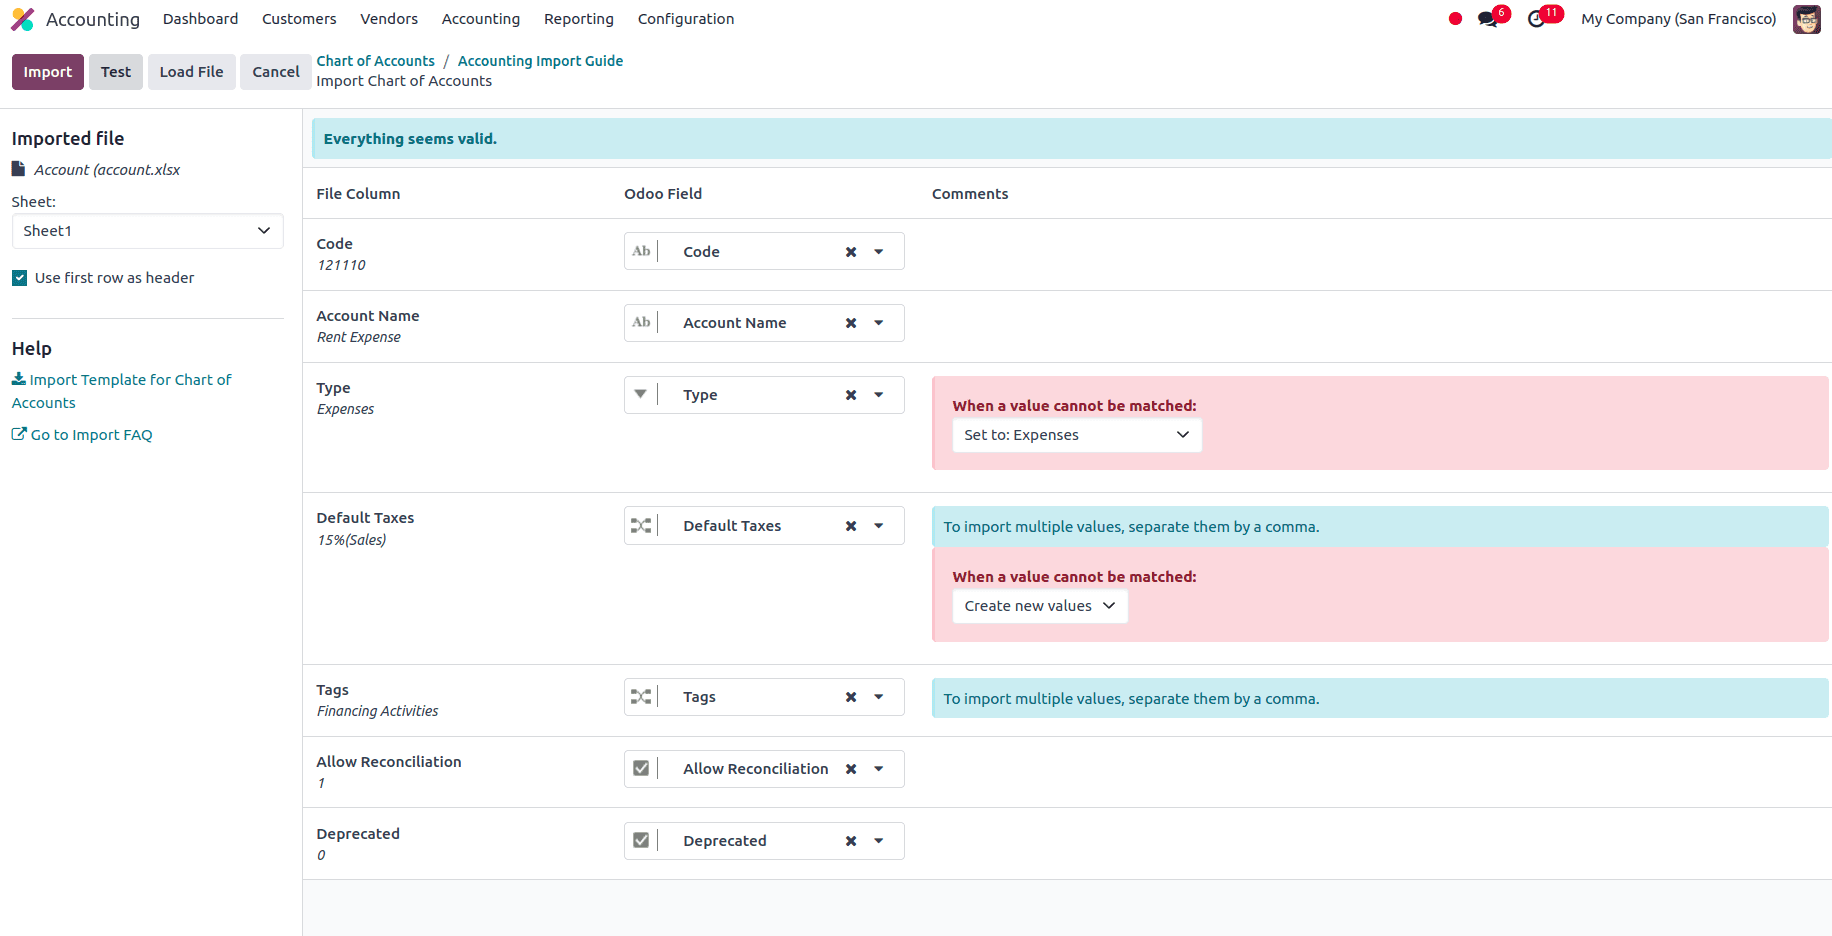
After uploading the file, a page that shows all the elements of the newly configured vendor template spreadsheet, with File Column, Odoo Field, and Comments appears.
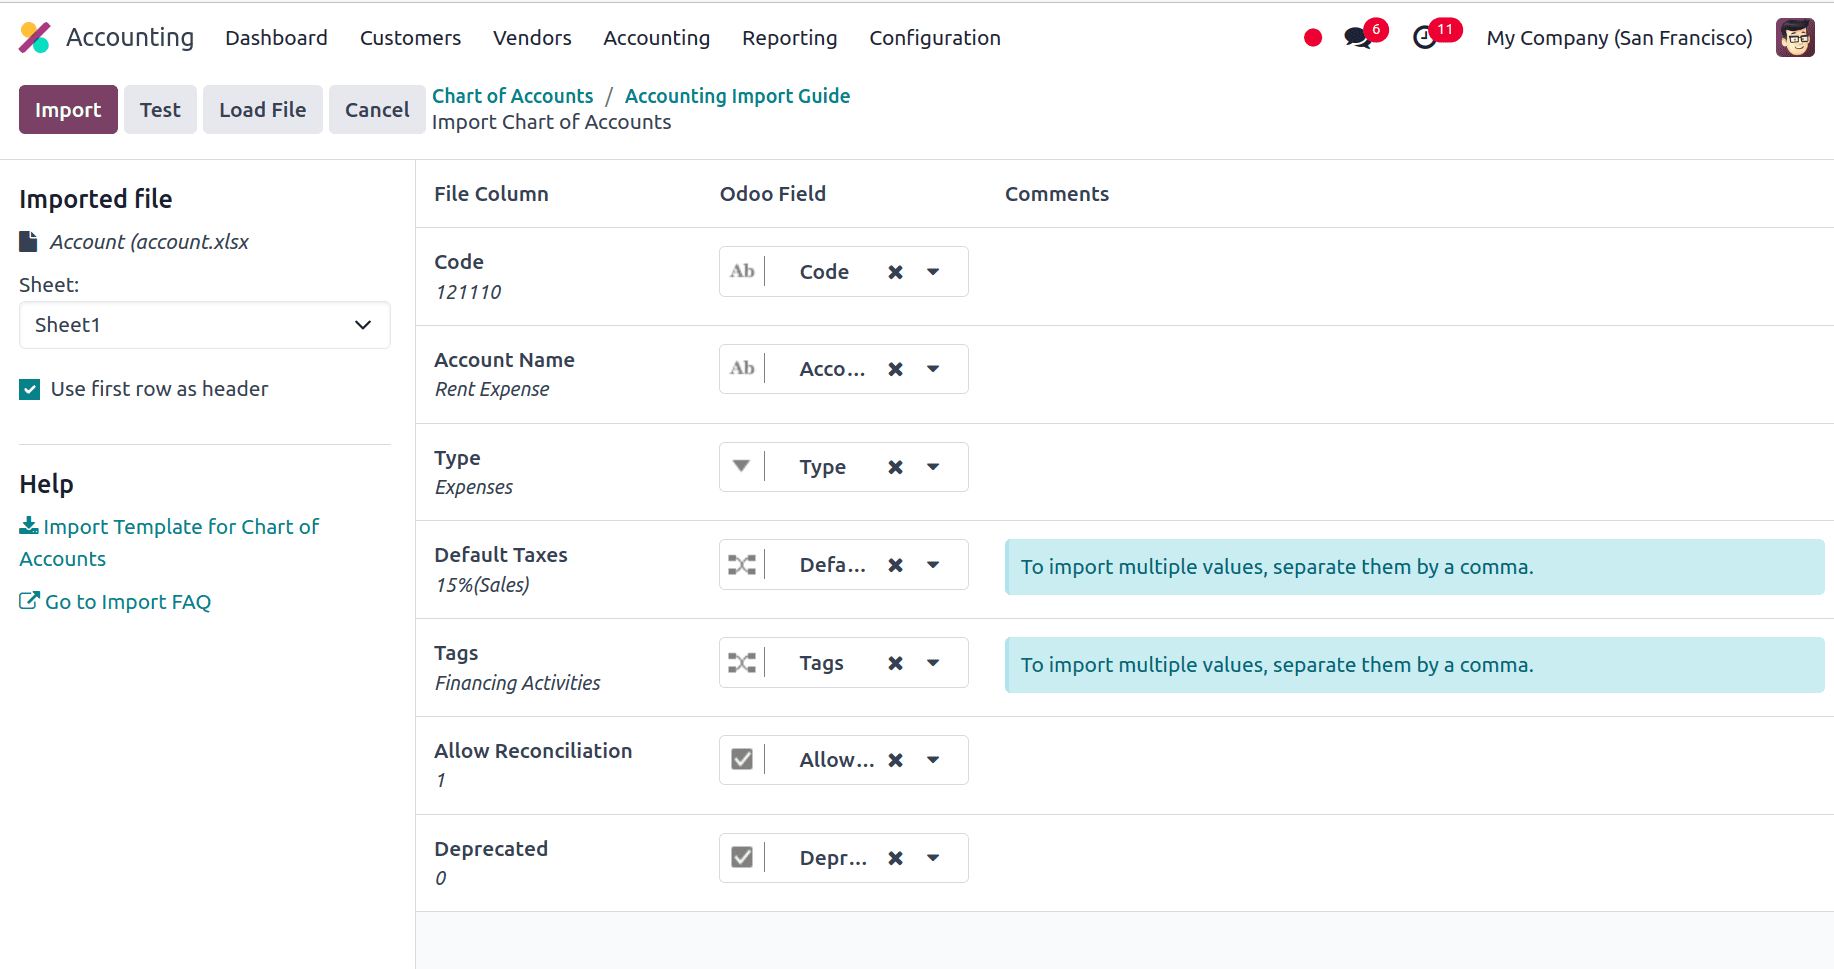
From this page, we can manually assign the file column to the Odoo Field if necessary and click on the Test button in the upper-left corner to check if every column and field are lined up in the right manner. If everything is correctly applied, then a blue banner is shown at the top of the page informing the user that Everything seems valid.
If there are any errors that prevent the importing of the records, a red banner is shown at the top of the page, and there will be instructions provided on where we can locate the specific errors, and how to fix them.
In the screenshot below, we can see the red banner with an error message. Here, we have set the type of account as expenses and the error message says value Expenses not found in the selection type.
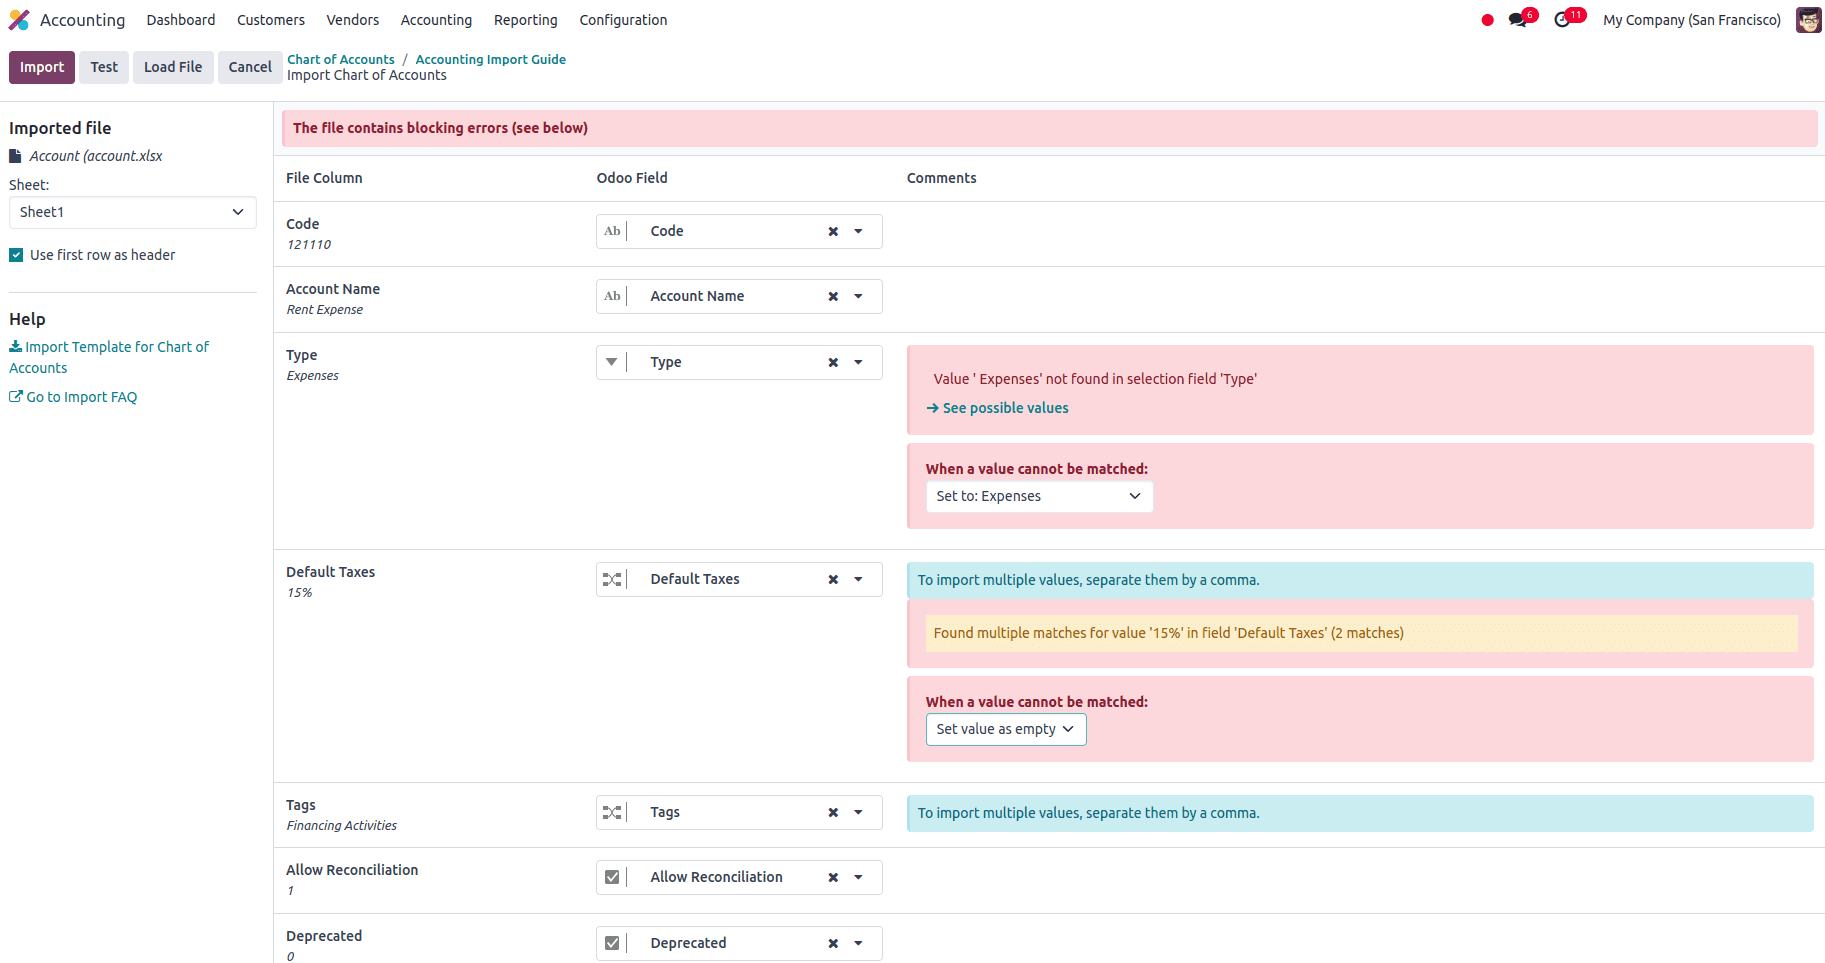
So we can manually set the value from the drop-down menu for when a value cannot be matched and for the Default Taxes field, we can set it to ‘create new values’ and click on the Test button.
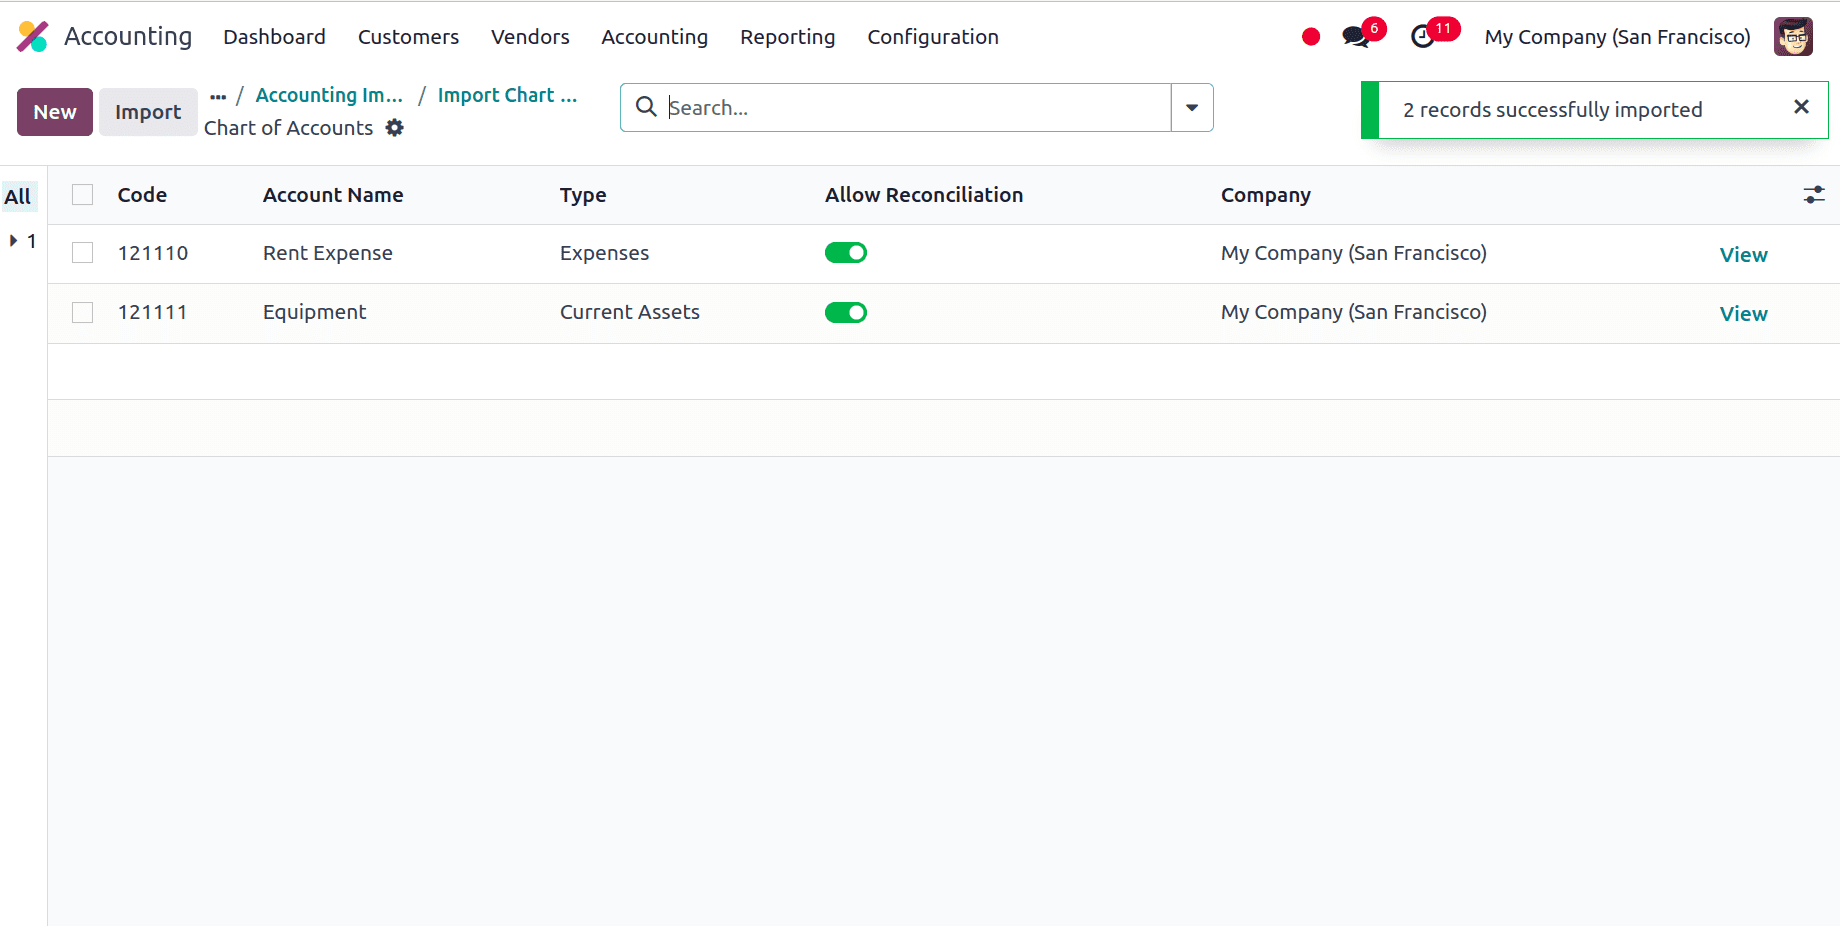
If all the errors are fixed, we will get a message saying Everything seems valid. Then, we can click on the Import button to import the records. When the records are imported a message appears in the upper-right corner, which informs the user how many Chart of Accounts records were successfully imported.
Importing Journals in Odoo 17
In Odoo, all the accounting entries are recorded in the accounting journals. Each journal serves a specific purpose and also helps to organize financial transactions efficiently. In Odoo, there are mainly five types of journals based on the transaction type, and they are Sales, Purchase, Cash, Bank, and Miscellaneous. We can use sales for customer invoices, purchase for vendor bills, bank and cash for the payments, and then we have a miscellaneous journal for other miscellaneous operations.
In order to import Journals, we have to download the Journals import template first. After downloading, the template can be modified and customized before uploading it into the Odoo database.
To download the required import template in Odoo 17, first we have to navigate to Accounting app ? Configuration ? Journals. On the Journals page, select a record for exporting, and click on the Actions button to reveal the Export option.

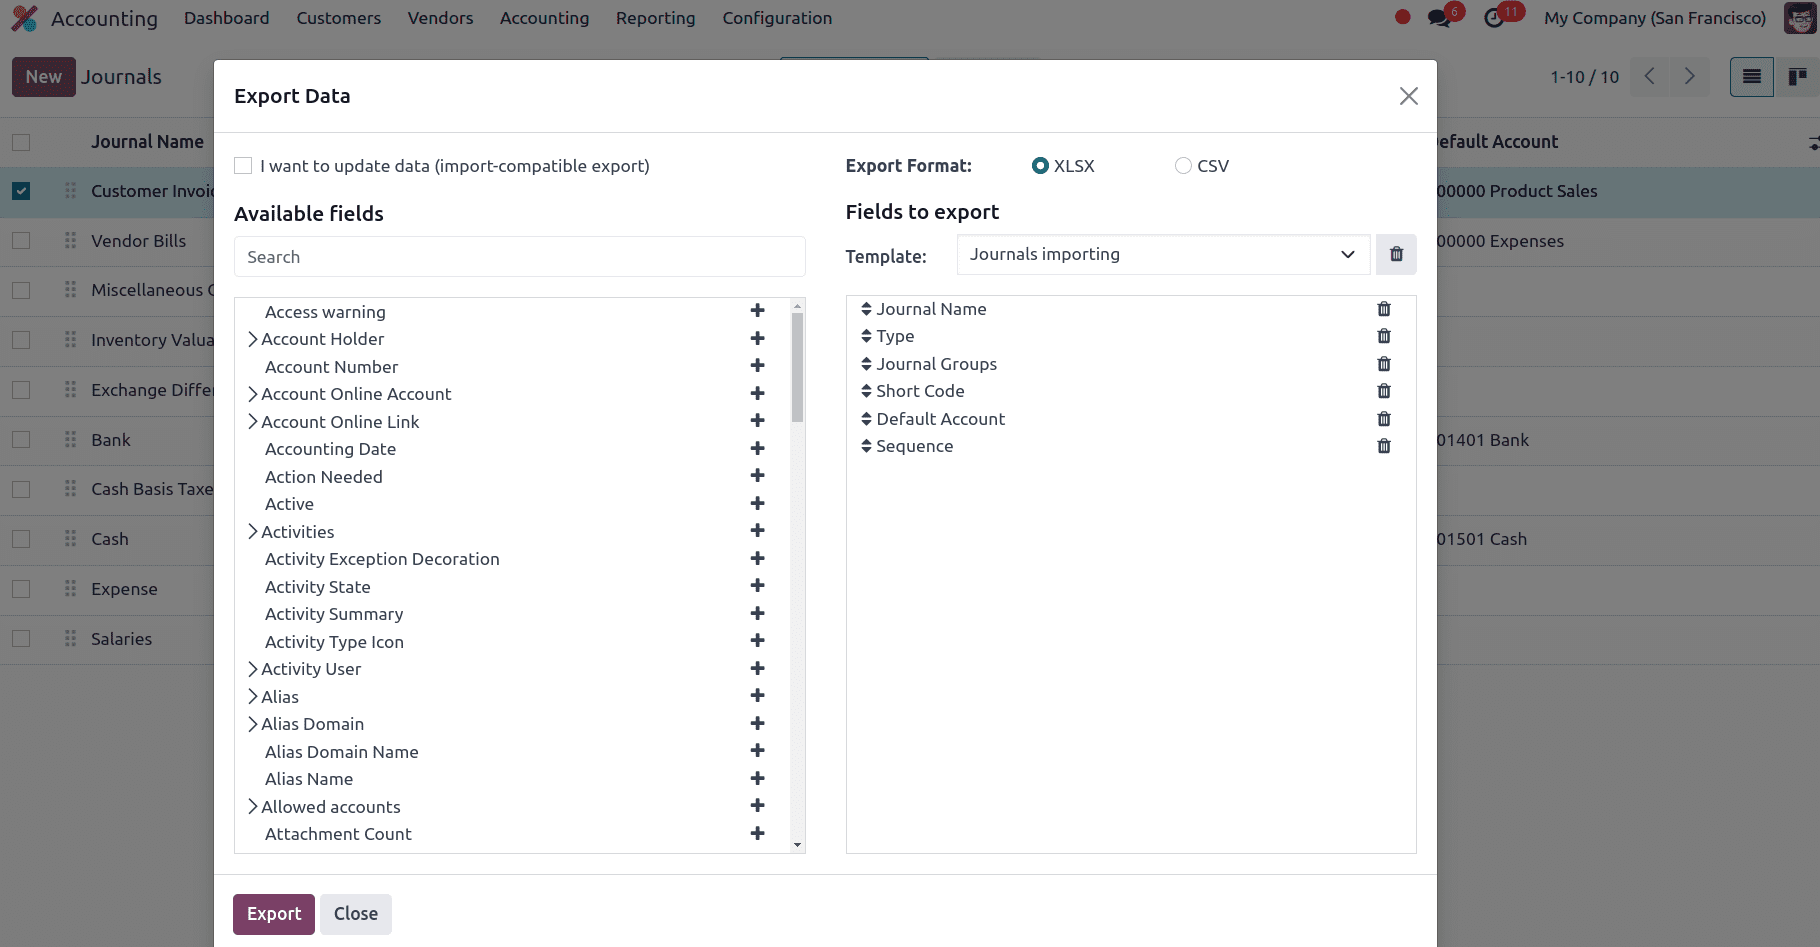
Click on Export and a new window appears with available fields on the left and fields to export on the right. From the available fields, we can add the fields that we want to export to the export section by clicking on the + icon. A name can be provided for the template to save the template in that name and we can use this template if we are exporting the data multiple times.

An option called, I want to update data (import-compatible export) is also available. If we check that option, the fields that can be imported are only shown. If we want to update any existing data we can add an external ID field to the file we are exporting to identify the existing data that needs to be updated and when we import the data odoo maps the field with the unique id provided. When the box is left unchecked, all of the fields are displayed, not only the ones that can be imported, giving you a lot more field options.
While exporting, we can export in two formats: .csv and .xlsx. The > (right arrow) icon can be clicked to display more sub-field options for each field and the search bar can be used to find specific fields we require. We can also drag the fields to arrange them in the order we want in the exported file and click the trash icon to delete unnecessary fields.
Here, we are adding the following fields:
* Journal Name: Display the name of the Journal
* Type: In this field, we can give the type of the journal as Sales, Purchase, Cash, Bank, or Miscellaneous.
* Journal Groups: It is used to categorize journals based on their purpose or function.
* Shortcode: The shortcode for the journal.
* Default Account: It is the default posting account for the transactions recorded in that journal.
* Sequence: Every journal has its own sequence that is defined for numbering the transaction documents. It determines the order in which these documents will be numbered.
After adding all the fields to export, we can click on the Export button to export the template and customize the template according to the needs.
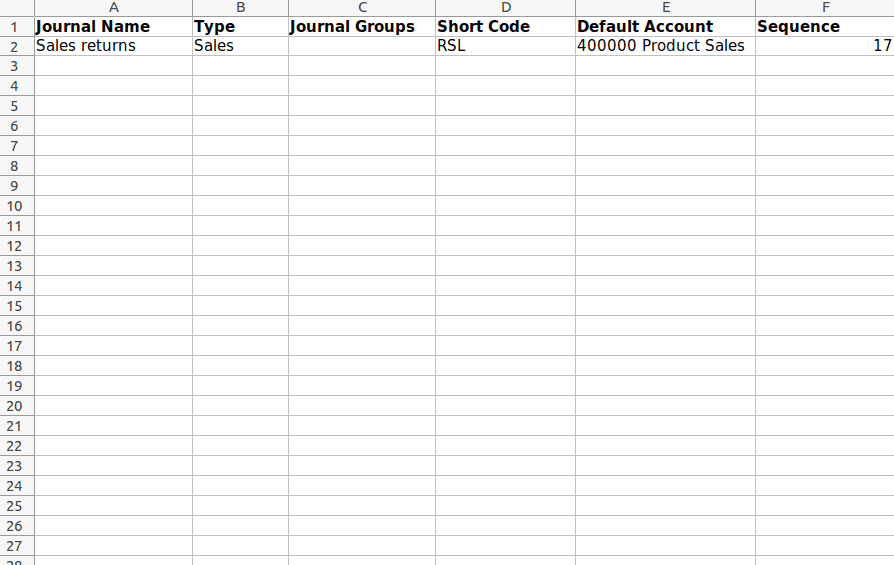
After customizing the Journals template spreadsheet we can go back to the Journals page and click on the gear icon ?? at the upper left corner and select Import records.
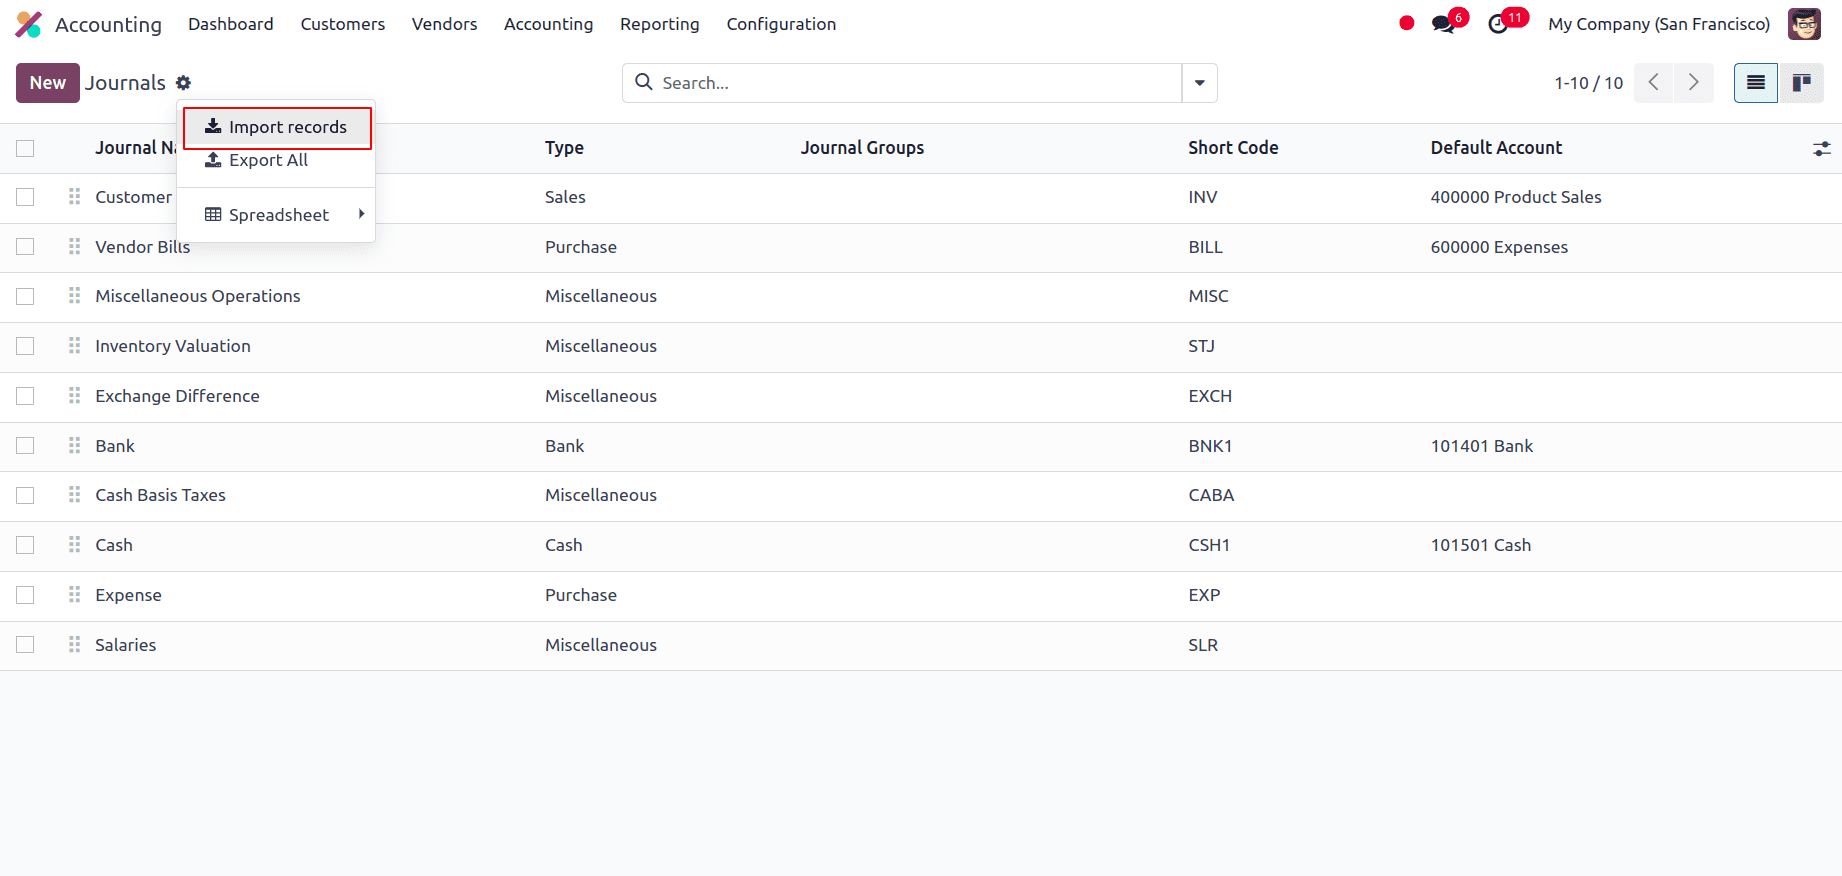
At the top left we have an option to upload the file from our system.

After uploading the file, a page that shows all the elements of the newly configured vendor template spreadsheet, with File Column, Odoo Field, and Comments appears.
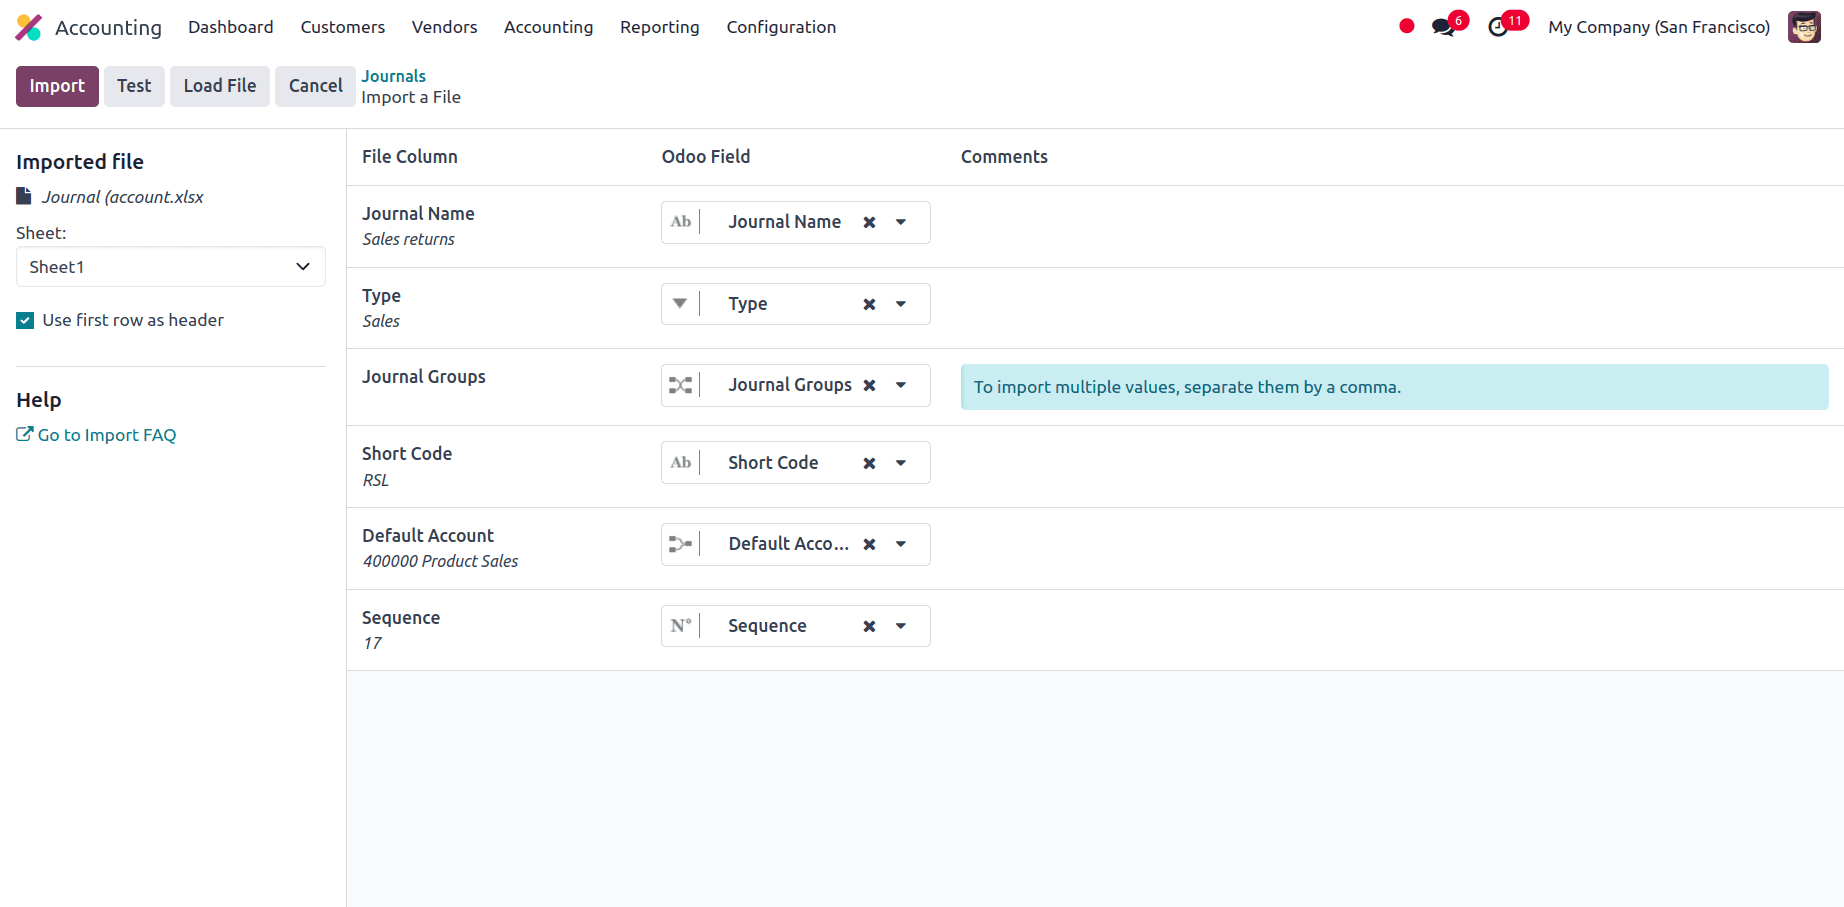
From this page, we can manually assign the file column to the Odoo Field if necessary and click on the Test button in the upper-left corner to check if every column and field are lined up in the right manner. If everything is correctly applied, then a blue banner is shown at the top of the page informing the user that Everything seems valid.

If there are any errors that prevent the importing of the records, a red banner is shown at the top of the page, and there will be instructions provided on where we can locate the specific errors, and how to fix them.
Once all the errors are fixed, we can click on the Test button and then on the Import button to import the records. When the records are imported a message appears in the upper-right corner which informs the user how many Journals records were successfully imported.
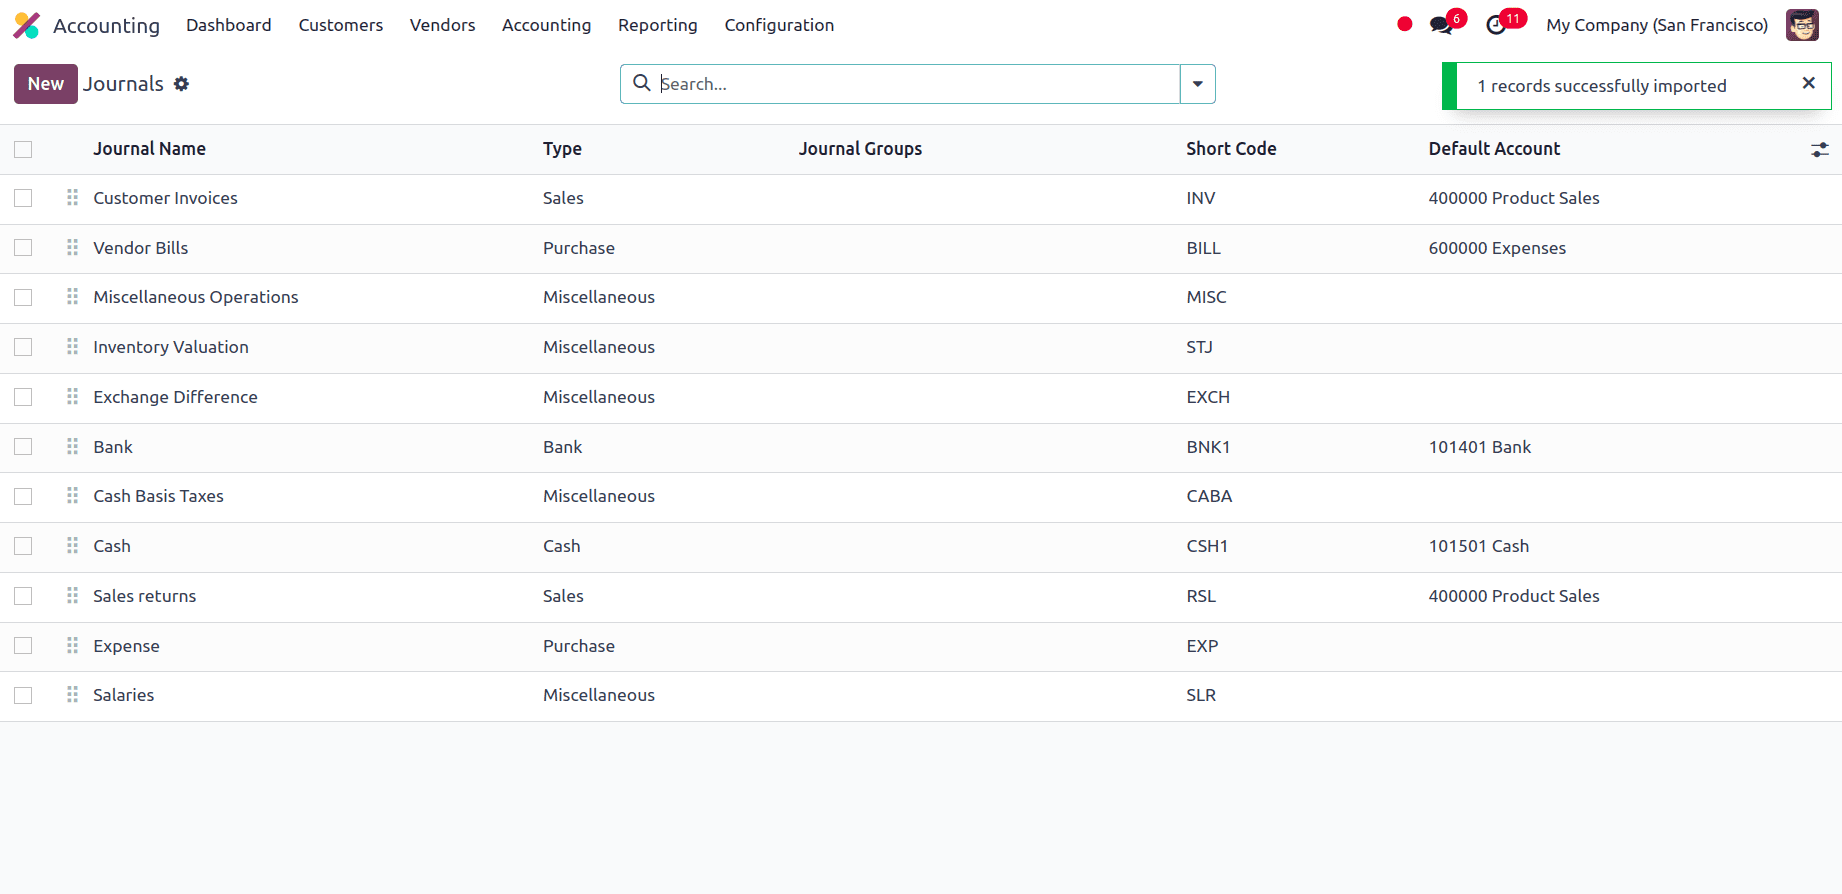
Now we will be able to view the newly-imported Journals and we can access and edit them from the Journals page.

Importing Taxes in Odoo 17
To manage all the taxation elements of a business operation, we have taxes in Odoo. There are different types of taxes and all of its applications vary widely, depending on the location of the company. Odoo provides various computation methods for taxes to ensure accurate recording. In order to import Taxes we have to download the Taxes import template first. After downloading, the template can be modified and customized before uploading it into the Odoo database.
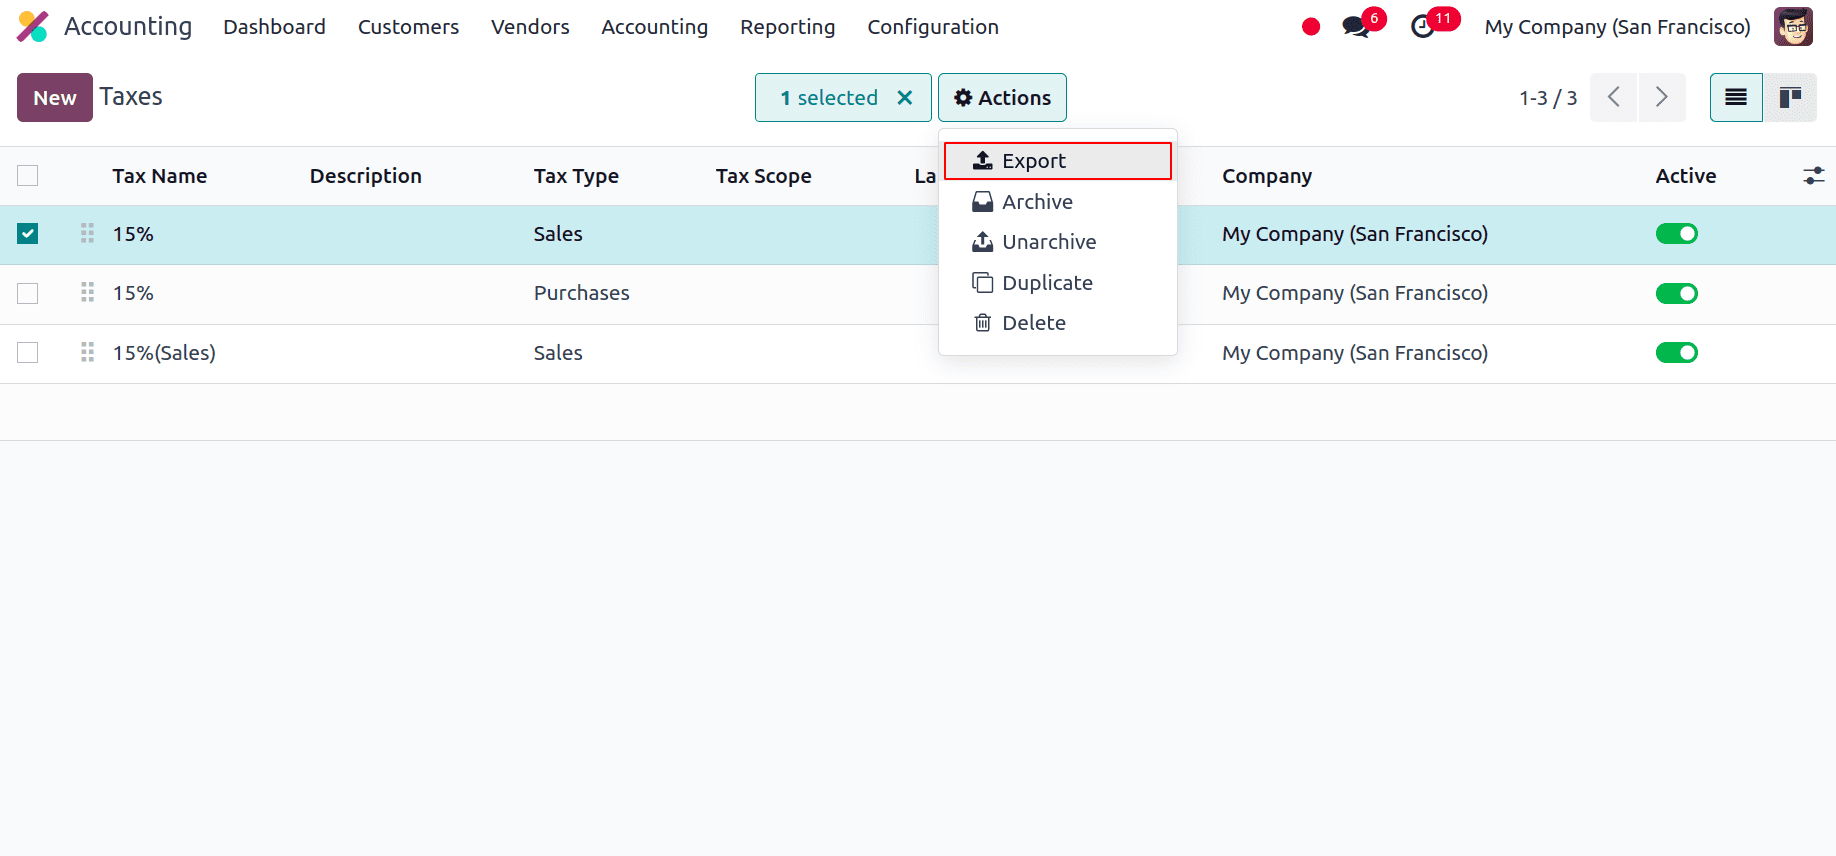
To import taxes in Odoo 17, first we have to navigate to Accounting app ? Configuration ? Taxes. On the Taxes page, select a record for exporting, and click on the Actions button to reveal the Export option.
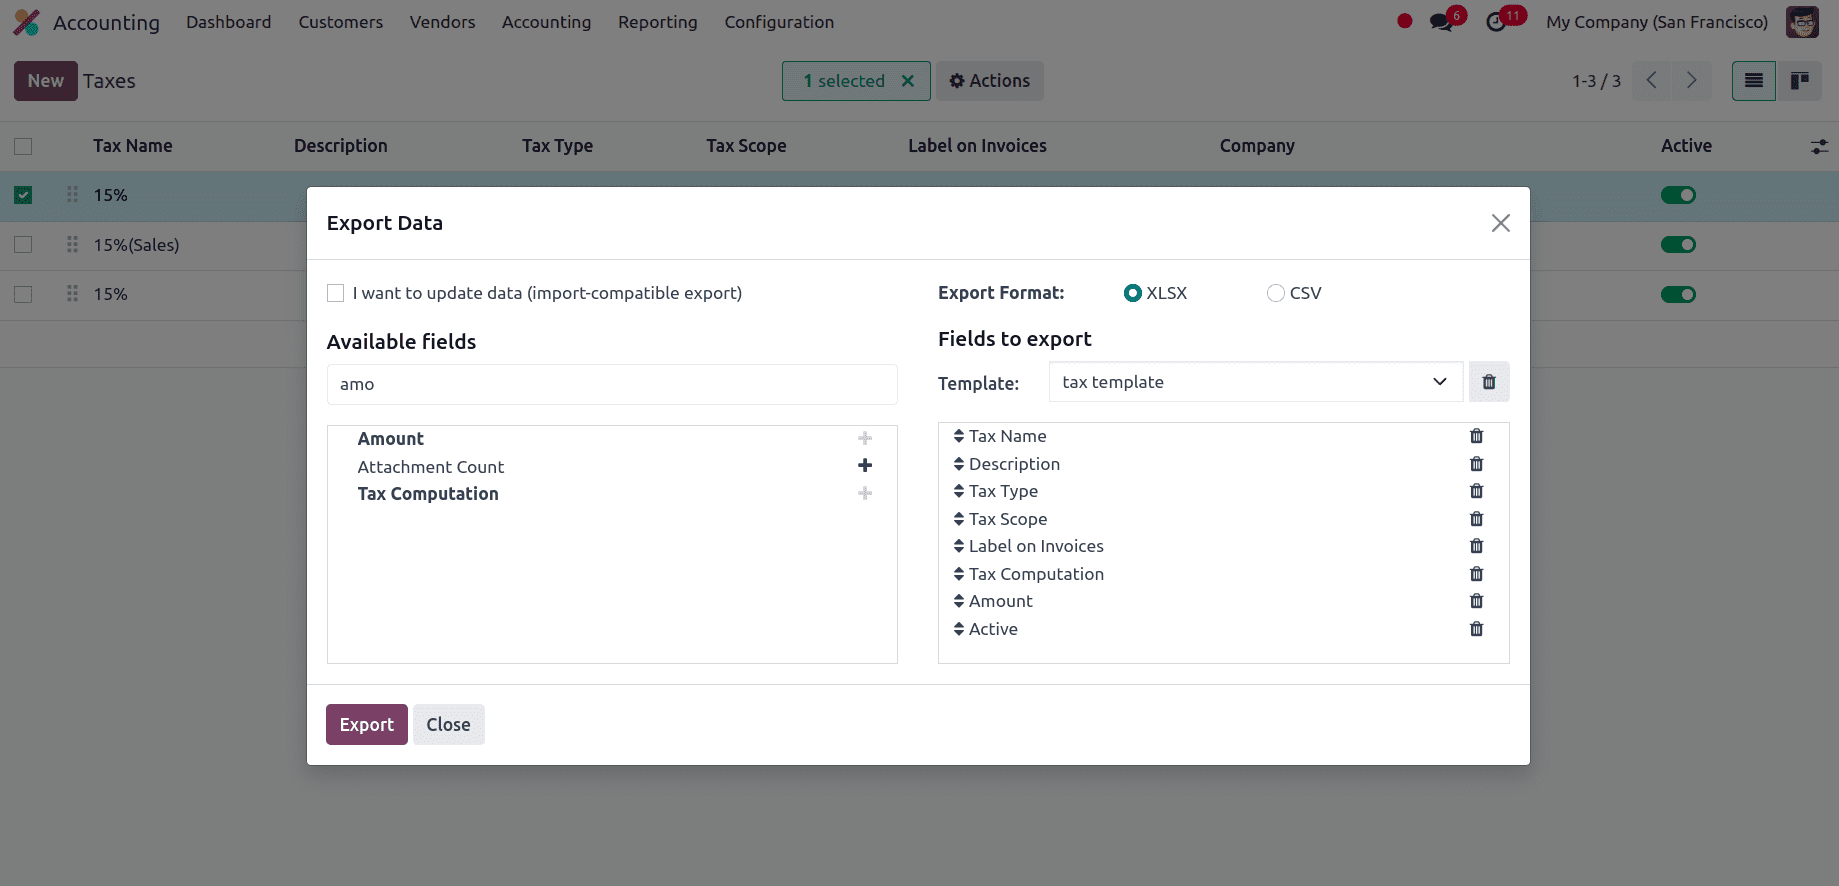
Click on Export and a new window appears with available fields on the left and fields to export on the right. In the available fields, we have all the fields that can be added to the template we are exporting. From the available fields section, we can add the fields that we want to export to the ‘fields to export’ section by clicking on the + icon. A name can be provided for the template to save the template in that name, and we can use this template if we are exporting the data multiple times.

An option called, I want to update data (import-compatible export) is also available. If we check that option, the fields that can be imported are only shown. If we want to update any existing data, an extra field called external ID is added to the file we are exporting to identify the existing data that needs to be updated and when we import the data, Odoo maps the field with the unique id provided. When the box is left unchecked, all of the fields are displayed, not only the ones that can be imported, giving you a lot more field options.
While exporting, we can export in two formats: .csv and .xlsx. The > (right arrow) icon can be clicked to display more sub-field options for each field and the search bar can be used to find specific fields we require. We can also drag the fields to arrange them in the order we want in the exported file and trash icon to delete unnecessary fields.
Here we are adding the following fields:
* Tax name: Refers to the name of the tax we are creating.
* Description: Description that needs to be provided for the tax.
* Tax type: It is the category or the classification of the tax such as sales or purchase based on its purpose or nature.
* Tax scope: We can restrict the use of taxes to a type of product such as Goods or Services.
* Label on invoices: It is the descriptive text or name that is associated with each tax that will appear on the invoice.
* Tax computation: It refers to the process of calculating the transactions based on the pre-configured rules.
* Amount: It is the total amount of tax calculated and applied to the transactions.
* Active: This field indicates whether the record is active or inactive.
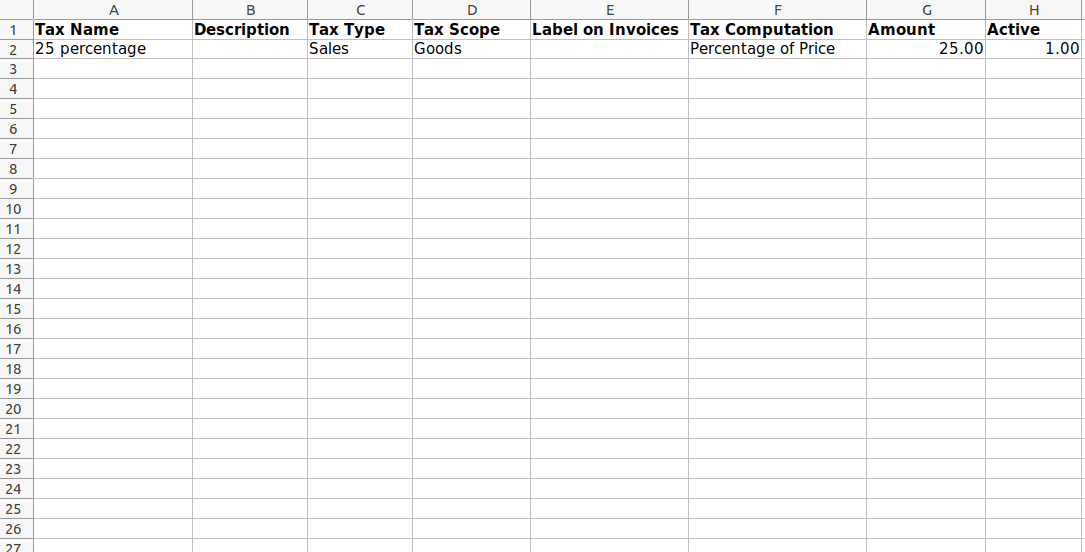
After adding all the fields to export, we can click on the Export button to export the template. And customize the template according to the need.
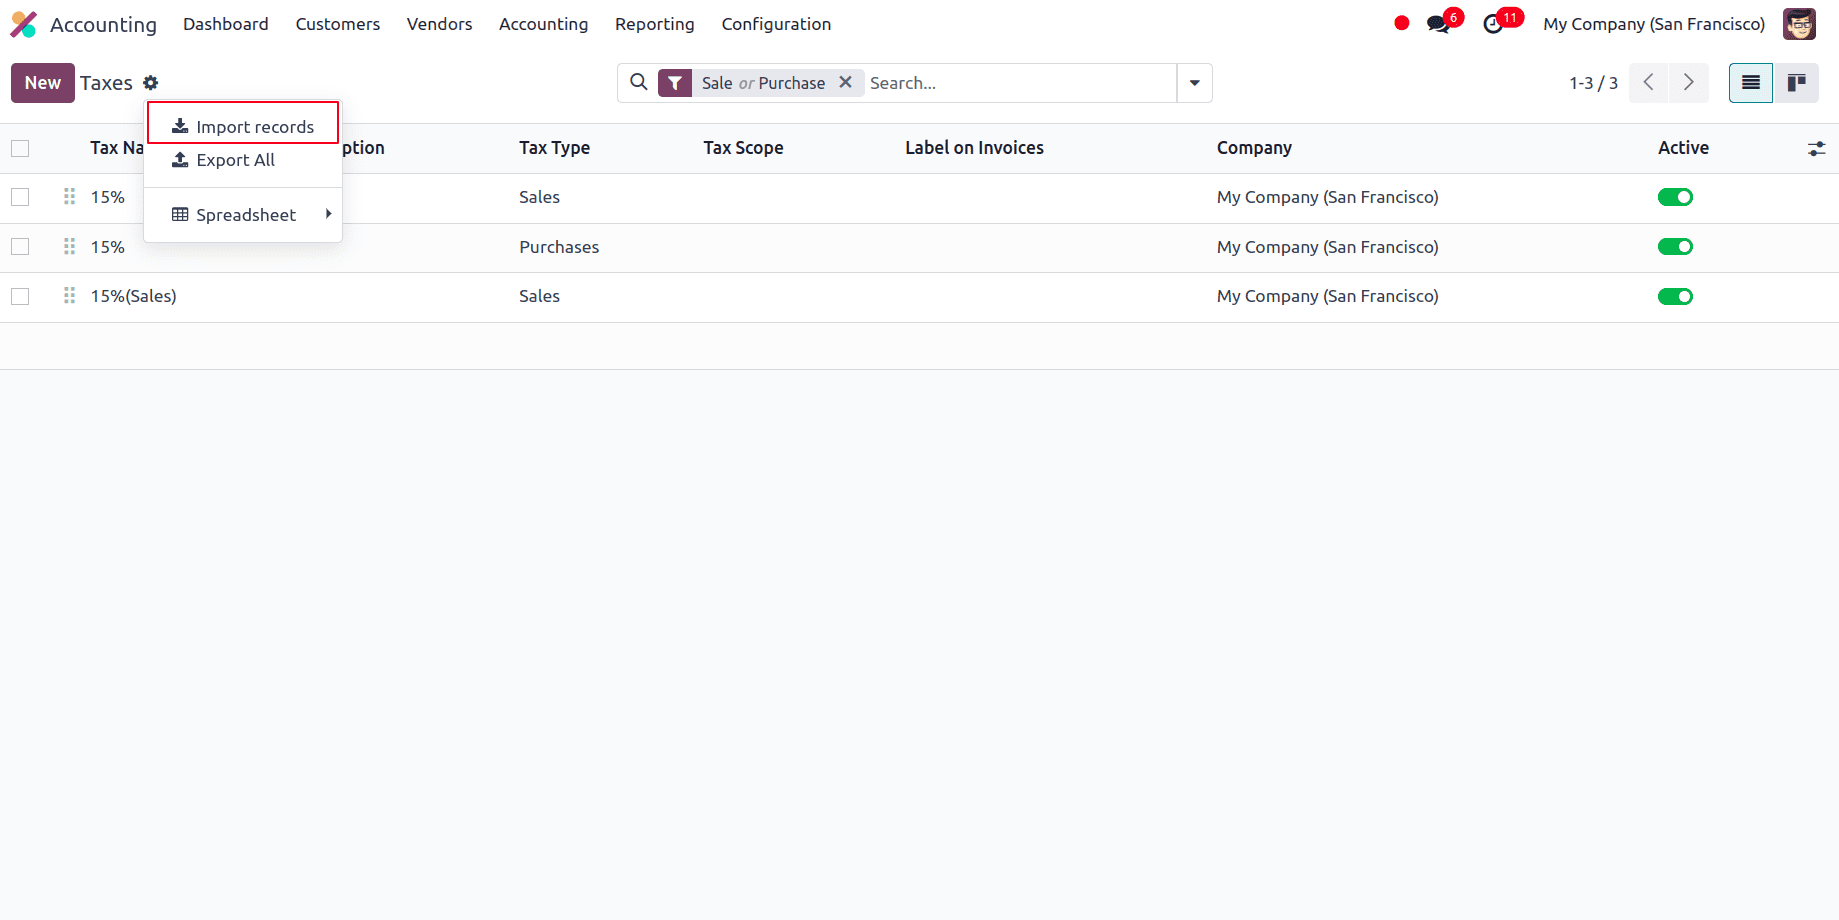
After customizing the Taxes template spreadsheet we can go back to the Taxes page and click on the gear icon ?? at the upper left corner and select Import records.
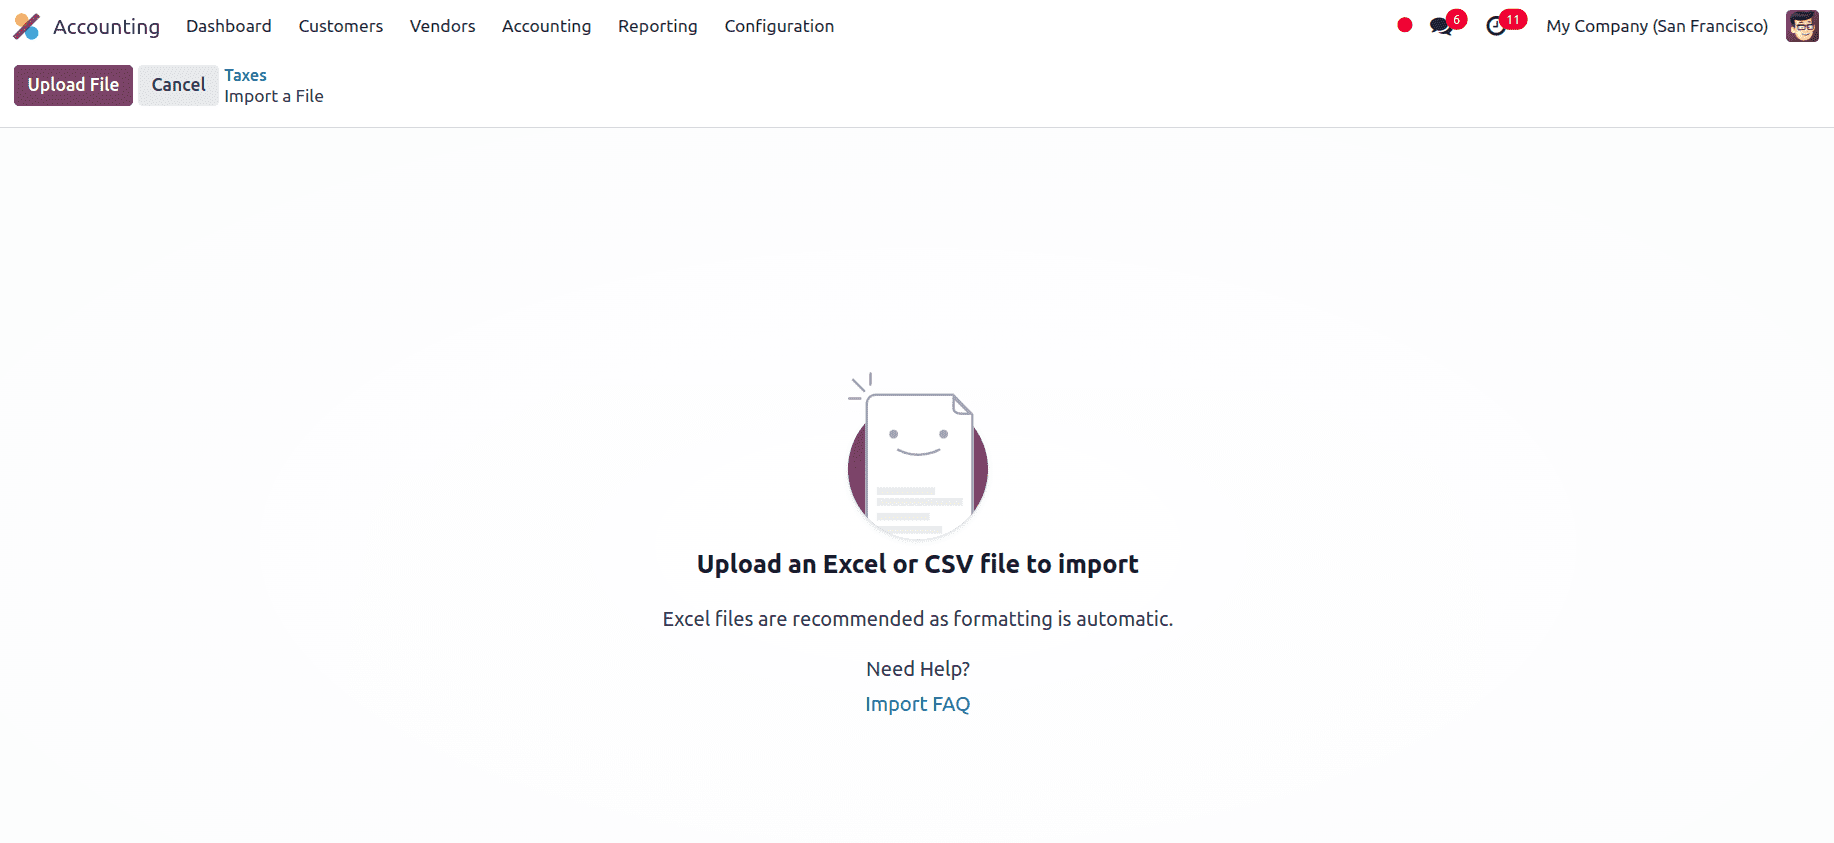
At the top left, we have an option to upload the file from our system.
After uploading the file, a page that shows all the elements of the newly configured vendor template spreadsheet, with File Column, Odoo Field, and Comments appears.
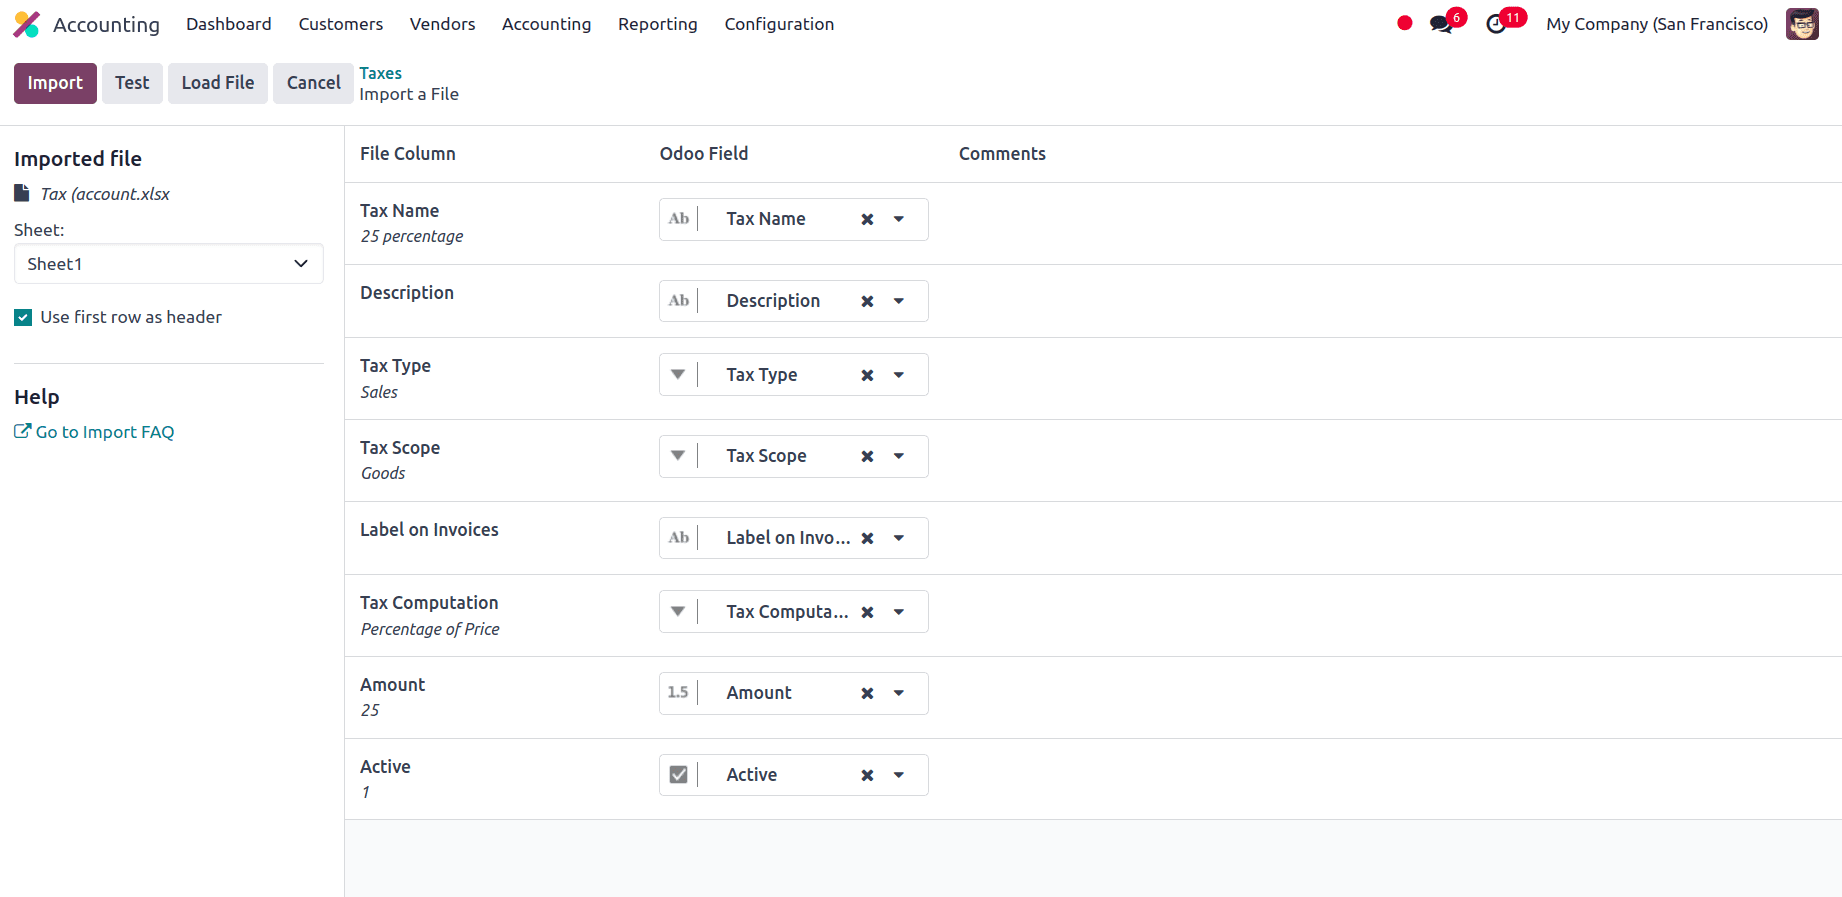
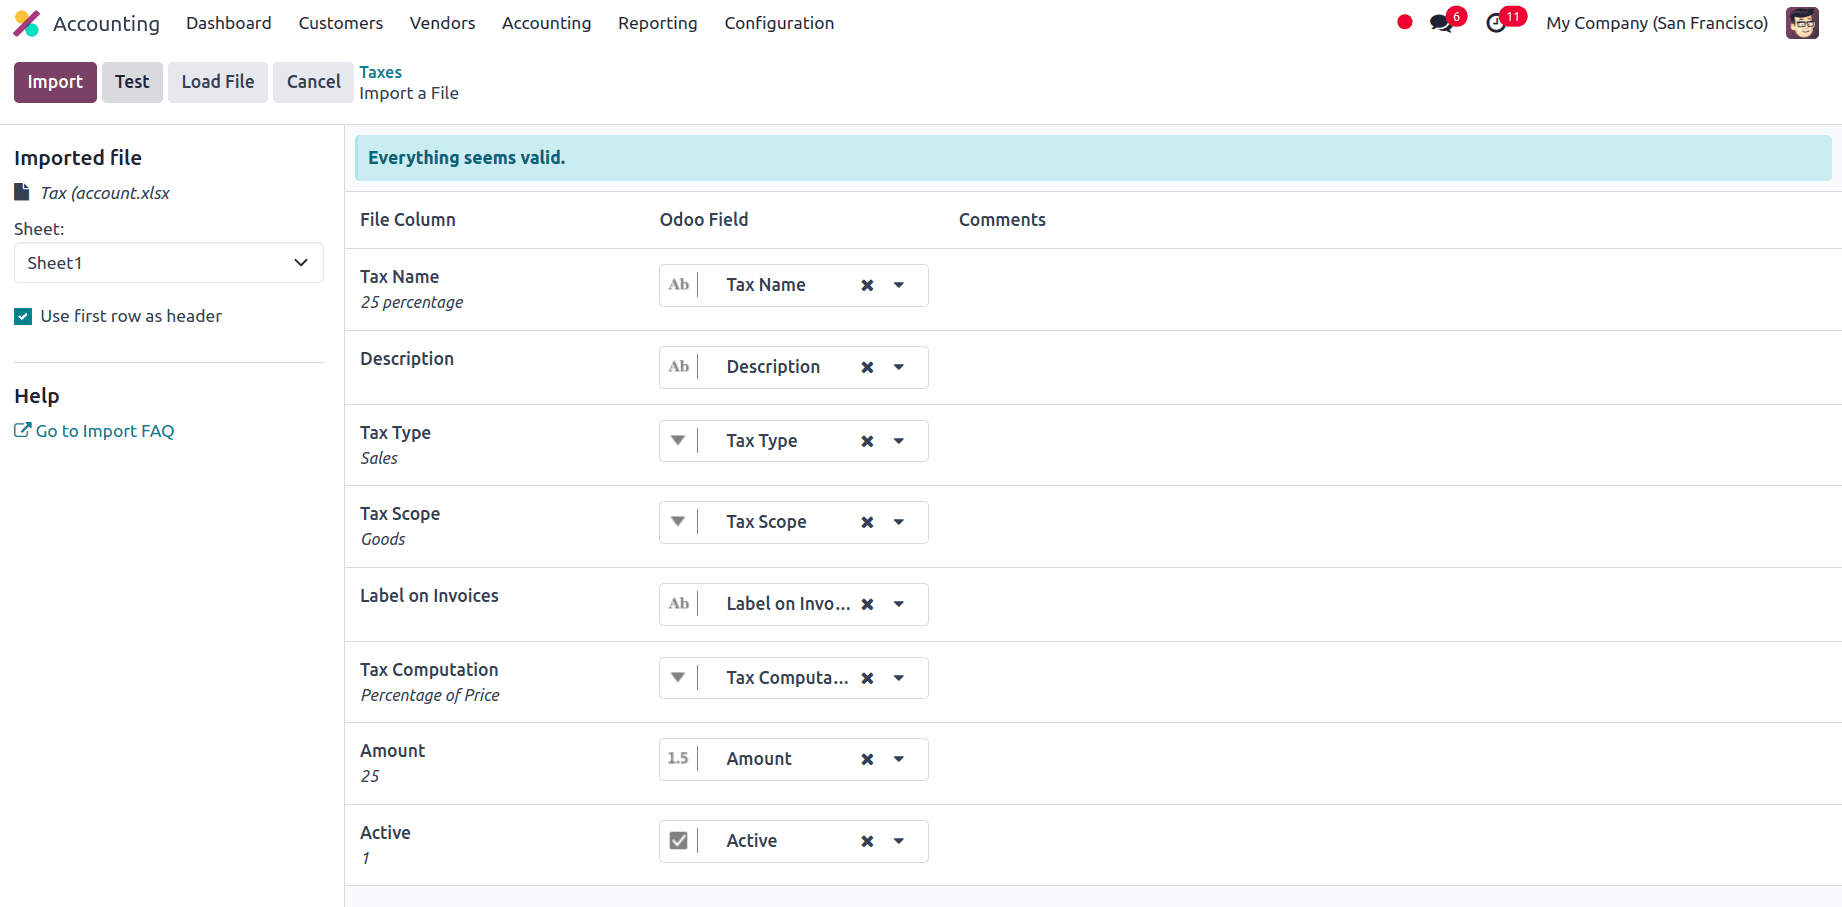
From this page, we can manually assign the file column to the Odoo Field if necessary and click on the Test button in the upper-left corner to check if every column and field are lined up in the right manner. If everything is correctly applied, then a blue banner is shown at the top of the page informing the user that Everything seems valid.
If there are any errors that prevent the importing of the records, a red banner is shown at the top of the page, and there will be instructions provided on where we can locate the specific errors, and how to fix them.
Once all the errors are fixed, we can click on the Test button and then on the Import button to import the records. When the records are imported a message appears in the upper-right corner which informs the user how many customers were successfully imported.
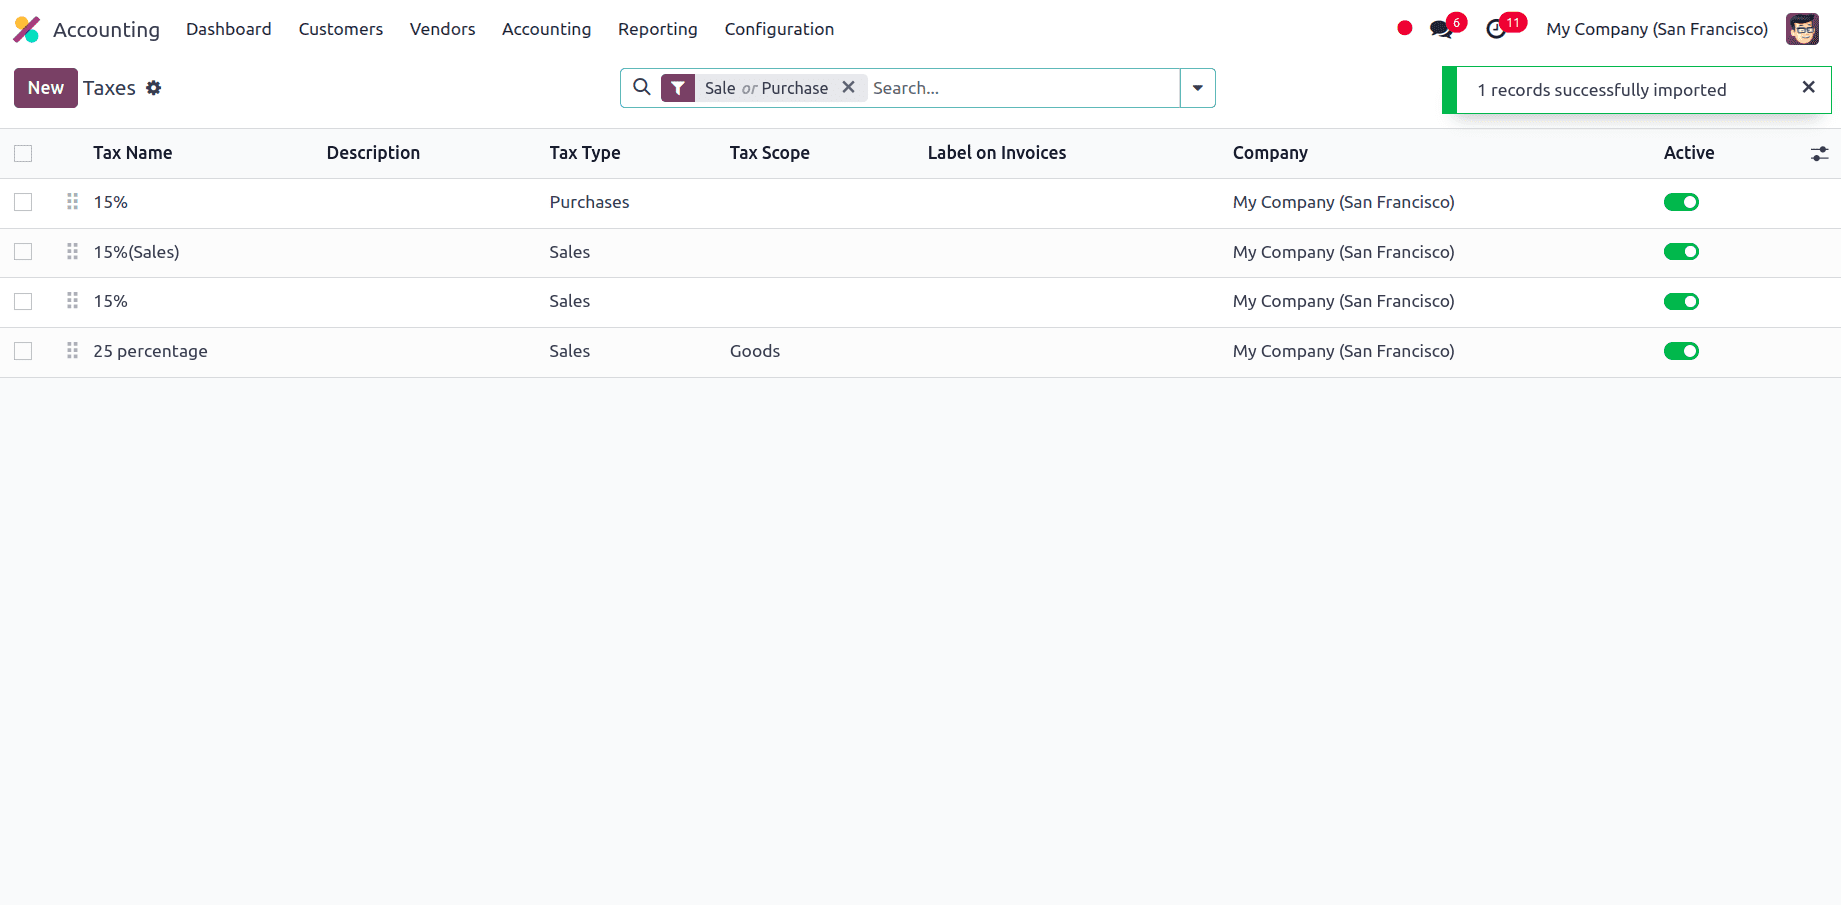
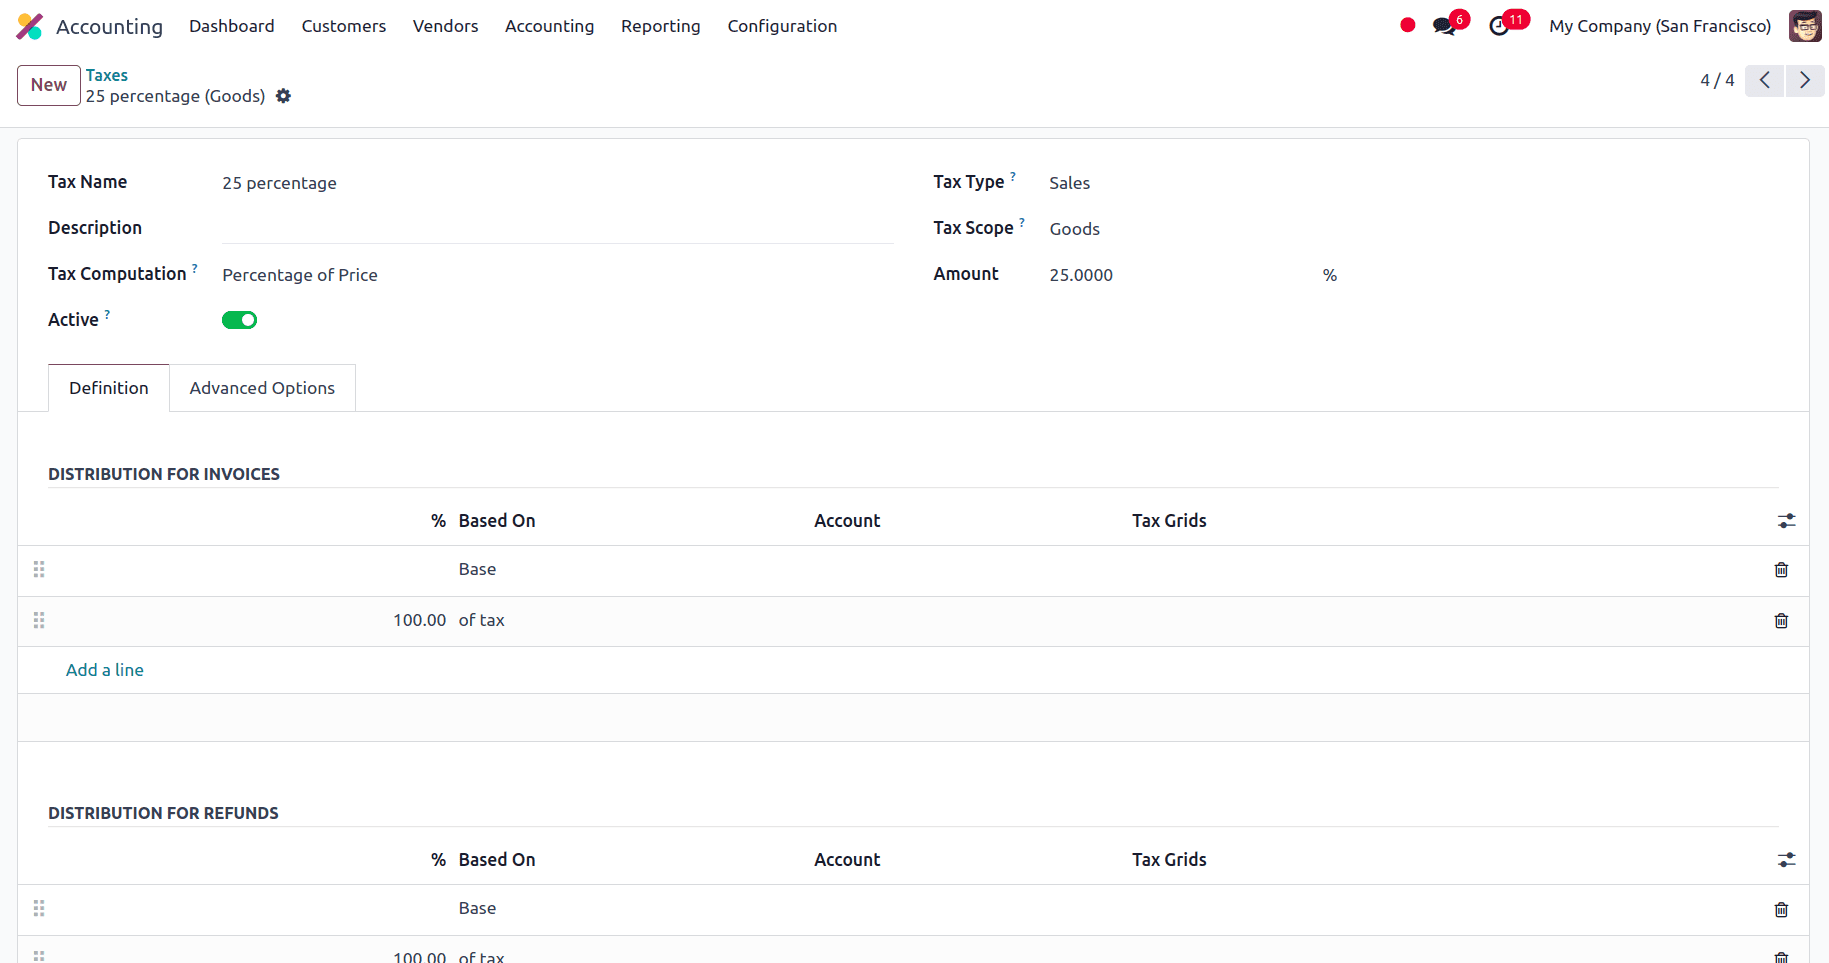
Now we will be able to view all the newly-imported Taxes and we can access and edit them from the Taxes page.
So we have seen the importing of Charts of Accounts, Journals, and Taxes in Odoo 17. The import option provided in Odoo 17 makes it easier to add multiple records to the database. Rather than manually importing bulk data into the Odoo database, we can import the data all at once by using the import option provided in Odoo 17.
To read more about An Overview of the Accounting Dashboard in Odoo 17, refer to our blog An Overview of the Accounting Dashboard in Odoo 17.