The front-end framework named OWL (Odoo Web Library) is used to build a modern kind of user interface and make it dynamic and reactive for use. Previously, the QWeb kind of older frameworks were used in Odoo for the front-end design and development, and OWL is completely in the way to replace it with every new version release, particularly for building UI components that interact smoothly with the backend.
Talking about these OWL features, the Notification Service is a part of the OWL framework in Odoo that allows the developers to display notification messages to users in a consistent way. OWL notification service allows us to generate customized user-friendly feedback to the users such as warnings, error messages, general information, success messages, and so on.
In this blog, we will be discussing how OWL notifications are implemented in Odoo 18. For the demonstration, the very first thing to do is the implementation of XML code to make any of the components in the Odoo 18 UI trigger the corresponding method defined in Javascript, which shows the corresponding notification to the user.
To make the notification services work properly, first, we need to implement the XML template to decide an action to perform for the notification to pop up. For that, let’s take an example code to show a simple ‘bell’ image as a systray icon on the Odoo backend UI. We know that the system tray icon in the notification bar of Odoo is a quick-access feature. Without navigating to other Odoo modules through the main interface and menus, the systray icon allows the users to easily interact with the responsible features of the Odoo system.
<?xml version="1.0" encoding="UTF-8" ?>
<templates xml:space="preserve">
  <t t-name="systray_icon" owl="1">
          <t t-set-slot="default">
              <button>
                  <div t-on-click="_notify">
                      <i id='notify_msg'
                         class="fa fa-bell fa-1.5x"
                         role="img"/>
                  </div>
              </button>
          </t>
  </t>
</templates>
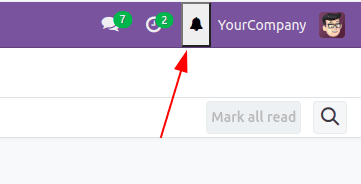
Here, the icon is set with the t-on-click attribute _notify when the bell icon is clicked. This renders function _notify() created in the javascript component. This bell icon is where the user interacts with the alerts.
The icon on the systray section will look like.
Now it’s the time to integrate the javascript component for the on-click action. For that, we define the setup(), notify() methods inside the SystrayIcon class extended from the OWL Component. The javascript code we use here is as
/** @odoo-module **/
import { registry } from "@web/core/registry";
import { useService } from "@web/core/utils/hooks";
import { Component } from "@odoo/owl";
import { _t } from "@web/core/l10n/translation";
class SystrayIcon extends Component {
  setup() {
      super.setup(...arguments);
      this.notificationService = useService("notification");
  }
  _notify() {
           {
       this.notificationService.add(_t("Success message test."), {
           title: "Success",
           type: "success"
       });
   }
          }
}
  SystrayIcon.template = "systray_icon";
  export const systrayItem = { Component: SystrayIcon,};
  registry.category("systray").add("SystrayIcon", systrayItem, { sequence: 1 });
The very first step is to add the line /** @odoo-module **/ and to import the registry, useService, Owl component, and _t for translation of the string.
The class SystrayIcon is created by extending the Component class, which is imported from the Owl library.
We make the setup() method super to add the notification service for it and the notification’s content is defined inside the _notify() method as
_notify() {
        {
    this.notificationService.add(_t("Success message test."), {
        title: "Success",
        type: "success"
    });
}
}
For a notification service to get defined, the keywords used for it are
* add: With the dot(.) operator, ‘add’ is used to display the notification content with the needed message inside it in quotes. Inside the content, the attributes that can be used are
- a. title: The message, or the content of the string to show.
- b. type: This defines the type of the message. It can be “success”, “info”, “warning” or “danger”.
- c. button: To add a custom button with attributes like name, onClick(), primary, etc
- d. sticky: It can have either “True” or “False” which determines whether or not the message should stick into the view until the user closes it manually.
- e. duration: This specifies how long (time duration in milliseconds) the message should remain on the screen.
* remove: Just opposite to the ‘add’, this is used to remove a specific notification.
* clear: Clears the notification.
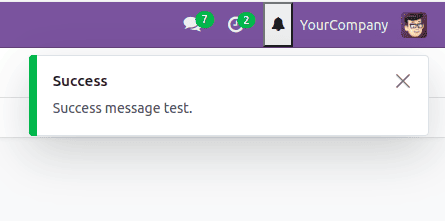
On clicking the bell icon on the systray, we get the notification with the above js code as
We can just have a look at the example codes to show another type of notification now. We can rewrite the _notify() function as
notify() {
this.notificationService.add(_t("Major error occurred. Please contact support or change the settings from the below button."), {
title: "Error",
type: "danger",
buttons: [{
onClick: () => {
this.actionService.doAction(
"base_setup.action_general_configuration");
closeFn();
},
primary: true,
name: "Go to Settings",
},],
});
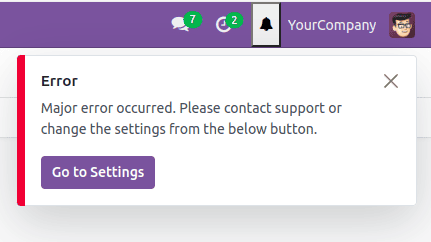
}Here, we have added a danger-type message, which will be shown in the UI in Red alerted color. A button named “Go to Settings” will also be seen there on the message pop-up body. The click event for the button can also be set there. The above code sample produces the error as
After the design of the needed notifications, the .xml and .js files are added to the manifest file of the module under 'assets': {'web.assets_backend':[],} key. Here in our case, since our module name is ‘systray_icon’, the manifest file’s assets key is defined as
'assets': {
   'web.assets_backend': [
        'systray_icon/static/src/**/*',
        'systray_icon/static/src/**/*',
           ],
},
In conclusion, we can say that the OWL Notification services can be implemented with XML and integrated into the javascript so that the various kinds of user-friendly and customized messages can be delivered to the users in a well-equipped way. The use cases can be stated as the need to handle the error, for a successful form submission and also for various system events as per the workflow we design. This paves the way for an improved user experience with timely feedback in Odoo 18. If you want to know more about Owl Notification Service Implementation in Odoo 17 refer to our previous blog.