Odoo is one of the best ERP software available in the market right now. Odoo provides two types of editions, Community and Enterprise. The Odoo community edition is a free basic edition supported by open-source software. Some modules and features are not available in the Odoo community version. But the Enterprise edition Paid, the upgraded version is more suitable for the higher value. Odoo Enterprise Edition is available with unlimited functionality support and full feature. Performance and top speed differentiate between the Enterprise edition and the Community edition.
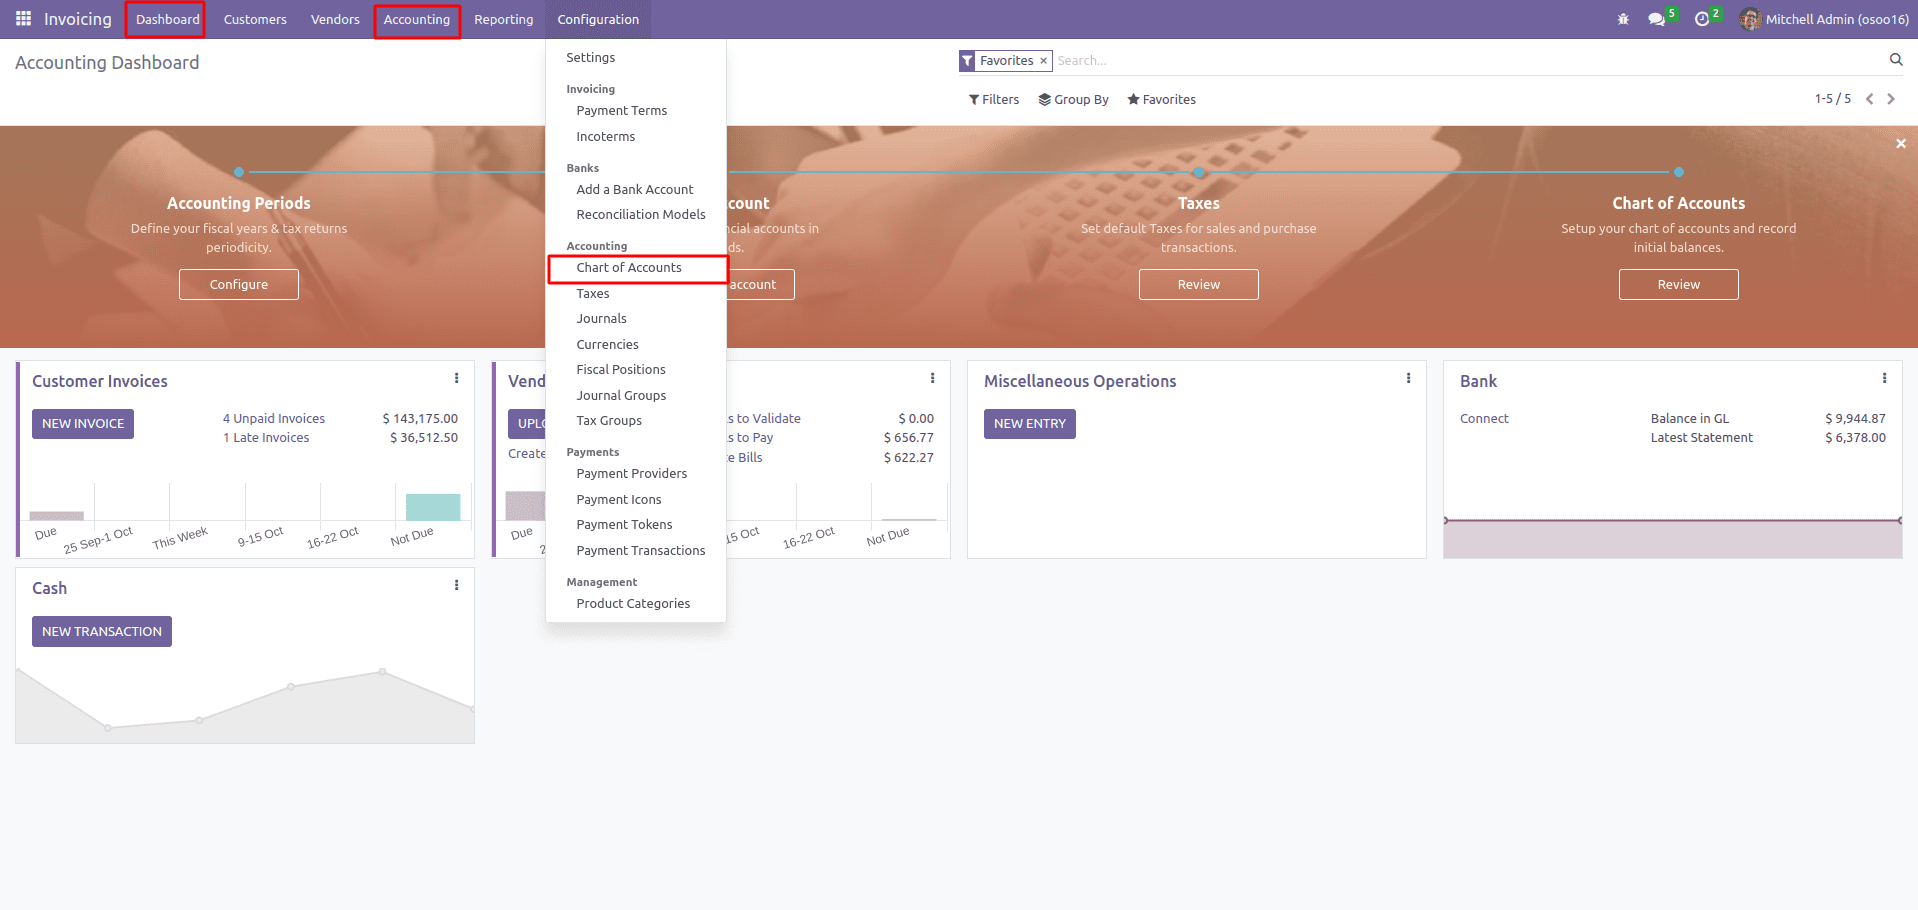
Many features are not available for the Odoo Community Edition accounting module. Like the dashboard, accounting menu, and chart of account configuration. But these features can be enabled in the community edition version. For this, set up a group for your users in settings. That group comes automatically after installing the invoicing module in Community Edition. Group Name "Show Full Accounting Features." After setting up your user under the group, you get some features of the accounting module that are not available in the community version.
This blog helps you enable these features.
Steps to enable the feature:
Step 1: Enable Developer Mode
You can enable developer mode from the bottom of the general settings. This step enables you to access Odoo's technical features. This feature is for users with technical knowledge to access technical information about the various features in Odoo.
Developer mode allows the user to set and modify various features in Odoo.
So after enabling this developer mode feature, you can set a particular group for your user. The next step navigates you to Odoo's user group configuration.
Step 2: Goto General Settings—>User & Companies—>Groups
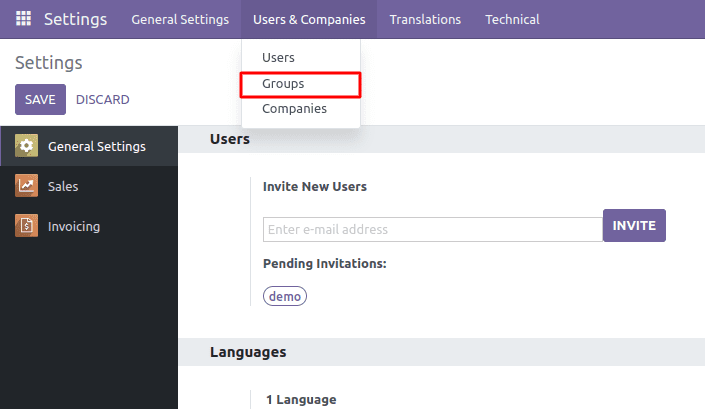
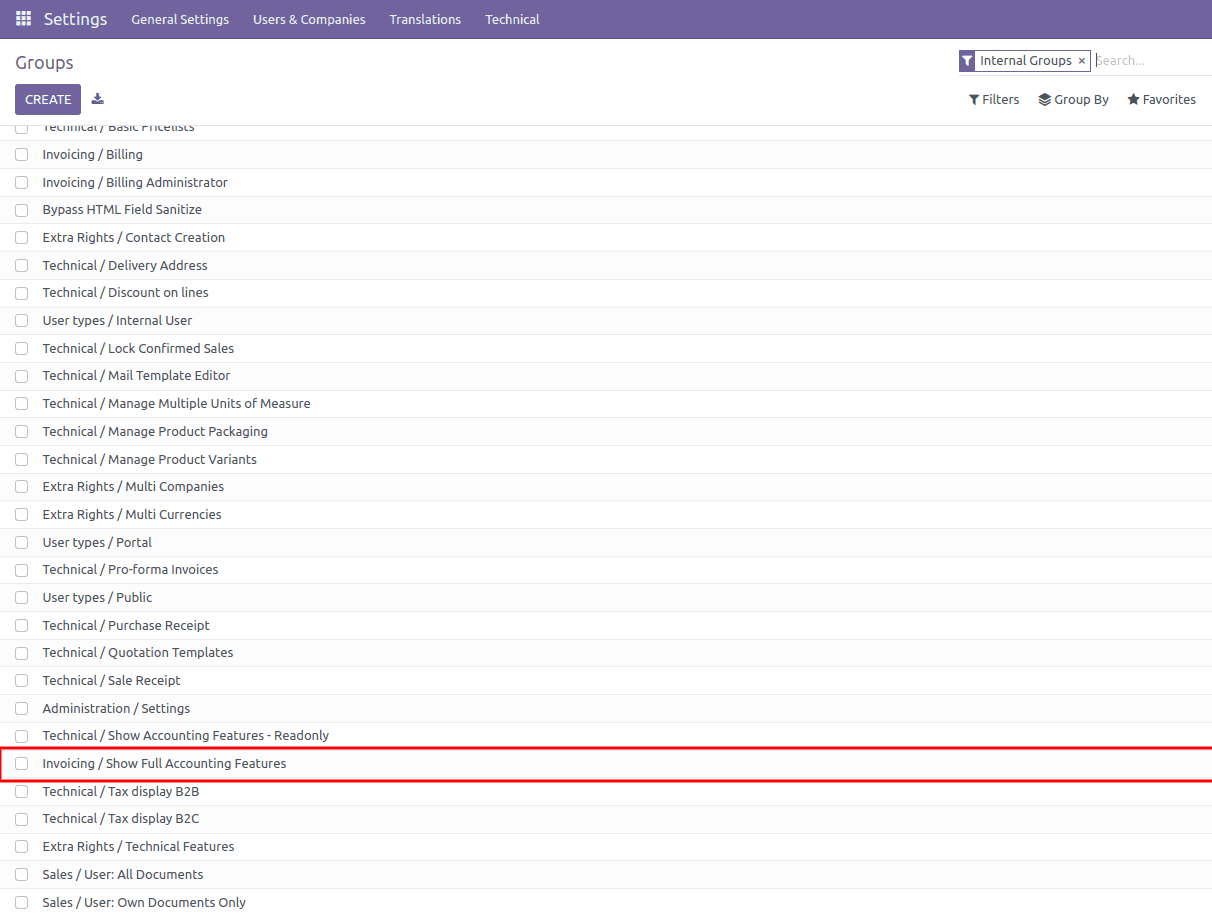
After opening the Particular menu, you can find a group called Show full accounting features.
Step 3: Select the "Show Full Accounting Features" group
Step 4: Change the application name to Accounting
There are some groups under the Inherited tab. Users added to this group are automatically added to the following groups. You have a few additional tabs to configure menus, views, access rights, and record rules. You can see all the access rights for the group under the Access Rights tab.
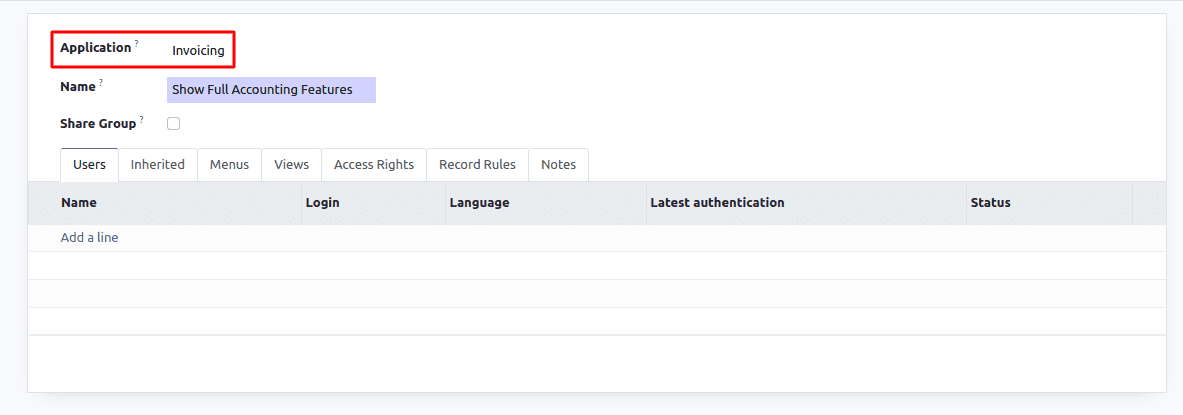
Step 5: Select a user under the User selection section and save
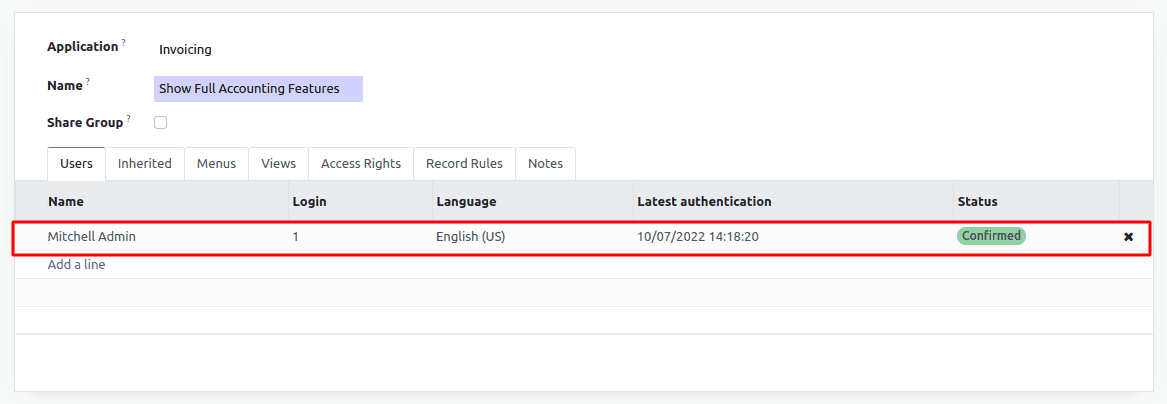
Step 6: Refresh. You will see the new features added
After enabling the module or browser, you can see the new features added in the invoicing module, like the dashboard, accounting menu, and accounting chart.
