The competition in business is high nowadays, and the promotion activities of a company have a massive role in it. Sales discounts, campaigns, seminars, and advertisements are the marketing methods that push forward an organization. The management strategies automate easily using Enterprise and Resource planning. Odoo 15 helps users manage, track, create or lead an event using advanced methods. You can organize many events within less time through the Odoo 15 Events module and assist in running your business events faster.
This blog helps you create tracks for an event in Odoo 15.
Odoo 15 Events module
The Events module allows you to create several events and assist the participants in registering their interests. Users can manage ticketing and the number of attendees and develop alerts regarding the program. Odoo platform enables sponsoring or marketing events for entrepreneurs' success. It is necessary to activate schedule/ Track options from the Setting menu of the Configuration tab in the Events window.
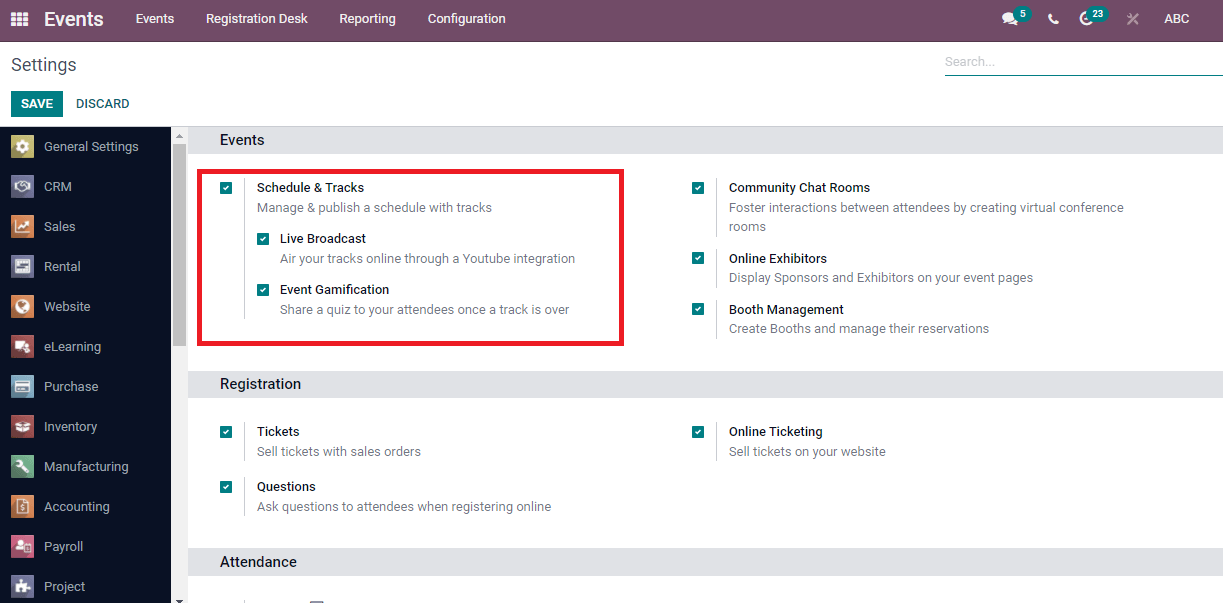
How to add Tracks in Odoo Events?
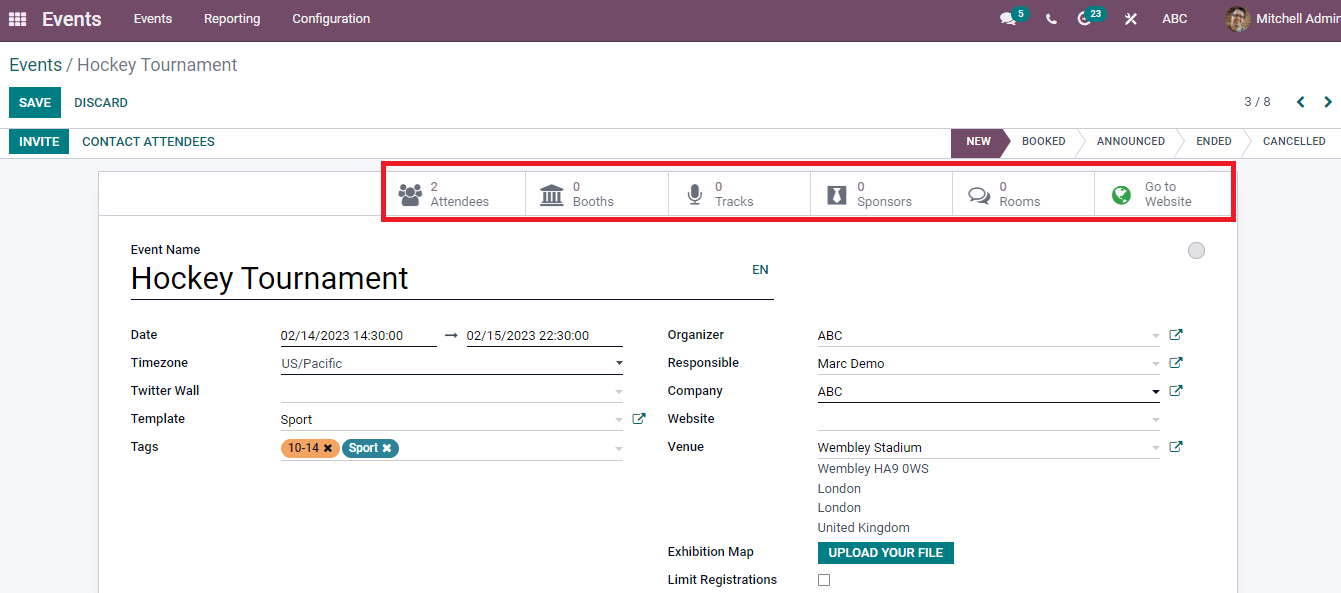
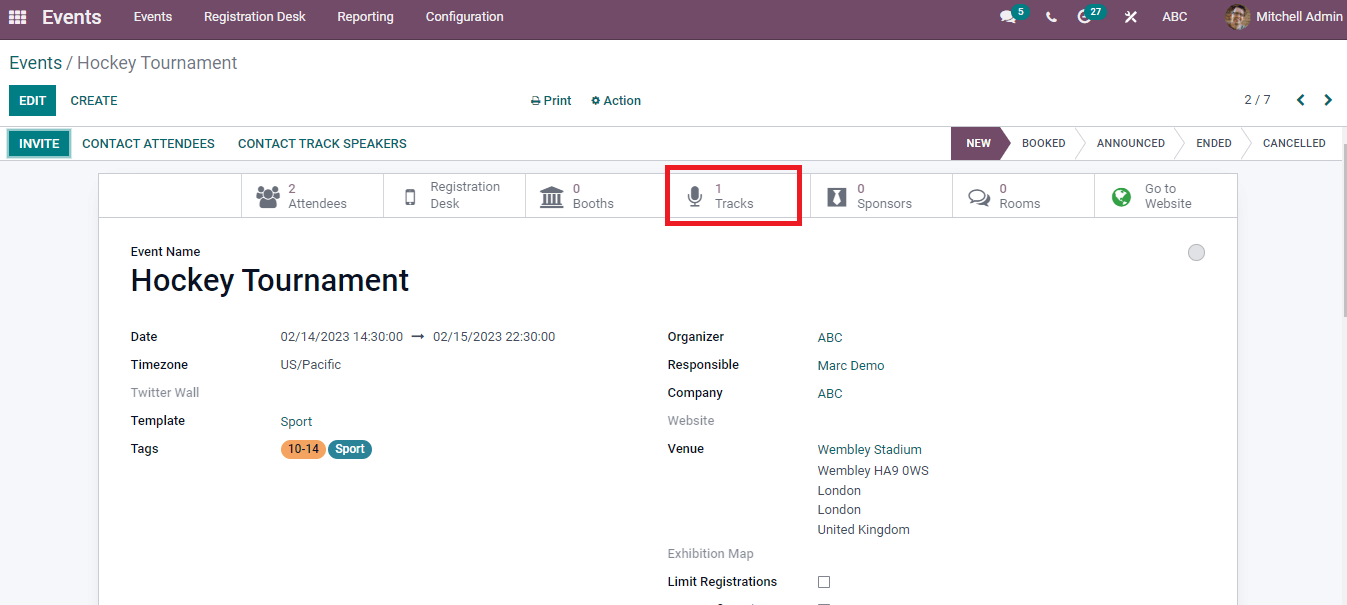
Choose one of the events in the Events dashboard, and you get the essential information in the new window. We can see details of the Event such as Date, Company, Organizer, Venue, and Timezone. The sub-menus below the invite button are Attendees, Rooms, Booths, Sponsors, Tracks, and Go to Website.
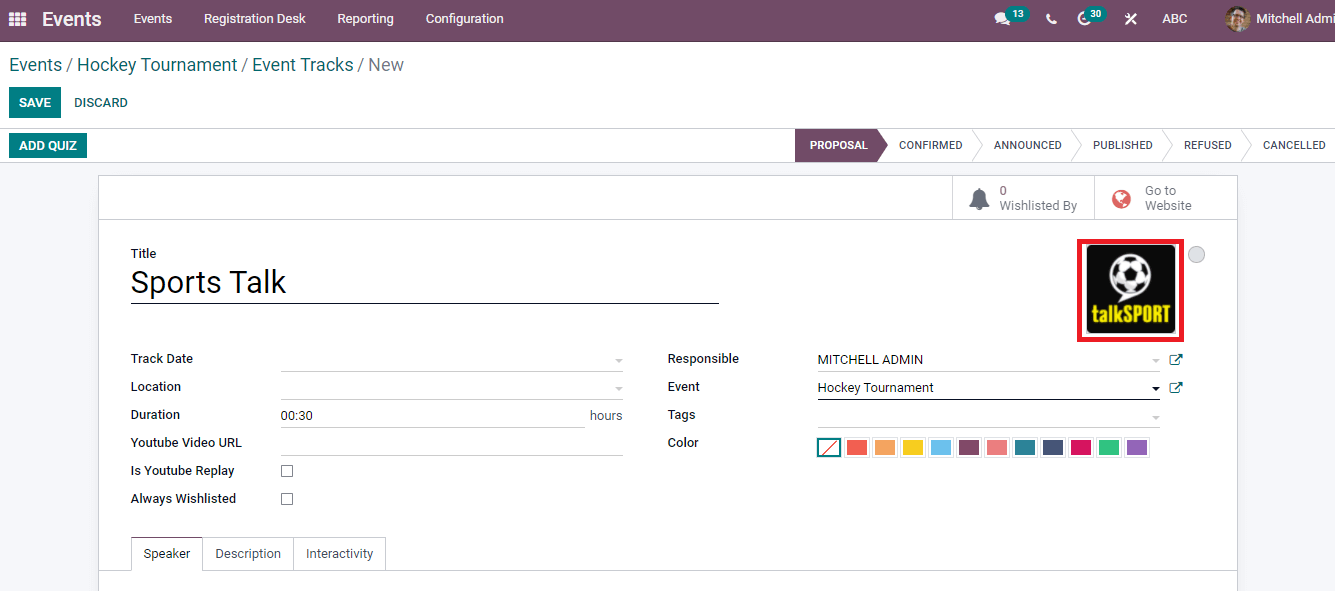
Click on the Tracks option, you will direct to a new Events Tracks window and select on Create icon. On the new page, we can enter details regarding the talk of your Event. Enter the Title, Location, Track date, Responsible person, Location, choose the Event and Duration. A camera image on the left side allows you to add an image for your Track. You can also apply Youtube Video Link and enable the Always Wishlisted options to help set the talk as the Events attendees favourite one.
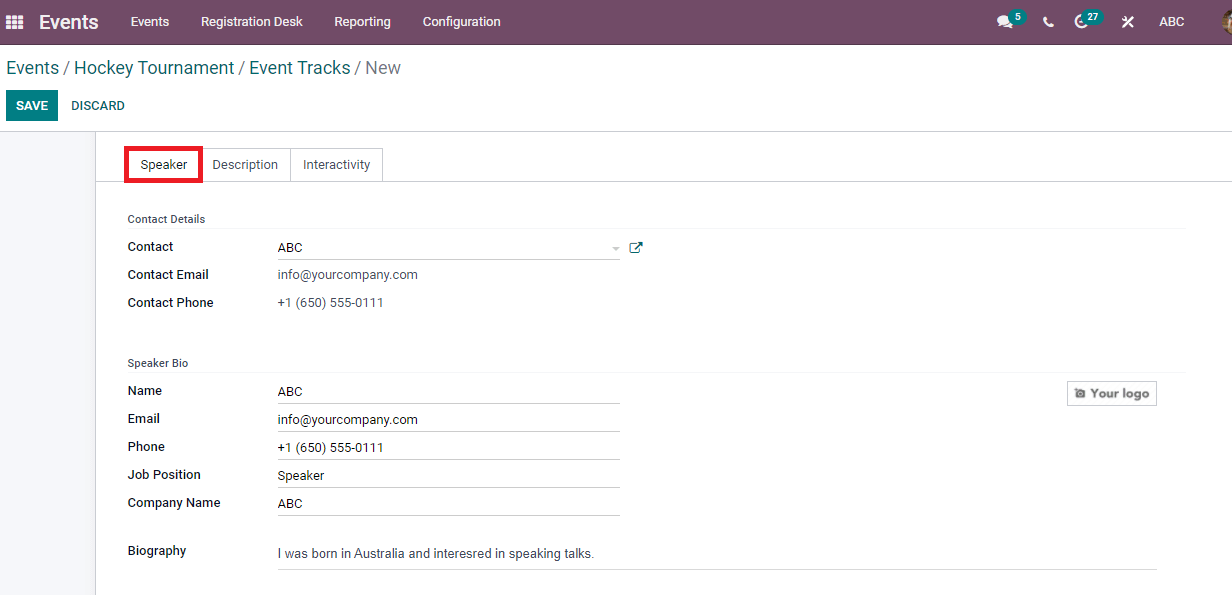
You can add details of speakers' information inside the Speakers tab at the end of the window. Here, we can enter Contact Details and Speaker Bio. It includes Contact Phone, Email, Name of Speaker, Job position, and Biography.
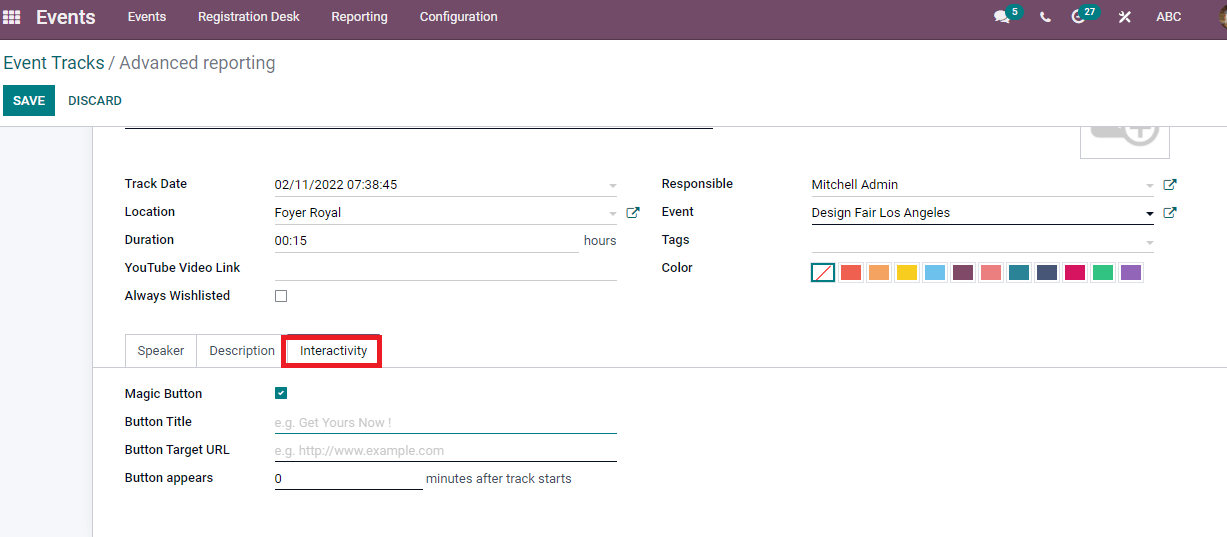
In the Description tab, you can give the information about the talk. The Interactivity tab allows you to activate the magic button that displays a Call to Action button to your attendees while they watch your Track. After starting the Button, you can mention the Button Target URL, Button Title, and Appearing Time of Button after Track begins, as shown in the screenshot.
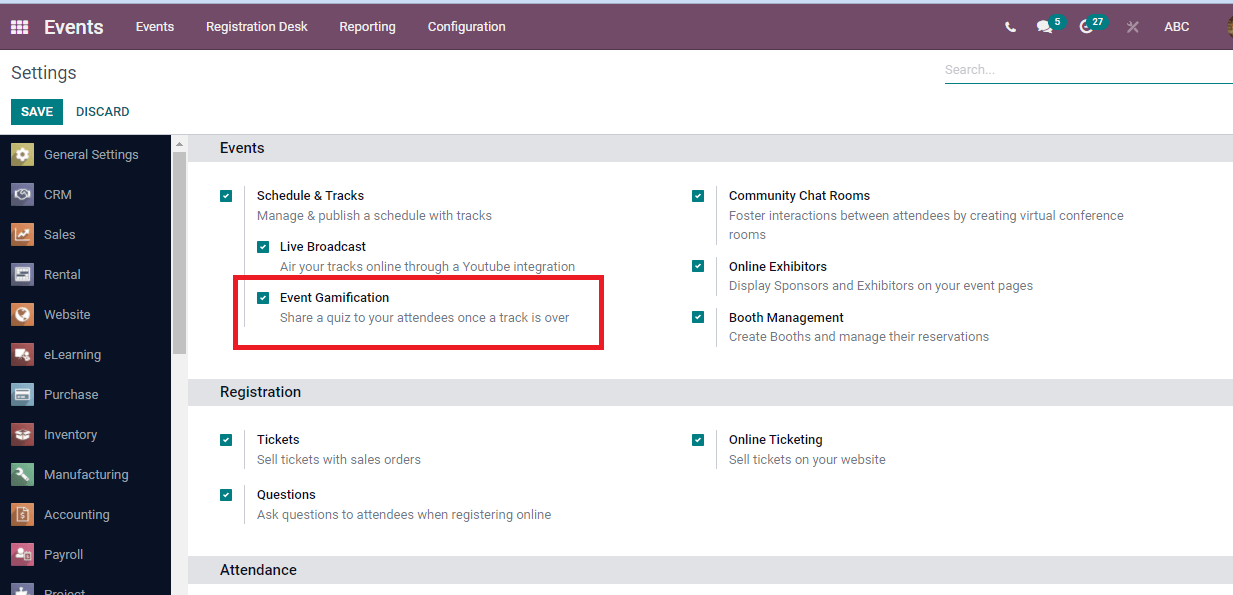
Click on the Save icon to store your data information. It is essential to activate the Event Gamification option to apply questions for the track.
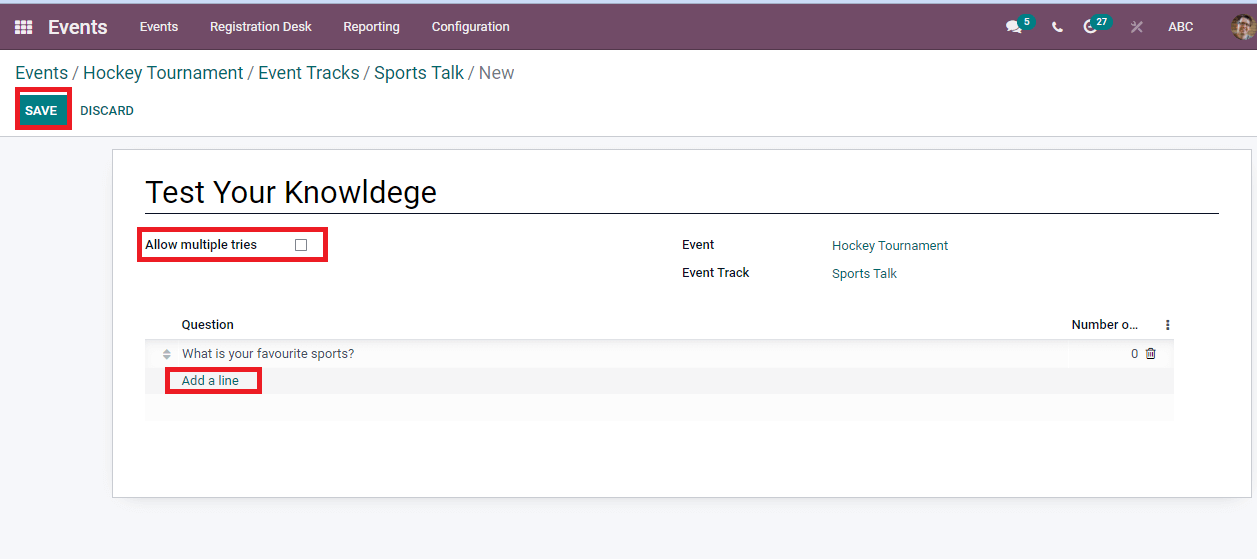
You can view the Add Quiz icon after enabling that option. Add Quiz icon in Tracks window to create a quiz regarding the talk. After Clicking Add Quiz button, a new window shows before you. Enter the title and enable Allow multiple tries as your wish. We can add a question by clicking on Add a Line option below the Question tab and selecting on the Save icon after entering all details.
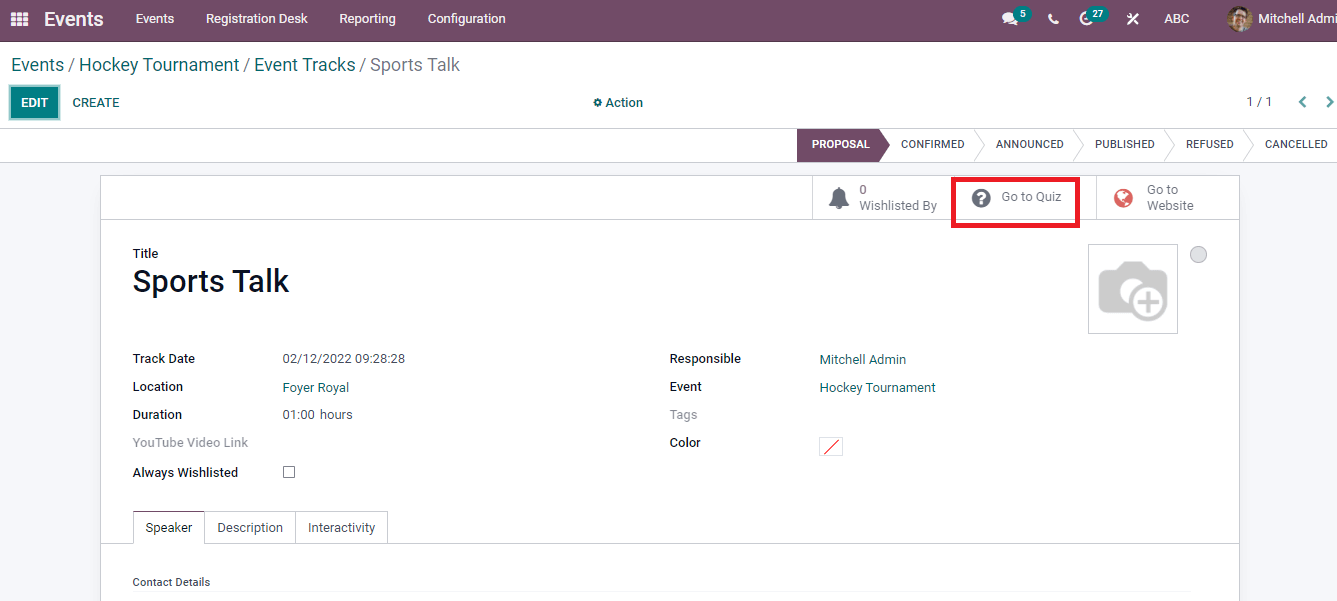
You can see the Go to Quiz option in the Event window shown in the screenshot below.
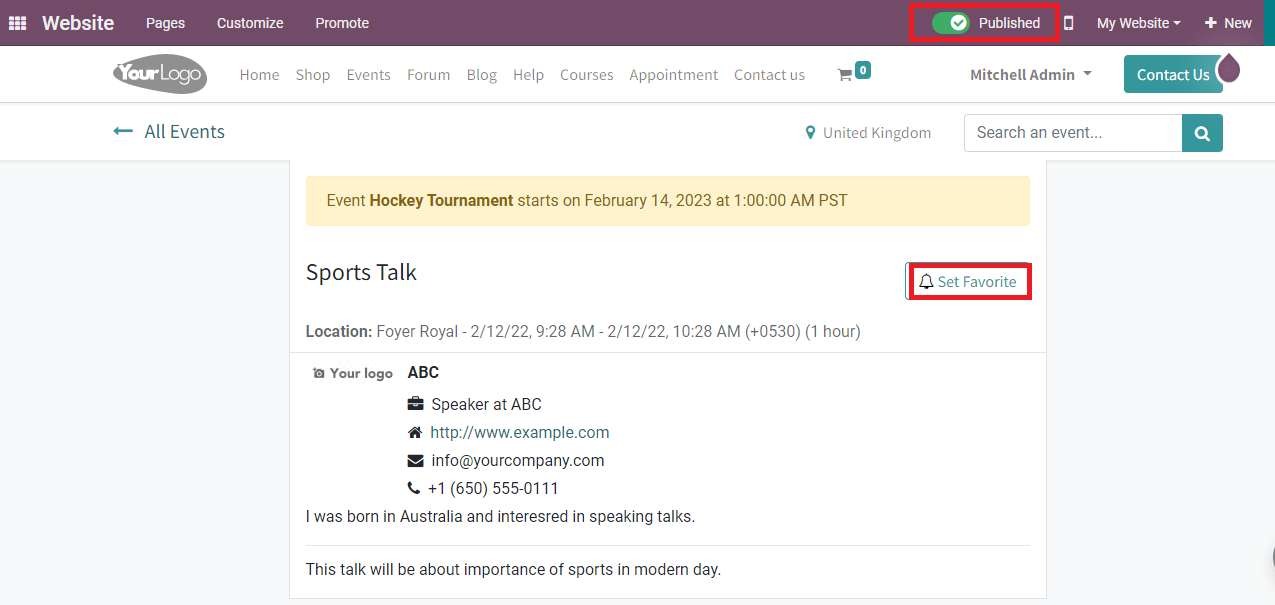
By selecting the Go to Website button, a new Track website page opens in front of you. The details of the talk, speaker, and program's motive are displayed on this window. You can publish the talk by selecting on Published button at the top end of the window. Hence, it is accessible for all participants, allows the tracks and questions on the company website. Set Favorite icon to assist in developing the talk as your favourite one.
We can see that one track is created in the screenshot below in the Events window.
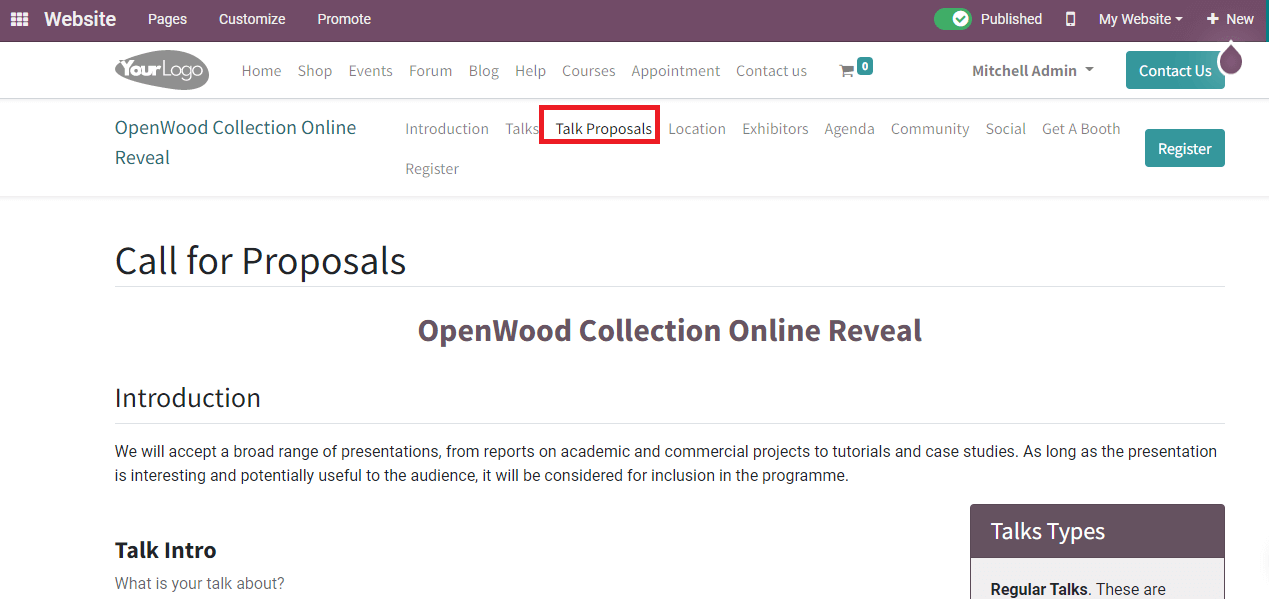
You can also create talks from the Go to Website icon in the events window. Click on Go to Website icon and select the Talk proposals option on a website page. Here, you can enter information about the talk and biography of the speaker. Add the talk's categories, title, and introduction in the Talk Intro section. After that, enter the speaker's biography, contact number, email, and job title below the Speaker Profile. Click on Submit proposal button after entering all details about the talk.
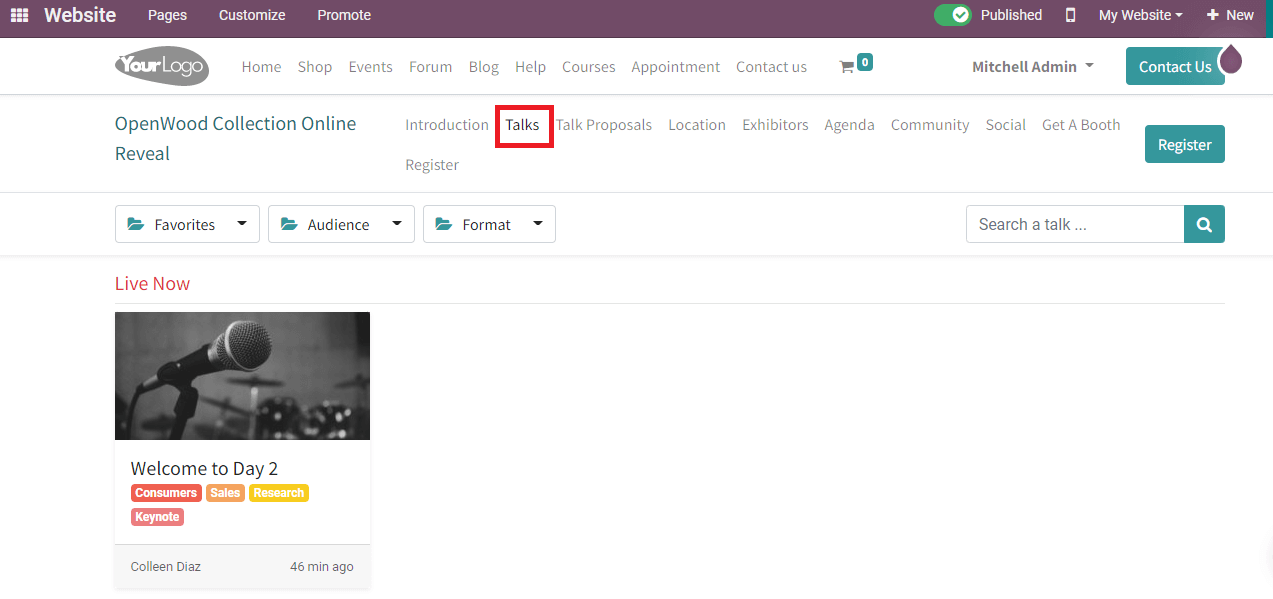
The upcoming or ongoing talks are visible under the Talks tab. You can also book the talks in an event under this tab.
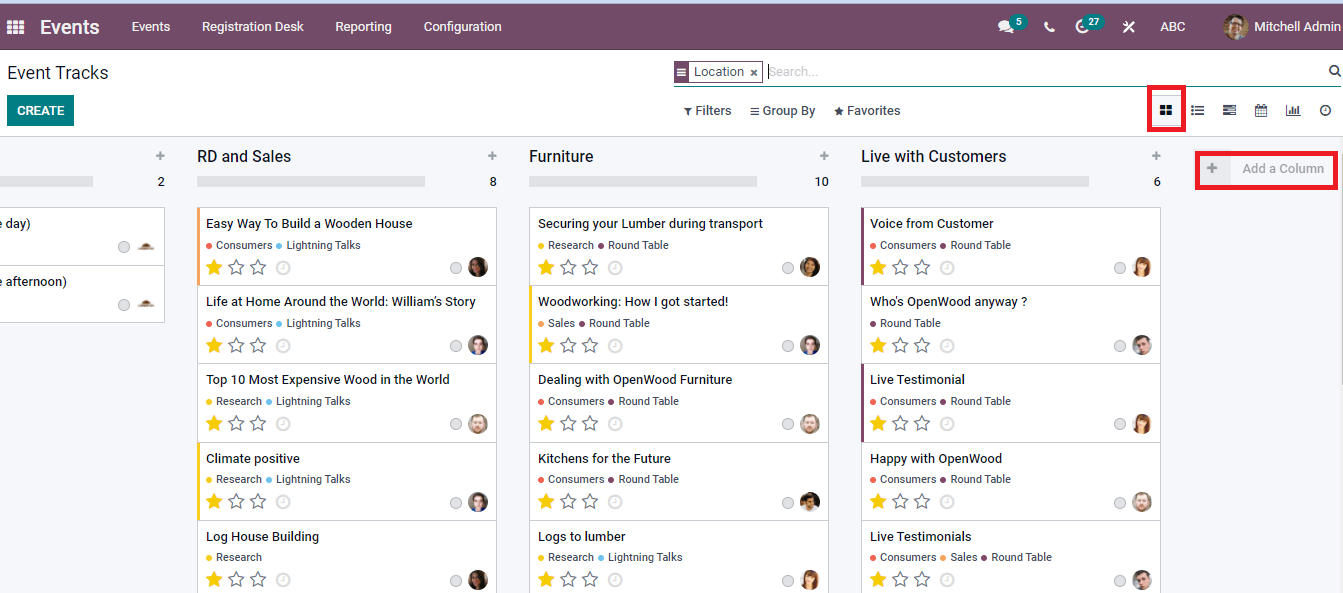
The Events Track window is visible in several forms for users. In the Kanban format, the tracks of events are published under different stages. You can add a new stage by clicking on Add a column icon and the three-dot Button near each track used to Delete, Edit/View the track.
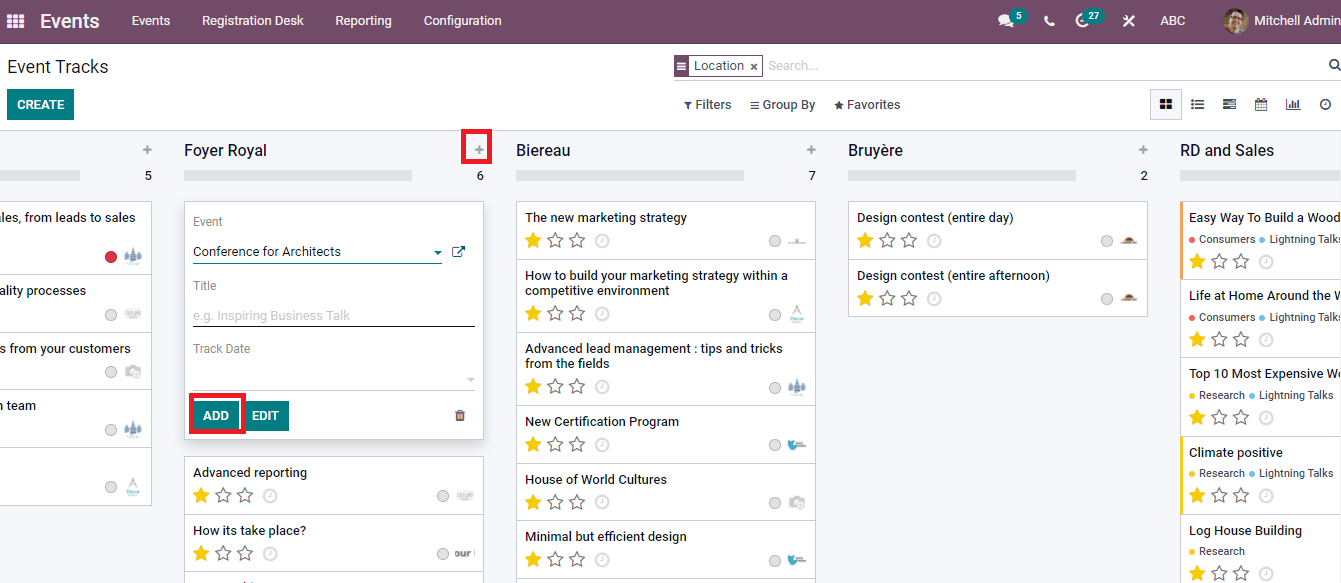
You can add a new track by selecting the + icon near each stage. Specify the title of the Event, Name, and Track date on the new window. After that, click on Add button to display a new stage.
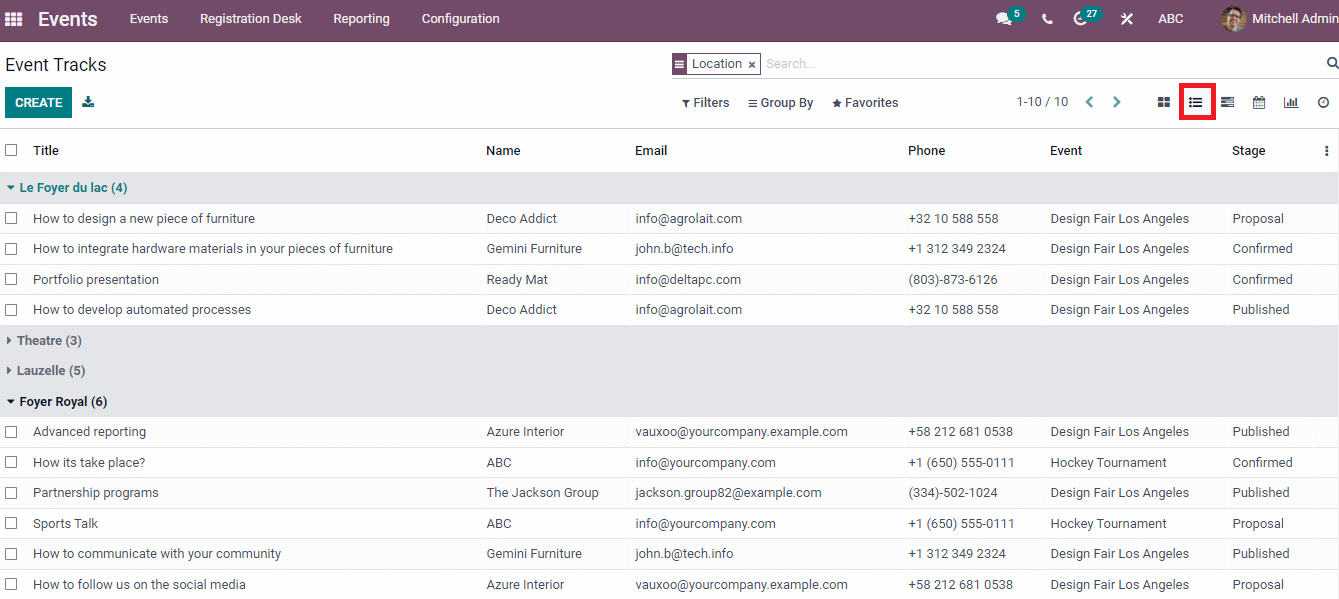
The List view depicts the Tracks under each Event. We can see the stage, Phone, Name, Email, and Event details in the window.
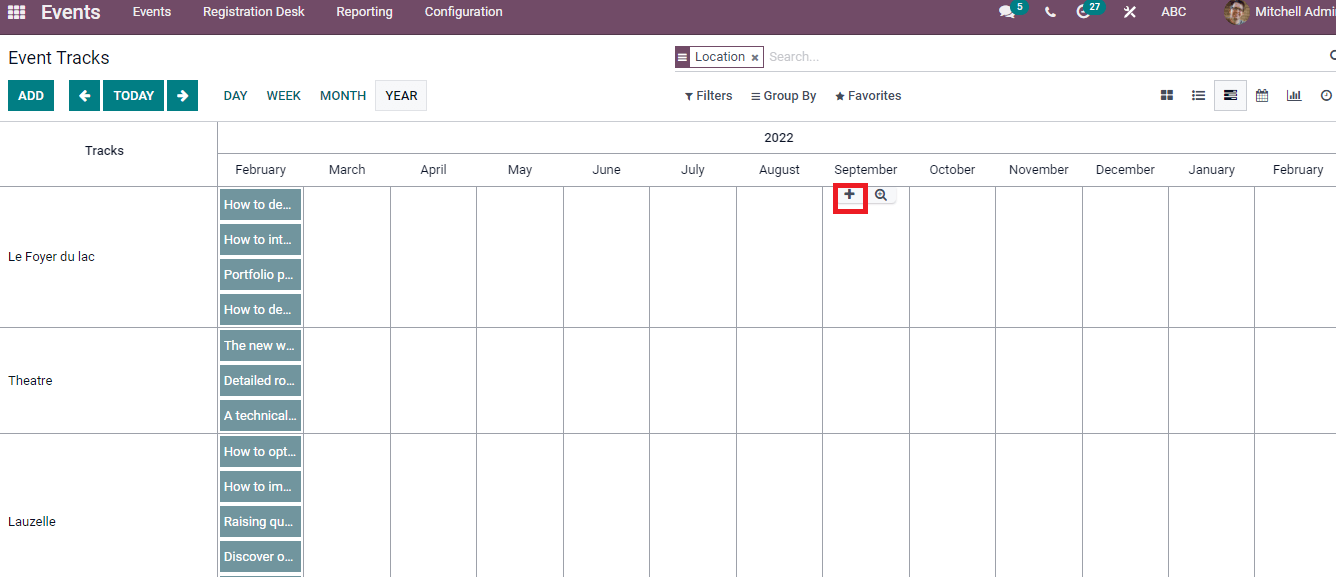
Events are arranged based on day, month, year, and week in the Gantt view. You can develop a new event on a particular date by clicking on the + icon.
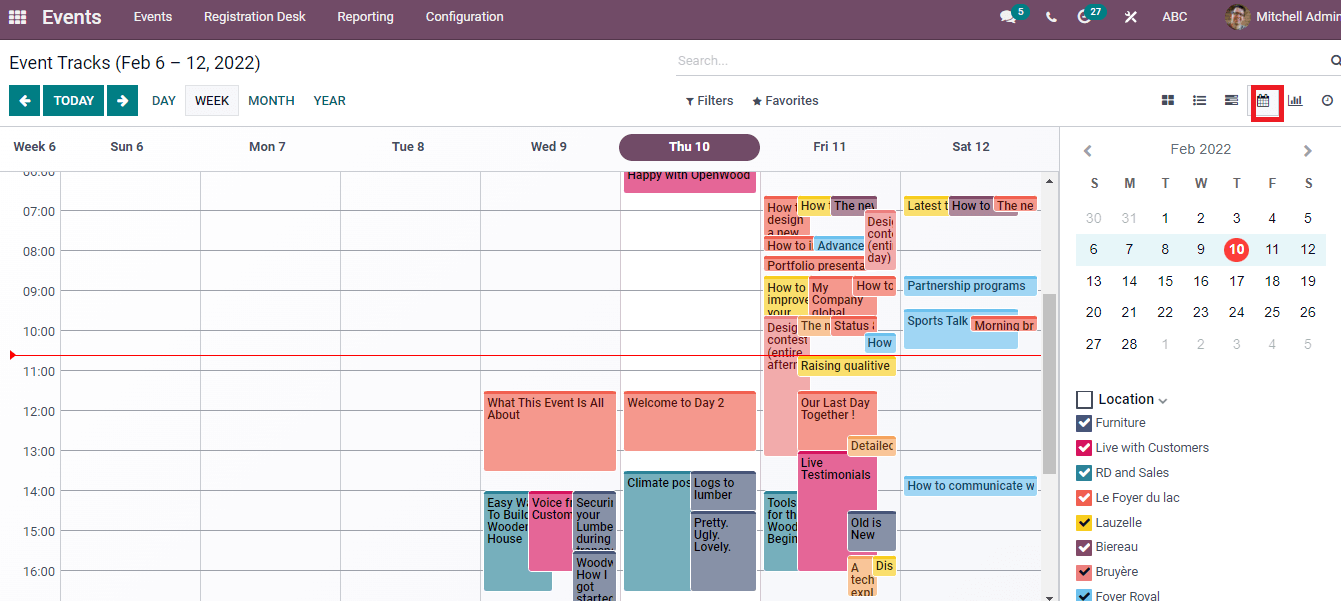
The calendar view depicts each Event's tracks' time, location, and contacts. You can implement a new event by clicking on a particular date.
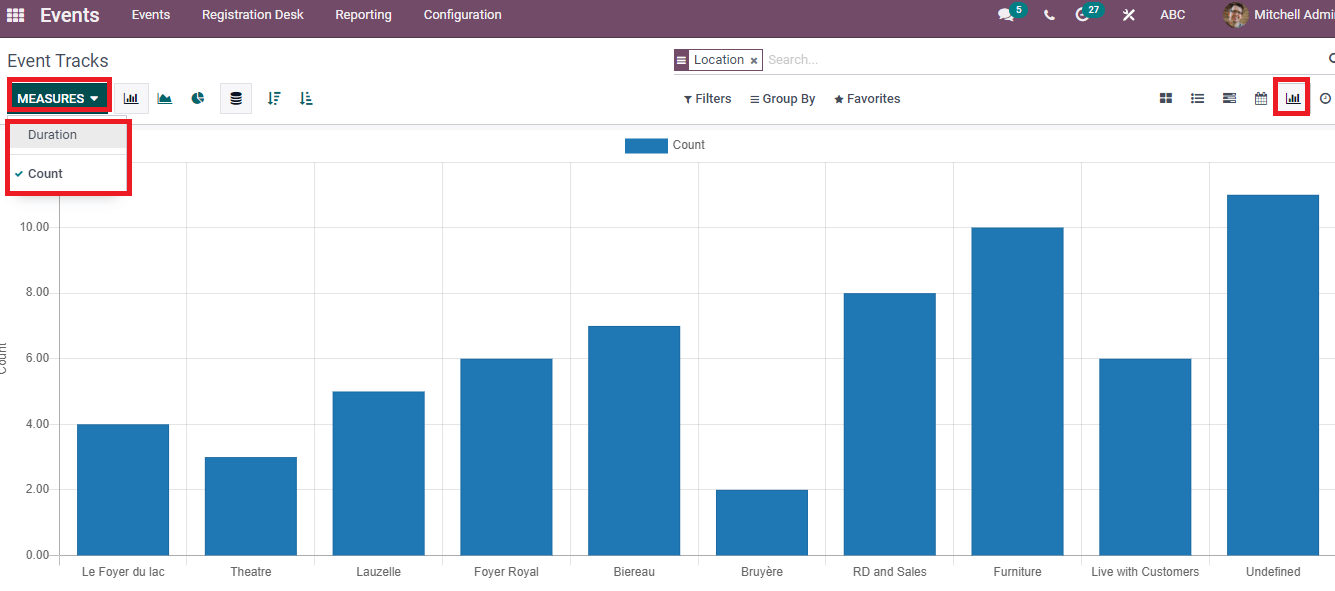
In the Graph view, we can see the Location of Tracks on X-axis and Count on Y-axis. You can also apply Duration in the graph by selecting the Measures icon.
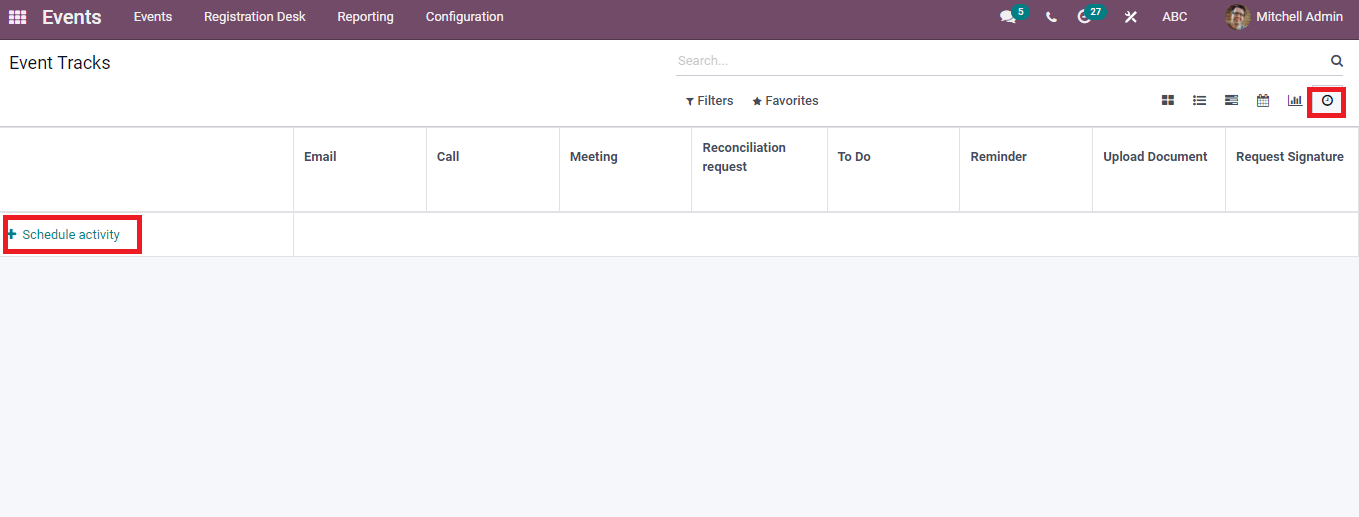
We can schedule an activity through the clock view of the Events Tracks window. It organizes through meetings, Emails, calls, and Reminders.
The Odoo Events Module helps publish Events and access the talks from various speakers. Apart from the above details, a record of tracks on the website is visible in the Events tracks option of the window. The organization, design and promotion of an event become easy using Odoo 15 Events module. You can manage the attendees, tickets, and communication for an event through the advanced features of the Odoo module, and features of the Odoo Event module boost the promotion/marketing of a business program.