Effective repair management is essential for proper customer management. Managing and repairing the customer products on time and providing them with the best quality services and care will automatically generate customer satisfaction and help you improve the business. Repair management is not an easy task. The difficulty ratio of the repair management procedures will vary with the company's size and the products and equipment that it has to manage.
With the support of the Odoo 15 Repair module, it is quite straightforward to manage and overview the complete repairing procedures on products from a single Odoo database.
This blog will give you a detailed note on creating and managing Repairs with the Odoo 15 repair module.
Repair management is straightforward with the Odoo 15 Repair module. The module is highly integrated with Odoo to give you full access to the inventory and other essential tools for repair management.

All Repairing orders with their live updates will be listed on this page. You can configure/create and manage multiple Repair orders from the module's dashboard. Click on the CREATE button and the page to configure the new repair order will open up.
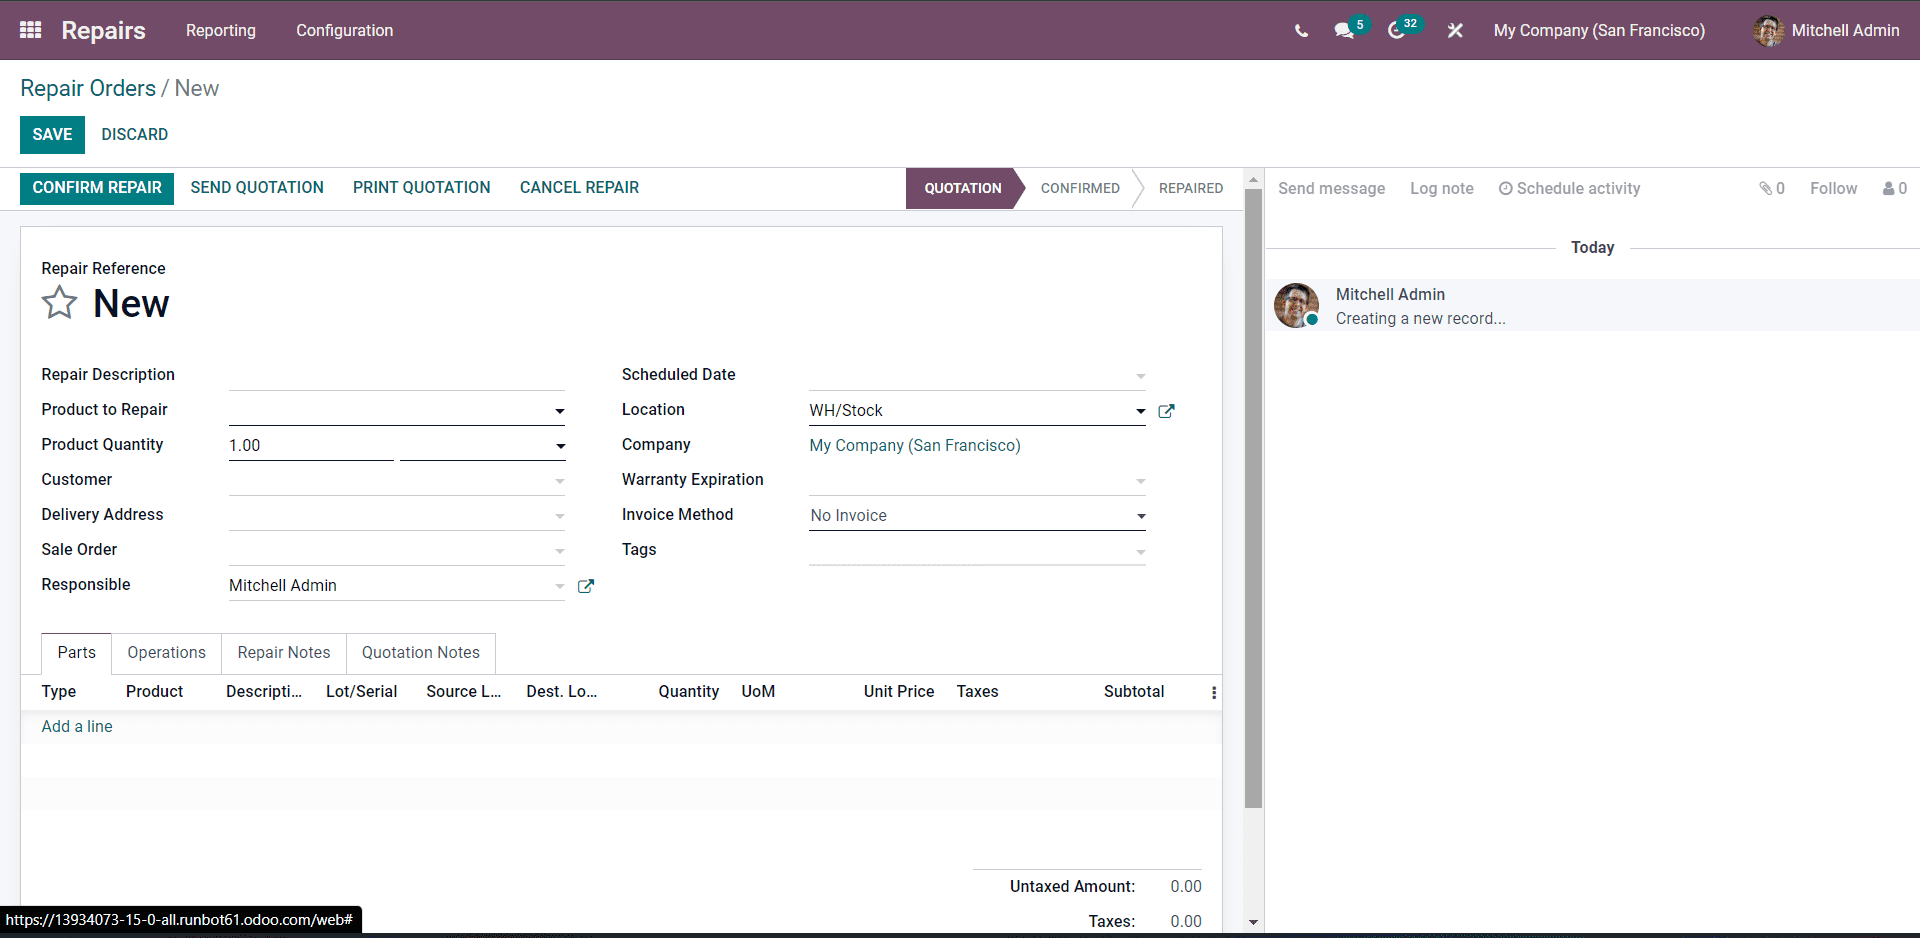
Consider an example for creating the Repair order. A customer returned a product that your company had delivered earlier. The customer needs it repaired as soon as possible. You can use the configuration to record a new repair report for the customer's submitted product.
The elementary step in the process is to type in the description for the repair. Usually, the issue with the products is given in this space. For example, if the desk you have supplied has a screw missing, then you can type in Missing screw. Descriptions will allow you and your repair team to understand the repair detail for easy management quickly.
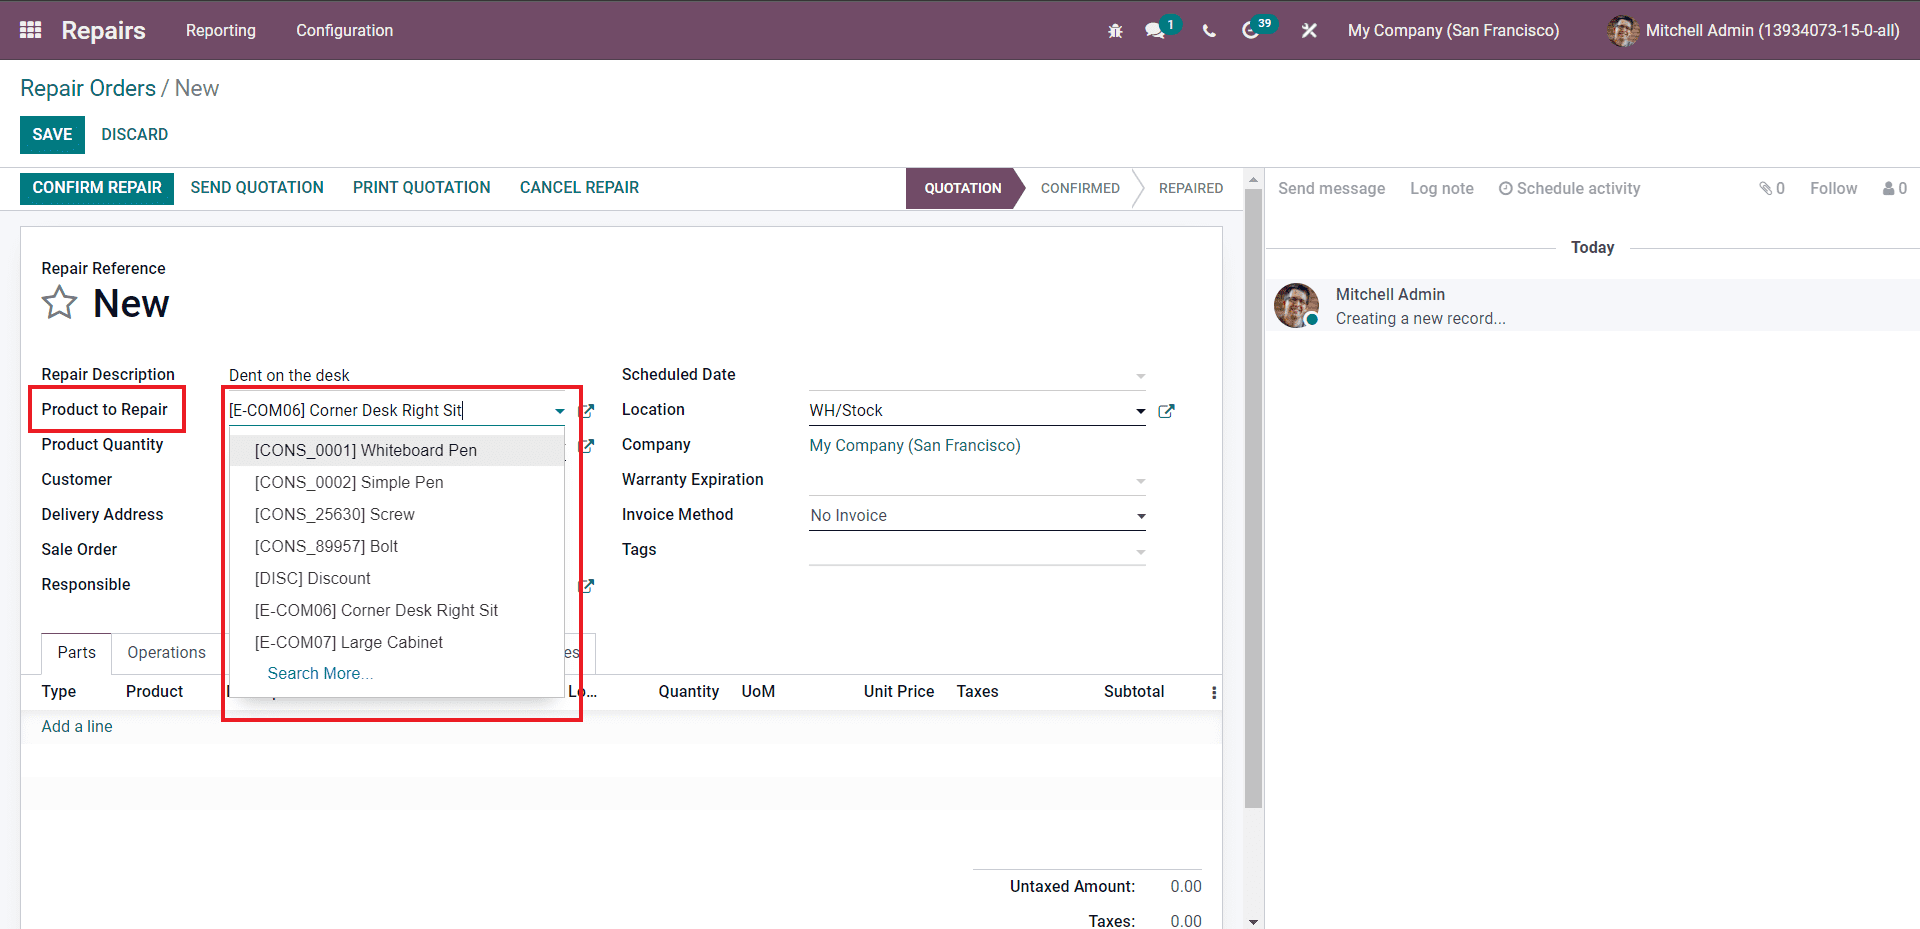
After typing in the reason or the description for repair, you have to select the product that has the issue from the Product to repair field. The module is integrated with the Odoo inventory module, you can access all of the products in your inventory for easy management. Click on the Search more button from the list of products to have a complete list of your products, as shown below.
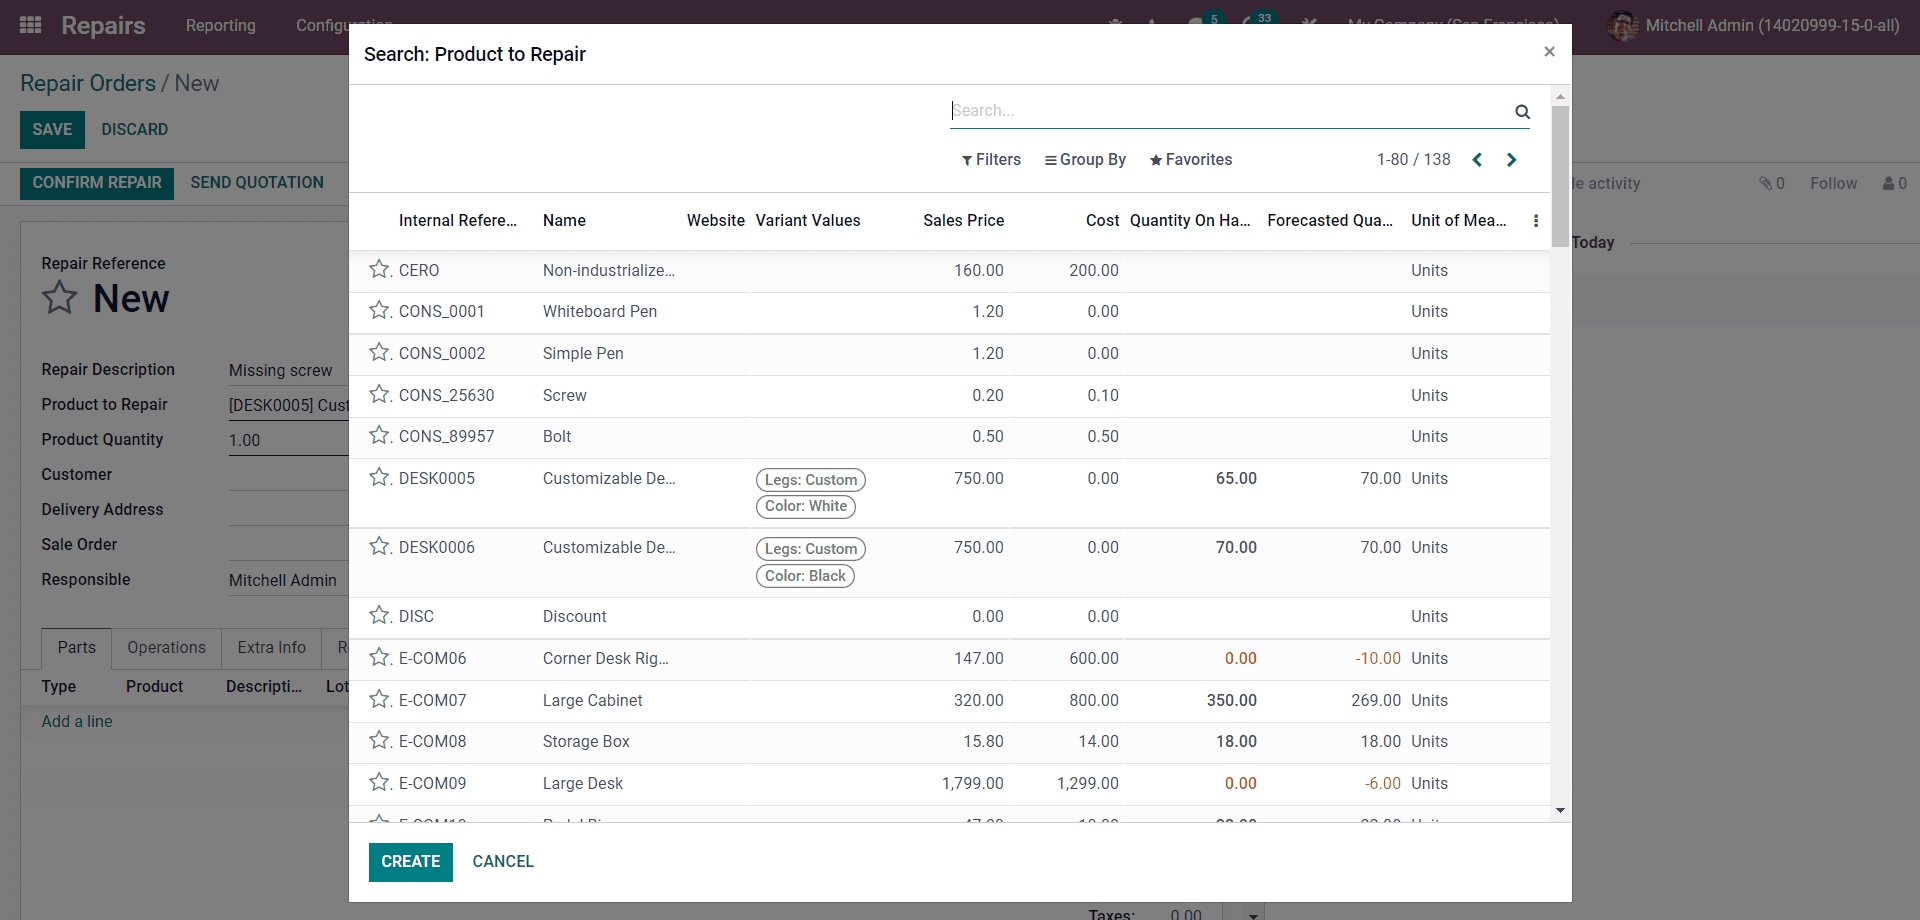
You can choose from the options list on the product to add them. So, in this case, we have to select the Customizable desk as the product implying that it is missing a vital screw. The next step in the process is choosing the number of products required to be repaired from the Product quantity field.
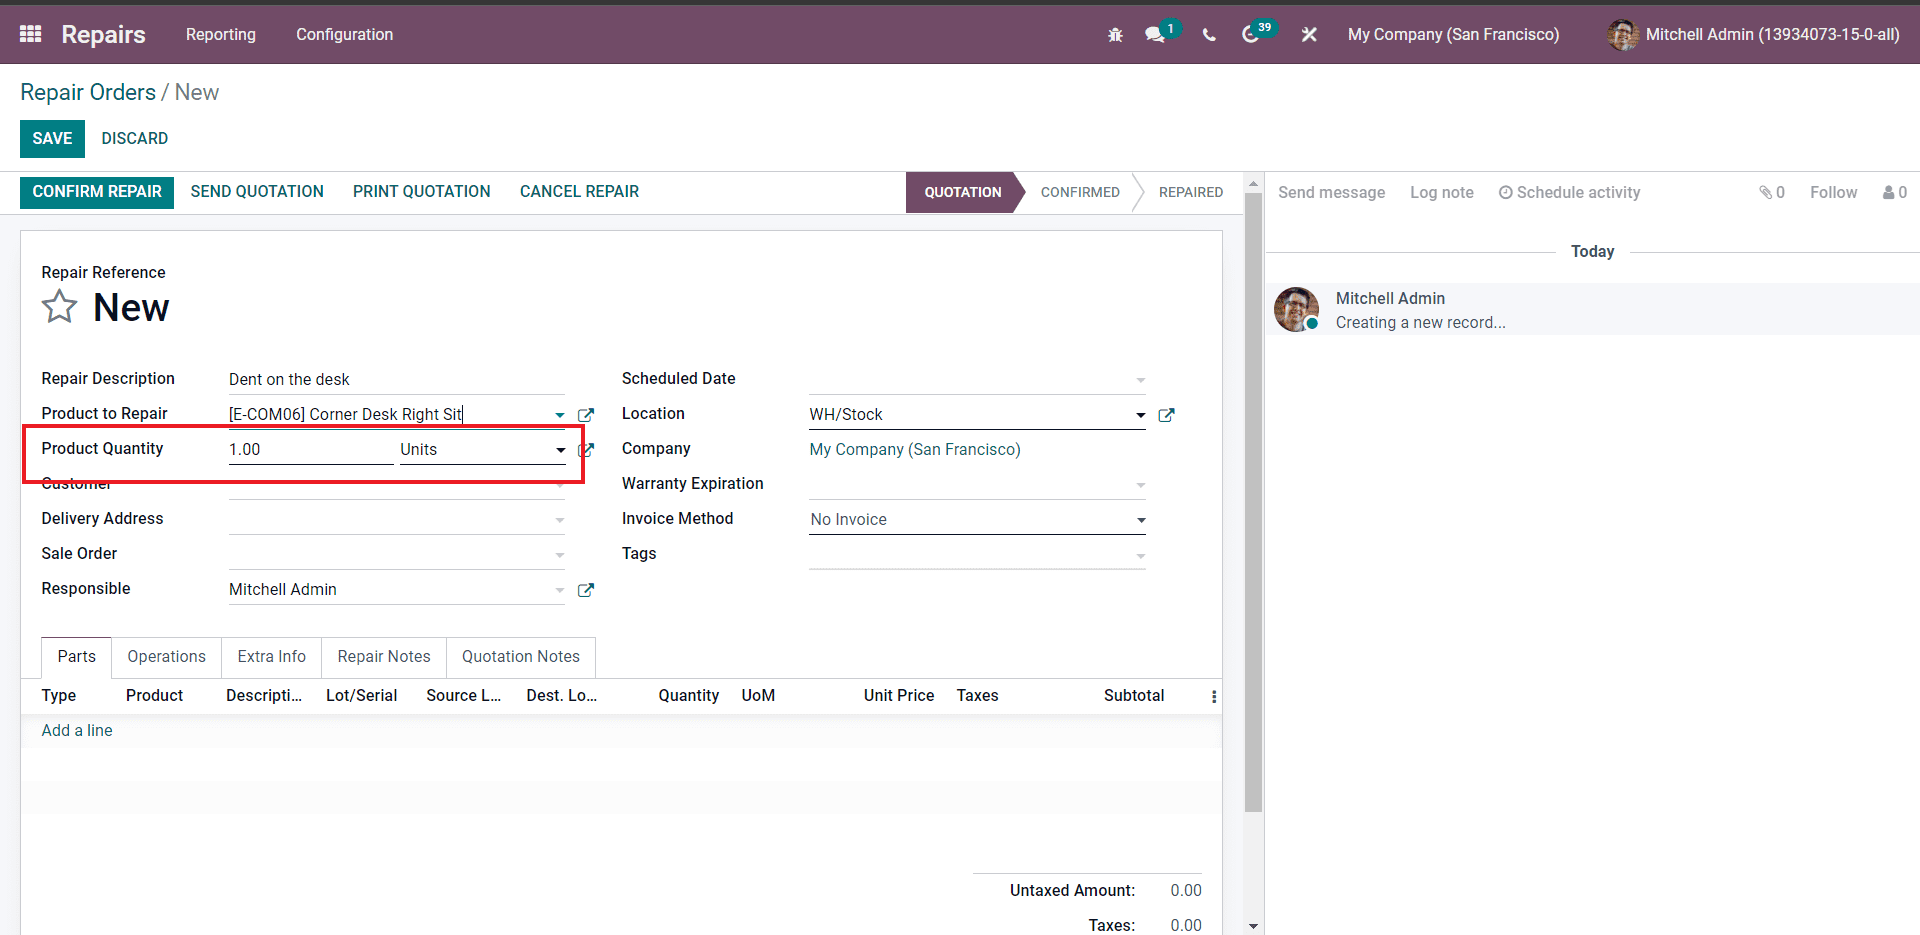
Enter the number of products and choose the unit from the Unit field.
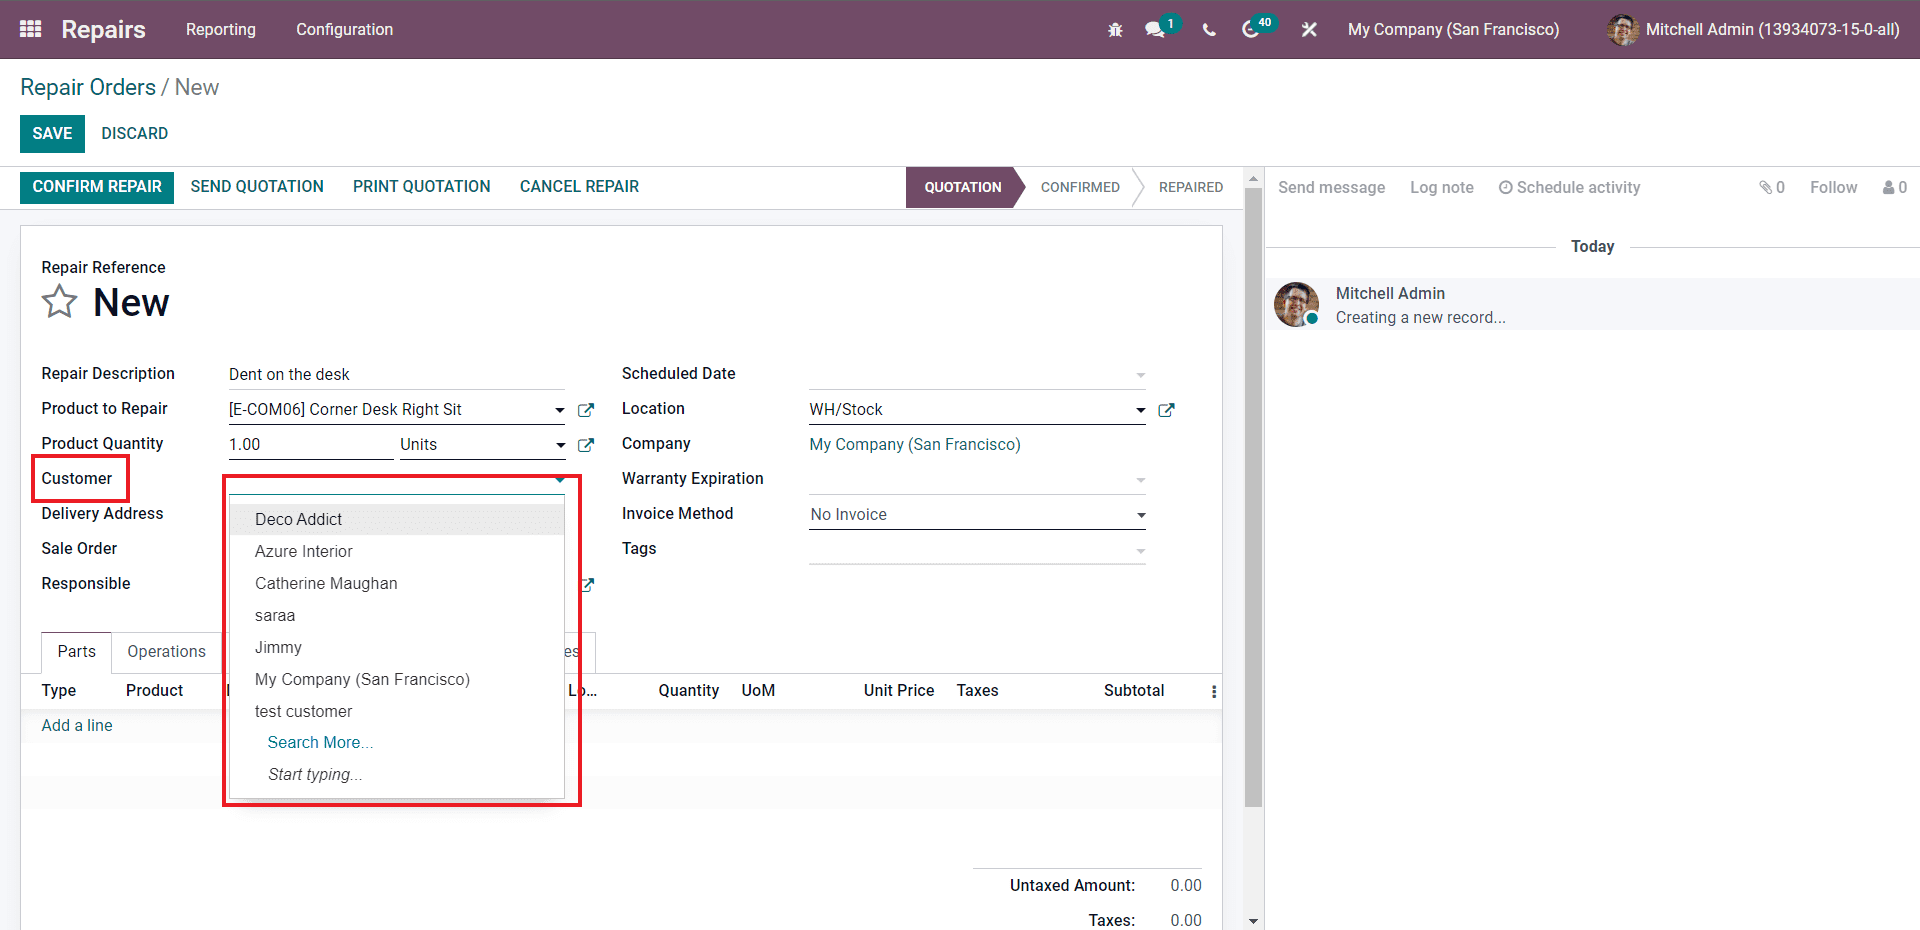
The next and the most crucial step in the process is to choose the customer from the Customer field. Selecting the customer will allow Odoo to recognize the customer and manage the product accordingly. Click on the Search more option to get the whole list of your customers. The delivery address will be auto-filled concerning the customer's address.
The next step in the process is to enter the scheduled date for the repair from the Scheduled date field, as shown in the image below.
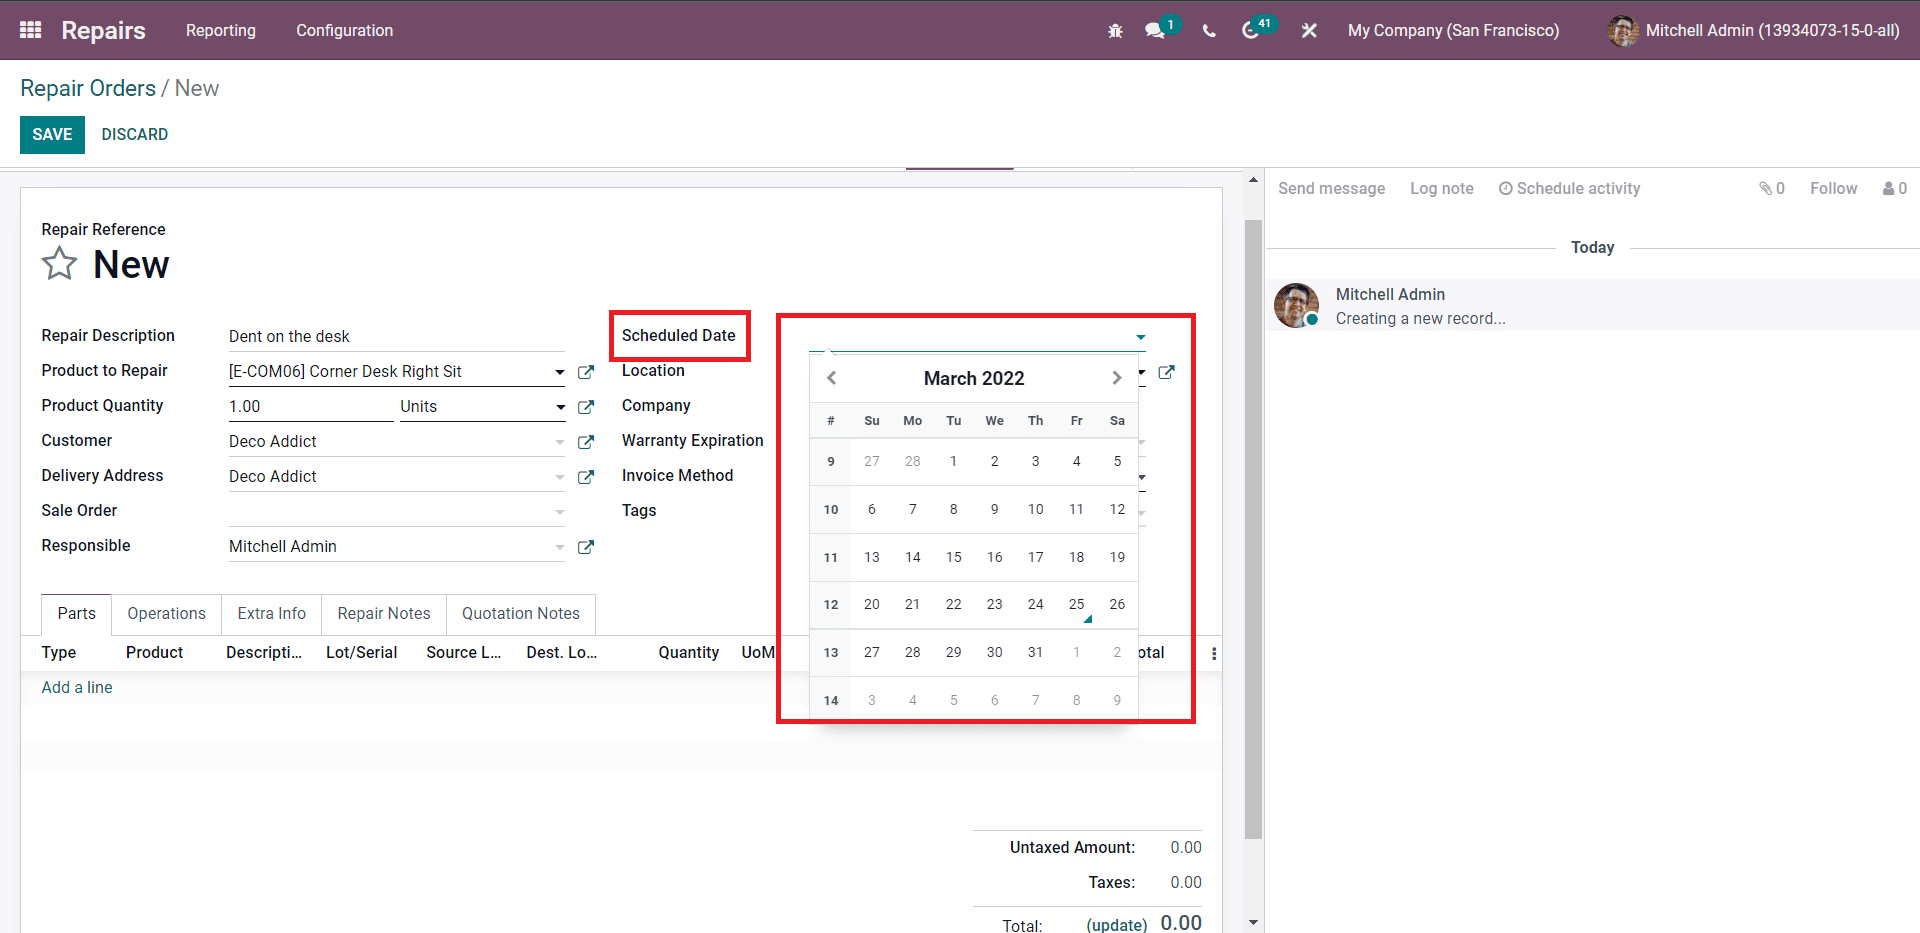
The location, company, Warranty Expiration, Invoice method and tags from product repair from their respective fields to configure the repair process. You can choose and configure these options based on your company policies.
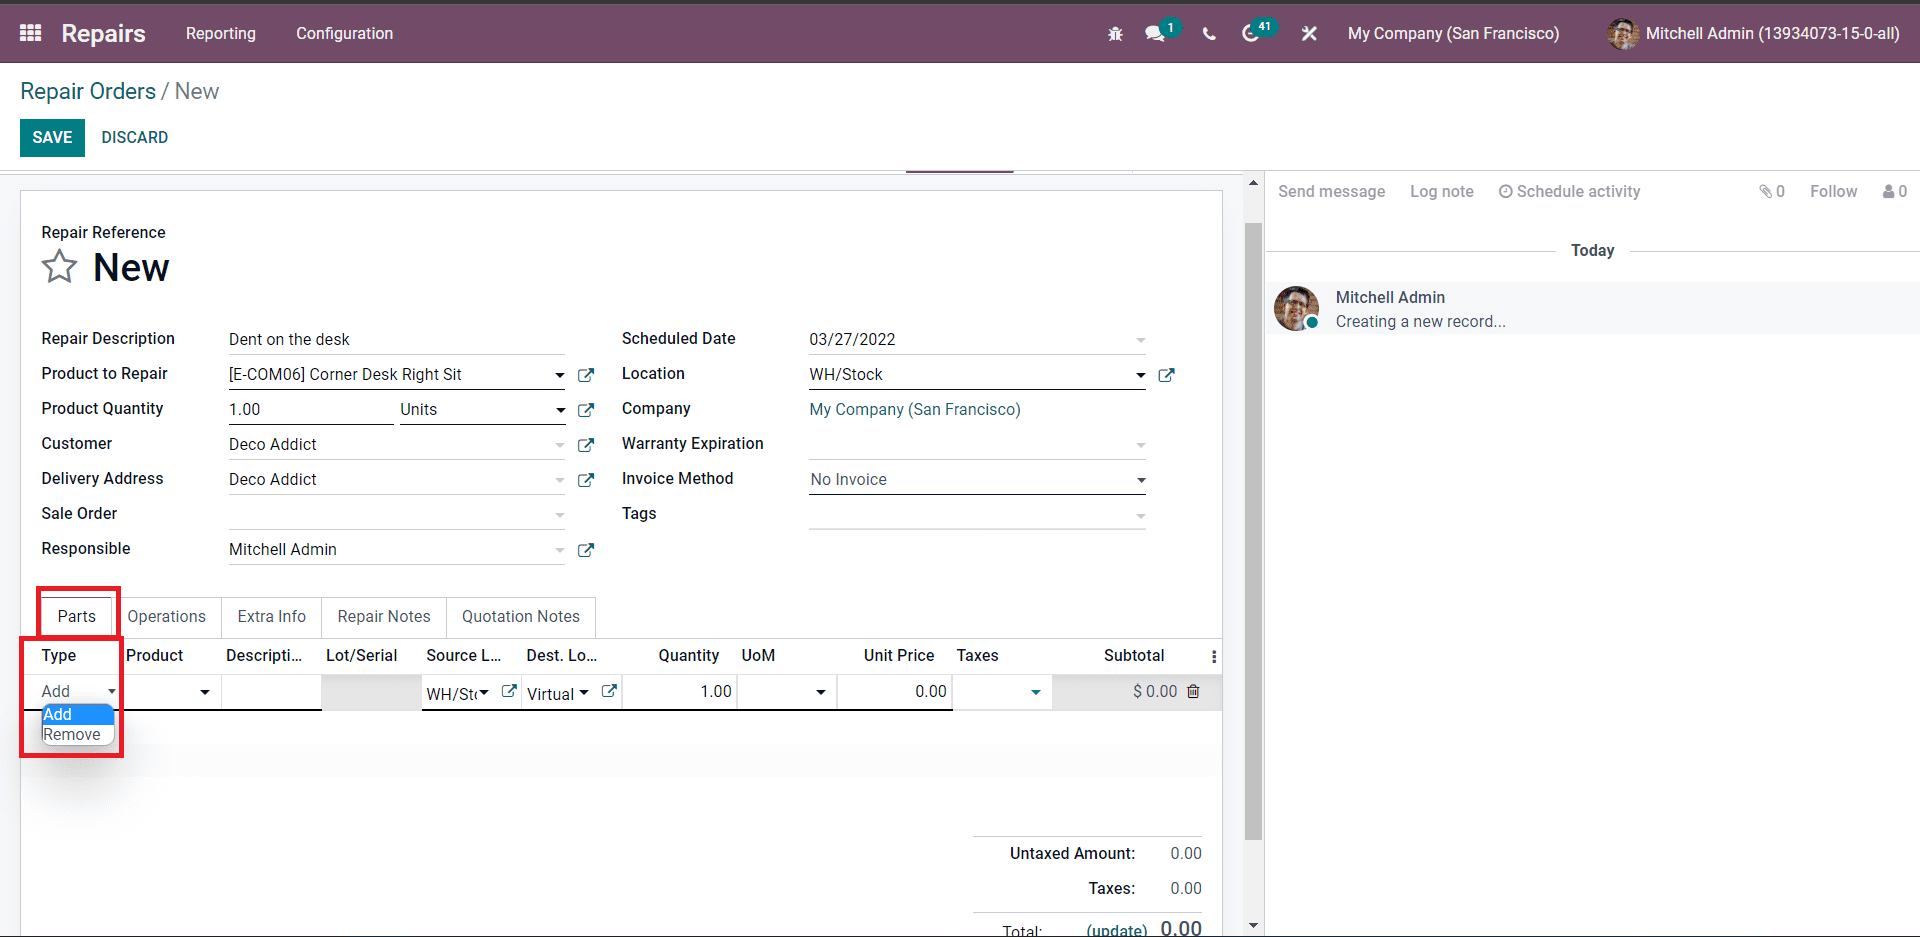
In the Parts section of the configuration section, you can choose the products or components that need to be included or removed from the main product. As marked on the image above, you can select the type from the Type field. The type section consists of two options Add or Remove. If you choose Add, it will be immediately recognized as the product that should be applied to the main product, and if your choose Remove, then, Odoo will recognize it as a product that needs to be provided from the main product.
In this case, we have to add the missing screw to the table, so we have to opt Add from the options and the following immediate field; you can choose the product that needs to include in the main product. Click on the Product field, and a list of products will open up, as on the image below.
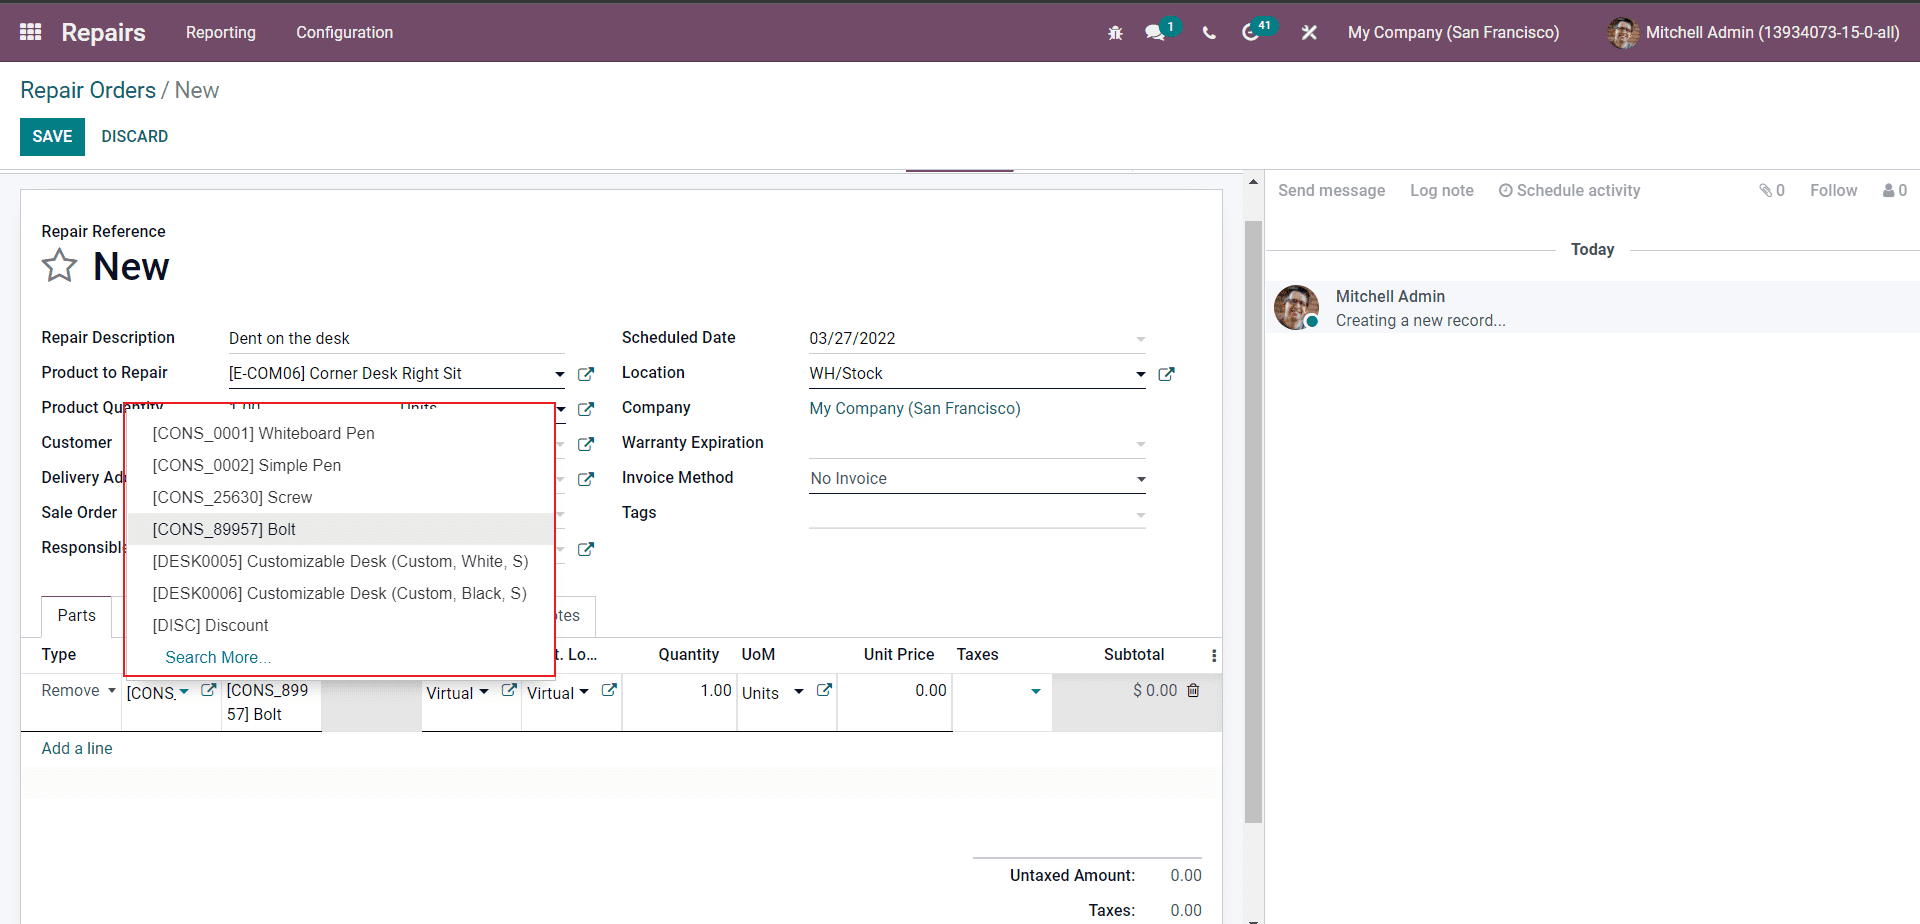
Select the component or the product from the list, and the fields supporting the product will be automatically filled with respect to the product configurations. Similarly, you can choose multiple products or components for removing or adding to the main product.
In the immediate field, you can find Operations options to add the operations to the repair process. You can type in letters for repair notes and quotation notes in the preceding fields, Repair notes and Quotation notes.
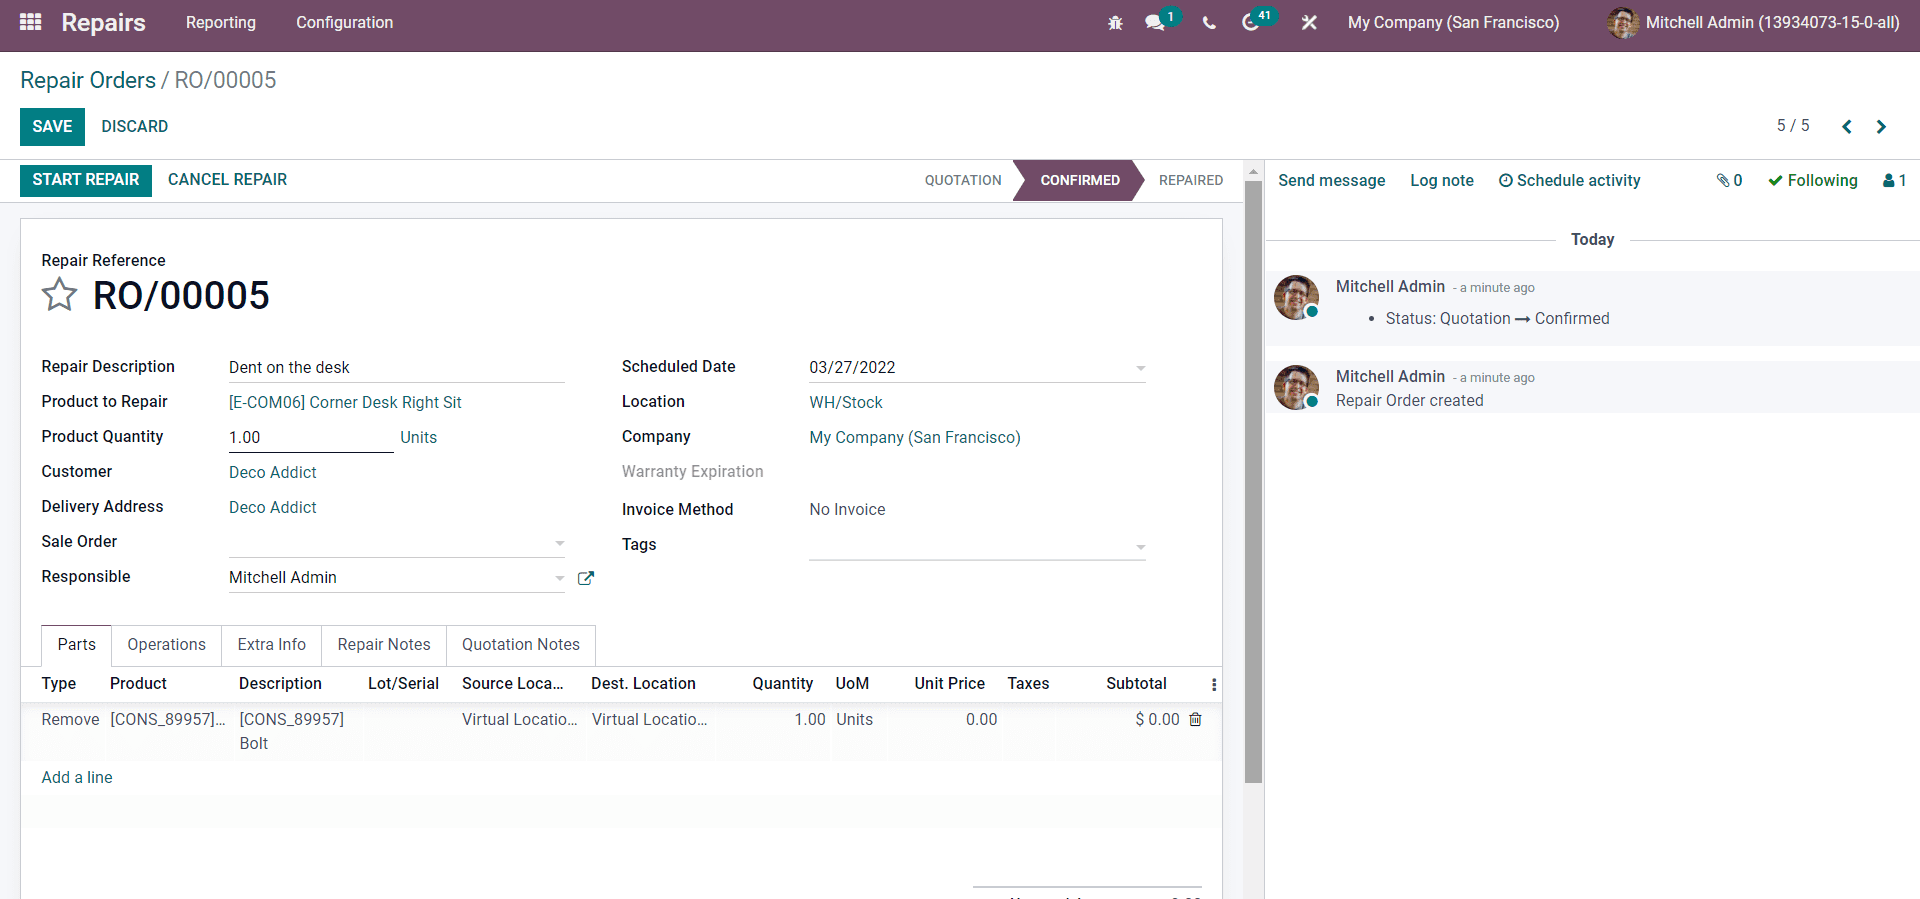
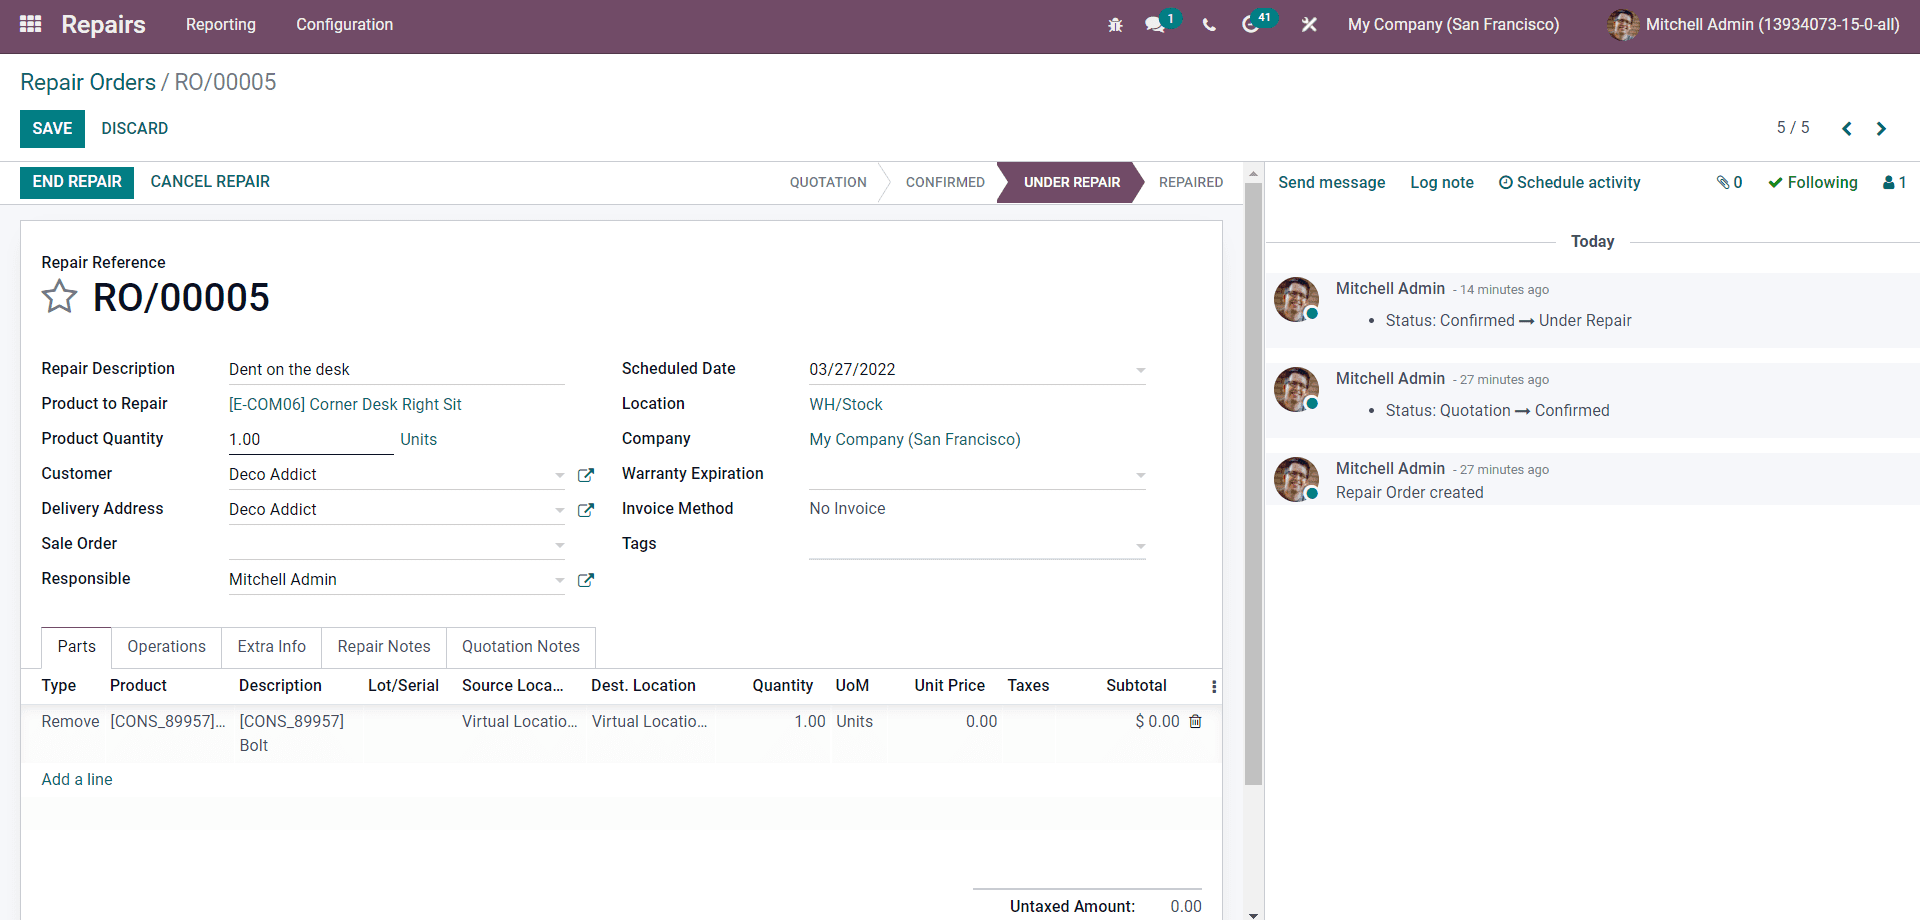
Post configurations, click on the START REPAIR button for your maintenance team to start the repairing procedures on the product. The END REPAIR button and the CANCEL repair button, which will immediately appear after the confirmation of the product repair, can be used to stop the repairing procedures on the product instantly.
For easy management and report viewing the repair report will be displayed on the modules dashboard as given below.

All of the live updates on the repairing procedures will be marked under the Status section of the page for easy access to the repairing process. Similarly, all of the updates on the repair procedures can be accessed from here for easy management.

Repair reference with the Scheduled date, Product repair, Customer, Delivery address, warranty Expiration, Sales order, company and Status. You can view the Repair orders in Kanban, Graph, Pivot and List (default) modes. You can choose the viewing option that suits you the most for easy management viewing.
One of the most critical factors that make the Odoo 15 Repair module unique is that it is fully integrated with the Odoo 15 Inventory and Maintenance modules for maximum efficiency. The inventory and the maintenance modules provide the repair module with complete access to the products and various product categories. The integration will help ley you access all of your products and the components of the product for configuring the repair reports without any clutter.