Manually converting emails into tasks can be a tedious process, often leading to mismanagement and overlooked requests. Odoo 18 provides an effortless solution to this problem by allowing businesses to automatically create tasks in a project upon receiving an email. This automation simplifies workflow management, ensuring that customer requests, support tickets, or internal tasks are never missed.
This process can manage the workflows of the organization by automatically converting emails into tasks, ensuring no request is missed. This eliminates manual task creation, reducing errors and saving time. With an automated process, team members can instantly access and work on new tasks, enhancing collaboration and efficiency. This blog discusses how to configure Odoo 18 to automatically create tasks from incoming email
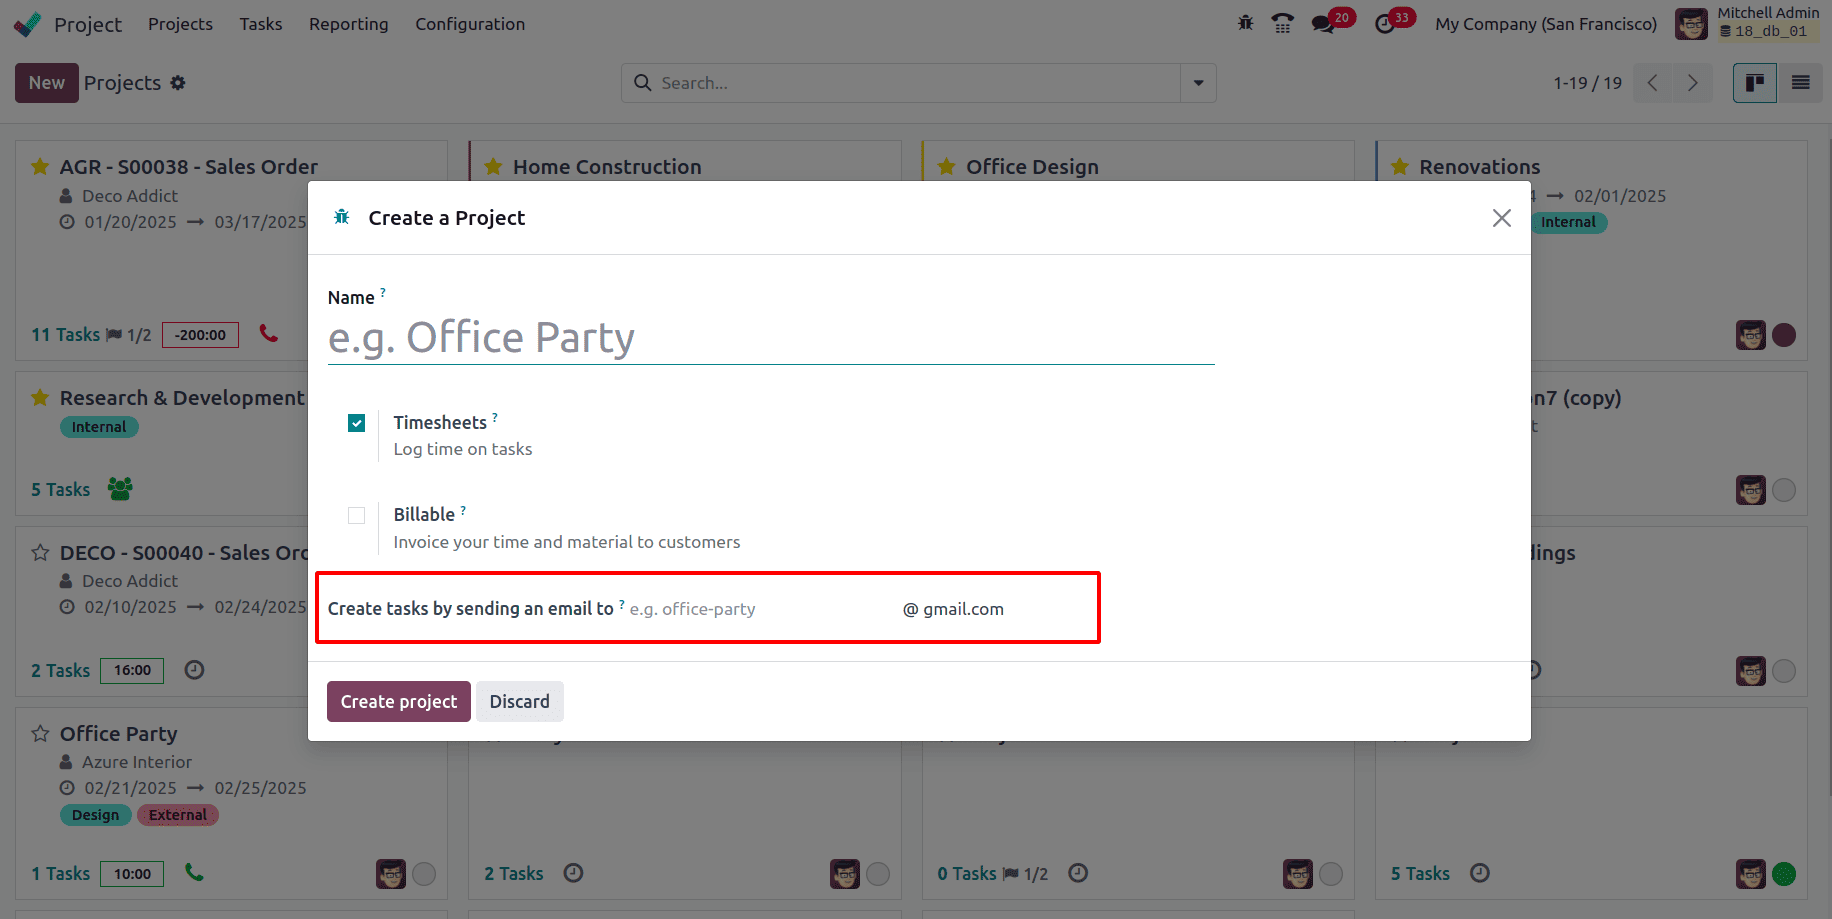
To create tasks upon an incoming email in Odoo, first, an email alias must be set up for the project so that when a mail is sent to that email alias, it will create new tasks in the first stage of that project. For that, navigate the Project module and from the dashboard, select a project under which the task has to be created or to create a new project, click on the New button. In the resulting pop-up, add the project name. The field Create tasks by sending an email to allows for the creation of tasks by sending an email to a specified email address. To ensure project workflow, add stages to the project.
If a project that already exists is chosen click on the vertical ellipsis of the project and go to its settings.
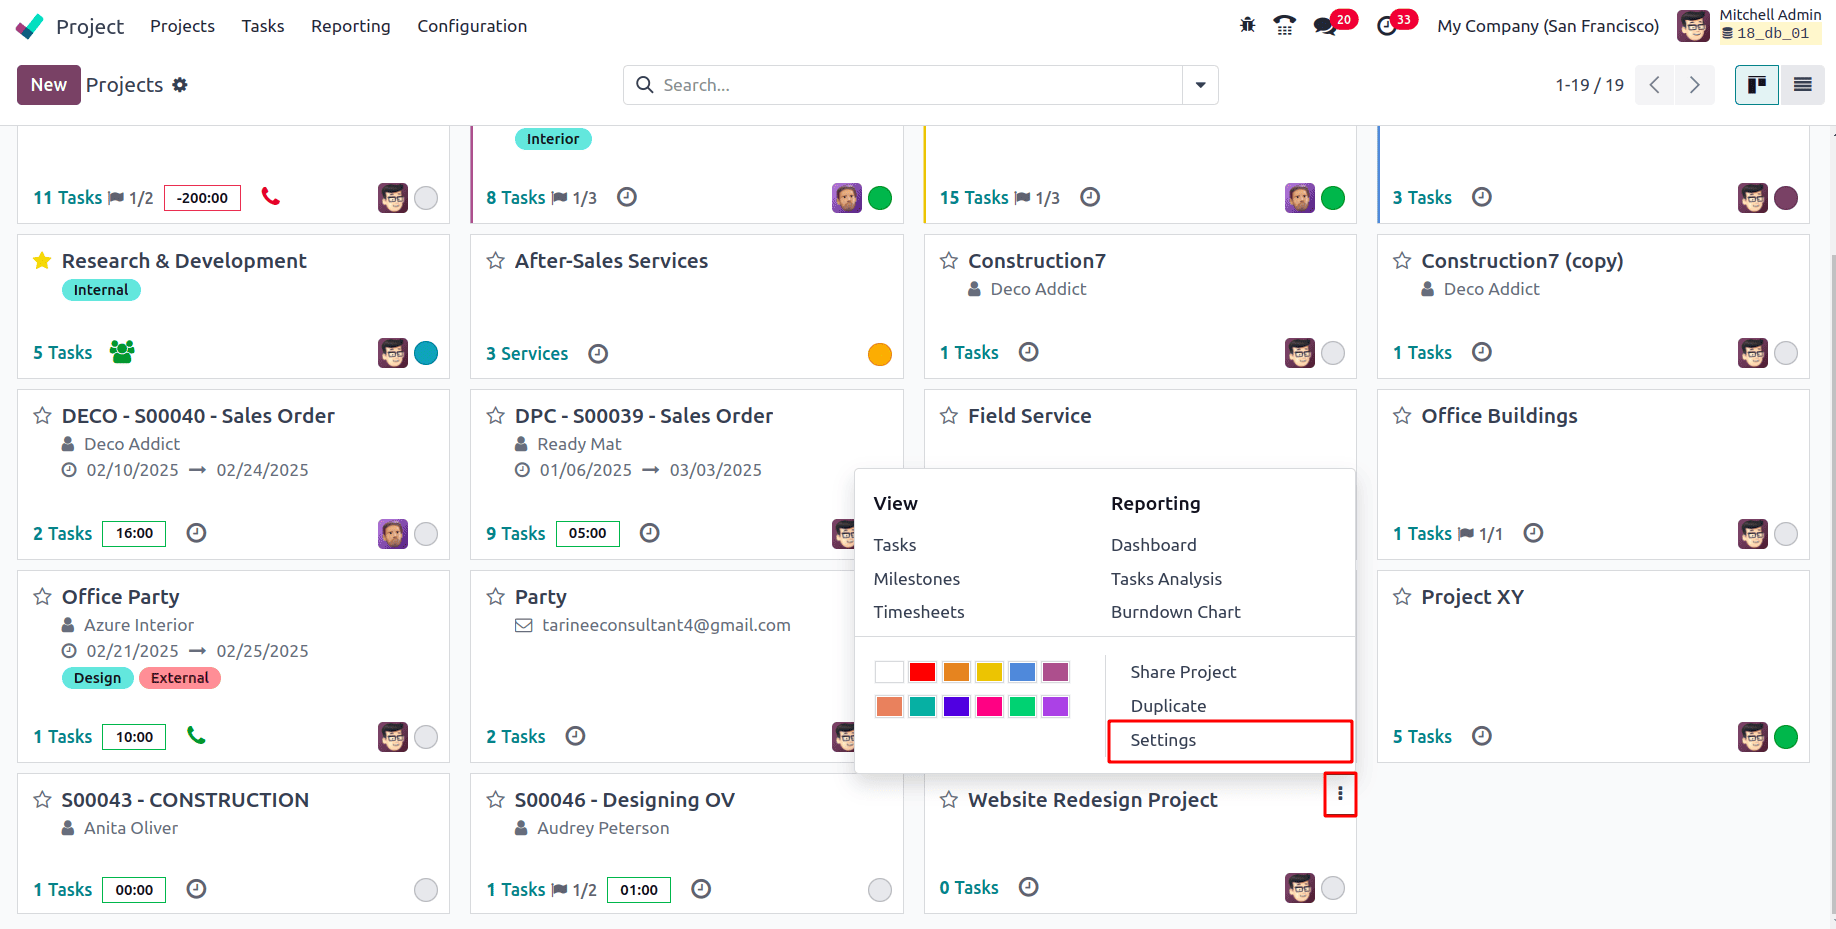
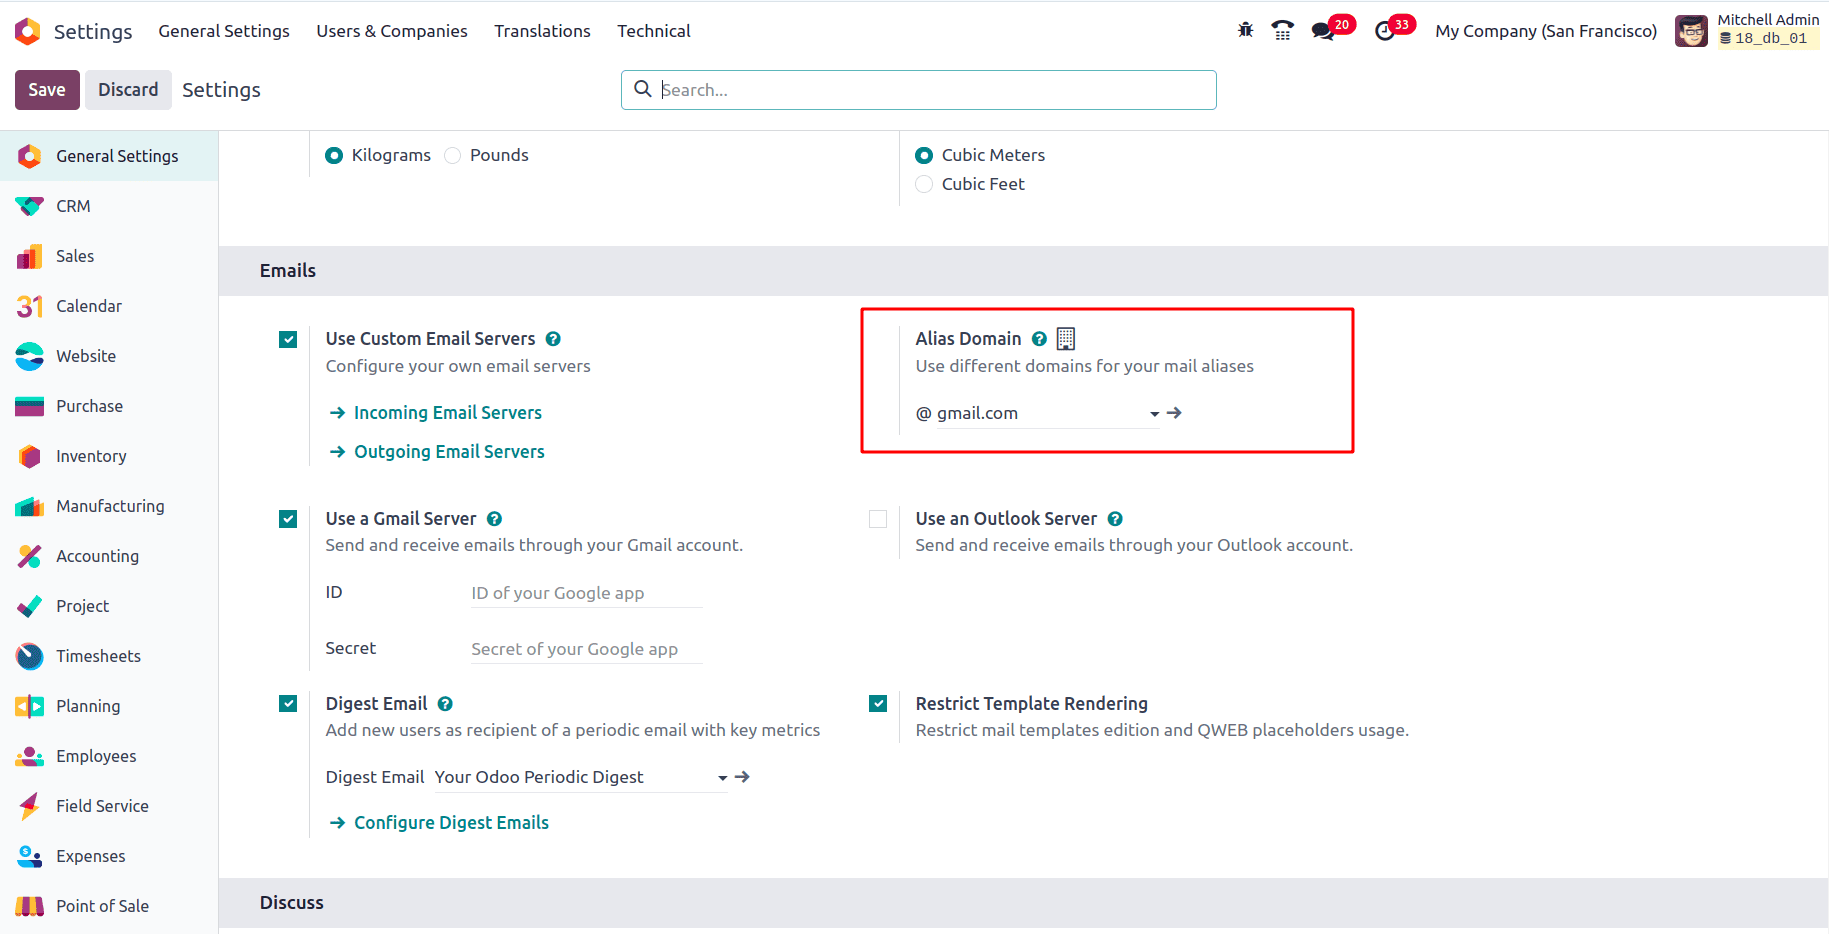
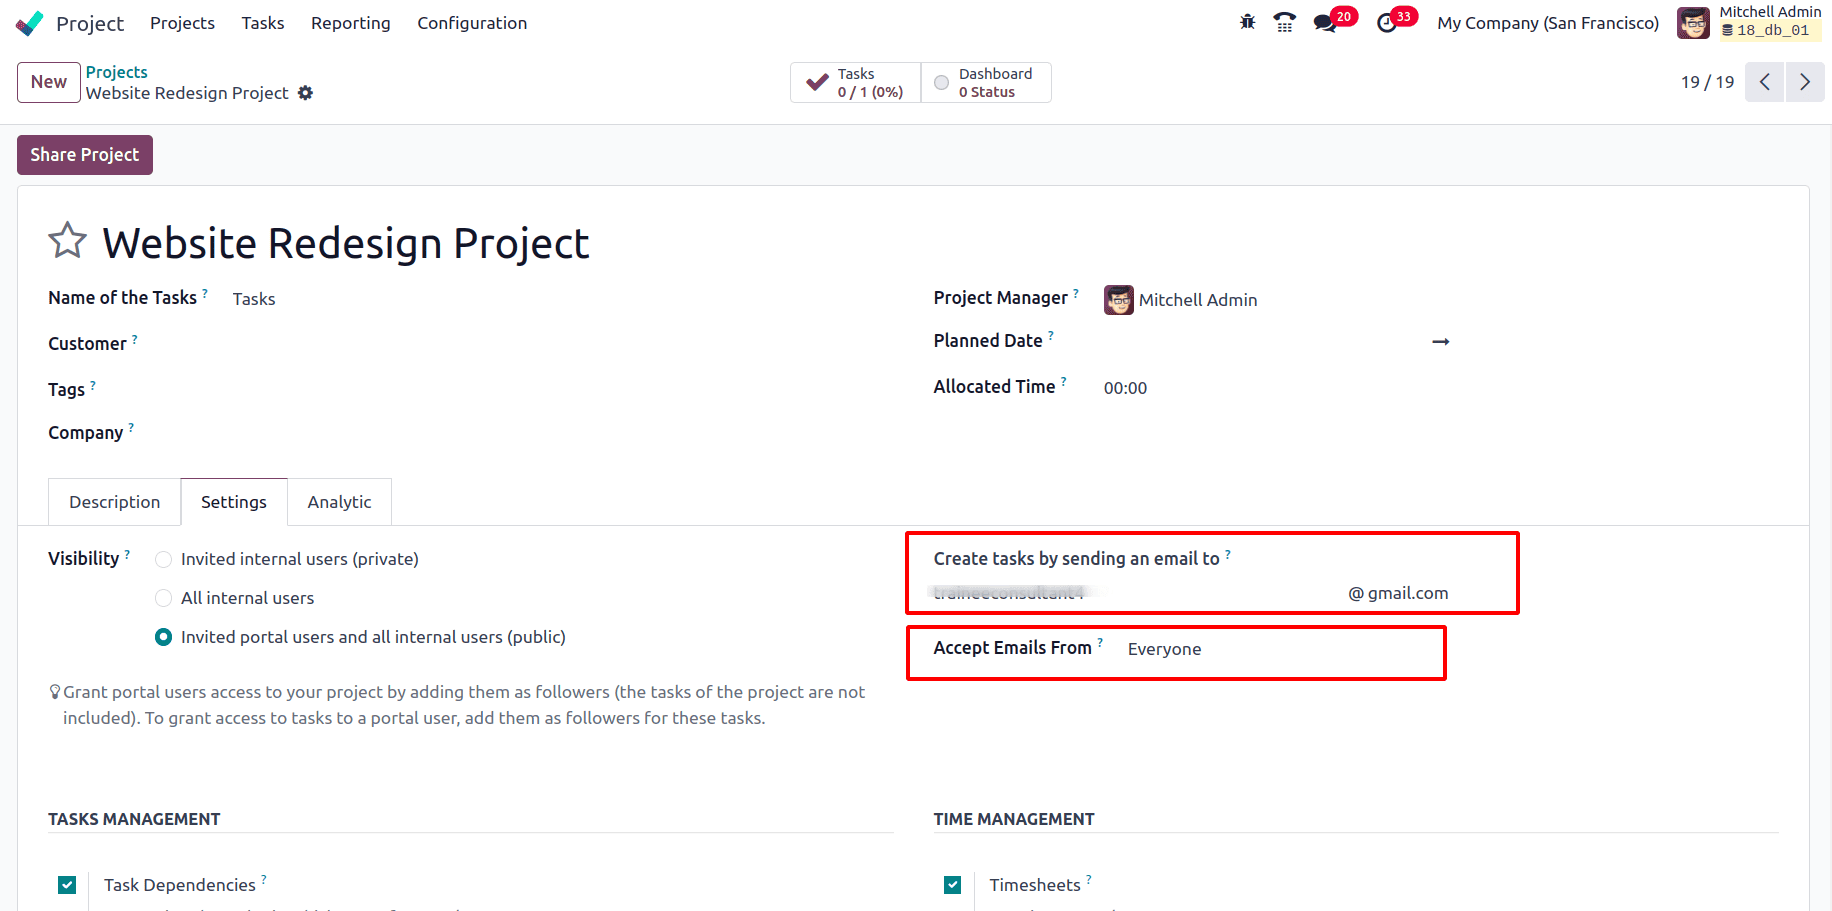
It takes users to the Settings tab of the project’s view, where there is a field called Create tasks by sending an email to where an email alias for that project can be set up and the domain must also be added. If the domain has not been set up go to general settings, and under the Emails section, there is an option for Alias Domain, select a domain from there or create a new one.
Also, adjust the privacy settings to control who can send emails to generate tasks in the Accept Emails From field that includes options such as Everyone, Authenticated Partners, Followers Only, and Authenticated Employees.
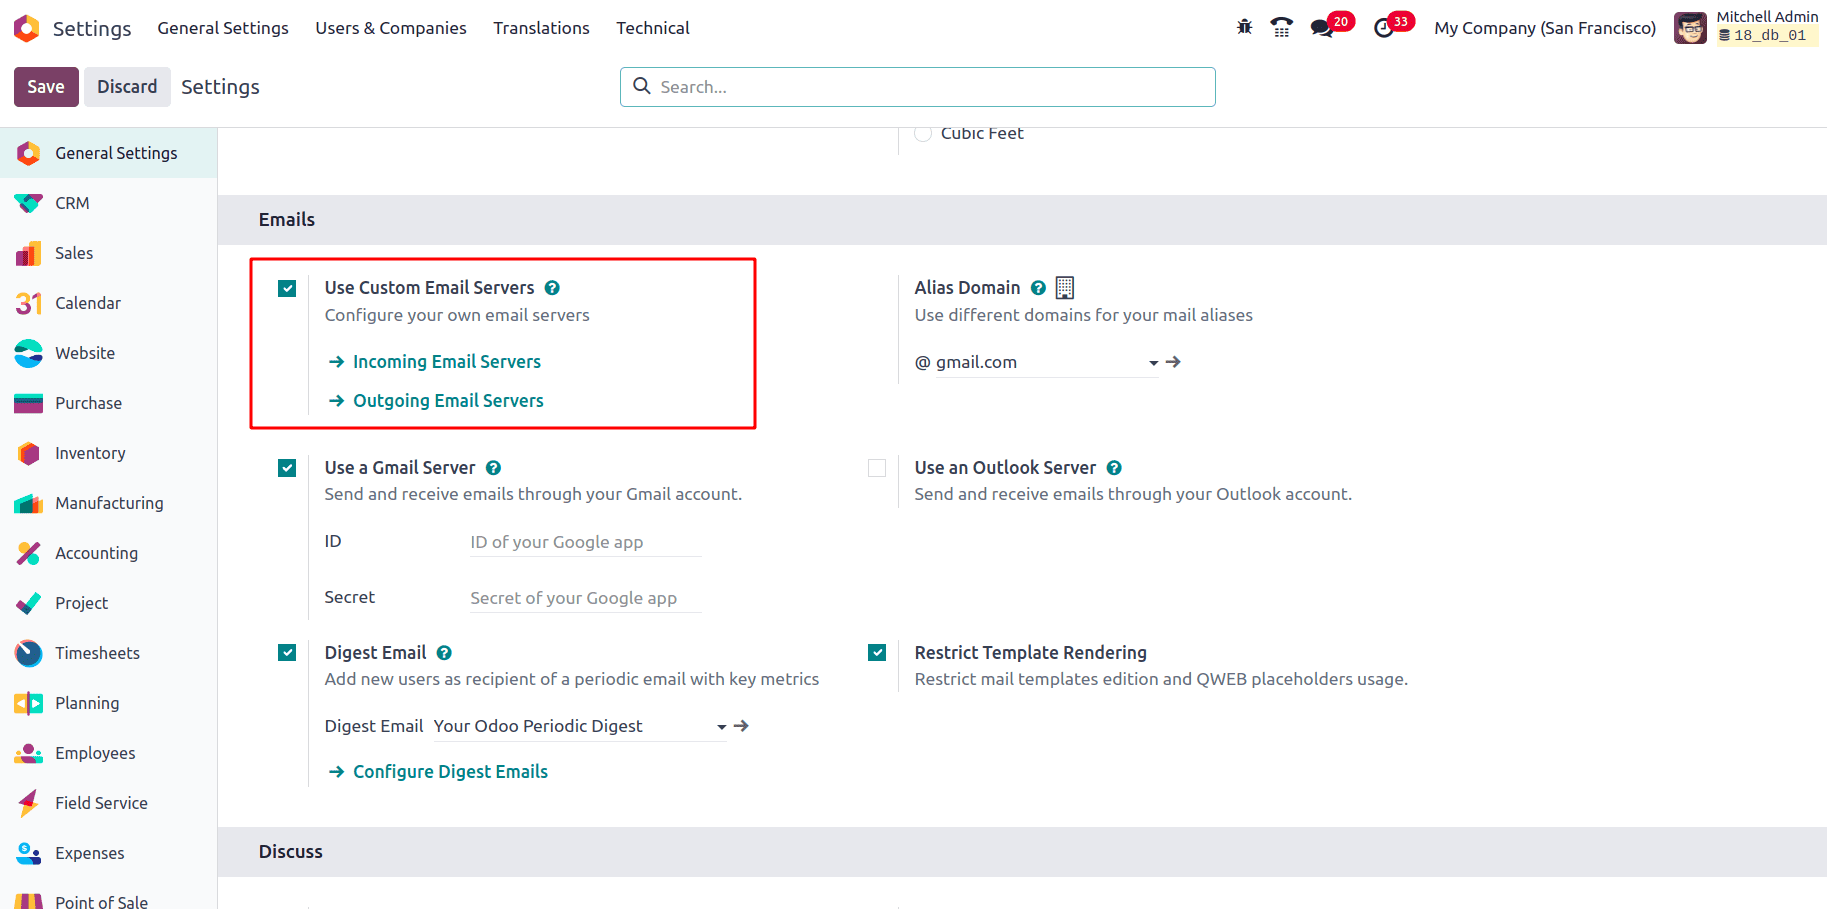
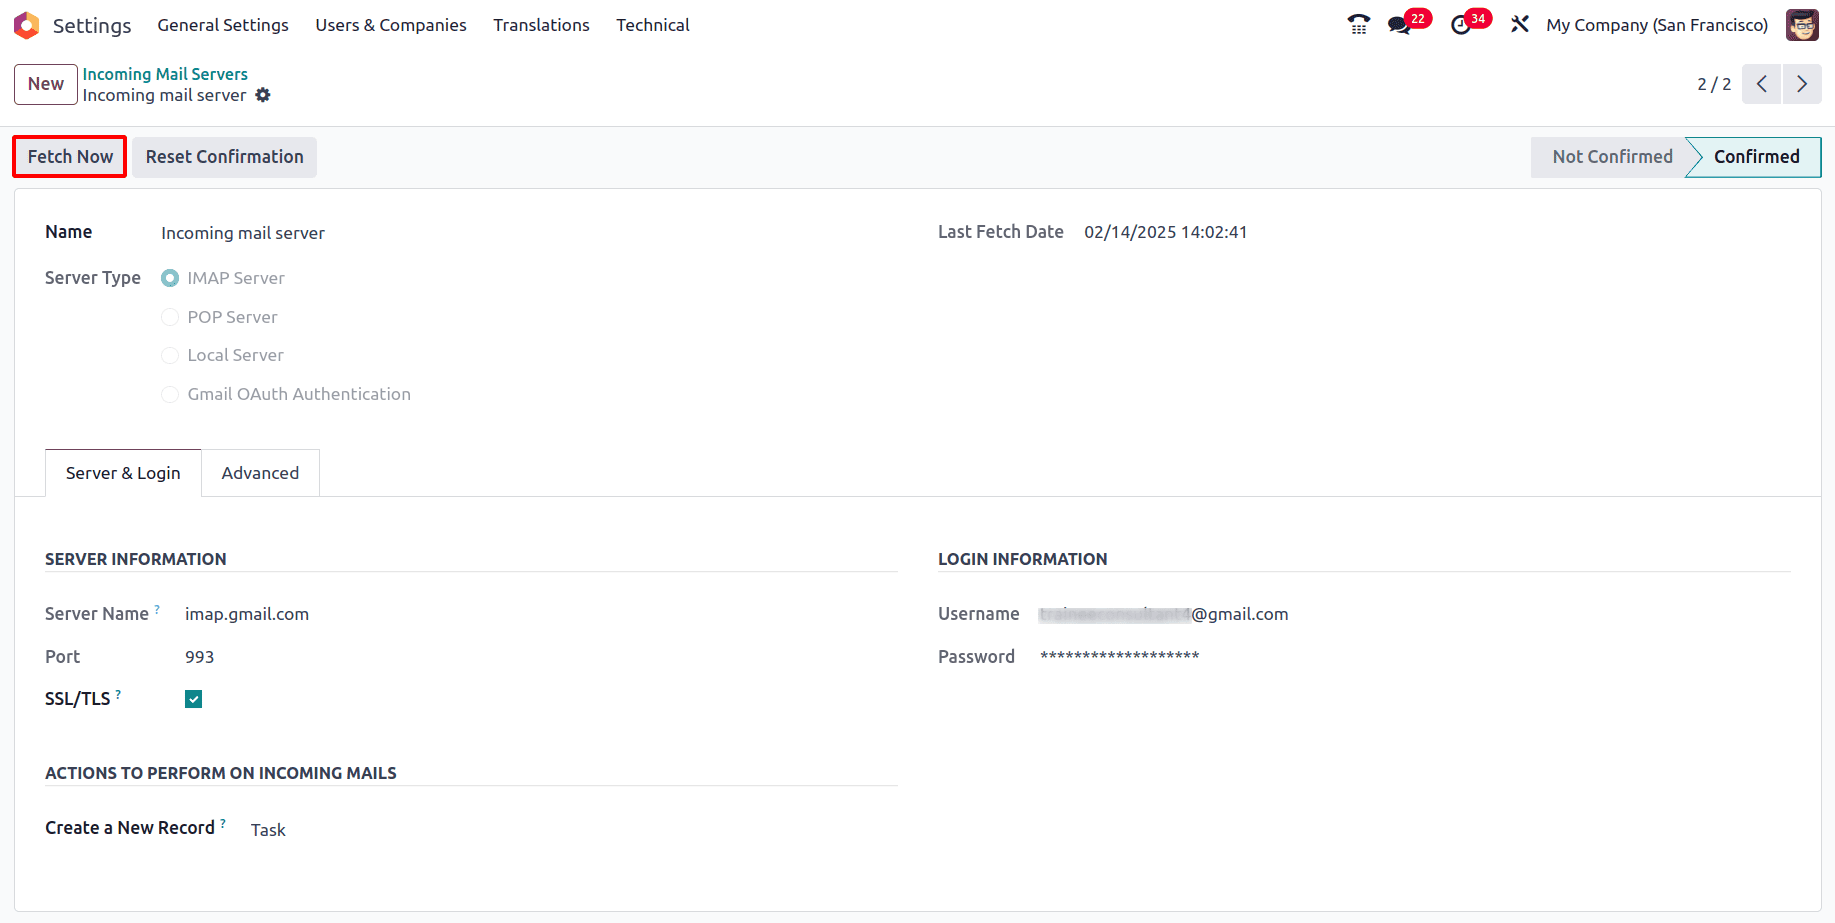
Once the email alias has been provided now it has to be ensured that there is an incoming mail server set up. For that navigate to Settings > General Settings under the Emails section. there is an option called Use Custom Email Servers that needs to be enabled and go to the internal link of Incoming Mail Servers.
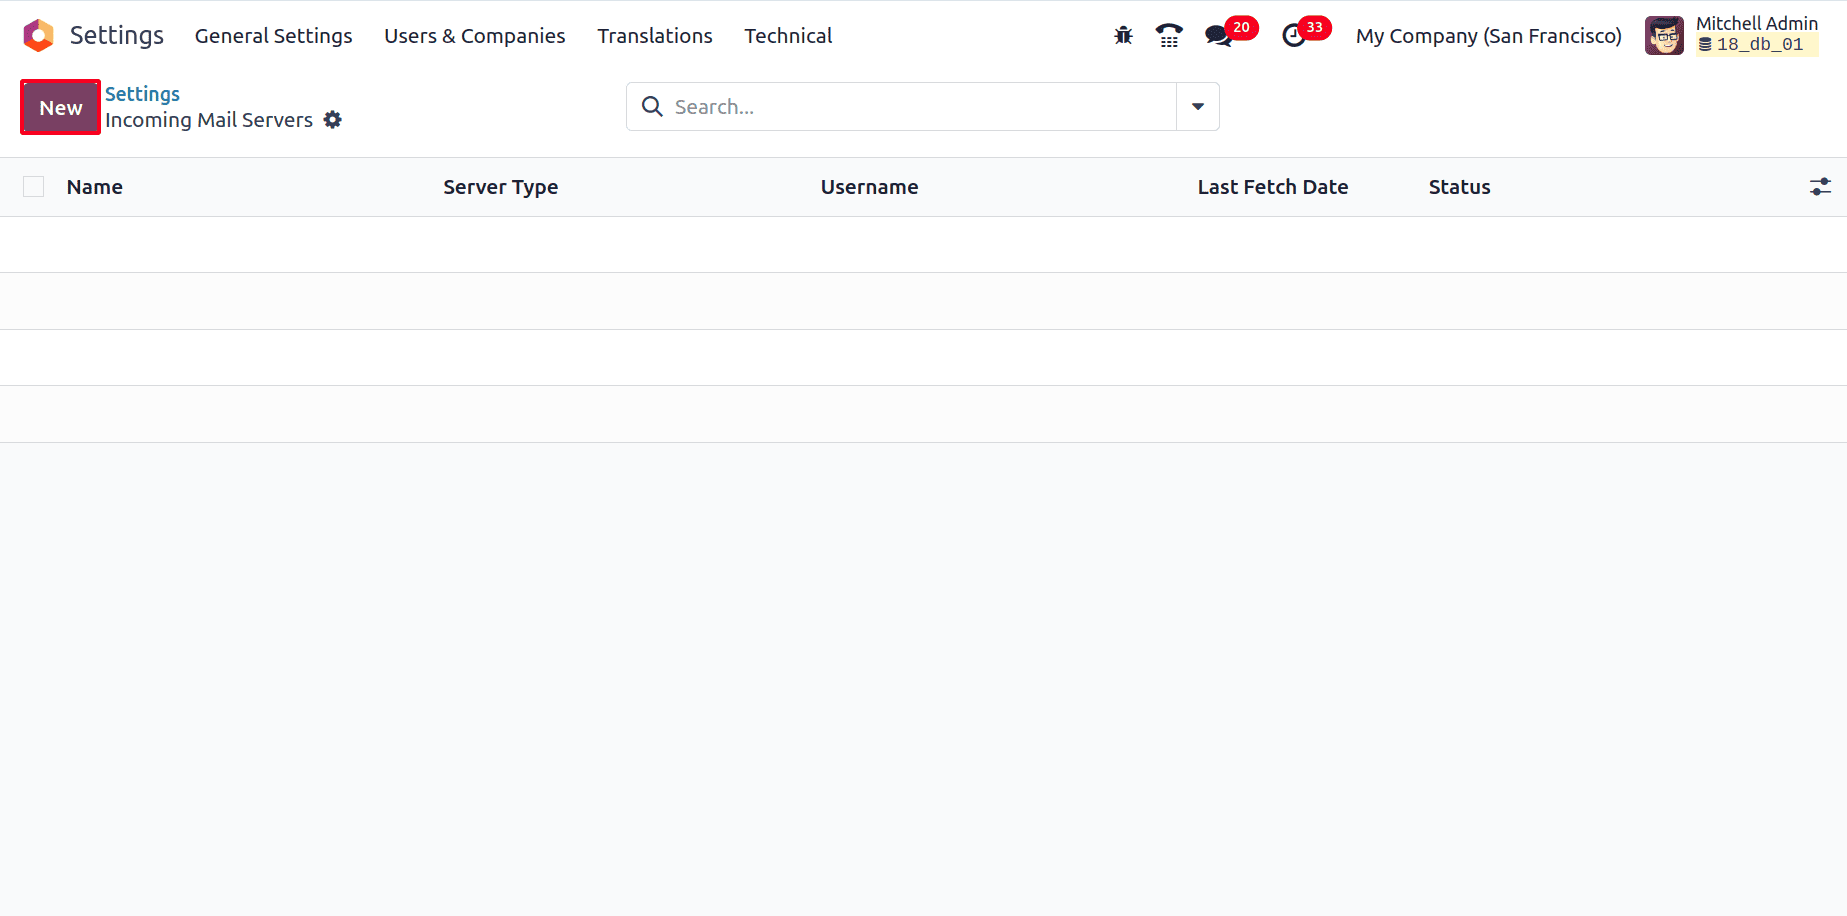
It opens a page where all the pre-configured incoming mail servers will be visible, and to create a new one, click on the New button.
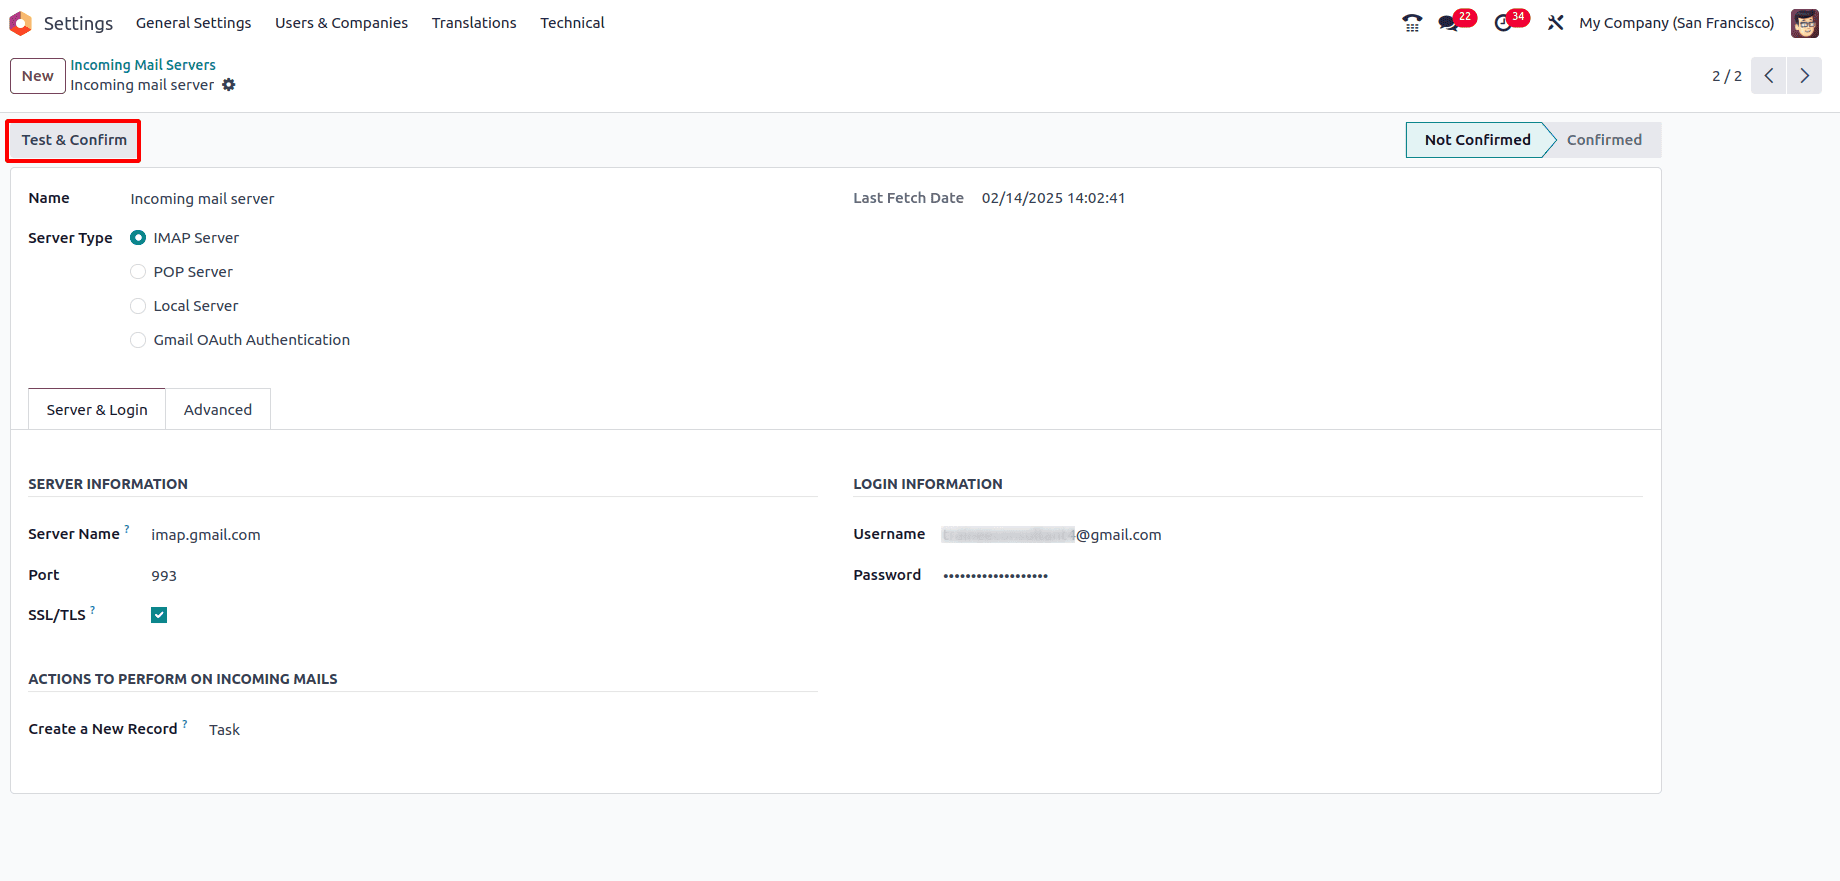
Provide the correct configurations to create the incoming mail server. Set a Name for the mail server, select the appropriate Server Type, Server name, Port, SLS/TLS, and also provide the Login Information such as the Username and Password. Then click on Test & Confirm, to test the connection and confirm it.
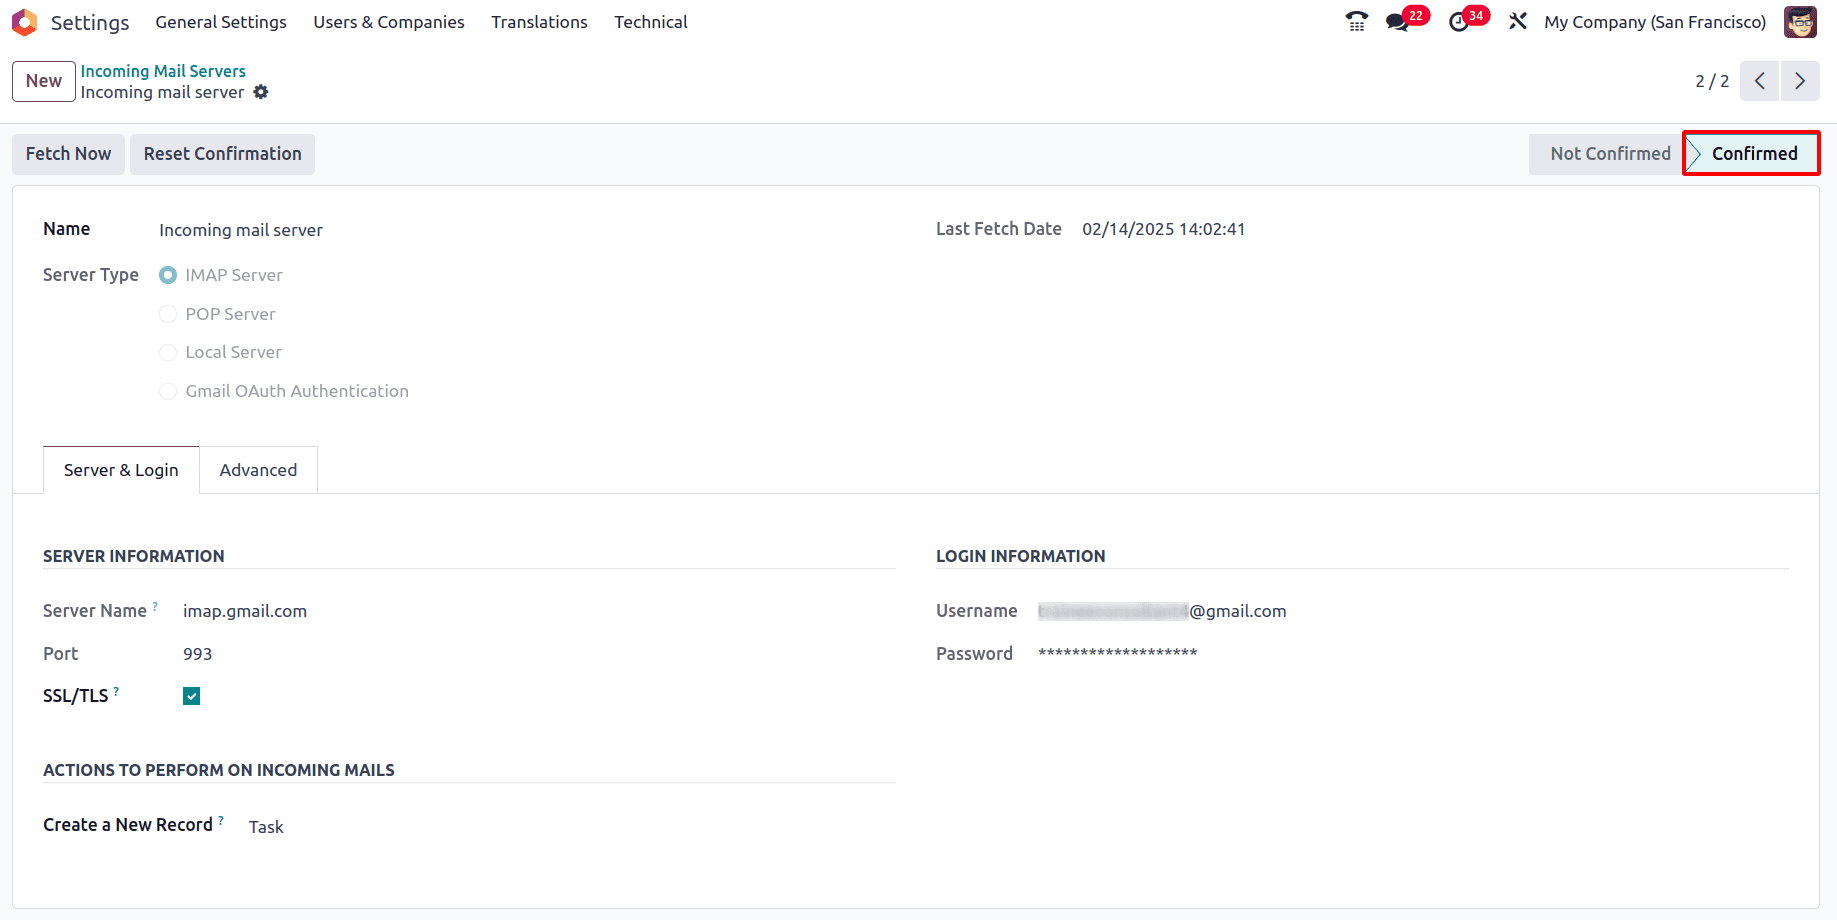
The status changed from Not Confirmed to Confirmed.
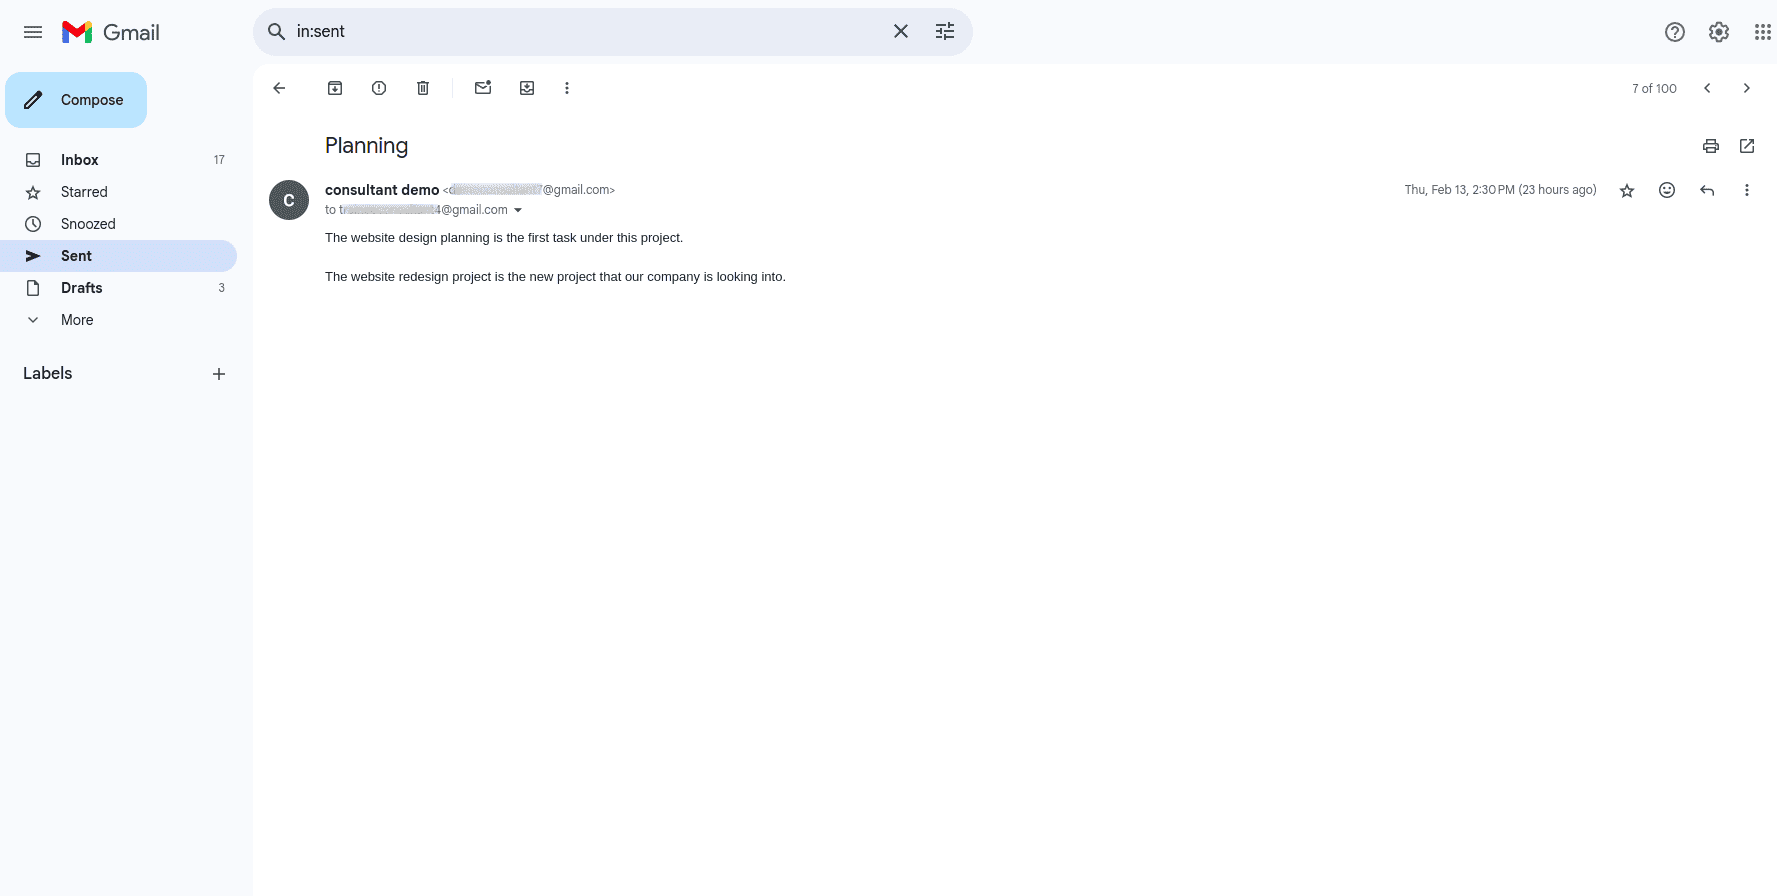
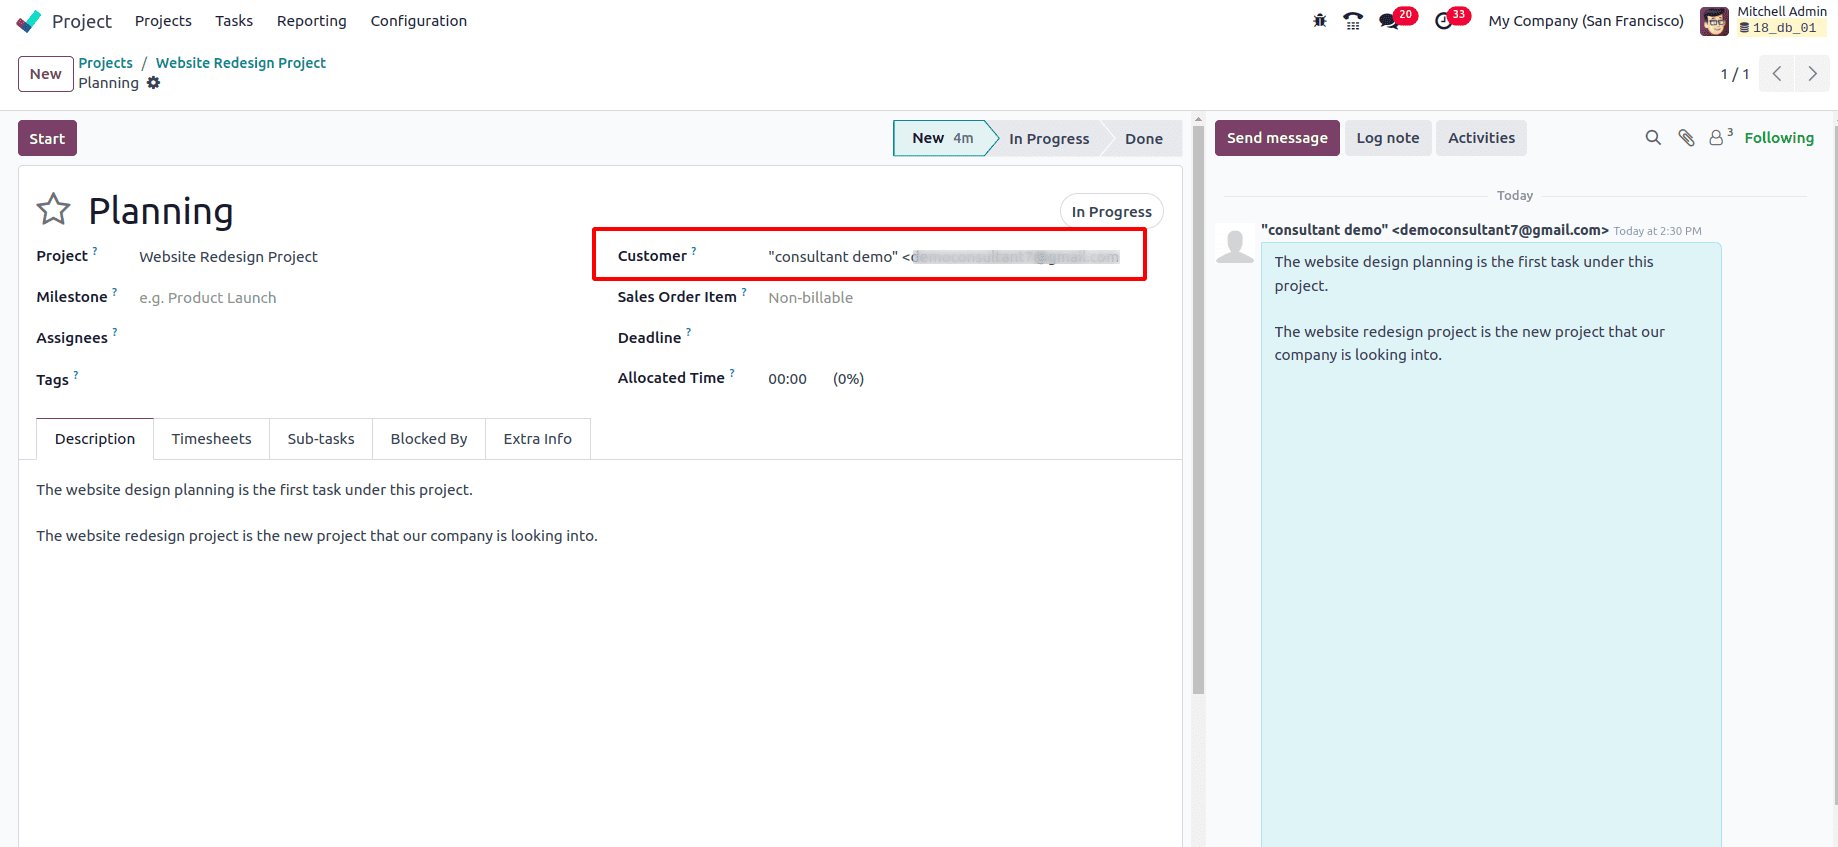
Once the setup is complete, every email received by the assigned alias will be converted into a task. The Email Subject becomes the Task Title, and the Email Body is added as the Task Description. Attachments are automatically linked to the task, ensuring all relevant information is available for team members. Also, the whole contents can be viewed in the chatter of the project. The person sending the mail will be added as the customer for the task.
Once the mail has been sent go to the incoming mail server and click on Fetch Now so that the record gets fetched.
Now navigate to the project module, and select the project under which the task has been created.
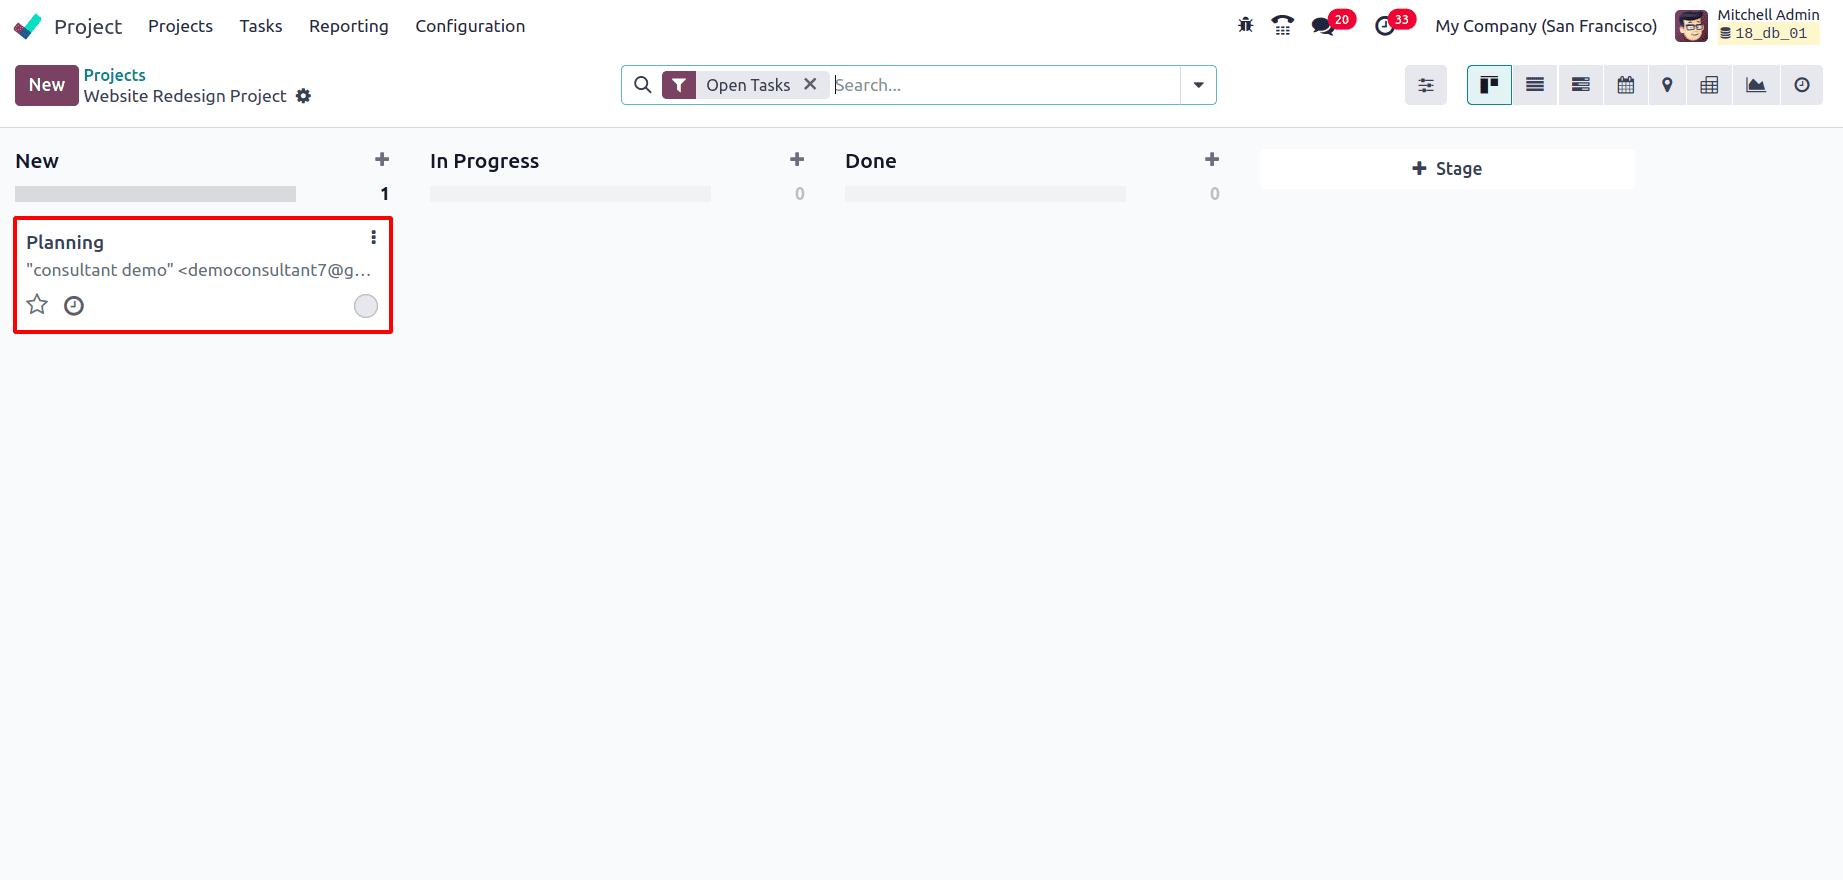
Once tasks are created, they can be assigned to specific team members. Tasks can also be categorized using priority levels to highlight urgent matters. Also, the Tags, Deadline, Allocated Time, etc can be added to the task. Here, the task name is the name that has been provided as the subject while sending the mail, the customer has been added as the mail sender and also the content is provided in the description as well as in the chatter.
So this is how a task can be created under a project upon an incoming email in Odoo 18. Automating task creation from emails in Odoo 18 significantly improves project management by reducing manual efforts, improving collaboration, and ensuring no task is overlooked. By configuring the email alias and integrating it with the incoming mail server, businesses can seamlessly convert incoming emails into actionable tasks.
By leveraging this feature, companies can focus on execution rather than administrative overhead, leading to increased efficiency and enhanced customer satisfaction. Start using Odoo 18’s Email-to-Task automation today to experience a smarter and more structured approach to project management.
To read more about How to Configure Outgoing & Incoming Mail Servers in Odoo 18, refer to our blog How to Configure Outgoing & Incoming Mail Servers in Odoo 18.