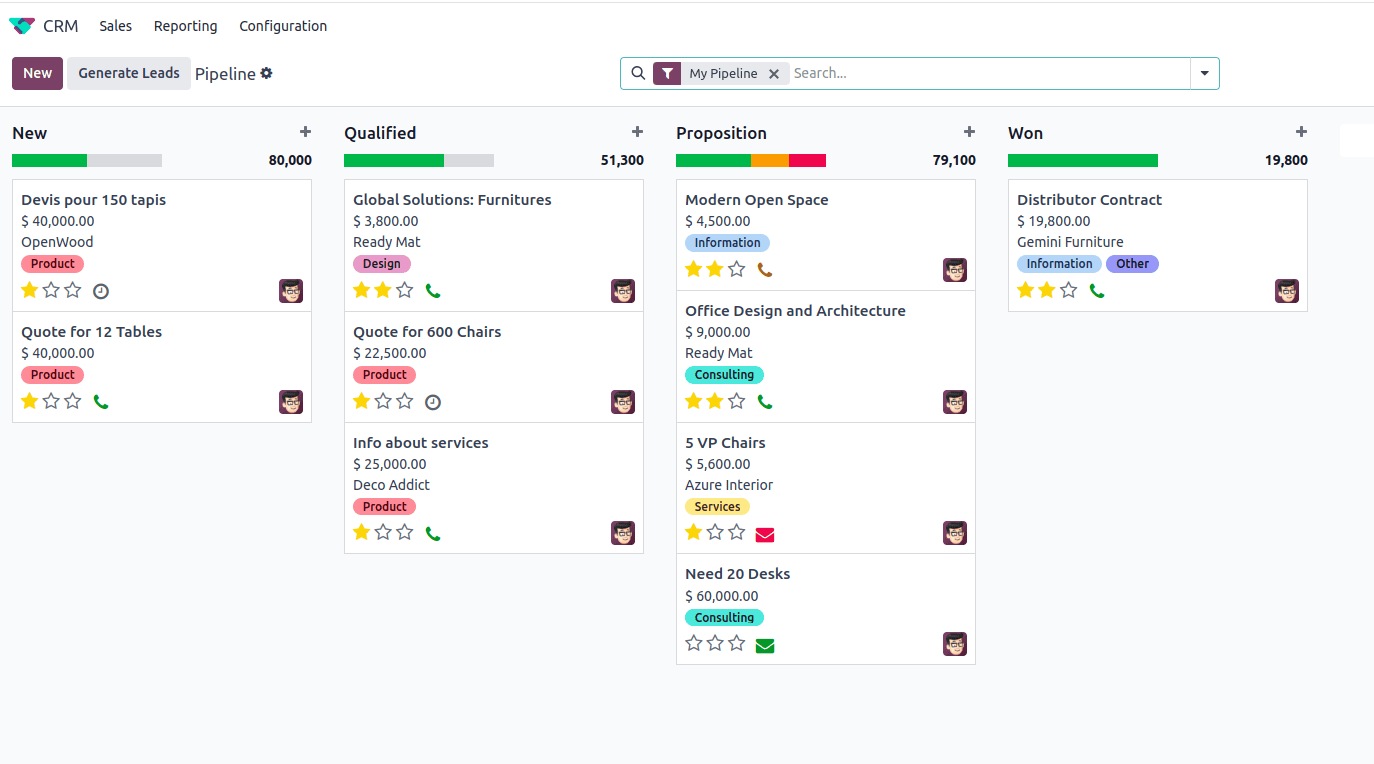
Odoo is a powerful ERP system that offers various views for managing your data, and the Kanban view is one of the most visually appealing and user-friendly options available. It allows you to manage workflows and projects effectively by presenting information in a card-based format. In this blog, we will guide you through the steps to create a Kanban view in Odoo 18.
What is a Kanban View?
The Kanban view is a visual tool used for managing tasks, allowing teams to see work progress, control the amount of ongoing tasks, and improve productivity. It usually features columns that represent various stages of a workflow, with cards representing specific tasks or items that move between these stages.

These views offer extensive customization options, allowing you to adjust them according to your unique requirements and preferences. In Odoo 18, setting up a Kanban view is simple, and we will walk you through the process step by step.
Steps to Create a Kanban View in Odoo 18
1. Define Your Model
In Odoo, every process begins with a model, which acts as a representation of your business entity. For this example, we’ll create a Kanban view for a model named ‘test.model’. This model will include fields such as name, description, and state.
from odoo import models, fields

class TestModel(models.Model):
   _name = 'test.model'
   _description = 'Test Model'
   name = fields.Char(string='Name', required=True)
   description = fields.Text(string='Description')
   date_order = fields.Date(string='Date')
   state = fields.Selection([
       ('draft', 'Draft'),
       ('in_progress', 'In Progress'),
       ('done', 'Done'),
   ], string='State', default='draft')
   activity_state = fields.Selection([
       ('overdue', 'Overdue'),
       ('today', 'Today'),
       ('planned', 'Planned')], string='Activity State',)
2. Create the Kanban View
Next, we will create the Kanban view. In the views directory of your module, add an XML file (e.g., test_model_views.xml):
<?xml version="1.0" encoding="utf-8" ?>
<odoo>
  <record id="test_model_view_kanban" model="ir.ui.view">
       <field name="name">test.model.view.kanban</field>
       <field name="model">test.model</field>
       <field name="arch" type="xml">
           <kanban class="o_kanban_mobile" sample="1" quick_create="false">
               <progressbar field="activity_state"
                   colors='{"planned": "success", "today": "warning", "overdue": "danger"}'/>
               <templates>
                   <t t-name="card">
                       <div class="d-flex mb-2" style="justify-content: space-between;">
                           <field name="name" class="fw-bolder fs-5" />
                           <field name="date_order" class="ms-1 text-muted fs-5"/>
                       </div>
                       <footer>
                           <div class="d-flex text-muted">
                               <field name="description"/>
                           </div>
                           <div>
                           <field name="state"
                               widget="label_selection"
                               options="{'classes': {'draft': 'info', 'done': 'default', 'in_progress': 'success'}}" class="ms-auto"/>
                       </div>
                       </footer>
                   </t>
               </templates>
           </kanban>
       </field>
   </record>
   <!--Add an action to open the Kanban view-->
   <record id="test_model_action" model="ir.actions.act_window">
       <field name="name">Test Model</field>
       <field name="res_model">test.model</field>
       <field name="view_mode">kanban,form</field>
       <field name="view_id"
              ref="test_model_view_kanban"/>
   </record>
<menuitem id="menu_test_model"
           name="Products"
           action="test_model_action"
           sequence="1"/>
</odoo>
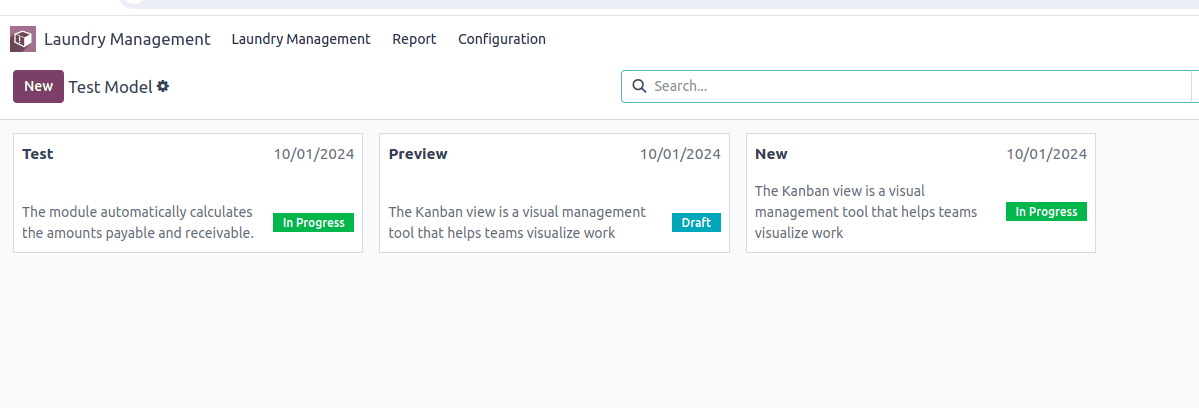
Now that we have covered the basics of creating a simple Kanban view in Odoo 18, here is the basic code for setting up Kanban views. This is how it will look:

Designing a Kanban view in Odoo 18 is a simple task that can greatly improve your team's efficiency and streamline workflow management. By following these steps, you can customize your Kanban view to meet your specific needs and create a more organized and efficient working environment. Whether for project management, sales tracking, or any other process, the Kanban view is a valuable addition to your Odoo toolkit.
To read more about How to Create Kanban View in Odoo 17, refer to our blog How to Create Kanban View in Odoo 17.