Widgets in Odoo are front-end components used to enhance the user interface by providing more interactive and user-friendly elements. They allow developers to extend the functionality of fields in views, such as forms, kanbans, lists, and more. Widgets can modify how data is displayed or interacted with, and they are particularly useful for handling complex UI interactions.
Now, let us see how to create a Slider Widget in Odoo 17.
The process will be like creating a widget and adding the widget to the registry in the category of fields. In Odoo, a slider widget is often used in forms to allow users to input a value by dragging a slider rather than typing in a number directly. This widget can be particularly useful for setting numeric values within a defined range, such as percentages, ratings, or quantities.
In this blog, we are particularly focusing on widgets for Integer fields. You can avail this widget to different field types by mentioning them in the JS file. Also, we have a provision to add the minimum and maximum value of the slider while adding the widget to the field.
First, we can create a JS file to define the functional aspects of the widget.
range_slider.js
/** @odoo-module **/
import { Component } from "@odoo/owl";
import { useState } from "@odoo/owl";
import { registry } from "@web/core/registry";
export class RangeSliderField extends Component {
  static template = 'FieldRangeSlider';
  setup(){
       const {min,max} = this.__owl__.parent.props.fieldInfo.attrs
       this.state = useState({
           value : this.props.record.data[this.props.name],
           min : min,
           max : max,
       });
  }
  getValue(e) {
       const config = this.env.model.config
       this.state.value = e.srcElement.value
       this.env.model.orm.write(config.resModel,
                               [config.resId], {
                               [this.props.name]: this.state.value,
       });
  }
}
export const rangeSliderField = {
   component: RangeSliderField,
   displayName: "RangeSliderField",
   supportedTypes: ["int"],
};
registry.category("fields").add("RangeSliderField", rangeSliderField);
Then we can create an XML file for the template of the widget. Here we are creating a range_slider.xml and add the following code in that file.
range_slider.xml
<?xml version="1.0" encoding="utf-8" ?>
<templates>
   <t t-name="FieldRangeSlider" owl="1">
       <div class="slidecontainer" t-on-change="getValue">
           <input type="range" t-att-min="state.min or 1" t-att-max="state.max or 10" value="state.value"/>
           <p>Value:
               <span>
                   <t t-esc="state.value"/>
               </span>
           </p>
       </div>
   </t>
</templates>
Then, we need to add all the files in the appropriate positions in the manifest. The template and js file will be added to the asset-backed as shown below.
'assets': {
   'web.assets_backend': [
               'range_slider/static/src/xml/range_slider.xml',
               'range_slider/static/src/js/range_slider_field.js',
           ],
   }
Now we have created the custom widget and added it to the registry. Then we can add this widget in the field Int in the view. Here we are adding the widget to the field ‘quality_level’ in the model ‘product.product’.
<record id="product_product_form" model="ir.ui.view">
   <field name="name">product_product.form.inherit</field>
   <field name="model">product.product</field>
   <field name="inherit_id" ref="product.product_normal_form_view"/>
   <field name="arch" type="xml">
       <field name="default_code" position="after">
           <field name="quality_level"
      widget="RangeSliderField" min="5" max="15"/>
       </field>
   </field>
</record>
The final look will be like this:
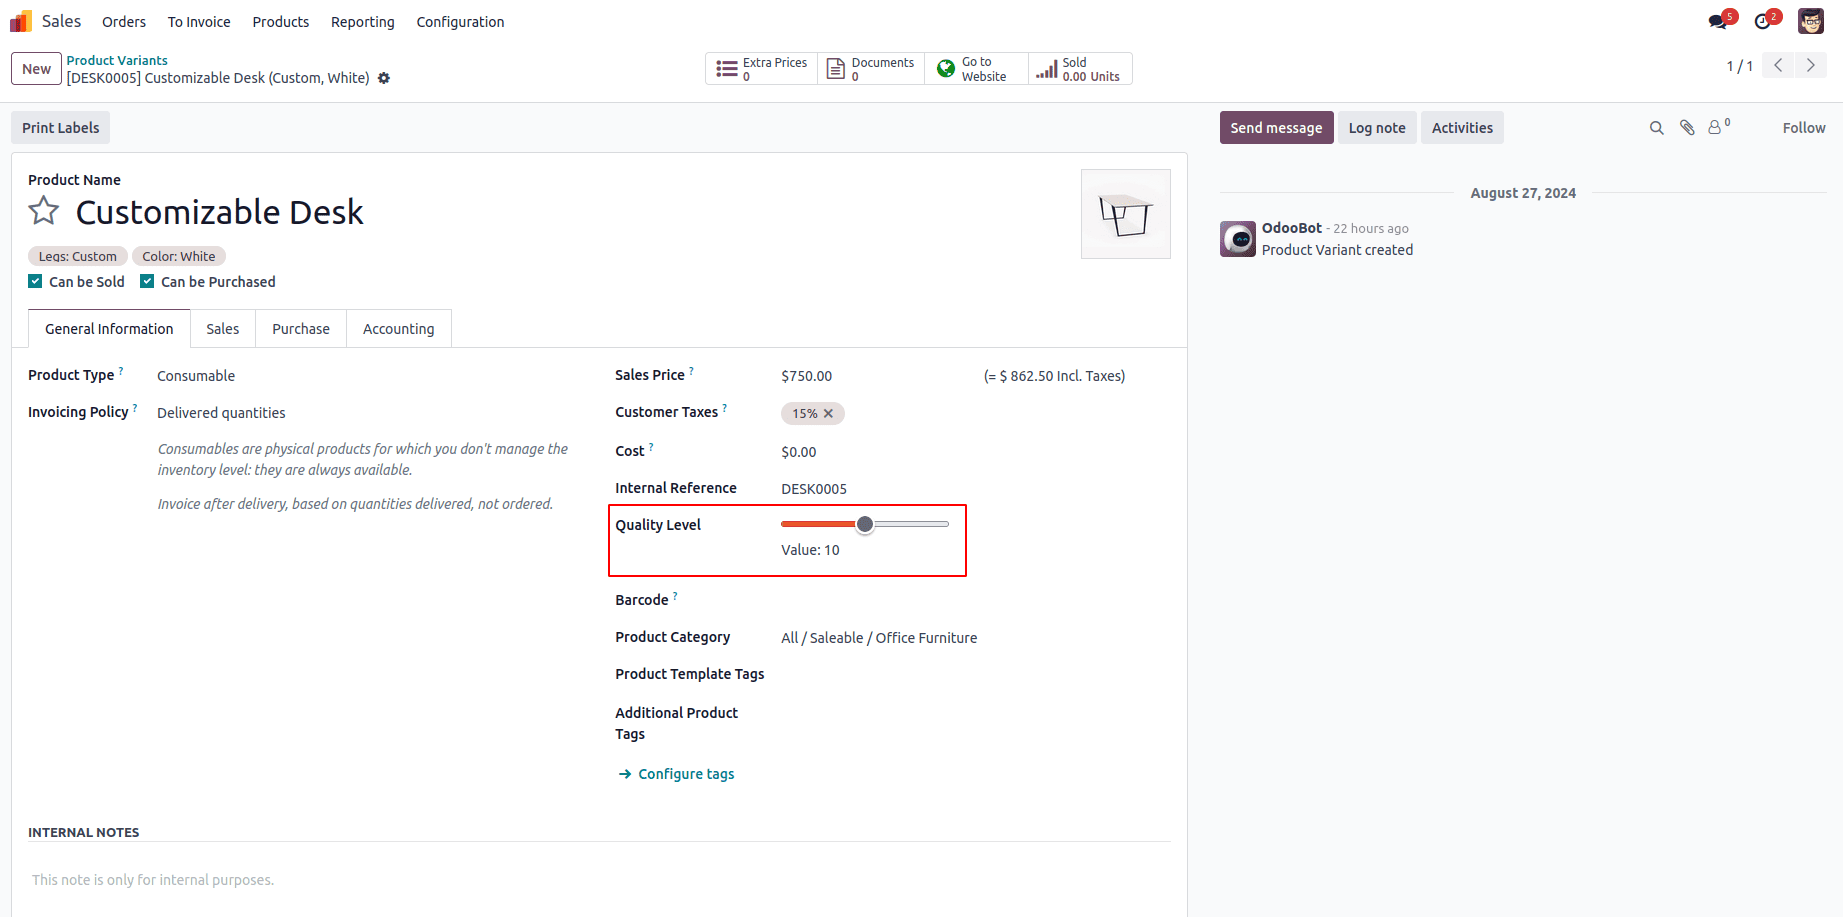
Here we can move the slider in both directions to choose the required value for the field.
To wrap up, the slider widget is a highly versatile and interactive UI component, useful for allowing users to select values within a defined range. Similarly, you can create any widgets of your needs by changing the code accordingly.
To read more about How to Create a Widget in Odoo 17, refer to our blog How to Create a Widget in Odoo 17.