Odoo offers various view types, such as tree, form, kanban, graph, and calendar. Each view presents data in a unique way, making it easier to understand. You can find these view options in almost every menu in Odoo.
Let me introduce you to one of the advanced views in Odoo, known as the Gantt view.
The Gantt view is currently available only in the Odoo Enterprise edition. This is because it requires the installation of the 'web_gantt' module, which is exclusive to the Enterprise edition. You can find and install this module under the Apps menu in Odoo Enterprise.
Now, let's explore the Gantt view in Odoo. You know about bar charts, right? They can be either horizontal or vertical. Well, in Odoo's Gantt view, we use the horizontal type.
Here's an example: The image below shows the Gantt view in the Planning module.

The core idea behind the Gantt view is planning. It allows you to plan out your projects, production schedules, or anything else you need to organize. Plus, it can double as an analysis report. And the best part? It offers a more visually appealing and user-friendly interface.
Before we dive into creating a Gantt view, let's ensure we've got all the necessary attributes and understand the main elements used in its creation.
Main Element:
* Gantt tag
Attributes:
* String
* Start date
* Stop date
* Default group by
* Progress
* Default scale
* Scales
* Precision
* Color
These are just a few example attributes, but remember, you can always incorporate more advanced attributes as needed, just like in any other view.
Let's create a basic Gantt view with essential attributes like start date, stop date, and group by.
To start, we'll need a model to represent our Gantt view. Below is an example of a model with parameters for date_from, date_to, and employee_id. Feel free to add more fields according to your requirements.
# -*- coding: utf-8 -*-
from odoo import fields, models

class SimpleGantt(models.Model):
   _name = 'simple.gantt'
   _rec_name = 'partner_id'

   partner_id = fields.Many2one('res.partner')
   start_date = fields.Date(string='Start Date')
   end_date = fields.Date(string='End Date')
In this example, we have a model named "simple.gantt" with three fields: "start_date" for the start date, "end_date" for the stop date, and "partner_id" as a reference to a partner. You can expand this model by adding more fields as needed for your specific use case.
Next, we require an XML file similar to the ones used for creating form views. However, instead of the form tag, we'll use the gantt tag along with its attributes.
<?xml version="1.0" encoding="UTF-8" ?>
<odoo>
   <record id="simple_gantt_view_gantt" model="ir.ui.view">
       <field name="name">simple.gantt.view.gantt</field>
       <field name="model">simple.gantt</field>
       <field name="arch" type="xml">
           <gantt date_start="start_date" date_stop="end_date"
                  default_group_by="partner_id" string="Customers">
               <field name="partner_id"/>
               <field name="start_date"/>
               <field name="end_date"/>
           </gantt>
       </field>
   </record>
   <record id="action_view_simple_gantt" model="ir.actions.act_window">
       <field name="name">Gantt Partners</field>
       <field name="type">ir.actions.act_window</field>
       <field name="res_model">simple.gantt</field>
       <field name="view_mode">tree,form,gantt</field>
   </record>
   <menuitem id="menu_view_simple_gantt"
             name="Simple Gantt"
             action="action_view_simple_gantt"/>
</odoo>
Now that we've defined the view, let's proceed to the next step. The Gantt tag comes with several attributes, offering basic features. The template attribute is particularly useful for displaying details of each bar as we hover over them. After this, we need to incorporate the Gantt view mode into our action.
In addition to our existing form and tree view modes, we've now included the Gantt view mode.
Let's take a closer look at how this code impacts our application. Below is the view I've created.
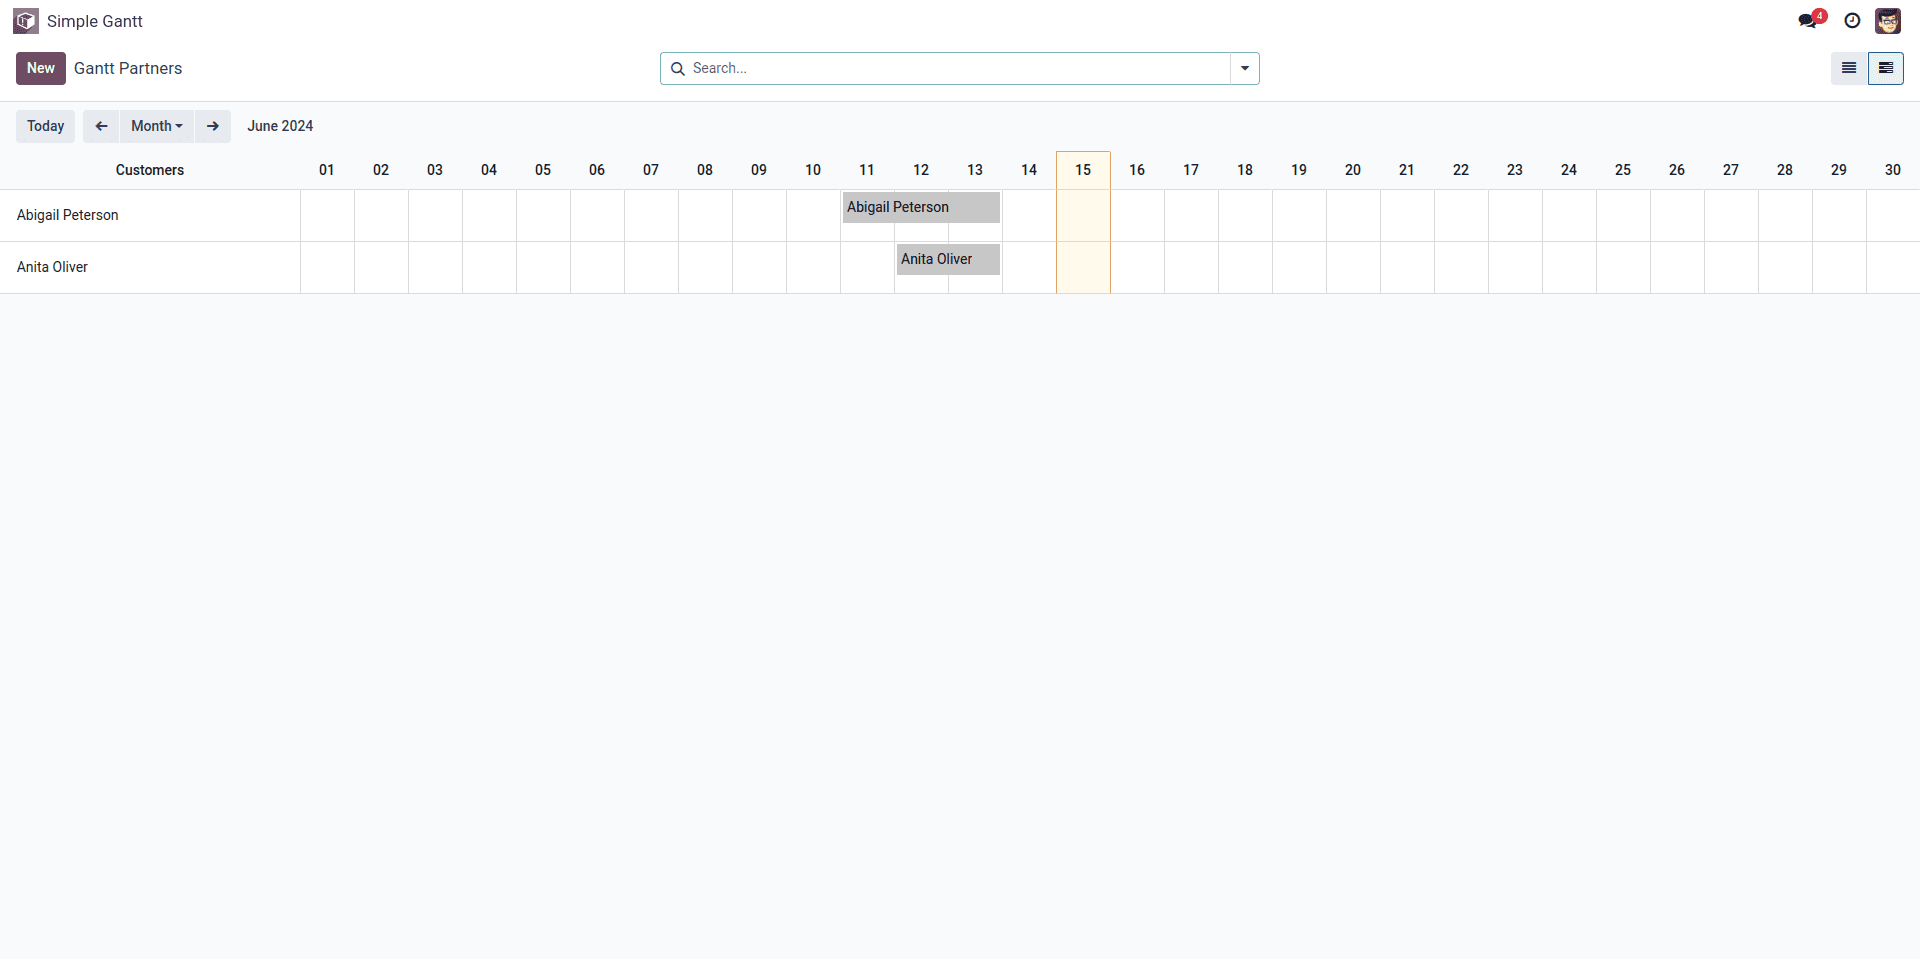
The 'Add' button in the display can be clicked to add a new record. Data can be filtered by week, year, or day. Diverse allocations are represented by the different colours. You may also try varying the properties inside the Gantt tag to get more sophisticated features.
Odoo 17's Gantt views are not just about visualizing schedules; they help optimize your business operations. Take advantage of this opportunity to discover the full potential of your data and guide your business toward a future where everything runs smoothly.
To read more about How to Create a New View Type in Odoo 17, refer to our blog How to Create a New View Type in Odoo 17.