Every business and every employee matters greatly. Throughout their employment, every employee should go through the onboarding and offboarding processes. The process of becoming an employee of a corporation is known as onboarding. However, the process of offboarding involves removing individuals from the organization. It might be a retirement, resignation, or dismissal.
A corporation must take several crucial actions when terminating an employee in order to guarantee a seamless and legal procedure. The procedure is started by the HR manager, who notifies the employee and legally documents the reasons for termination. The employee receives the necessary documentation, which is created and includes letters of termination and final settlements. To ensure security, the employee's access to business systems and resources is terminated. Lastly, all termination documents are safely kept for future reference and compliance.
Employee termination in Odoo 17 is handled through the Employee module. The HR manager starts by going to the individual employee's profile and choosing the option for termination. Next, the system asks for important information including the reason and date of termination. Odoo immediately modifies the employee's status to 'Terminated' after confirmation. Termination letters and other pertinent papers can be created and stored using the platform. To maintain security, the system also removes the employee's access to business systems and resources. With the integrated payroll module, the HR manager may take care of any outstanding payments as well as final settlements. Every termination record is kept up to date in the system for compliance and future use.
So let's check how the offboarding process of an employee happens in Odoo17.
* Checking the Employee details
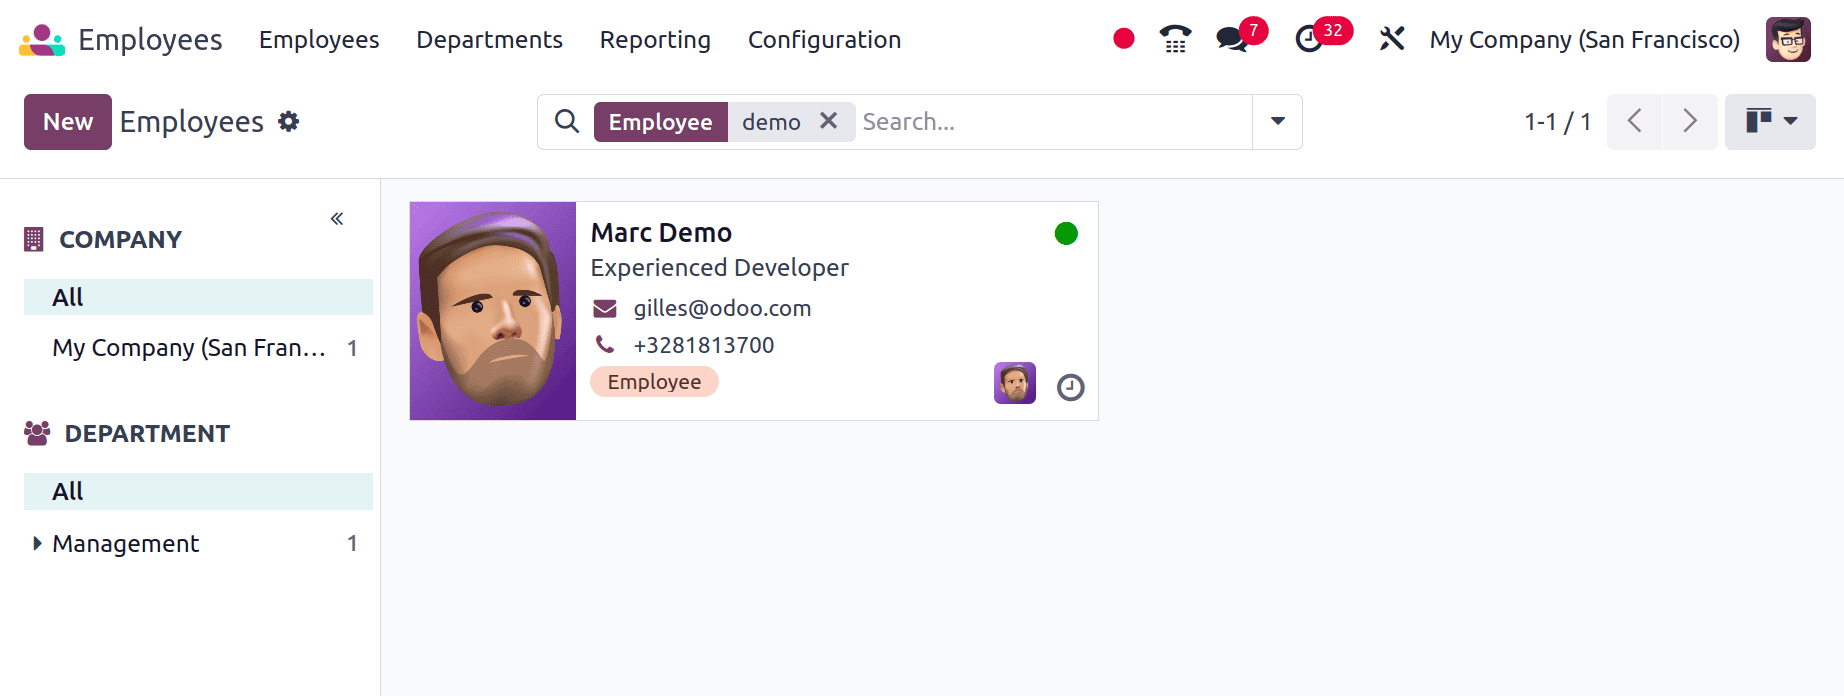
Here the employee chosen is Marc Demo. Let's assume that the employee named Marc Demo is terminated from the company, so let's check what the procedures are. For that, move to the Employee module and open the corresponding employee. For that we can use the search option to easily find the employee.
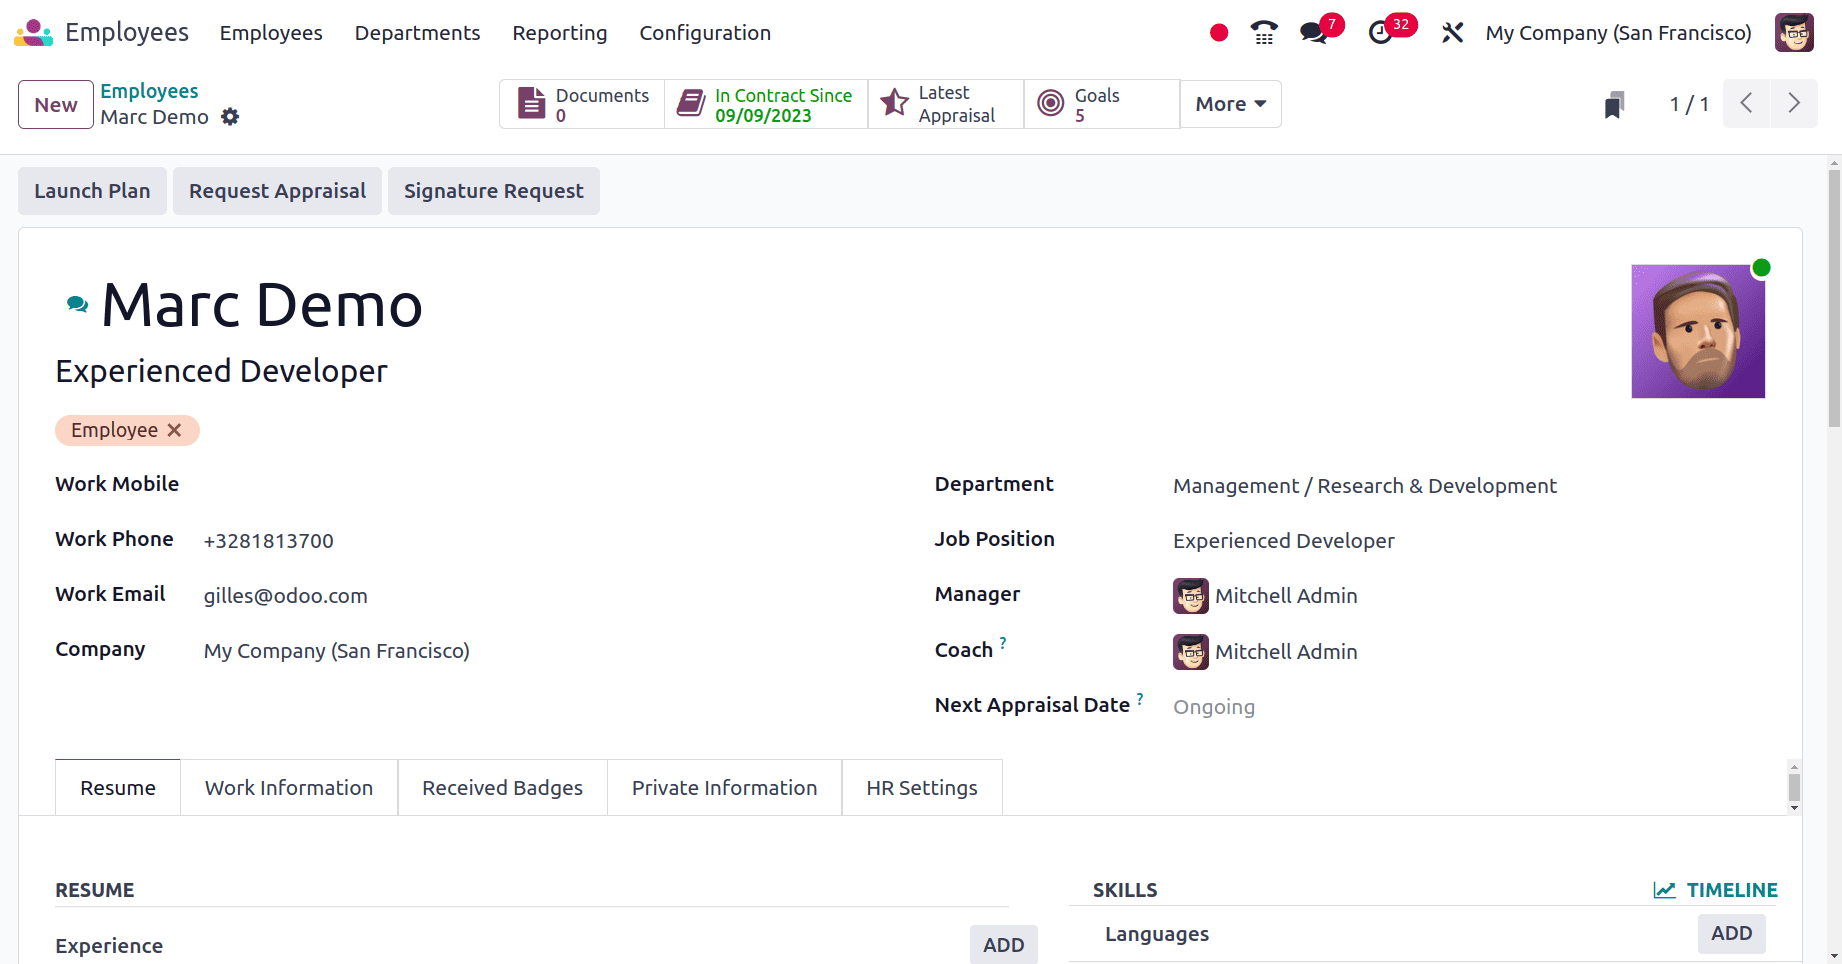
While opening the employee, which contains all the details of the employee. There are also some smart tabs named as Documents, Contract, Goals etc.
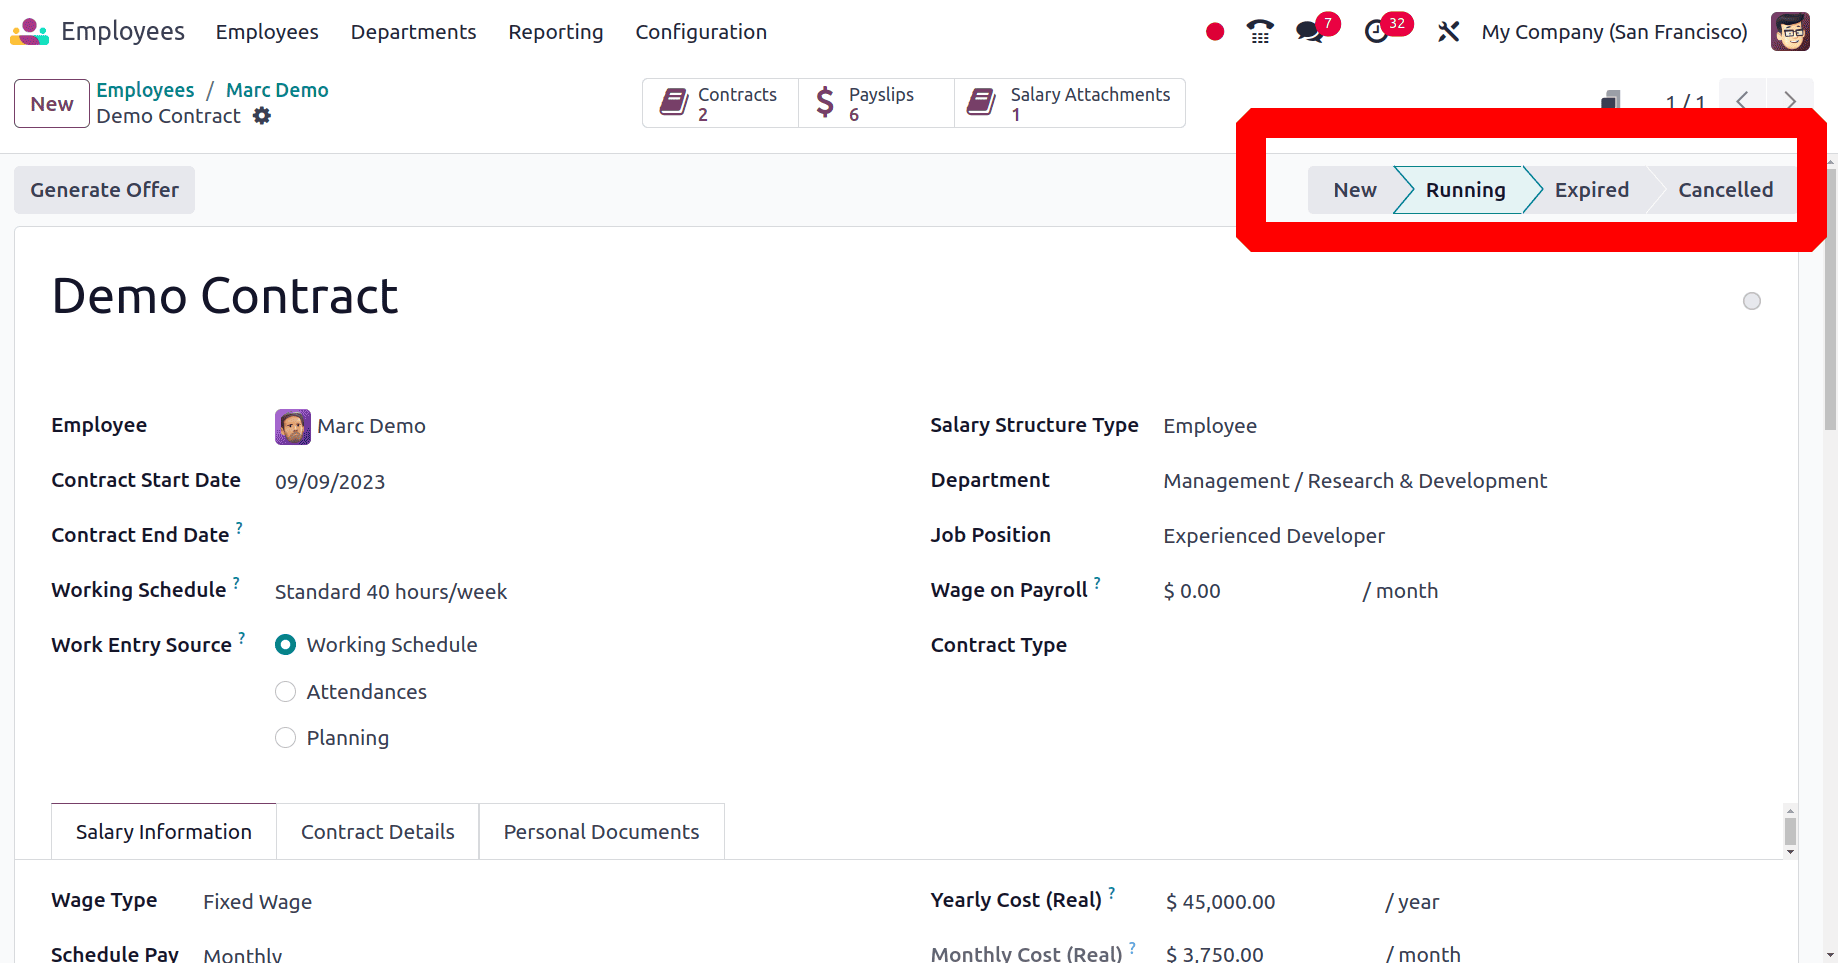
To examine the employment contract, click the Contract smart tab. The contract includes information on the employee, including name, start and finish dates, compensation schedule, department, and work title. The stage is running because this contract is still in effect.
The worker is then granted a certain amount of time off. Click the "Time Off" smart tab to get the employee's time off details.
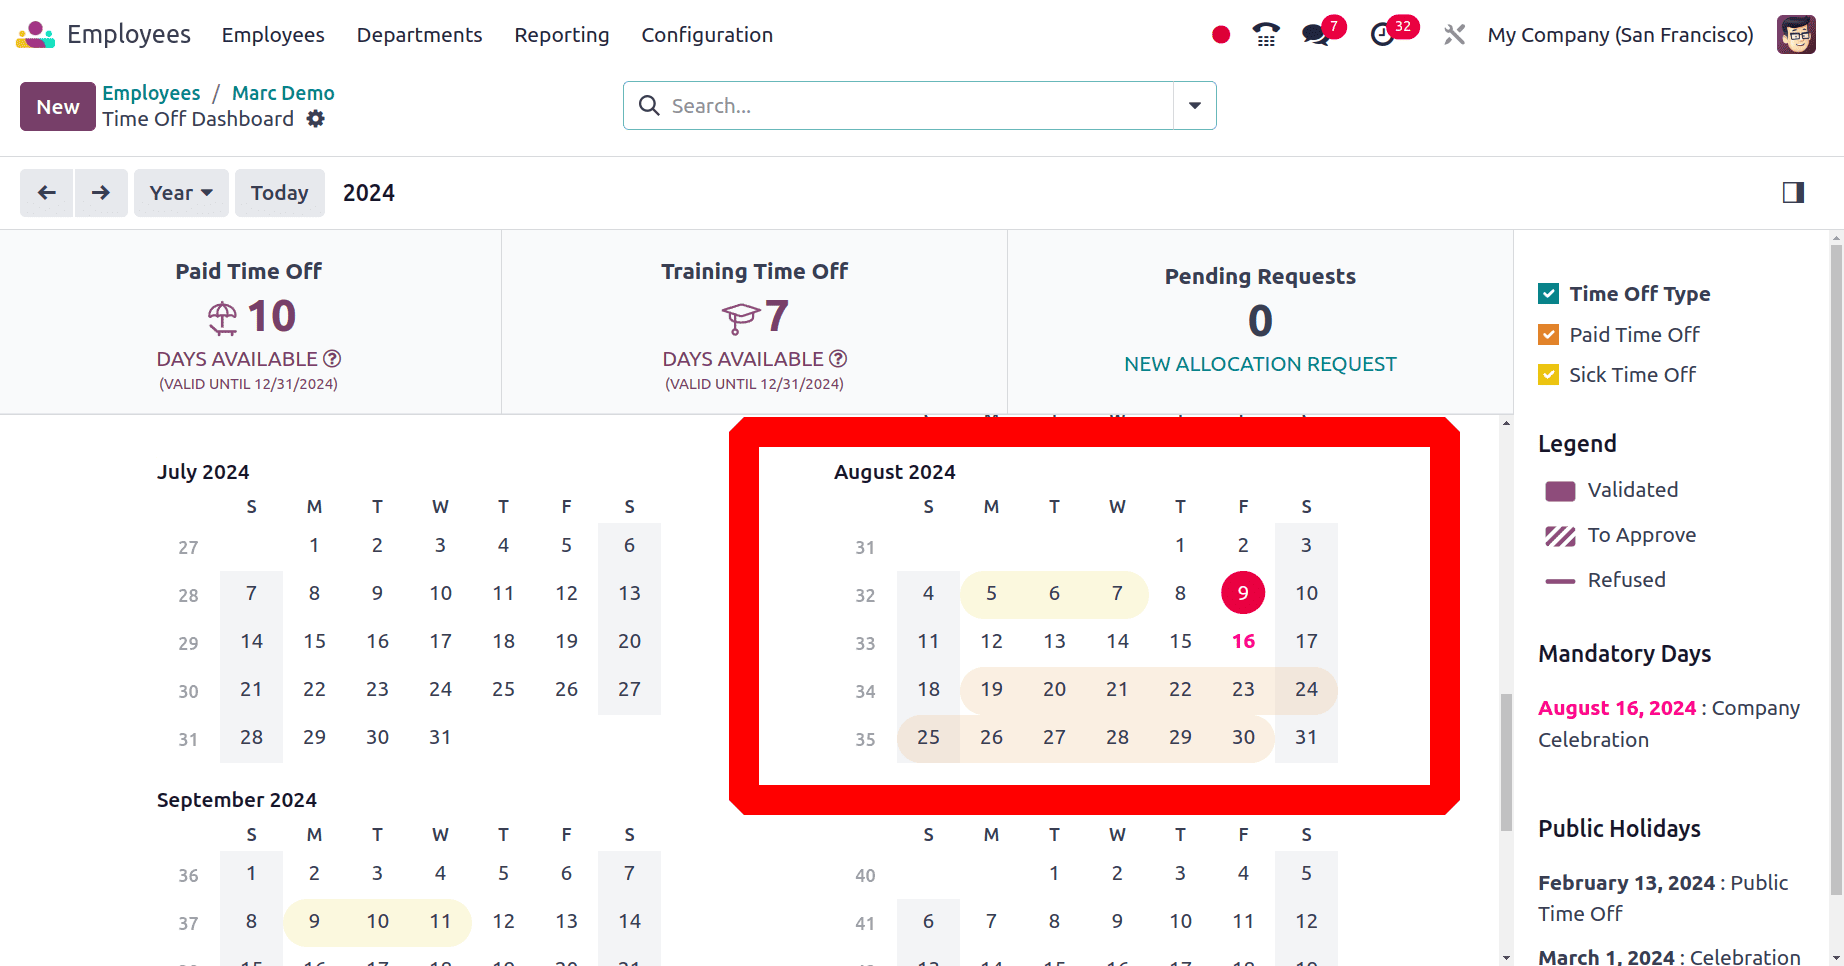
The employees have approved time off from August 19th to August 30. That's why those days are marked with a red color.
* Configuring Offboarding Plans
Odoo 17's offboarding plans automate processes, including final payroll, clearance procedures, and asset return to expedite the employee departure process. To guarantee compliance and uniformity in the handling of resignations or terminations, they incorporate personalized workflows. In addition to keeping correct records and reducing risks for the company, this guarantees a seamless transition.
To create a new onboarding plan, click on the Configuration menu, then choose the option Activity plans, which list some Employee Plans. To add a new one, click on the New button.

The Onboarding and Offboarding planes are the two that exist. In the event of retirement or resignation, the offboarding procedures will begin. Let's get the offboarding plan open.
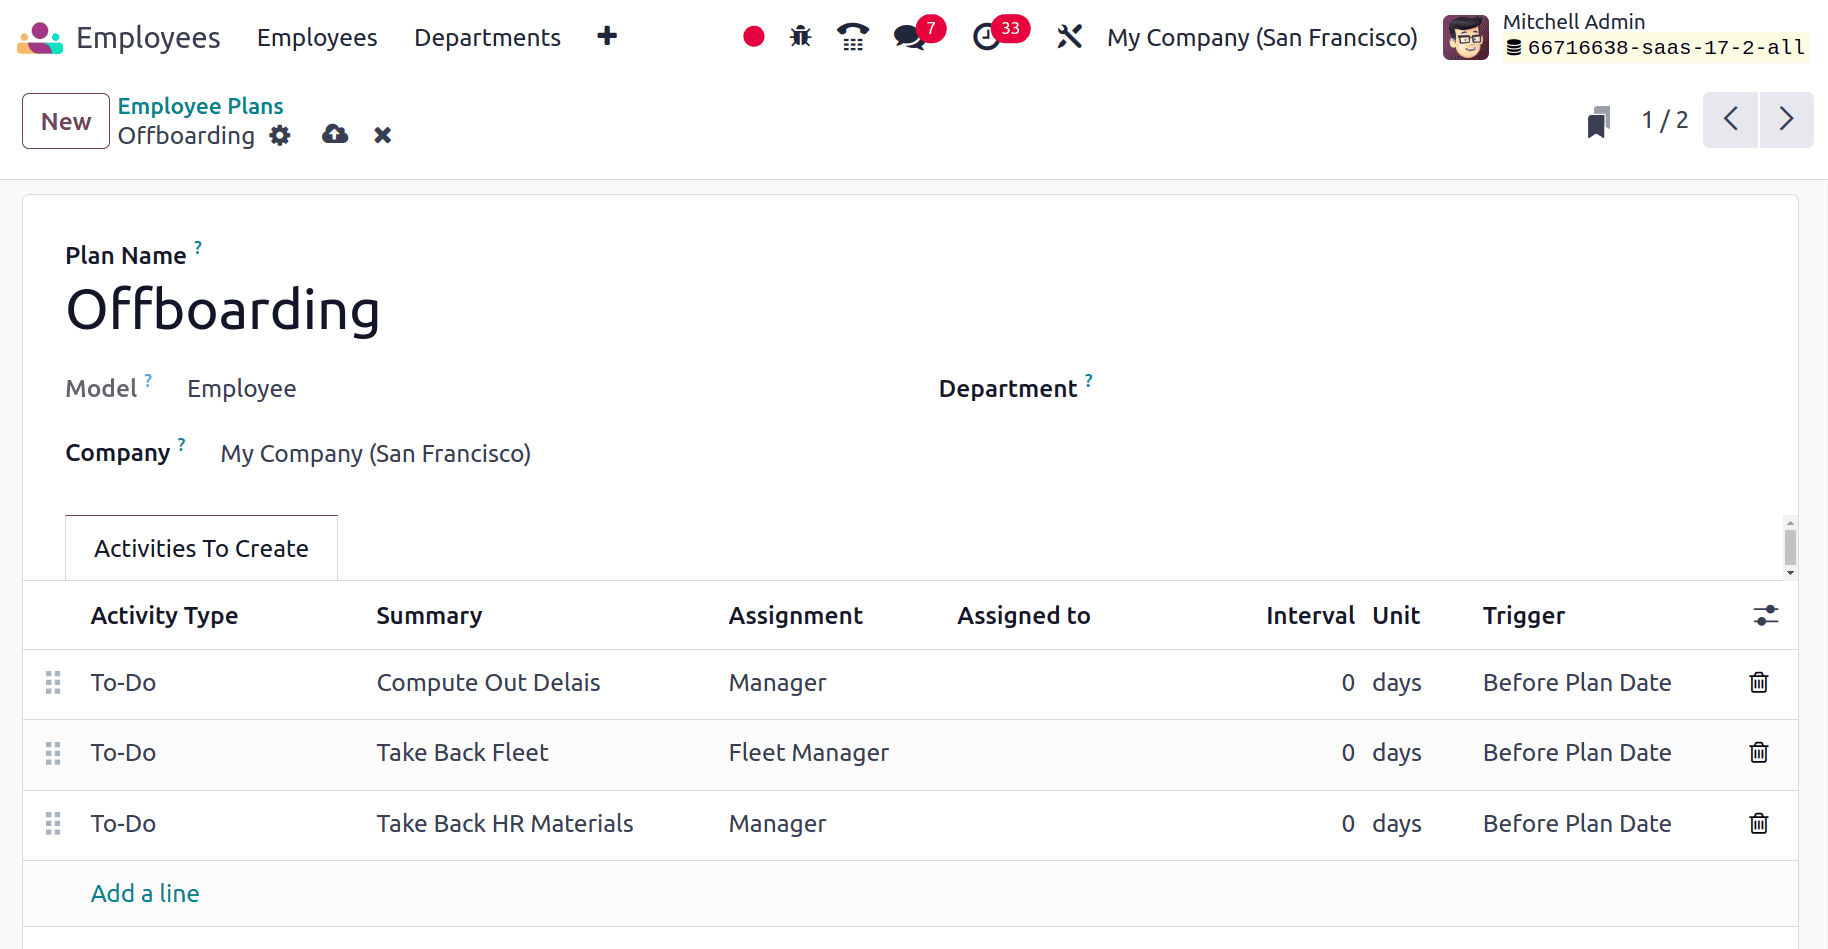
The model selected is Employee, and the plan name is Offboarding. The Activity To Create tab contains the actions that need to be scheduled for the plan's launch. Four new activities have been introduced. There are the following displayed: Activity Type, Summary, Assignment, Assigned to, Interval Unit, and Trigger. Click the Add a line button to add a new activity, and click the delete icon to remove an existing activity. The delete icon is located at the end of each activity line.
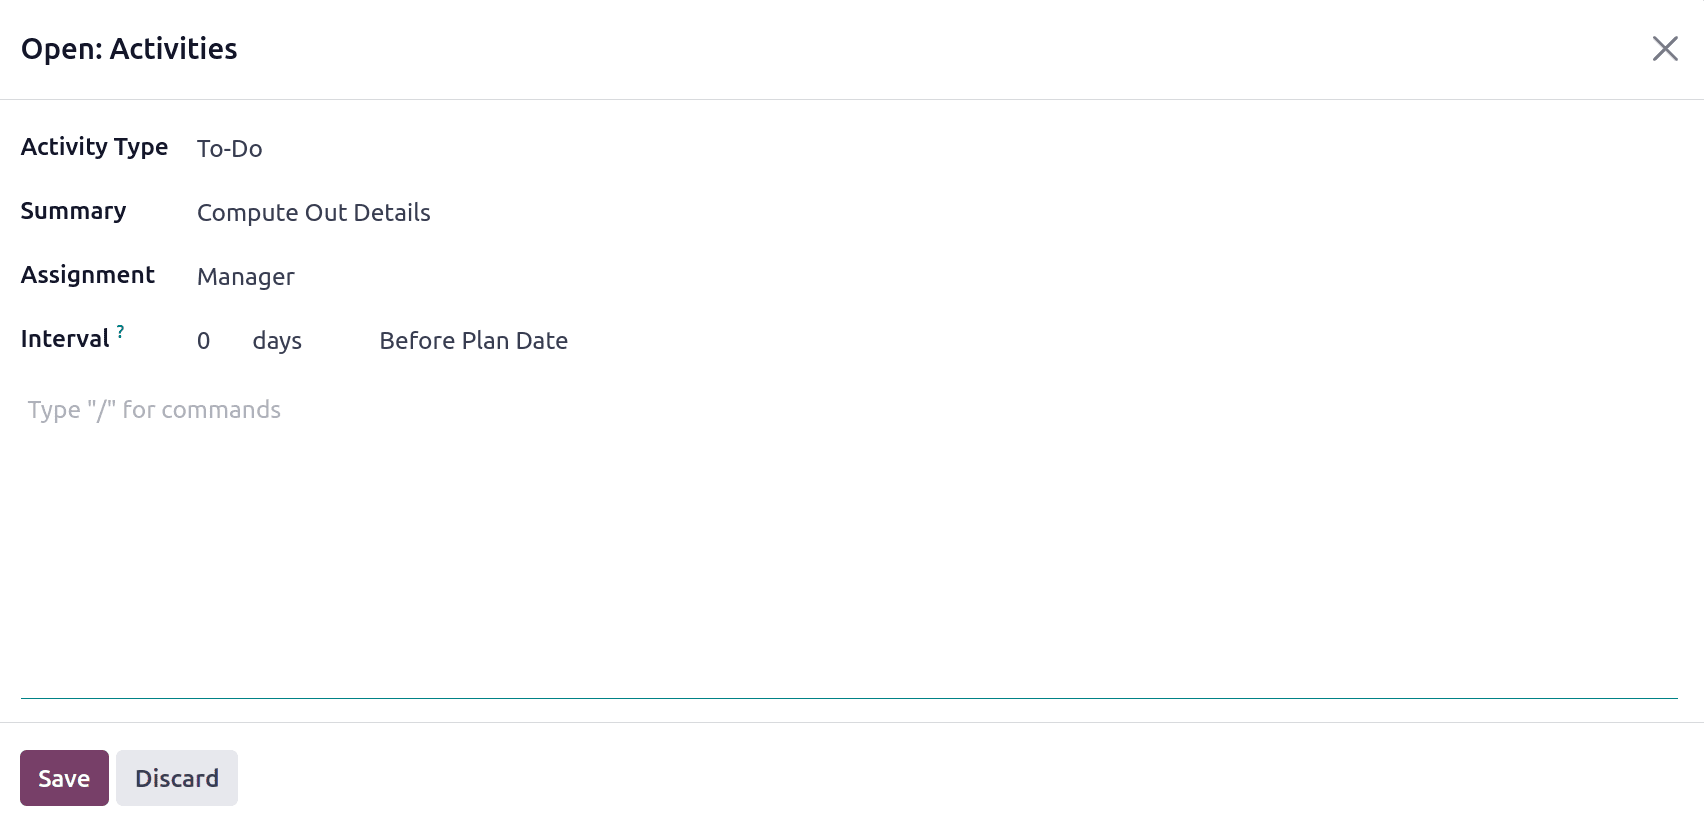
To-Do is the first task here. This implies that the manager must communicate all of the employee's information, including payroll and attendance, until the deadline.
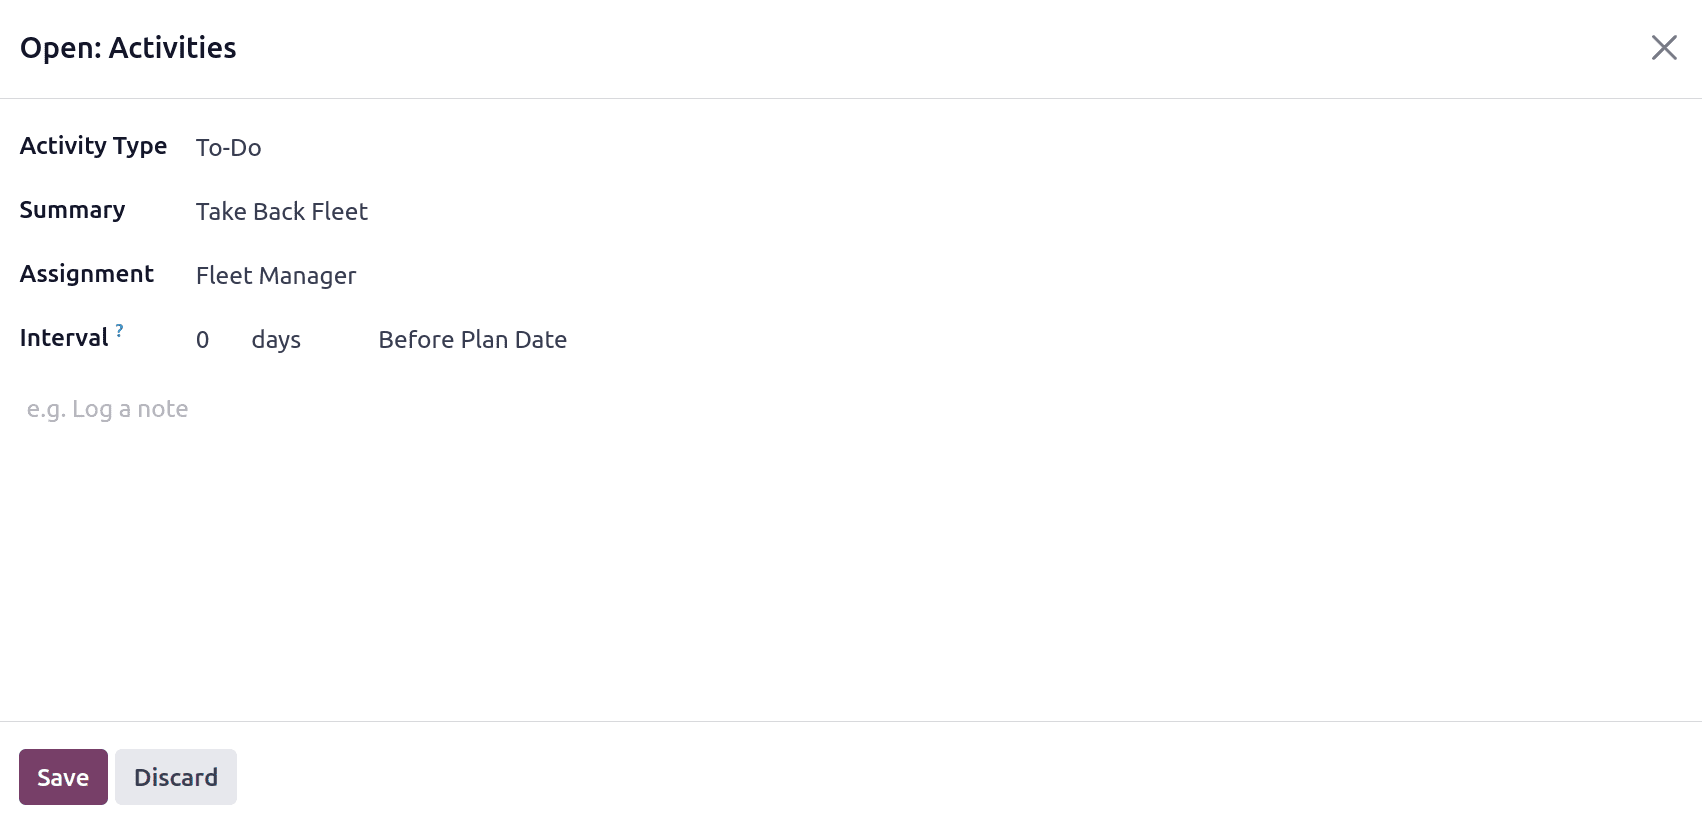
The second task is also a to-do list item. This is meant to serve as a reminder to the manager to return the employee's fleet.
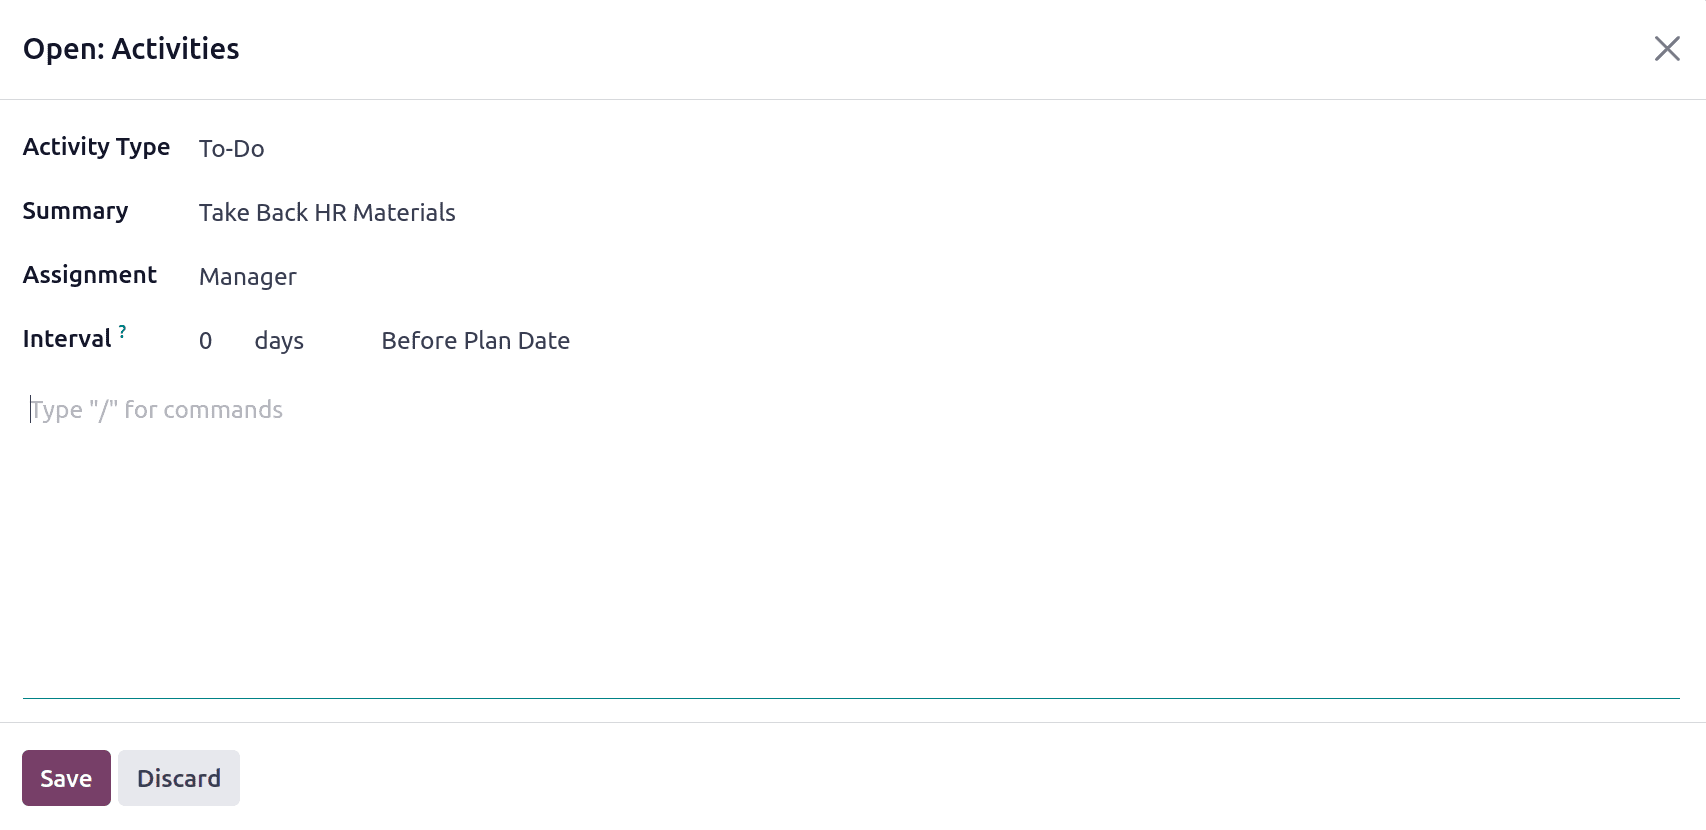
The final task is a tire-related to-do list item. which is to notify the user to get the HR materials from the employee, such as the laptop and chargers.
* Request Signature
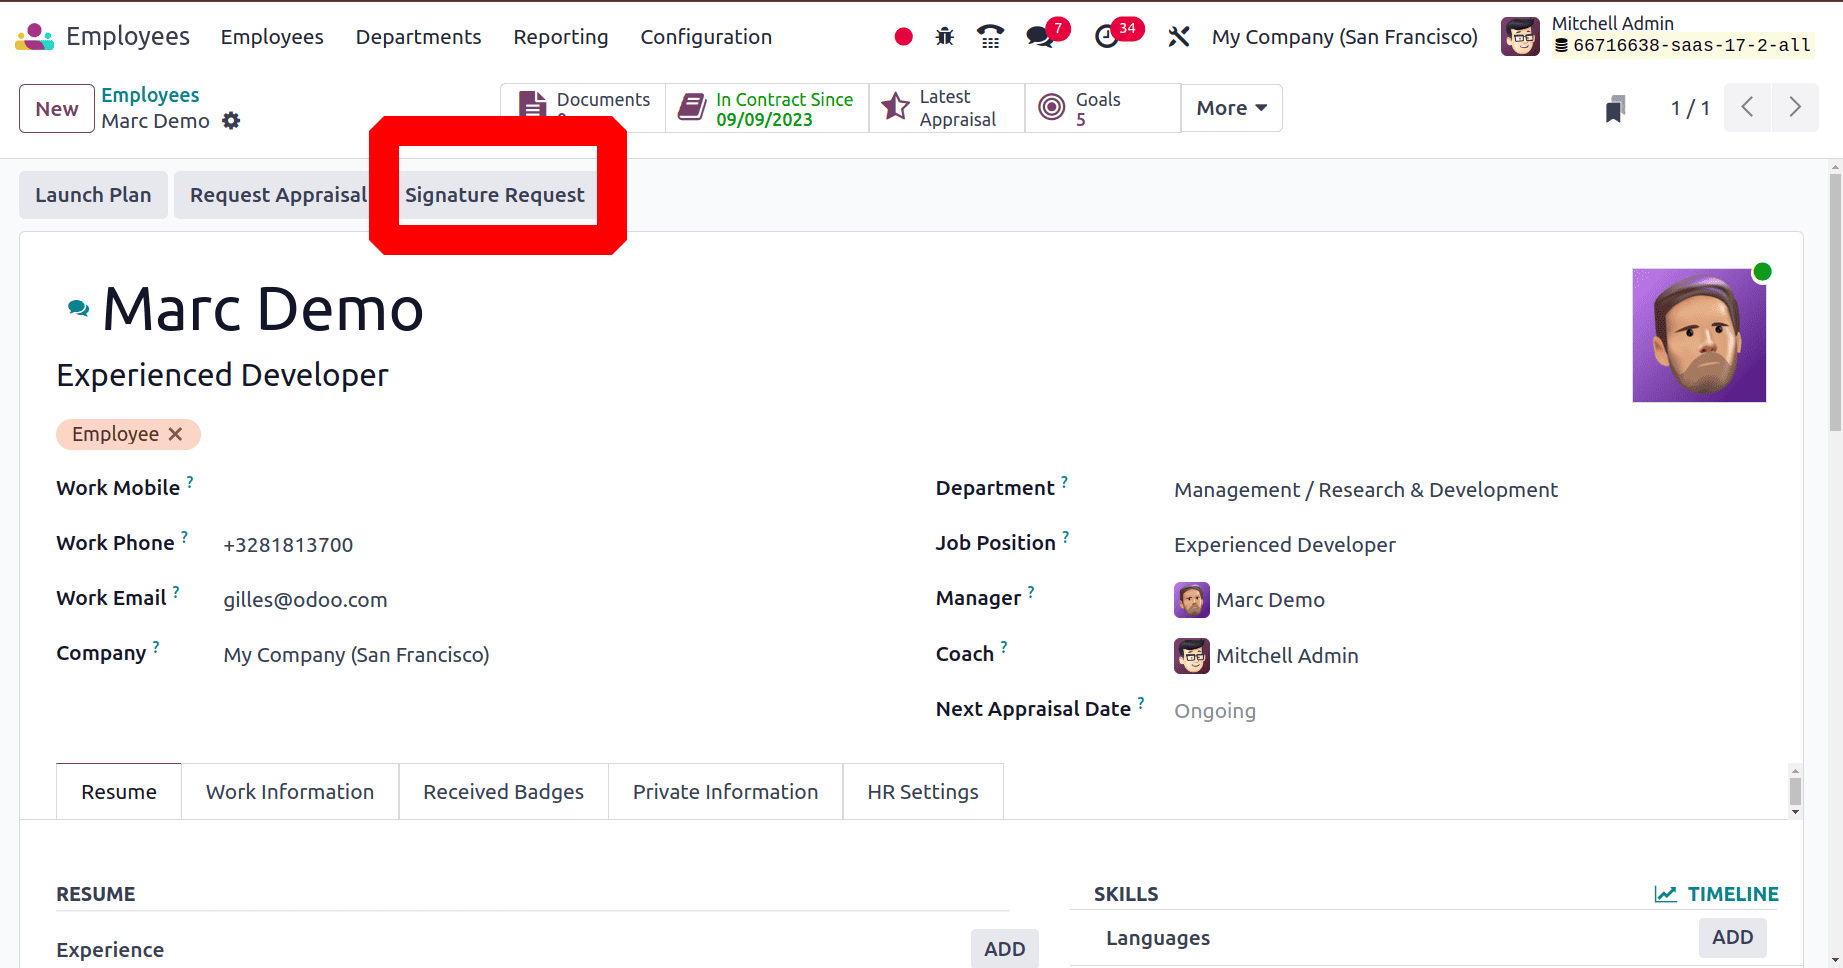
Then go back to employees and choose the employee Marc Demo. There shows a button named Signature Request.
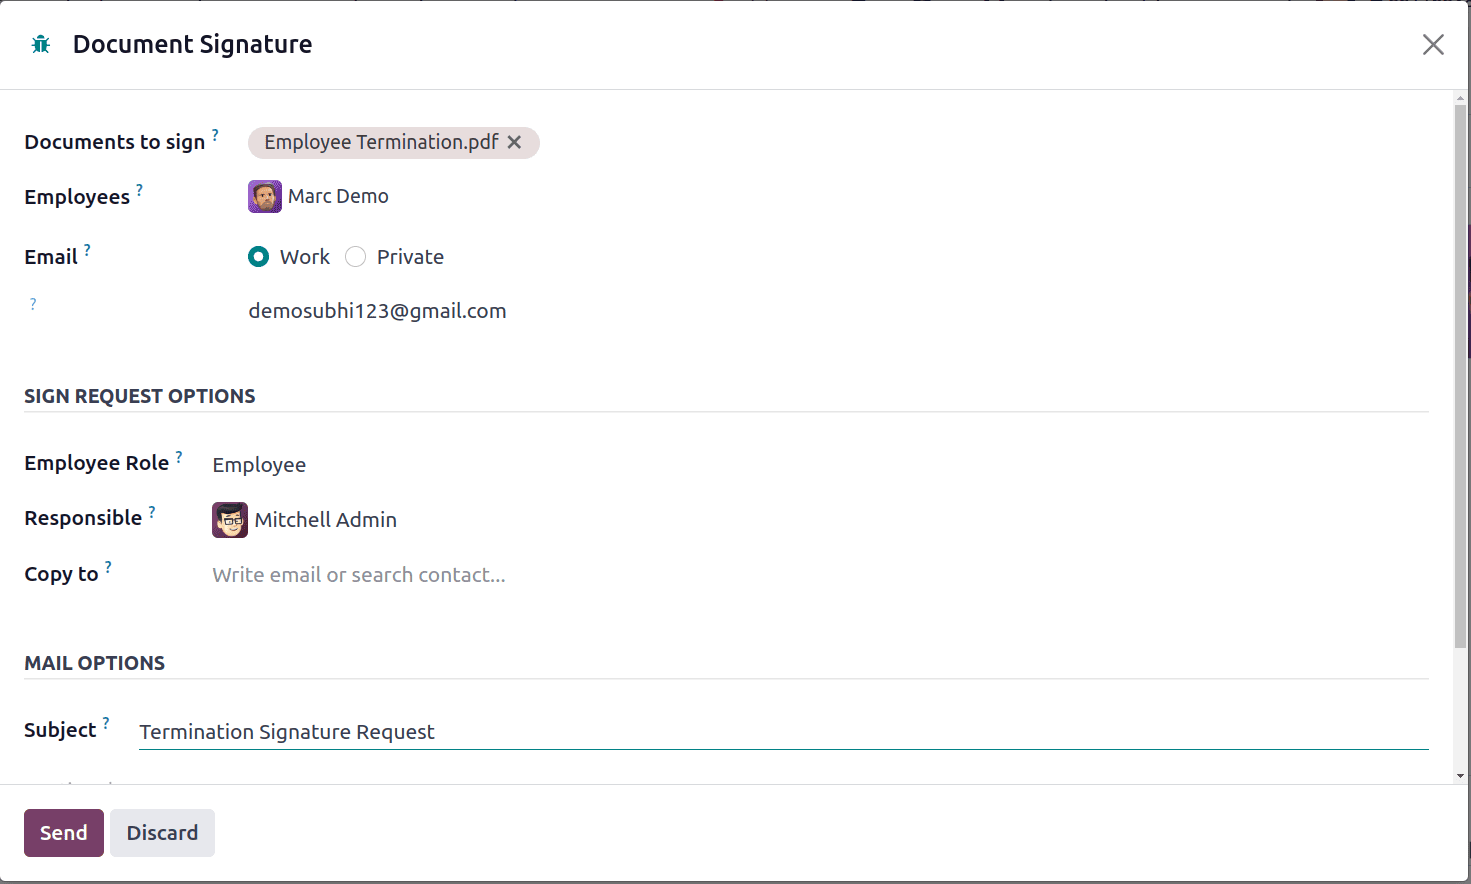
Then add the details like document to sign, employee name, email etc on the window. Then click on the Send button to send the termination email to the employee.
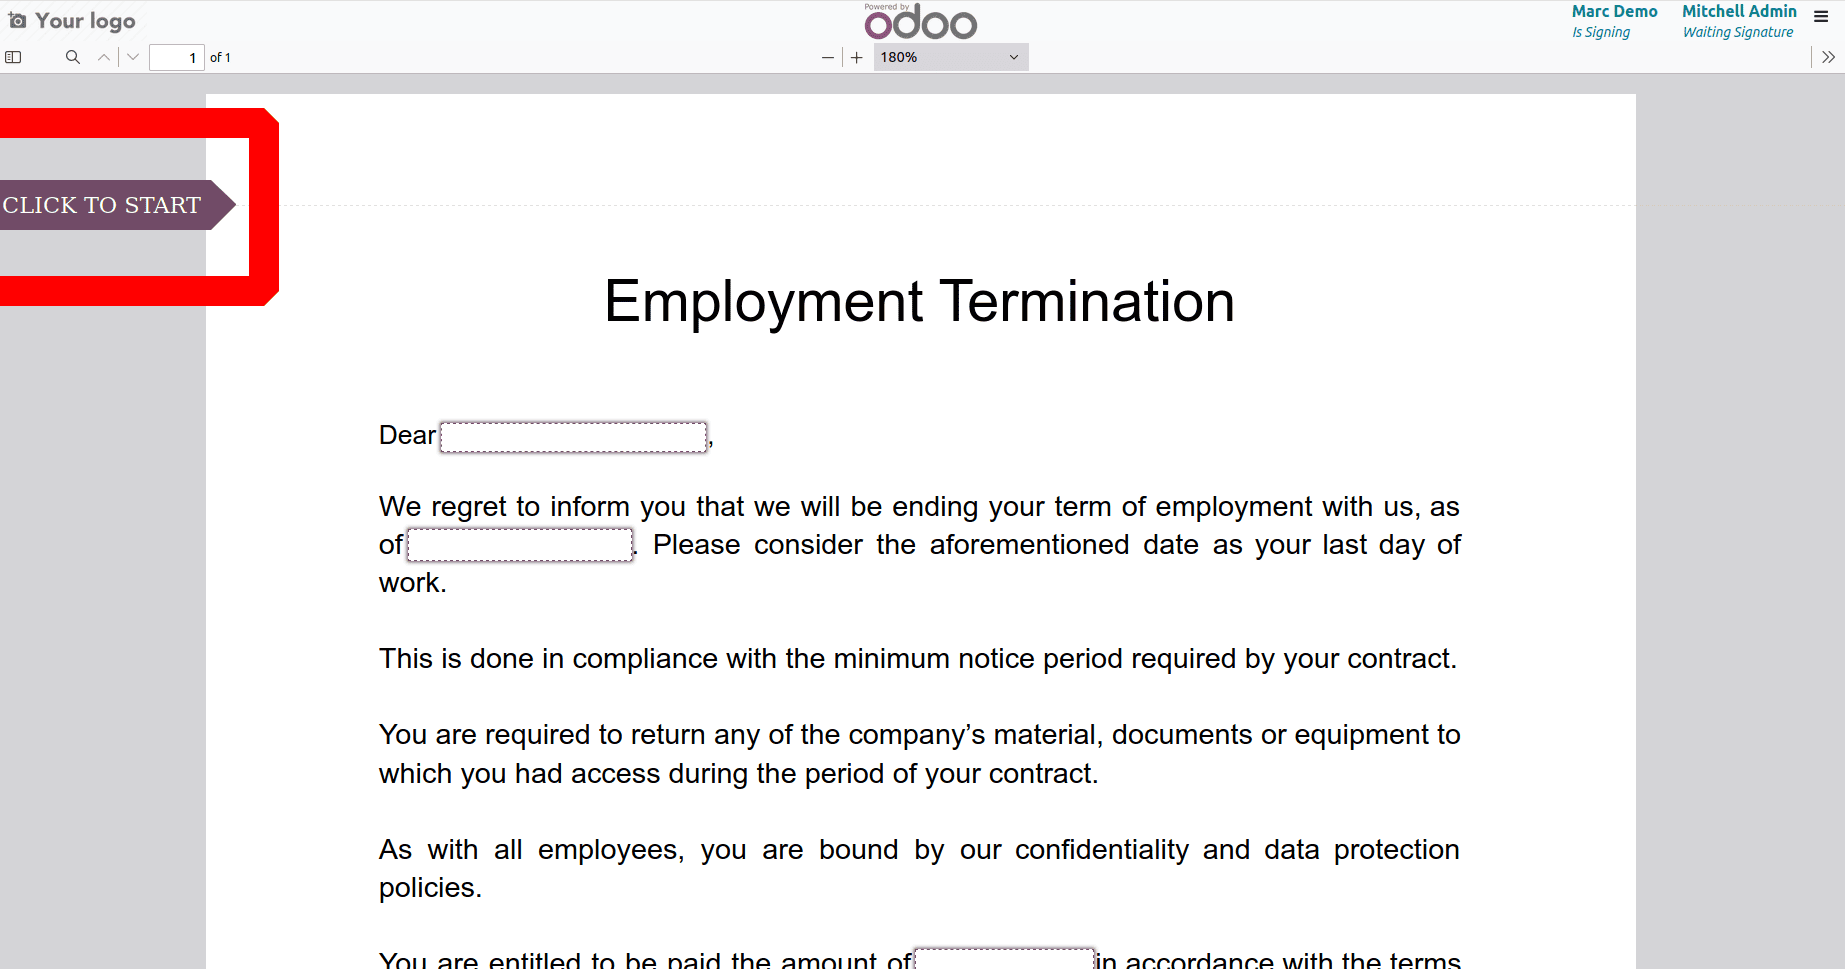
Then the employee gets the termination document to sign from his email. Open the email and open the document. Then click on the CLICK TO START button.
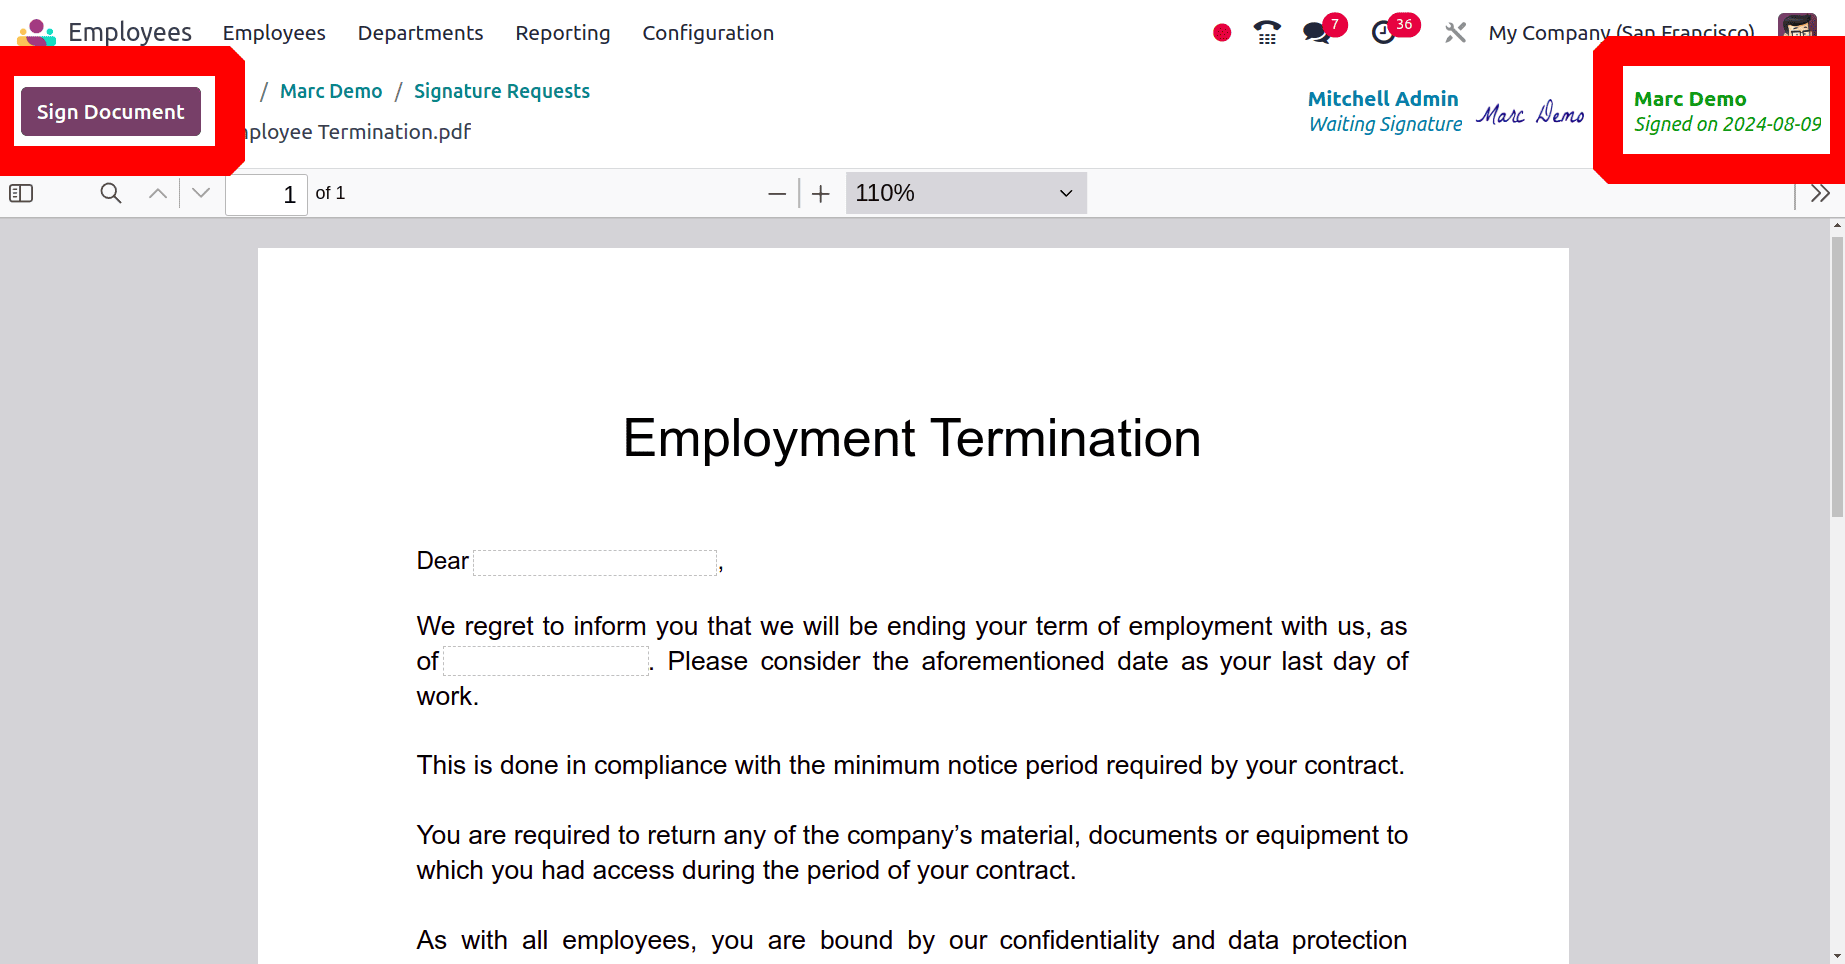
Then the manager wants to add the sign to the document after the employee signature. So the Manger can sign the document. So here the Employee marcdemo signed and waiting for the manager Mitchell Admins signature. Click on the Sign Document button.
Click on the Start button, fill in the necessary details and sign the document. At last click on the button, Validate & Send completed Document button.
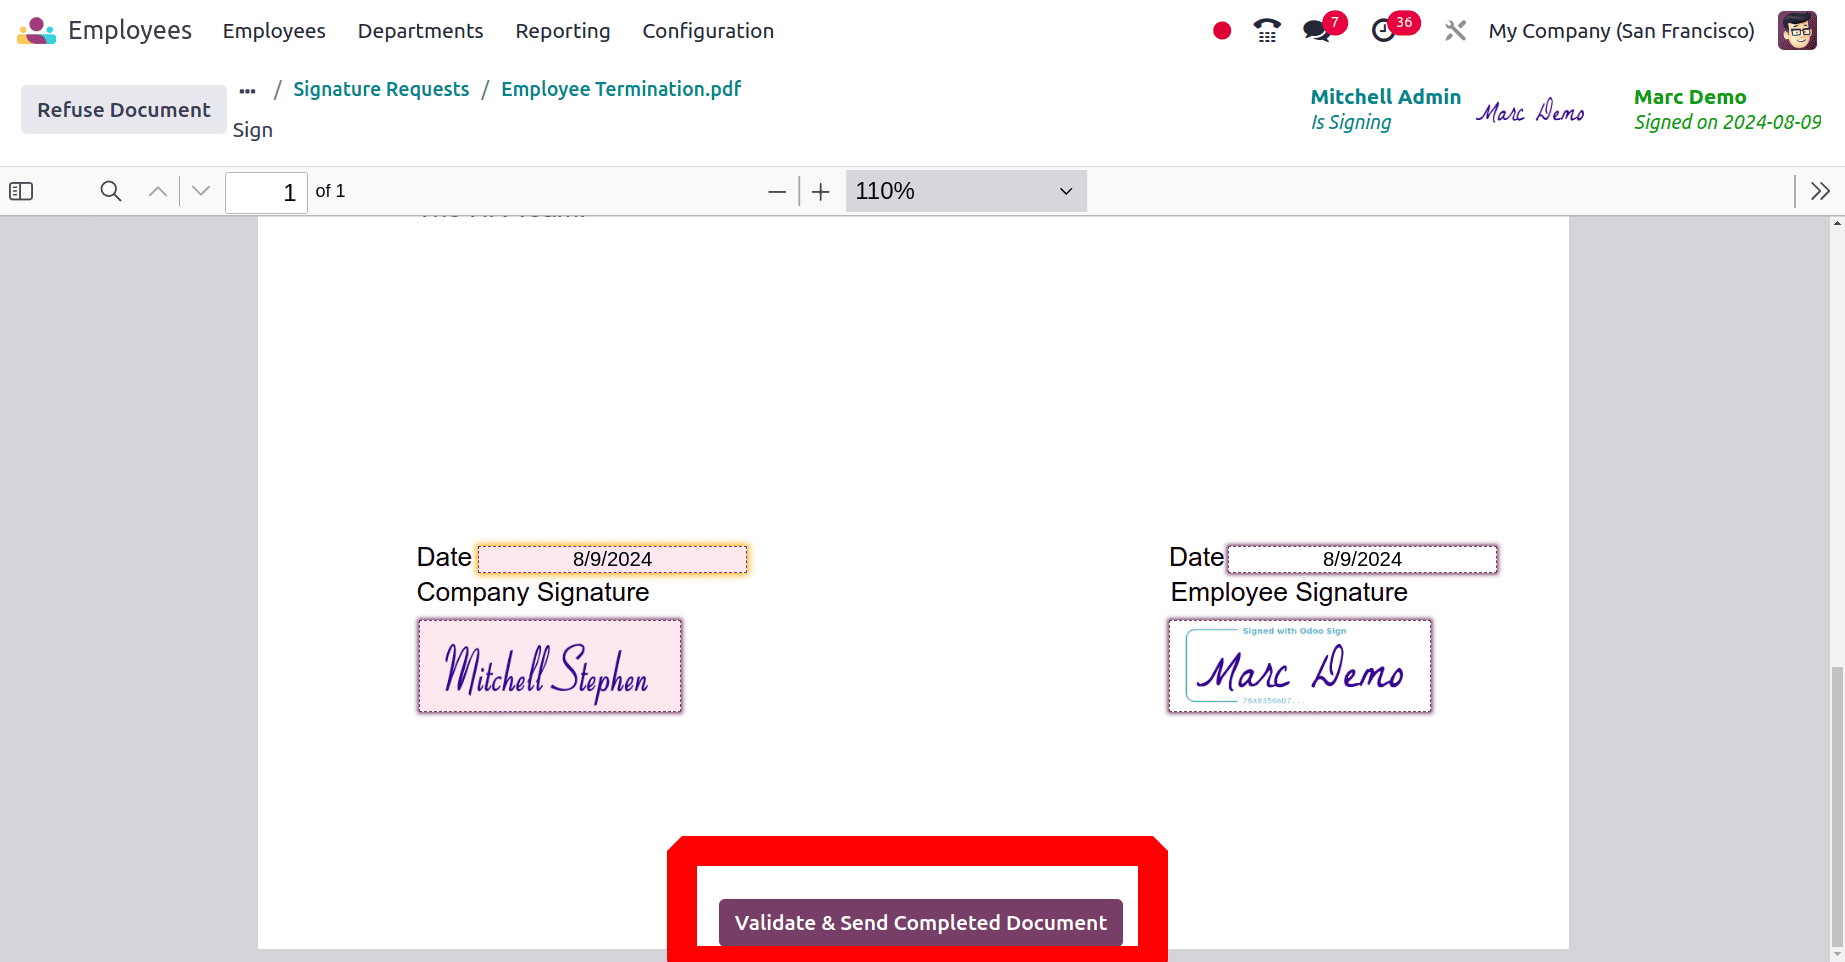
Now the employee termination document signing process is completed.
* Launch the Offboarding plan
Return to the employees list and select the employee Marc Demo. The onboarding plan may be launched by clicking the "Launch Plan" button in the upper left corner.
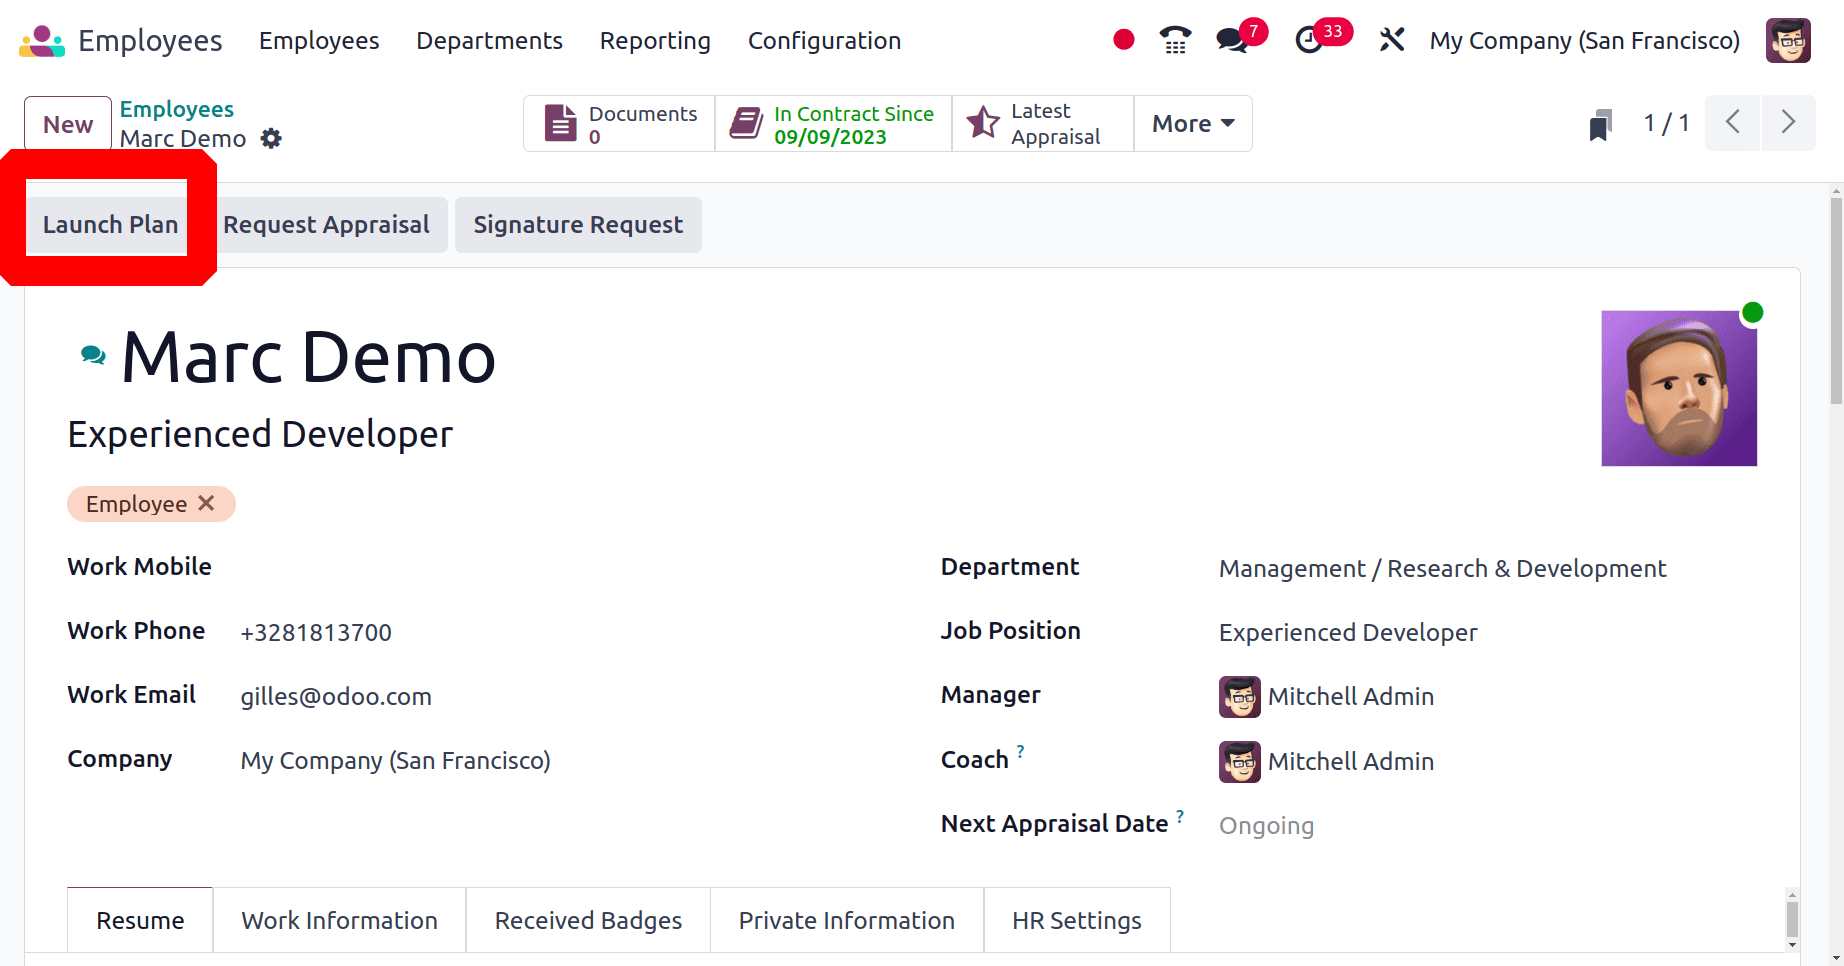
After that, a fresh popup window will open. The user must first select the previously configured Offboarding Plan. The plan summary will then show up on the screen's right side. There will be a display of the assigned employee name and the Lan date. Once all the information has been added, press the schedule button.

Then the activities will be scheduled and which can be shown as marked in the screenshot below.
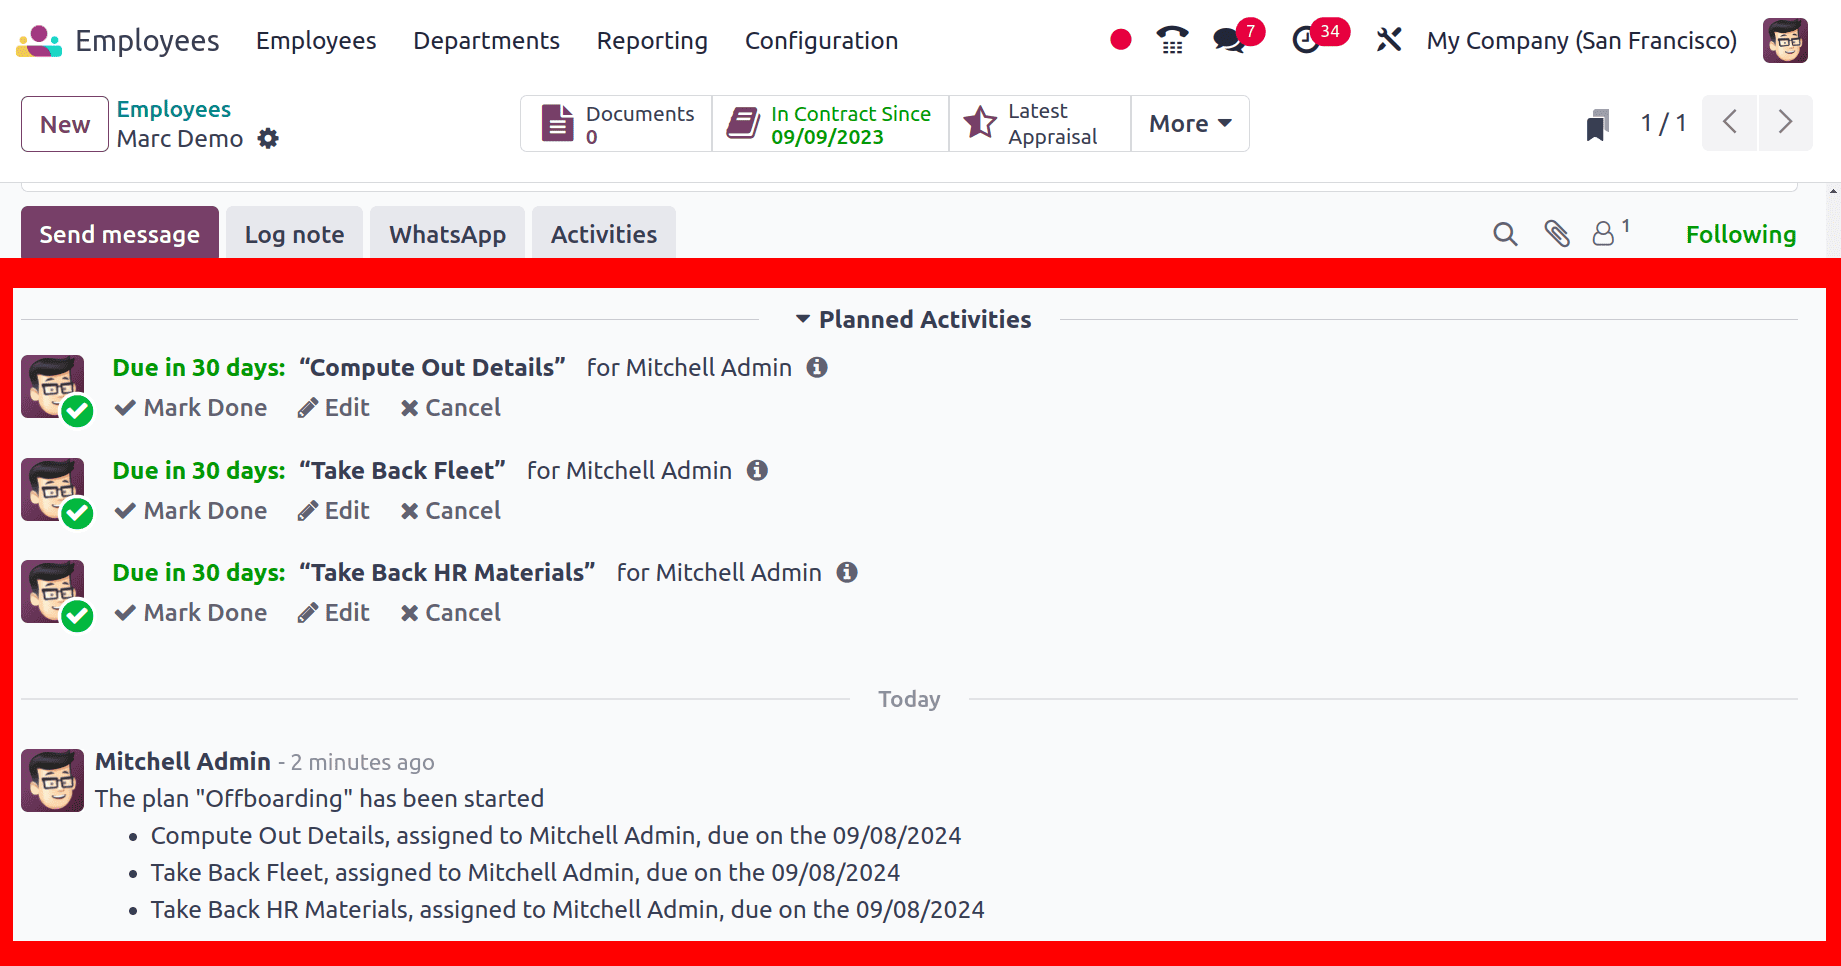
So the manager first needs to compute all the details of the employee. If he completed the process just needed to mark it as done. So click on the Mark as Done. Then from there, the manager can add any feedback. It's possible not only to complete the activity but also schedule the next activity simultaneously.
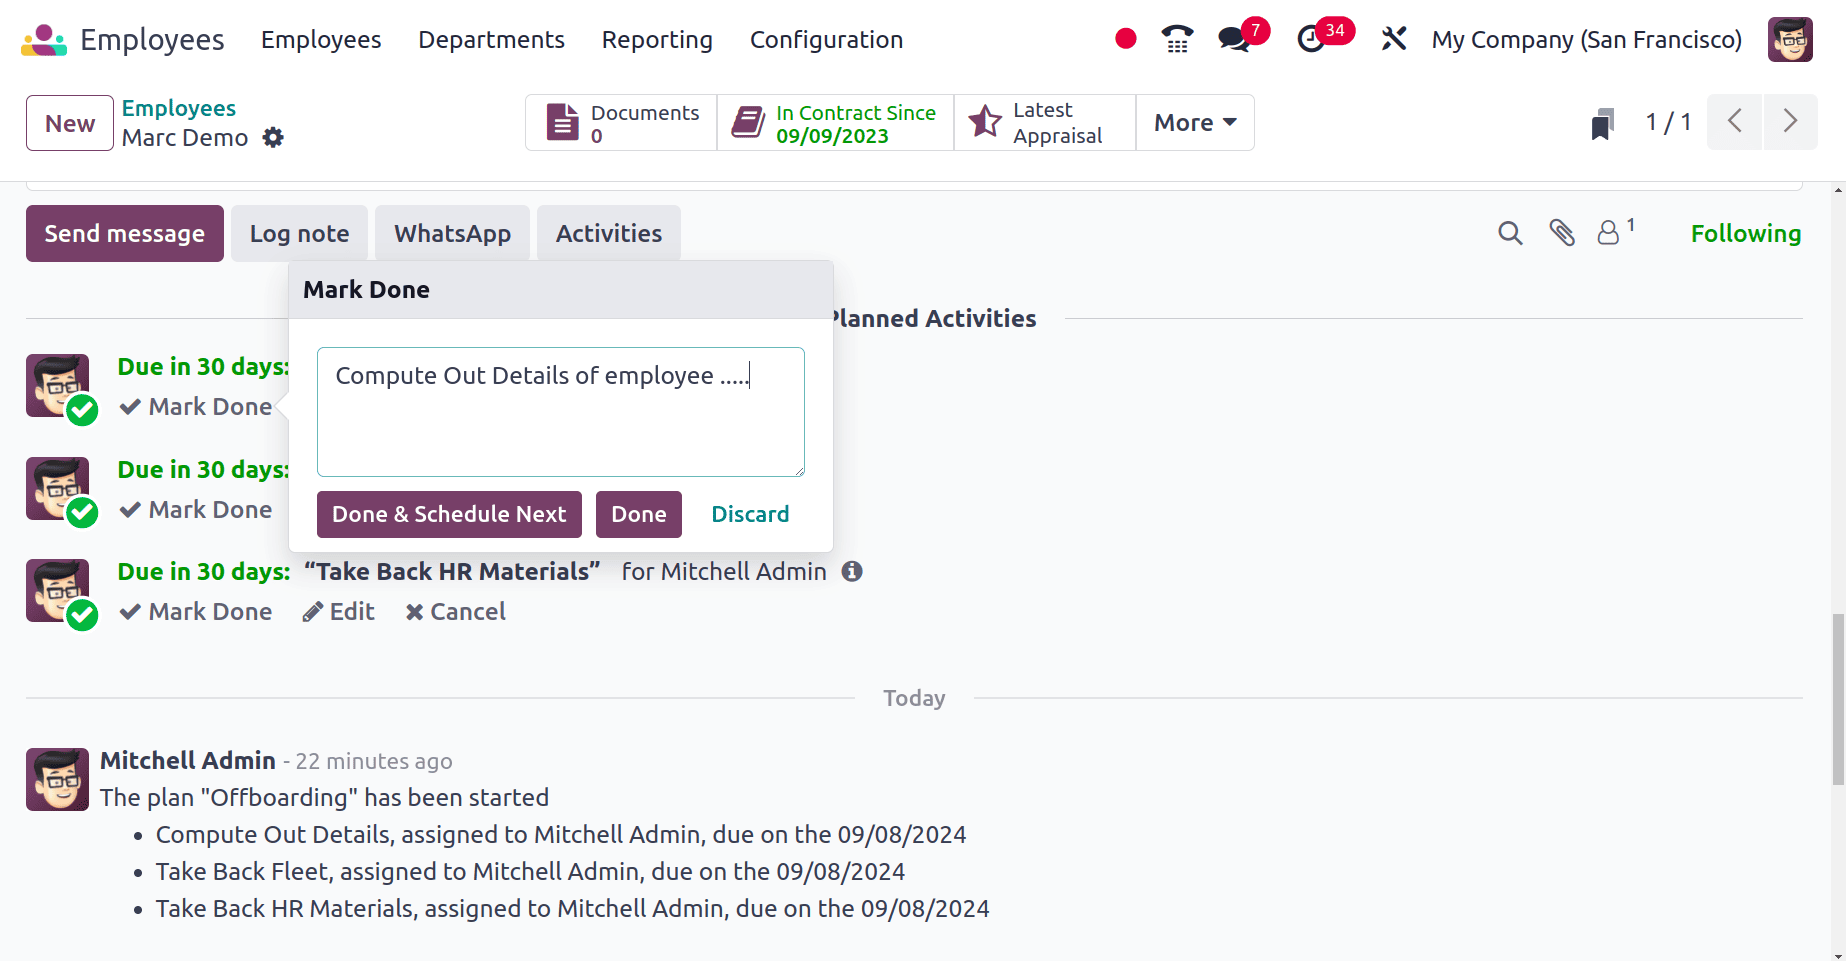
Then the manager wants to take back the fleet from the employee. After completing the process again click on the Mark Done.
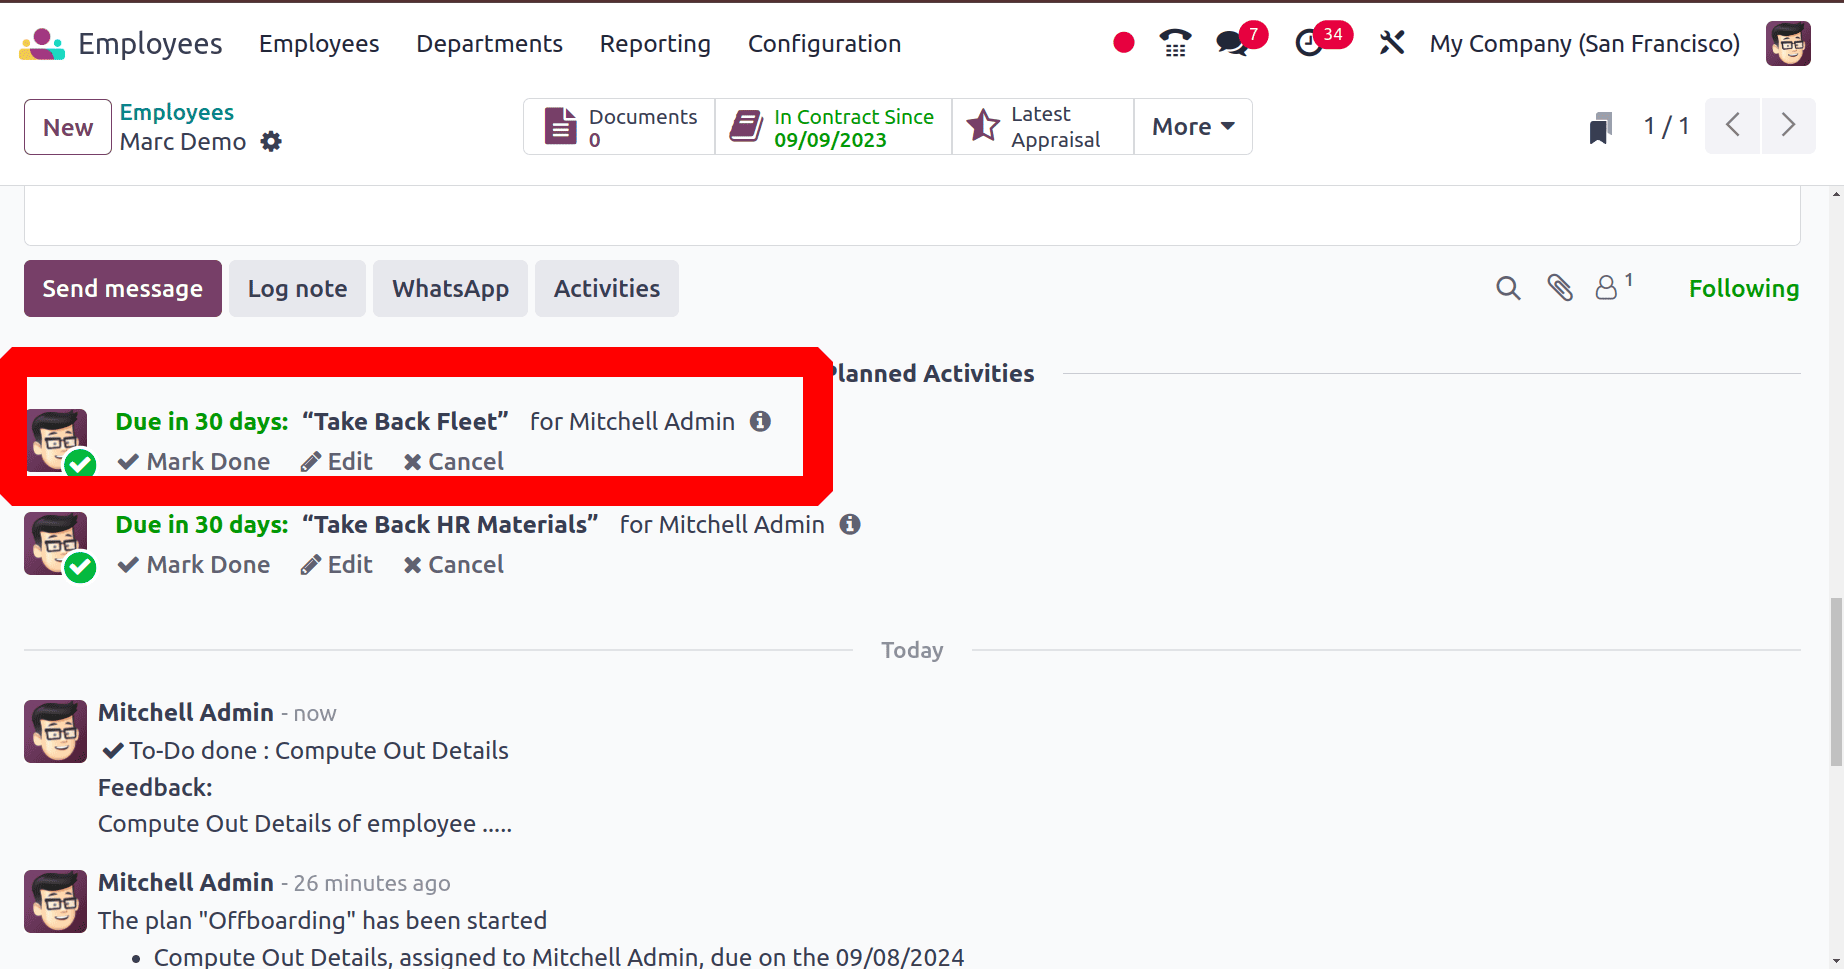
Then the last activity is to take back all the HR Materials from the employee. After completing that, as said before mark the activity as done.
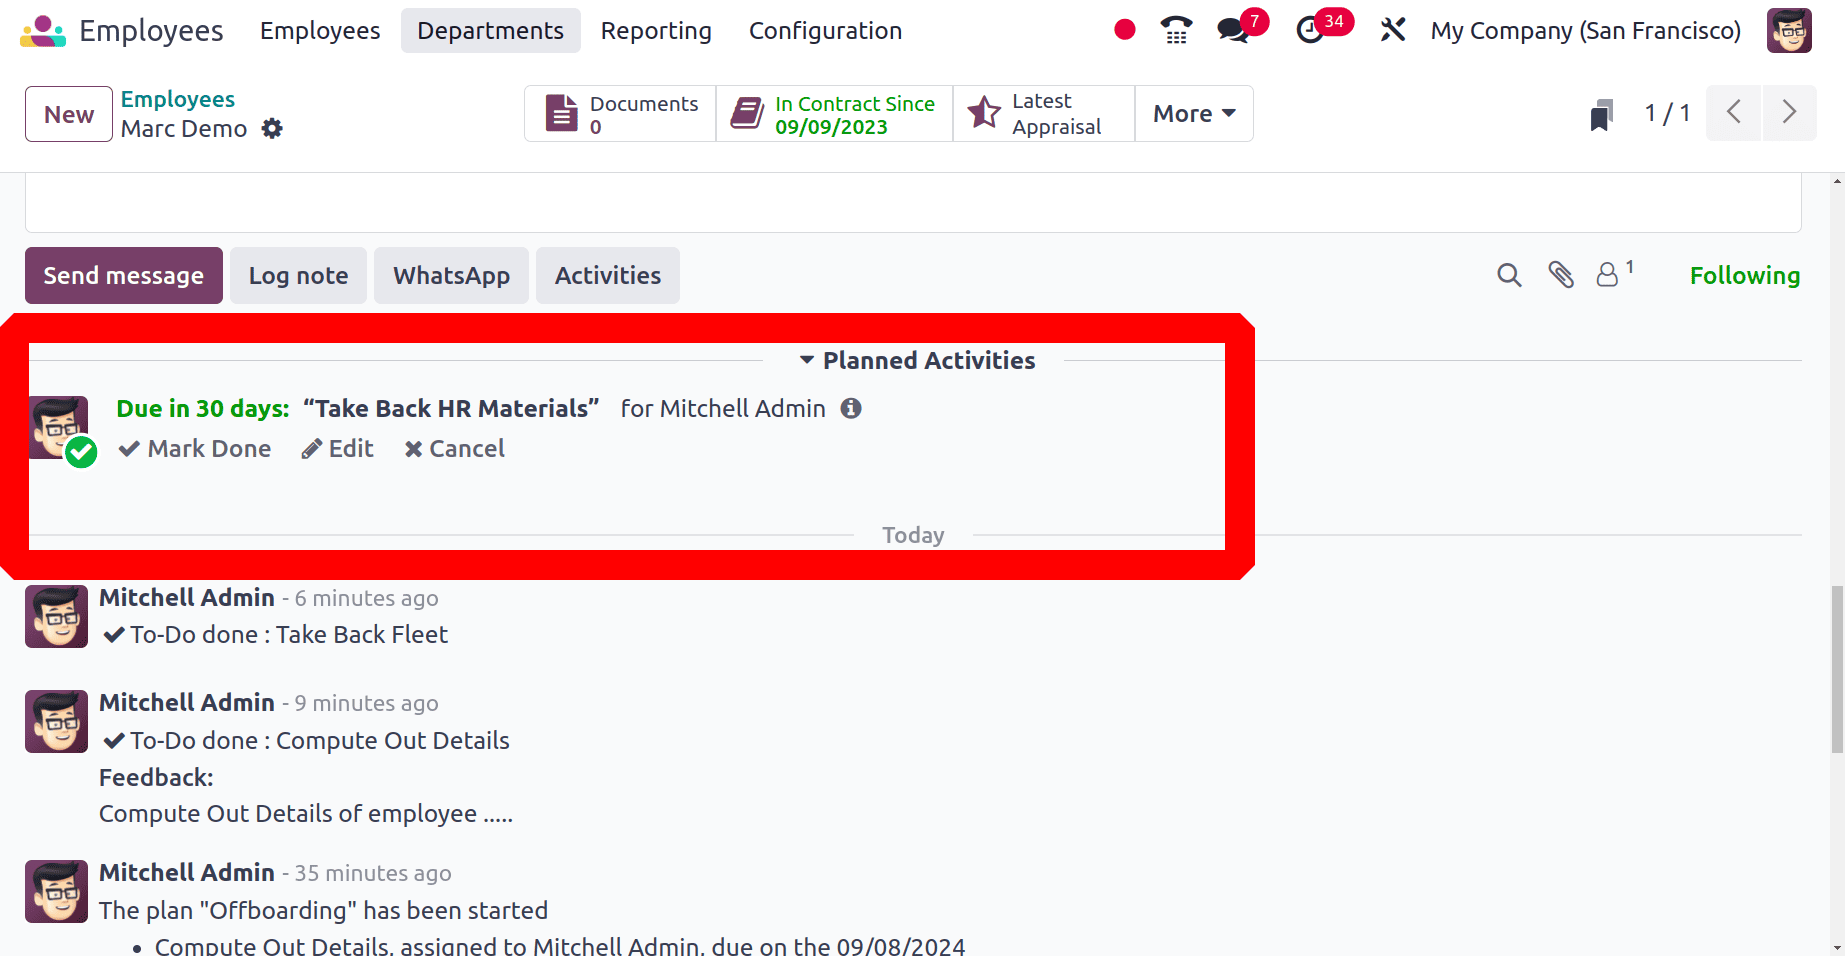
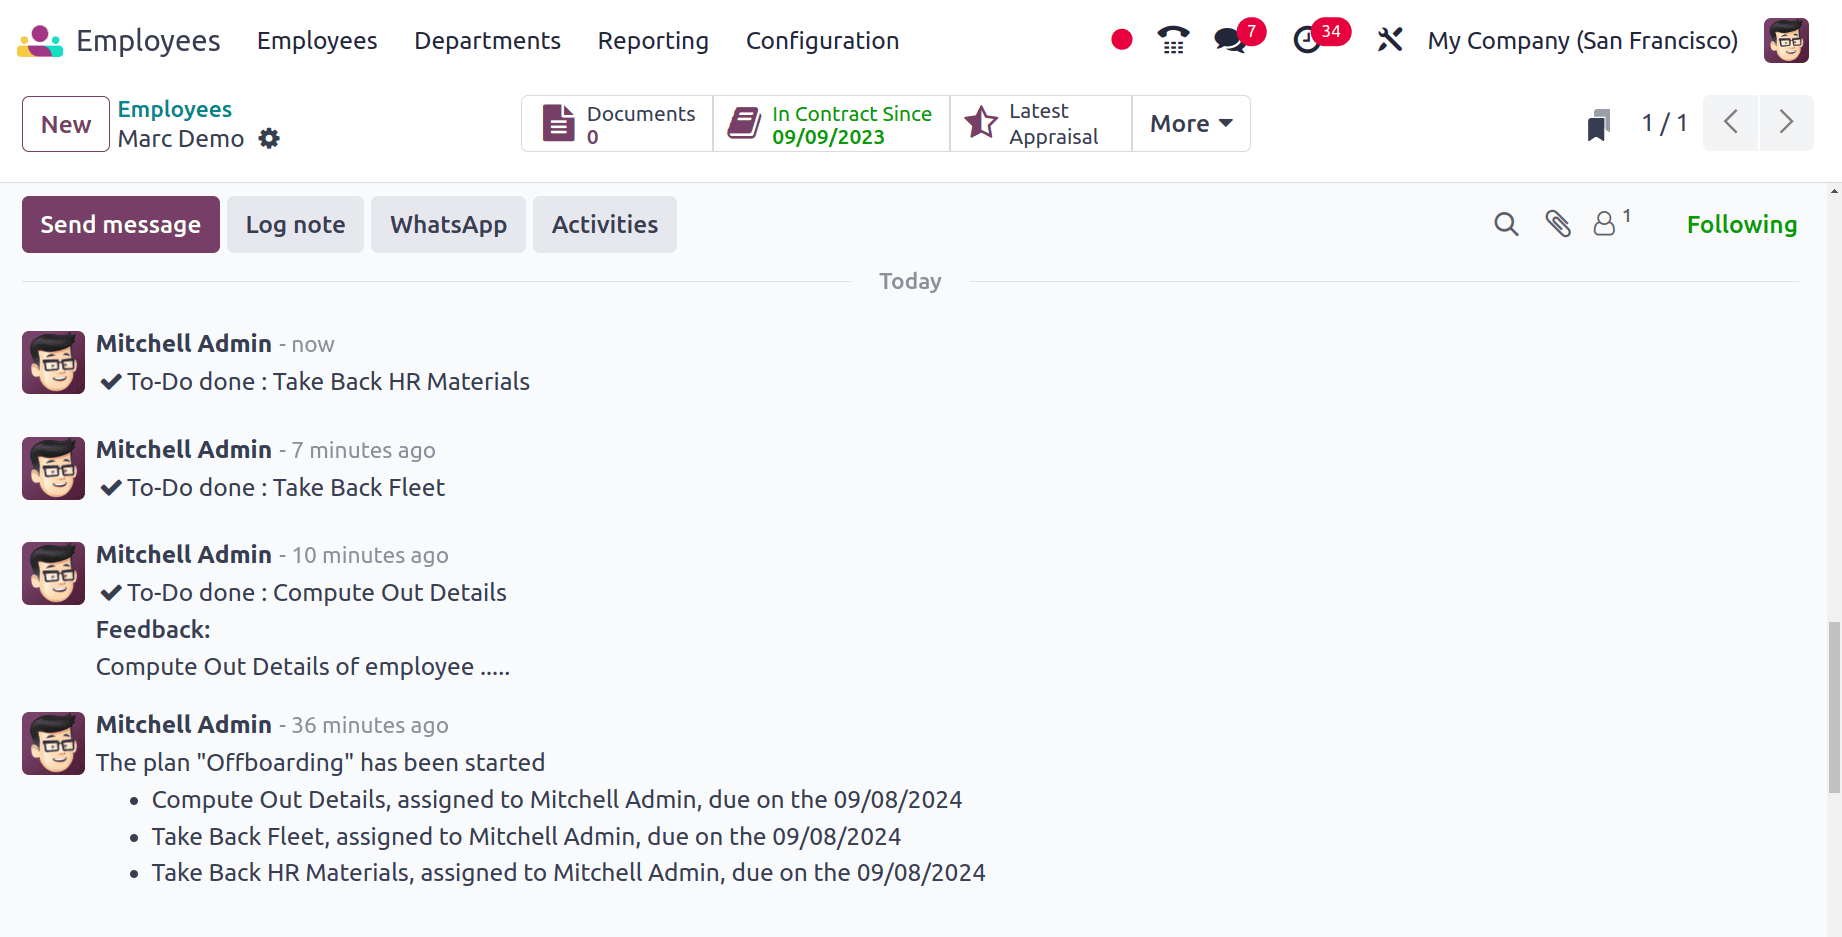
So, the onboarding plan is now completed, as shown in the screenshot below.
* Archiving the Employee
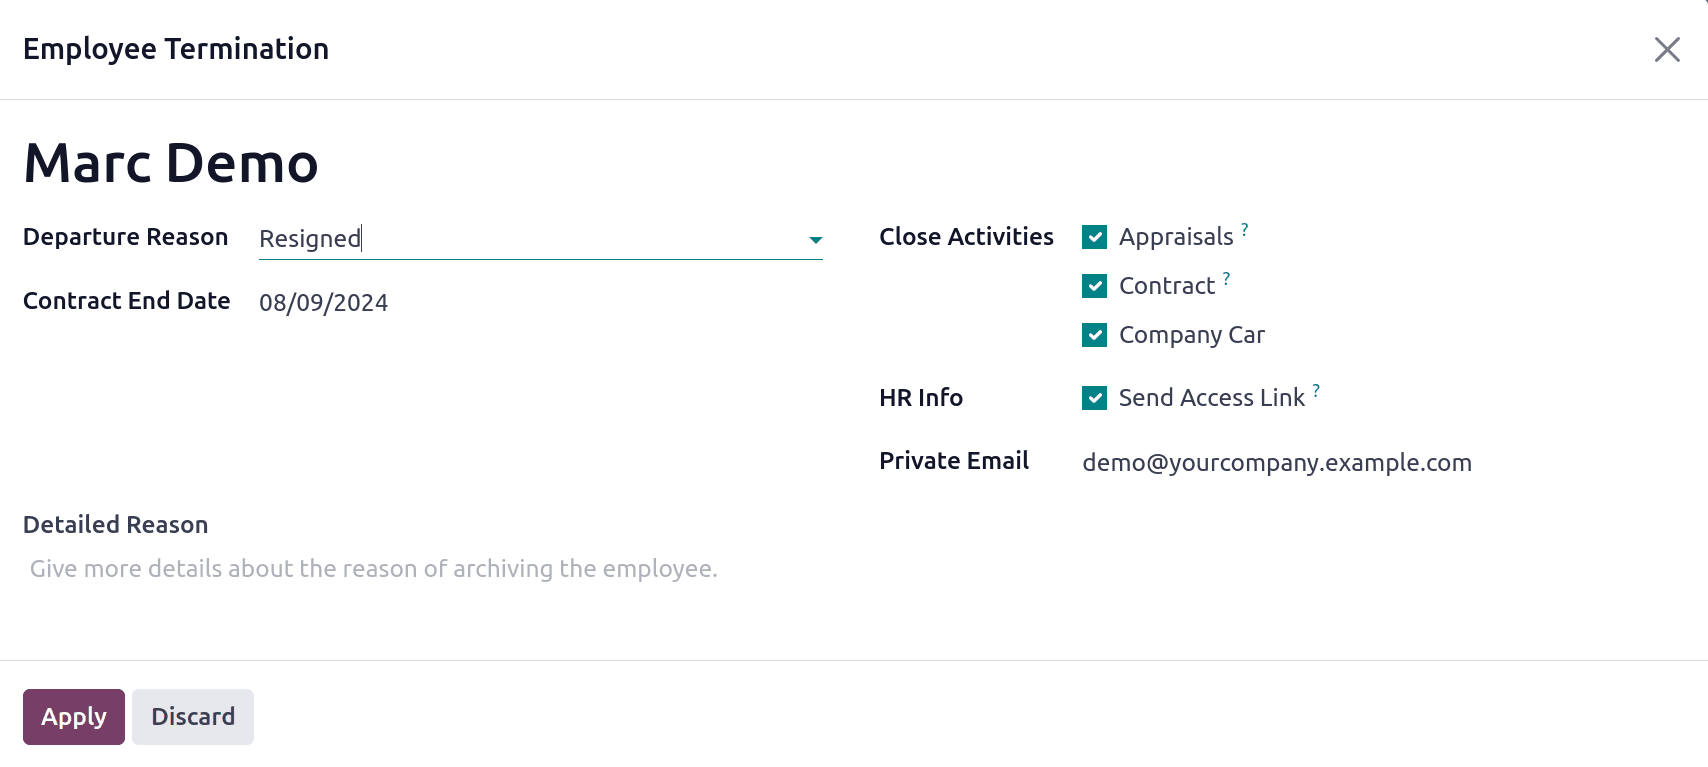
The employee has just resigned from the company, thus the next step is to archive him. As a result, as of right now, he is not employed by the company. Simply click the gear icon that is next to the employee's name in the upper left corner. Click the Archive button after that.

Next, the Employee Termination window appears. Next, indicate the reason for leaving, such as being fired, retired, or resigned. The Contract End date follows. The activities that are closed are displayed on the right. The manager could potentially provide a more thorough explanation if they so choose. Finally, press the Apply button.
The employee is now archived from the list. Which means a ribbon named Archive will appear on the employee form. And also, the smart tab named contract will change to red color.
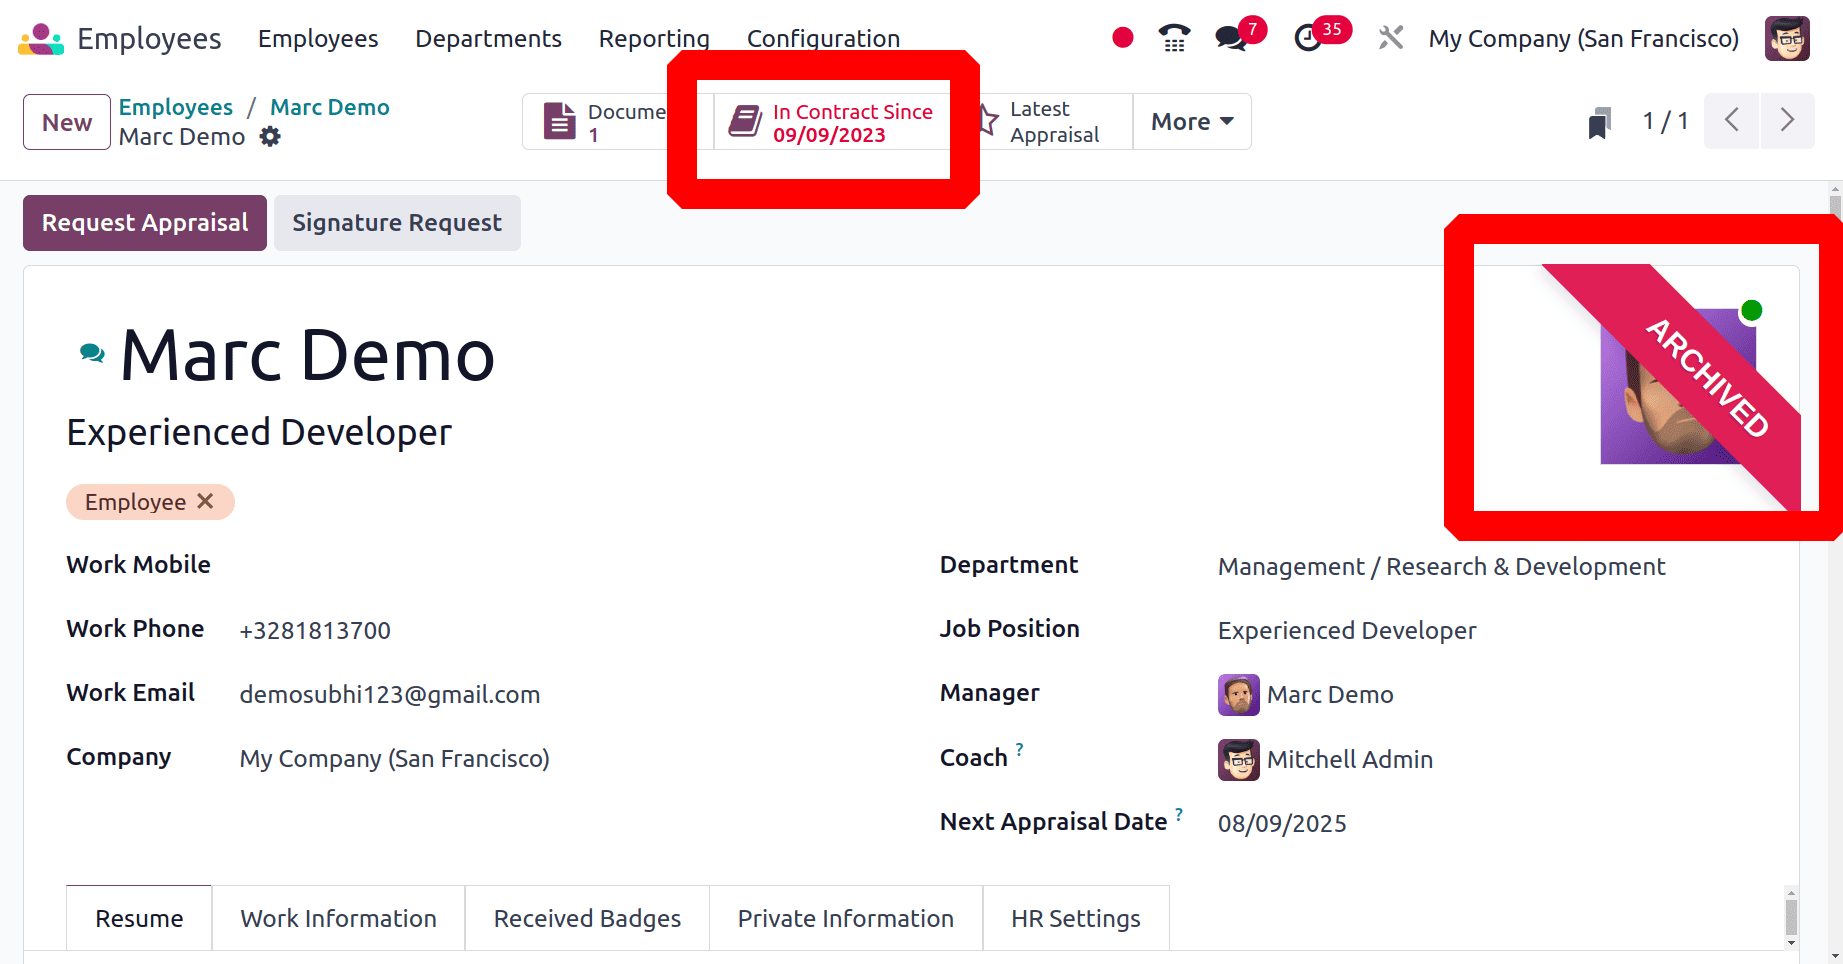
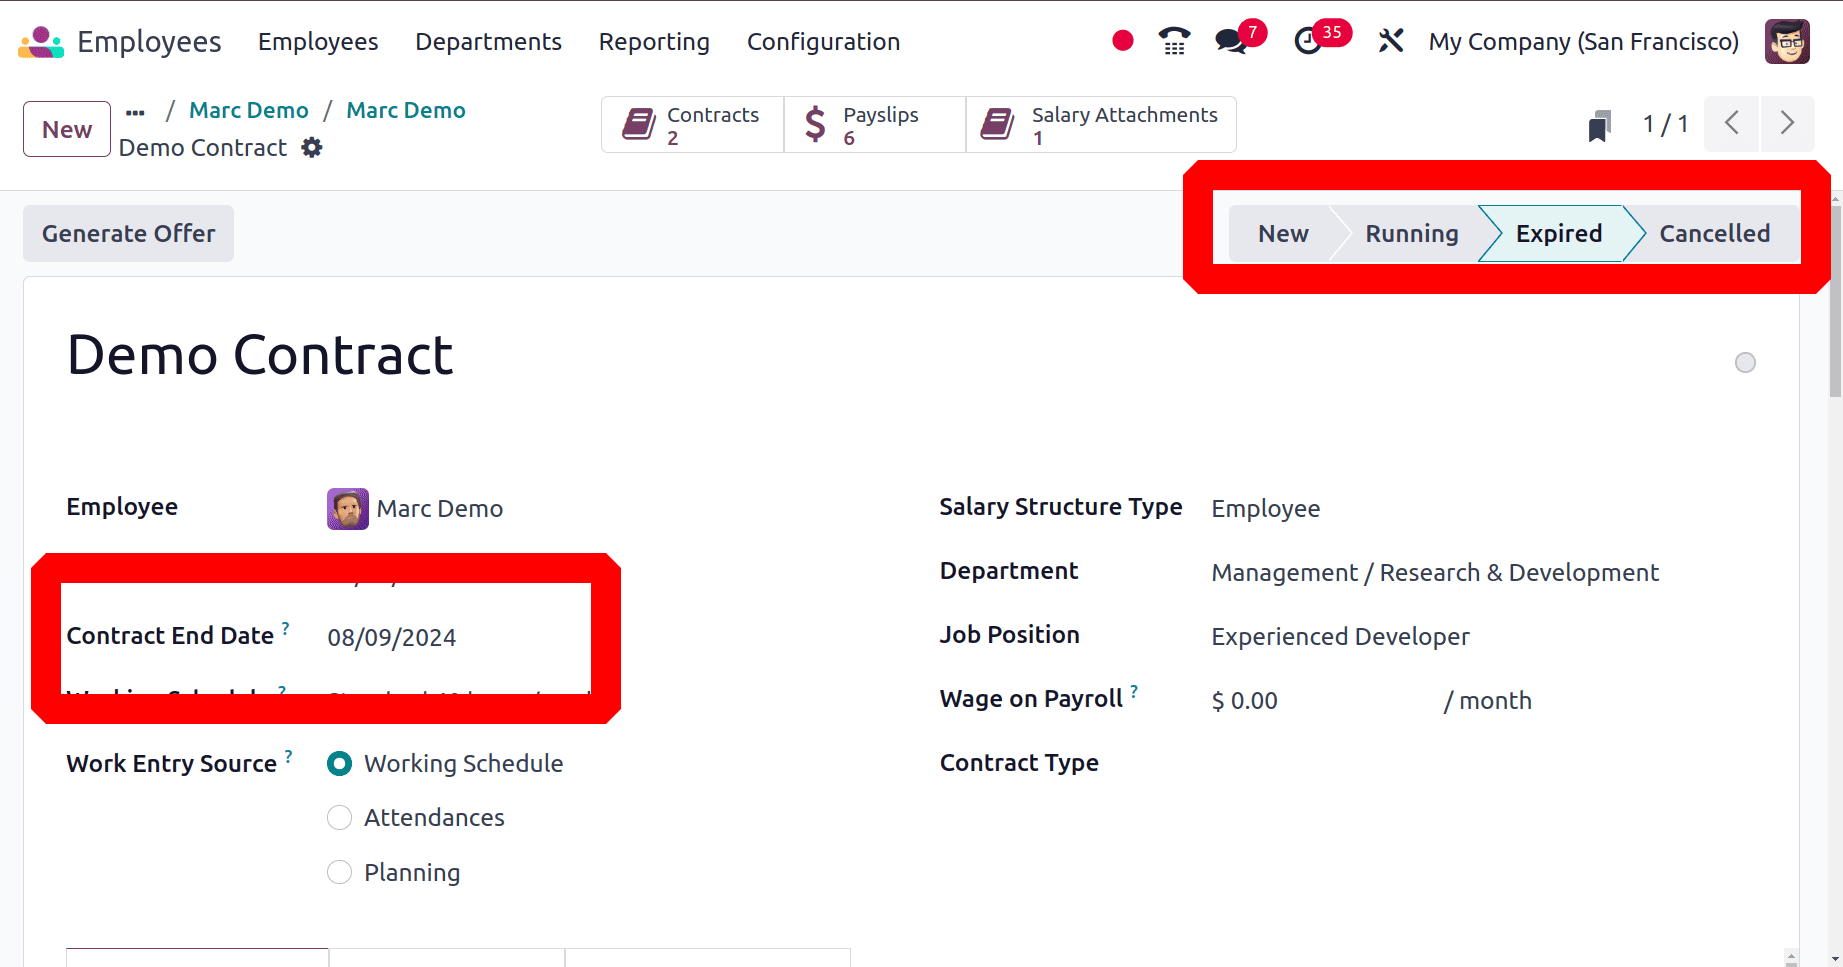
To check and open the contract, click on it. In this case, the contract has now reached its expiration stage and the contract end date has been automatically changed to the present day.
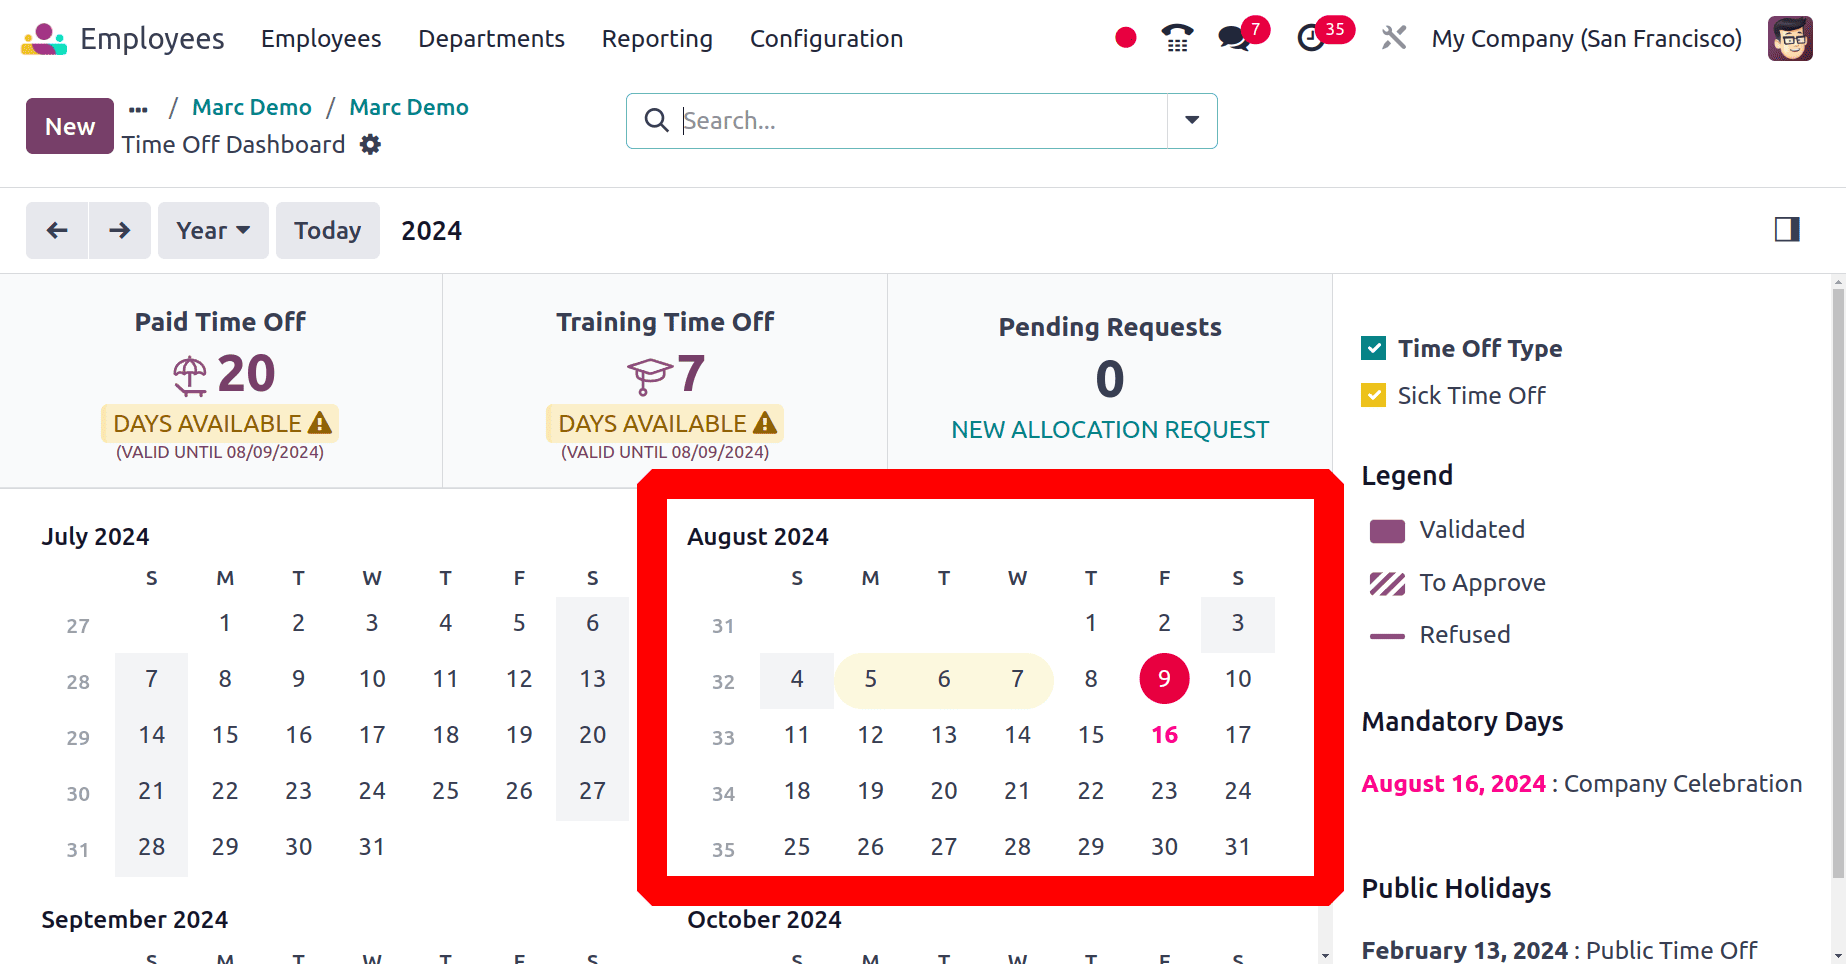
Then let's check what happens to the approved time off. As shown in the screenshot below, the time off scheduled for future days automatically disappears from the dashboard.
Employee Termination in Belgium Localization
Depending on the country, there could be minor variations in the procedure. Similarly, when compared to localizations in other nations, Belgium has a few more elements. Let's take a closer look.
In Belgium, dismissing an employee must have a valid reason; there are differences between dismissals due to misconduct and those for financial gain. Depending on their length of service, employees may also be eligible for severance pay. Employers are required to give notice or compensate instead of notice.
So let's open the Employee module and select a Belgian company. Here from the list, choose an employee. Here the selected employee is Laurie Poiret. Then click to open.
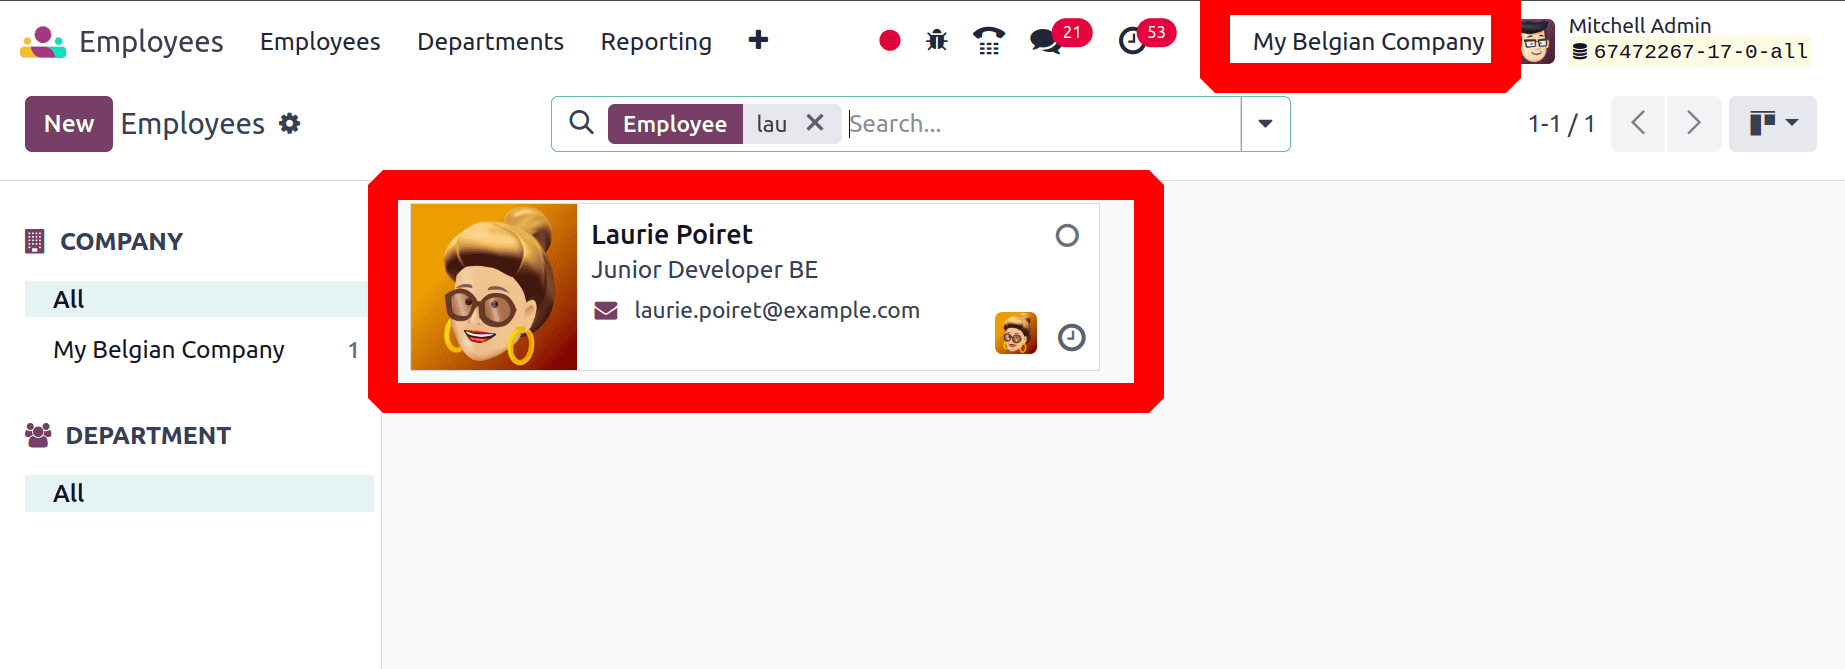
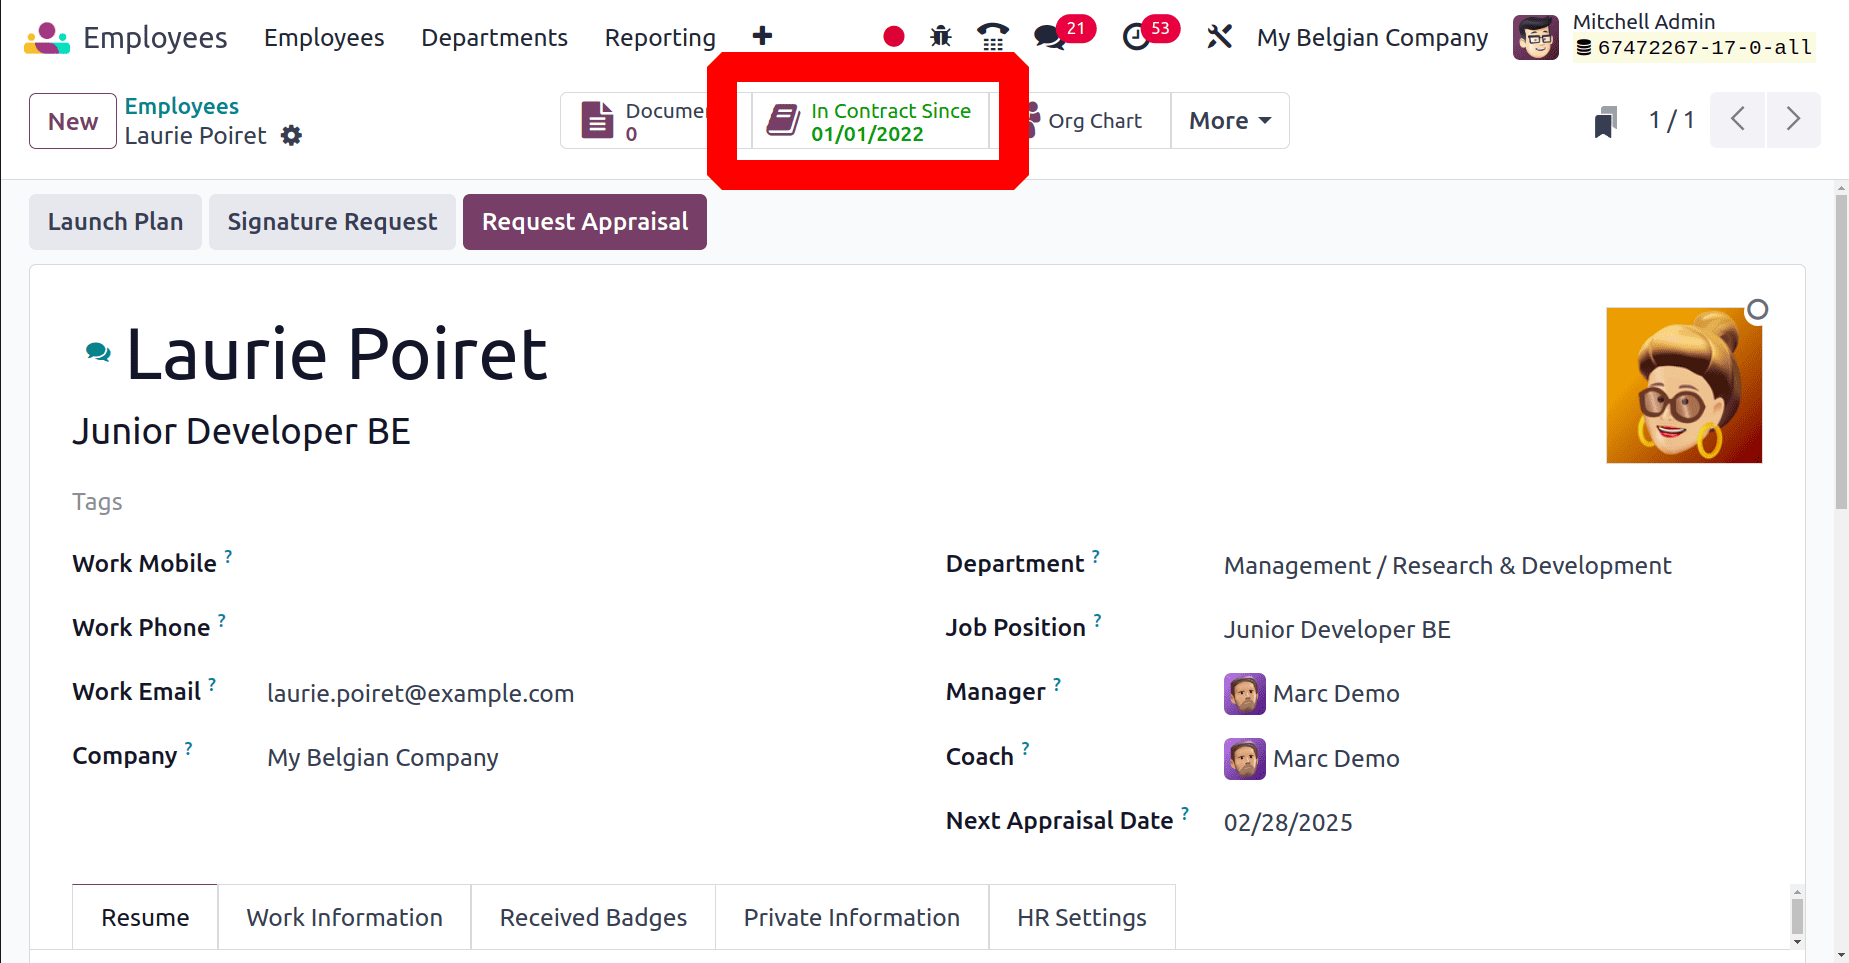
So the details about the employee are shown in the employee profile. Let's check the employee contract first. Here the contract is shown as a smart tab, open it.
So here the employees contract start date, end date, working schedule and other details are shown. Salary Structure Type is also added in contract, to view the salary rules open through the internal link.
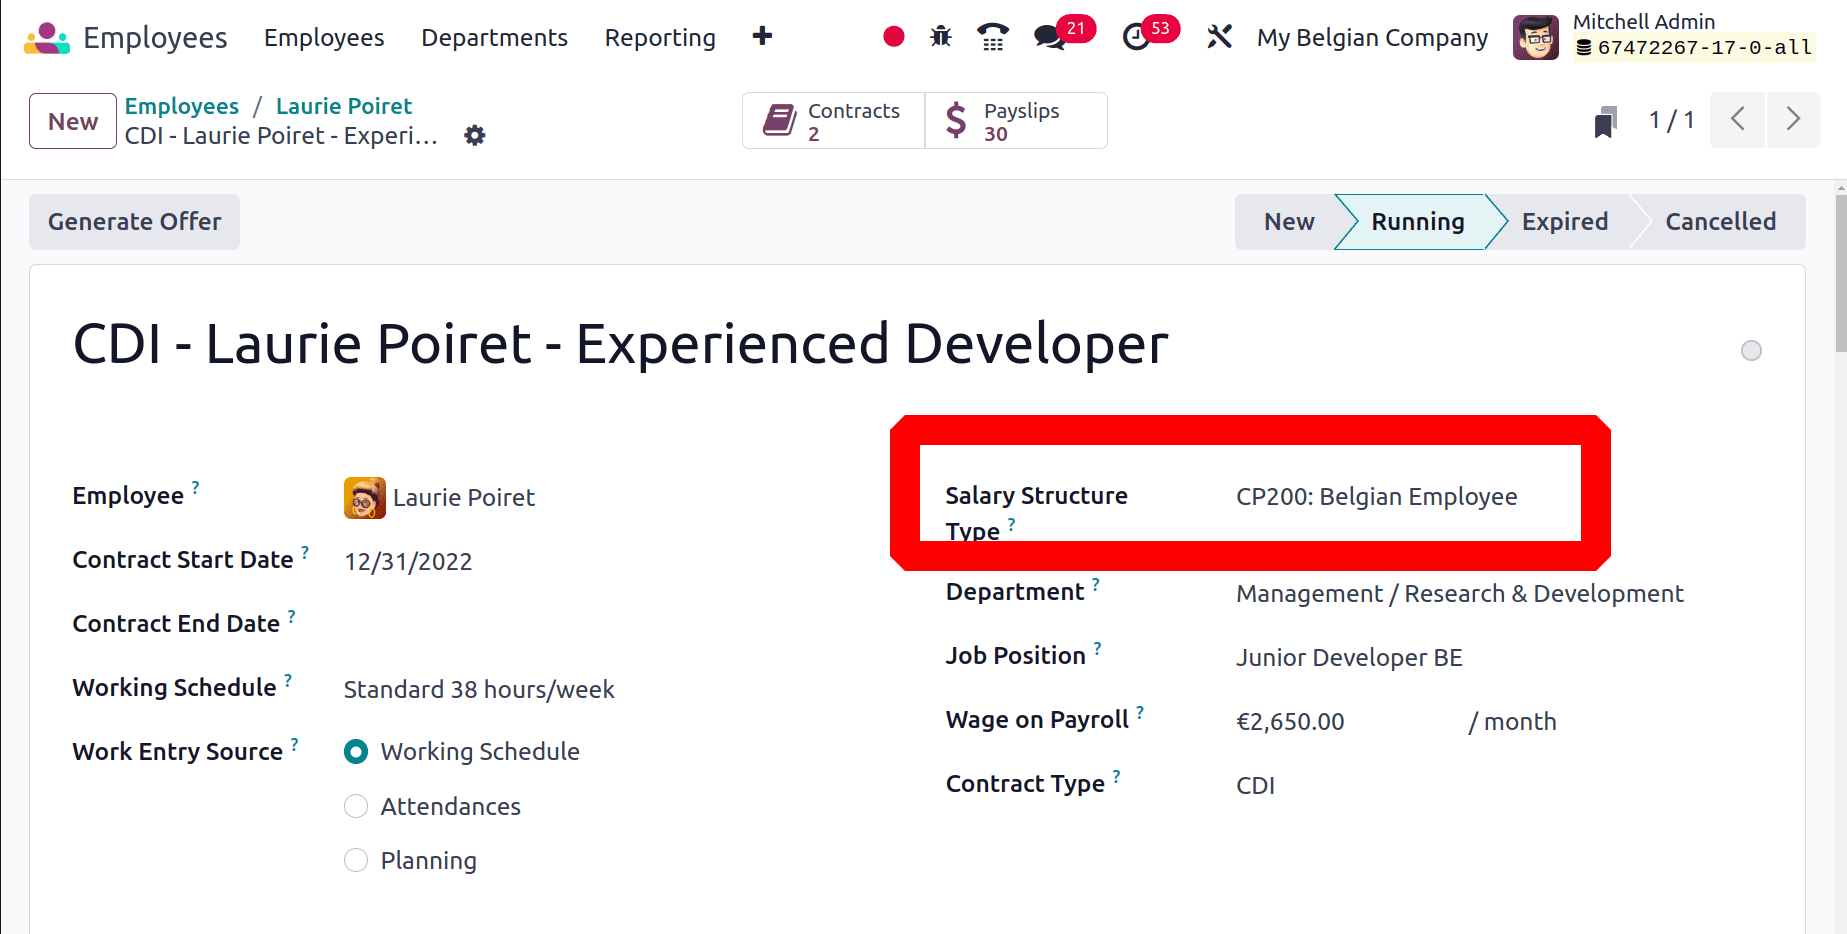
Salary rules for Employee Termination
The salary components of an employee, such as basic pay, allowances, deductions, and other benefits, are defined by their Salary Structure in Odoo 17 Payroll and are utilized to determine the final payroll.
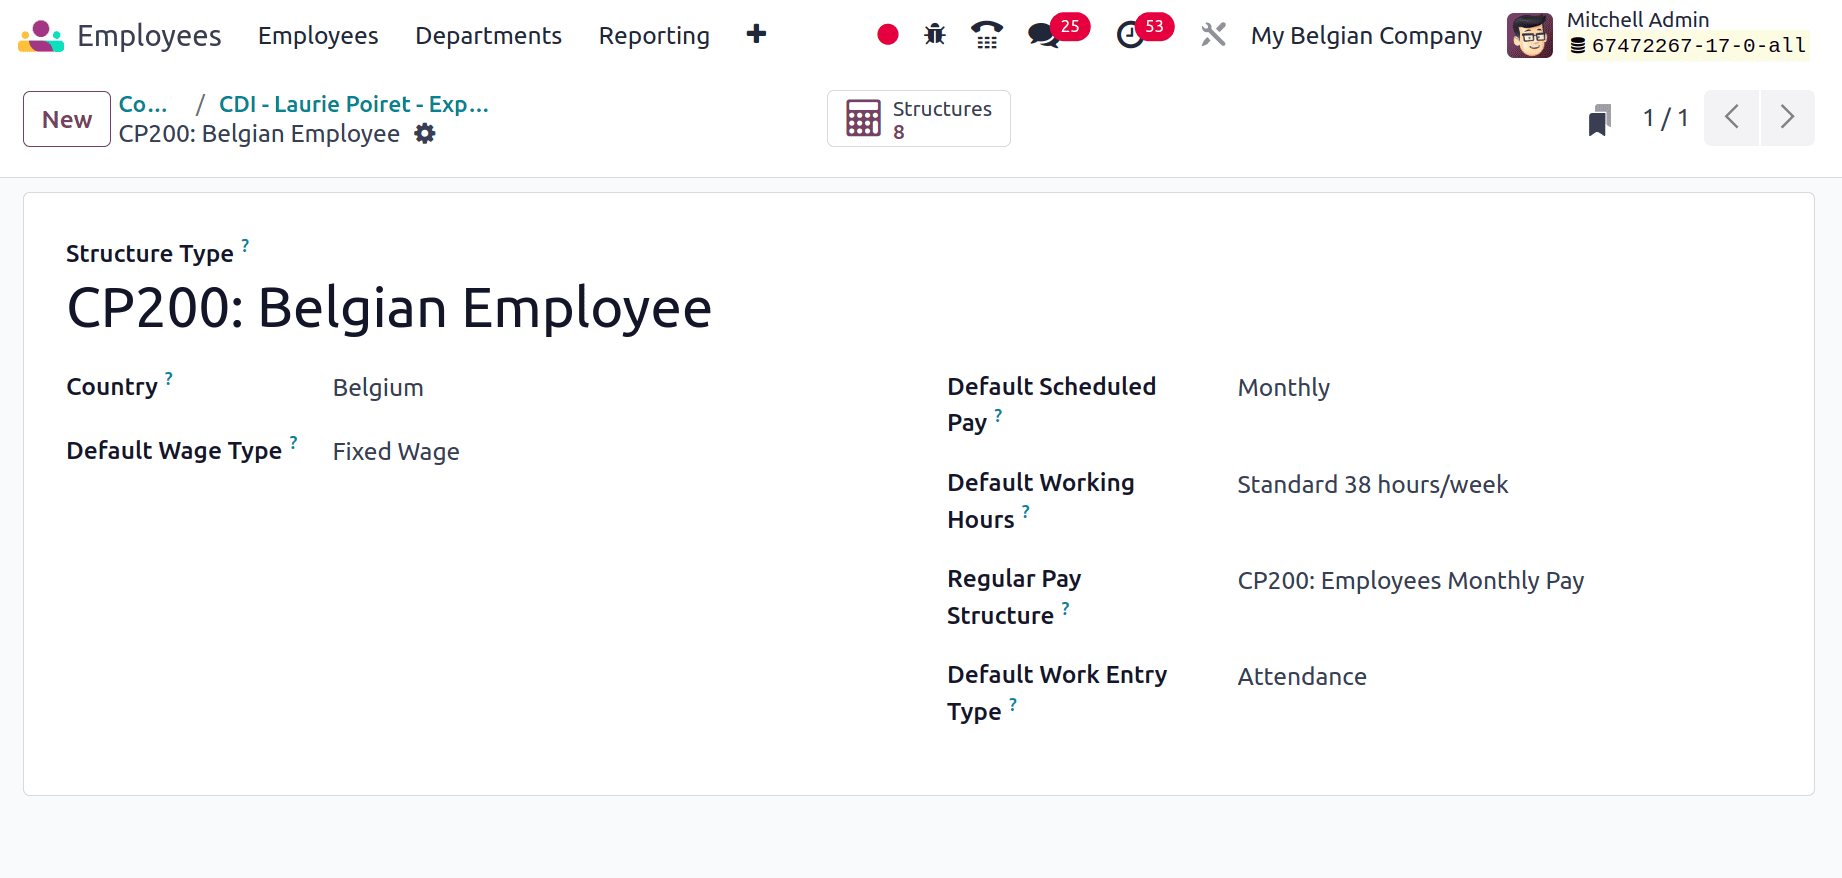
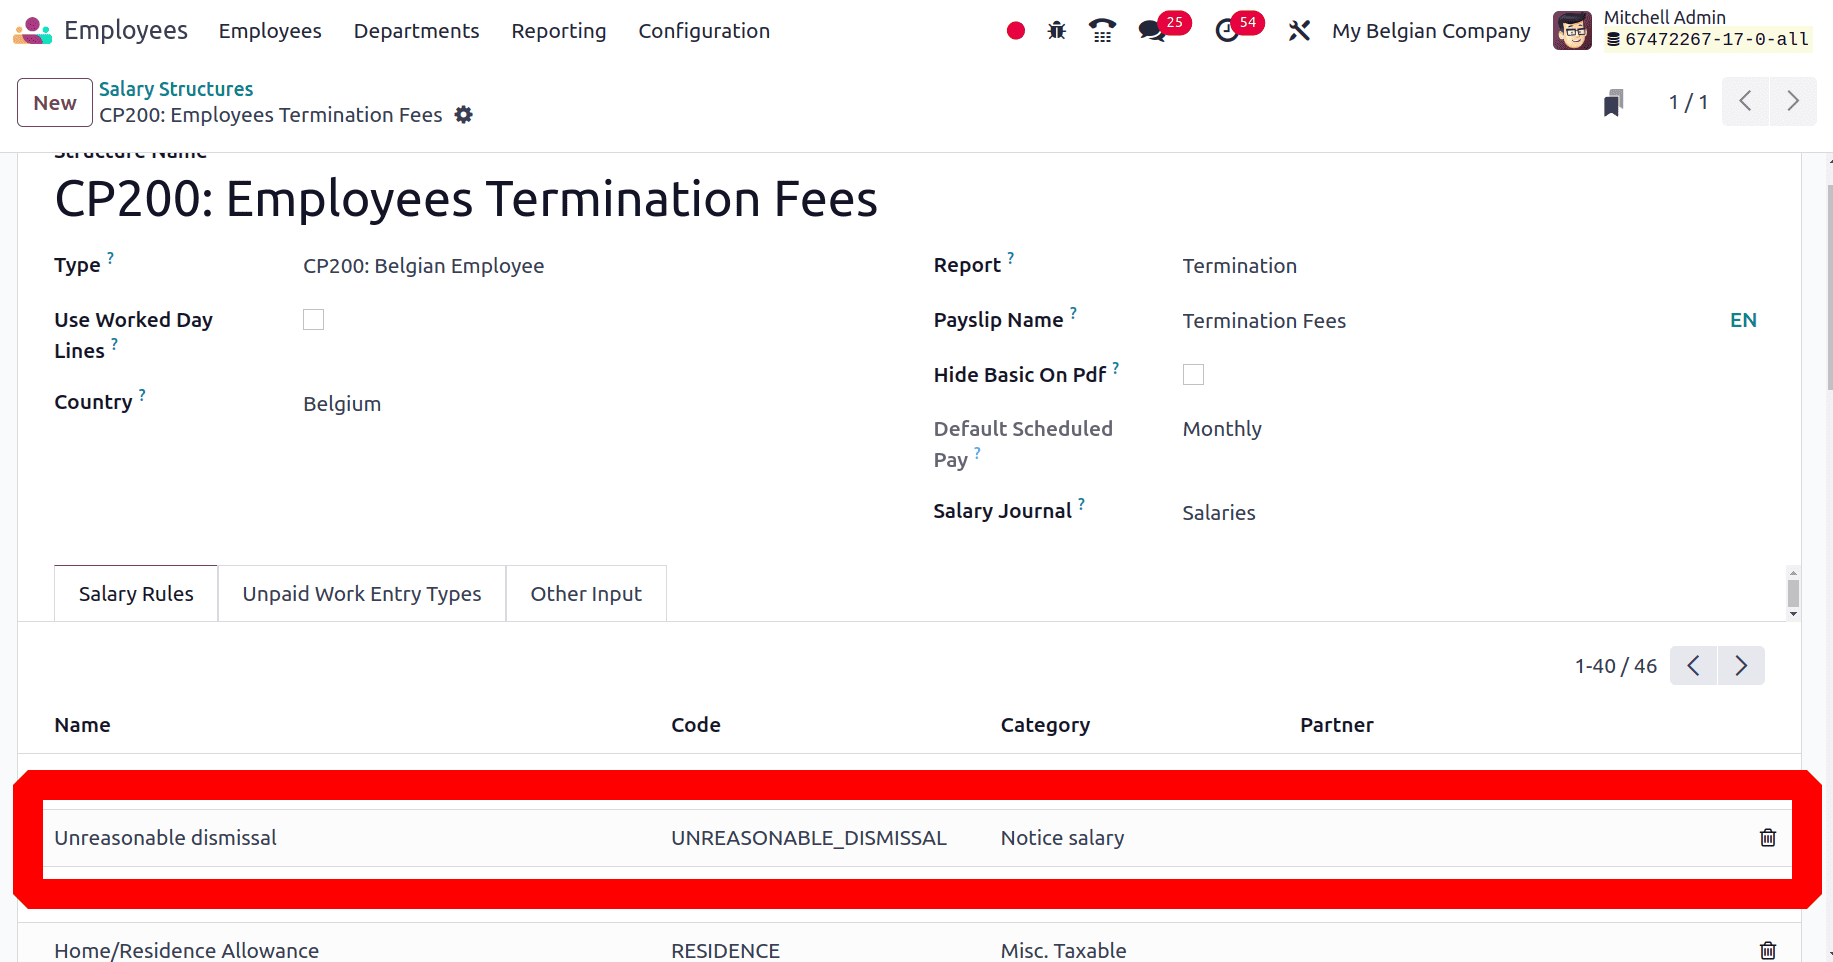
And the salary structure type contains 8 Structures. Open the structure to view the salary rules. There is a rule named CP200: Employees Termination Fees, it's used to calculate the employee salary after termination.
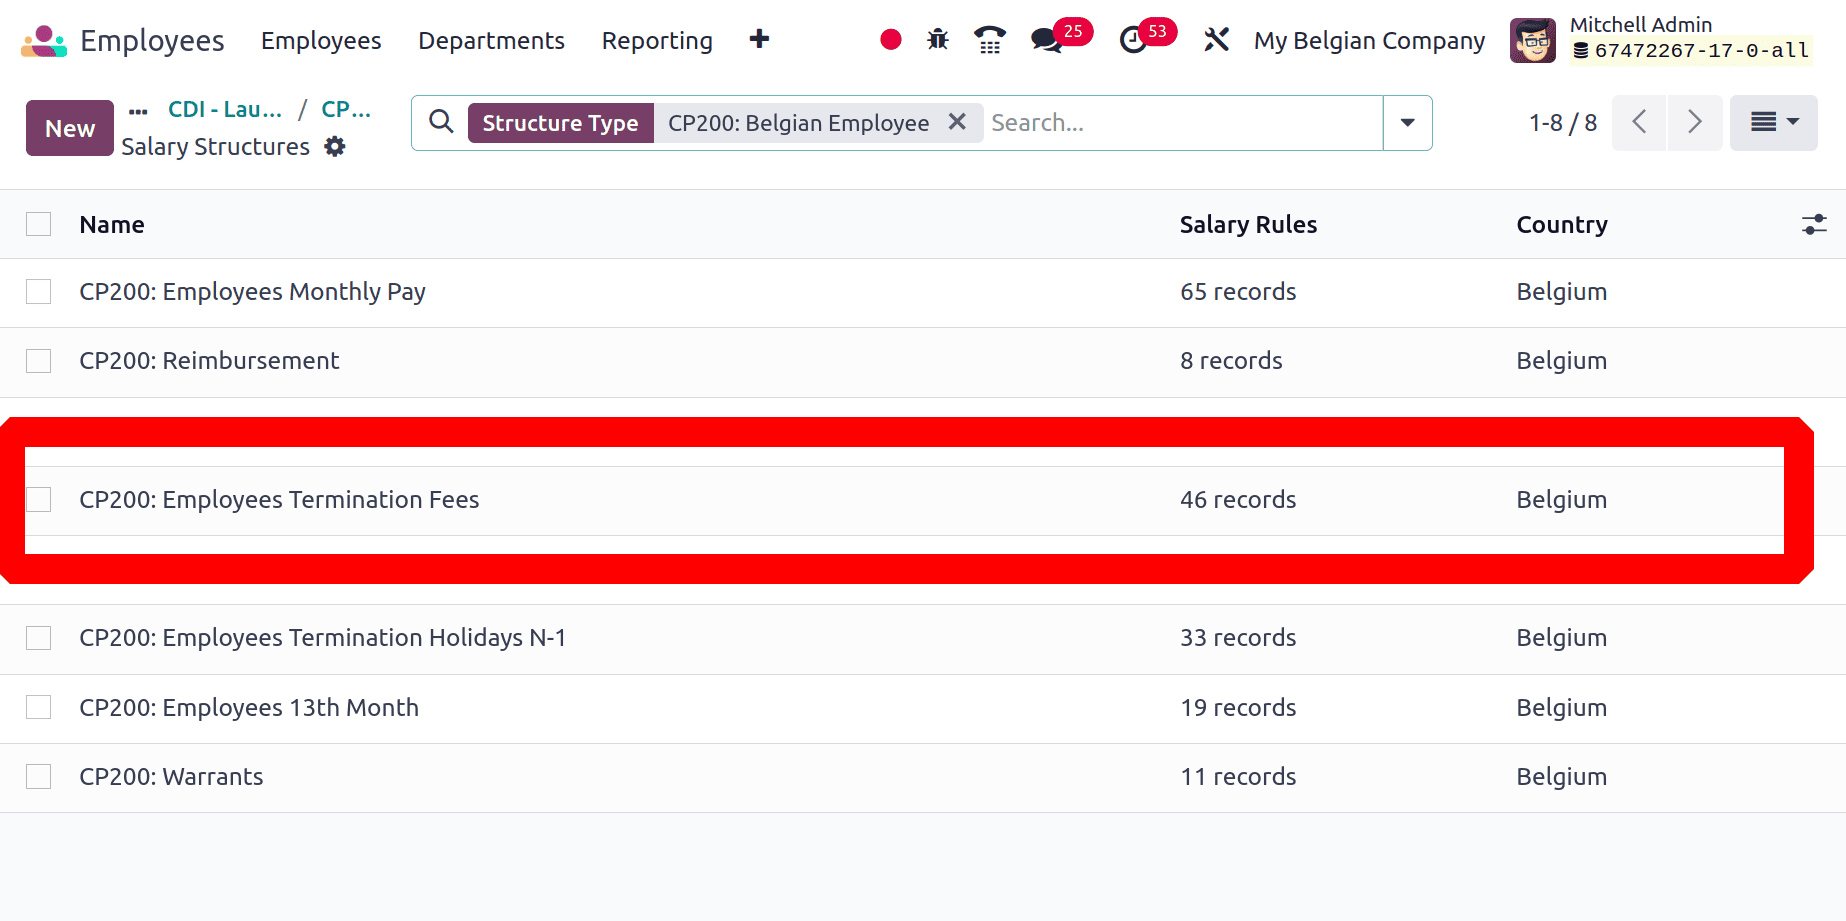
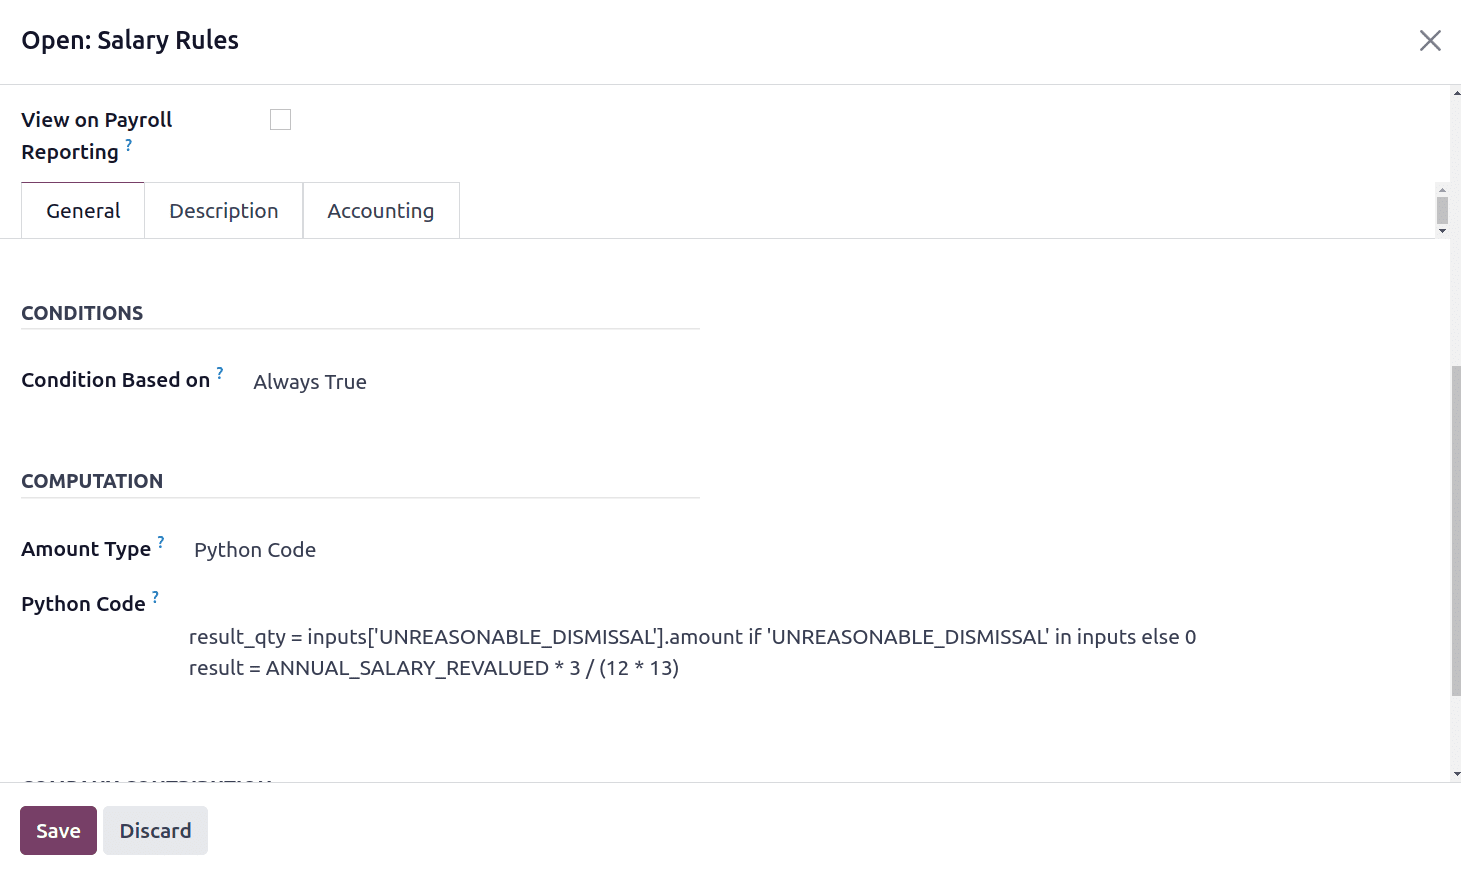
It contains all the rules to calculate the salary. There is a rule named “Unreasonable dismissal”, which is used while an employee is terminated from the company. Open the rule to view the condition of the rule.
The General tab contains the rule condition and the computation, which is based on a Python Code.
Terminating the Employee
As said before if the employee terminated or retired the manager needed to archive the employee. So click on the Action button. In Belgium localisation there were two new options as shown below.
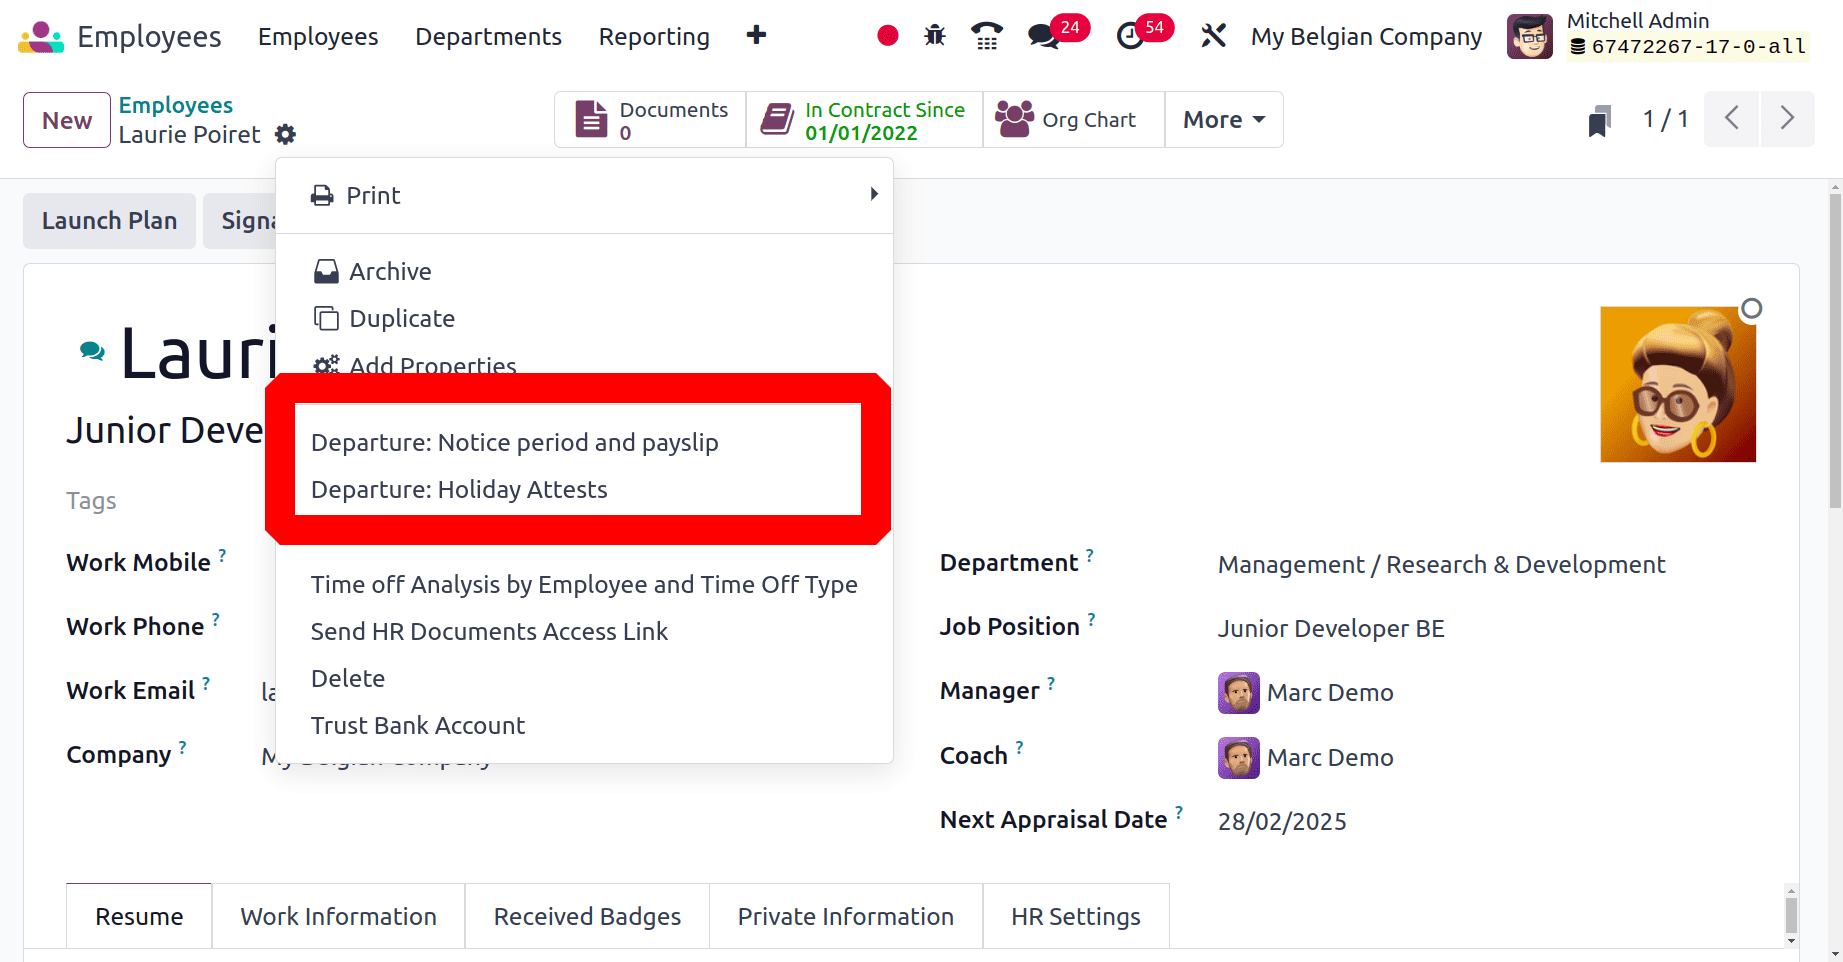
Let's check the Departure Notice period and Payslip. Then another window will open there. Specify the Departure Reason and Departure Description there. The notice period date, Notice duration are shown.
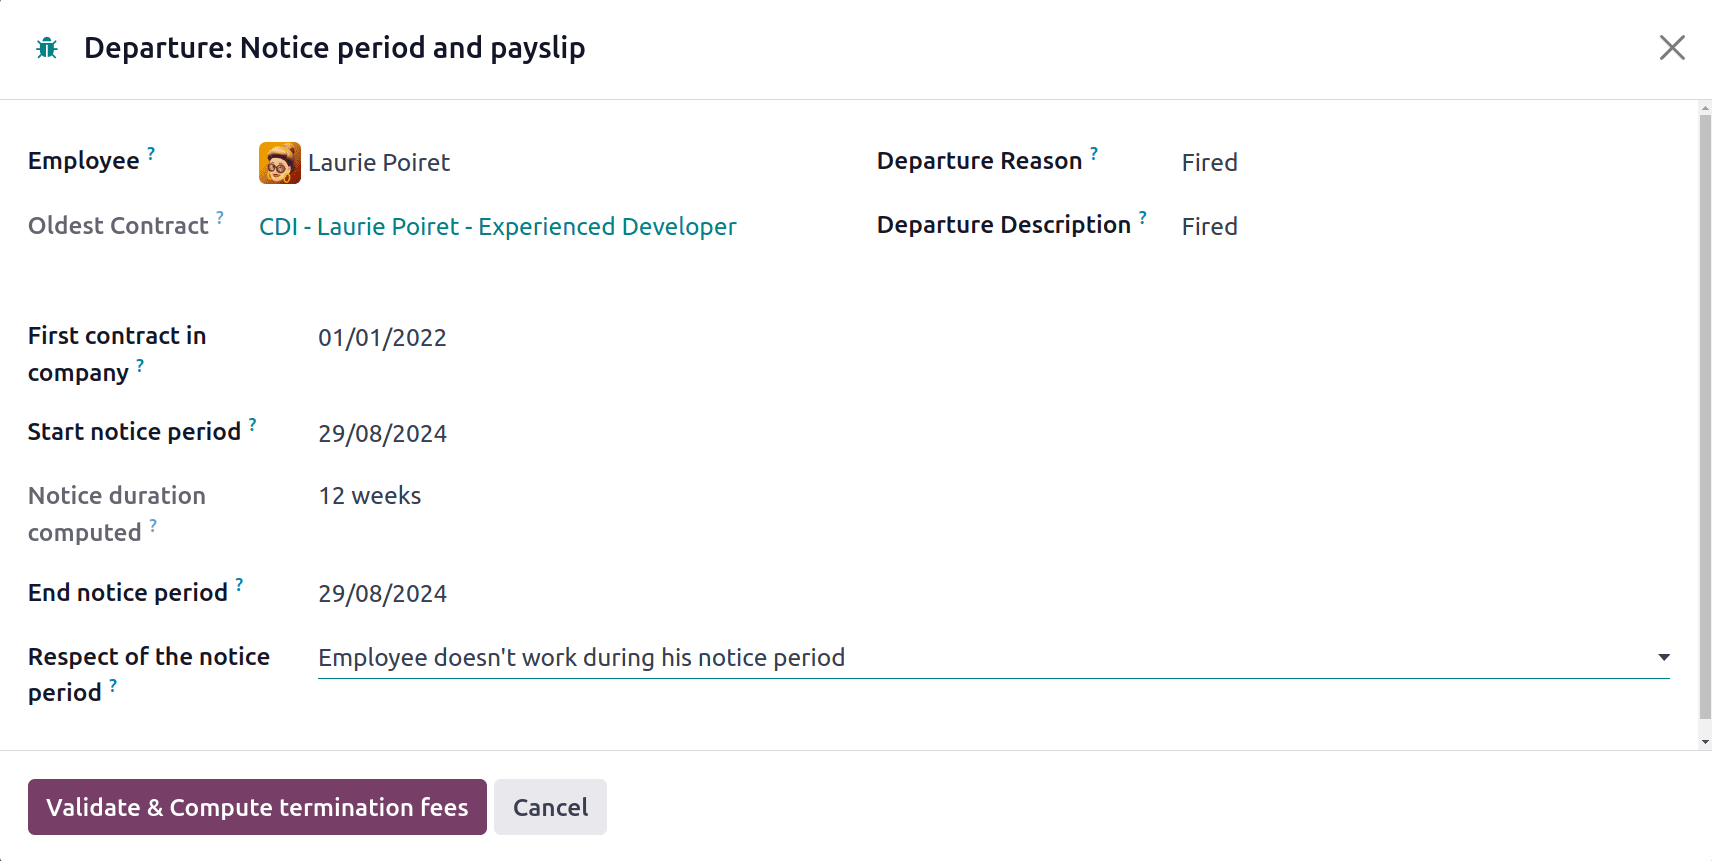
There are two options on Respect of the notice period section, either choose Employee doesn't work during his notice period or Employee during his notice period. Here choosed the Employee doesn't work during his notice period. Then click on the Validate & Commute termination fees button. Then the employee payslip will automatically popup there.
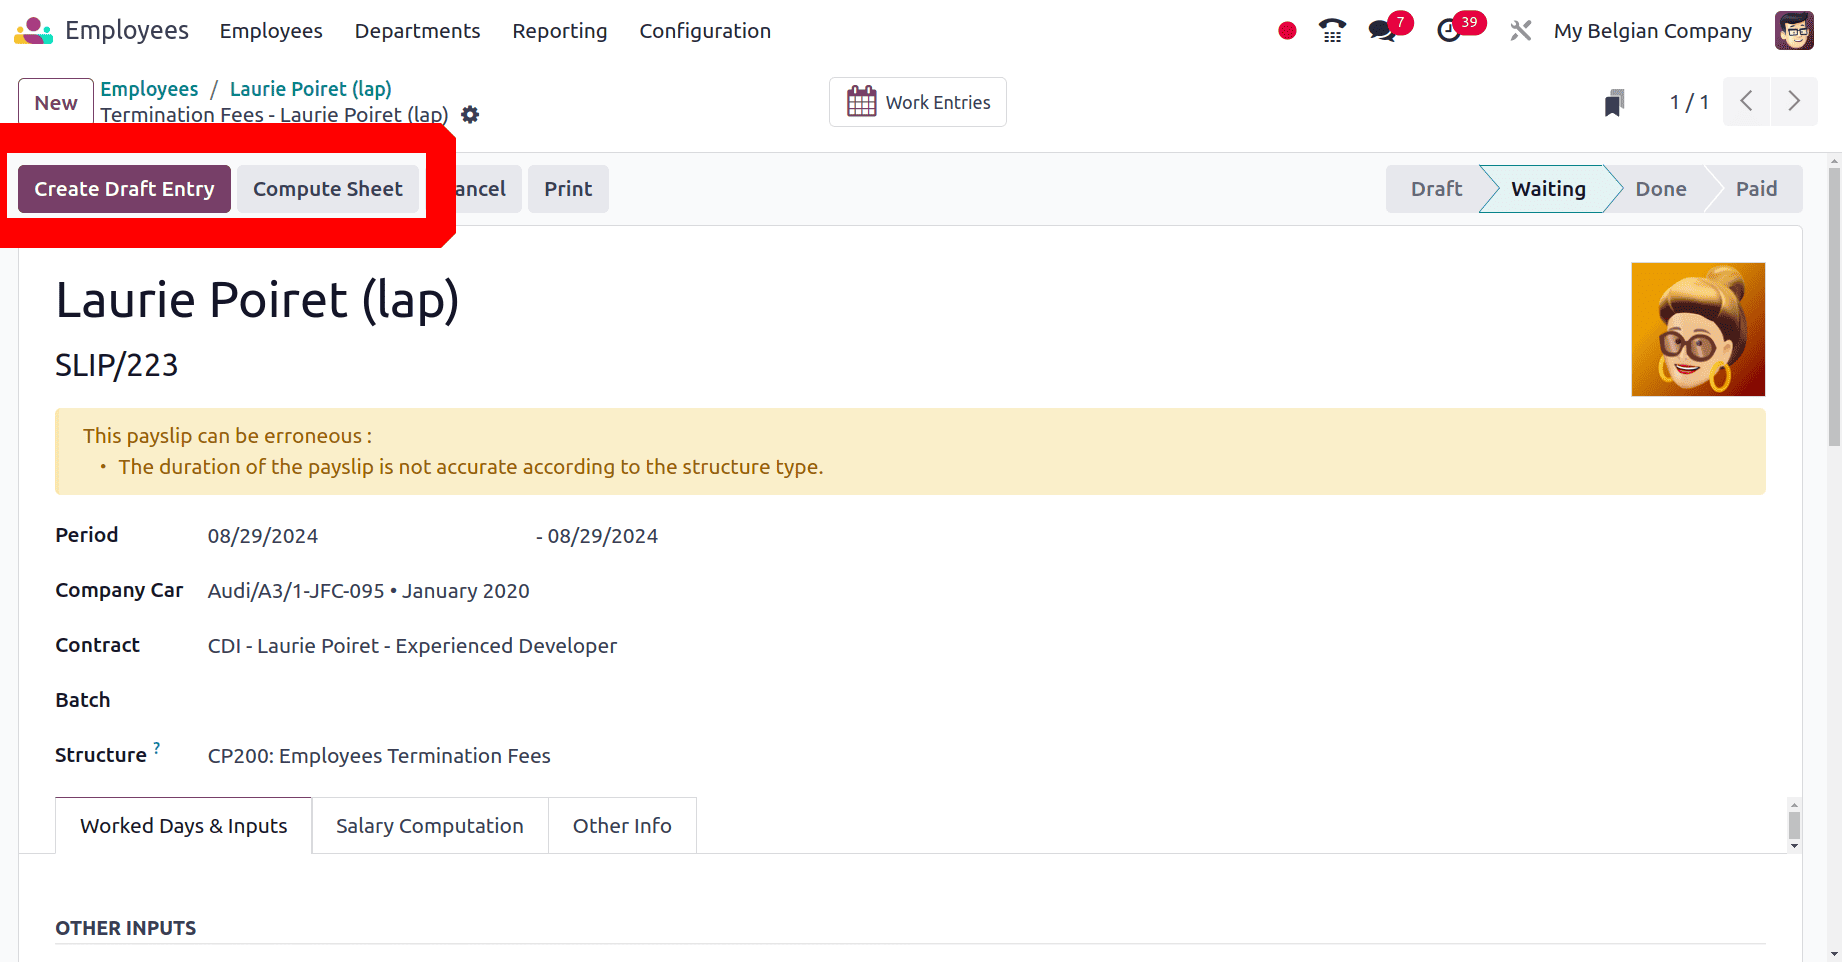
So the employee payslip contains the details like Period, Contract and all. Users can calculate the payslip by clicking on the Compute Sheet button. Then the calculated salary will be visible inside the Salary Computation tab.
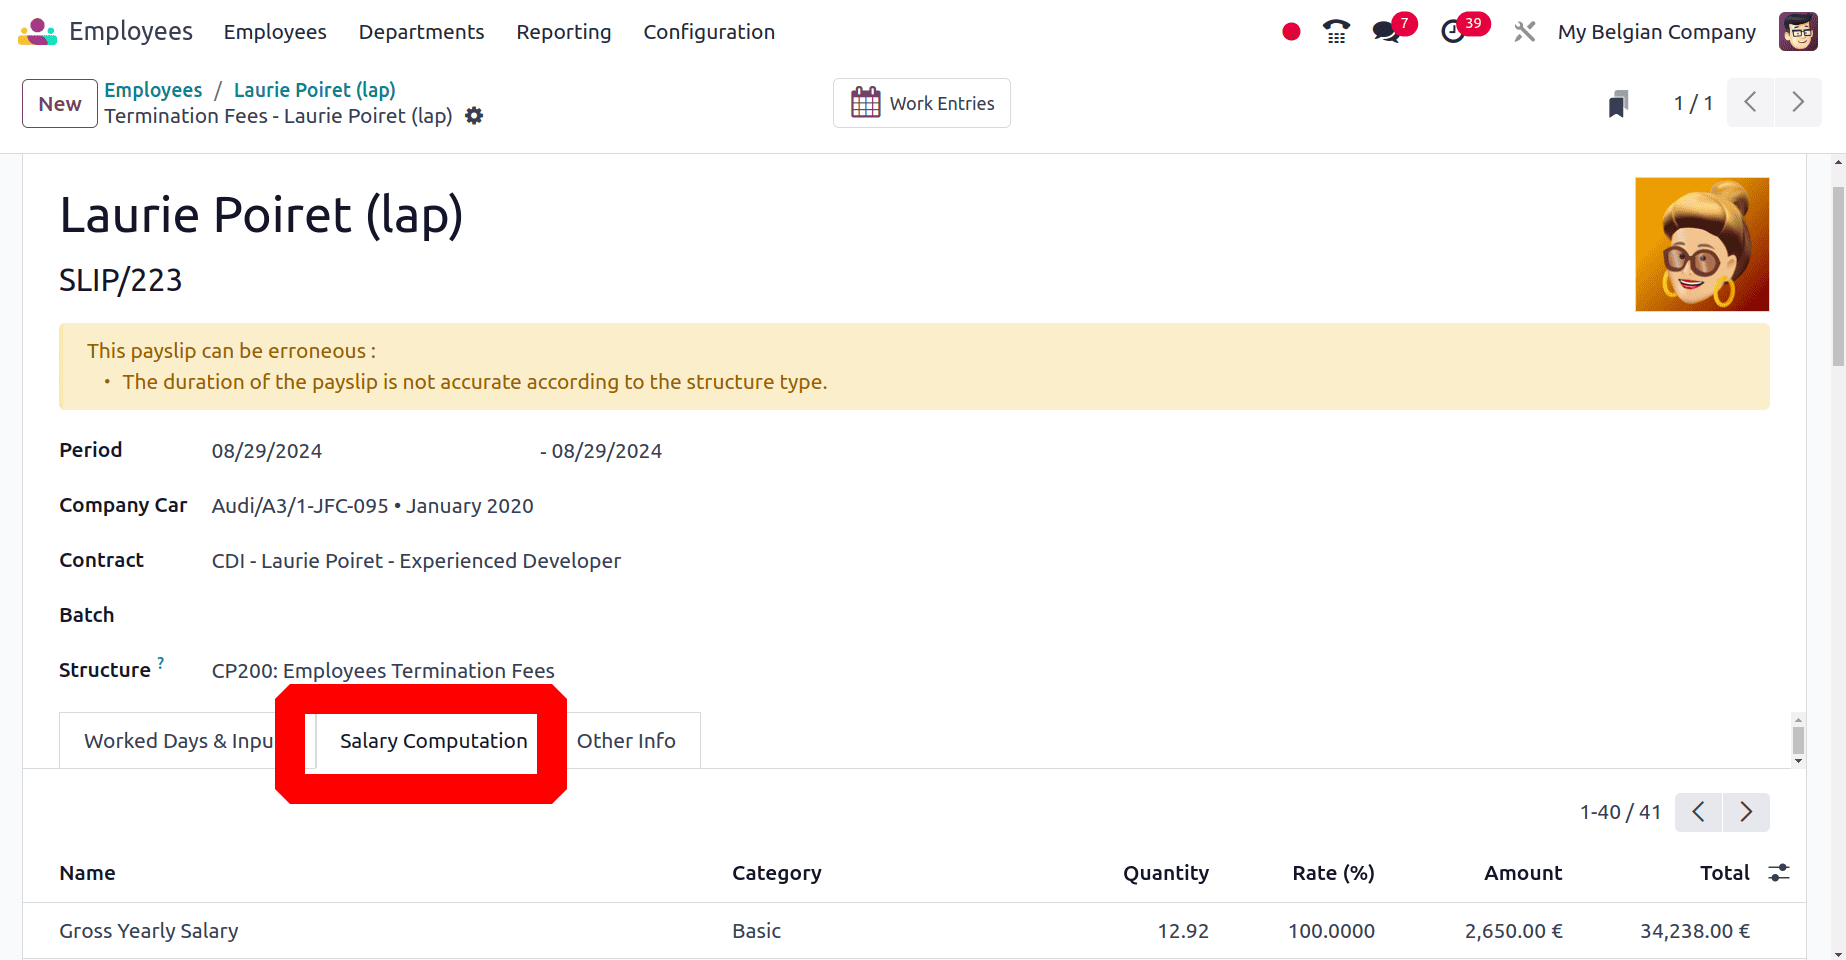
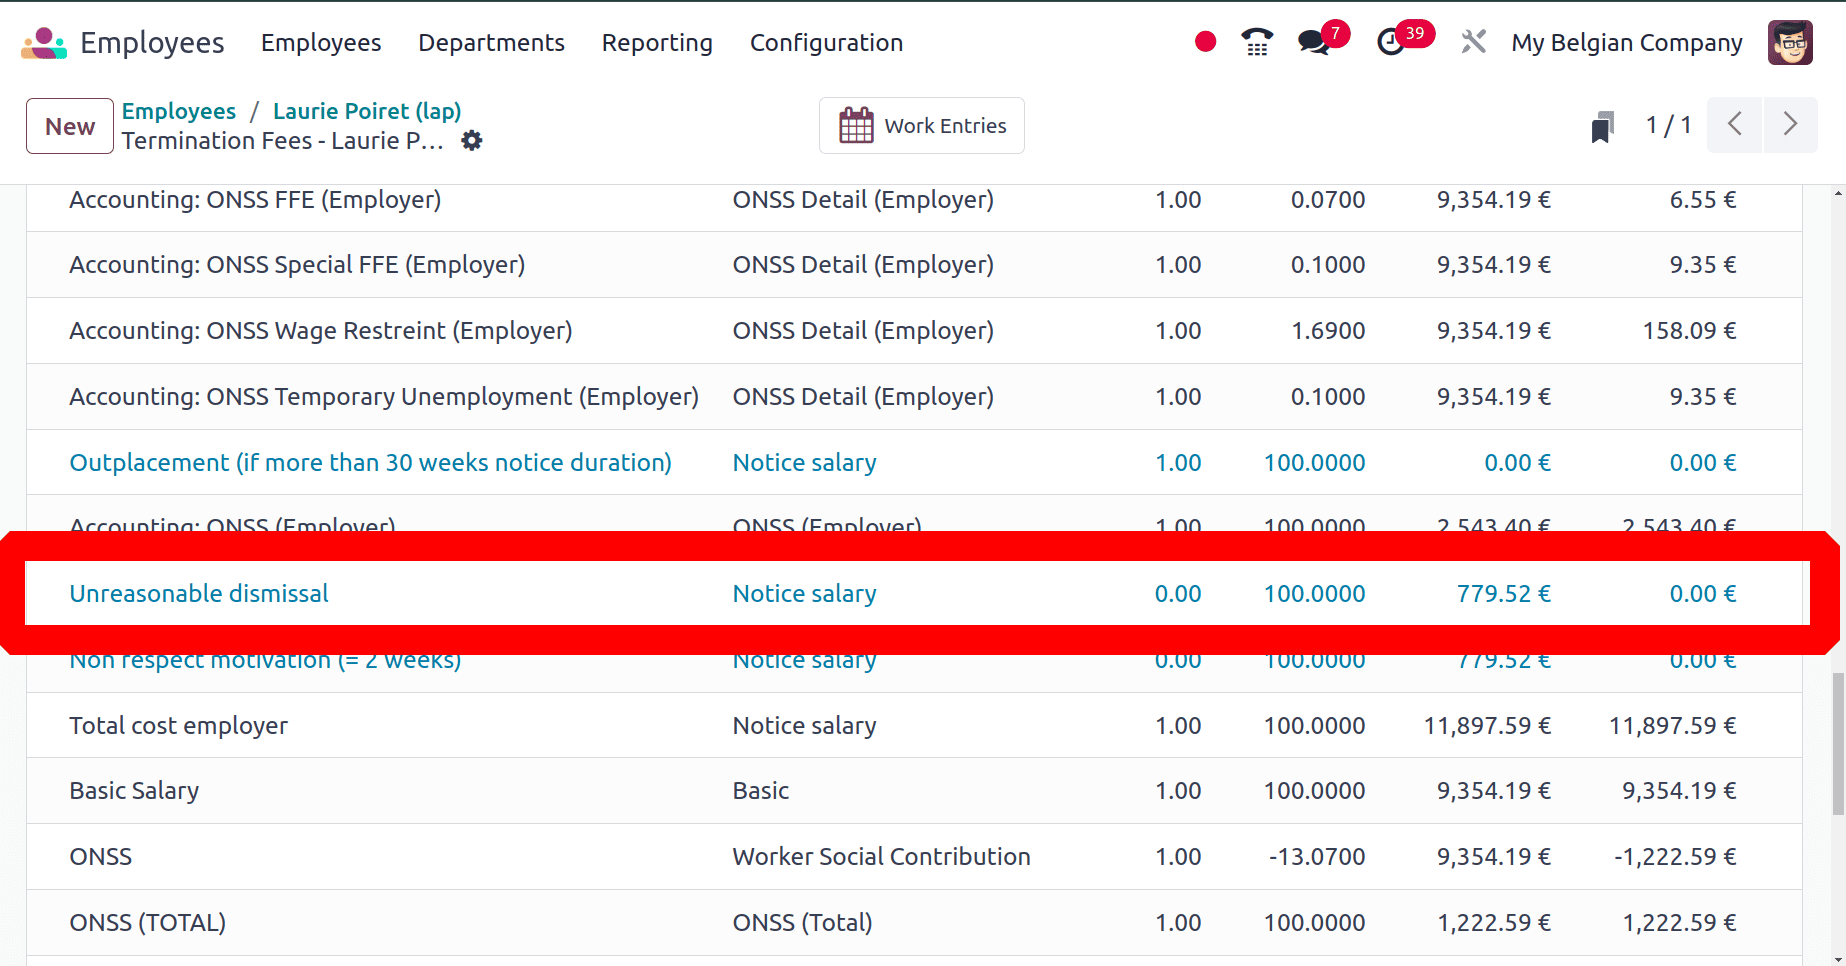
There is an additional rule named as Unreasonable dismissal, it's the rule which previously discussed.
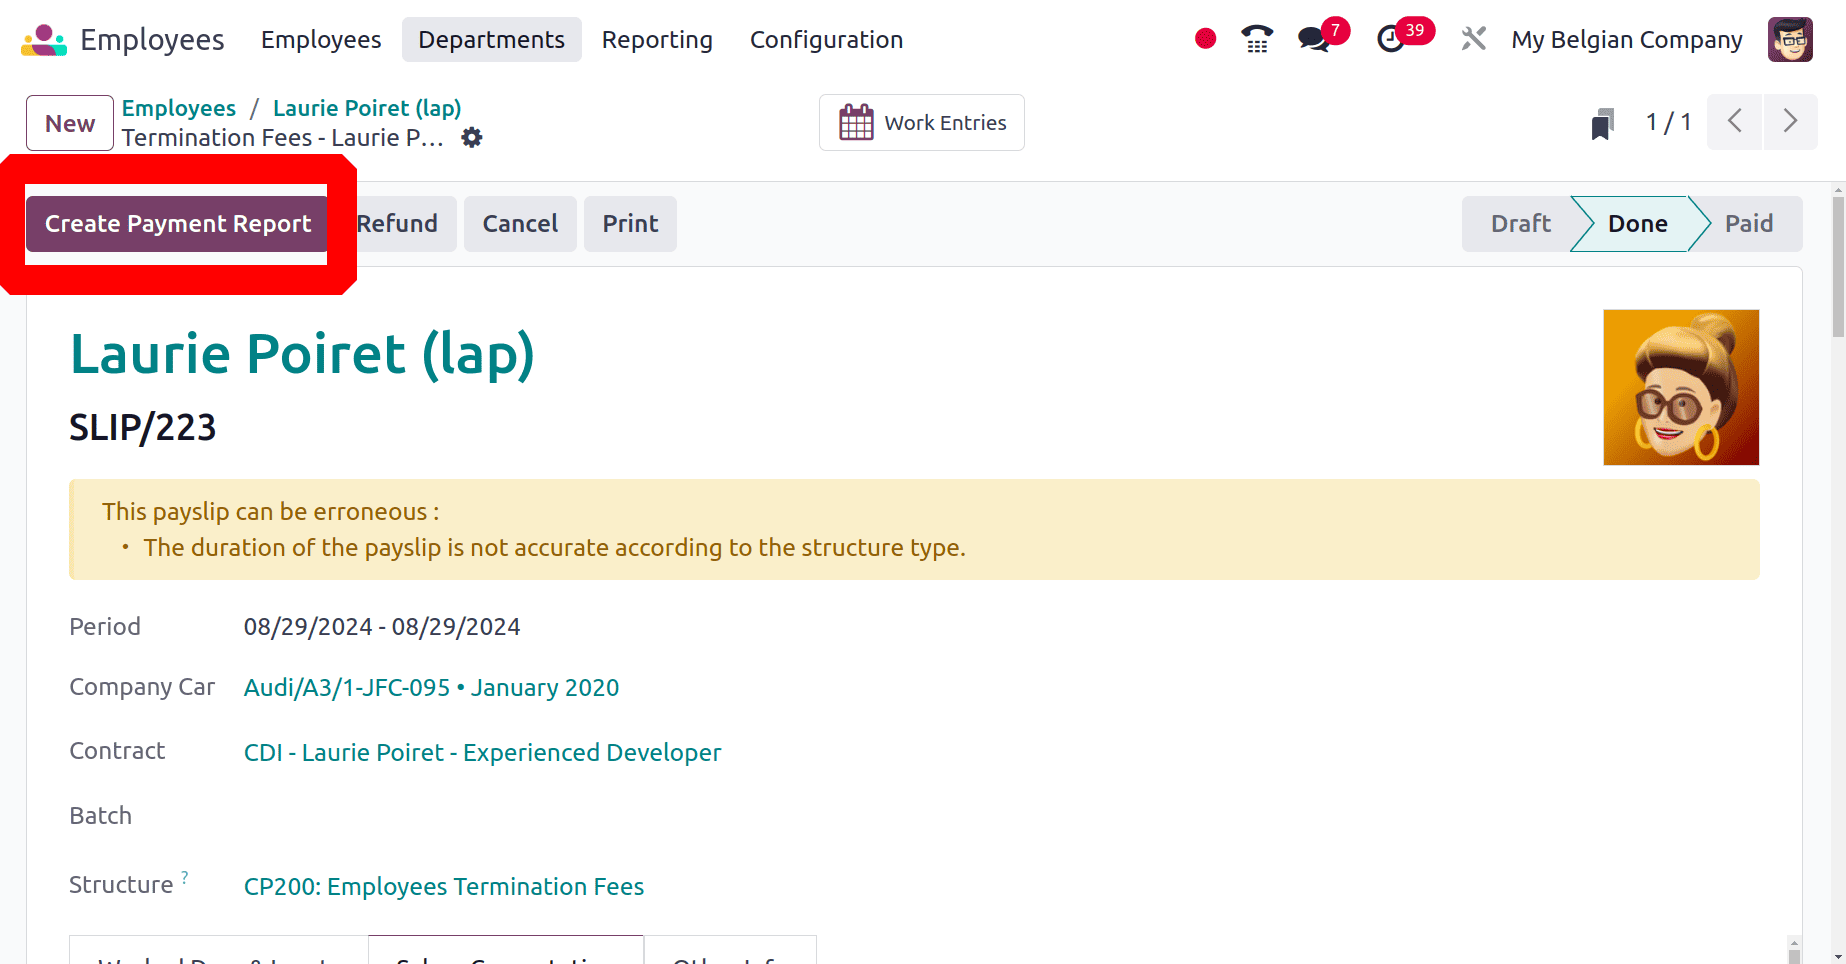
After computing the salary, users can click on the Create Payment Report button to pay the salary to the employee. Currently the payslip status is Done. After completing the payment the status becomes Paid.
As similar as other localizations, the employee contract will automatically changed its state to Expired, after completing the employee termination.
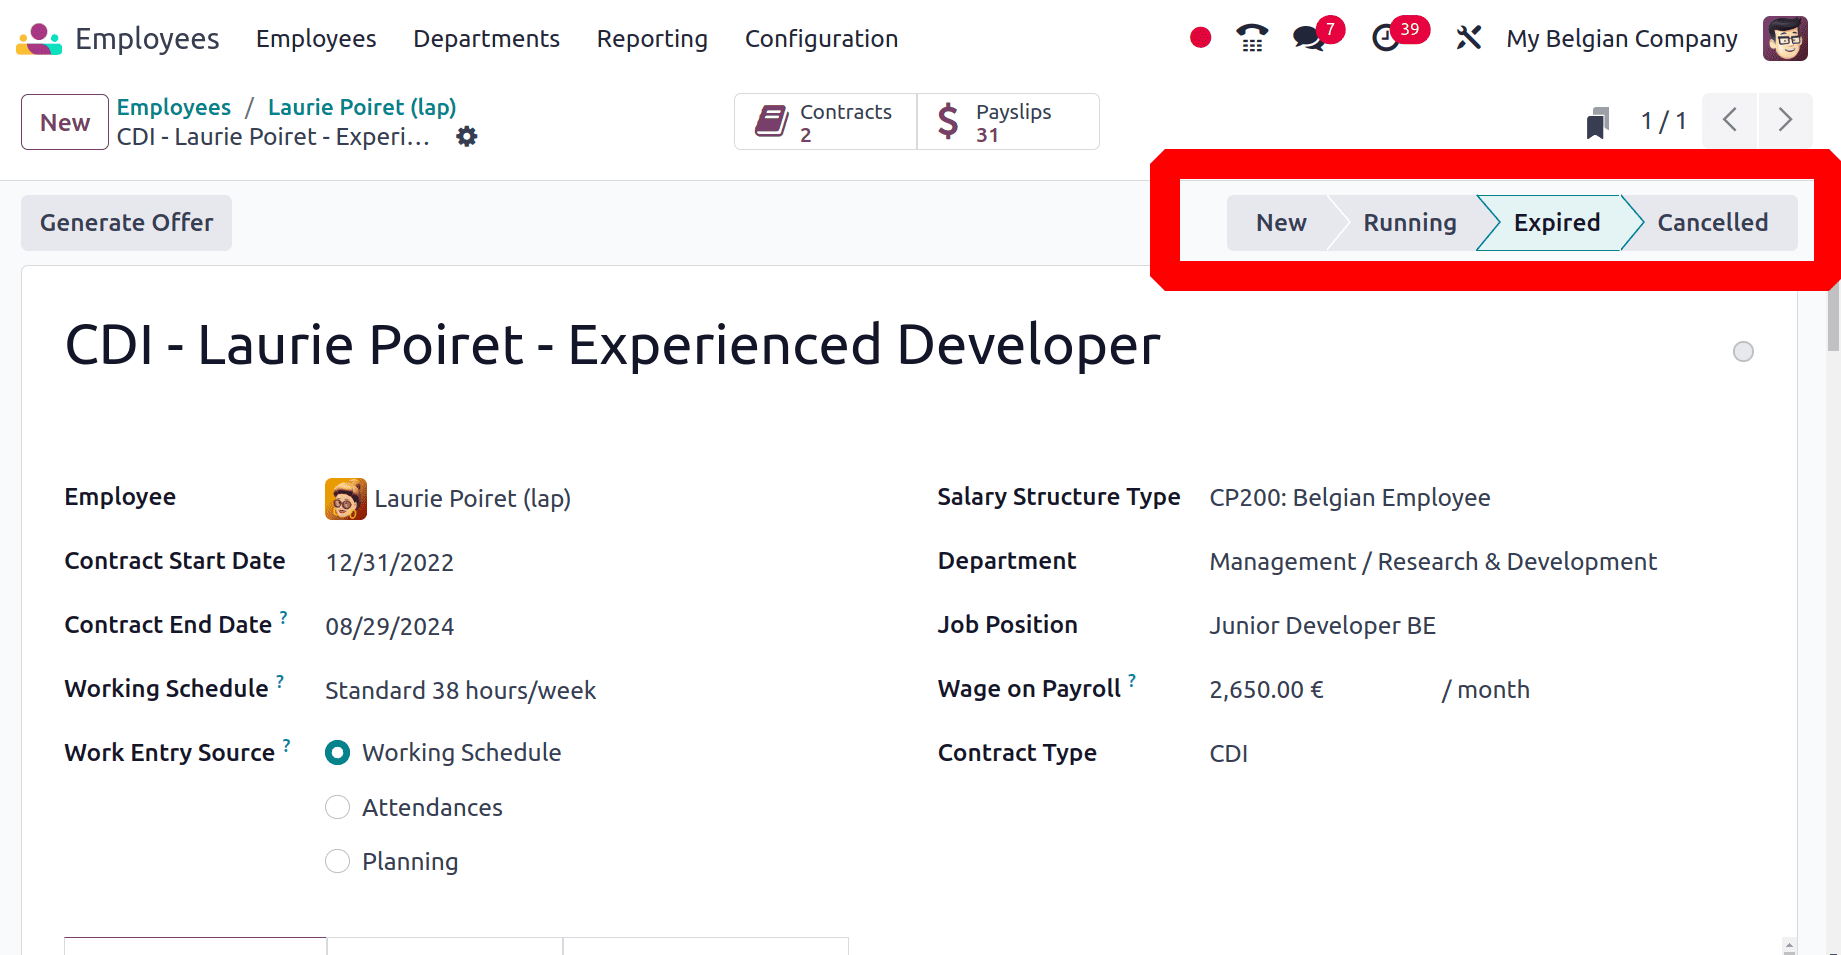
Now the employee termination process in Odoo 17 is completed. Odoo 17's employee termination procedure provides a simplified, automated method that guarantees all required processes are carried out correctly and quickly. Organizations may manage terminations with minimal disturbance and preserve compliance and clear documentation by utilizing Odoo 17.
To read more about Employee On-boarding & Off-boarding Process with Odoo 16, refer to our blog Employee On-boarding & Off-boarding Process with Odoo 16.