The Rental Module in Odoo 16 is a one-stop solution for all of your rental management requirements, including rental businesses, organizations, etc. This platform contains an abstract view of products and services at a simple glance. Users can manage every aspect of their rental products using this module. The platform helps build very professional-level quotations, which help grow the business as well as boost revenues.
1. Reduced amount of data entry works
Everything can be entered methodically in order to examine the business, view the transactions in a split second, and offer different suggestions for the company's expansion.
2. Schedule Management for better performance
The rental module provides various scheduling options for all kinds of jobs. It keeps track of all employee activity on a daily, monthly, and annual basis. With the help of this tool, the manager can keep an eye on all actions, such as how many products are currently purchased and how many are waiting to be rented, and track everything appropriately. It also organizes the return periods and confirms the product's availability to reduce conflicts between two rentals.
3. Simple product administration
The Odoo Rental integration with the inventory app helps control product availability according to serial numbers. This function enables the manager to locate the product or discover an alternative if it is not in stock.
4. Online payment and payment providers
After the rental invoice or sales order has been prepared and confirmed, tracks are placed on the online payment mechanism. Users can select the payment provider as per convenience to complete the online transactions. The customer is given an electronic signature by agreeing to the terms and conditions of the established policy of the business. Therefore, it ensures a secure and transparent transaction with the clients.
Selling and buying online became a common tradition in this era. So Odoo Rental Module comes up with a platform that offers more customer-satisfying and user-friendly features. The updated version of the Rental Module will help users manage their rental business requirements without any struggles.
* Rental Periods
* Rental Period Pricing Based on Time
* Online Rental (Rental + eCommerce)
* Rental Product Cross-Selling and Upselling Made Simple
* Using Rental Search to Sell Rental Products with Interesting Blog Content
* Unavailability Dates Configuration
Let’s discuss how to schedule a new rental using Odoo’s all-new Rental Module.
Just hop into the rental module.
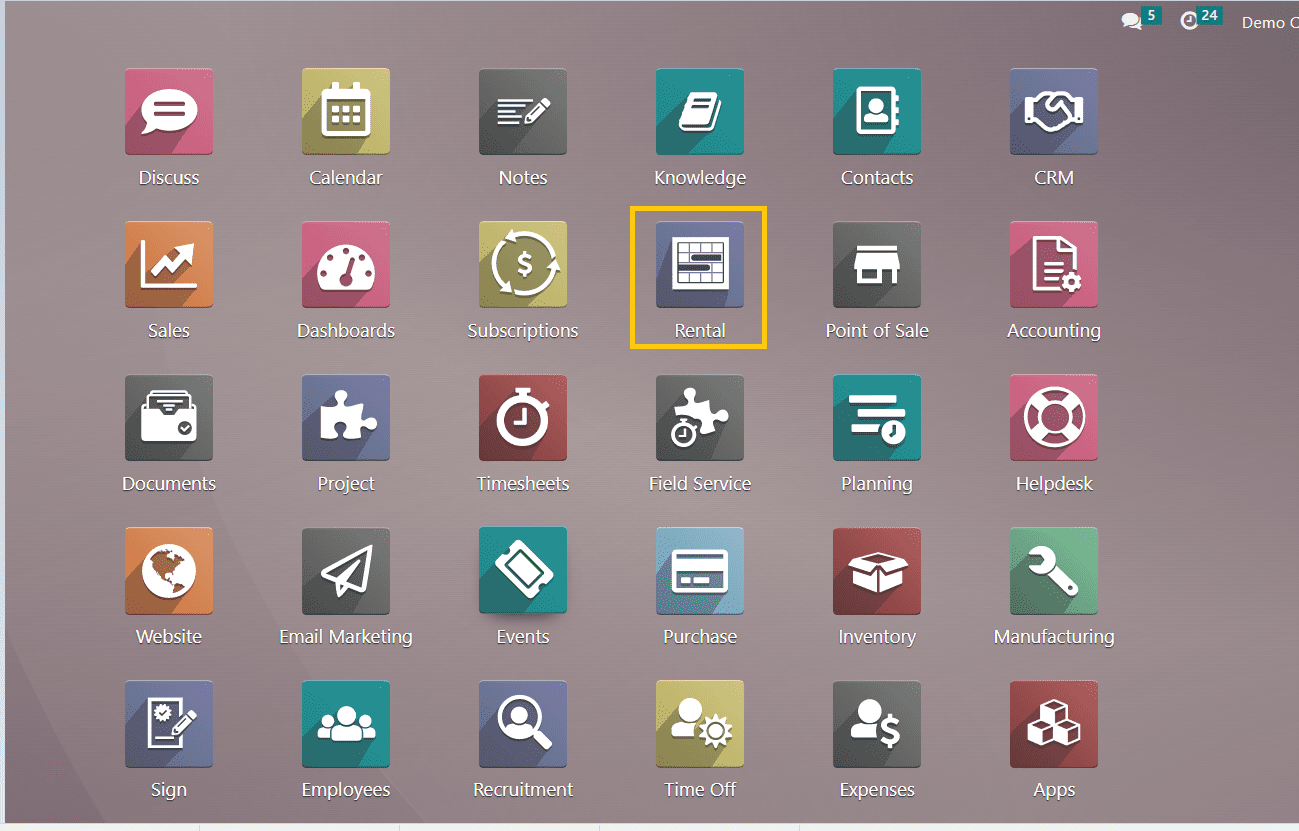
When you reach the module interface, you can see the page as shown below.
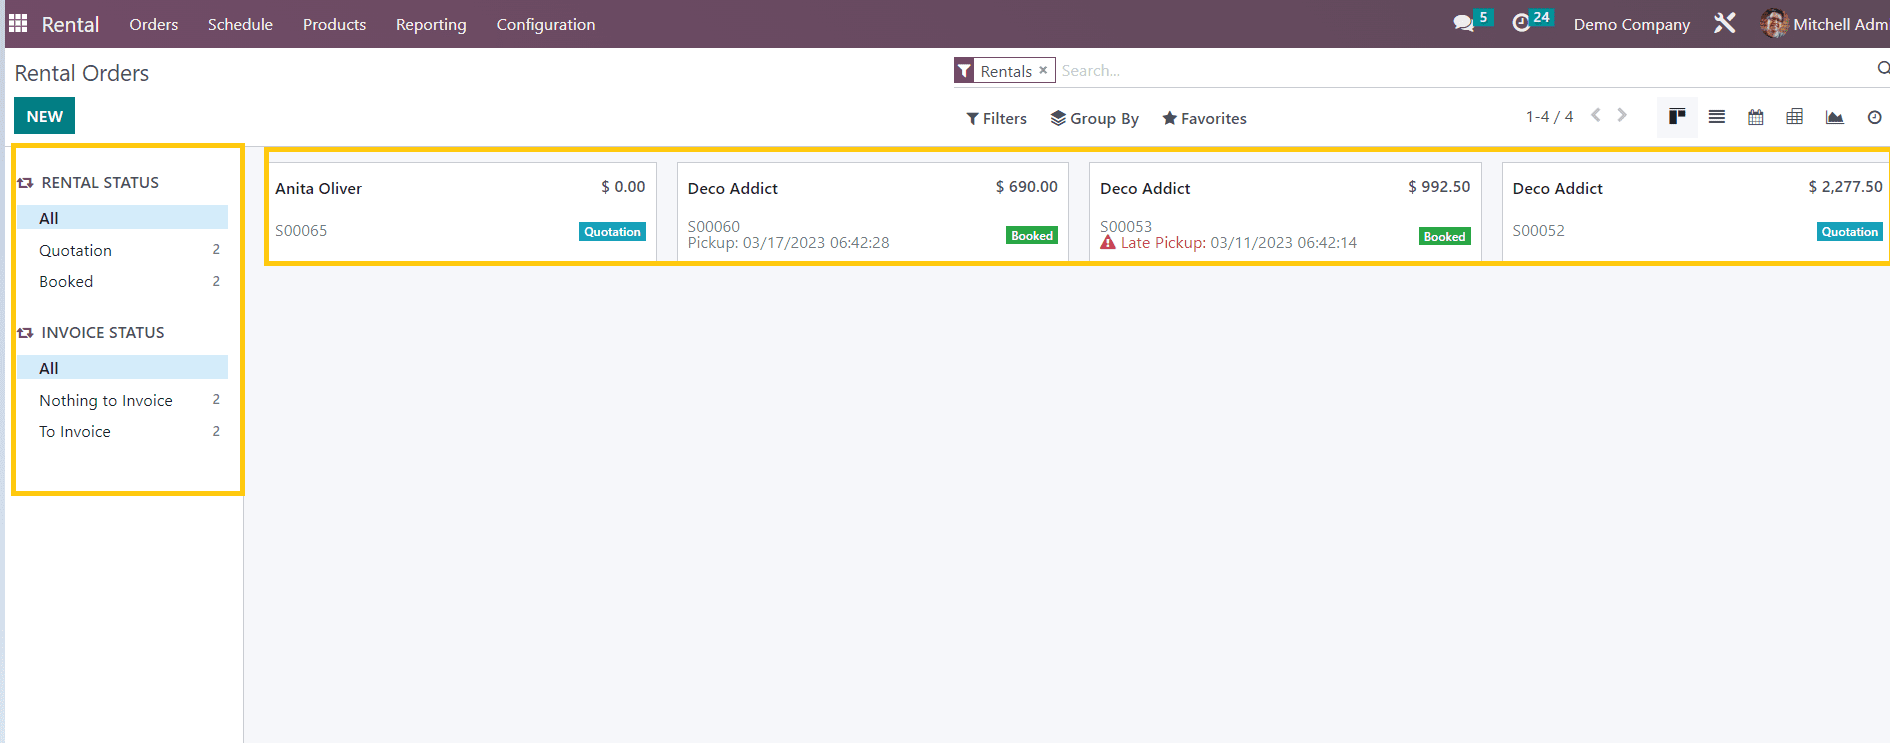
Here, you can see the previously created rental orders in a Kanban view. Additionally, look over the specifics of different rental statuses and invoice statuses. The filters that the platform offers are these. Using these filters provided on the left side, we can filter out the rental orders.
Creation of New Rental Order
Users can create their own new rental order or select from the existing list of companies, persons, etc. Here, I am creating a new rental order for a company. So we have to provide the customer details, and it is also possible to select from the existing customer details from the drop-down menu that has already been created for various other orders, as shown in the below screenshot.
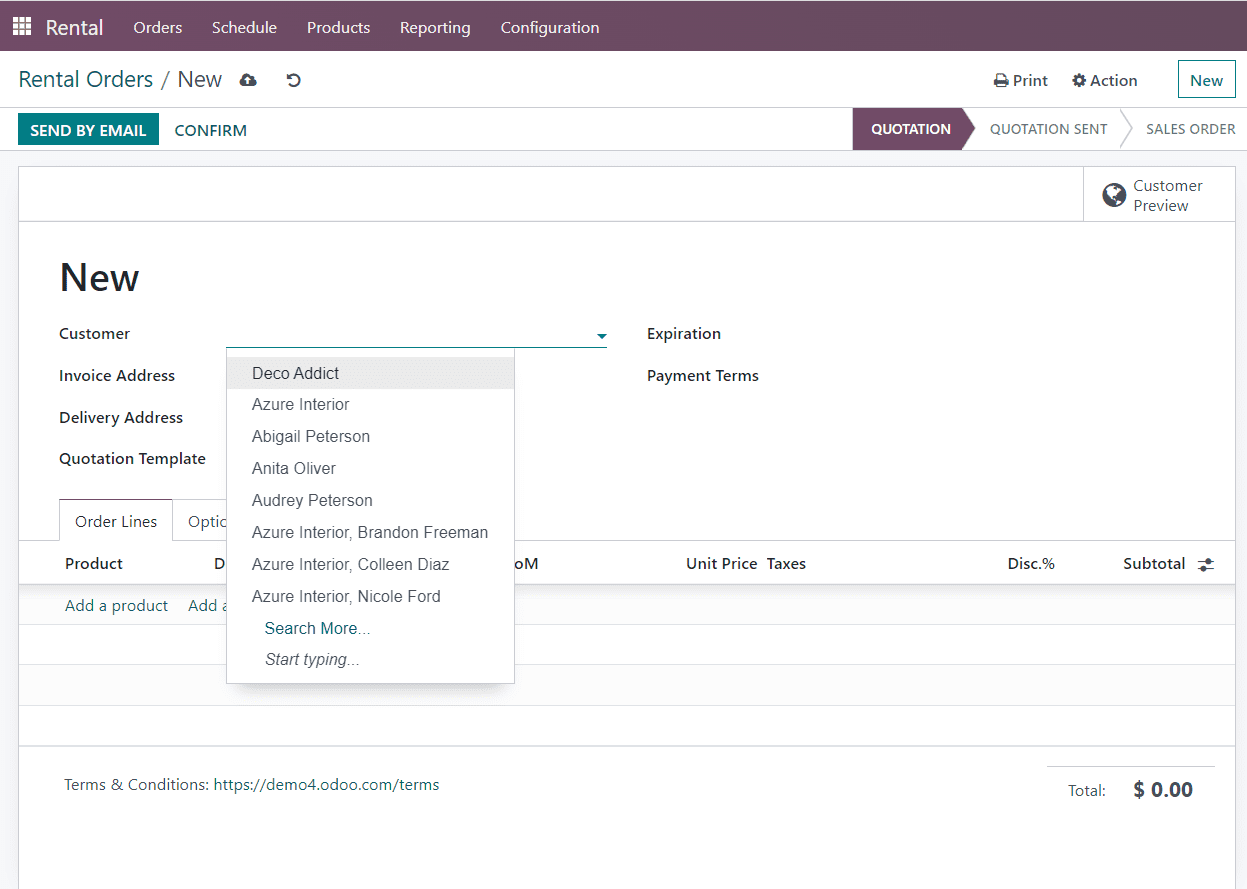
To create a new rental order, click on the “New” button under rental orders. It will open a form view in which we have to fill in the details regarding the new rental order. Users can enter a new customer name, so you must fill out every field pertaining to that customer; otherwise, when we enter an existing customer name, the stored information will automatically be filled in.
This form view has 4 sections such as,
* Order line - To add and create products and also users can set up the unit price, tax, and discounts regarding that particular product.
* Optional products - another option for the product
* Other info - Details about Sales, delivery, Invoicing and payments, tracking, etc.
* Notes - Any notes regarding the product or order
These details have to fill in the respective fields, as shown in the below screenshot.
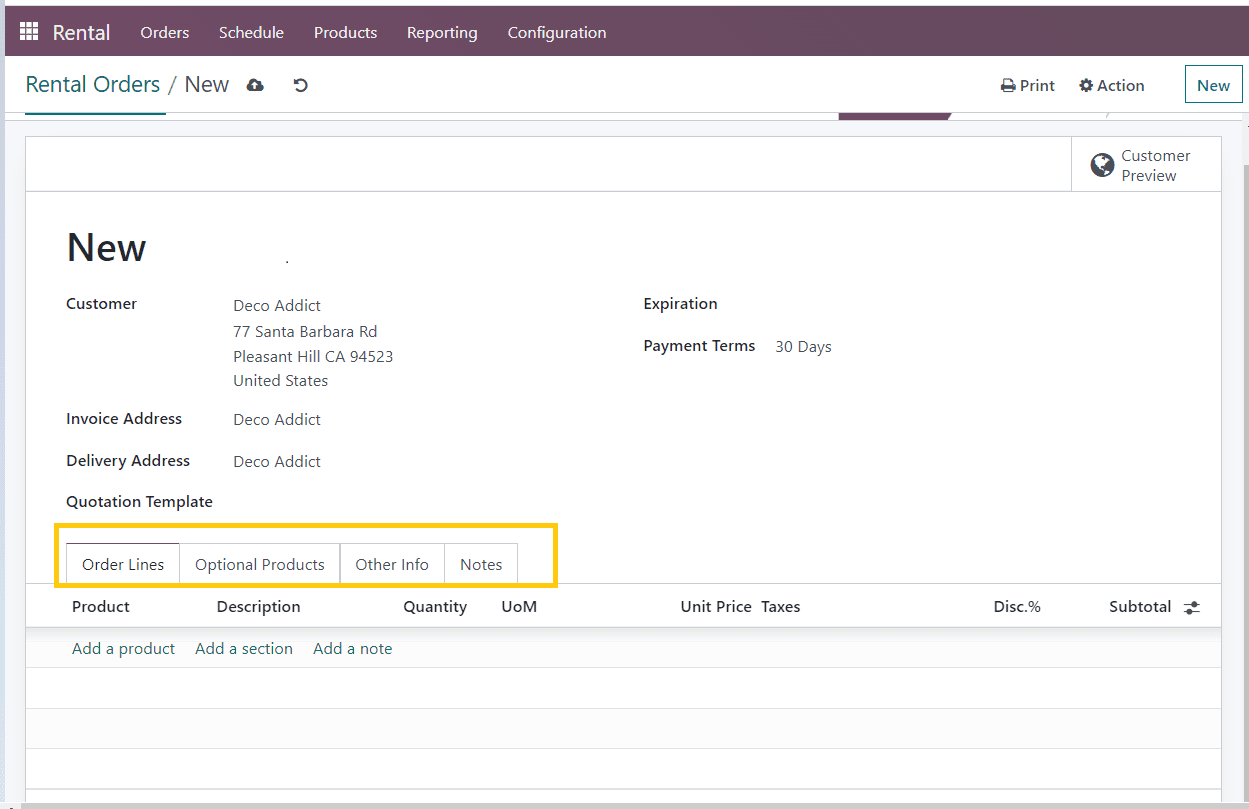
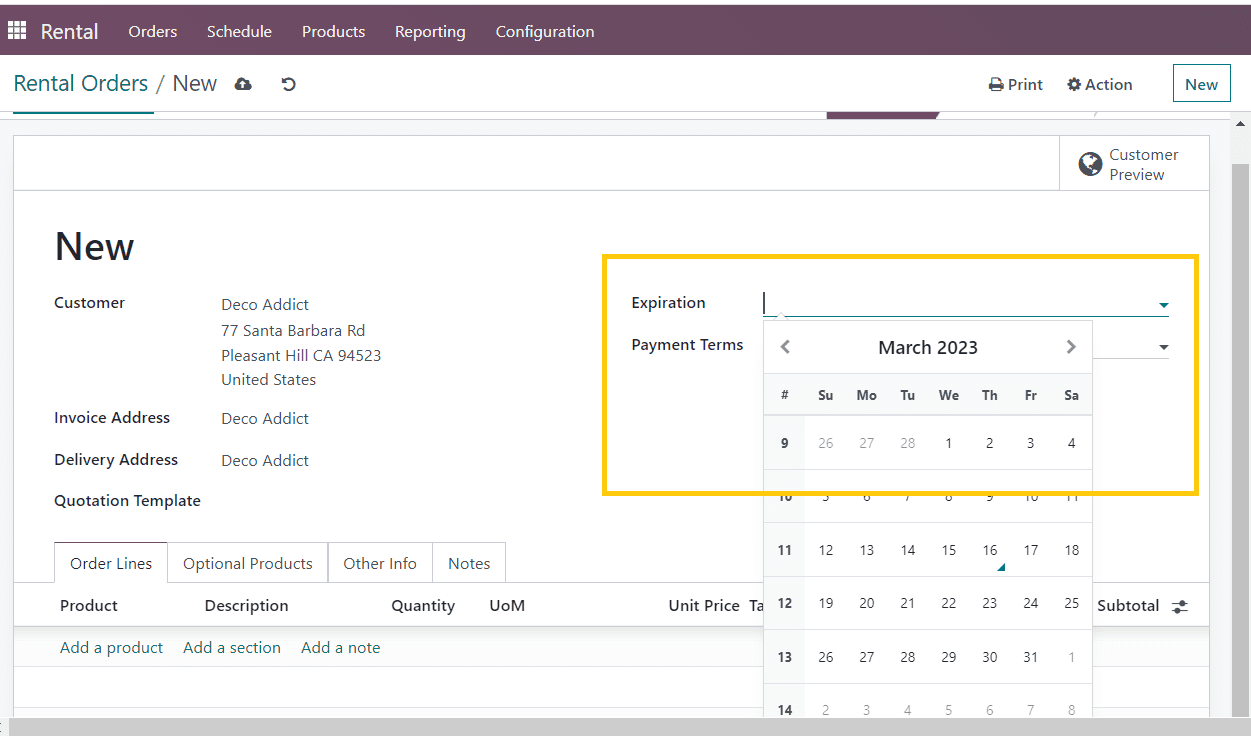
Give the customer's name first, followed by the rent expiration date and payment information in the right portion of the page. You can select the date from the calendar option already given under Expiration Options and payment terms in days or months, as shown below.
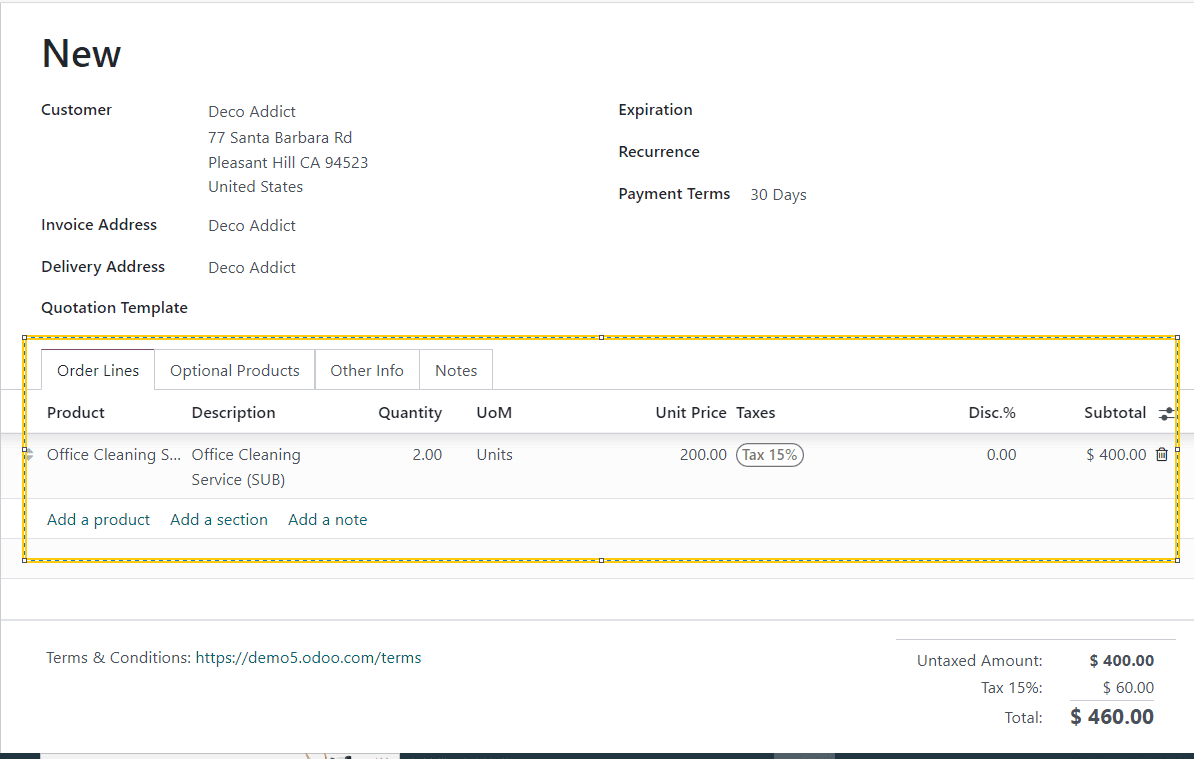
Provide the details in the ‘Order Lines’ section, such as product name, product details, quantity, etc. by clicking on the ‘Add product’ button from the order details dropdown section.
Here I am selecting "office cleaning services" from the dropdown and giving a quantity of 2, so the price and tax will be shown according to the product or service.
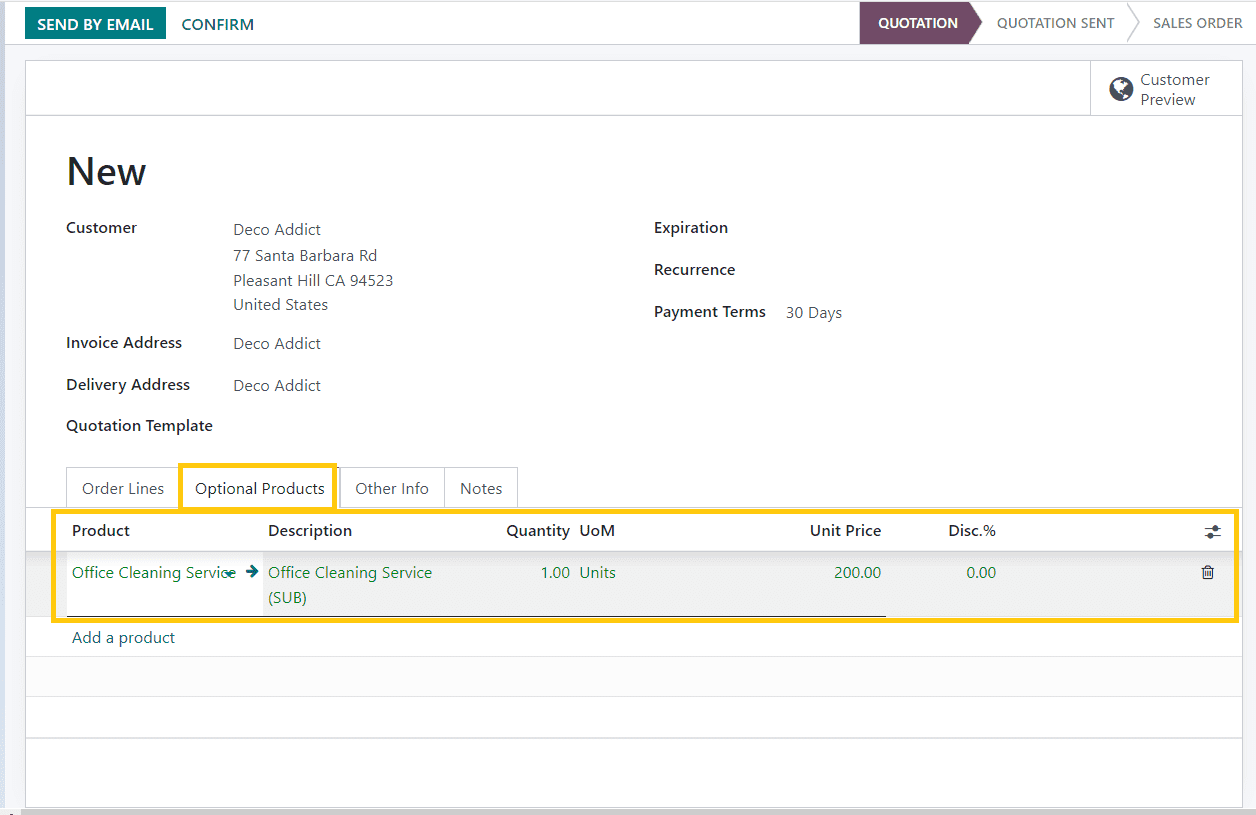
After that, move on to the section where you can provide optional products if the specific product is not available. I am therefore providing the same service while reducing the quantity.
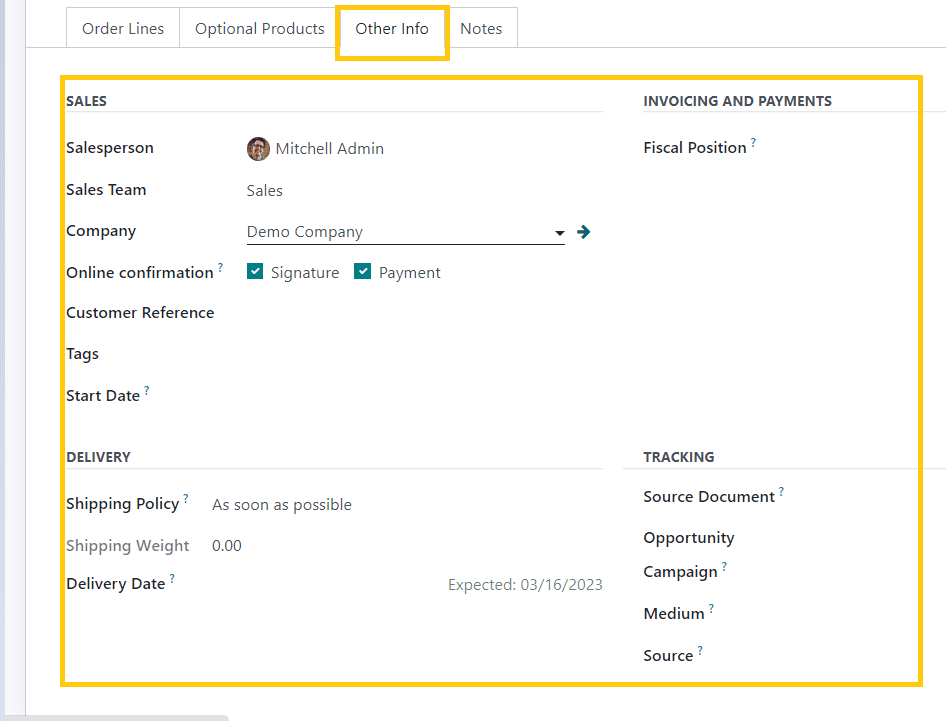
Then fill in the Other Info section, which contains delivery information, sales invoice, and payment details, tracking details, etc. You can provide any descriptions in the “Notes” section regarding the delivery or product.
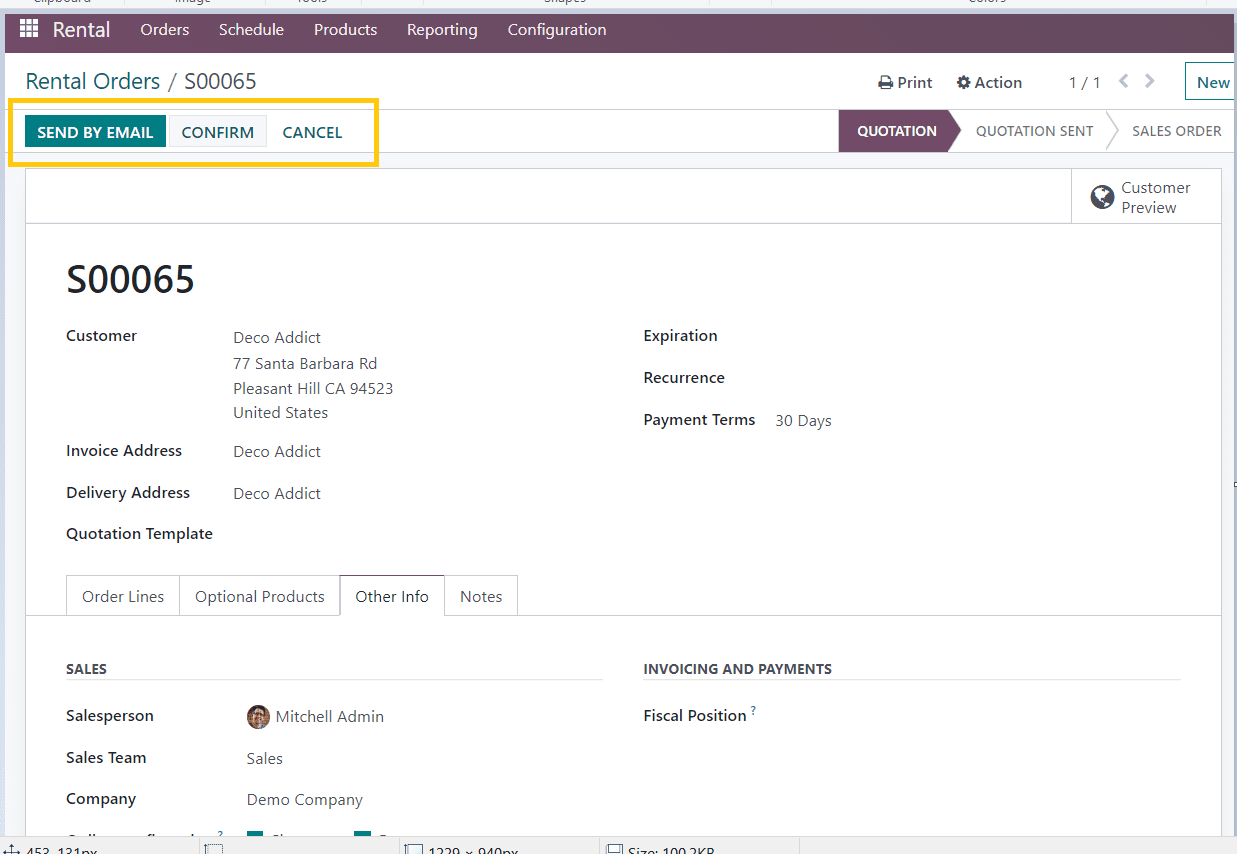
After filling in the details, save the details, and you can also confirm the rental order and notify the customer by sending a mail about the rental agreement details. By clicking on the ‘SEND MAIL’ button, it will send a mail regarding the quotation, as depicted in the below screenshots.
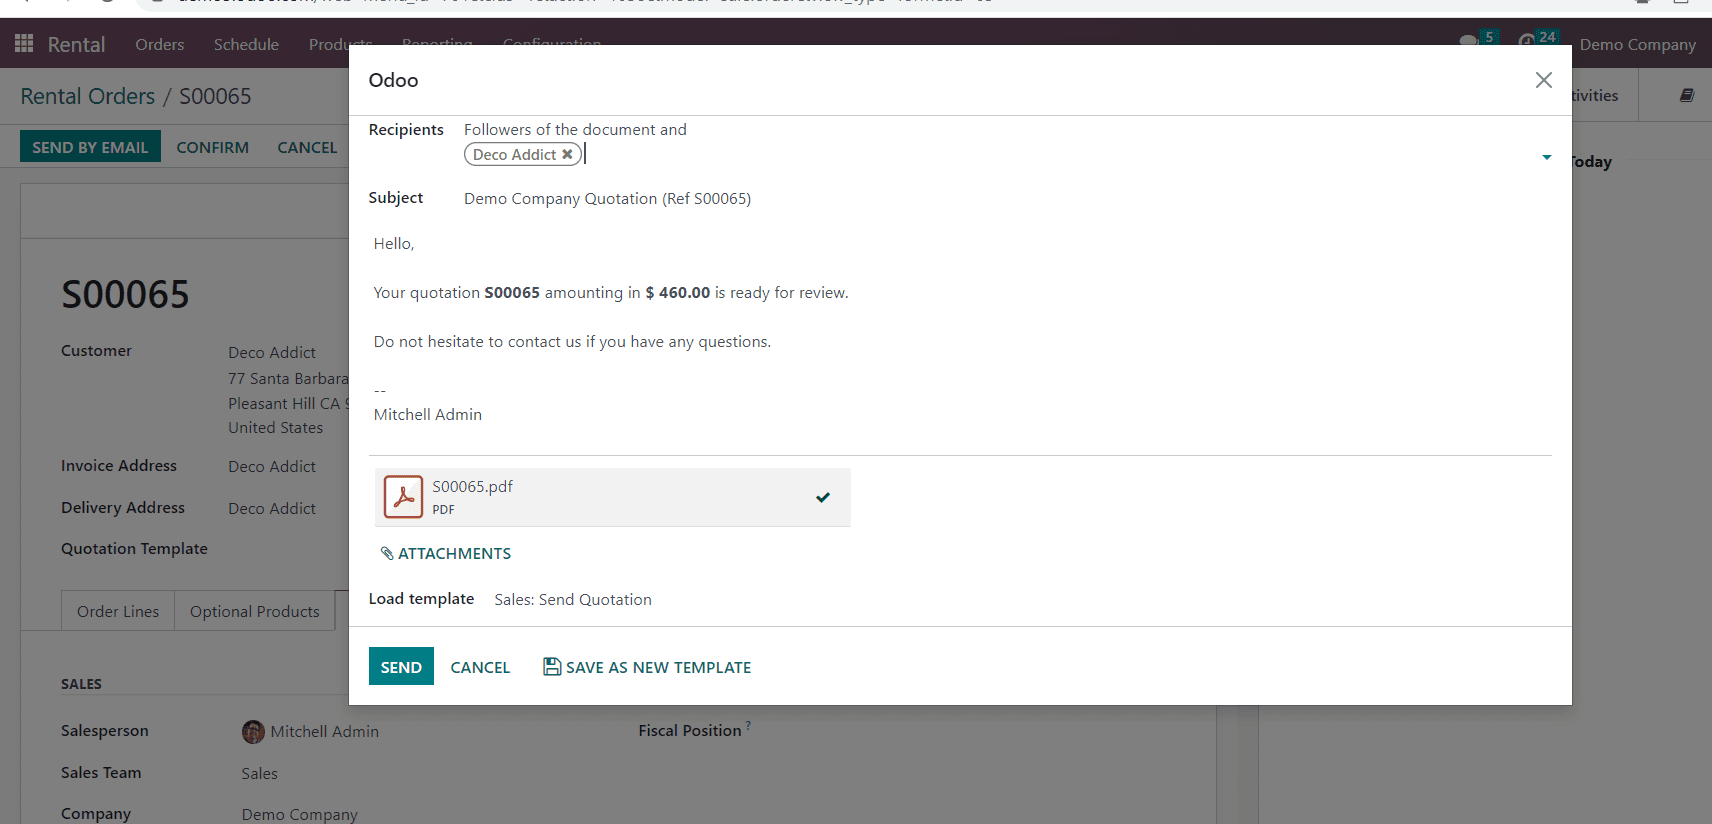
An email interface will pop up on the screen that can be used for editing the mail body. After editing the email, you can add attachments. Once done, send the mail.
Now, check the details of our new order from the home page of the Rental module. The new order has been created now.
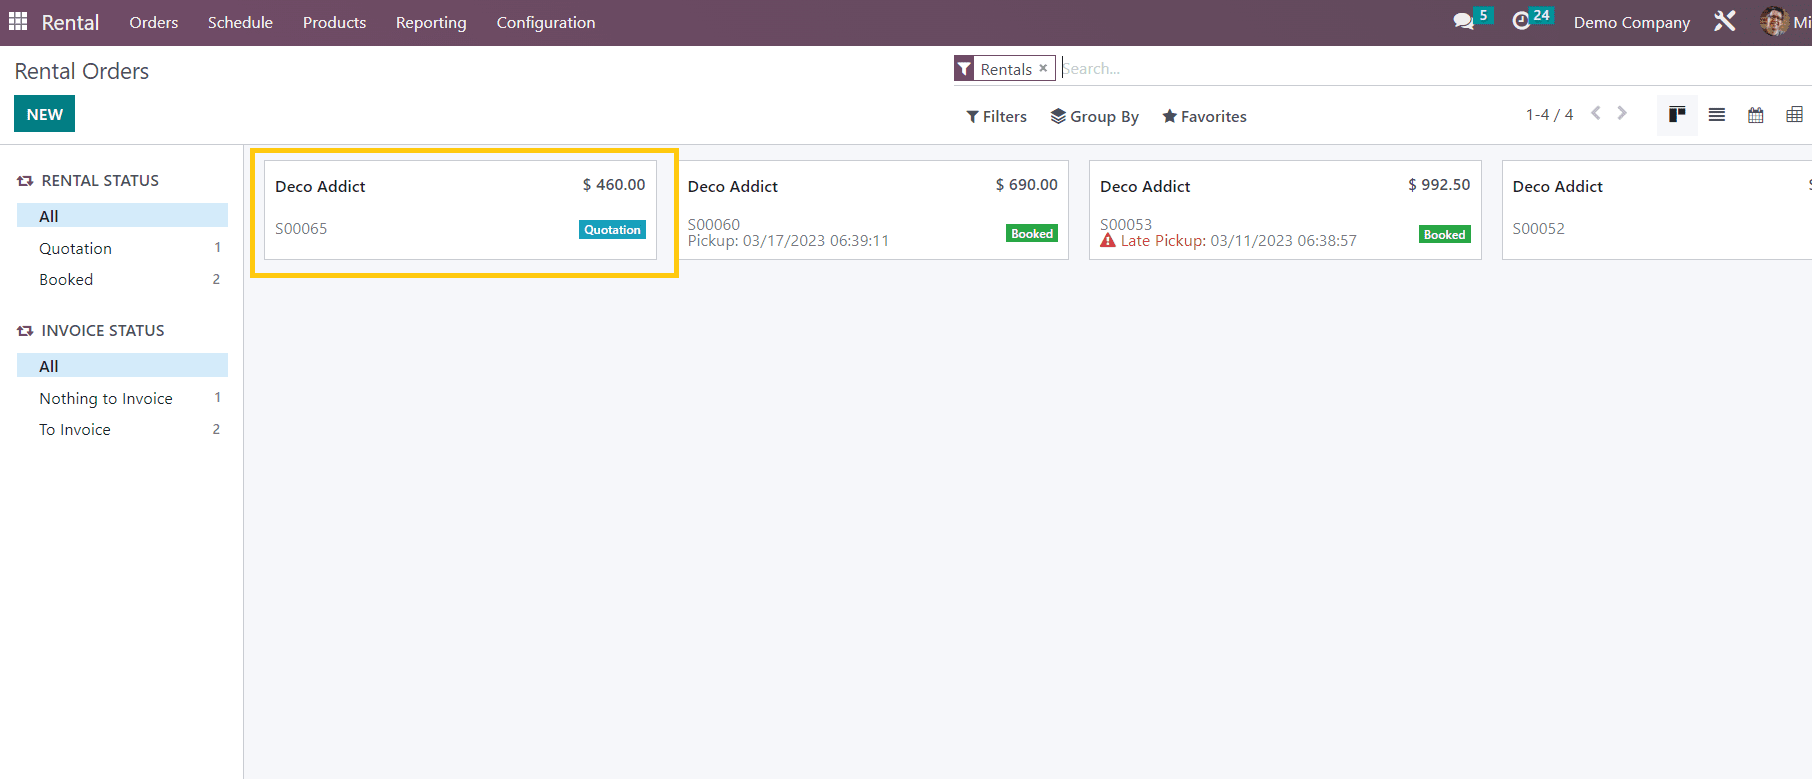
Once the order is booked, the status will change in the Kanban view according to the current situation of the order. This is a small part of the Rental Module and can be easily done by first-time users too. You can check the status by clicking on the “Rental Status” and “Invoice Status” filters provided in the left corner of the page, as shown in the above screenshot.
We've covered how to use the Odoo 16 Rental Module to create a new rental order in this blog. As you can see, this platform provides a simple and organized method for planning and controlling rental activities. and users can manage any number of products by utilizing this simple platform, which also aids in enhancing customer satisfaction and accelerating business growth.
Have a look at the following blog to explore more about How to Create a New Rental Product in Odoo Rental Module. How to Create a New Rental Product in Odoo Rental Module