By creating your business application with Odoo, you can use the Odoo Studio module in the latest version if you need to customize it. In Odoo 15, by handling the Studio module, you can configure the reports and translations menu with the help of its customization feature with an XML editor. You need not write any single code for the configuration. You can customize your business application within a few seconds and follow it accordingly within a few clicks. Now let us discuss how we can configure the reports and translators in Odoo 15 Studio.
This blog gives you a detailed understanding of configuring and formulating the reports and translators in your business application with Odoo 15 Studio.
Through step by step process, we can move into detail on how we can customize and configure our business application by reports and translators.
Reports
Let us see in the Sales Module of Odoo and examine how we can configure reports in Odoo 15 Studio. With the filtration, Group By, and Favorites options, you can see and divide the sales order and other created models with the Odoo platform.
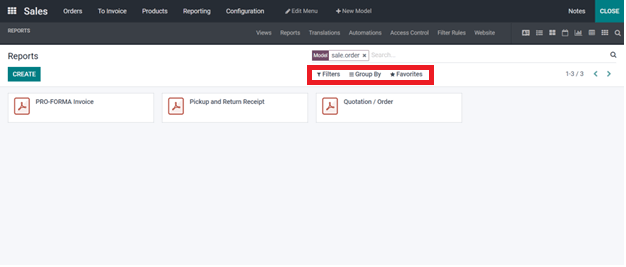
Here in the screenshot, we can see a list of sales orders filtered. While clicking on the CREATE button, you can create a new model. Now by going to the below screenshot, let us see how to create a new model.
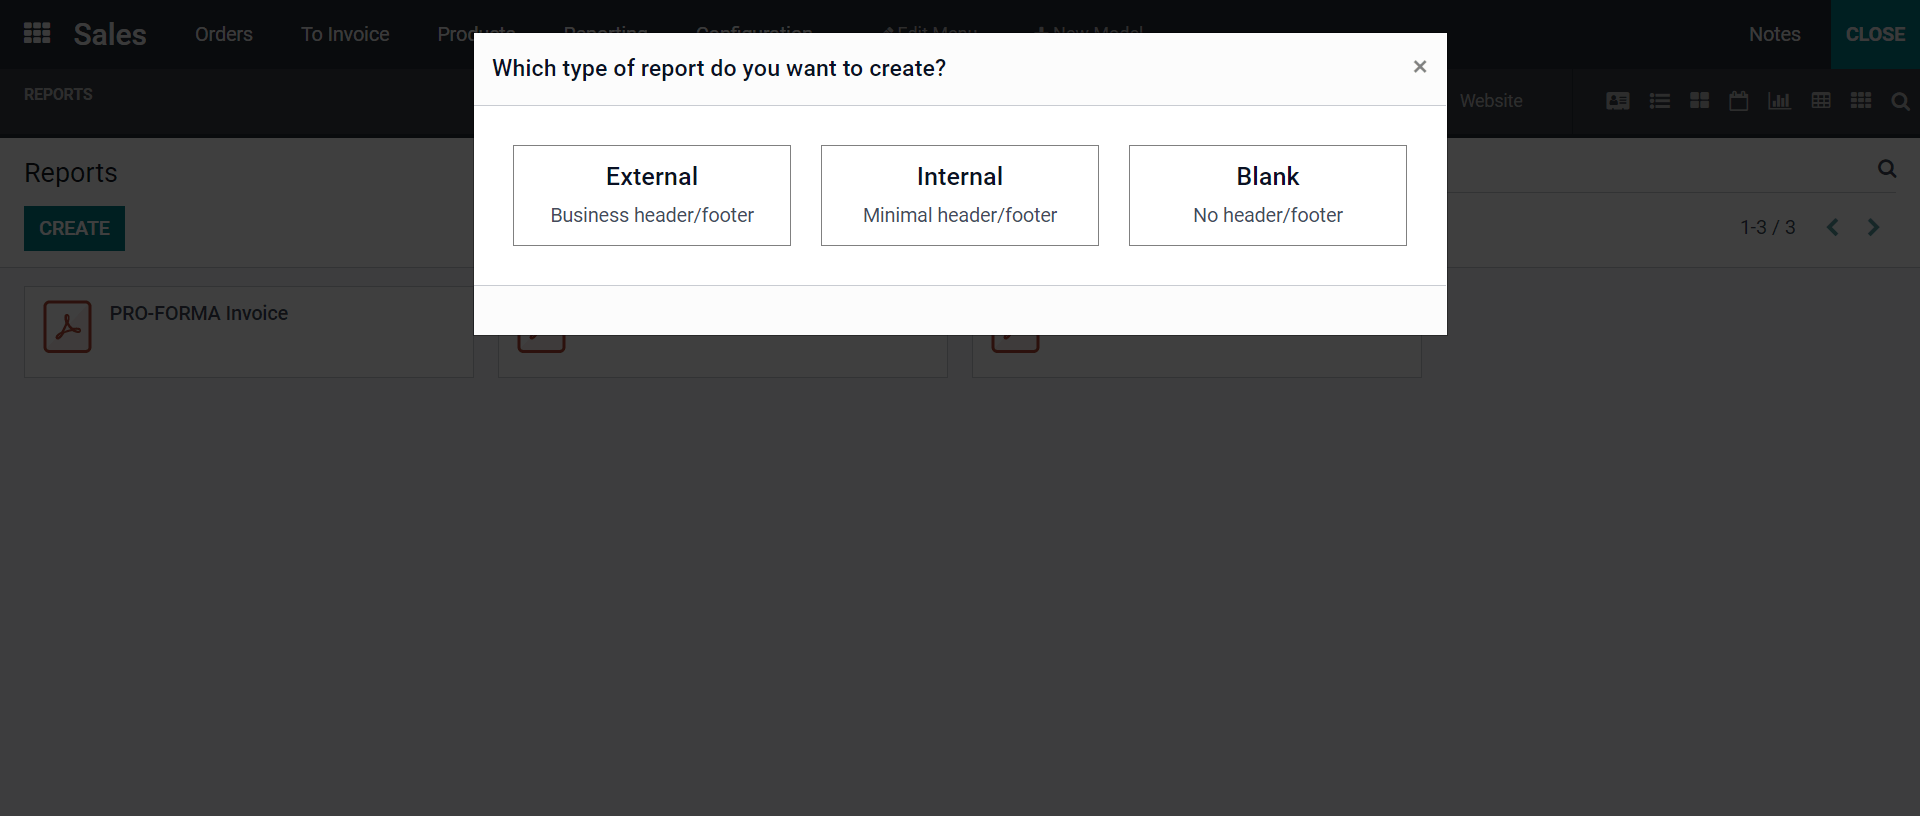
As seen in the above screenshot, you will get a small window to select the type of reports you want to create. If you choose the External Report, you will get your Business Address as the header and footer. If you select the Internal Report, you get a minimal header footer with your address or details. And in Blank Report, you won't be getting any header and footer.
External Report
Let us see the External report if we select how it is done and its specialty.
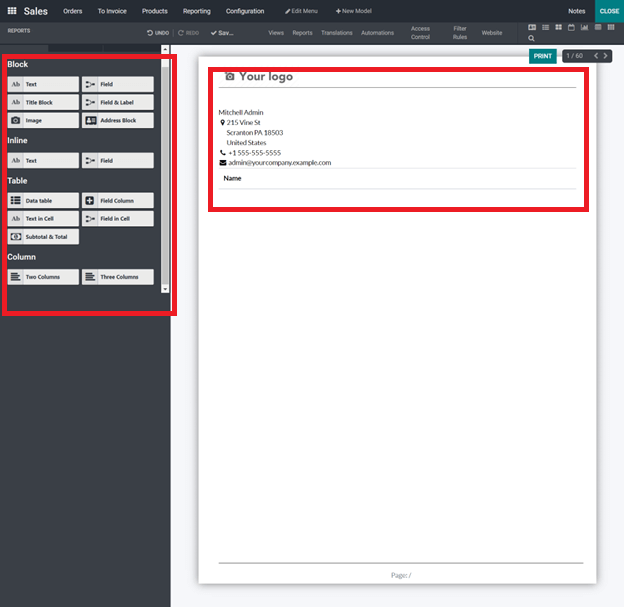
By observing the above screenshot, you can see a header and footer where you get a default logo part and footer part the page number at the header portion.
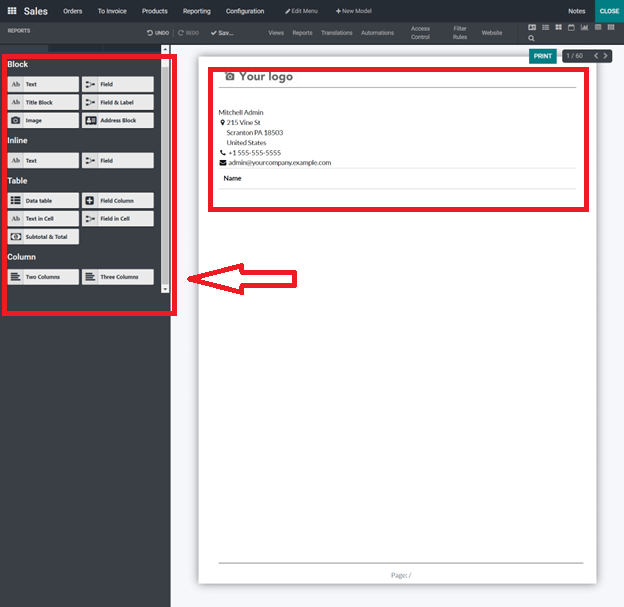
Here you can insert many other fields as seen in the screenshot, in the highlighted portion by dragging and dropping each field from the left-hand side of the window which is marked with an arrow. And while dragging and dropping each tab in each section, you need to enter the field properties from the drop-down menu.
Internal Report
Next, we can see the difference while selecting the Internal Report Type.
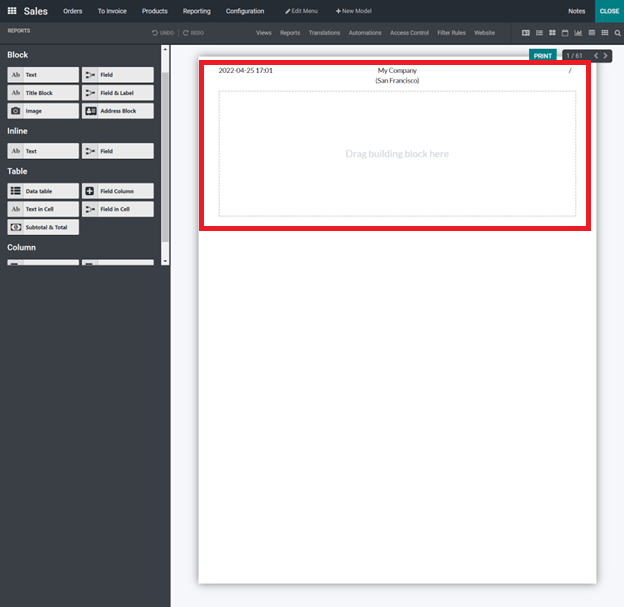
As seen in the above screenshot, you will be observing that the page you have got is with minimal header and footer. And the rest, by entering the text, you get the dragging and dropping of fields in each section where you require. And as discussed later, you have to enter the field properties also.
Blank Report
Next, we’ll see the Blank report and how it is configured.
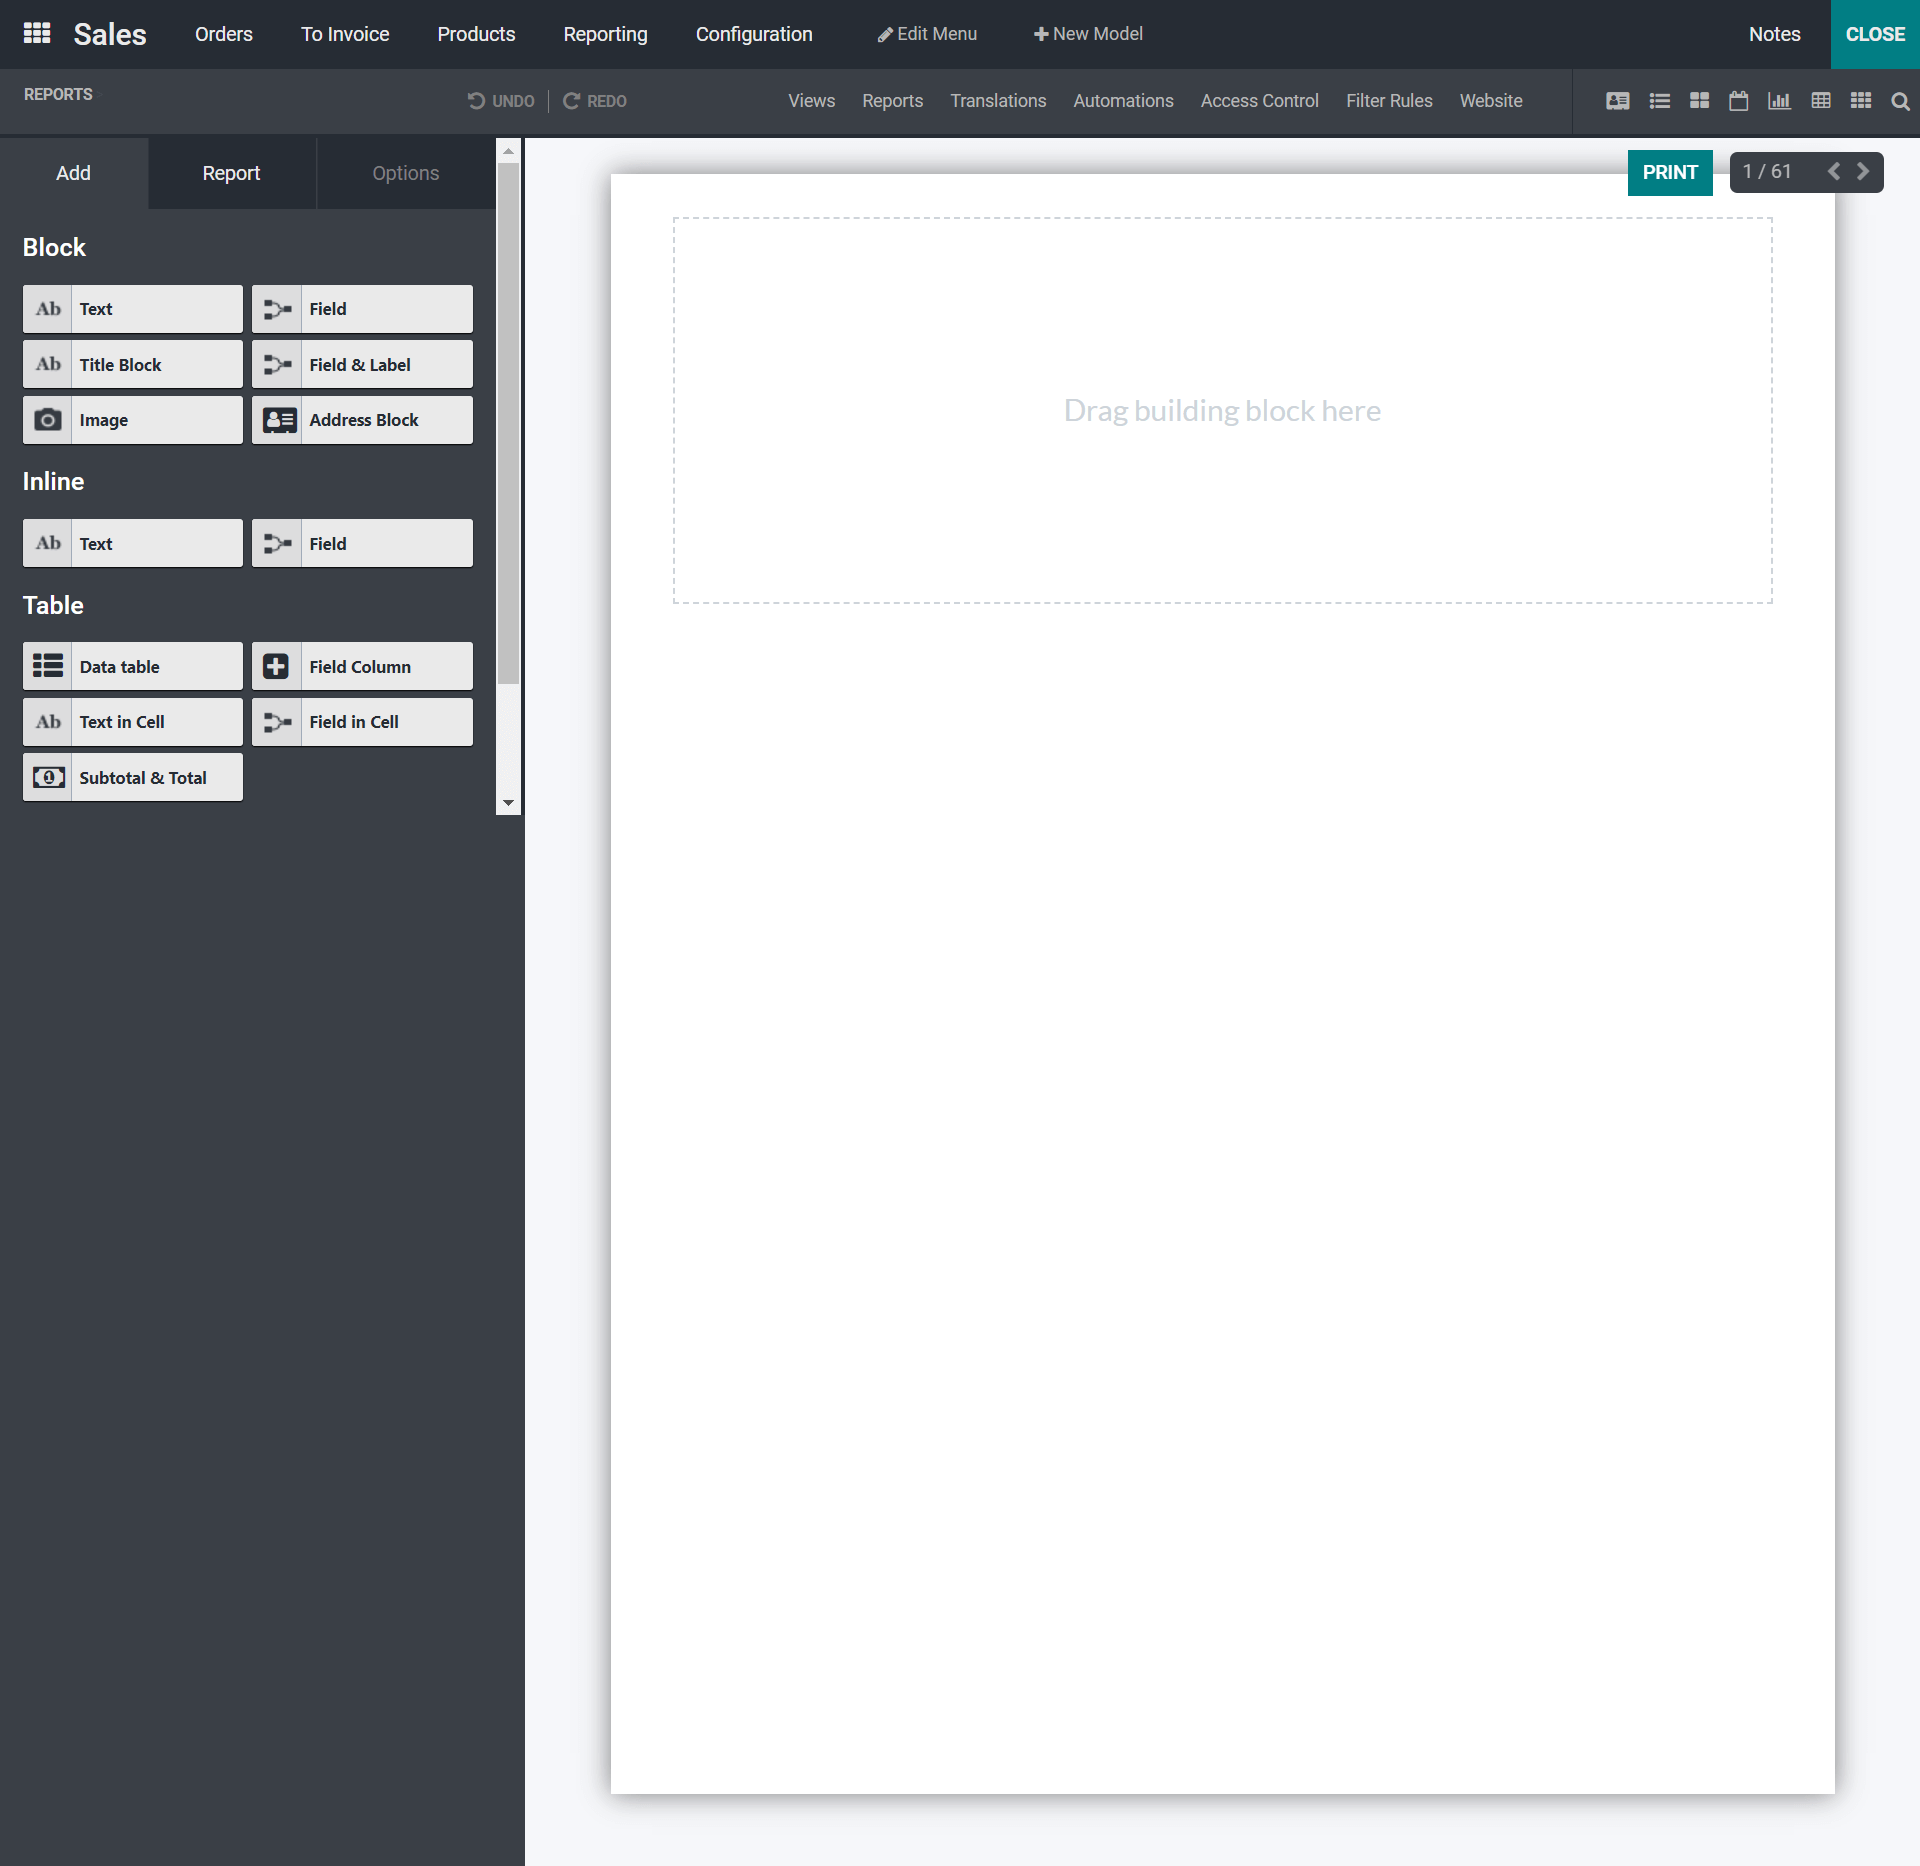
As seen in the above screenshot, you can see the Blank report with no header and footer, and it is a blank page where you can insert the fields by dragging and dropping at the selected area with field properties.
Additionally, you can define the limit visibility options by ensuring only specific people can enable the configurations of the report and enable to observe the report and edit the report if required. The user can enable this function even though the user can enable the option to Print the page for specific users. By clicking on the PRINT menu, you will get a window of the preview of the printed page and its detailed configuration. You can change the logo's color, and you will be able to get the downloaded pdf format of the print.
Translations
Now let us discuss more Translation or Translate views in Odoo 15 Studio.
The purpose of translations or Translate view in Odoo Studio is to obtain the translation to your appropriate language for the business application. Suppose the user from any region requires your website or business application to translate into their language with this feature. With this feature, you can make your business application globally reachable by enhancing the multiple users to recognize your business application and use your services. Odoo platform improves your business operations management with the aspect of localization feature and enables multiple users from anywhere in the world can access it in their language.
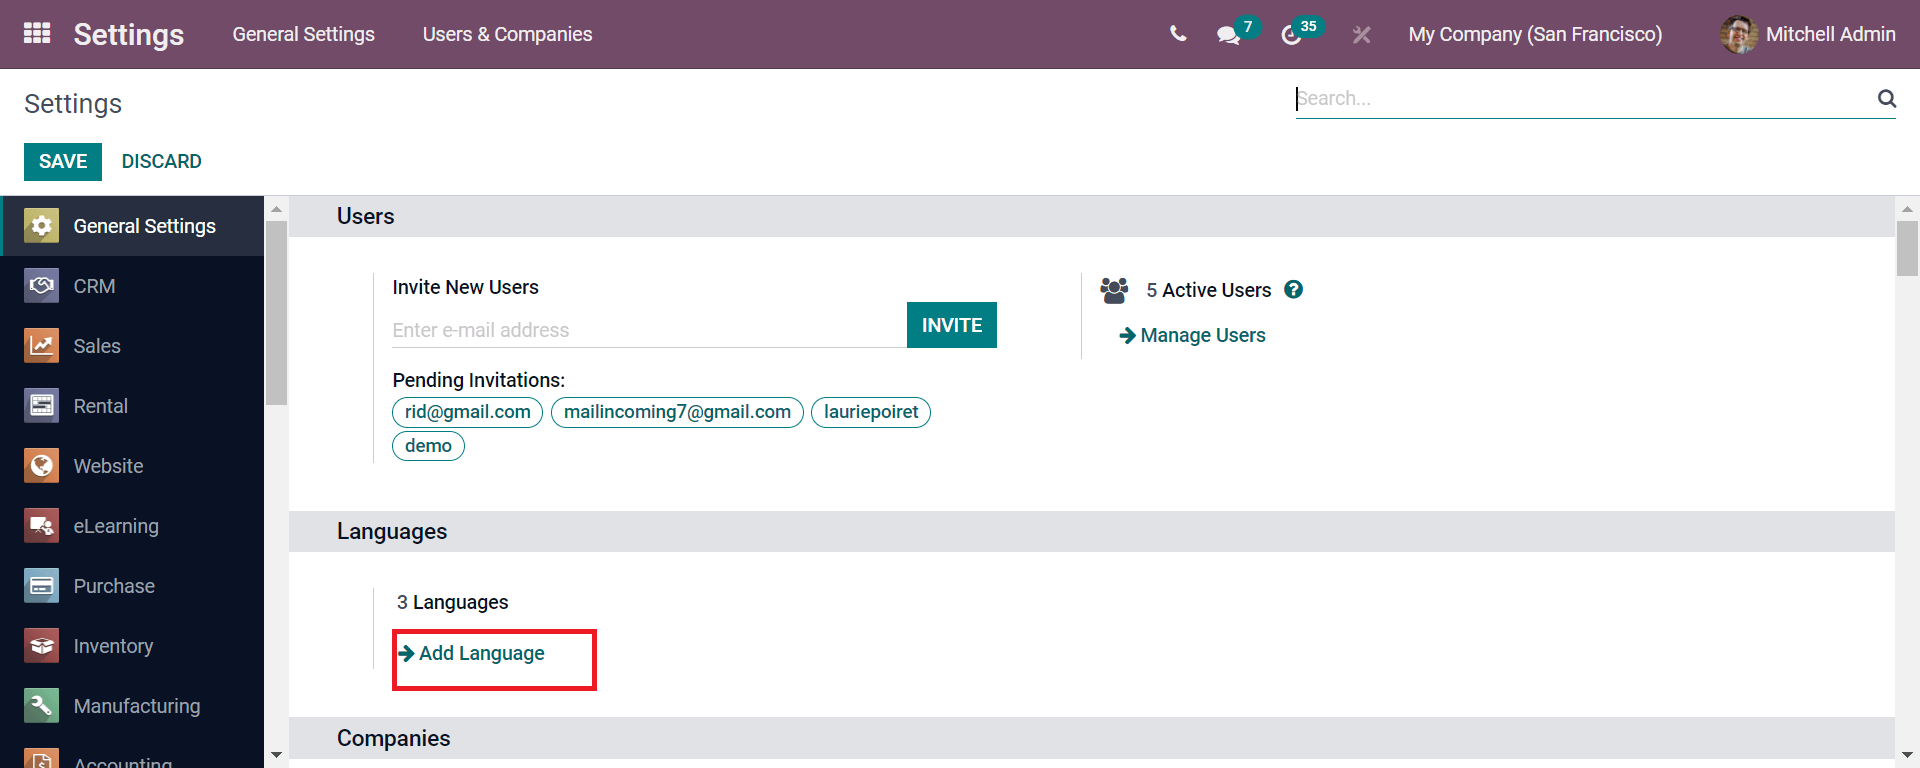
Before clicking the translations in Odoo Studio as seen in the above screenshot you have to change the settings. Now by changing the language for your business application, with Odoo 15 Studio you need to go to the Settings and move to the General settings and from there you need to move the Add Language as per your desire to convert. By clicking the Add Language you will be getting a window where you can select the language from the drop-down menu. And later you need to Save the language.
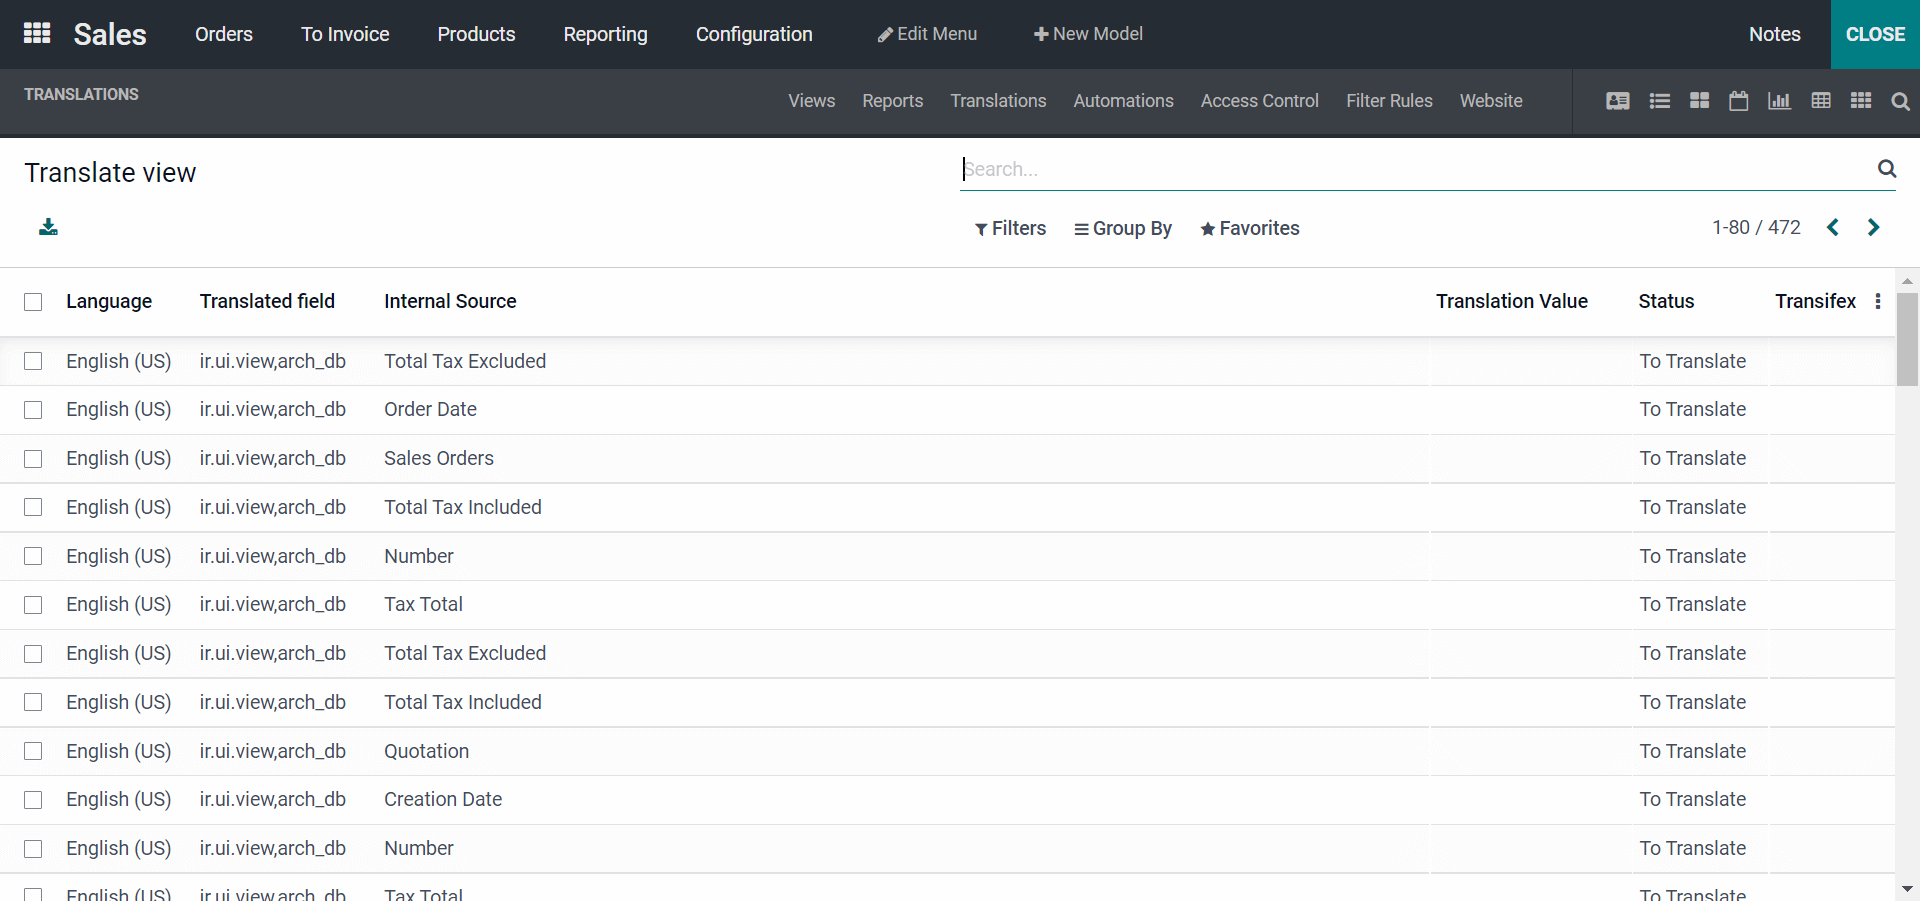
Here in the above screenshot, you get a standard view of the Translate view by clicking on the Translations menu in the menubar. If you require to get a translation of the English language into your required language, you need to go to Settings and you have to add your desired language and thus it will be converted as discussed later.
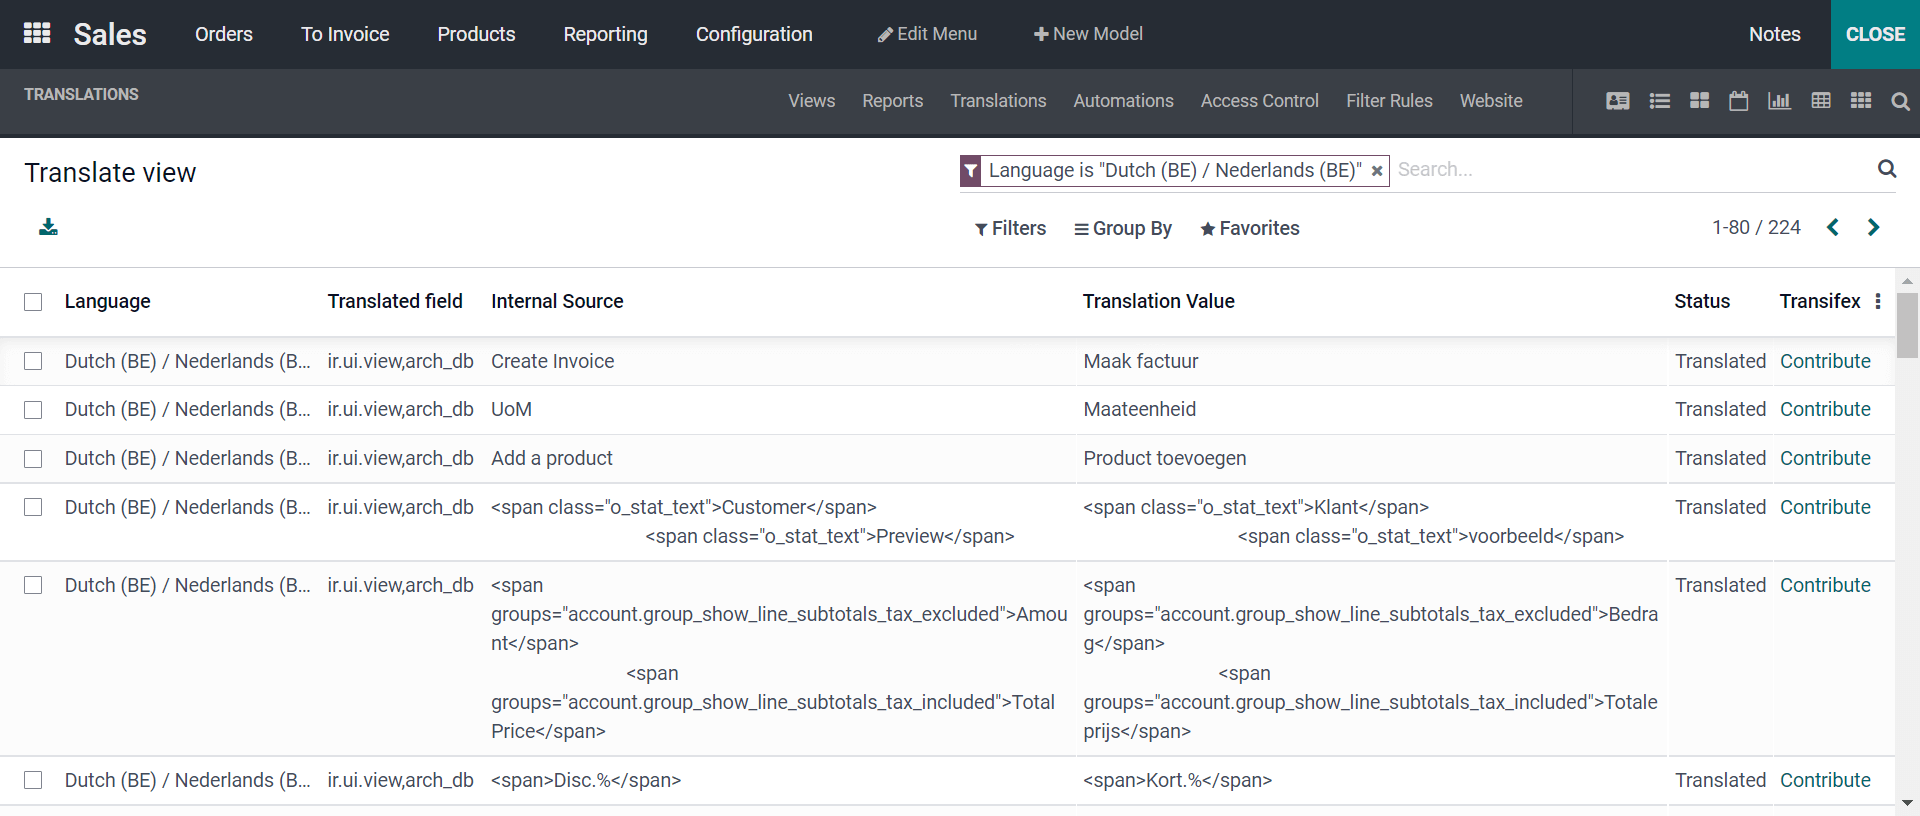
As seen in the above screenshot, by moving the filters and by applying the desired language from the options you will be able to get those in your desired language.
With this, we can conclude that the Odoo 15 Studio enhances you with appropriate customization options which makes your job easier and formulates without using any code management and by using the XML editor. Thus Odoo Studio module in Odoo 15 makes your tasks in an intricate effortless manner.