The Odoo app allows the sale of multiple products in a single bundle pack, resulting in efficient and cost-effective sales. Users can configure combo products in POS and Product, create POS orders with required and optional products, alter carts to include optional products, generate multiple combo products, and calculate combo prices from main products or all products added to the combo. This module ensures efficient and cost-effective sales.
In Odoo Point of Sale (POS), creating product combos involves configuring bundled products, allowing customers to purchase multiple items together at a discounted rate or as part of a special offer. Below are the general steps to set up product combos in Odoo 17 POS:
Creating Product Combos
Log in to your Odoo account and access the backend. Access Point of Sale Module. Open the "Point of Sale" application in the Odoo backend and create individual products before creating a combo. Ensure that the individual products that will be part of the combo are created in the system. These can be items that customers typically buy together.
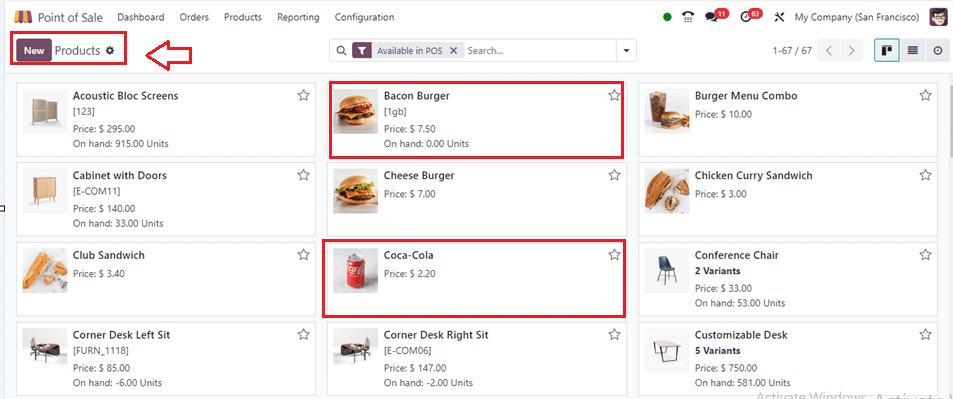
Create or Choose a New Product for the Combo
In the Point of Sale module, go to the "Products" section and create a new product for the combo using the product configuration form. This product will serve as the container for the bundled items. Here, I have chosen an already existing product named ‘Bacon Burger’ for this purpose.
Product 1
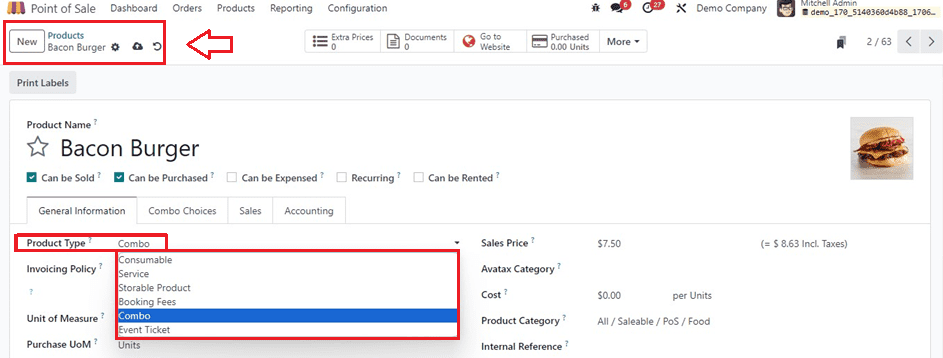
If a new product is being created, provide the fundamental product information in the product configuration form. Next, choose "Combo" as the "Product Type" to designate it as a combination product, as seen in the screenshot below.
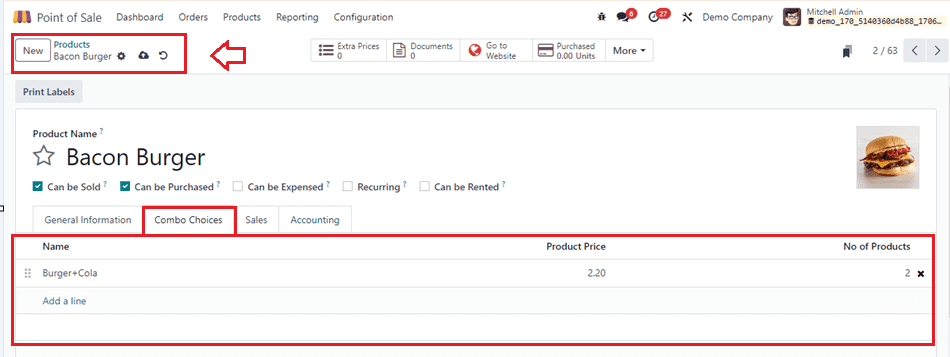
Combo Choices Tab
At times, a sales-oriented enterprise may offer various product combinations, and a specific product could have multiple alternative combinations. Within the designated 'Combo Choices' tab section, it is possible to establish or incorporate diverse combinations wherein this specific product is featured.
Click the ‘Add a line’ button provided under the Products area of the Combo Choices tab. This will open a pop-up window, as shown below.
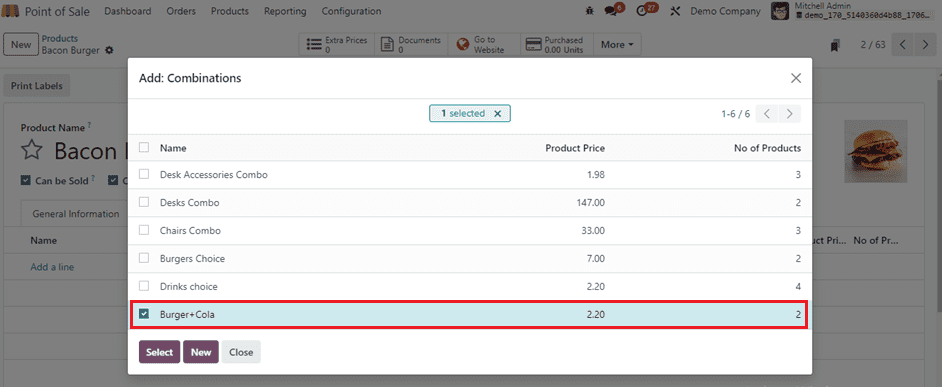
Choose the desired product combinations from this window and click the ‘Select’ button to add them to the product configuration window. Here, I am choosing the ‘Burger+Cola’ as the combo choice. Then, set the product costs and other relevant details of the product inside the product configuration form and save the details.
Now, Let’s configure another product for the requirement of product combos.
Product 2
We can now set another product named ‘Coca-Cola’ for this product combo and choose the Combo Choices as shown below.
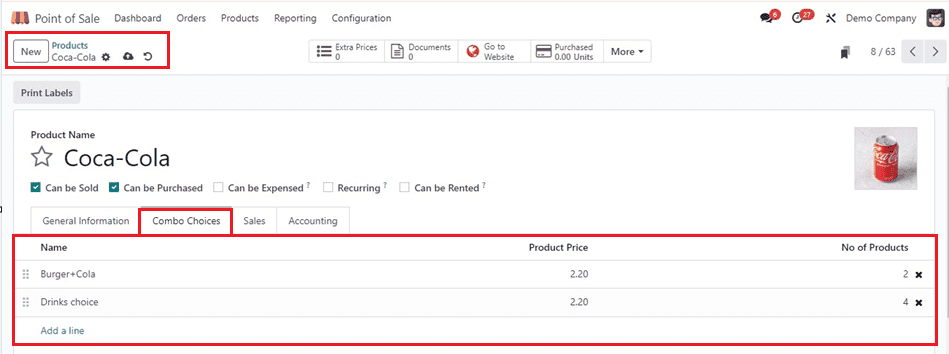
As you can see from the screenshot above, the above-mentioned item will be offered in both "Drink Choice" and "Burger+Cola" product combinations.
Managing Product Combos
Odoo provides an exclusive menu section to manage or create new product combinations inside its PoS Module interface. You can access this facility from the ‘Product Combos’ section of the ‘Products’ menu.
This window displays the list of various product combinations with their Name, Product Price, and No. of Products as shown below.

To create a new product combination, click the "New" button and complete the form's fields.

Click the "Add a line" button to add the combo products after entering a combo name. There should be an option to add components or bundle items. Add the individual products to the combo by associating them with this product.
If you would want to charge more for each product, enter the amount in the Price Extra section. You may view each product's original price in the Original Price section. Using this section, you may apply a discount on the total cost of the individual goods or establish a fixed price for the bundle. After saving the product combo, we can check the functionality by establishing a new PoS session.
Make sure that every combination product is set to "Accessible in PoS" so that it can be sold through the Point of Sale interface before examining the product combo visibility.
Testing Product Combo in a POS Session
Access the Odoo 17 Point of Sale interface and verify that the configured combo appears correctly. Test the purchase flow to ensure that the combo is processed accurately. So we can open a PoS session from the ‘Dashboard’ menu and start ordering the combo product.

Opening a session and choosing the desired product named ‘Coca-Cola.’ So, this will open a pop-up window with the two combo choices named ‘Burger+Cola’ and ‘Drinks choice’ as shown below.
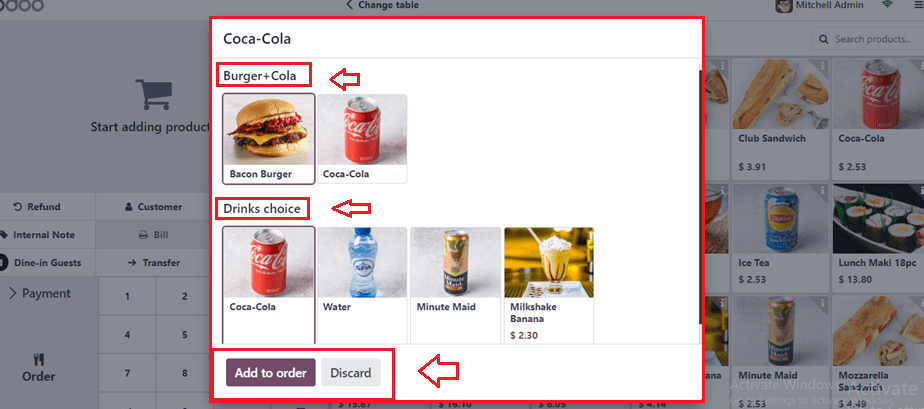
Choose the products from the desired combo and click on the ‘Add to order’ button to make a PoS order. Then, the ordered products and their amounts can be seen inside the Orders window.
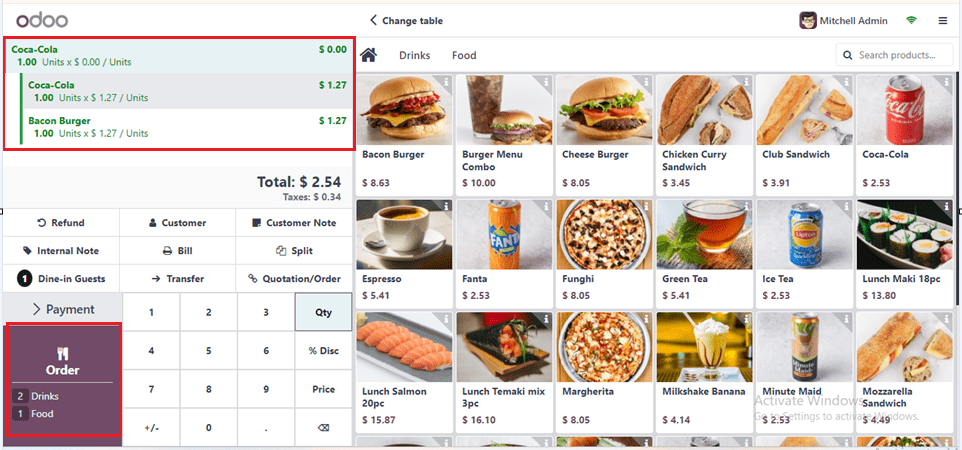
To begin the order process, click the "Order" button. Then, use the "Payment" button to complete the payment. Next, select a payment method from the window showing payments that are shown in the image below.
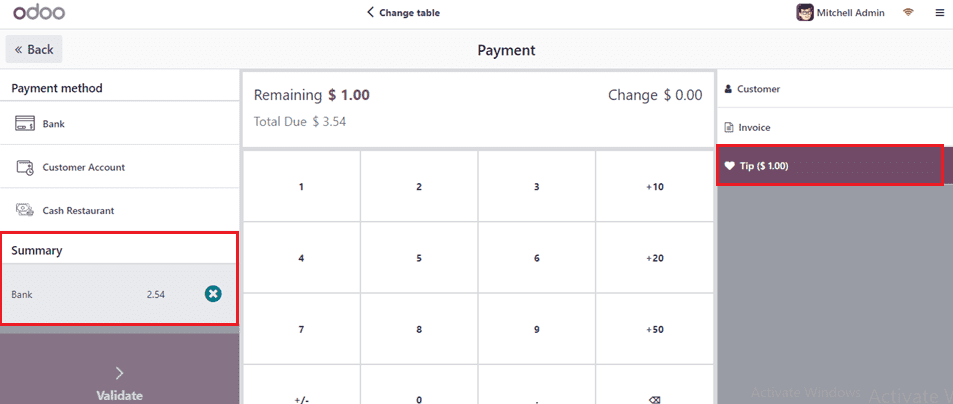
The 'Tip' option allows you to add the amount of the client tip to the bill. The $1 tip from the screenshot above is visible here, following the payment options. Verify the payment to finish the procedure using the ‘Validate’ button. As seen below, you will eventually receive the payment success window along with a printable invoice document.
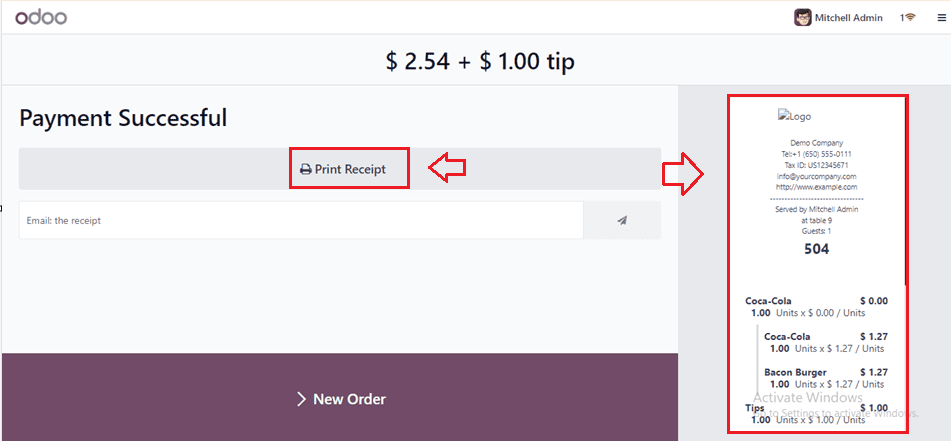
The screenshot above illustrates how Odoo PoS generates comprehensive invoice bills following each order fulfillment and payment transfer that is successful. Make use of the 'Print Receipt' option to print the bill using an external device.
By following these steps, you can create and manage product combos in Odoo POS, providing customers with the option to purchase related items together at a special price. Keep in mind that the steps and options may vary slightly based on the version of Odoo you are using, so refer to the documentation specific to your Odoo version for the most accurate information.
To read more about adding products using the product catalog in Odoo 17, refer to our blog How to Add Products Using Product Catalog in Odoo 17 Sales App