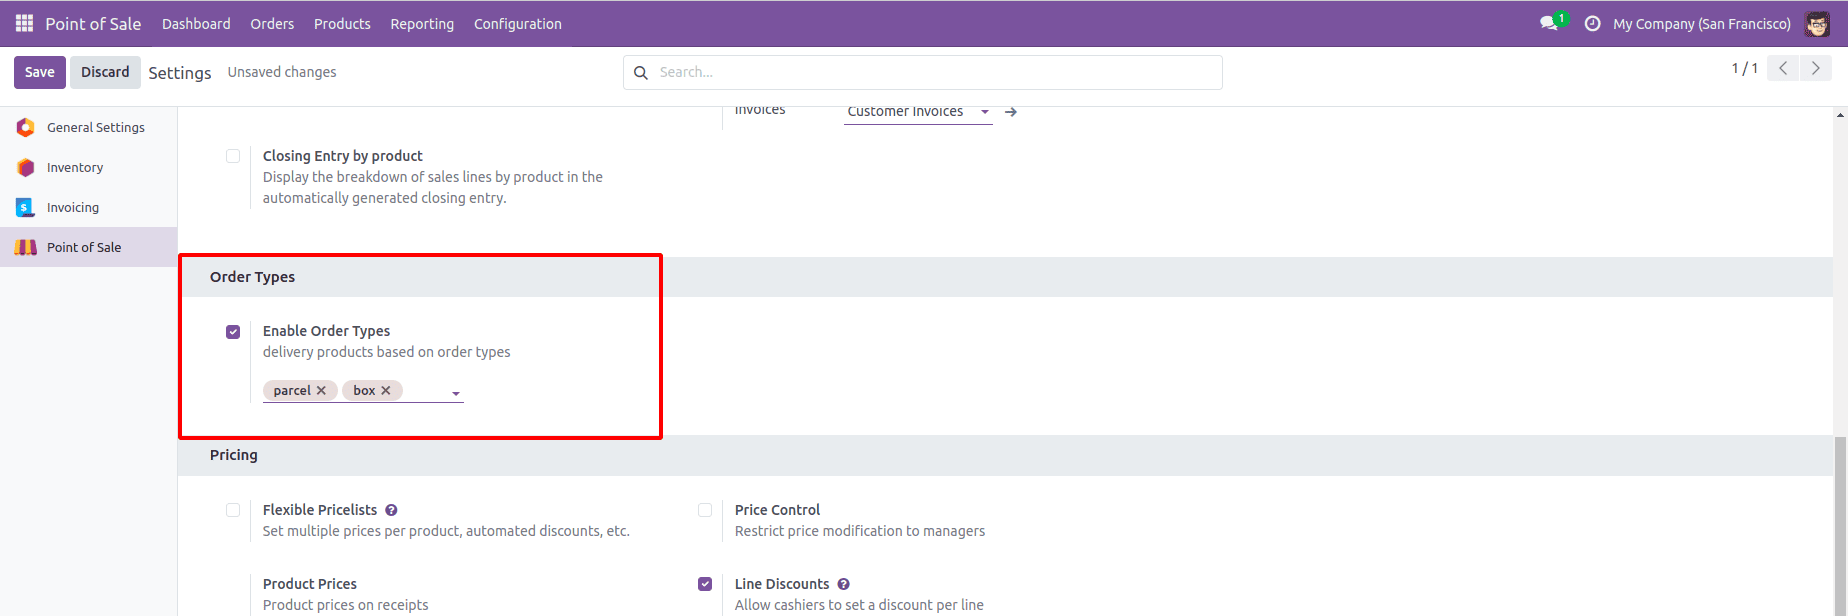
In Odoo, configuration settings play a pivotal role in managing various system configurations, allowing you to tailor the software to fit your specific business needs. While Odoo provides a robust set of default configuration options, there are times when you may need to add custom fields to better align with your business processes. This guide will walk you through the process of adding custom fields to configuration settings in Odoo 18, using a practical example of extending the Odoo 18 POS (Point of Sale) configuration with additional delivery options.
Configuration settings in Odoo are managed through the res.config.settings model. This model serves as a centralized location for managing module-specific settings, which can range from general system preferences to specific configuration options for individual modules. By extending this model, you can add new fields that cater to your unique requirements, ensuring that your configuration settings are as comprehensive and relevant as possible.
Extending configuration settings allows you to integrate additional parameters that are not included in the default Odoo configuration. This is particularly useful for modules that require specific settings not covered by the standard options. For instance, in a POS system, you might need to configure various delivery methods and enable specific options based on your business operations. By adding custom fields, you can provide a more tailored and functional setup for users.
Adding Custom Fields to Configuration Settings
To add custom fields to the configuration settings in Odoo 18, follow these key steps:
Define Custom Fields
The first step is to extend the res.config.settings model by adding custom fields. This involves creating a new Python file where you define the additional fields and specify their properties. For instance, you might want to add a Boolean field to enable or disable certain features, and a Many2many field to select various delivery methods. Create a Python file, e.g., res_config_settings.py, to extend the res.config.settings model.
from ast import literal_eval
from odoo import api, fields, models
class ResConfigSettings(models.TransientModel):
    """Extension of 'res.config.settings' for configuring delivery settings."""
    _inherit = 'res.config.settings'
    enable_delivery = fields.Boolean(string='Enable Order Types',
                                     help='This field is used to enable setting'
                                          'order types in settings')
    delivery_methods = fields.Many2many('delivery.type',
                                        string='Order Types',
                                        help='Set the delivery methods')
    @api.model
    def get_values(self):
        """Get the values from settings."""
        res = super(ResConfigSettings, self).get_values()
        icp_sudo = self.env['ir.config_parameter'].sudo()
        enable_delivery = icp_sudo.get_param('res.config.settings.enable_delivery')
        delivery_methods = icp_sudo.get_param('res.config.settings.delivery_methods')
        res.update(
            enable_delivery=enable_delivery,
            delivery_methods=[(6, 0, literal_eval(delivery_methods))] if delivery_methods else False,
        )
        return res
    def set_values(self):
        """Set the values. The new values are stored in the configuration parameters."""
        res = super(ResConfigSettings, self).set_values()
        self.env['ir.config_parameter'].sudo().set_param(
            'res.config.settings.enable_delivery', self.enable_delivery)
        self.env['ir.config_parameter'].sudo().set_param(
            'res.config.settings.delivery_methods',
            self.delivery_methods.ids)
        return res
Create a Custom View
Once the custom fields are defined, the next step is to create a view that will display these fields in the configuration settings. This involves defining an XML file that specifies how and where the new fields will appear within the existing configuration settings form. Using XML, you can integrate your custom fields into the appropriate sections of the settings view, ensuring that they are easily accessible and logically placed.
To integrate the custom fields into the POS configuration settings form, define an XML view in a file, e.g., res_config_settings_views.xml:
<?xml version="1.0" encoding="UTF-8"?>
<odoo>
    <!-- Define a view to extend POS configuration settings with delivery options -->
    <record id="view_pos_configuration_form" model="ir.ui.view">
        <field name="name">pos.config.view.form.inherit.pos.order.types</field>
        <field name="model">res.config.settings</field>
        <field name="inherit_id" ref="point_of_sale.res_config_settings_view_form"/>
        <field name="arch" type="xml">
            <xpath expr="//block[@id='pos_accounting_section']" position="after">
                <div class="row mt16 o_settings_container">
                    <div class="col-12 col-lg-6 o_setting_box">
                        <div class="o_setting_left_pane">
                            <field name="enable_delivery"/>
                        </div>
                        <div class="o_setting_right_pane">
                            <label for="enable_delivery"/>
                            <div class="text-muted">
                                Delivery products based on order types
                            </div>
                            <div class="content-group mt16" invisible="enable_delivery == False">
                                <field name="delivery_methods" widget="many2many_tags"/>
                            </div>
                        </div>
                    </div>
                </div>
            </xpath>
        </field>
    </record>
</odoo>
After defining the custom fields and creating the view, you need to update the module list and install your custom module. This step ensures that your new fields are integrated into the Odoo system and available for use. By updating the module list and installing the module, you make your custom configuration settings visible and functional within the Odoo interface.

Adding custom fields to configuration settings in Odoo 18 enhances the flexibility and functionality of your Odoo instance. By extending the res.config.settings model and creating a custom view, you can integrate additional parameters that cater to your specific business needs. This approach not only improves the user experience but also ensures that your configuration settings are aligned with your operational requirements.
Whether you are customizing POS settings or configuring other modules, the ability to add and manage custom fields provides valuable options for tailoring Odoo to fit your business processes. With this guide, you can confidently extend your Odoo configuration settings and enhance your system’s capabilities.
To read more about How to Add Custom Fields to Configuration Settings in Odoo 17, refer to our blog How to Add Custom Fields to Configuration Settings in Odoo 17.