A business's ability to maximize price, keep tabs on inventory expenditure, and assess performance may all be enhanced by understanding landed costs, which are hidden expenses related to buying items. Landed cost is the total cost paid when an item is delivered from the factory to the buyer's door, including the price of the goods, shipping, insurance, customs duties, and other charges. It is crucial for business success and can be easily tracked using the Odoo ERP system. Specifications from a business, which might change depending on policies within the organization and the requirements of the product, can be used to customize these expenses. Businesses may improve pricing and inventory control by comprehending and controlling landing expenses.
This blog will help you understand the functionality of Adding landed costs and different computation methods inside the Odoo 17 Inventory Module.
Configuring Landed Costs
To configure landed costs in your Odoo Inventory database, go to the “Settings” option inside the “Configuration” menu and enable the “Landed Costs” option in the “Valuation” tab section.
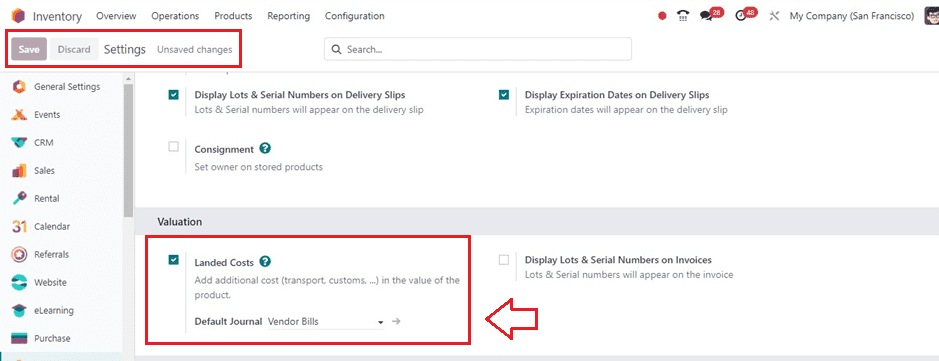
After enabling the option, you can set a “Default Journal” from the designated field and save the details. Here, I have chosen the “Vendor Bills” as the default journal. Now you can create a purchase order using the Odoo 17 Purchase Module.
Configuring Bills
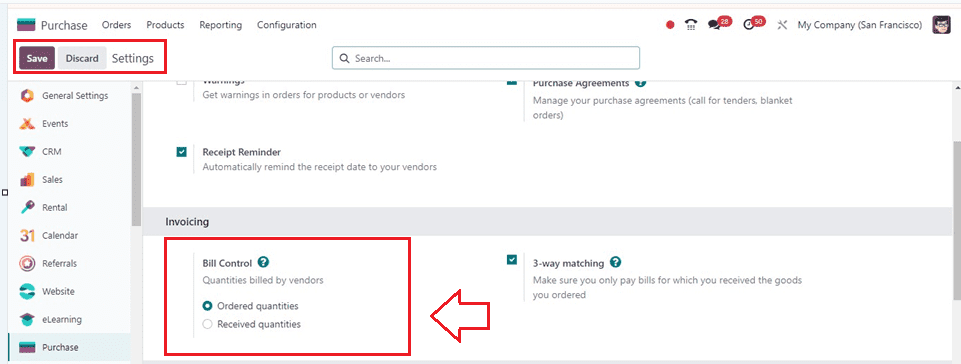
To start with the functionality of adding additional costs for products inside the vendor bills, enable the “Bill Control” facility in the Purchase Settings window.
Setting Control Policy for Products
Go to the product detail form of a decided product and choose the “Control Policy” option under the “Purchase tab” to alter the default control policy of the product. You may directly manage the needed product billing policy using this functionality, which is accessible for all goods.
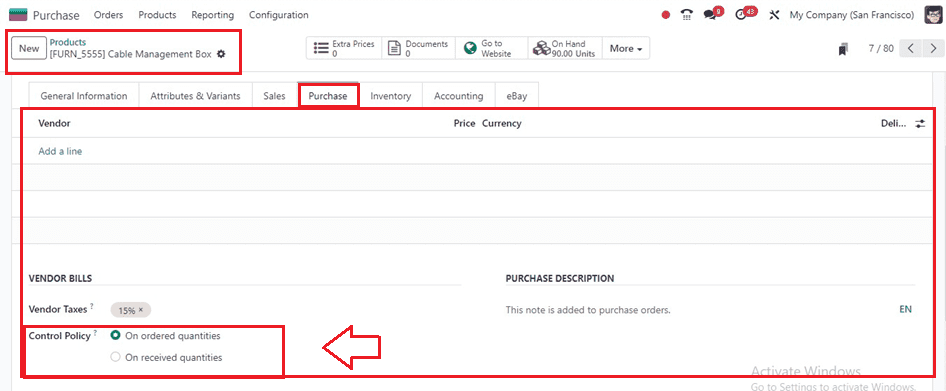
Here, we can choose the “On ordered quantities” as the control policy.
Configuring Landed Cost Product
You can also create products or services as a Landed Cost product from the “Products” menu. Inside the form view, set the product as a Purchase product and choose the “Product Type” as “Service.” This will open an additional “VENDOR BILLS” section inside the “Purchase” Tab as shown below.
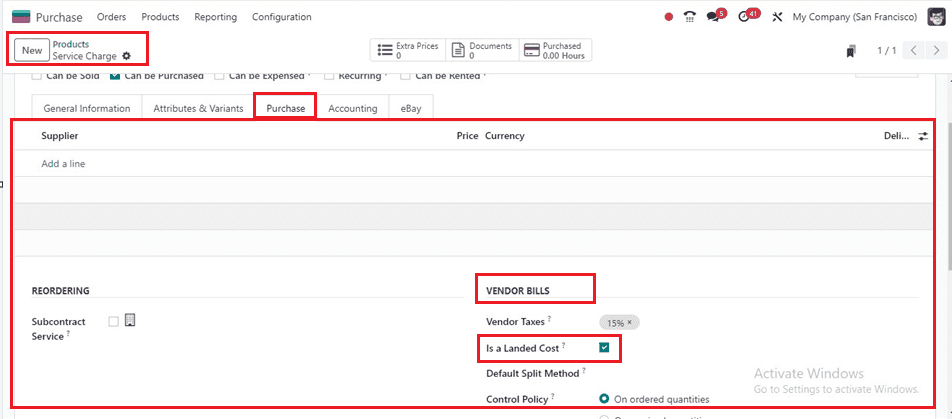
Just enable the “Is a Landed Cost” option. Enabling this option will help you add this cost to vendor bills inside the preceding receipts. Save the product details and move on to the next function.
Creating a Purchase Order
We can create a new purchase order with the selected product and Landed Cost. To do this, I am going to the “Requests for Quotation” section of the Purchase “Orders” menu. Then, edit the purchase order details inside the displayed form view, save the data, and confirm the order using the “Confirm” button. You can see a “Create Bill” button on the top of the form, as shown below.
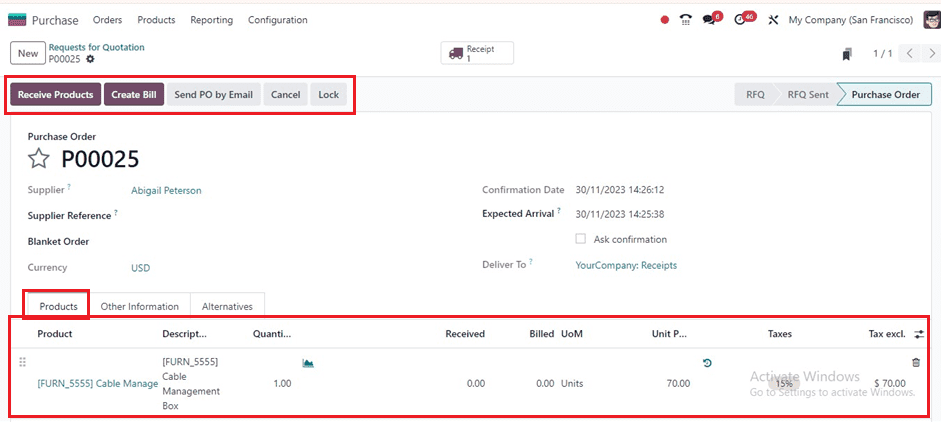
Then, click on “Create Bill” on the purchase order to open a vendor bill in Odoo once a vendor completes a purchase order and sends a bill. This action will display the draft vendor bill page with details like the vendor, bill reference, date, accounting, payment reference, recipient bank, journal, due date, etc. Purchase orders or previous invoices can be entered for auto-completion of the billing procedure inside the “Invoice Lines” tab section.
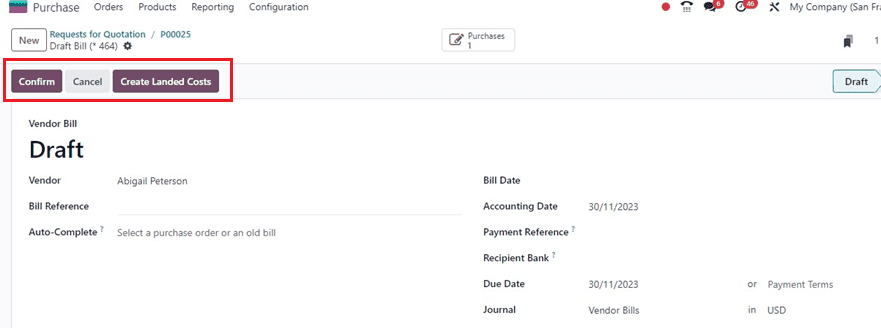

You can see an “Invoice Lines” tab inside the Vendor Bills configuration form. Check the box in the “Landed Costs” column if the vendor bill includes landed expenses.
Creating Extra Landed Costs
Using the “Create Landed Costs” button provided at the top of the draft bill form, we can immediately create additional costs for the vendor bill. Clicking on this option will open another form as shown below.
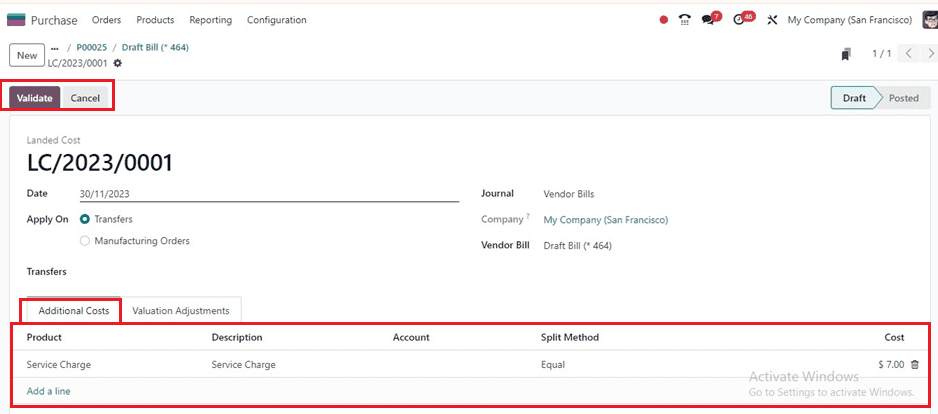
You can see the existing landed cost added in this particular draft bill of this purchase order from the “Additional Costs” tab of the Laded Cost Configuration form. You can also add extra costs using the “Add a line” button. Save the information once you've added more expenses, then click the "Validate" option to confirm them.
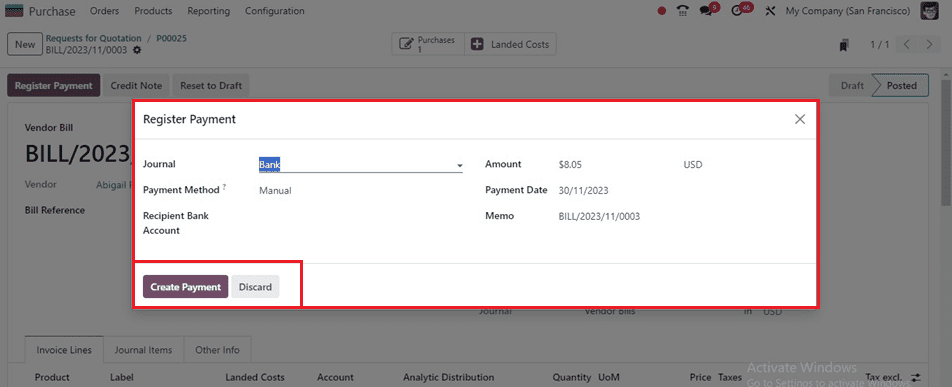
After choosing the Landed cost for billing, save the details and proceed with the billing process by clicking on the “Confirm” button and starting the payment procedure using the “Register Payment” button.
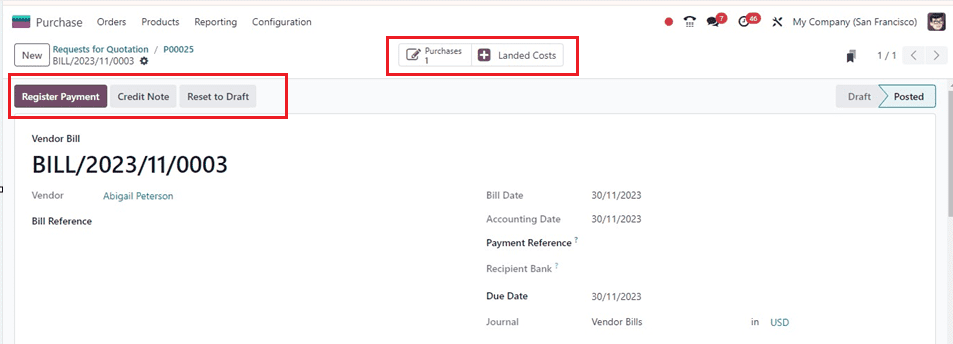
You can check the purchase details from the “Purchase” smart button and add or manage the landed costs using the “Landed Costs” smart button. Then, register the payment and select the payment journals from the little pop-up window.
You can see the green-colored “PAID” ribbon inside the form view, as shown below.
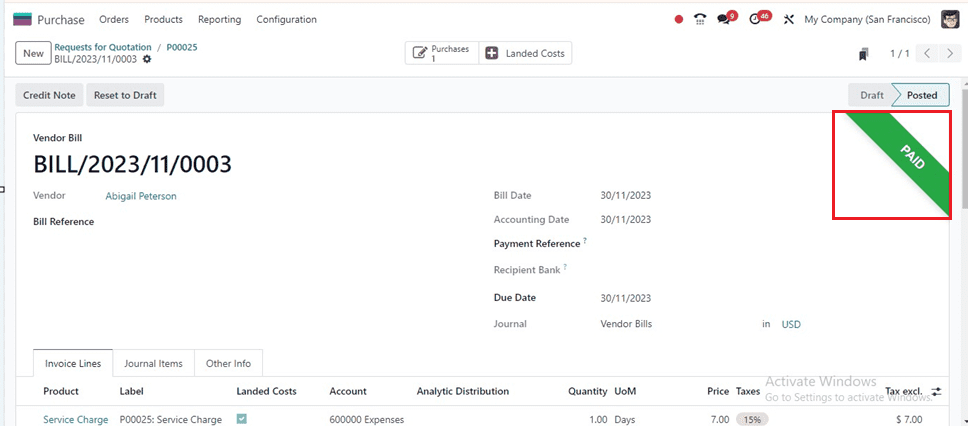
The “Invoice Lines” tab will show the Landed Cost Charges, and you can see other service charges and costs inside the “Journal Items” tab section.
This is the functional workflow of adding additional costs to products inside vendor bills using the Landed Costs facility of the Odoo 17 Inventory Module.